1990 Comanche Build - The Wilderbeest

02rangeredge

Adventurer
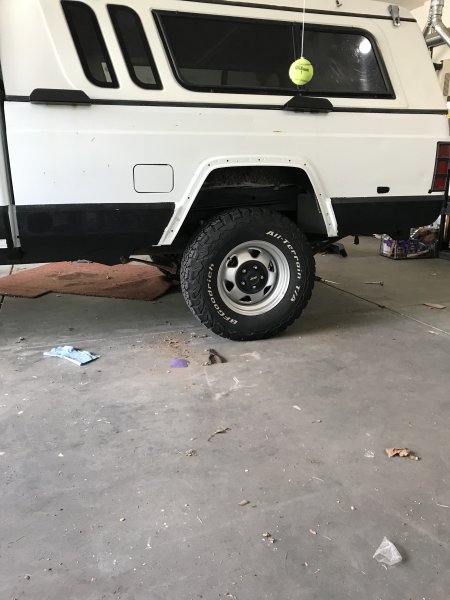
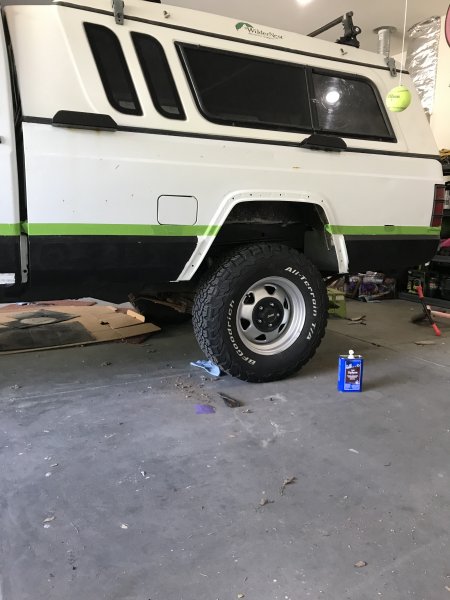
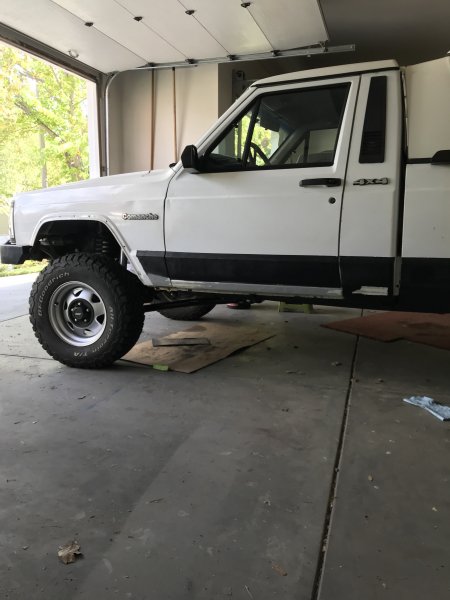
Before fall set in I completed body work on the quarter panels, complete with a primer coating. I was hoping to reapply the bedliner on the lower quarter panels to have it done and out of the way, but time was not on my side. With the colder temperatures the plan was put on pause. Now that spring has sprung, a brought with it warmer temperatures it is time to finish the lower quarter panels. A some point a coat of Durabak (a DIY bedliner) was applied to prevent rock chips. When it was originally done the Durabak was applied with the fender flares on, resulting in peeling near the flares and a feeling of being incomplete. This time around the flares were removed to have a complete running front to back. (the garage wall prevented me from having enough space to get a single shot).
056FD3DD-2BB8-474A-9906-EFE537FEBAFA.jpeg

D221DEE7-44B5-4C04-BB58-4636765E6C0B.jpeg

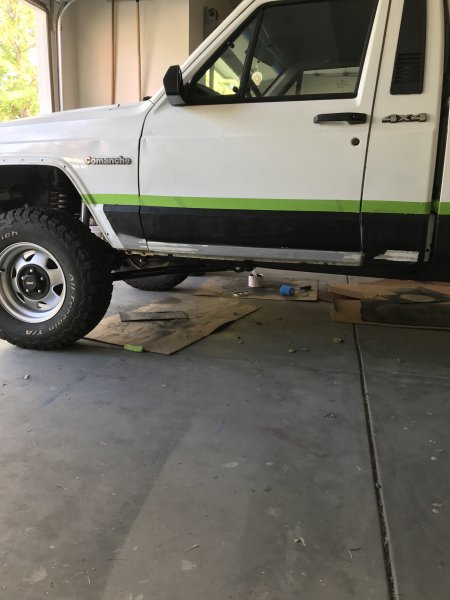
The entire lower half of the truck was washed clean to remove dirt, oil, grease, and grime and given a rub down with xylene per the manufacturer instructions. I masked off a line where I didn't want Durabak to be. I moved the tape line up ever so slightly to clean up the rough edge from the previous application.
C188F6D1-0E03-40AC-ADF2-404E06ECBF46.jpeg

9AA73316-B551-4F8A-A524-3E605C33A1A4.jpeg

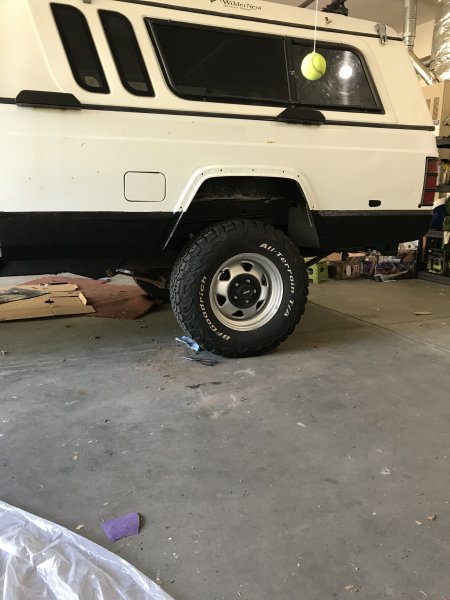
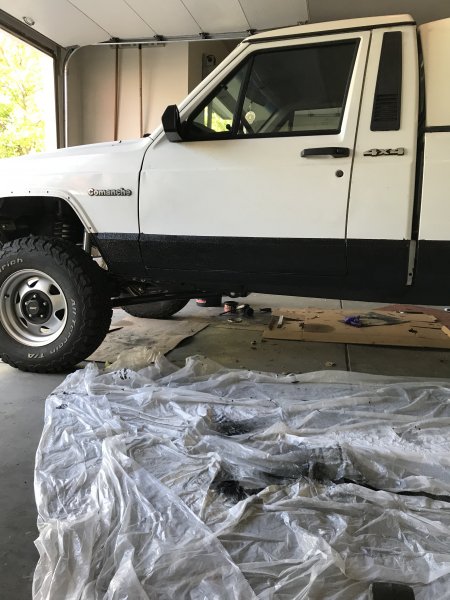
Durabak can be sprayed or rolled on, I went with roll. You can buy special rollers from the manufacturer that helps the rubber granuals spread more evenly. The manufacturer’s directions for application of the Durabak bedliner state that a primer coat is not necessary, but I found that the bedliner adhered much better to the primed areas than the places where I had just roughed up the factory paint with a light sanding, as recommended. Application was pretty straightforward. I used the manufacturer supplied foam brush to paint along panel, nooks and crannies I used a paint brush. I started by woking on the factory exposed paint. The first coat went on smoothly, though it did take a minute or two to really get the hang of how to apply the bedliner evenly. Since the air here is so dry, the first coat took ~25 minutes to become tacky to the touch. Once the second was applied, a third and final coat was applied along the entire lower panel to give an even, more consistent look all around. As soon as the final coat was on I we all of the painters tape and am letting the Jeep to dry overnight. I've been out twice to touch up any necessary areas. Since Durabak bonds to itself, this has not been a problem.
4FA22CF9-D143-46B0-A49C-055F2B1095F4.jpeg

A018FFDF-0586-4044-8E37-C2E97EC64CA8.jpeg

Turned out awesome, do you have fender flares going back on?
 

agamble

Member
Turned out awesome, do you have fender flares going back on?
The fender flares are going back on. I gave the Durabak a couple days to cure and have since put the front flares back on. Earlier in the build I removed the front flares, which resulted in a majority of the bracket studs for the flares breaking off. I replaced them by drilling out the broken studs then welding on bolts as replacements. A healthy coat of anti-seize was put on each stud for reinstallation. Until recently I never attempted to remove the rear flares, and they did not want to come off. I broke most of the bracket studs and need to replace them like the front.
 

agamble

Member
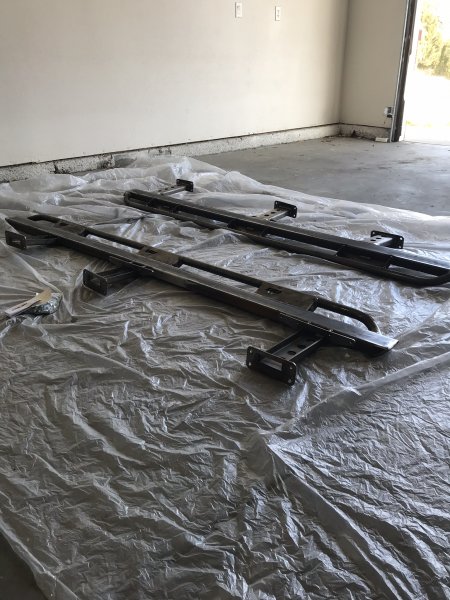
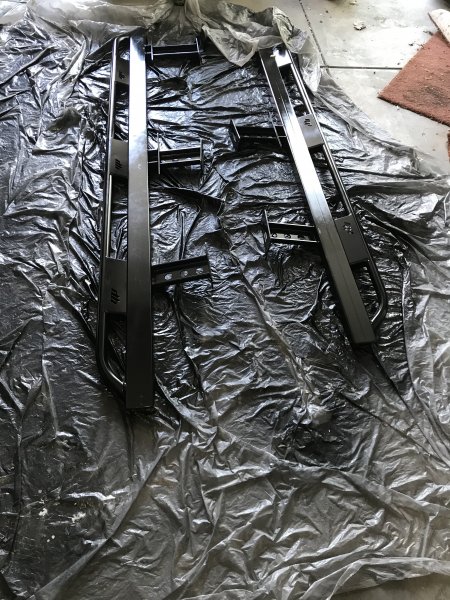
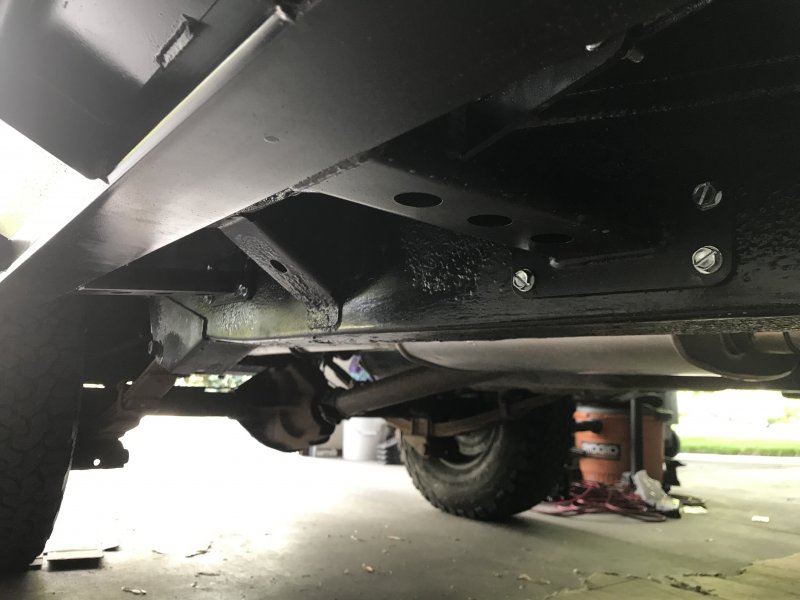
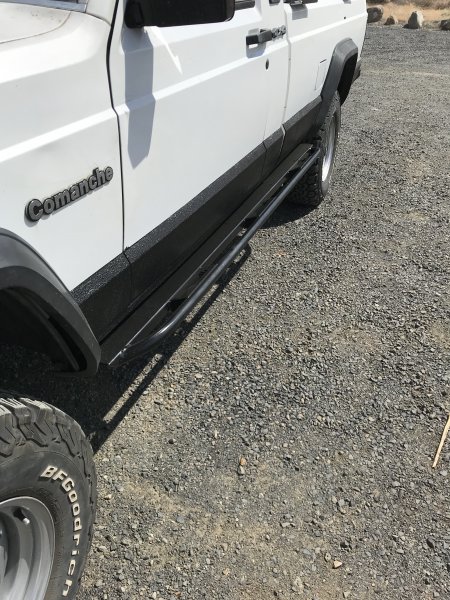
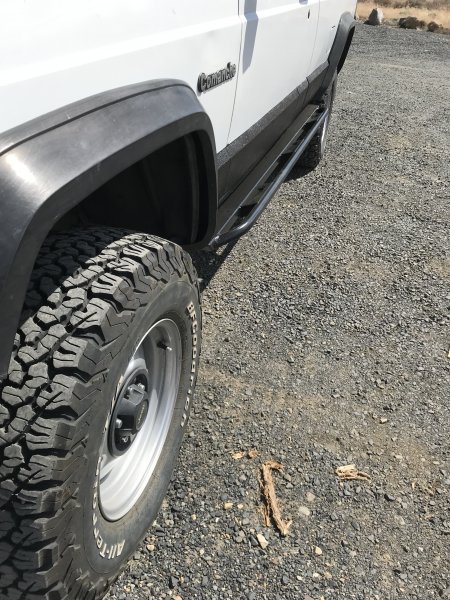
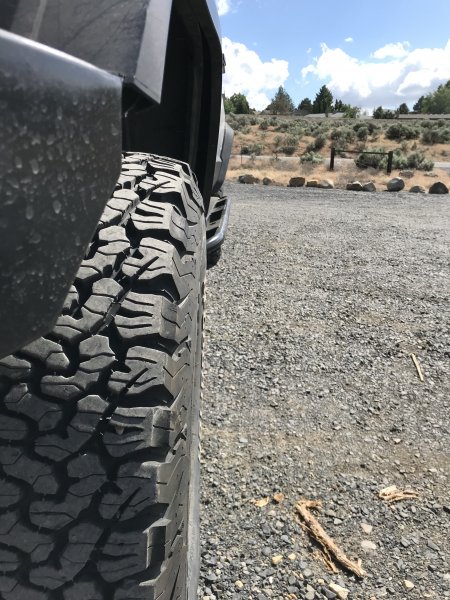
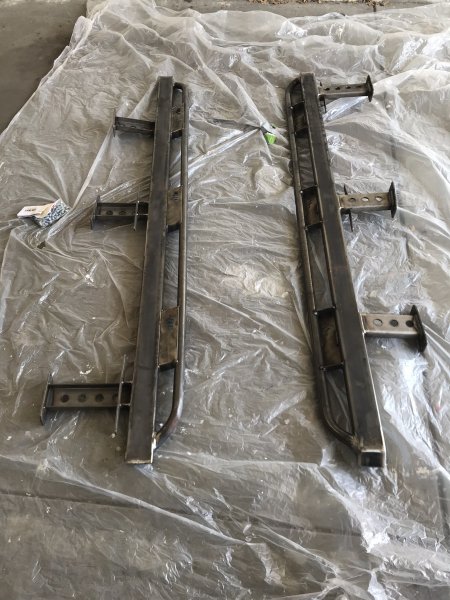
Having completed the lower body panel work, I installed in what is my opinion the second most important modification you can do to any offload vehicle (the first of course being quality tires), a good set of rock sliders. Past experience has shown all it takes is one easy trail run gone bad and you've damaged or wiped out the side of your truck. The options available for the long bed Comanche are few and far between. I ordered the deluxe rock sliders from Dirtbound Offroad. The sliders are built using 1.5 x 3 x .188" for the main tube and 1.25 x .120 for the side tube. The sliders bolt to the unibody in 12 places and the pinch seam on 8 places per side. The final product comes shipped in bare steel. The added bonus of having the tube step is getting to park in the good parking spaces without getting door dings. It's funny seeing the new half moon marks on the sliders from people inconsiderately swinging their doors open. And they are wide enough I can now shimmy along the rig when packing up the Wildernest.

First I applied two coats of a rust inhibitor to the bare metal, followed by two coats of Rust-O-leum paint and primer in one (any color works), then as a finish I applied two coats of Rust-O-leum Appliance Epoxy.
D05CB755-2504-4C5F-9B62-8ADACE0624A2.jpeg

CE967883-98ED-4FBB-88F5-54306F3D6A7D.jpeg

5927B11B-BA41-40A6-8834-D550C02A30DE.jpeg

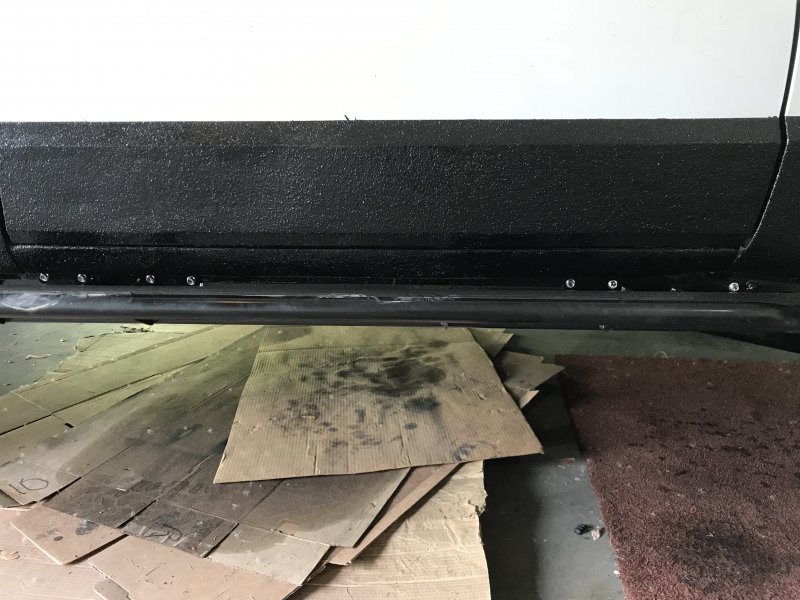
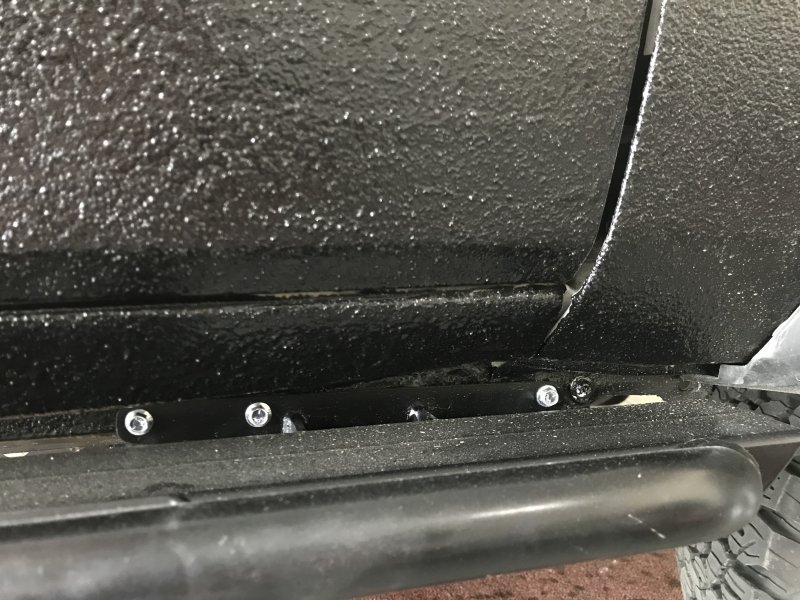
To mount the rocker guards, I debated on using nutserts, as I had seen others use and recommend, or use the provided self tapping bolts. After reading the pros and cons on the web between the two and much deliberation and internal debate, I went with the provided self tapping bolts. With my mounting hardware selected, I followed/repeated the mounting procedure found on the JCR Offroad website (Dirtbound Offroad did not supply any instructions, nor do they have any on their website), http://www.jcroffroad.com/install_guides/SL_CL_XJ_ZJ_WJ_KK_KJ REV 2016.04.15.pdf.

Mounting took me about 40 minutes per side. This was with me taking my time, marking the holes, drilling out the holes and working up in size to the final 1/4" hole needed for the self tapping bolts.
9DD8B59E-3652-43AB-B91C-7EC241740917.jpeg

As you can see in the photos above and below I was only able to use 7 of the 8 pinch seam bolts. The outcome of an easy trail run gone wrong. Slid off a tree branch and onto a stump. I was only able to get 3 out of the 4 bolts because of it.
F8B04B47-C954-4252-A8AB-6F8BD1ACFF3F.jpeg

63D369B4-D6E8-4DCE-9948-C8E1CD488F55.jpeg

8206C664-25FD-432A-9A1C-48A93556E3EF.jpeg

1273C58E-D186-4E78-99C5-934816B4E5CD.jpeg

518BD106-22C4-4194-A062-500B39F424B7.jpeg
 

agamble

Member
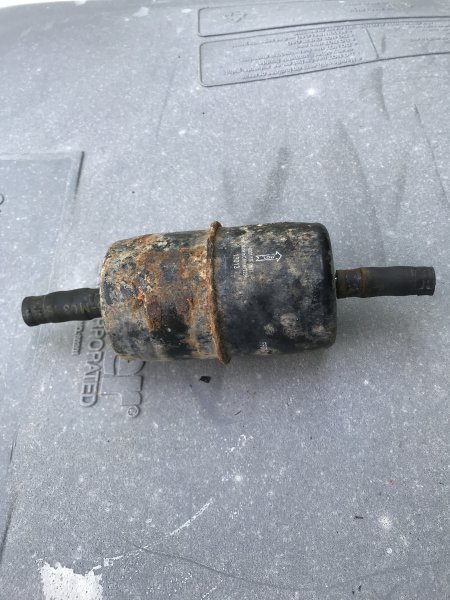
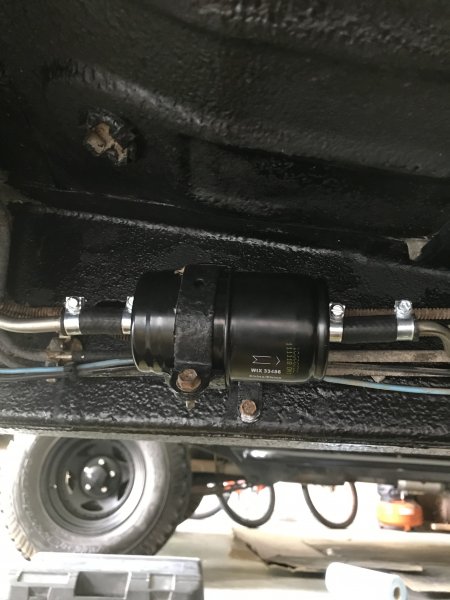
I was crawling around under the Jeep and took note of how rusted the fuel filter was. This got me to thinking how old the filter must be for it to have rusted. Then a bit of inspection on the fuel line showed some dry rot occurring. A $10 investment for piece of mind goes along way.

ADA1B511-2189-41CD-83C0-3087AE212D0D.jpeg

I replaced the fuel line and fuel injection clamps for a fresh new start.
D87E51BE-C5CB-4AB8-9BB1-C0A55A19A8BD.jpeg
 

agamble

Member
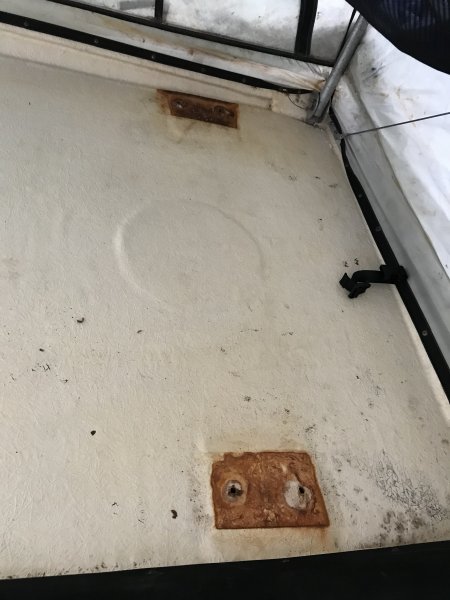
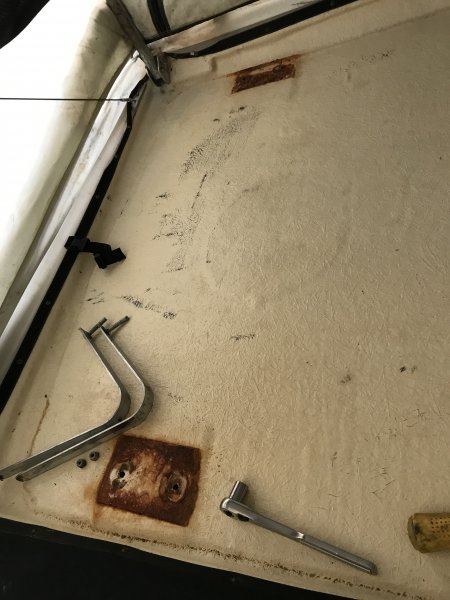
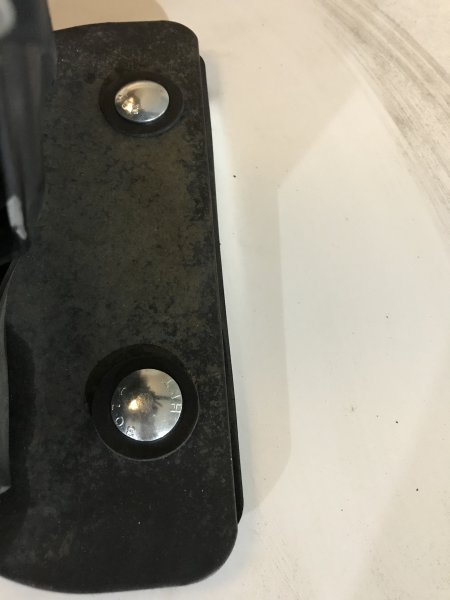
I started on some of the repairs to the Wildernest. The first thing to address is leaking. At some point a previous owner installed a roof rack onto the top of the shell. In the X-amount of time since its installation water has been seeping in the mounting bolts. Underneath the mattress the mounting plates and bolts had rusted. When I removed the old hardware an unnerving amount of the bolts had rusted away.
A851A6FD-2335-4D7A-B52A-BE5222339B92.jpeg

E04DBBEC-F50F-405F-A5C5-5870E3219076.jpeg

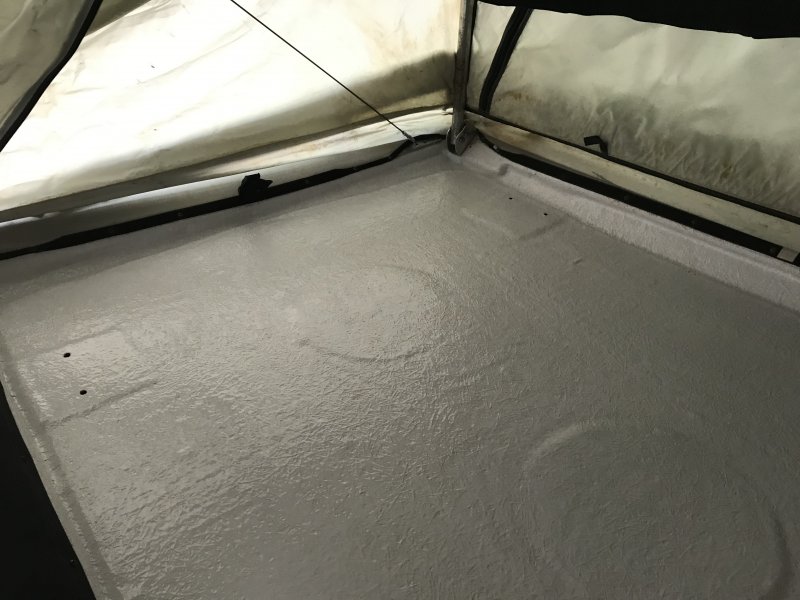
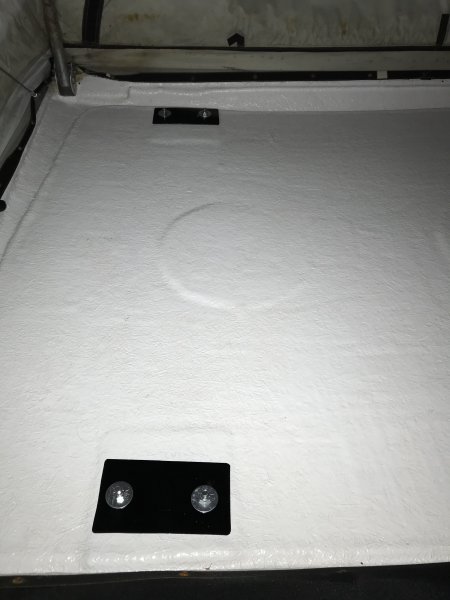
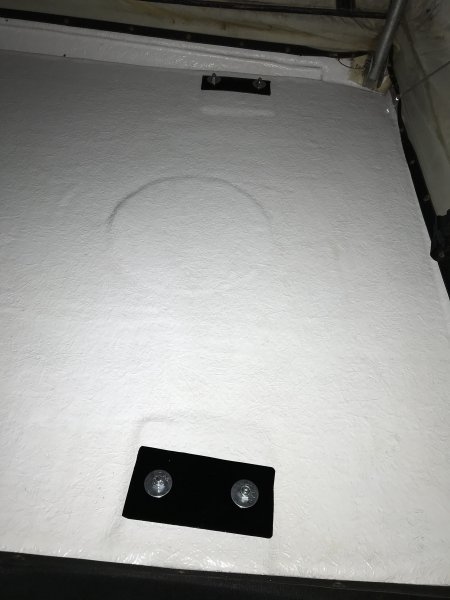
Once I got the brackets and homemade mounting plates removed the residual rust was removed from the fiberglass with soap, water and a scrub brush. I was unable to removal all the rust stains. I applied a coat of enamel paint, to cover the rust stains and add another layer of protection to the fiberglass resin.
72D379DA-6BAC-40EA-B41A-EA0F53B80B9F.jpeg

E531CAD9-0FEA-4503-AAD4-DEC696B70FB4.jpeg

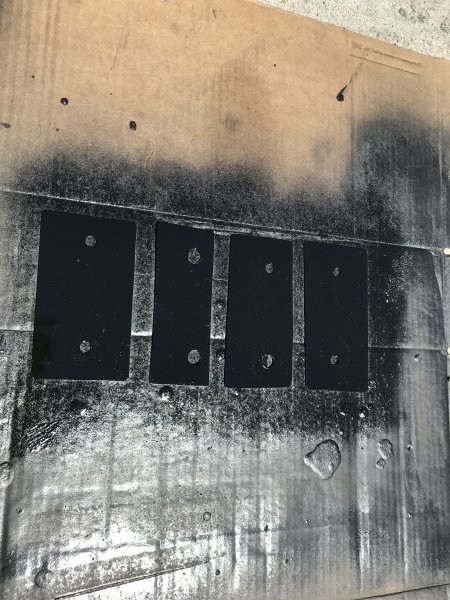
I removed the rust from the mounting plates and coated them with enamel paint as well to prevent future rust from occurring.
25ECABED-277E-40E4-AE85-3F8226ABDE40.jpeg

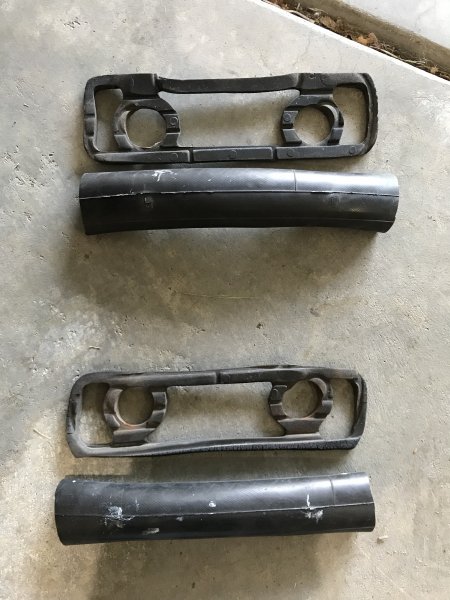
It appeared that the water started leaking in as the old neoprene gaskets that came with the roof rack were dried and cracked. I was unsuccessful in sourcing new gaskets. I had some old bike tubes that I repurposed to make new gaskets. The tube was cut into sections the same length as the old gasket.
CF8E927F-83D7-447D-8B79-F9818527027B.jpeg

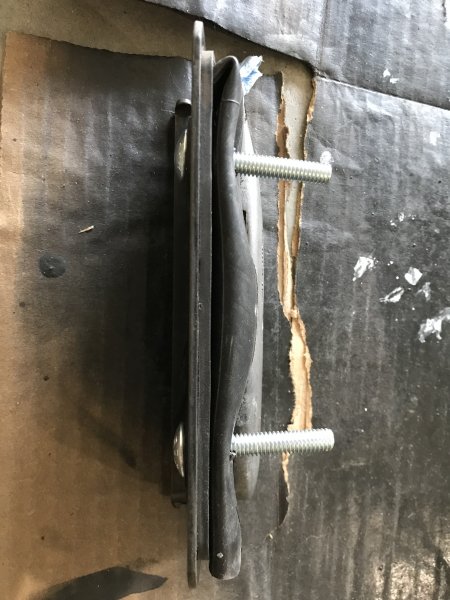
The old hardware was too rusty to reuse, so i bought new nuts and bolts. I used rubber washer on the outside bracket to seal the bolt hole and reinstalled the roof rack.
3133F8BC-552A-4379-9A94-7D0C11A7F94A.jpeg

Final product
5241CD5F-D452-4466-9E6D-2629BFDCB739.jpeg

FEEEC409-EF84-44F8-BA9A-25DEEE186F85.jpeg

31BAD83A-E799-49E0-91C7-98829FE19DA2.jpeg
 

DaveInDenver

Middle Income Semi-Redneck
Even when those gaskets were new I found water could still seep under the carriage bolts for the Top Loader brackets, so caulk or rubber washers were necessary. Good move, looks great in there.

I trim the bolts flush with the nuts and file them smooth on the inside. Then I snap those plastic caps you find at the end of metal chair legs over them to help keep the mattress cover from wearing too much or tearing. They are tall enough to cover double nutted bolts or just cut them to be half as tall and they fit nice and snug over a nut and lock washer.


522893
 

agamble

Member
Even when those gaskets were new I found water could still seep under the carriage bolts for the Top Loader brackets, so caulk or rubber washers were necessary. Good move, looks great in there.

I trim the bolts flush with the nuts and file them smooth on the inside. Then I snap those plastic caps you find at the end of metal chair legs over them to help keep the mattress cover from wearing too much or tearing. They are tall enough to cover double nutted bolts or just cut them to be half as tall and they fit nice and snug over a nut and lock washer.


View attachment 522893

I'll see how well the rubber washers work. If it appears that water is still seeping in under the carriage bolts I'll had a seam of caulk. I like that, trimming the bolt flush and covering them with plastic caps. That is going onto my to do list.
 

DaveInDenver

Middle Income Semi-Redneck
I'll see how well the rubber washers work. If it appears that water is still seeping in under the carriage bolts I'll had a seam of caulk. I like that, trimming the bolt flush and covering them with plastic caps. That is going onto my to do list.
I tried a few things since I could see the bolts wearing a thin spot on my mattress. Rubber caps don't stay put, a couple of layers of tape, either. Those hard plastic caps let the cotton slide which when I thought about it was exactly why they exist in the first place - to let a chair leg tube glide over carpet without catching.
 

agamble

Member
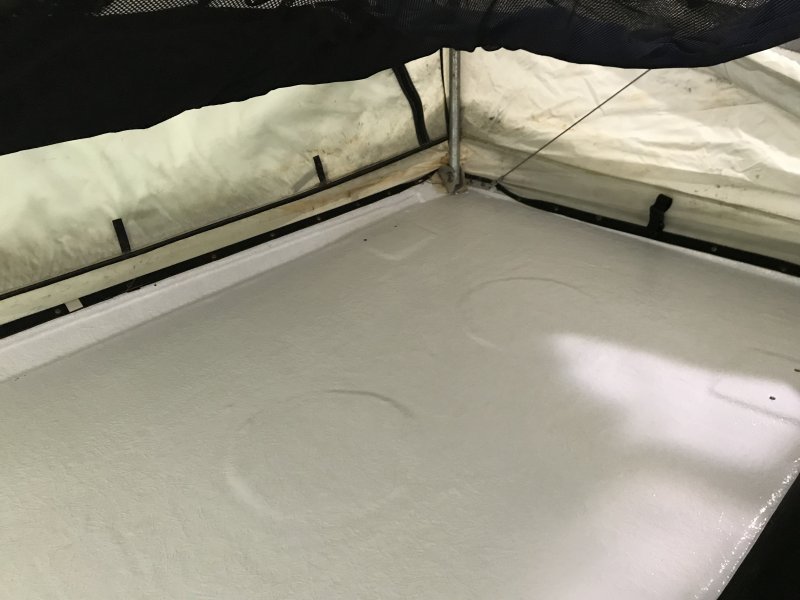
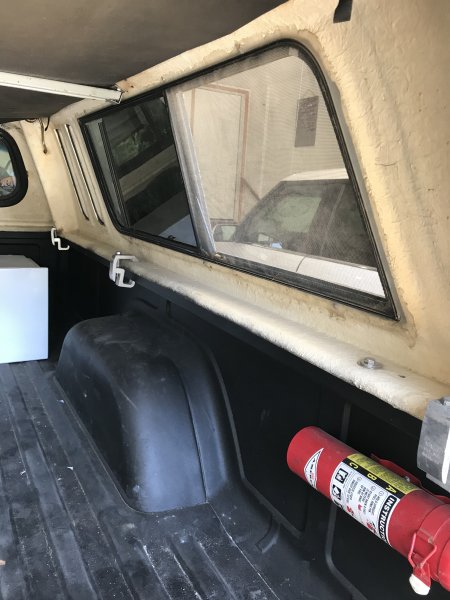
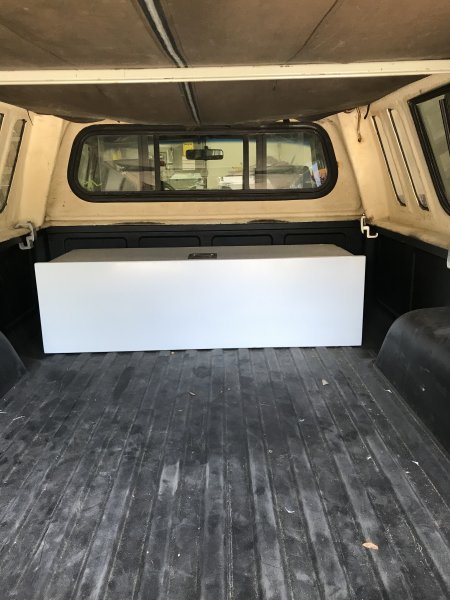
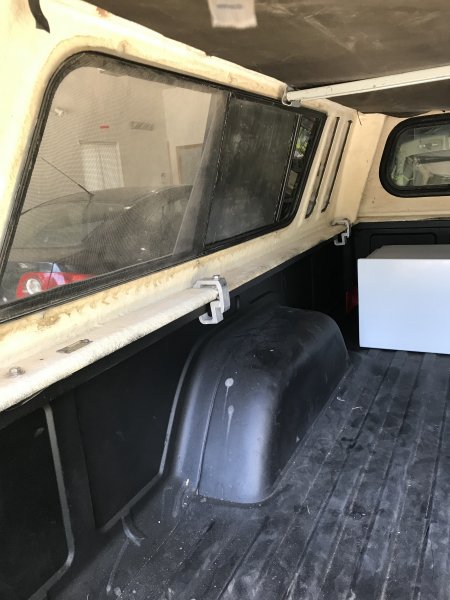
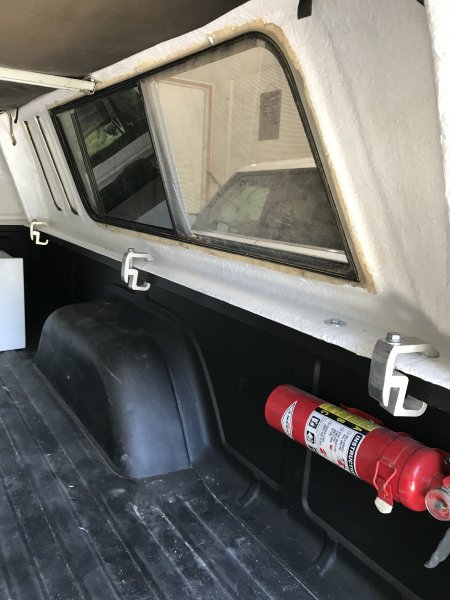
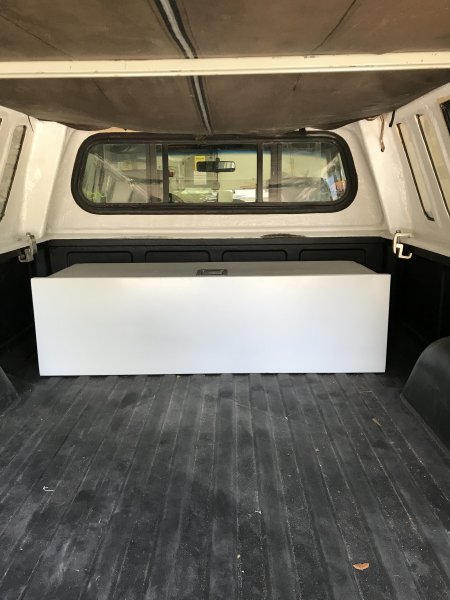
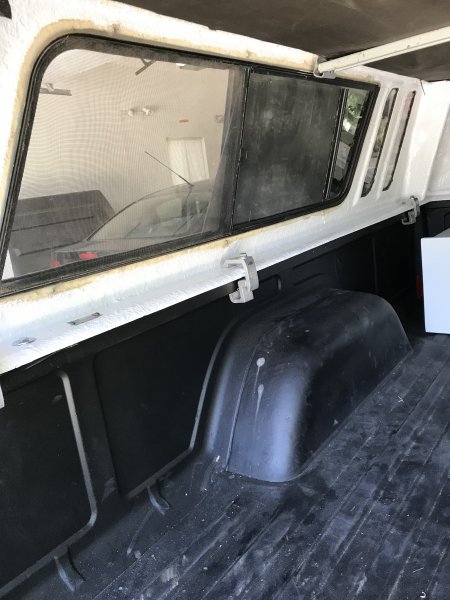
After freshening up the sleeping platform of the Wildernest with enamel paint; 1: it looked much better than before (i.e., cleaner/newer) 2: the dirt didn't stick to it as readily 3: it had a smoother feel to the touch than the raw resin 4: it encapsulated the fiberglass fibers that were breaking free. Seeing as I only used about an 1/8 of the quart to cover the sleeping platform the remainder of the quart was used to freshen up the rest of the cap.

Before:
F9685078-F7E4-47D4-9449-4EA77DA8AAC4.jpeg

63C25374-4B71-4314-9753-8E201BBAB31B.jpeg

E06EBE8A-7760-4920-AA2D-8719EF2AAFC9.jpeg

After: (Note the silicone sealant used around the edge of the windows didn't allow the paint to stick or cure very well, it was left unpainted.)
4CF759CB-3893-4C02-8A0F-567681147284.jpeg

60049DFF-B8CD-4616-970B-78C543A63212.jpeg

E65CFEEB-BE09-4A5D-99EA-6A142505E224.jpeg
 

Forum statistics

Threads
185,829
Messages
2,878,663
Members
225,393
Latest member
jgrillz94
Top