Building the AlumEscape

2012Taco

AlumEscape
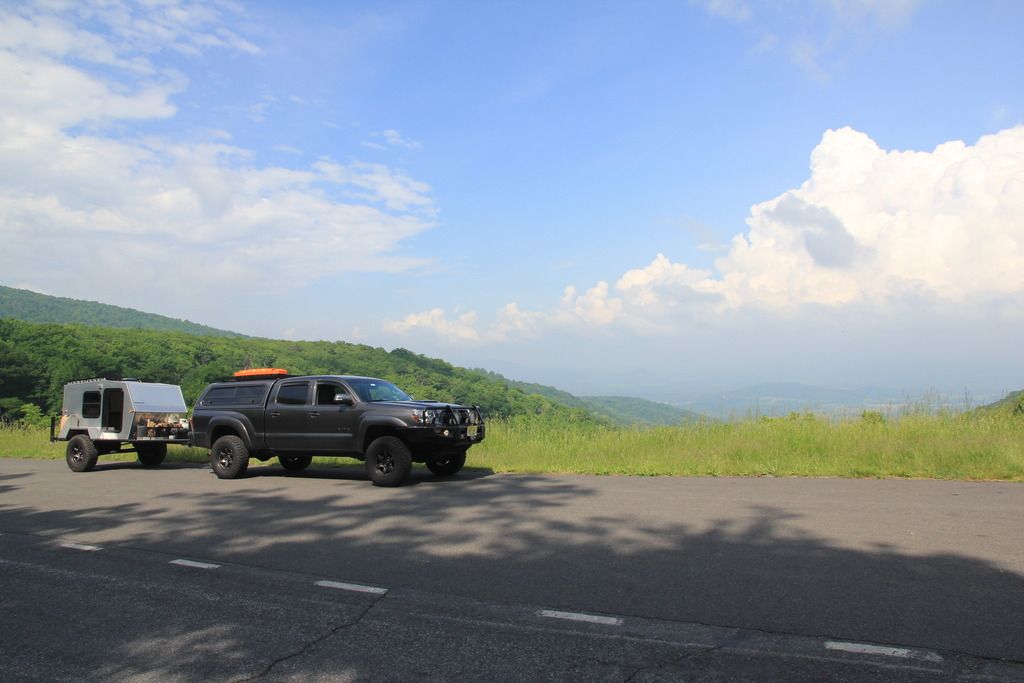
As of June 2015 in Shenandoah National Park!
IMG_5202_zps8ijeh1pk.jpg


Well major construction of my almost yearlong Expo style trailer build is complete and I figured I post up the build stages! I wish I had kept up a build thread like the rest of you guys but I promise to keep this updated as I do the finishing touches, put some miles under her, and build up my Tacoma tow vehicle.

Basically I had spent nearly a year lurking the builds here to get ideas and tips from the great builds here then drafted up a CAD rendition of my plan:


In general I stayed pretty near the plan other than extending the front cargo area, shifting the side-table mount and I'm running an air suspension rather than the leaf sprung setup I originally planned.

Construction started with a trip to my local steel supplier in June 2013 and the rest is history!


After deciding to go with an air suspension I decided to continue the custom fab with a single wishbone style arm that will be located by a panhard bar. The axle is mounted to the wishbone via poly mounts.


Well I don't want to overload my first build thread post so I'll let y'all digest this teaser before I get more stuff loaded up!
 
Last edited:

elmo_4_vt

Explorer
'Bout time you posted this up here... It's a truly well constructed trailer. You need to teach me how to make the welds look that good! Makes me want to spend more time and money on mine.

Don

-
 

2012Taco

AlumEscape
Beautiful welds

Sent from my SCH-I535 using Tapatalk

Thanks bonomonster, I wouldn't call myself a welder but I've put quite a few hours in behind the mask for projects over the years - I've really pleased with the quality of welds I've been able to get out of my little 110 Lincoln 140!
 

2012Taco

AlumEscape
Wow, loving the leveling jack setup, and of course those welds are nice enough to put in a picture frame.

Thanks jeep-N-montero - I've found the jacks to be super practical so far, last weekend I took the first trip with it with elmo_4_vt out to PA and managed to level it out on a bit of a side-slope, so much so that the door side tire was a few inches off the ground.
 

2012Taco

AlumEscape
'Bout time you posted this up here... It's a truly well constructed trailer. You need to teach me how to make the welds look that good! Makes me want to spend more time and money on mine.

Don

-

Thanks Don, I wish I had put this up as I was going but better late than never eh? As far as welding/working goes just let me know next time you're tinkering on something and I'd be glad to swing by and give and hand and/or drink your beer!
 

2012Taco

AlumEscape
Interesting suspension designe. Do you think you will need a sway bar?

You make a great point Grim Reaper, I was initially worried I'd pickup some sway with this design but I've put a few hundred miles under her now and (knocks on wood) no issues so far. I'm running the bags at about 55psi and they seem to soak up the rough stuff really well. I think the shocks are what are keeping things in check so I'll have to keep an eye on things as they wear in.

Hopefully elmo_4_vt can get some footage uploaded from the last trip out of where I drug this up a short section of rocky road - I'm really curious what the performance looked like from a view other than my mirrors.
 

2012Taco

AlumEscape
As promised, more photos!

IMG_0877_zps0ba3eee9.jpg


IMG_0883_zps64a1c82e.jpg


IMG_0887_zps2b71732c.jpg


Mounted up my Optima on a front mount box and added ears on each side for the battery charger and shore connection. The 110 was continued into the camper interior and galley area as well for additional power needs.

IMG_0918_zpse65b5f1f.jpg


Mocking up the spare tire carrier setup. The lift drum is actually a salvage part from a Ford Expedition from the local pick-a-part - works great as it's easy to crank down and has a long enough cable to work with my pulley setup.

IMG_0938_zpsbc183c64.jpg


Weld up the adjustable trackbar/panhard bar that locks in the lateral position of the axle. I used some DOM tube and heavy rod ends for this as the wishbone setup is really only located by this bar.

IMG_0972_zps5a0c25a5.jpg


IMG_0975_zps6a4e8ee8.jpg


Again, frame side and wishbone side are locked down with extra gussets and plating.

IMG_0941_zpsa841bfb1.jpg


IMG_0943_zps40ac67d0.jpg


IMG_0956_zps38f25e33.jpg


IMG_1035_zps77b576e4.jpg


And I'll leave y'all with this one for now - I love this perforated material as it really matches the look I was going for. This outrigger area will eventually be home to a Jerry Can and mount, and one to match on the other side.
 

bluejeep

just a guy
Nice, very nice. I built a trailer with a similar suspension, it was to haul my jeep on, so much heavier load. The beauty of the airbags is the ability to adjust the pressure (spring rate, essentially) to the load. That trailer pulled silently no matter if it was loaded with 5000 lbs of vehicle and gear, or completely empty. I did eventually see the need for a sway bar (sold it before I installed it tho). But my load was heavier, and much higher center of gravity. The air bags were not interconnected while traveling, but I put a fitting in so when I was adjusting the pressure they were interconnected, balancing to equal pressures in either bag. Worked well
 

Forum statistics

Threads
185,823
Messages
2,878,597
Members
225,378
Latest member
norcalmaier
Top