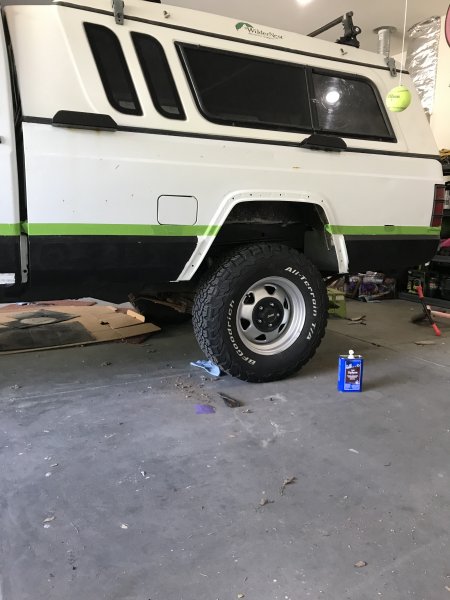
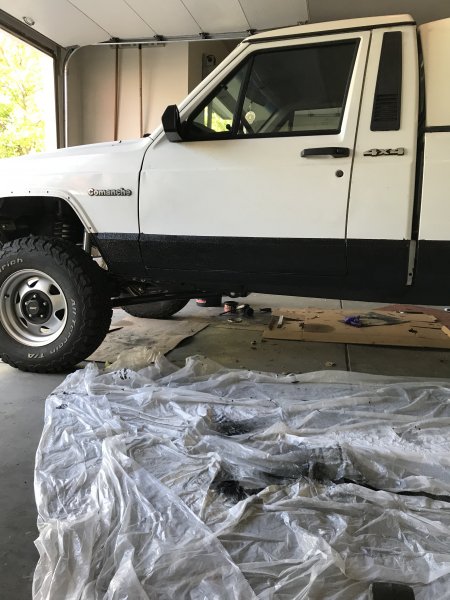
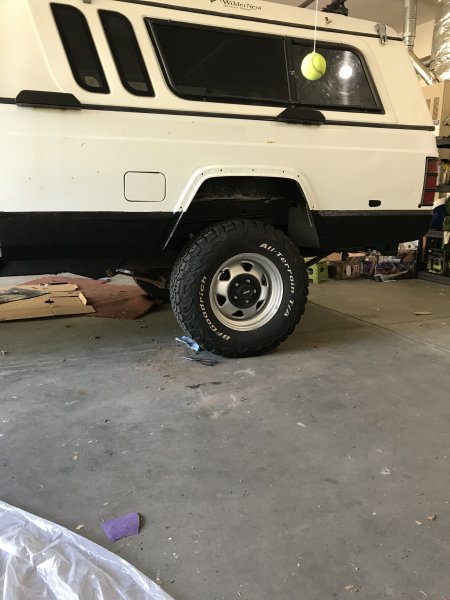
1990 Comanche Build - The Wilderbeest

agamble

Member
Great thread! I really like the work your doing and that Wildernest top is neat to see. I'll be following this thread for sure. (y)

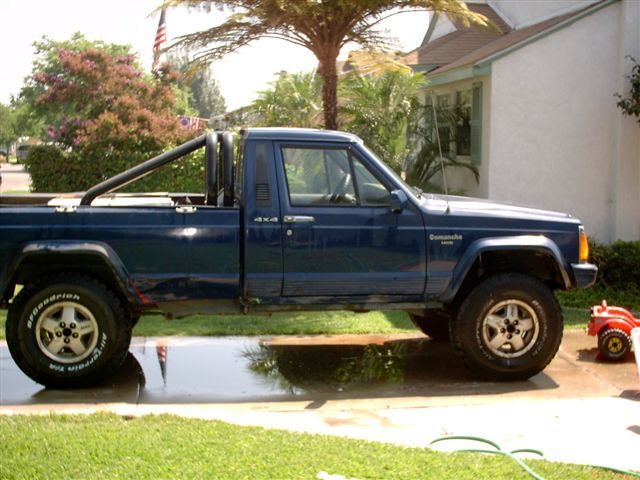
Comanche's are fun to drive and attract a lot of attention. You don't "see yourself" driving down the road very often. Here's my MJ next to my XJ ...
picture.php


I also have a "barn find" Comanche ...

Thanks for the positive feed back. I use to daily drive the Comanche and still do for the most part. When I had a job change my commute increased to about 40 miles one way. I commuted in the jeep for a month or two but didn't want to put that many miles on it and the fuel consumption became old very quick. I ended up getting a commuter car for my trip to work and use the Jeep for everything else.

That find barn find it amazing, definitely not a parts truck as the individual was thinking. Way to clean and complete, it still had the Jeep logo covers on the roll bar lights. Impressive Jeep fleet, from the picture of them all it looks like you have an LJ, TJ, XJ, and two MJs.
 

PCO6

Adventurer
02 rangeredge - I agree ... 80's tastic - (y) . The first thing I noticed on the barn car was the sport bar and that was from about 50 yards away. I removed it, blasted some minor rust, repainted it and put it on my good MJ. It came with all of the proper brackets and a set of driving lights. They work and even have covers with the "Jeep" logo. They're in rough shape but I should be able to restore them.

I don't have a decent pic yet of my #1 MJ with the sport bar but I do have one with a 2nd bar laying loose in the bed. The lights in this pic are cheap ones I bought just to make sure the wiring works. I picked the 2nd bar up cheap so I thought I'd grab it. I bought it with the "dumb idea" that I might cut it up (it has some bad rust) and make it in to an overlanding bed rack system, kayak rack, etc. I haven't seen anybody do that ... there may be a good reason why! lol

picture.php
 

02rangeredge

Adventurer
The metallic silver that was used on the wheels or the color of the tail gate in the above photos? I have no plans on painting the Jeep. I like the roughness of the paint, give it some character and I don't feel bad when I add more pinstripping as I drive through brush. The tail gate was an extra one in better condition I had laying around.

I was asking about the tailgate, you've got a decent amount of cammanche stuff in your life for how hard they are to find
 

PCO6

Adventurer
agamble - I drive mine a lot too and it's great! No doubt you've noticed the dumb things people do to get a look at yours. I had a guy drive full tilt across a Home Depot lot right at me. He slowed down swerved then yelled out the window ... "nice truck" (idiot). You're right about the barn truck. I was expecting to part it out but it's way too good. I got some great parts from it and have replaced them with good/decent parts. I'll be trying to find a good home for it. And yes ... I do have a bit of a fleet issue. The TJ, LJ, XJ and MJ are all daily drivers. They're the only cars I have. My real problems is that I also have 5 trailers (home built utility, home built expedition, fibreglass project, tear drop & tear drop project). It's a good thing they're all small!
 

PCO6

Adventurer
02rangeredge - Once you have one they find you! I parked my MJ in the old cars corral at a big auto flea market near here. A guy parked next to me in a nice old Dodge pick. He got out and told me he had one for sale. That was the barn car. A few months later I had 2 MJ's in my driveway and a guy drove up in a nice old Suburban, opened up the back and said ... "would you like this stuff?". He had a pile of MJ parts he just wanted to get out of his garage. At no cost he gave me a near perfect tailgate, tail lights (unique, hard to find and expensive) Comanche badges, interior bits and a lot of MJ specific things. Turned out he owns the coin car wash nearest to me and I'm now a regular customer of his.

BTW - Sorry guys. For some reason I'm not able to quote other people's posts. Not sure what the problem is. Hopefully it's temporary.
 

agamble

Member
I was asking about the tailgate, you've got a decent amount of cammanche stuff in your life for how hard they are to find

I try to have a spare on smaller Comanche specific parts (tail lights, sending unit, badges, tailgate, etc.) that are harder find. Like PCO6 some was given when somebody had extra stuff they wanted to get rid of, other stuff was opportunistic purchases.

agamble - I drive mine a lot too and it's great! No doubt you've noticed the dumb things people do to get a look at yours. I had a guy drive full tilt across a Home Depot lot right at me. He slowed down swerved then yelled out the window ... "nice truck" (idiot). You're right about the barn truck. I was expecting to part it out but it's way too good. I got some great parts from it and have replaced them with good/decent parts. I'll be trying to find a good home for it. And yes ... I do have a bit of a fleet issue. The TJ, LJ, XJ and MJ are all daily drivers. They're the only cars I have. My real problems is that I also have 5 trailers (home built utility, home built expedition, fibreglass project, tear drop & tear drop project). It's a good thing they're all small!

I indeed have some interesting instances of people trying to get my attention while driving about. Also have found a fair share or notes left on the truck as well.
 

agamble

Member
When I removed the fenders to repair the door hinges I also removed the fender flares. During their removal I ended up snapping the majority of the mounting bracket studs. To re-attach the brackets I used a angle grinder with a grinding wheel and punch to get the old studs off the bracket. Then tacked 10-32 x 1” bolts onto the brackets. With the new studs were in place a couple coats of paint were applied to brackets and the threads were covered with a heavy coat of anti-seize.
6CFEB450-81C7-4750-93BE-A4E8FEB066F6.jpeg

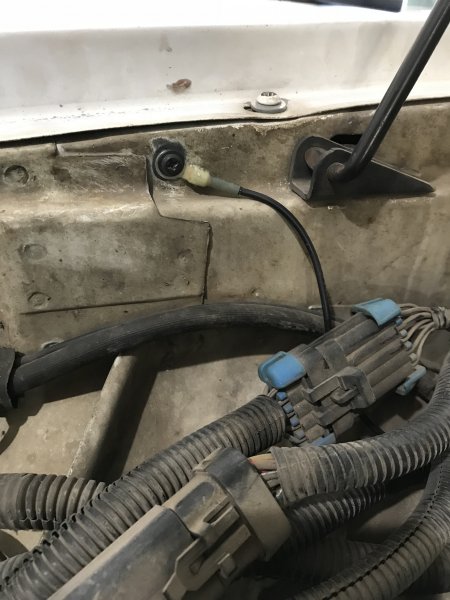
During my driving trips I note down repairs that are not critical to being done and take care of them at my leisure. Some of the small issues included a high idle, ~1500 RPM, no climate control or transfer case illumination lights, and the blower motor being weak and a smell of burnt oil.

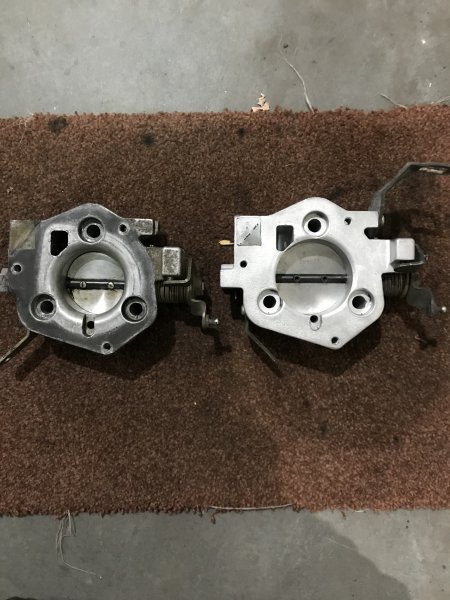
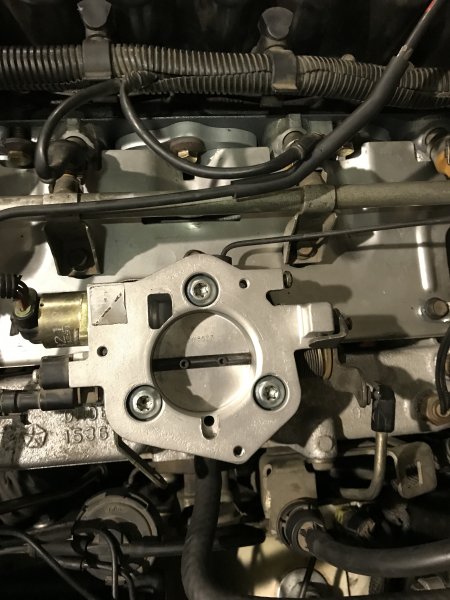
I traced all the vacuum lines and couldn’t locate any holes or leaks in the lines. So I double checked all the previous work that has been done. Still didn’t find any leaks or holes. So the diagnosis moved into other sensors and fuel related items and all were new and working or still functioning properly. I had a similar issue in another renix era Jeep and ultimately I ended up adjusting the butterfly valve to .003 mm. Rather than adjust the butterfly valve this time I decided to help the Jeep breath a little better. I came across a fabricator that sells bored throttle bodies for Renix Jeeps.

The stock throttle body has an opening that is 52mm, the new one has been bored to 60mm. With new throttle body installed the idles settled down to ~800 RPM.
D26ECEEC-A038-4C1B-BDBB-042D573BF78A.jpeg

224B69BC-034D-4D01-AA91-31442972F2C1.jpeg

The bulbs for the climate controls and the transfer case were replaced and all displays are now illuminated.

The burning oil on the exhaust was traced to the output shaft seal on the transfer case. That was replaced and the burning oil smell is now gone.

A webpage dedicated to maintenance tips for Renix era Jeeps was built by a moderator by the name of Cruiser54. Webpage link: http://cruiser54.com Referencing the information on this webpage the an additional blower motor ground was made closer to the blower motor. The blower motor output has since increased.
556A772B-4D13-43F4-B473-0FC26274C5EB.jpeg

0C277AF6-3402-4571-BEA1-616F41A009CF.jpeg
 

agamble

Member
Rolling off the assembly line every Jeep Comanche came equipped with load sensing valve (LSV). Near the back of the bed there was a valve and arm plumbed into the rear brake line. The arm was then connected by a rod of sorts to the rear differential. The concept was that as the weight in the bed increased causing the leaves to sag the, the rod would cause push the arm upwards opening the valve, thus giving more braking power to the rear drums. When I came into possession of the truck the LSV was zip tied in a 12 o'clock position to an upper hardline. As far as I tell the LSV functions on the truck. I seemed to have more rear brakes when it was tied up higher (pointing towards the underside of the bed) vs when it was hanging there pointing towards the ground. It seemed that the LSV semi functioned as when I cut the zip tie and let the arm hang in a 6 o'clock position the rear brakes were sort of reducing. Now majority of comanche owners simply delete or bypass the the LSV all together when it has issues. A common theme is that it plugs somehow, which doesn't makes sense to me. If the valve were to plug then more lines, such as the calipers would plug and stop working. And experience has dictated that if a valve fails it usually leaks meaning I would in theory have maximum braking at all times, not less. A bit of searching and I found a diagram and accompanying write-up on the LSV and its adjustment.

"Today I broke out the FSM and re-read the load sensing valve (LSV) adjustment procedure - again. Referring to the diagram below, rear brake bias is optimal when the LSV shaft flat (shown by the red line; flat is actually on the splined portion of the shaft) points down at the 6.00 o'clock position while looking at the LSV from the front. The factory adjustment procedure used a wonky 85* adjustment fixture to do the procedure; naturally they are now unobtanium. But in reading the procedure I could see exactly what was happening and how it worked. I pulled the LSV lever partially off the LSV so I could see the shaft flat, and it was pointing at 3:00 o'clock! ******? I then pulled the lever completely off, and rotated the shaft clockwise 360*. You could feel the pull in the shaft as the LSV internal rotary piston passed across the inlet and outlet fluid ports, then after it passed over the ports, it turned freely with no pull. This is how it regulates the rear brake bias depending on the vehicle load, and if the lever isn't in the correct orientation, the ports are blocked, thus there's no opening for the fluid to pass. Which of course causes weak or no rear braking.

I then rotated the valve shaft so it faced at about the 8:00 o'clock position, which simulated a fully loaded MJ and maximum rear braking. Then while keeping the shaft from rotating, slid the lever back on the splined shaft, pressed it on, and tightened it all down. Went for a test drive and slammed on the brakes, and the rears locked right up. Yay! Then I fooled with different lever positions on the splined valve shaft, and the best braking ended up to be when the shaft flat was facing right at the 7:00 o'clock position.

Now in a panic stop, the fronts lock up just before the rears - perfect. After about four full pedal stops, all four disks were hotter than the hinges of hell. Whereas before, just the front disks got real hot. I'm happy now - no ZJ proportioning valve and re-routing of the brake lines is now required. :) At least for now.

Does this make sense to y'all? Unfortunately, the 91-92 LSV's are different than the older ones as there's no flat on the splined arm of the 90 and below LSV's. And the older LSV's use a completely different adjustment procedure and adjustment fixture, even wonkier than the HO's do.
"

505084

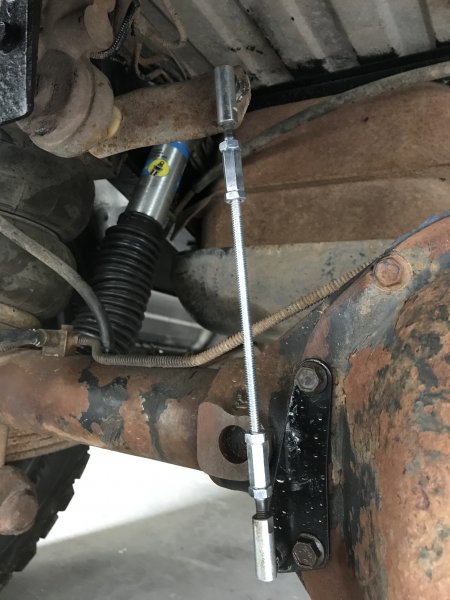
Mimicking the above write-up I found the flat of the section on my LSV positioned at 11 o'clock. Holding the arm in my hand, I was able to rotate the LSV bolt with a wrench until I had the shaft flat oriented at the 7 o'clock position. With the LSV adjusted I needed a way to keep the LSV arm in place. To fabricate a new longer rod to accommodate the lift that has been installed I used two 1/4"x28 LH threaded rod ends w. studs, a length of stainless 1/4"x28 LH threaded rod, two couplers, and four 1/4"x28 stainless nuts, washers, and lock washers. I got all the stuff at my local Ace hardware for about $15.
305BDED5-9EB6-44B9-AF01-E46C1D609336.jpeg

With a bit of tinkering I found the sweet spot to get my rear brakes to lock up just after the fronts.
 

agamble

Member
Had the battery die on me the other day. I knew it was old, made it almost 8 years. For a replacement I debated on getting a fancy AGM battery, like an odessy. But after researching everything out I got to thinking, I have no aftermarket electronics and the Gold Top batteries at AutoZone have always been reliable and served me well. The most on the electrical upgrades list I have planned is perhaps a winch in the far, far future. The new battery oddly enough sorted out a slight rpm surge that was present in the jeep, added bonus
:L:
.

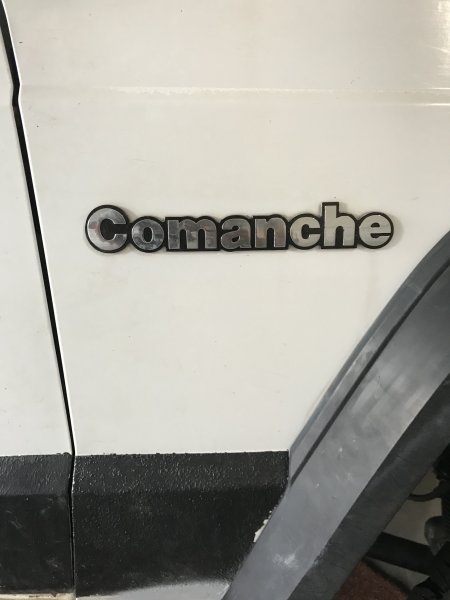
Aside from rust prevention, I did the most cosmetic thing that I will probably perform on the Jeep. I freshened up the emblems. The freshen up entailed repainting the background black to get the lettering to pop again; hand painted those. Then some a clear coat for a bit of shine.
06EC5005-7254-40BF-AF61-2723E3A99E5D.jpeg

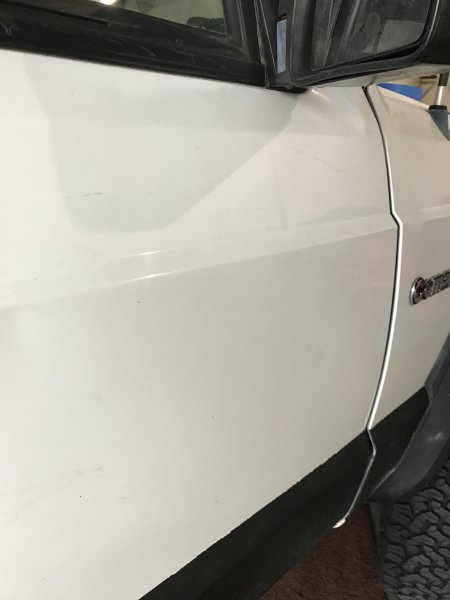
In an earlier post I shared how both the driver and passenger doors came from a newer model XJ (94 I think?) as the original doors had rusted out and were falling apart. The replacement doors came off an XJ with the upcountry trim package, which entails gold striping running the length of the door. No where else on the truck had gold striping, they stood out. I have no plans to make this a show truck, and the visible scratches, dents, and dings can attest to that. But I figured a consistent theme is do able. It took longer than I thought it would but I removed the gold striping from the doors. A fresh razor blade and a lot of patience got all the sticker and adhesive from the doors.
CA70975A-CD4F-446F-9D2D-620F3D36E04B.jpeg

E85980A3-016F-4997-80FB-D61ED4EB2608.jpeg

The razor blade also made its way to the Wildernest to remove the last of the decal stickers.
 

agamble

Member
Disc Swap Part I

I was tinkering around with the parking brake out in street in front of the house. After applying the brake the pedal released on its own, but the jeep didn't roll. Upon completing what I had been doing I went to pull forward only to find that the drivers side rear wheel did not want to spin. An initial attempt at a quick fix, putting the brake back on and releasing it again, did nothing to remedy the problem. So I now found myself in a conundrum. The tire would roll just fine in reverse, but would not move going forward. I could attempt reversing all the way around the block or try and drive into the garage. I went with trying to pull forward into the garage. 10 minutes later and severely burning brakes I was in the garage. After getting it into the garage I figured it was time to rebuild the brakes. I had been tossing around the idea of converting the D44 from drums to discs when the time came to redo the brakes. Research showed there were several ways to do it ranging from easier to more difficult. After doing the research I opted to use the Ford 8.8 for my disc conversion as its cheap...ish and pretty straight forward. I used this write-up as my source for information: https://www.naxja.org/forum/showthread.php?t=967146. The write-up is filled with great information.

Ford explorer rear discs appear to be the best for this conversion as the bolt pattern of the backing plates is closest to the D44.
- 95' - 01' F8.8 rear discs backing plate has a 2" x 3 9/16" bolt pattern​
- 86' - 90' MJ/XJ D44 backing plate has a 2" x 3 11/32" bolt pattern​

This makes for a horizontal difference of 7/32" between the two backing plates. The explorer backing plate needs the bolt holes to be elongated to the inside 7/32" for them to bolt onto the D44 housing. A dremel with a carbide bit made quick work on elongating the backing plates from the F8.8. Make sure to remove about 1/8" inward side of each hole. I used the D44 retaining plate to measure when I had removed enough material. When removing the metal with the carbide bit wear gloves, the shaving that are created are super irritating if you get them on the skin, and hang around forever if you don't vacuum them up.
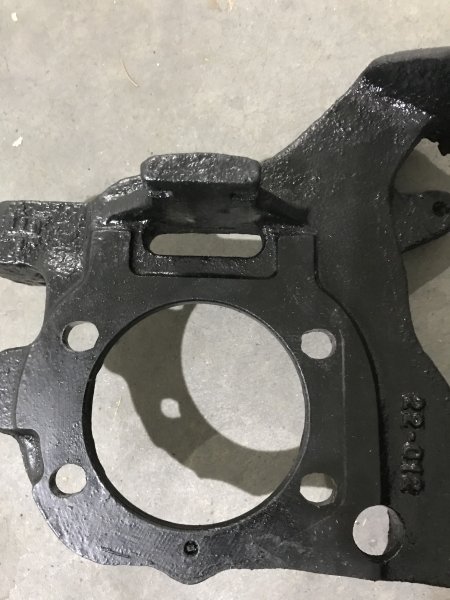
25193B56-869F-4205-BA5E-95891DA72C06.jpeg

C3C130F4-7A99-4D72-9B1F-FE29C919E154.jpeg

F6F966D8-6FEE-4BAC-8ACB-A876DA62A368.jpeg

With the bolt pattern taken care of the next thing to address is the difference in thickness between the F8.8 disc brake backing plates and D44 drum backing plates.
- F8.8 disc brake backing plates are .350" thick​
- D44 drum brake backing plates are .125" thick​
This gives a difference in thickness of .225". Teraflex supplies a spacer in their aftermarket conversion kit to compensate for this. A search of their webpage showed the spacers can be purchase by themselves (PN 86261) for $6.99 each. The spacers are .226" thick. When you press them onto the axle shafts the spacer will go between the D44 retaining plate and the oil seal ring.

I read conflicting posts on whether or not the stock wheel studs would work and with what rims. I run the 90's era stock steel D-window rims. Before pressing the new axle bearings onto the axle shafts I did a test fit. With the old oil seal ring I put the axle shaft in place with the retaining plate and spacer. The stock wheel studs were just long enough. I was able to get 5 - 6 full rotations on the lug nuts. The thread engagement was not enough for my personal comfort so I swapped the wheel studs for some F8.8 rear wheel studs (Dorman PN 610-368).
6BDC7927-E681-4F76-A5A4-957185C7BD6D.jpeg

Before installing the axle shafts you will have to install the parking brake shoes. There is no way to get the parking brake shoes on with the axle shafts in.
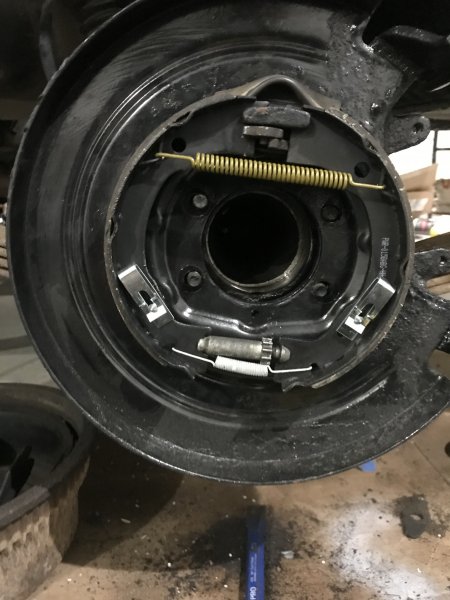
53EEE6B9-5CC0-4149-9AEC-0EEA06D6E09C.jpeg

When trying to put the axle shafts in the spacer kept falling down preventing me from getting the axle shaft to seat all the way. To keep it from falling down when installing the axle shafts I put a thin coat of Ultragrey RTV on the spacer to glue it onto the retaining plate.
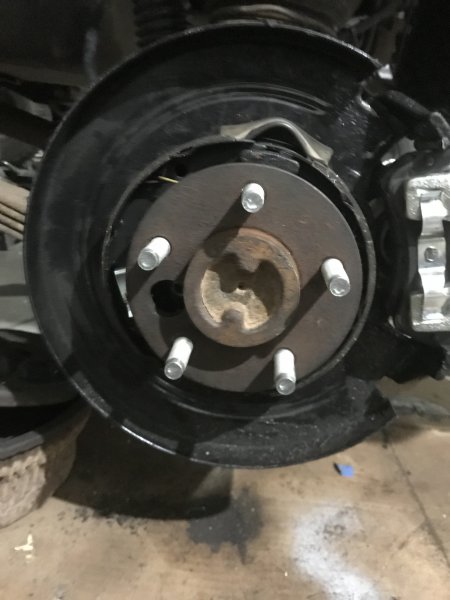
94CC7CA2-663D-4DFC-99A6-EC3470050FDD.jpeg

When selecting rotors I read of some guys using Ford Explorer rotors and others going with ZJ rotors. The comparison of the two is as follows:
F8.8 Rear Rotor w/Parking Drum in Hat
-Number bolt holes: 5​
- Bolt Circle Dimensions: 4.5"​
-Discard Thickness: .433"​
-New Surface Thickness: .473"​
-Outside Diameter: 11.22"​
-Overall Height: 2.295"​
ZJ Rear Rotor w/Parking Drum in Hat
-Number bolt holes: 5​
- Bolt Circle Dimensions: 4.5"​
-Discard Thickness: .374"​
-New Surface Thickness: .43"​
-Outside Diameter: 11.22"​
-Overall Height: 2.33"​
The difference between the two is practially negligible. So either one will work. Reviews of using the F8.8 rotors is there is some brake pad drag. But the main issue with using Ford 8.8 rotors is the center hole is too small for the axle shaft. The D44 axle shaft will not fit through the center hole without widening the inner circumference ~.015". A flapper wheel could take care of this. I went with the ZJ rear rotors due to the two issues that I read about the F8.8 rotors.
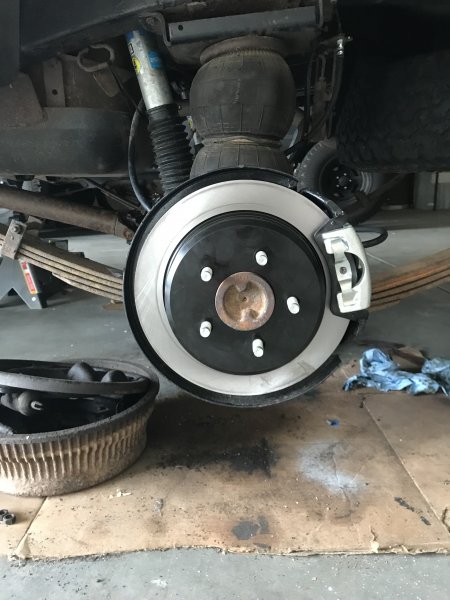
A75356C6-1F49-48EB-AE29-623DF3B3B3C7.jpeg
 

agamble

Member
Disc Swap Part II

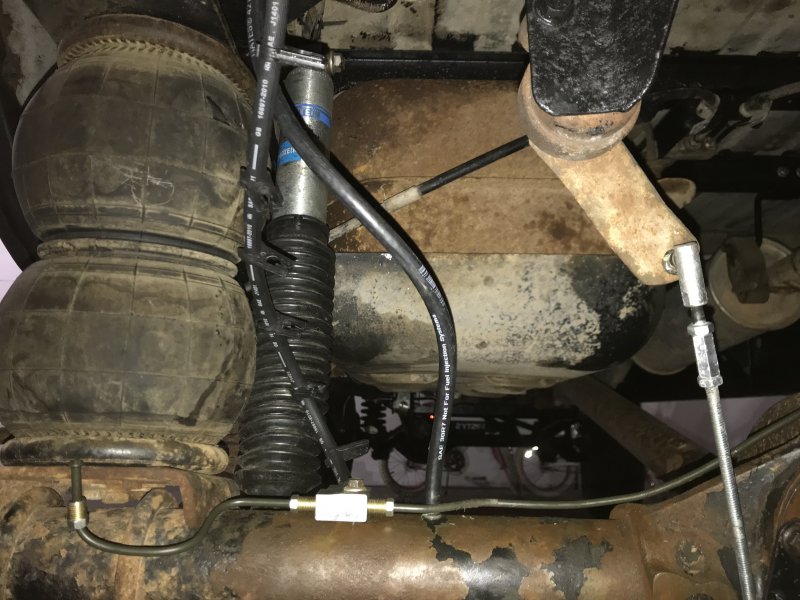
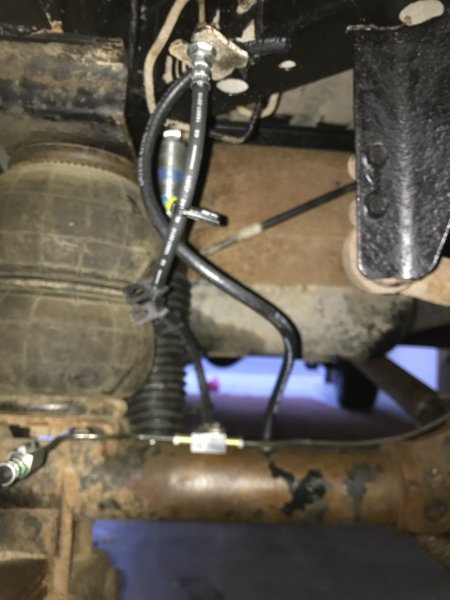
The stock steel brake lines for the D44 for drums will be too long, which will require them to be modified or replaced. I replaced mine as I don't know when the hardliners were last....if ever replaced. The hard lines were run behind air bag perches. The soft line running from the D44 to the bed was the stock length and was maxed out at ride height due to the lift, not allowing for any flex. A longer soft line from a Dodge Dakota was installed. This photo is with the axle at fool droop.
B37547B1-A0A2-4273-9D34-2392944B4649.jpeg

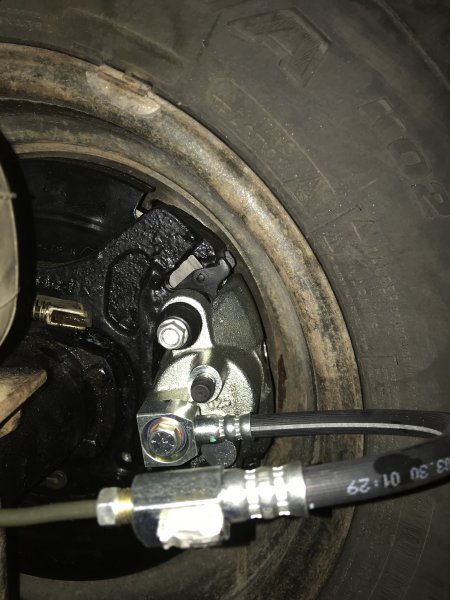
To connect the hard line to the caliper, I used two passenger soft lines for the Ford Explorer. They run horizontal and inline with the leaf springs to prevent them from getting snagged or caught on anything. When I did a test fit early on in the process I neglected to do one major thing. I never put on the caliper to test for clearance with the stock D-window rims. I remember reading conflicting information on which rims and backspacing will work with the calipers. I recall reading that the 90's era 5 spoke and 11 spoke stock rims wouldn't fit. But when researching stock Explorer rims they're the same size and dimensions as Jeep stock rims, so there is no reason why they shouldn't fit. Further reading led me to suspect people were mixing up Crown Victoria brakes. Stock rims most likely will not fit with that setup as stock rims for the Crown Vic are 16". Anyways, the stock rims had plenty of clearance for the calipers.
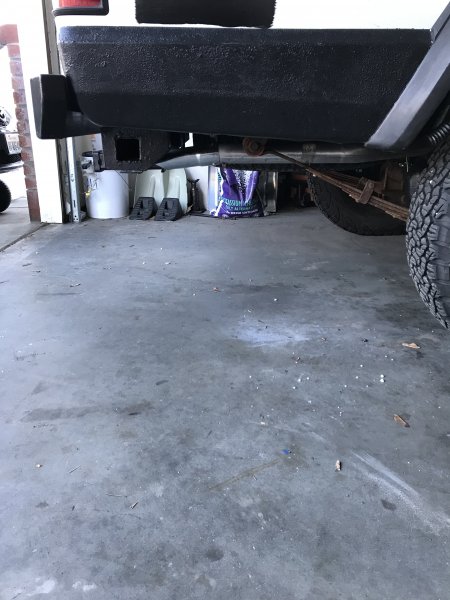
3F65089F-3748-4152-98D9-2C00C727F7A9.jpeg

DBB1F221-1C84-44E8-9E38-47796F9B82F1.jpeg

Several post discussed swapping out the prop valve for one from a ZJ with disc brakes to provide better braking pressure on the rear discs. I still have the MJ prop valve as my load sensor still functions. After bleeding the brakes I tinkered around with the prop valve position once again until the new brake setup was dialed in allowing the rear brakes to lock just after the fronts.

With the brakes bled and functioning the only thing left to address is the ebrake cables. There are three solutions that are brought discussed over and over:
  1. Cut the spring off the stock cable, fold it over and use cable clamps to secure it to the ebrake arm
  2. Purchase the Lokar Clevis Kit and modify them for the drum cable ends
  3. Use the Lokar Universal Ebrake Cable Kit and build your own cables
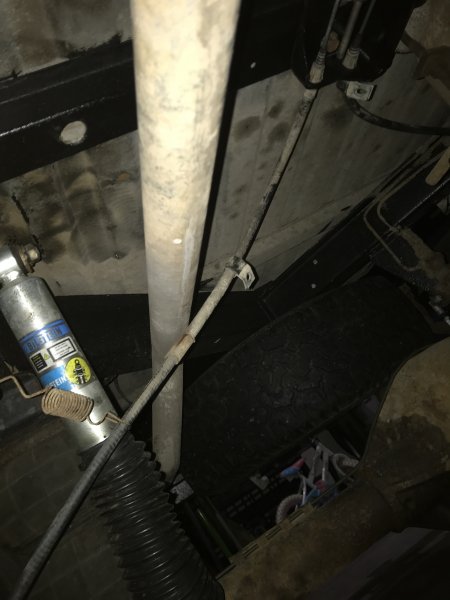
I actually went with a fourth option. After measuring the length of ebrake cables for a ZJ with disc brakes I found in the junkyard they appeared to be long enough to work with the Comanche. Once I got home I threw them on, the length is snug but just long enough.
31083849-FD9A-4B15-83B5-3177EAEDA877.jpeg.e411f82e6c4cde06b27a1167b2912847.jpeg


B9FAC8BC-AAEF-4EF7-B82C-94ECCAFAF388.jpeg
 

agamble

Member
When the transmission was swapped the biggest hiccup that I encounter was the exhaust system was completely welded. From the exhaust headers to the tail pipe, all the segments were fully welded. Who, when, or why it was decided to weld everything in as one unit left me with so many questions. So at the time of the transmission swap in order to drop the transmission I was left with two options:

1 - Tear apart half of the engine to unbolt and remove the intake manifold and exhaust headers.
2- cut the down pipe to allow the exhaust to be dropped

At the time I didn't want to take apart half of the engine bay, only to then remove the entire exhaust system and drop the transmission. And thinking of future endeavors I didn't want this to be the requirement every time, I therefore went with option two. I cut the down pipe just in front of the transmission to get the separation needed to drop the transmission. When all was said and done, I tried to fix the the cut with an extension and hose clamps but I couldn't get it to seal and settled for an extremely bad exhaust leak and exhaust. The exhaust pipes on the system were 2" diameter and the auto parts stores didn't really have much to offer.
32327B13-C488-46A8-8884-3A75A5213A28.jpeg

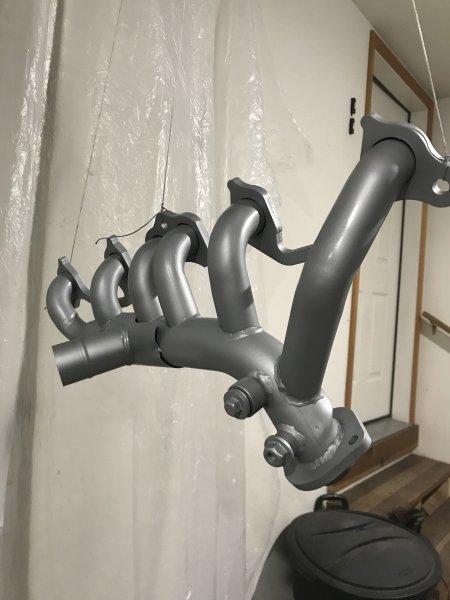
I decided I've had enough with the loud exhaust and poor fuel mileage and replaced the entire exhaust system. Due to lack of availability, fitment issues, and cost I went back to the stock exhaust manifold in place of the exhaust headers that were previously installed. Before cutting the exhaust apart and creating a bad leak, I didn't really notice any power gains or MPG improvements from the exhaust headers anyways (I have held onto them and at some point if I think I want them back on I'll weld on a flange). Before I put the exhaust manifold in I gave it a coating of Rust-O-leum high temp paint.
6FEE6542-23B4-4401-8E79-45A9C9FDBD42.jpeg

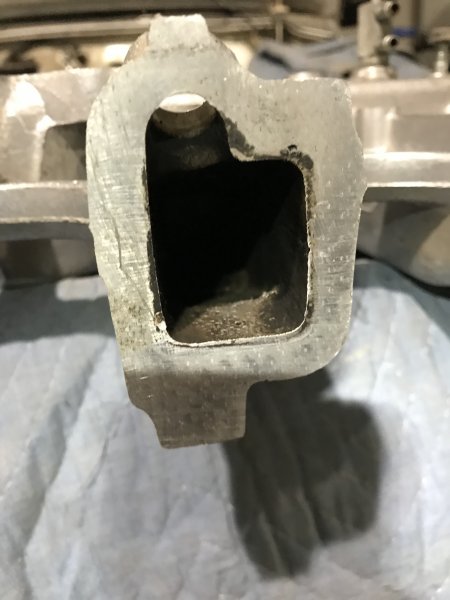
After the tear down 29 years of use and little maintenance was clearly showing. The inner walls of the intake manifold were caked in oily carbon build-up.
ECF7CEF4-1438-494F-AD11-5F978E2C4D63.jpeg

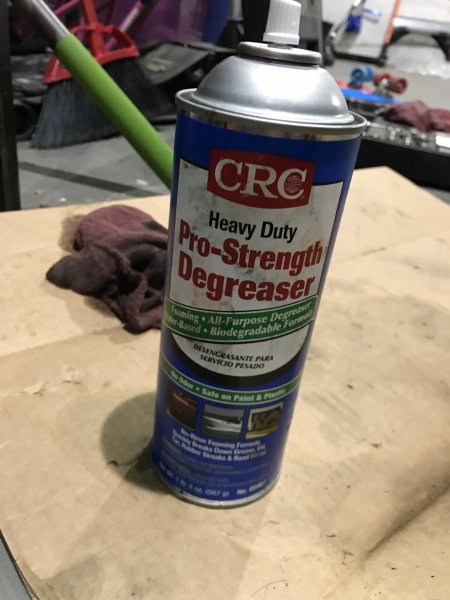
To remove the carbon build-up and grease I tried a product I've never used before.
649DBBDA-3B69-47E1-A6FC-F6D7FCF4744B.jpeg

Spray the degreaser on, let the foam sit for 10-15 minutes and wipe away. A couple sprays and wipes, with a good rinse in-between and the soot build-up was gone.
2DFD3022-FBBA-4749-8216-4CBA6F2926FB.jpeg

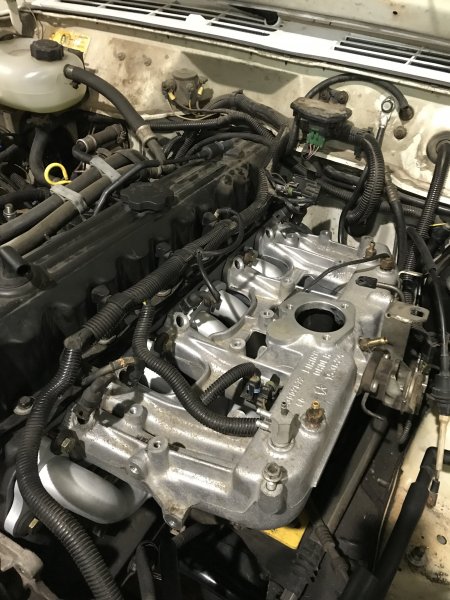
When dismantling the intake and exhaust manifolds, the bolts holding them onto the engine block were a mixture of OEM and random bolts. All of the random bolts were too long and came complete with a collection of differing amounts of washers and/or additional nuts to take up the extra length on the threads. A quick trip to the hardware store landed me 11 new 3/8-16 1 x 1/4" replacement bolts. Out of sheer habit and without giving it much thought until I was bolting the manifolds on, I grabbed Grade 8 hardware. If I had been paying more attention I probably could have saved a few bucks, ah well. Degreaser made the manifold look almost new.
40B5EA15-4CDD-4F1A-845D-A3EE91558C9F.jpeg

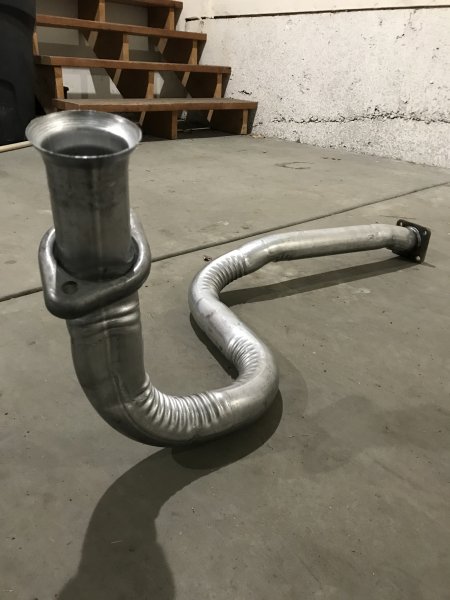
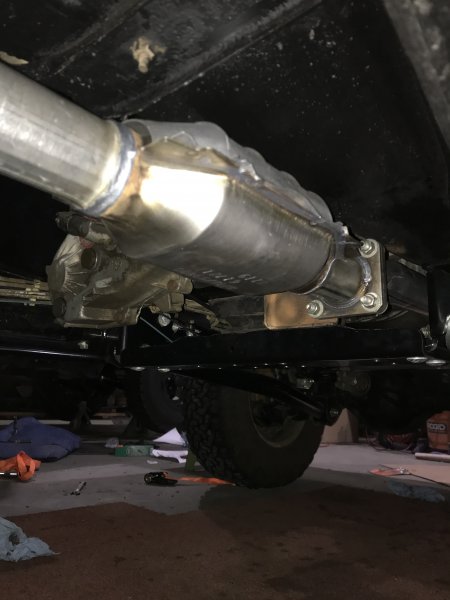
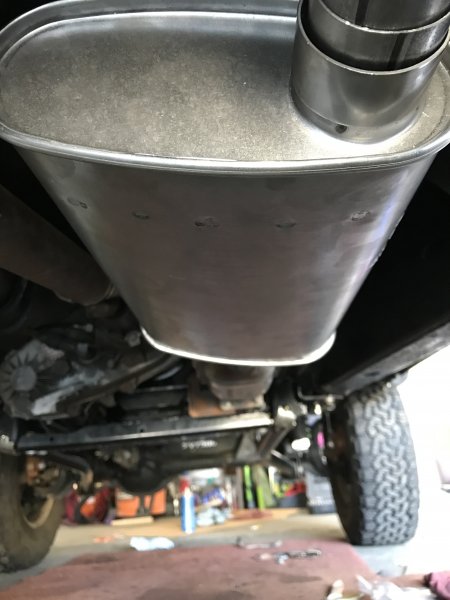
Rockauto has OEM spec replacements for the entire exhaust system. Everything was purchased (the down pipe, O2 sensor, cat, SoundFX muffler, and tail pipe). All the hangers and mounts are located in the right spot. Instead of using the u-bolt style exhaust clamps, I went with band clamps. The u-bolts tend to cause crimps that make it more difficult to disassemble down the road. I personally like to make future disassembly as easy as possible for myself.
7EDBD172-A47F-42F1-8546-2923114021C1.jpeg

FBEB9F70-E92D-40BC-B142-3436C435D6EF.jpeg

5F47FD3B-018C-4C26-BD8C-CFD8389BC8E1.jpeg

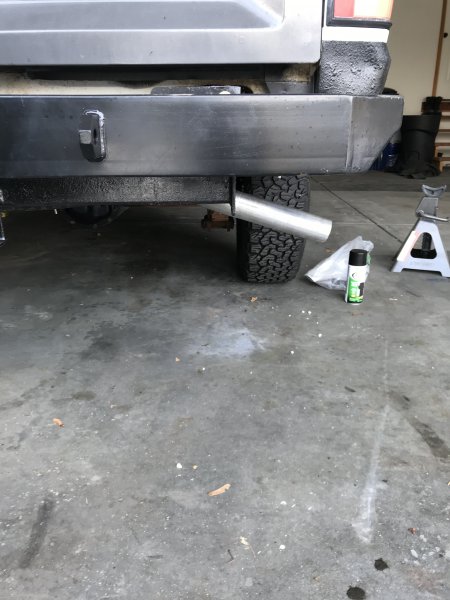
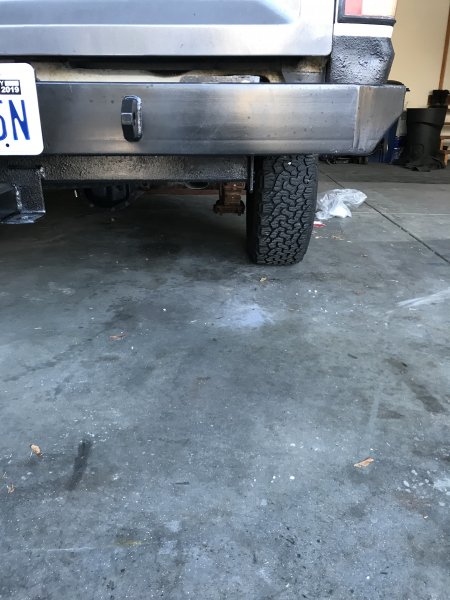
The only fitment issue was the tailpipe extended about 1/8" too far back and was contacting the hitch, also didn't like how low it hung. To shorten and tuck it up I removed tailpipe to just in front of where the crimps leading into the bend begin and installed a cheapo chrome tip. The tip didn't sit flush on the tailpipe, leaving an 1/8" gap. The two supplied screws used to pinch it into place would cause the tip to angle down and slide/fall out of place. To secure it into place I drilled out two 3/16" holes allowing the screws to thread into the tail pipe itself with an additional hole and screw added to the top.
0B264512-CB9B-4239-9133-FA1763E032B2.jpeg

52368C75-FC70-4FBD-8081-CE247628135B.jpeg

19C9EDD6-DC64-4E94-8CBB-8B8D322AB422.jpeg

98AC24AE-B8CE-4FFE-A844-9160C72E246A.jpeg
 

Mundo4x4Casa

West slope, N. Ser. Nev.
You have a lot of perseverance with the Comanche build. I've always thought they were a good platform after a friend bought an '88 and built it. His was the rarest of the rare: a 1988 Comanche, One Metric Ton model.

Yes, that's a 2200 pound payload capacity. Wow! What was different? First, the rear axle was a Dana 44/ thick wall with the highest spline count (I think it was 31 spline) and factory Trac Loc. The rear leaf springs had a lot of leaves plus an upper secondary spring (some call it an overload) and an actual thick overload spring on the bottom, like the one ton trucks have only on a smaller scale. We did an SOA on the rear axle, and installed an XJ, 4 inch lift kit on the front. He had a Power Lok front limited slip installed in the Dana 30 High pinion diff., and put tall and skinny 33/9.50 BFG muds on factory wheels. If memory serves me right, his truck had the bulletproof Aisin/Warner Gear AW-4 trans and NV 231 t.case. He put 4.56 gears in all around. Maybe that was 4.88's. It's 25 years ago. How did it run? Very well, good enough to tackle the fabled Rubicon in a LWB MJ! It had the same 'sticky' character on the rocks as the XJ's had. We did some tuning on the Renix injection system, as you could actually adjust a few thing during that period before the CARB made any adjustments taboo. Alas, he was rear ended and had to get a different bed and tailgate negating the cool METRIC TON decal:

jefe
 

agamble

Member
You have a lot of perseverance with the Comanche build. I've always thought they were a good platform after a friend bought an '88 and built it. His was the rarest of the rare: a 1988 Comanche, One Metric Ton model.

Yes, that's a 2200 pound payload capacity. Wow! What was different? First, the rear axle was a Dana 44/ thick wall with the highest spline count (I think it was 31 spline) and factory Trac Loc. The rear leaf springs had a lot of leaves plus an upper secondary spring (some call it an overload) and an actual thick overload spring on the bottom, like the one ton trucks have only on a smaller scale. We did an SOA on the rear axle, and installed an XJ, 4 inch lift kit on the front. He had a Power Lok front limited slip installed in the Dana 30 High pinion diff., and put tall and skinny 33/9.50 BFG muds on factory wheels. If memory serves me right, his truck had the bulletproof Aisin/Warner Gear AW-4 trans and NV 231 t.case. He put 4.56 gears in all around. Maybe that was 4.88's. It's 25 years ago. How did it run? Very well, good enough to tackle the fabled Rubicon in a LWB MJ! It had the same 'sticky' character on the rocks as the XJ's had. We did some tuning on the Renix injection system, as you could actually adjust a few thing during that period before the CARB made any adjustments taboo. Alas, he was rear ended and had to get a different bed and tailgate negating the cool METRIC TON decal:

jefe

Thanks. There has been plenty of blood, sweat and tears put into the Jeep. I had an XJ and loved it, but need/wanted a truck. The Comanche is the perfect solution, best of both worlds.....in my opinion. Does your friend still have his Comanche?
 

agamble

Member
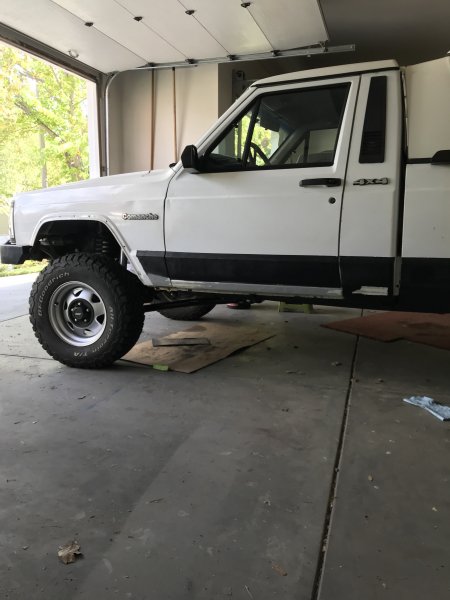
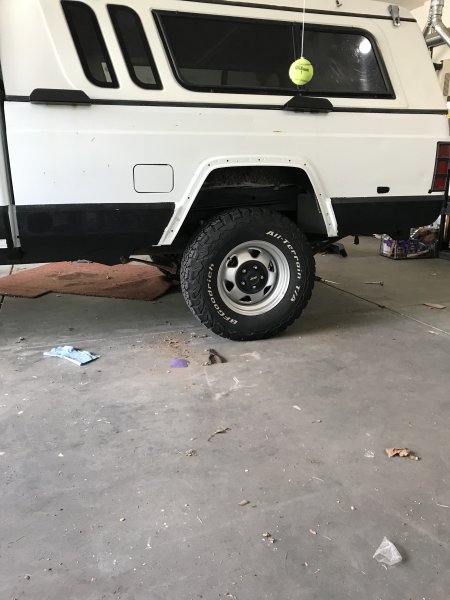
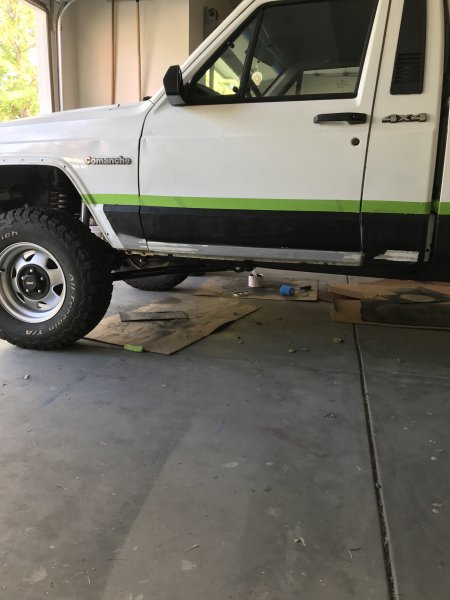
Before fall set in I completed body work on the quarter panels, complete with a primer coating. I was hoping to reapply the bedliner on the lower quarter panels to have it done and out of the way, but time was not on my side. With the colder temperatures the plan was put on pause. Now that spring has sprung, a brought with it warmer temperatures it is time to finish the lower quarter panels. A some point a coat of Durabak (a DIY bedliner) was applied to prevent rock chips. When it was originally done the Durabak was applied with the fender flares on, resulting in peeling near the flares and a feeling of being incomplete. This time around the flares were removed to have a complete running front to back. (the garage wall prevented me from having enough space to get a single shot).
056FD3DD-2BB8-474A-9906-EFE537FEBAFA.jpeg

D221DEE7-44B5-4C04-BB58-4636765E6C0B.jpeg

The entire lower half of the truck was washed clean to remove dirt, oil, grease, and grime and given a rub down with xylene per the manufacturer instructions. I masked off a line where I didn't want Durabak to be. I moved the tape line up ever so slightly to clean up the rough edge from the previous application.
C188F6D1-0E03-40AC-ADF2-404E06ECBF46.jpeg

9AA73316-B551-4F8A-A524-3E605C33A1A4.jpeg

Durabak can be sprayed or rolled on, I went with roll. You can buy special rollers from the manufacturer that helps the rubber granuals spread more evenly. The manufacturer’s directions for application of the Durabak bedliner state that a primer coat is not necessary, but I found that the bedliner adhered much better to the primed areas than the places where I had just roughed up the factory paint with a light sanding, as recommended. Application was pretty straightforward. I used the manufacturer supplied foam brush to paint along panel, nooks and crannies I used a paint brush. I started by woking on the factory exposed paint. The first coat went on smoothly, though it did take a minute or two to really get the hang of how to apply the bedliner evenly. Since the air here is so dry, the first coat took ~25 minutes to become tacky to the touch. Once the second was applied, a third and final coat was applied along the entire lower panel to give an even, more consistent look all around. As soon as the final coat was on I we all of the painters tape and am letting the Jeep to dry overnight. I've been out twice to touch up any necessary areas. Since Durabak bonds to itself, this has not been a problem.
4FA22CF9-D143-46B0-A49C-055F2B1095F4.jpeg

A018FFDF-0586-4044-8E37-C2E97EC64CA8.jpeg
 

Forum statistics

Threads
185,815
Messages
2,878,492
Members
225,378
Latest member
norcalmaier
Top