2004 Tacoma SAS

Dec 19, 2021 at 7:32 PM

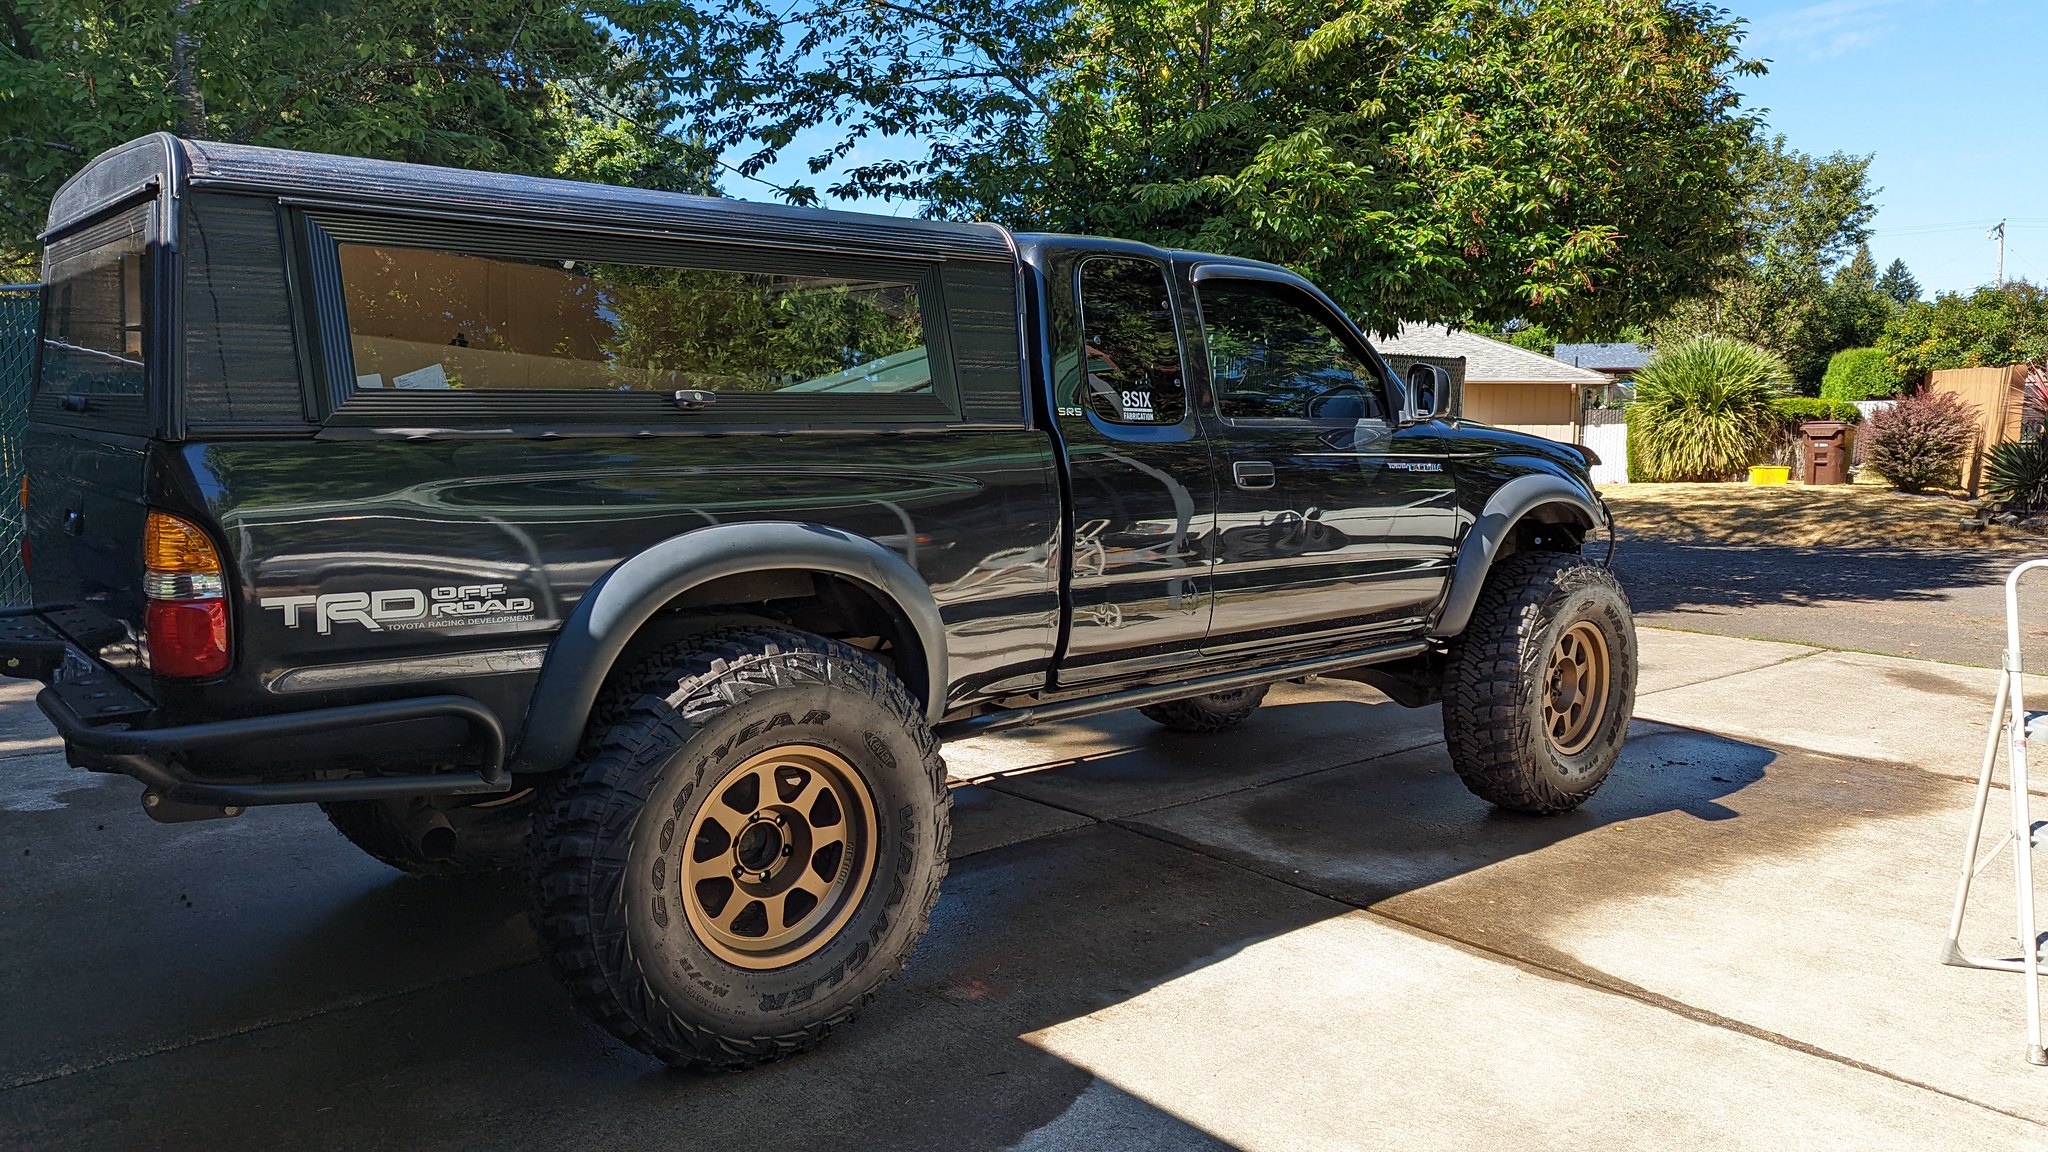
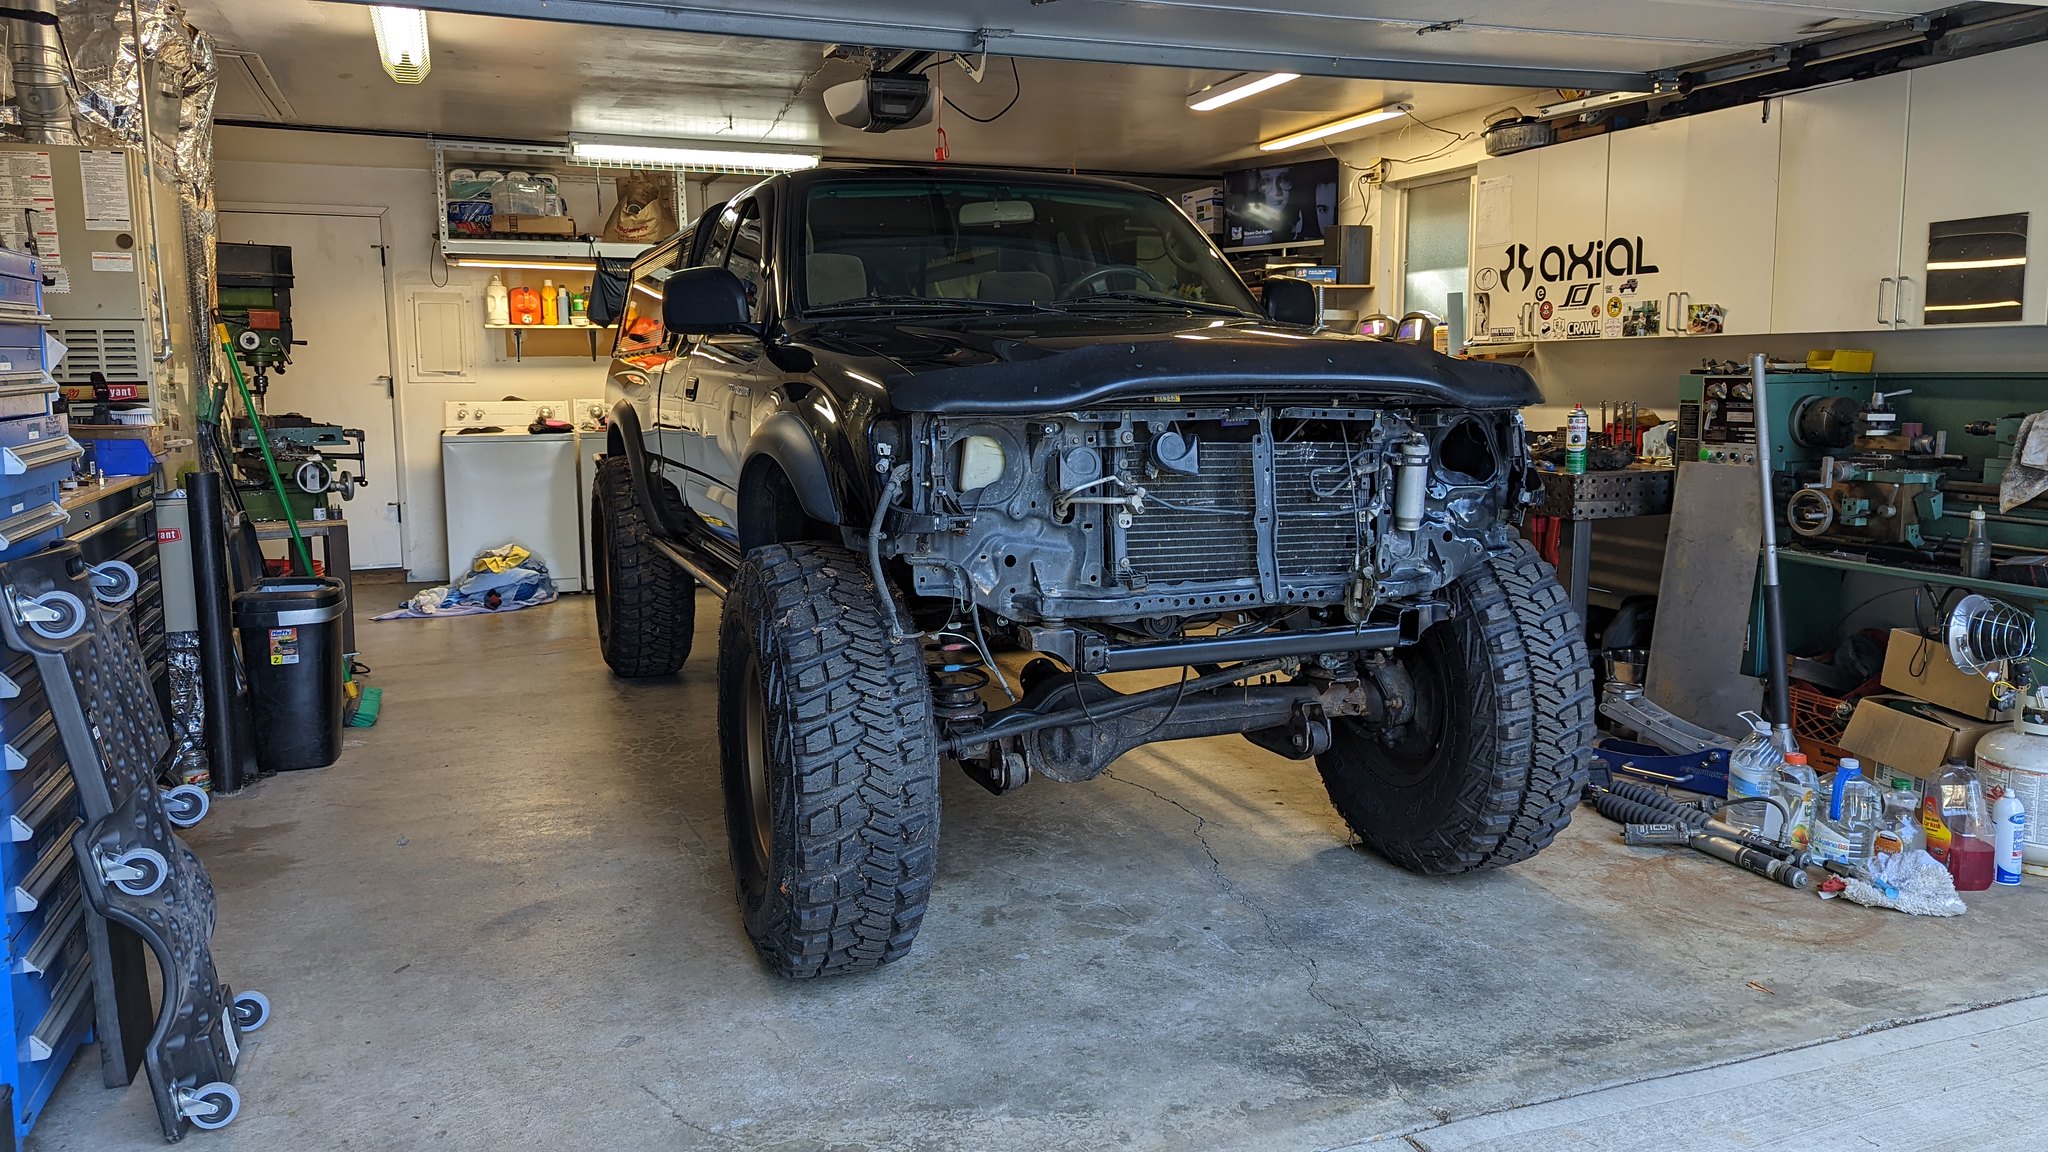
Well, there seems to be a common theme anymore with how often I can find time to work on the Tacoma. That's life I suppose. Anyhow, I managed to get some time here and there over the last week to put in some time on it.


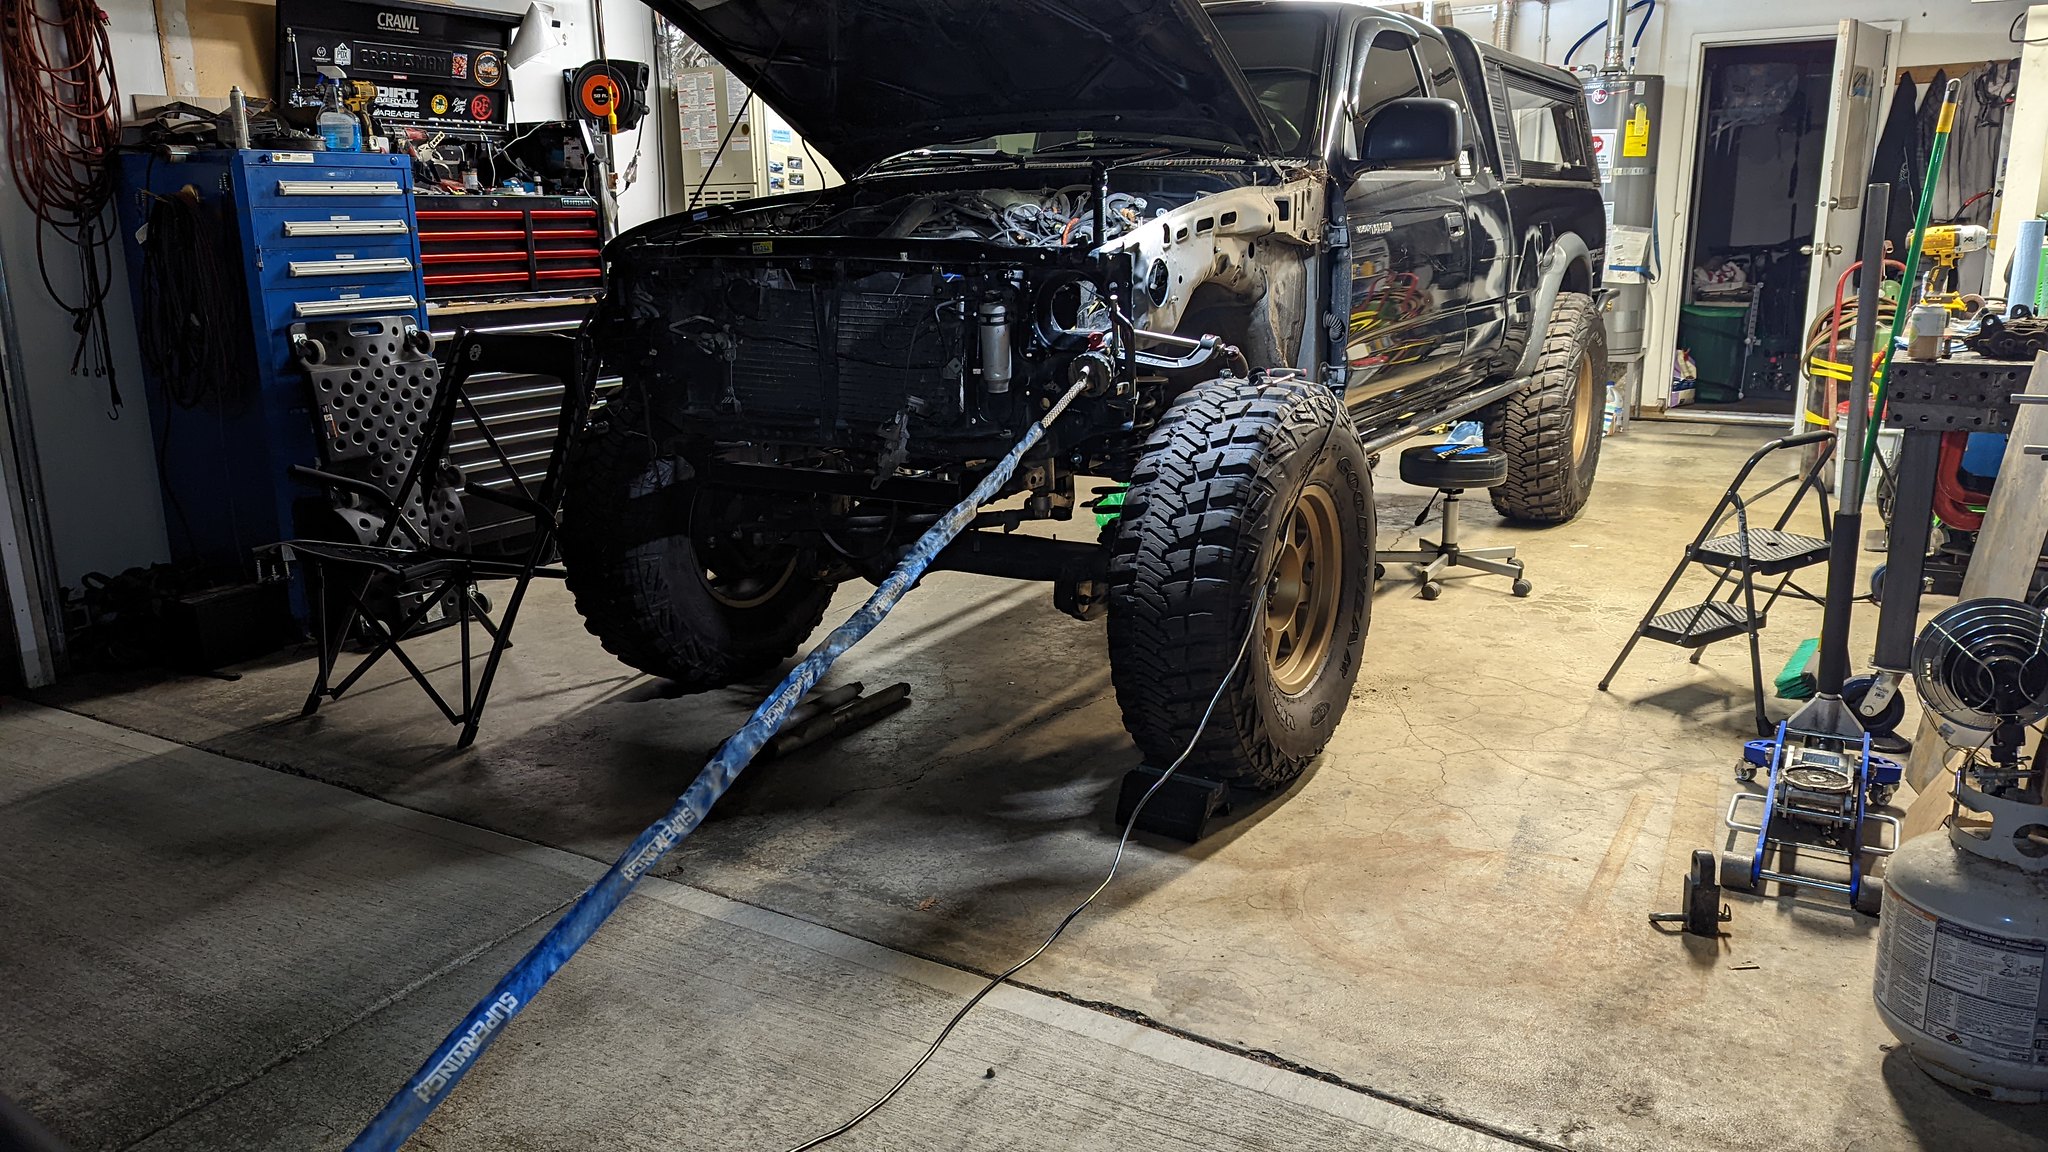
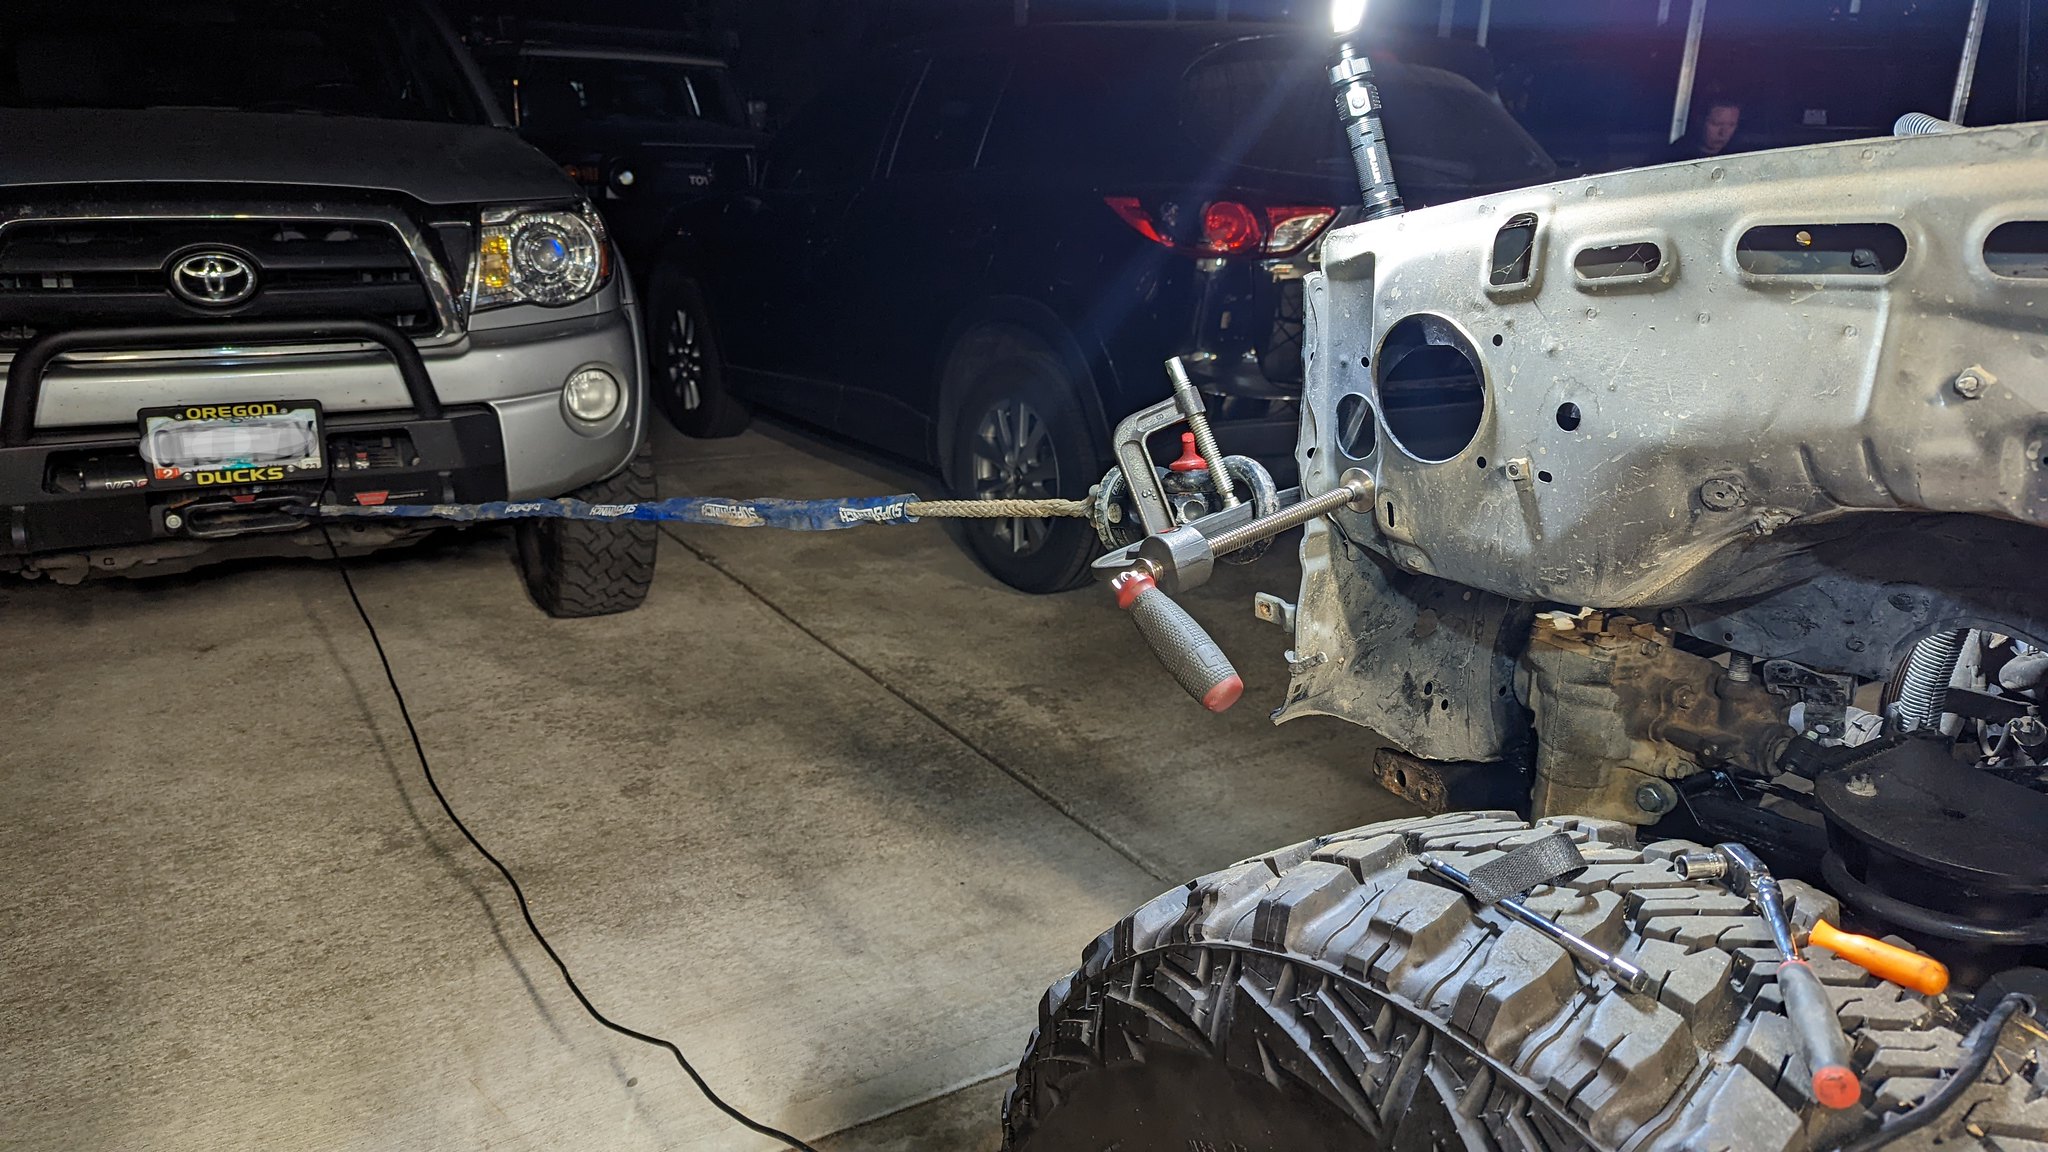
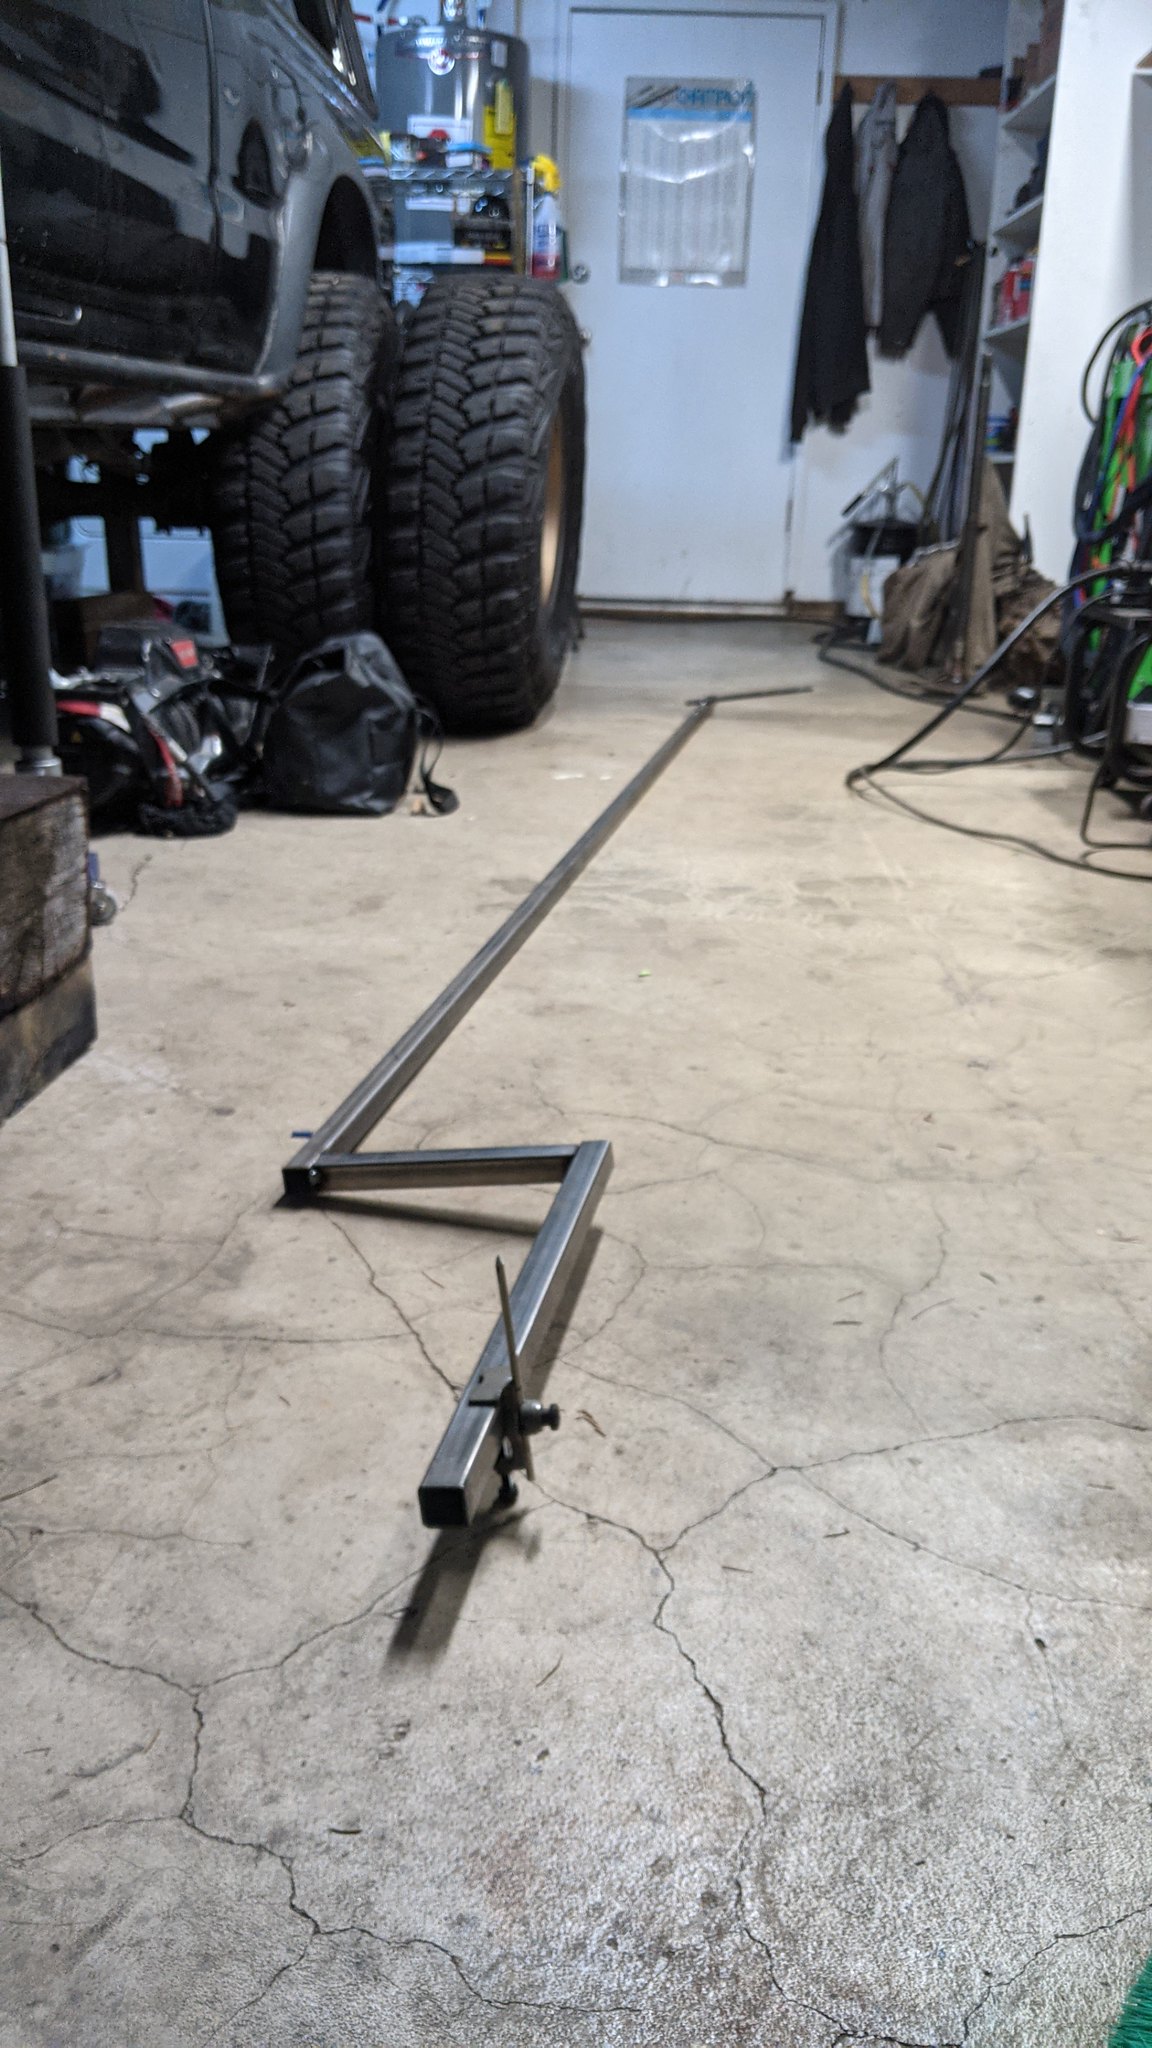
First thing I wanted to do, was make sure the wheel base was close(+/- 1/16") so I could be confident in the placement of the coil mounts both upper and lower. I made this fixture that picks up the center machine mark on the rear axle shafts, and the center machine mark on the trunion bearing cap. Somehow, out of dumb luck...... I was exactly on.

51758513019_4278c7fb6e_k.jpg


Somehow during this process, I discovered the axle was off side to side, by 3/16". I believe this mistake happened because I measured from the center holes of the lower coil mounts, and now I assume those aren't reliable.

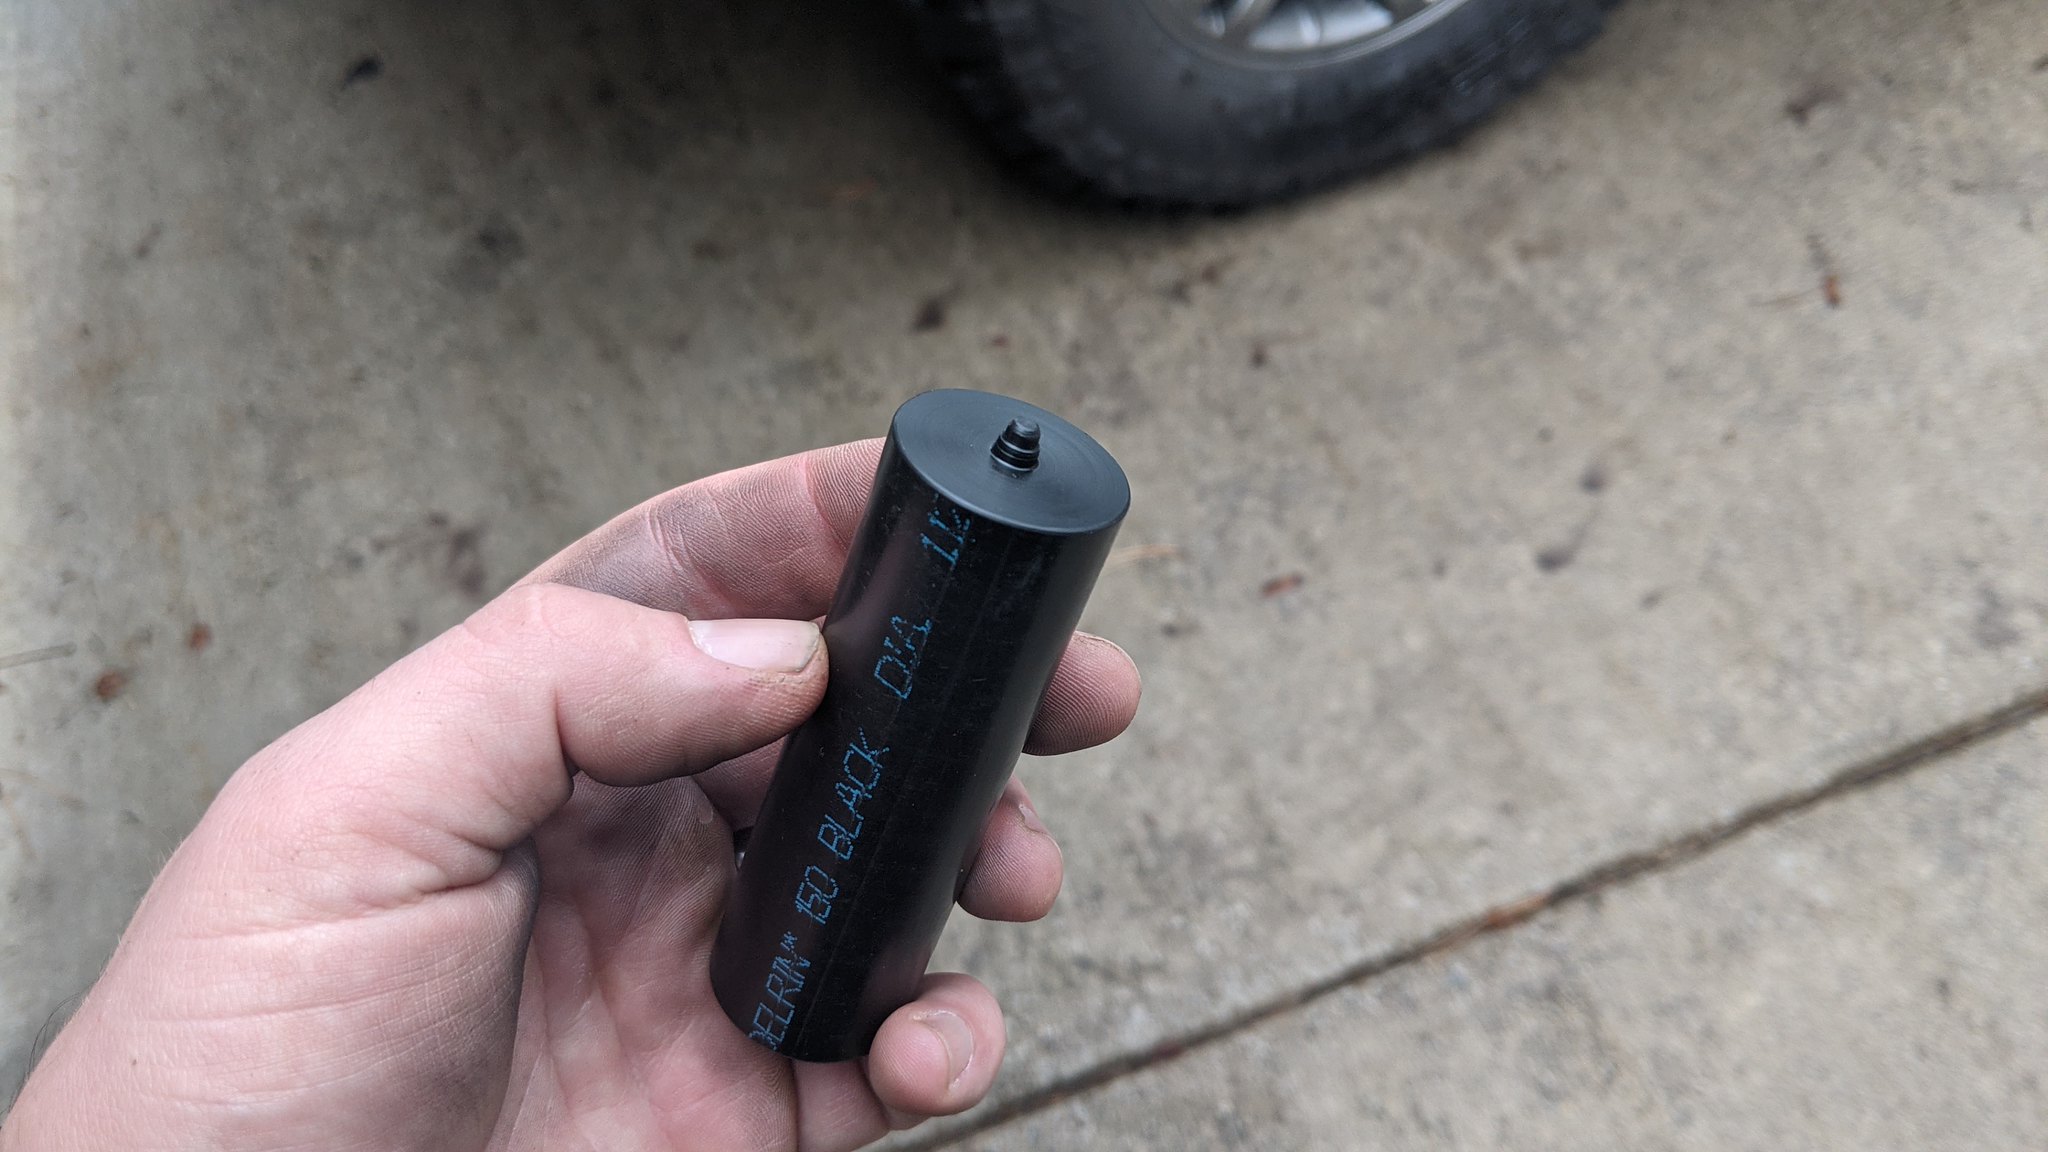
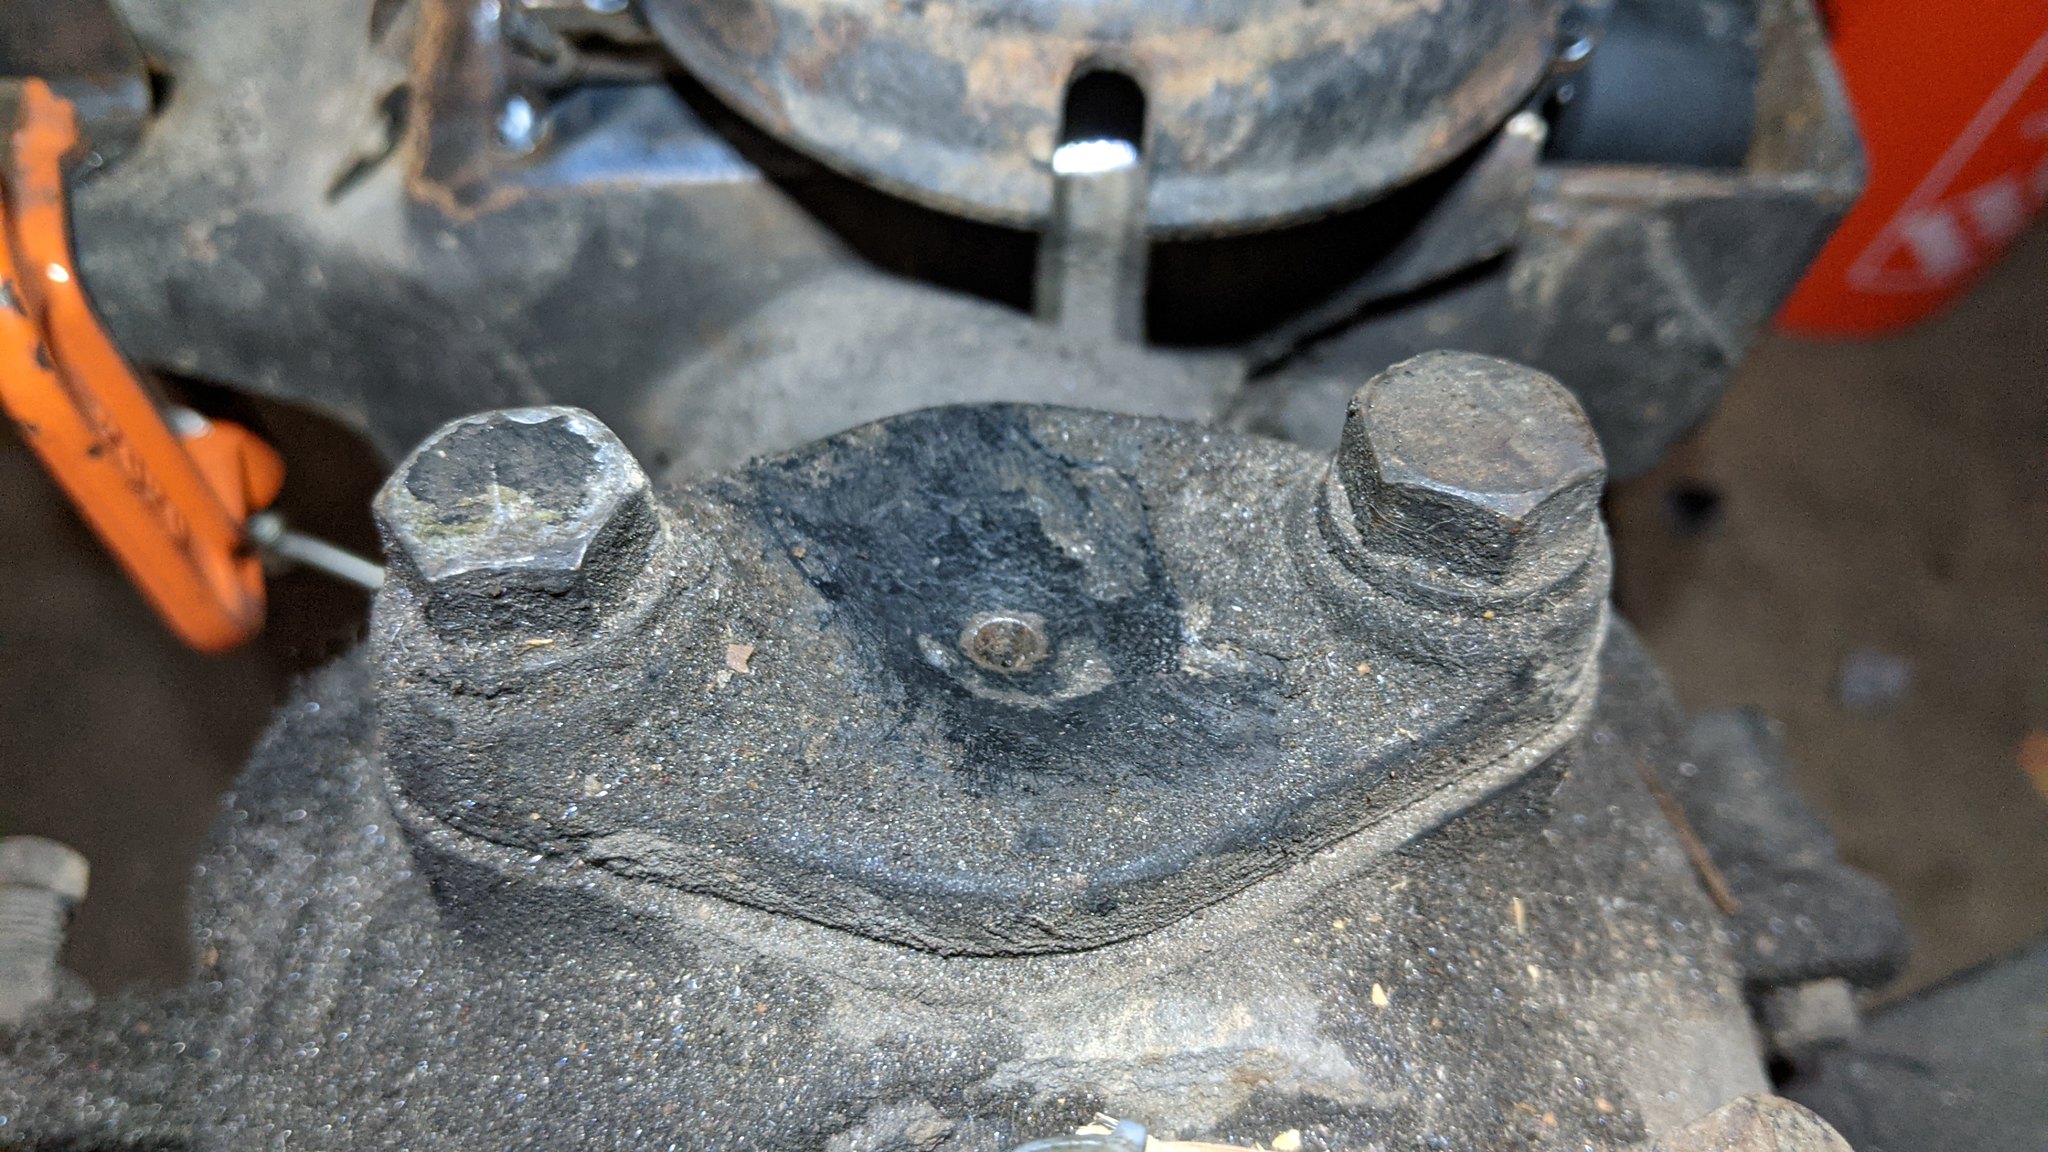
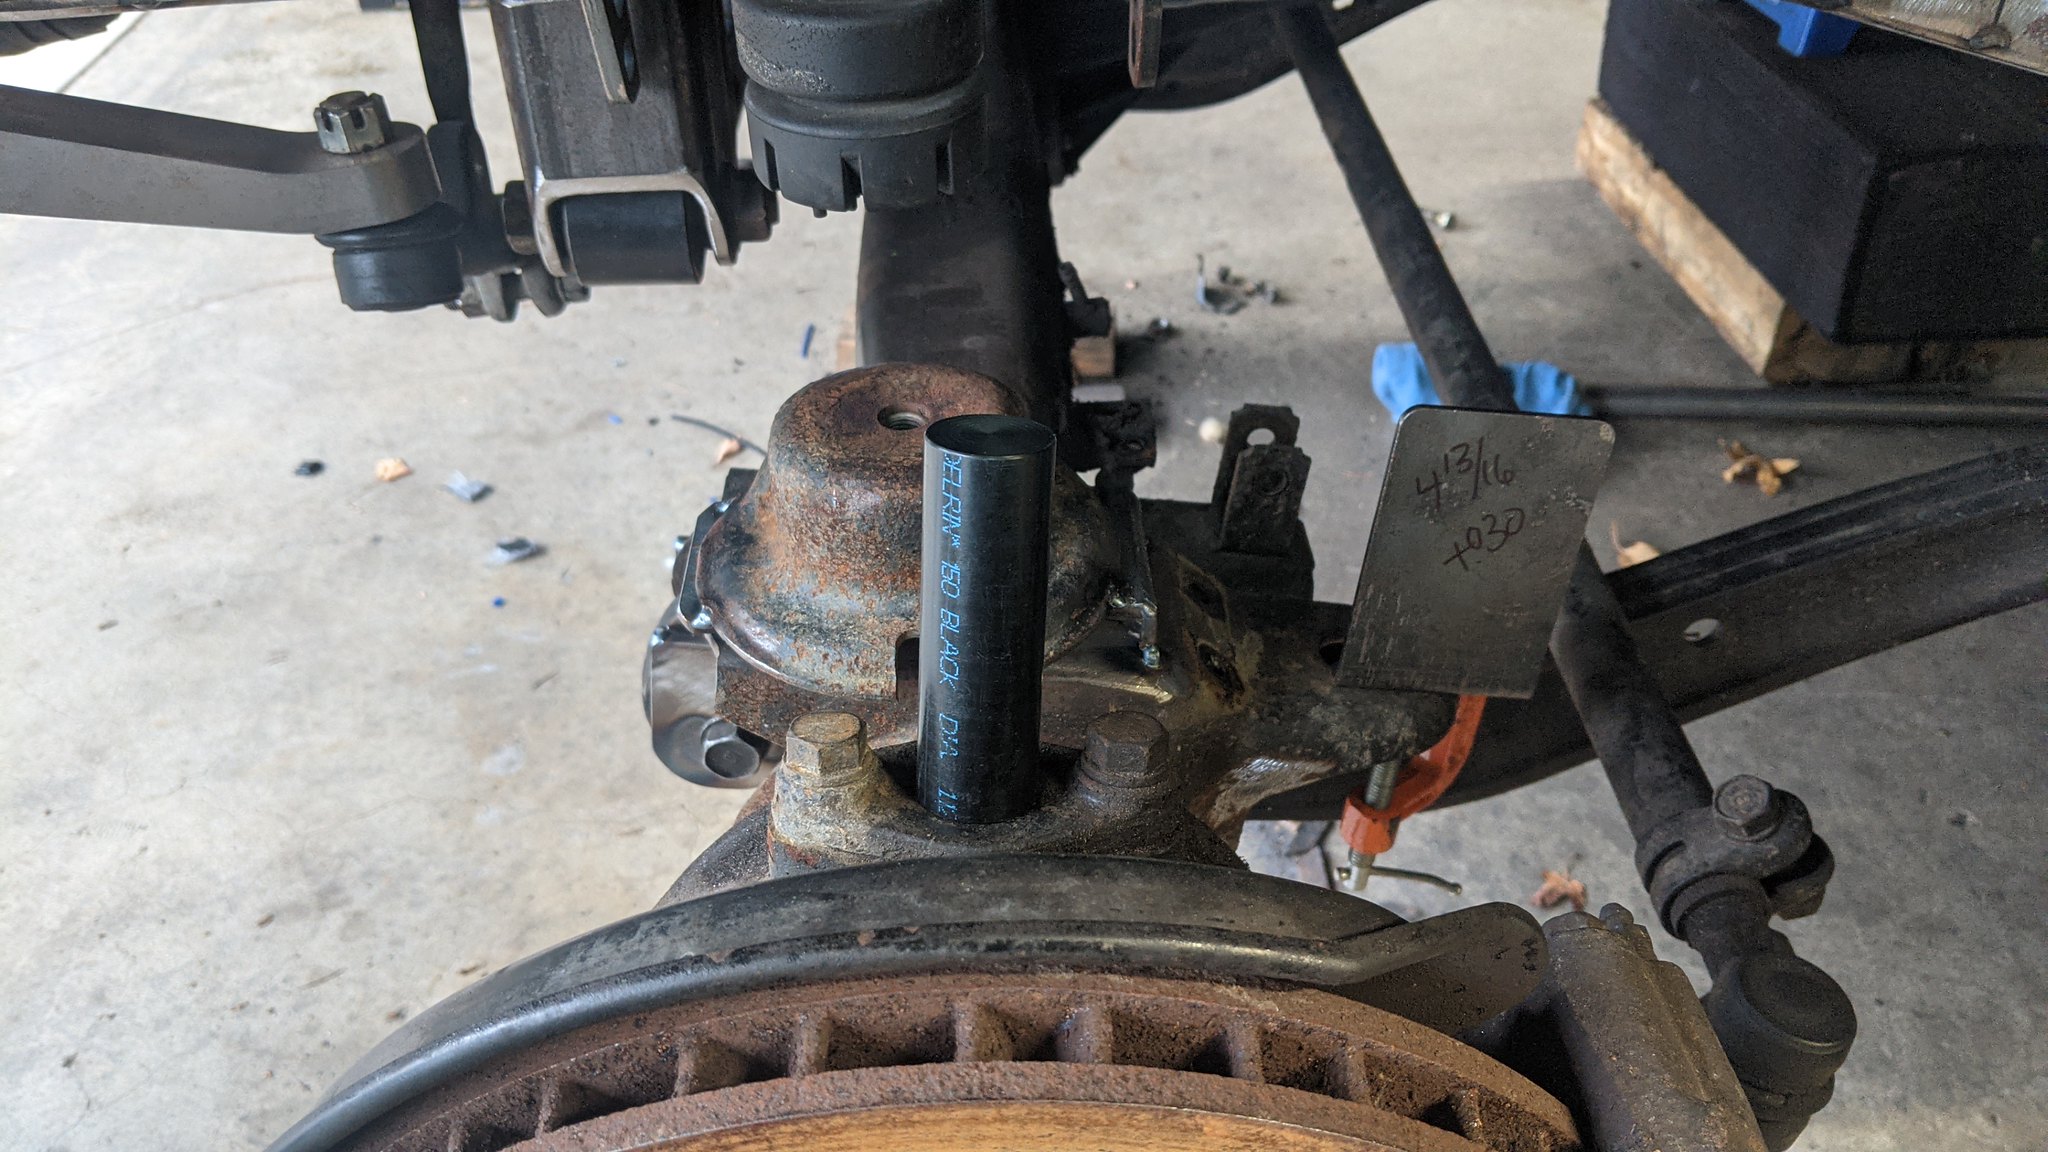
So to confirm my findings, I took a piece of leftover delrin, and machined a little indicator that allows me to place it in the center machine marks of the trunion bearing caps and get a good side to side measurement. This confirmed my findings, and allowed me to fine tune it into within 1/32" of centered.

51757028047_4a22c8f34a_k.jpg

51758731160_c66d0161a9_k.jpg

51758728985_b1605235c3_k.jpg


Luckily my lathe is in a position that helped pulling the axle over with a strap haha.

51757026377_ab4924f7d3_k.jpg


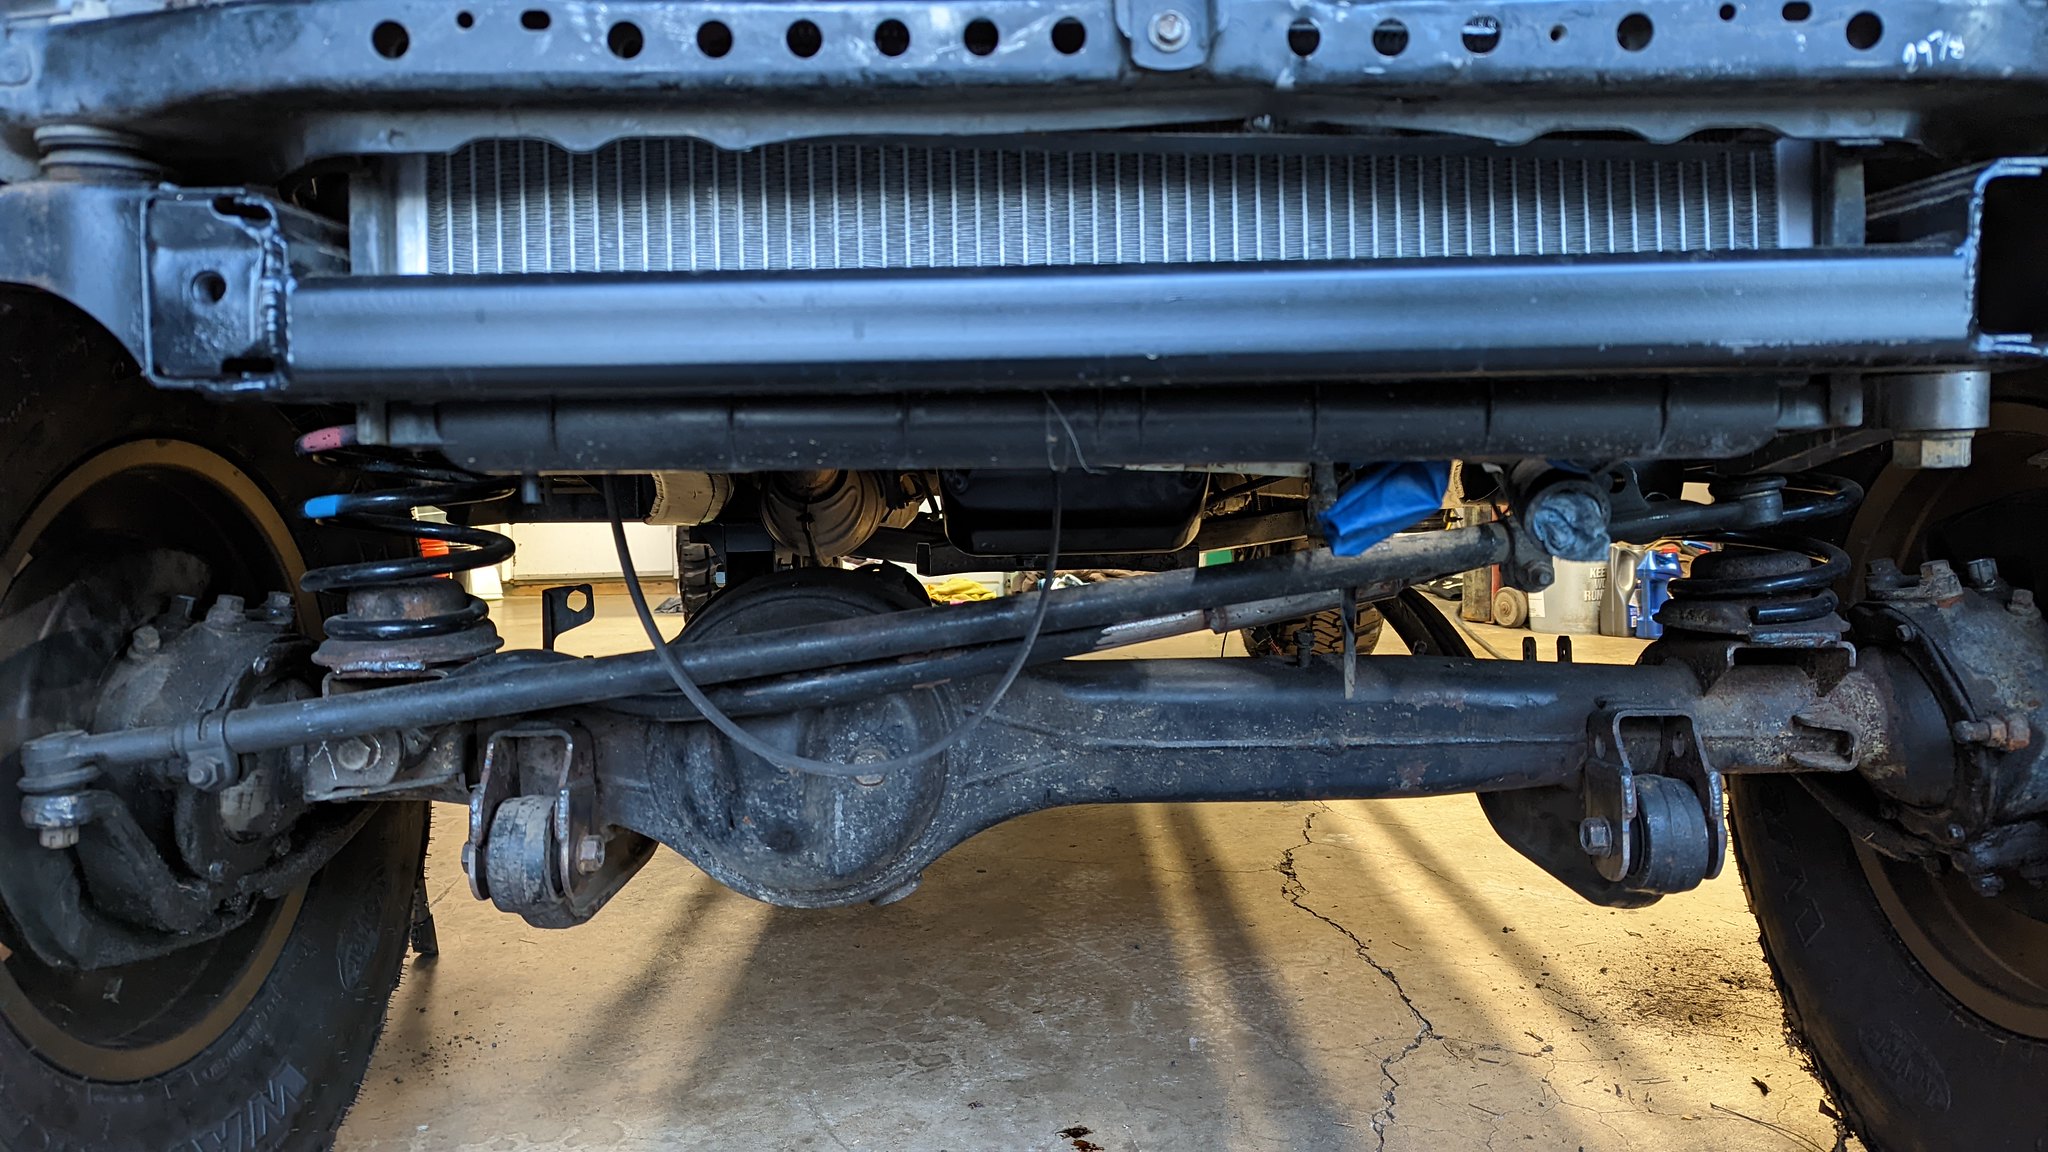
After that was done, and I re-welded the temp panhard(which I cut apart). I was worried that a bunch of other stuff was off. So I dropped the radius arms to see if they were off, and they were fine. This was good news, because I thought I might have to cut the radius arm mounts off again, and adjust them.

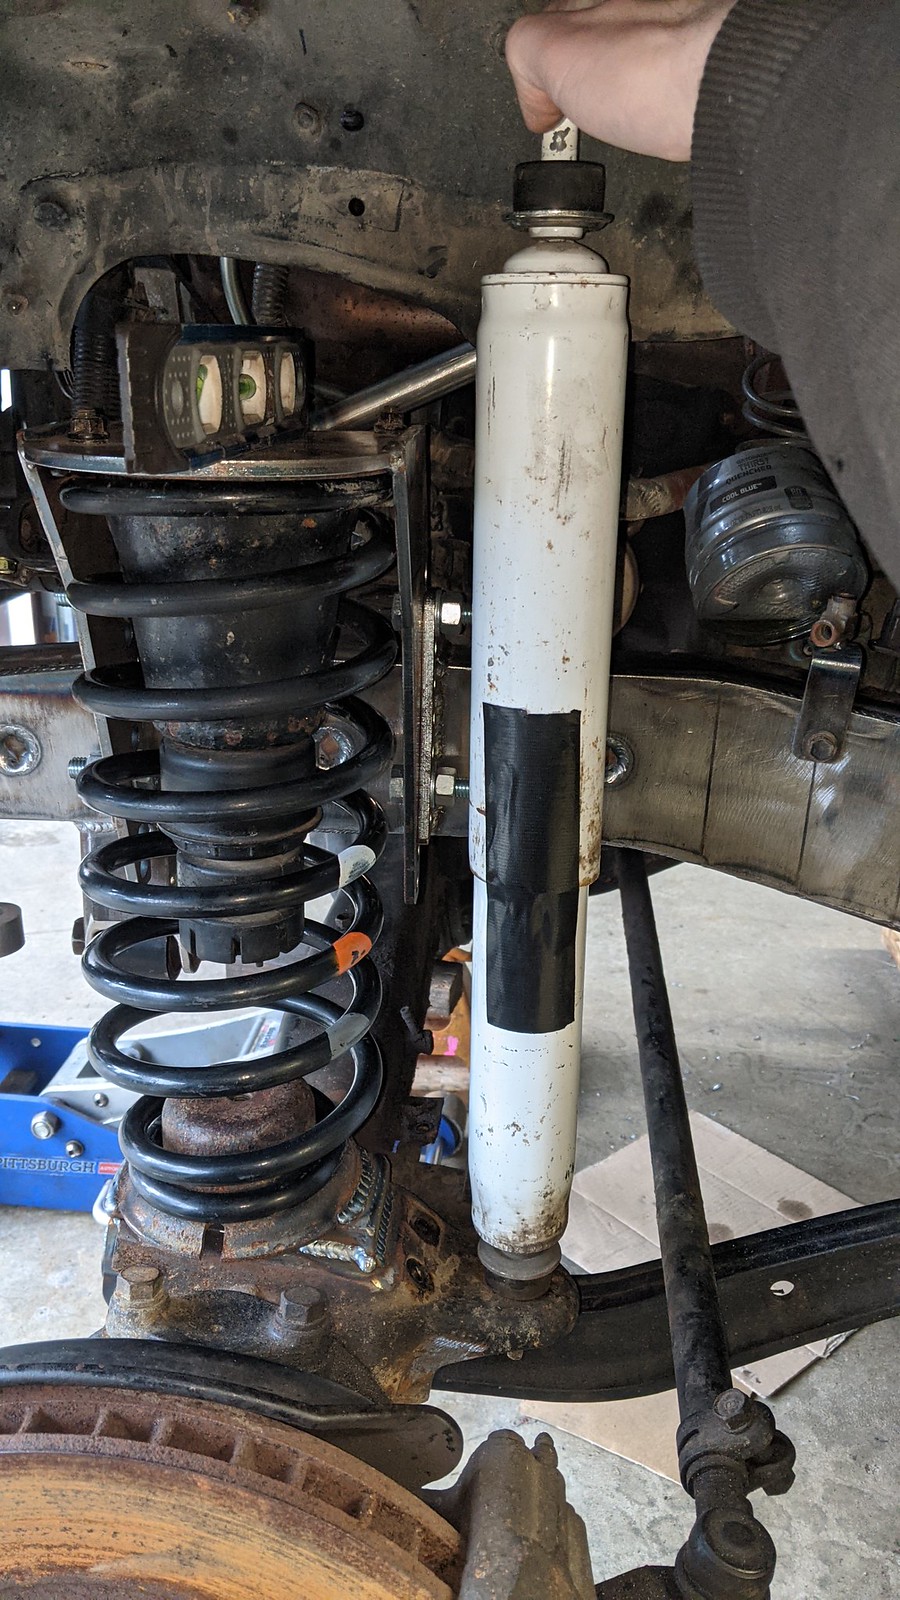
I verified some other measurements, and made some adjustments to the upper coil mounts.

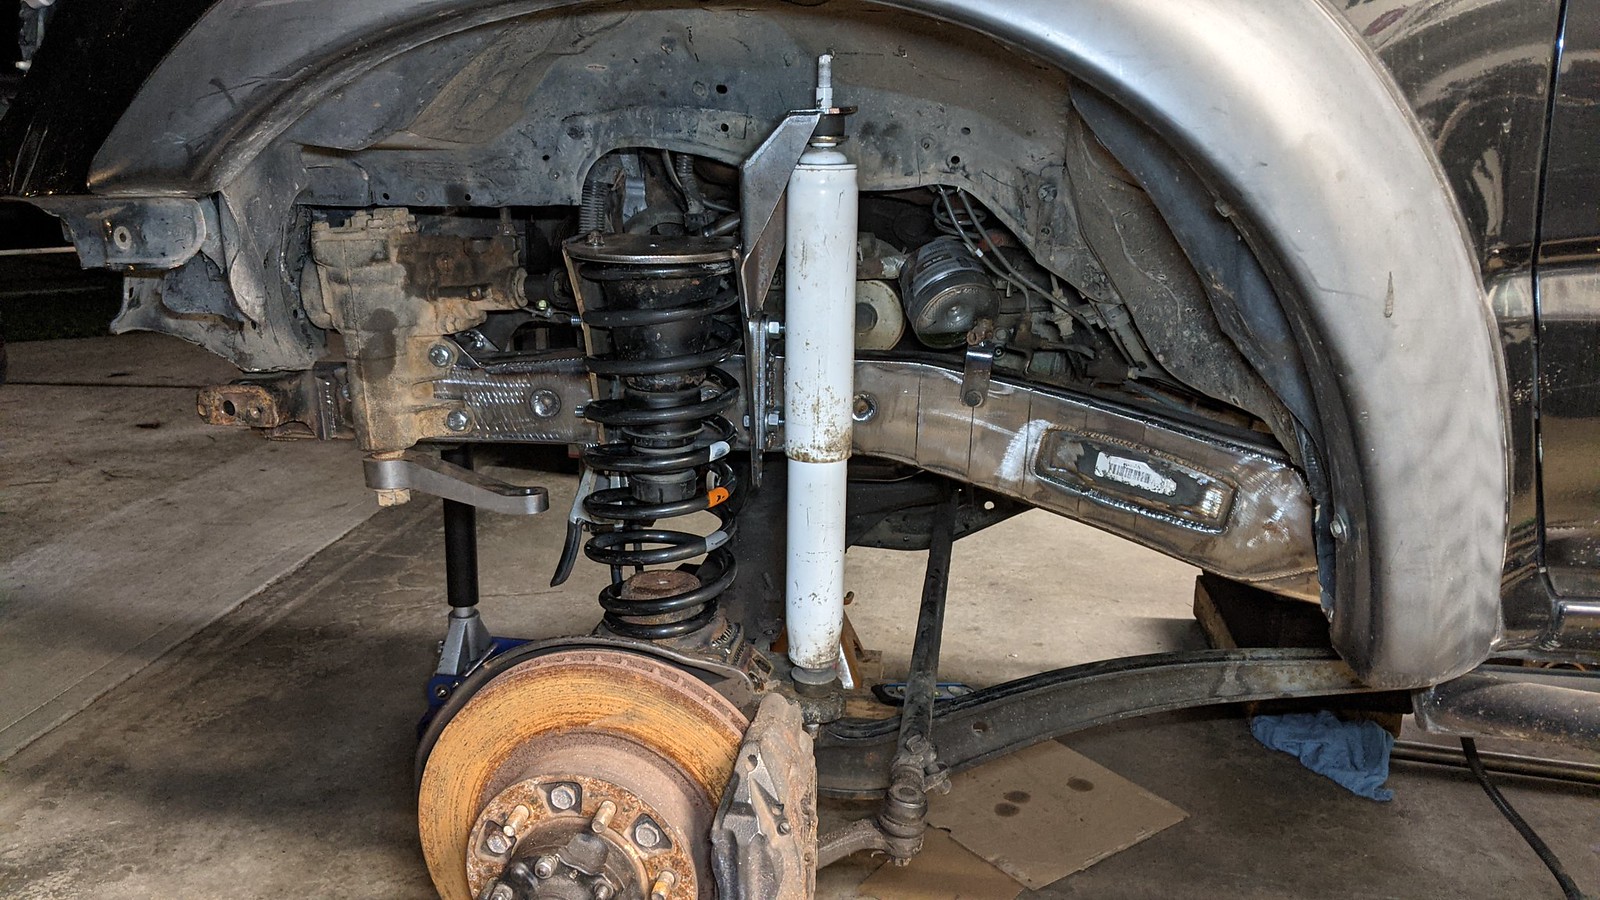
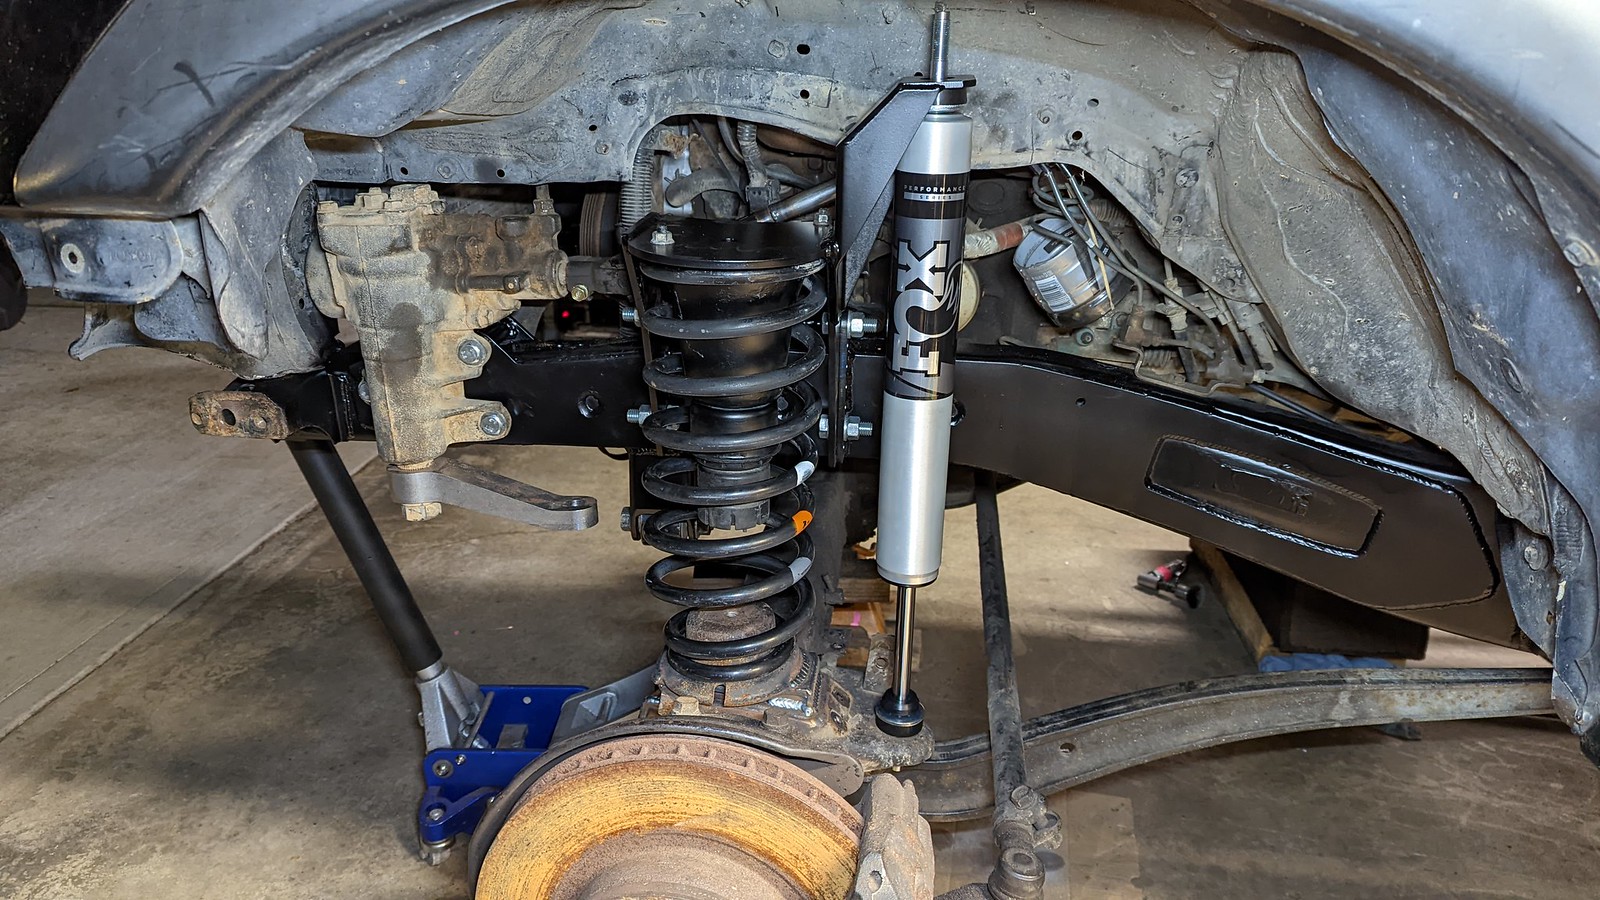
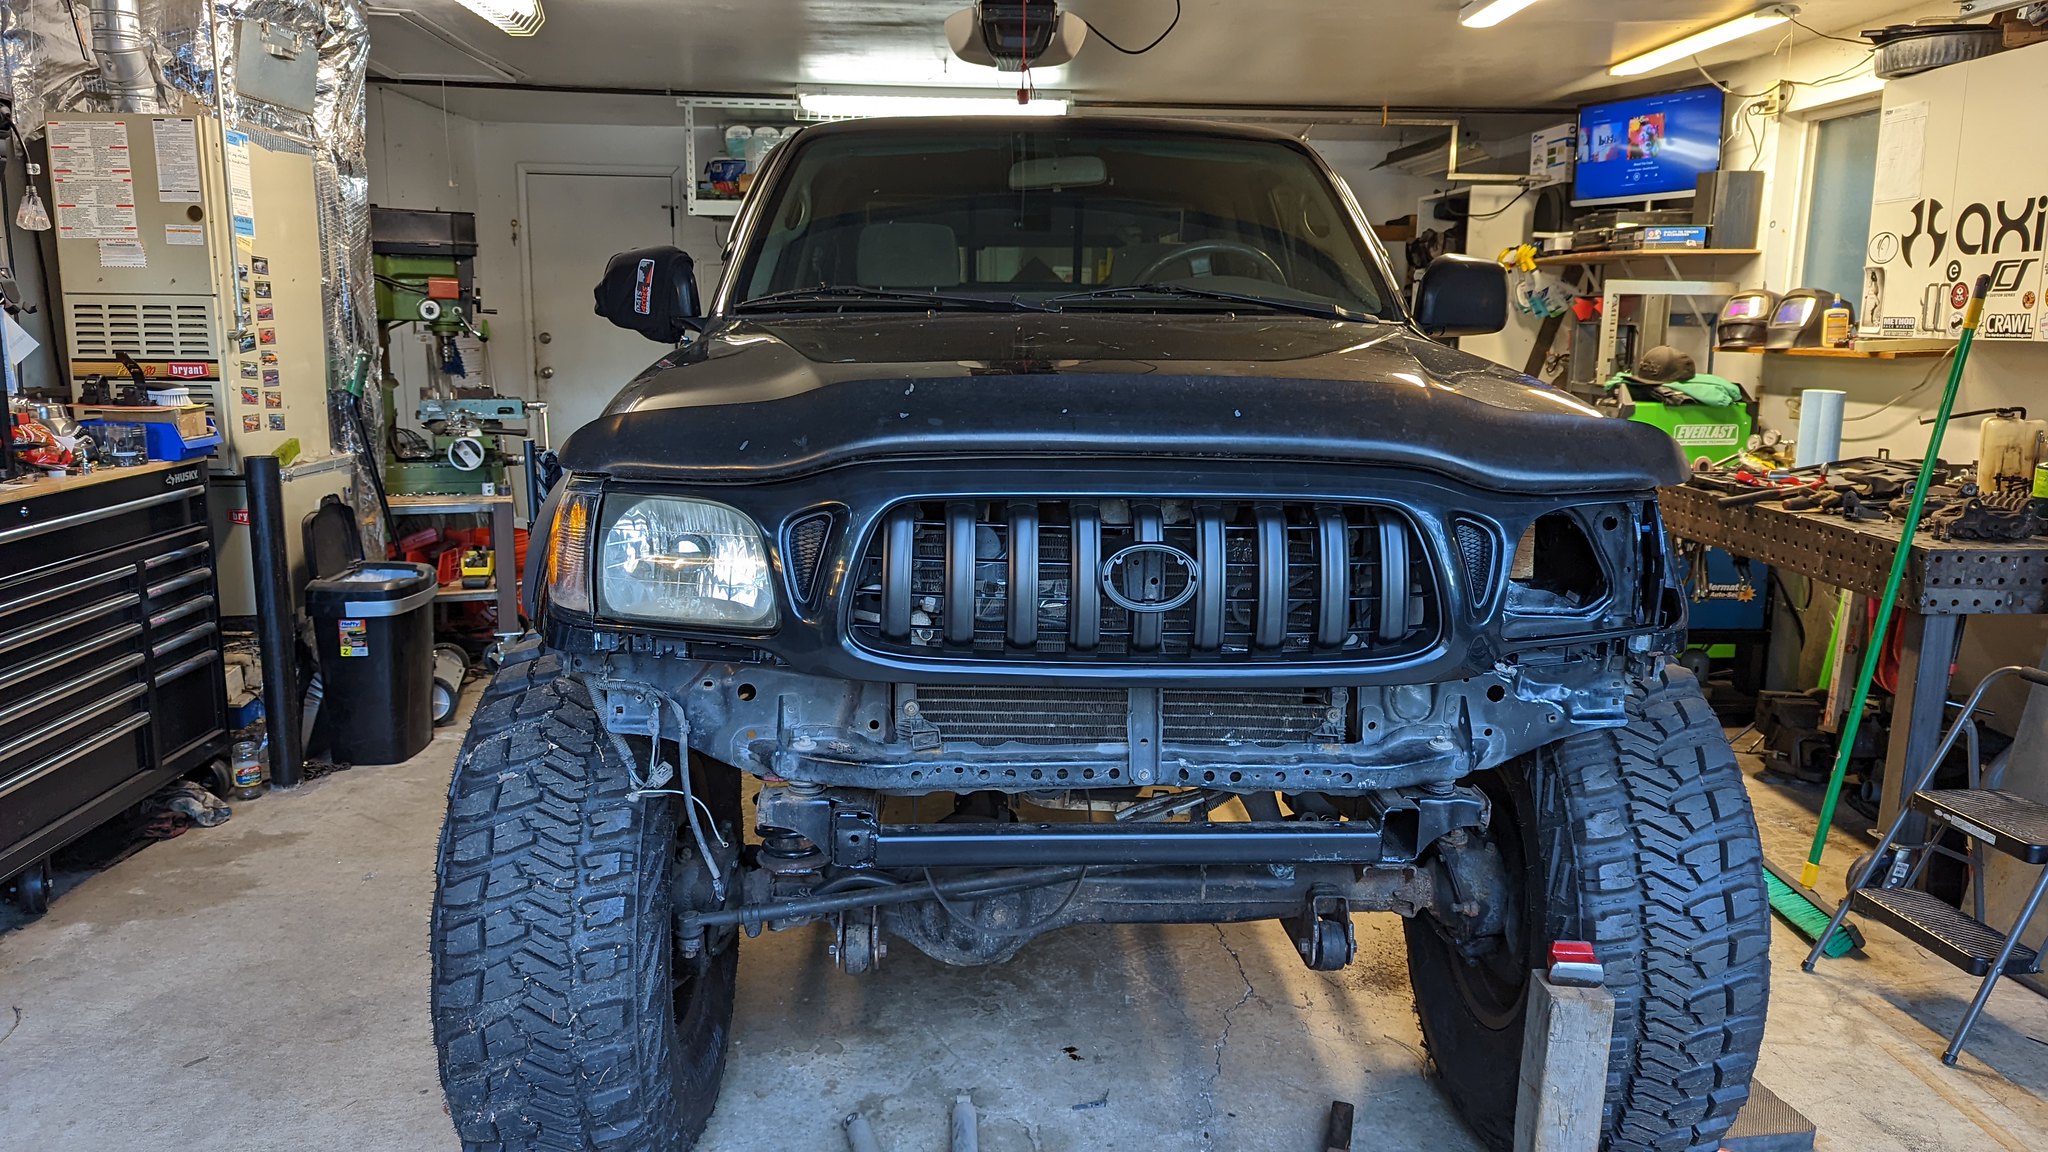
From there, I cut the tacks on the lower mounts, and dropped the upper mounts as low as they could go. This allowed me to better line up and tack in the lower mounts, so the coils now mount straight when its sitting on its own weight.

51758728635_b00181ef5a_k.jpg

51757025947_23409bf88f_k.jpg


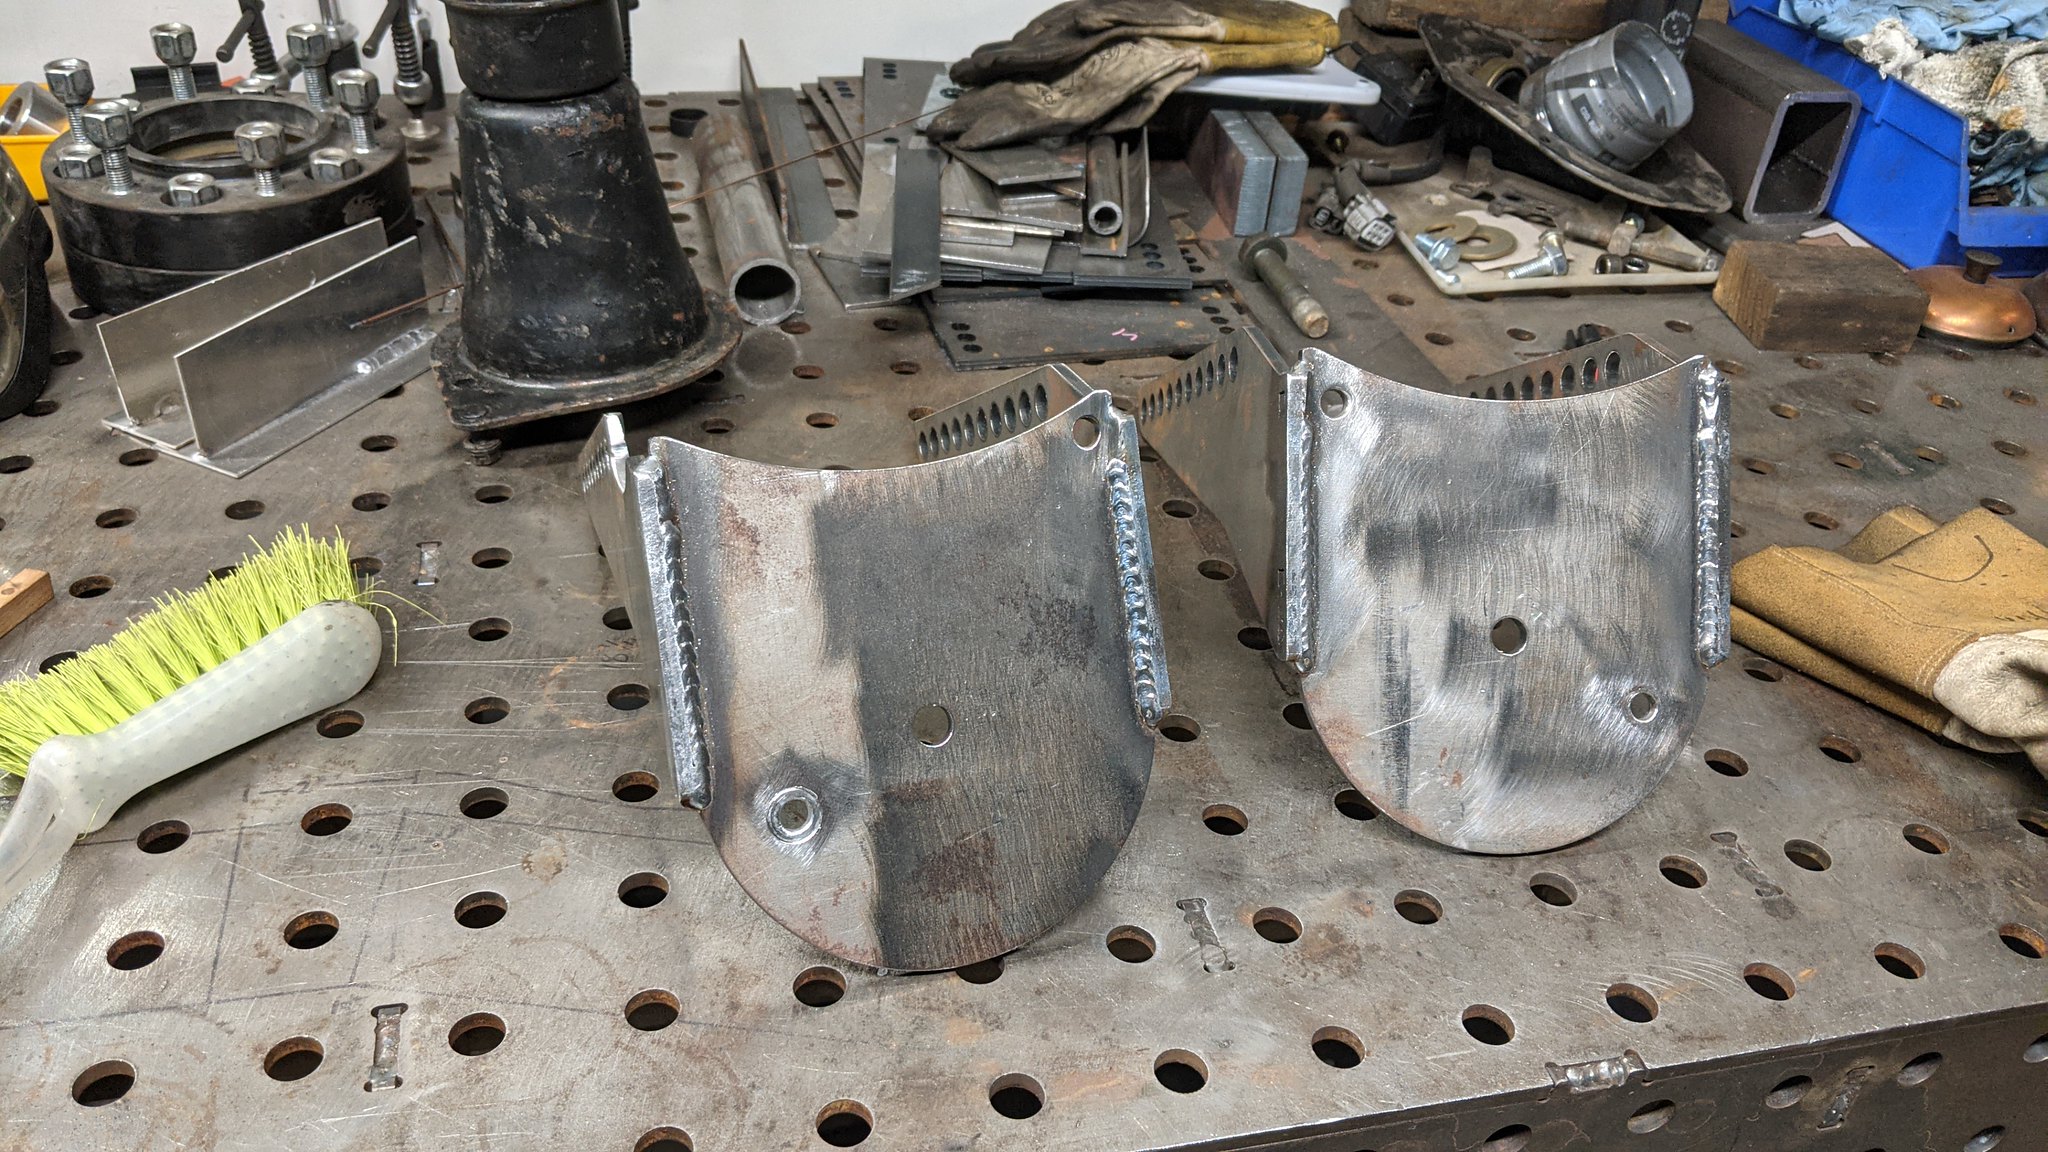
With all that taken care of, I was confident in beginning the process of welding everything up. I welded some Friday evening and a little this evening until I ran completely out of argon. I was able to get the frame plates completely welded up, and the upper coil mounts. After, I cleaned them up and wire-wheeled everything.

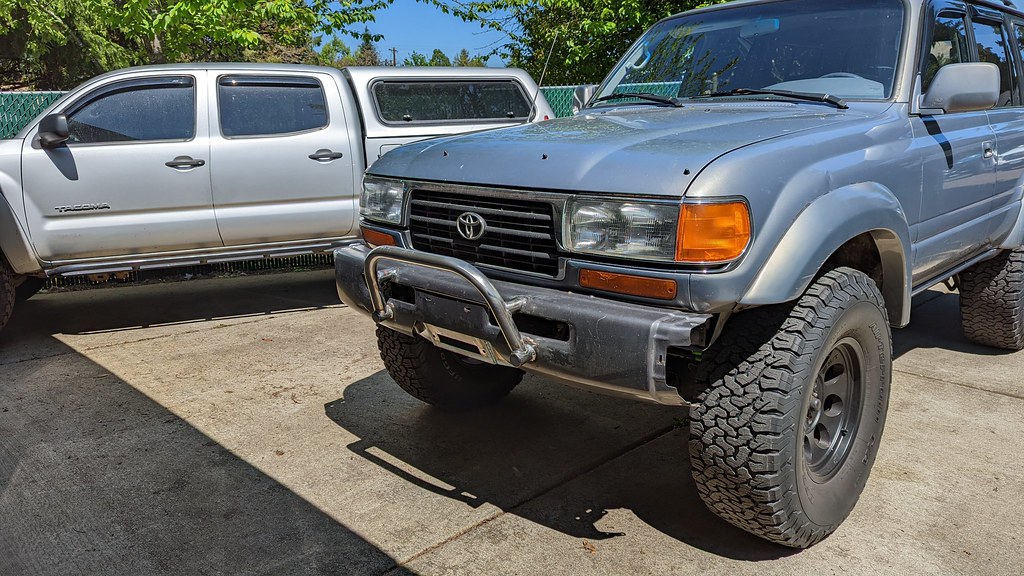
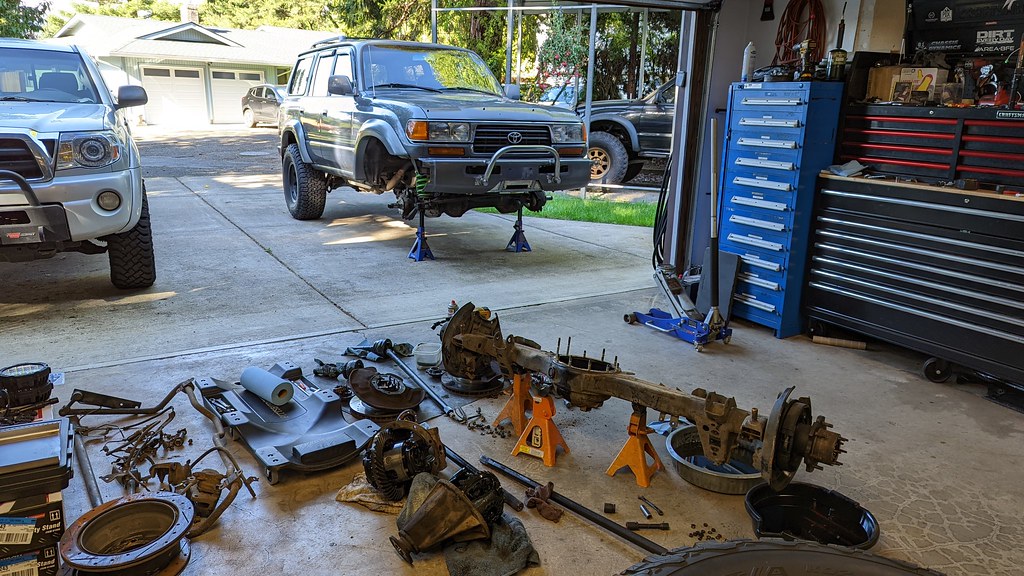
I'm now trying to work towards a checkpoint and have all the fab work complete on the frame and paint it all. Since its winter here in the PNW, I don't want to put it outside and have the frame rust. However, I want to have the ability to put it outside so I can bop around onto other projects like our Land Cruiser or my 85. So this is the little fire under my butt that I need to keep working on it.

This week I will get another bottle of argon so I can keep welding. From there, I will need to make mounts for the sway bar, upper shock mounts, and some other small detail work before I can begin prepping and painting the frame. More to come(hopefully)

51757025012_1b0db936e5_k.jpg

51757860346_426b24e4ff_k.jpg

51757025532_82c95bc698_k.jpg
 
Jan 31, 2022 at 4:48 PM

I've made some progress lately, but haven't been keeping things up to date in here. Since I have limited space at home, I decided that it was time to get the truck to the point where it could be put outside without rusting. This meant I needed to finish up some fab work and paint the stuff that would be a pain to clean if they got rusty outside.

I took the week before last off to help expedite this process. Like usual, life got in the way so I didn't get as much done as I wanted. However, I still made pretty good progress.

The first order of business was figuring out shock mounts. I spent a ton of time online reading about shocks and springs on ih8mud. Originally my plan was to use the stock shocks off our 80. However, they ended up being too short of travel for me, so I had to come up with something else. I landed on a set of fox shocks for an 80 series. This took quite a bit of time to make my decision. So I proceeded to use a junk 80 shock to mock up, and gorilla tape it to length to build shock mounts around.

If you look closely enough, I made some brake line parts. Towards the back of the fender well, I drilled and tapped the frame for a bracket that was welded to a modified pair of the old brake elbows. I also had a set of custom brake lines made by an awesome outfit down in Eugene, OR called Pacific Rubber and Supply Corp. They will be making my power steering line as well.

51840069655_5e1662828e_h.jpg

51839333326_8bf019106e_h.jpg

51839333196_8d547dbfc4_h.jpg

51839333116_1b36f992db_h.jpg


One little detail that I should have done before the coil mounts were welded to the frame, was made the top of the engine mounts look nicer. I cut them off, but neglected to do the detail work while I had the room. I put a support in so they're structurally sound, but am not terribly stoked on the looks. Luckily, its a small hidden detail that will only bother me

51839451188_0fd5c7581e_h.jpg


With all the important fab work done, it was time to paint. I would have liked a little more time to get the sway bar mounts in, but I decided that will have to wait

51839335686_bbe7361718_h.jpg

51838390272_f63e8618ec_h.jpg


The last thing to sort out was the firewall plate at the steering column. Originally I thought I was going to make a new plate. But after looking at it with some precision cut CADboard, I wouldn't have had much room to work on it when removing the steering shaft, or clear the brake booster.

51838390197_b70fe8bbd5_h.jpg


So the alternative was to use the stock plate and modify it. I wanted to get this sealed up so I could keep bugs, moisture, and rodents out of the cab.

Its again, not quite as cosmetically appealing... but ultimately its simple and hidden.

I will probably find a plastic pipe cap to press into the old hole. For now, a couple layers of gorilla tape will have to suffice.

I didn't have access to quality rubber on the weekends, so I cut a piece of heater hose and made a temp piece, and held it in with some spare fasteners I have laying around. It was also a good opportunity to have a practice piece. I will probably use a little thicker piece of beefy rubber, and use some bearing grease to keep it from wearing too quickly. The idea here is to keep it simple, and easy to replace if needed.

51840071870_cd8de26995_h.jpg

51854121000_b22967dd19_h.jpg

51853786354_1c08c38087_h.jpg

51853461316_87996af42f_h.jpg


With all that done, it was time to put everything back together and move the truck out to underneath the RV port, where it will live for the next couple months. Of course I had to pop in one of the shocks to see how cool it looked haha.

There probably wont be many more updates on this until later in the spring. Hopefully that will be due to building out my wife's 80 series Land Cruiser for lots of adventuring

51853461276_8c5ff0b0dc_h.jpg

51853461411_859ea5b2da_h.jpg
 
May 23, 2022 at 2:03 PM

Small update that's a bit late. I recieved my NW Fabworks T-Case setup not long ago. I happened to be the first person on the list for this particular combo, but had to wait a while until they had the triple stick kit designed. Almost exactly a year after I put my deposit down, and we had it!

I probably wont be back onto this project until around August or so. What I plan on next is getting the front end repaired so I can hang a grill, headlights, and markers. Then I can get the bumper sorted out and a radiator installed.

52094562983_1dff192173_h.jpg

In the meantime, building up my wifes 80 has been consuming my time. For those interested, it's now sitting on 37's with an Iron Man 2" lift and an EIM Keith lower control arm mount. It will have 4.88's and be locked F/R with a factory elocker rear axle(getting swapped in) and an Eaton Elocker in front. Rock sliders, a rear swing out, front bumper modifications with a winch mount, sleeping platform, and more are all the goodies that I am hoping to have wrapped up by the time we go on a summer adventure.

52094572516_09dd174686_h.jpg

52095029265_9fc2f264a3_b.jpg

52094551593_57f5875b8e_b.jpg
 
Aug 13, 2022 at 12:27 PM

Figured it was time to breathe a little life back into this thread!


Now that we have been back from Moab, and the Landcruiser is done(for now) I can think about the next steps on the Taco!

52283331646_239dbd4eed_k.jpg


The next thing that makes the most sense, is to get the core support straight so I can get the grille, headlights, markers and what not mounted. Then I can modify and install the bumper, get a radiator in, and power steering lines made so the ol' girl can move under its own power.

My cousin who helped me with the frame will be coming over in a couple weeks to help get the core support proper again. For now, I have gathered a combo of free/used and new parts to get it going.

Small update, but its progress!

52283331691_19cb8f0dca_k.jpg
 
Aug 22, 2022 at 9:55 PM

Small update,


I got a little motivated to drag her out from under the carport and giver her a bath, then roller her into the garage. There was about 6 months of dust and pollen that was caked on thick.

52305321808_129695ea9c_k.jpg

52305368694_faa84eb4c9_k.jpg


One of the first things I wanted to look at was this spot under the battery tray thats wrinkled. I pulled the wiring out of the way and washed it up a little to get a better look. My cousin is pretty busy so I may try and tackle this myself. I only have the month of September to work on her, since I am taking on a bit of side work(to help fund this) so I am hoping to accomplish something of substance within this window.

I was able to look at a buddies truck(who is also undergoing a SAS too) and confirm how much this spot was damaged.

For now, I will fart around with it and get some juices flowing in my noggin for a plan of attack. Ideally, having my cousin help get it all straight would be my preference but we shall see what happens

52305404190_36d2e28831_k.jpg

52304878506_3059769dc1_k.jpg
 

bkg

Explorer
this is a great concept. I'm curious why more haven't done it this way..

QQ - in some of the pictures, it looks like the coil spring is hitting the bucket. Is that just an optical illusion?
 
this is a great concept. I'm curious why more haven't done it this way..

QQ - in some of the pictures, it looks like the coil spring is hitting the bucket. Is that just an optical illusion?


It does when the coils isn't perfectly in line. All the work I did to line up the lower coil mount was partially because I wanted to stop that. However, it is really tight. So when it flexes out, I expect it to rub. This shouldn't be a big deal 95% of the time. I mainly didn't want it making noises or anything on the street
 
  • Like
Reactions: bkg

4Runner666

New member
Just registered on here to follow this build. Looking forward to see how this turns out as I am looking to do something similar.

Thanks for having a build thread on a forum! I miss the days of endless build threads and tech to look through.
 
Just registered on here to follow this build. Looking forward to see how this turns out as I am looking to do something similar.

Thanks for having a build thread on a forum! I miss the days of endless build threads and tech to look through.


Thanks for following! I come originally from the RC Rock Crawling world dating back to about 2004. I worked in the field for 11 years and spent countless hours on forums. Some of the best times were spent on RC Crawlers forum.

This was a chance for me to get back to my roots when it comes to sharing my projects. FB and IG are pretty limiting and frankly, I have hit an age where newer ways of doing things are foreign and scary haha.

Bonus points: When someone asks for more details on something, I can give them a link to something like this, rather than digging around on FB which is cumbersome at best.
 
Not much progress, but some progress is better than no progress.

Life has been uncomfortably busy lately and I still don't see myself having any large chunks of time to myself, until mid November unfortunately.

Recently I stumbled across this tread and it has re-inspired me to get some stuff done. So I am hoping to chip away at things, even if its an hour here and there.


The next step is to get the core support and body damage repaired. With my cousin being busy as hell too, I figured I would take a stab at it. After all, I repair a lot of broken/bent metal at my day job. Even if its not legitimate body work, I am hoping I can make it all straight and presentable enough for everything mount fine.

I needed to tug some of it out. The space under the battery, between the battery back of the headlights had a significant wrinkle. I rigged up this totally safe contraption to pull on it some while I nailed it with some hammers.

52338002139_9cdcb03fc6_k.jpg

52337935558_f1a63cc8a2_k.jpg


Its really hard to see the damage in these photos unfortunately. I got one from underneath and it shows it a little better

52337935708_42a9fa516d_k.jpg


After spending a couple hours with misc Hammers, wood, brass drifts, a body hammer kit, a floor jack, and a C-Clamp... I was able to make the space under the battery look less bad. I still have work to do, but I am waiting on more photos of a buddies truck for reference.

I did spend time pulling other parts of the core support straight while I was in there.

52338125450_a91464b82a_k.jpg

52337935573_3df2cf92f8_k.jpg


With some things more straight, I figured I would start attempting to hang things and see how close I am. It certainly helps light a fire under my butt to keep plugging away. There's definitely a fair amount of work left, but it is exciting progress

I think the hood might be tweaked a little so I am hoping I can get that figured out. It wants to sit higher than the fender on the drivers side, and its not contacting the rubber bumper on the core support. So there will be a little head and ass scratching to figure that out.

52338002074_15c032572e_k.jpg


One other thing I did was dig out the damaged radiator so I could see how far down it hangs. I figured it would be good to get some measurements and see what I want to run for a radiator.

The stock one hangs below my "new crossmember" 1.375" and I am contemplating just making a guard for it to allow maximum cooling, or get a shorter one. Time to do a little homework. My current radiator is about 24.5" tall so I have some choices to make.

52336742747_91b9239aa2_k.jpg
 

TheCascadeKid

Observer
I love everything about this and wish EP had more builds with fab work rather than just bolting on fancy after market parts (nothing wrong with that, just wish it wasn’t so lop sided).

Always been a fan of the 80 series SAS projects. Keeps the truck so low and functional. Keep it up and keep us posted!
 
==Copy and paste from my post on 7/3 on TacomaWorld:

Time for a long overdue post!

I've been uncomfortably busy for quite some time, but am now forcing myself to put in a little time on this. Since I agreed to help my dad out, building up his square body Chevy project, I want to get this back to a state where I can move it under its own power again. I'm not certain where I will draw the line on that.

Ideally I want:
-Oil pan back on and fresh oil in it
-Cooling system put back together and filled up
-New high pressure power steering hose made and get the power steering put back together
-Front calipers rebuilt and installed so front brakes function again
-Steering links tacked together (so truck has full lock to lock steering)
-All engine accys installed
-Rear suspension lifted more(to keep tires out of flares)

This would get me by for a bit until I get my dads project down the road. I'm hoping to be back at this full steam by later in the summer. I've set myself a soft goal of having it done over the winter, for Easter Jeep Safari 2024. I'm sure life will throw me some curve balls, but I want this thing back on the road and not turn into a 5 year project
:turtleride:


Today was reasonably reproductive.

First thing I did was get the oil pan on. I cleaned up all the hardware on the wire wheel, and installed it with some fresh Toyota FIPG sealant. Then I threw a new oil filter at it and fresh Delo 400 (5w40) so its ready to rock.
53021692750_206495af0b_k.jpg


With that done, it was time to move onto the radiator. I picked up a new Denso that is supposed to be tucked out of the way. Here's how low the old one hangs down
53021789583_88d1c92fbb_k.jpg


OEM parts =insert drool emoji=
53020722202_b2b2742f80_k.jpg


Before I could put the new radiator in to test, I had to address the bent condenser. I was reluctant to straighten it, but wanted to try and salvage it. The AC system is still holding a charge. I do have replacement parts a buddy gave me, but for now this will work. I used some wood to spread the load and slowly clamped it back to straight-ish. Plenty enough to get the truck back on the road. Then a zip-tie to hold it in place and we are in business!
53021304956_e8756d24aa_k.jpg

53021467829_b08dd31c3f_k.jpg

53020710932_393c0309ca_k.jpg


The side brackets for the radiator needed to be modified. The pass side needed some sanding and a fastener at the bottom without such a large head. The drivers side needed to be clearanced for the steering box, and the tab for the shroud needed to be bent out of the way. I took them off the radiator to get modified, hosed them with a little paint and installed the radiator. I'm not sure if I will bend the tab back straight for the fan shroud or modify it. It will work if you pull the steering box out of the way, but I don't want it to be a pain in the ass down the road if the radiator needs to be pulled.
53021456499_6738d4c4da_k.jpg


Here's the bottom view with the new radiator installed. It's nice and tucked up out of the way. Looking at the lower radiator hose, I am unsure if the one I have will work, or if I will need to get a shorter one to work with the new location of the lower part of the tank.
53021776783_0101717e99_k.jpg


Tomorrow I hope to put in a couple hours on it while folks are blowing their fingers off with fireworks. If I could sort out measurements for the power steering hose, I could drop off the info at a hose shop this next weekend and get the ball rolling on that.
 
==Copy and paste from my TacomaWorld thread on 7/4:

Today I spent a couple hours on the ol' girl.

First thing I did was tackle the hood latch. It wouldn't work properly. After lots of fiddling, I got it working. I had to modify the holes a tad and massage the upper part of the core support some. It goes though. The lower cross bar on the core support got pulled out more and some small details got buttoned up.

Then I wanted to see some visual signs of progress, so I got the rest of the mock up lights and grill put in. I have some small fitment issues to address(seal on the hood that contacts the grill prevents the hood from sitting properly), but I'm happy to have seen something new.

Tomorrow I will get ahold of my buddy at Toyota for part numbers for the proper lower radiator hose to go with the new radiator. I'll have to see how the fan shroud fits too before I make an order for parts.

53023165667_98fd62a72a_k.jpg
 

Forum statistics

Threads
185,782
Messages
2,878,177
Members
225,329
Latest member
FranklinDufresne
Top