You are using an out of date browser. It may not display this or other websites correctly.
You should upgrade or use an alternative browser.
You should upgrade or use an alternative browser.
Ammo can idea thread
- Thread starter jscherb
- Start date
jswift716
Adventurer
Someone beat you to it, if it needs to go in a box an ammo can or a pelican is just about the best you can getI use ammo cans for ammo. (sorry I couldn't resist.)
jscusmcvet
Explorer

Mounted on front of trailer. I use it for chock blocks, straps and other miscellaneous items. I am going to rebuild the front platform this winter and this might get relocated.
Happy Joe
Apprentice Geezer
For years I had four of the plastic (glass filled nylon, I think) double ended, 25mm (if I recall correctly) Bradley boxes bolted into the back of the CJ-5 for winch accessories fluids etc.
I use the large 20mm cartridge boxes for critter resistant food storage.
I use a couple of the singe ended 25 MM metal boxes for canned refreshment protection (not much that is as disappointing as reaching a mountain top or remote site only to find the beer and soda has had holes worn in all of the cans by jostling over the rough terrain).
I use a missile box for the cooking supplies.

Enjoy!
Edit... I almost forgot; medical supplies in a small .308box and tools in another small .50 cal box... It is possible to fit all of the tools necessary to disassemble and reassemble an old Jeeo in a short/.50 cal ammo box (except fragile and large things like a dial indicator for ring and pinion setup and a pipe/torque multiplier).
I use the large 20mm cartridge boxes for critter resistant food storage.
I use a couple of the singe ended 25 MM metal boxes for canned refreshment protection (not much that is as disappointing as reaching a mountain top or remote site only to find the beer and soda has had holes worn in all of the cans by jostling over the rough terrain).
I use a missile box for the cooking supplies.
Enjoy!
Edit... I almost forgot; medical supplies in a small .308box and tools in another small .50 cal box... It is possible to fit all of the tools necessary to disassemble and reassemble an old Jeeo in a short/.50 cal ammo box (except fragile and large things like a dial indicator for ring and pinion setup and a pipe/torque multiplier).
Last edited:
JAVYPRO
Observer
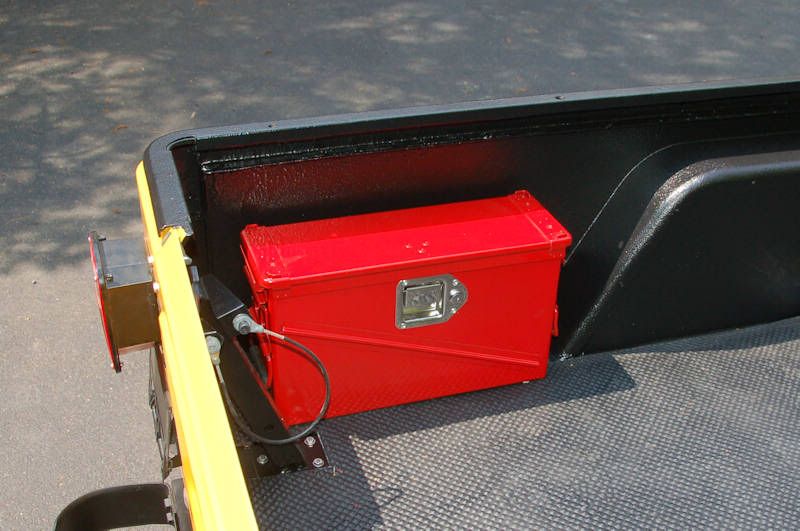
I modified this 40mm can to have a locking paddle latch and hinged top to serve as secure storage in one of my trailers.

Painted it red:
I use my fat 50 for tools.
That paddle latch looks great, where did you get it?
Javy
jscherb
Expedition Leader
I use my fat 50 for tools.
That paddle latch looks great, where did you get it?
Javy
I did a writeup on how to modify the cans for locking paddle latches/hinged covers, I'll post it here. It'll take a few posts to get it all in...
Here's how to modify an ammo can for a locking paddle handle and hinged lid.
Supplies required:
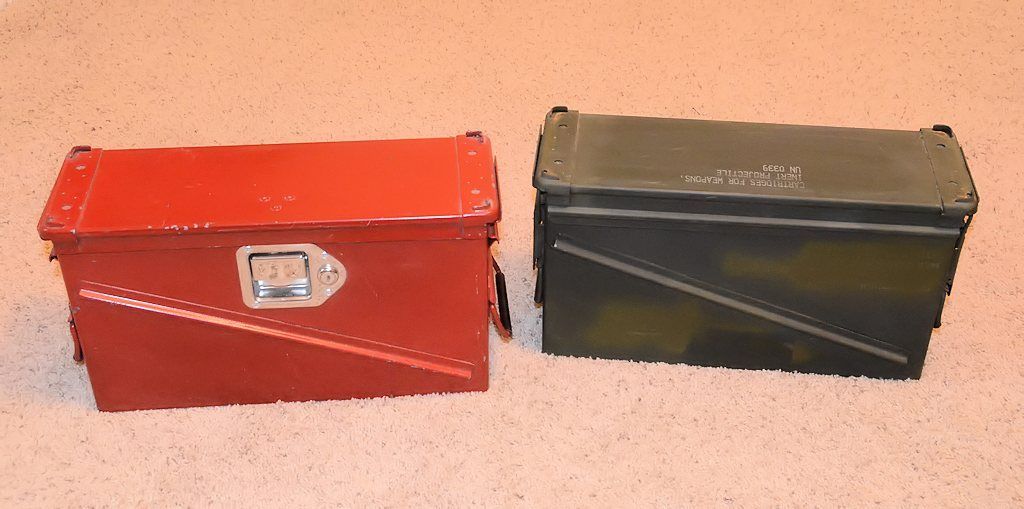
- Ammo can. A 40mm can is shown in these examples, but the methods apply to other size cans as well.
- Paddle latch. Used in this example: http://www.northerntool.com/shop/tools/product_357023_357023
- Printout of latch hole template (below)
- 3/16" diameter pop rivets and rivet tool
- 2 1/2"" hinges
- L-bracket and 1" shoulder bolt to make a catch (see below)
- Drill
- 3/16" drill bit (for pop rivet holes)
- 1/8" drill bit (for pilot holes)
- Center punch to ensure accurate placement of holes
- Means to cut latch hole in box. The lock cylinder takes a 3/4" hole, which is most accurately done with a 3/4:" hole saw or step drill. The main hole for the paddle latch has 1/2" radius corners, which are most accurately done with a step drill or 1/2" hole saw; the rest of the main hole is easily cut with a metal-cutting blade in a handheld jigsaw.
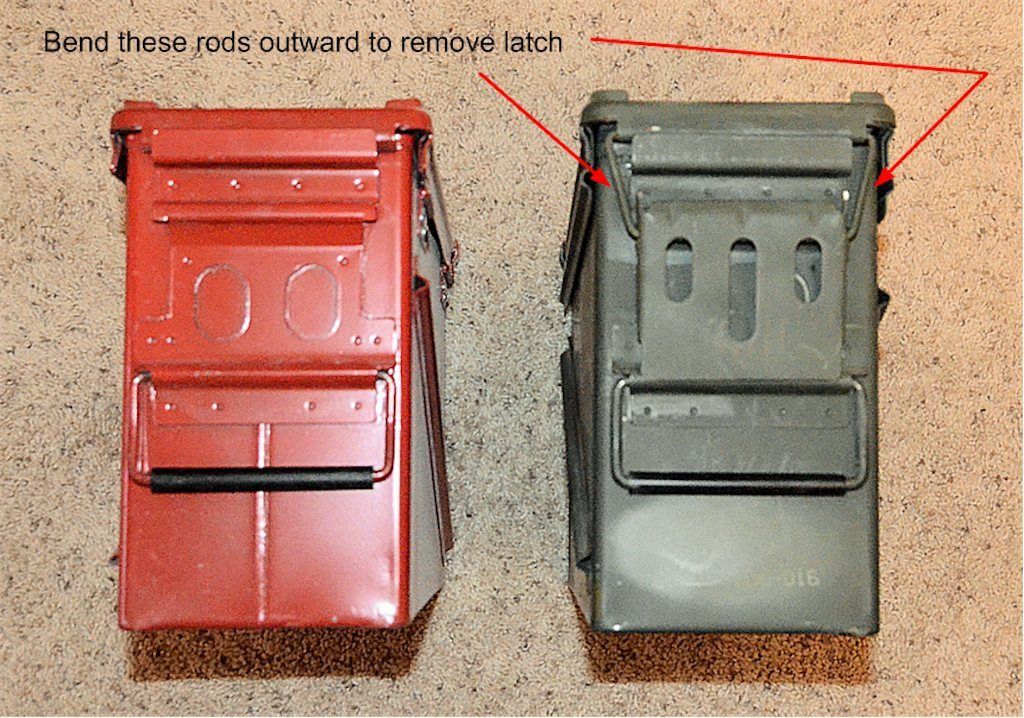
Step 1 - remove cover latches
Remove the old latches from the cover. The rods that hold the latch plates to the cover can just be bent a bit to come out of the holes in the cover.
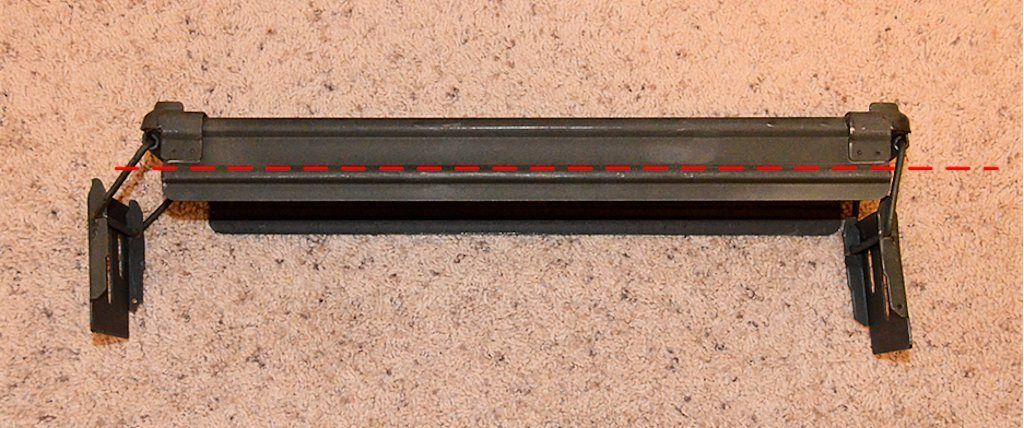
Step 2 - Trim the bottom edge of the cover
Cut the bottom edge of the cover on the dotted lines. While not strictly necessary, if the top is not cut there won't be enough room to fit the paddle latch in the center of the can - the latch would have to be offset to one side to clear the strengthening rib that runs diagonally down the center of the can.
Continued next post...
jscherb
Expedition Leader
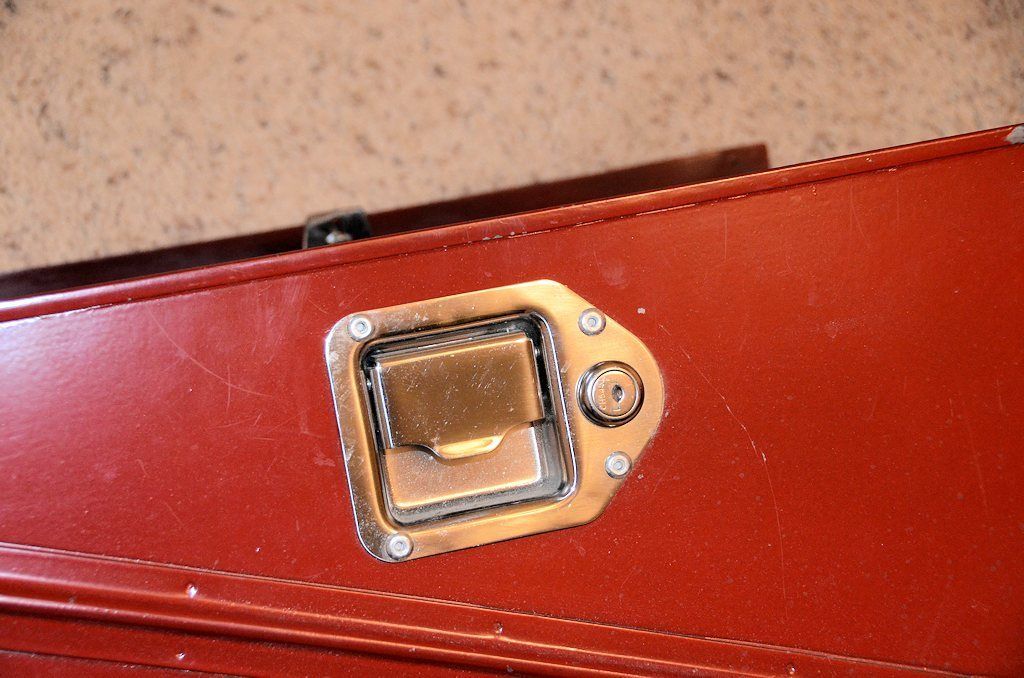
Step 3 - install the paddle latch
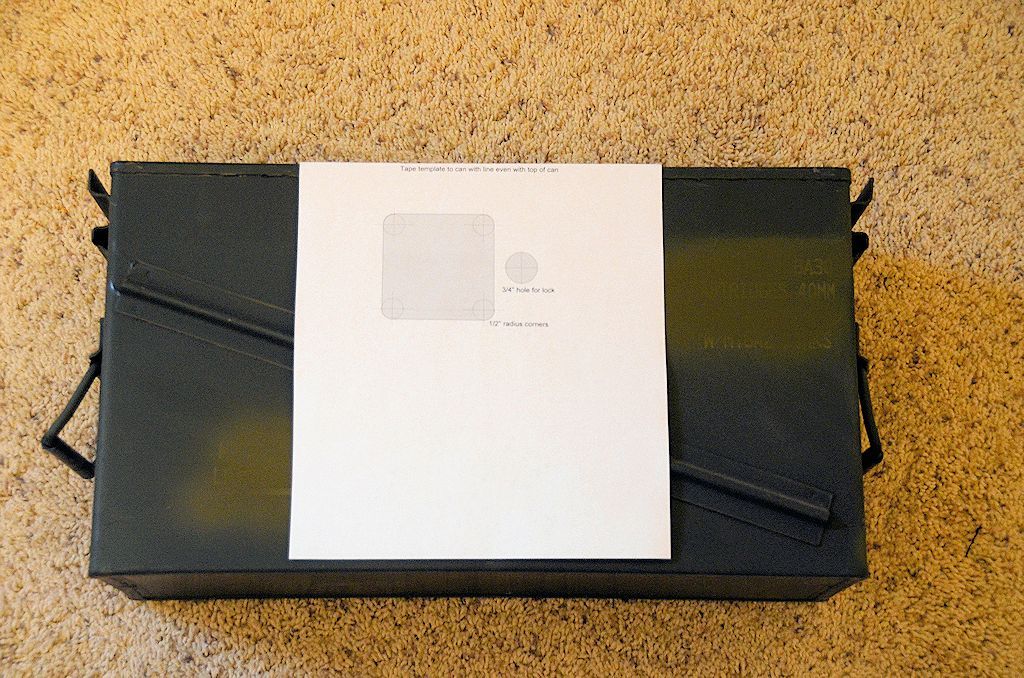
Print this template, and ensure that the line at the top is 4" long. If the line isn't 4" long, enlarge or reduce the drawing to get the size correct.
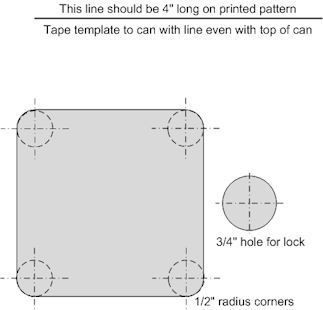
Fold the template at the line, and position the line at the top of the box as shown. Using a center punch, mark the center of the hole for the lock cylinder, and the center of each corner radius. Drill a 1/8" pilot hole at each point you punched. The easiest way to make the hole for the lock cylinder is with a 3/4" hole saw or a step drill with a 3/4" step. The easiest way to make the large hole is by drilling the 4 corners with a step drill with a 1/2" step or a 1/2" hole saw, and then cut the straight lines with a metal cutting blade in a handheld jig saw.
Ensure the lock cylinder and paddle handle fit well in the holes; adjust holes with a file if necessary. Once everything fits well, mark the rivet holes for the paddle handle, center punch the locations and drill 3/16" holes for the pop rivets. Pop rivet the paddle handle in place and then install the lock cylinder.
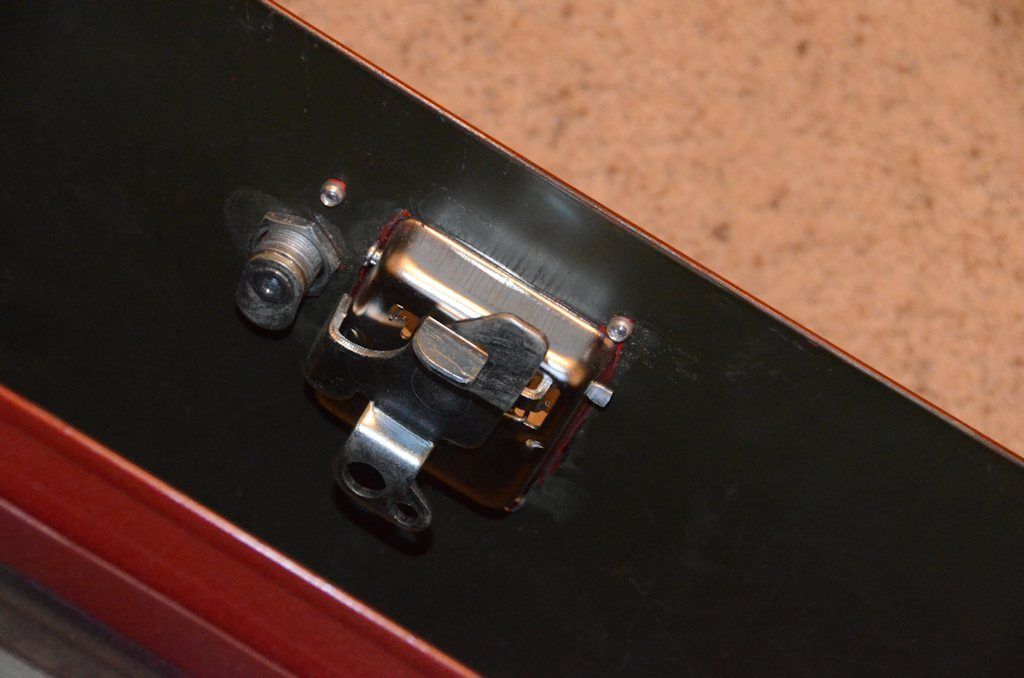
The inside view of the installed paddle handle and lock cylinder:
Continued next post...
Print this template, and ensure that the line at the top is 4" long. If the line isn't 4" long, enlarge or reduce the drawing to get the size correct.
Fold the template at the line, and position the line at the top of the box as shown. Using a center punch, mark the center of the hole for the lock cylinder, and the center of each corner radius. Drill a 1/8" pilot hole at each point you punched. The easiest way to make the hole for the lock cylinder is with a 3/4" hole saw or a step drill with a 3/4" step. The easiest way to make the large hole is by drilling the 4 corners with a step drill with a 1/2" step or a 1/2" hole saw, and then cut the straight lines with a metal cutting blade in a handheld jig saw.
Ensure the lock cylinder and paddle handle fit well in the holes; adjust holes with a file if necessary. Once everything fits well, mark the rivet holes for the paddle handle, center punch the locations and drill 3/16" holes for the pop rivets. Pop rivet the paddle handle in place and then install the lock cylinder.
The inside view of the installed paddle handle and lock cylinder:
Continued next post...
jscherb
Expedition Leader
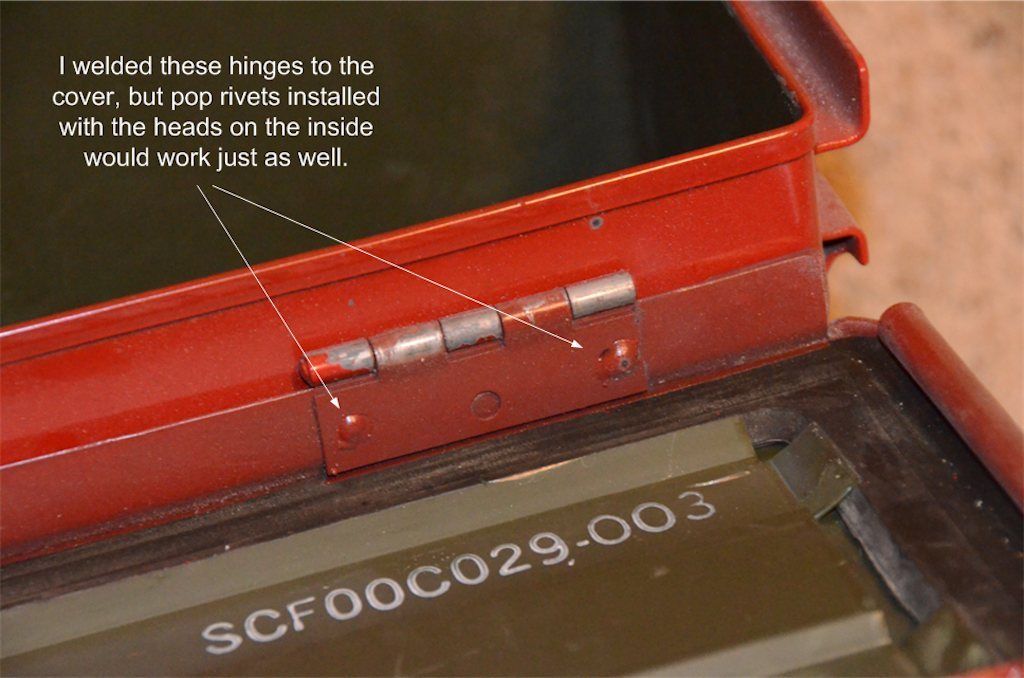
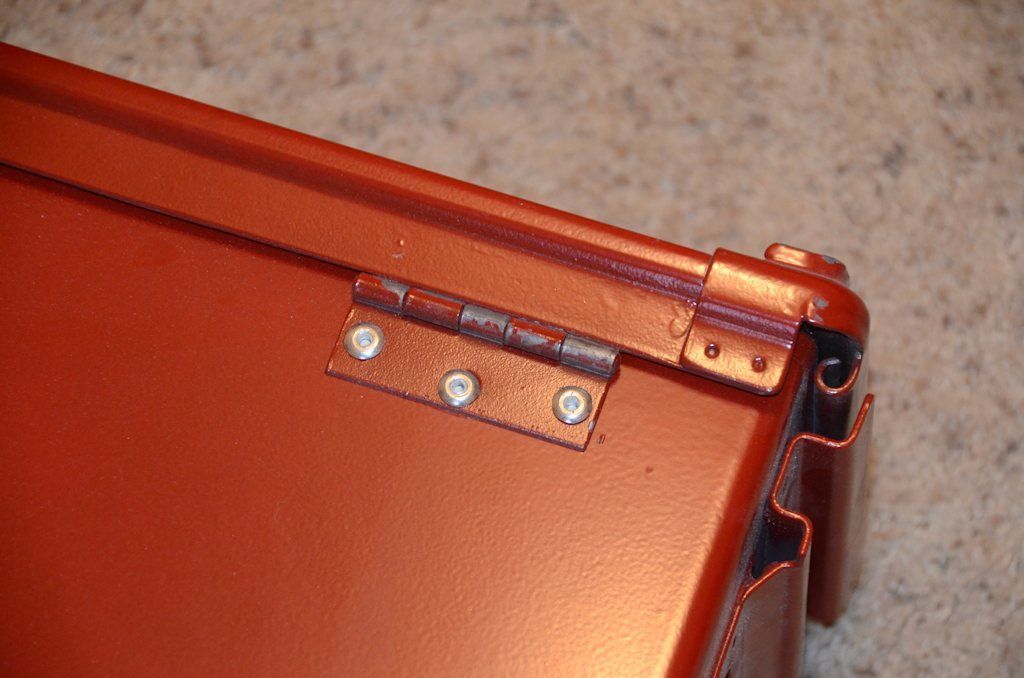
Step 4 - install new hinges
This is pretty straightforward - I used 2 1/2"" hinges I got from a hardware store. Hold the hinges against the inside of the cover and mark the locations of the holes. Use the center punch to accurately mark the hole centers and use a 3/16" drill to drill through the cover. Pop rivet the hinges in place with the head of the rivet on the inside of the cover (Back when I converted this box I welded my hinges to the cover, but pop rivets installed from the inside would work just as well). Once the hinges are riveted to the cover, put the cover on the box and mark holes in the side of the box for the other side of the hinges. Center punch, drill and pop-rivet the hinges in place.
Step 5 - make the catch for the latch
I made my own l-bracket from steel angle, but an l-bracket from a hardware store will work fine. A shoulder bolt is placed in one leg of the bracket to form the catch. The the bolt should be 1" from the bottom of the lid as shown in the photo. The bracket is then pop-riveted to the cover, located so the latch will engage with the bolt. This photo of the open can shows the latch, and the catch placement on the inside of the cover. If you can't find a shoulder bolt, a regular bolt with two nuts can be used instead. Thread one nut on to be on one side of the angle bracket, and put the other nut on the other side; tighten them to secure the bolt to the bracket.
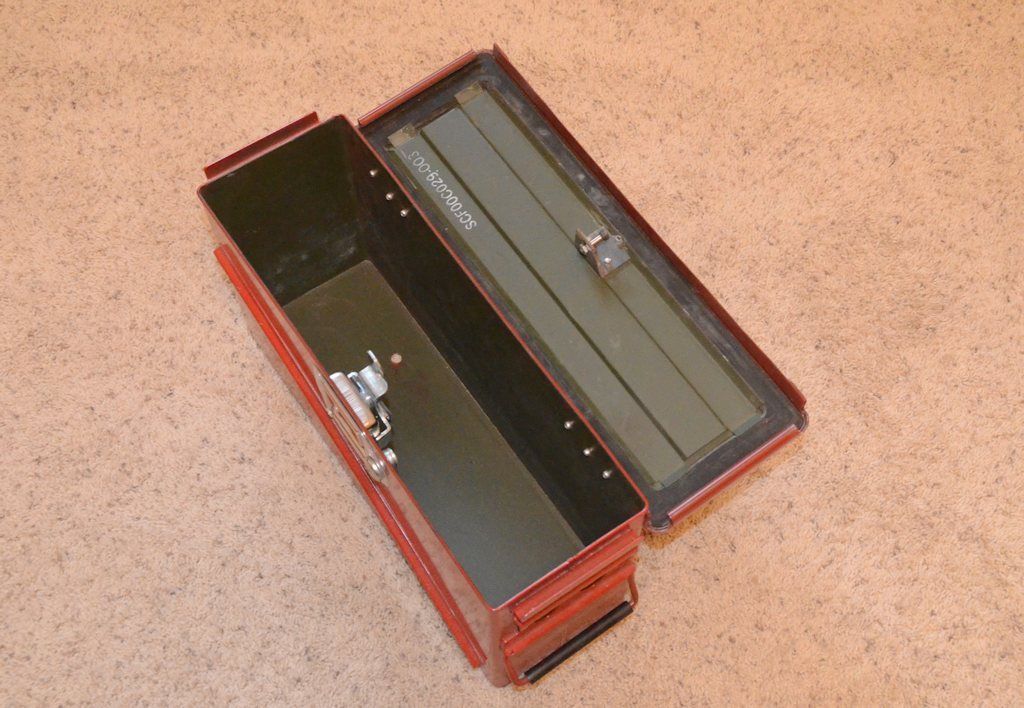
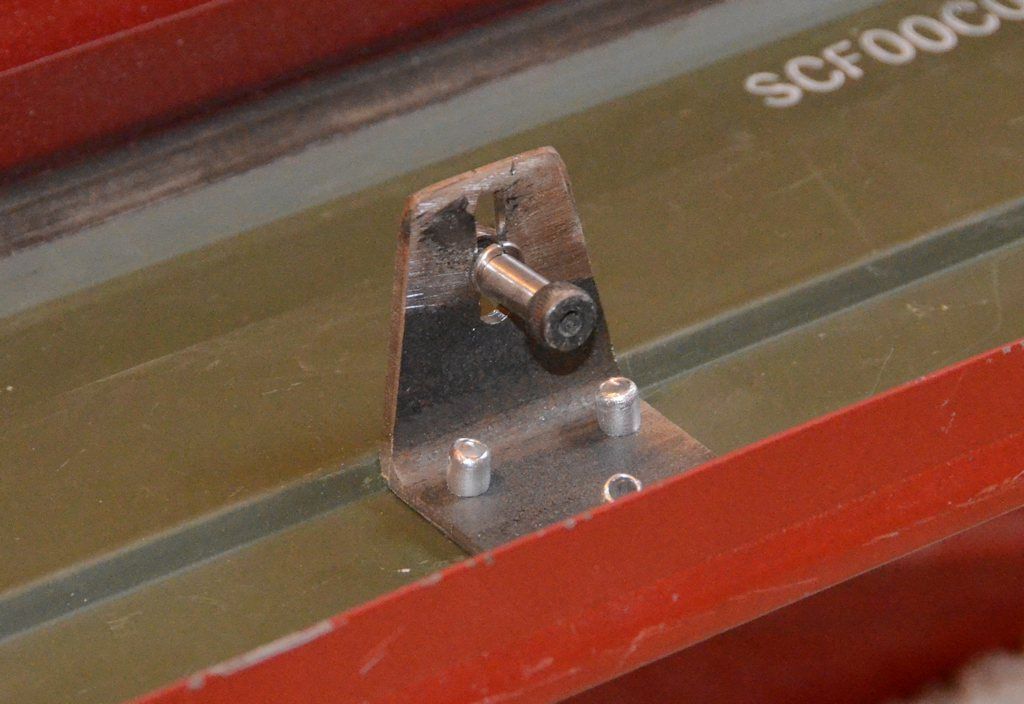
Here's a close-up of the catch. I put a slot in my bracket so the position of the bolt can be adjusted. The bolt goes 1 1/4" from the inside of the lid, and to avoid the trouble of cutting a slot you could just make a slightly oversize hole that would allow for a little adjustment of the bolt position.
Continued next post...
This is pretty straightforward - I used 2 1/2"" hinges I got from a hardware store. Hold the hinges against the inside of the cover and mark the locations of the holes. Use the center punch to accurately mark the hole centers and use a 3/16" drill to drill through the cover. Pop rivet the hinges in place with the head of the rivet on the inside of the cover (Back when I converted this box I welded my hinges to the cover, but pop rivets installed from the inside would work just as well). Once the hinges are riveted to the cover, put the cover on the box and mark holes in the side of the box for the other side of the hinges. Center punch, drill and pop-rivet the hinges in place.
Step 5 - make the catch for the latch
I made my own l-bracket from steel angle, but an l-bracket from a hardware store will work fine. A shoulder bolt is placed in one leg of the bracket to form the catch. The the bolt should be 1" from the bottom of the lid as shown in the photo. The bracket is then pop-riveted to the cover, located so the latch will engage with the bolt. This photo of the open can shows the latch, and the catch placement on the inside of the cover. If you can't find a shoulder bolt, a regular bolt with two nuts can be used instead. Thread one nut on to be on one side of the angle bracket, and put the other nut on the other side; tighten them to secure the bolt to the bracket.
Here's a close-up of the catch. I put a slot in my bracket so the position of the bolt can be adjusted. The bolt goes 1 1/4" from the inside of the lid, and to avoid the trouble of cutting a slot you could just make a slightly oversize hole that would allow for a little adjustment of the bolt position.
Continued next post...
jscherb
Expedition Leader
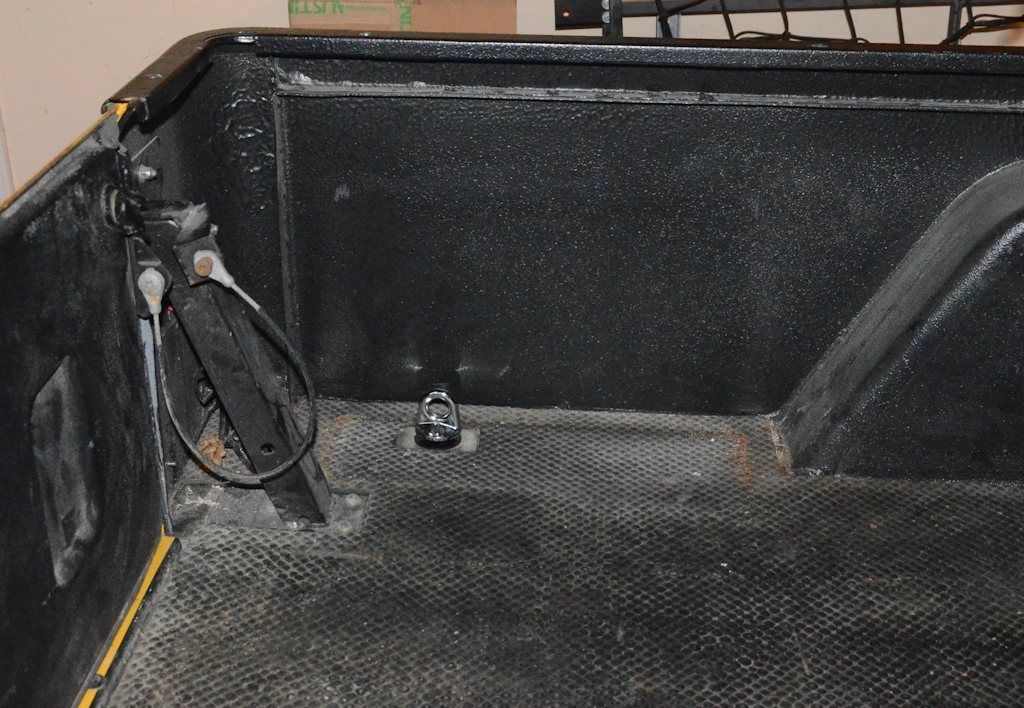
I made the red one shown about 5 years ago; it's been in service in my trailer ever since. I use it to hold tie-downs and other trailer supplies. It's secured to the trailer floor with a hole in the bottom that's positioned over one of my tie-down points; I screw the tie-down in place inside the box to hold it to the floor. When I need to move the box, I just open the box and unscrew the tie-down. If you look inside the box in step 5 above, you can see a hole in the bottom of the box. That hole is what the tie-down goes through.
The tie down with the box removed:
The tie down with the box removed:
") .
.
jscherb
Expedition Leader
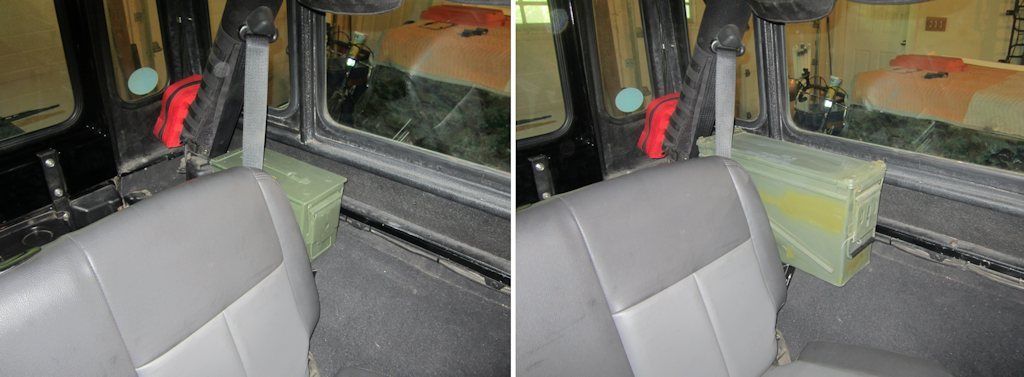
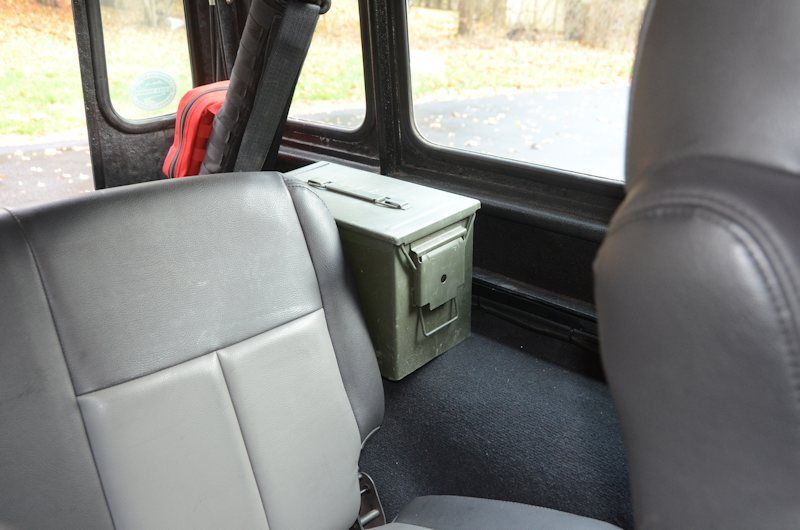
The can in that photo is a standard 50 cal. can. This photo shows a Fat 50 can, which fits, unless you have a soft top and want to put the soft top down - the Fat 50 can is wide enough that it will interfere with the soft top hoops as you try to fold them down. You might be able to make a soft top work if you push the can hard against the seat, but that might not be the best for rear seat passengers.
Forum statistics
Members online
- Ranger3316
- Long Rifle
- PHXtaco
- parabolD
- hugodufour
- Johan H Marais
- JWag21
- svmaple
- Deleted Member 183
- SparowAK
- kmacafee
- cricket1
- gabrielef
- wild1
- GHI
- GAPMN
- Fredricksen
- epyonxero
- ITTOG
- pjm511
- MuleySam
- Kingsize24
- KHow
- Dogpilot
- Hyde
- RedBeard0
- dustinbriq
- Zak
- Knochenhauer
- Scooooooooop
- Wagrenca06
- fieldsy32
- rolloverland
- bmizak
- metres
- D0Z3R
- Wakeup2river
- speedy gonzales
- vick
- TheCatman
- Pacific Northwest yetti
- Actros617
- Todd n Natalie
- Anders
- zachmacgregor
- STREGA
- Lee
- matttahoe53
- chopyourown
- timeforcamping
Total: 563 (members: 62, guests: 501)