Blender, My LX450/FZJ80 + FJ45esk + GM + Land Rover crazy concoction

Metcalf

Expedition Leader
My evening progress...


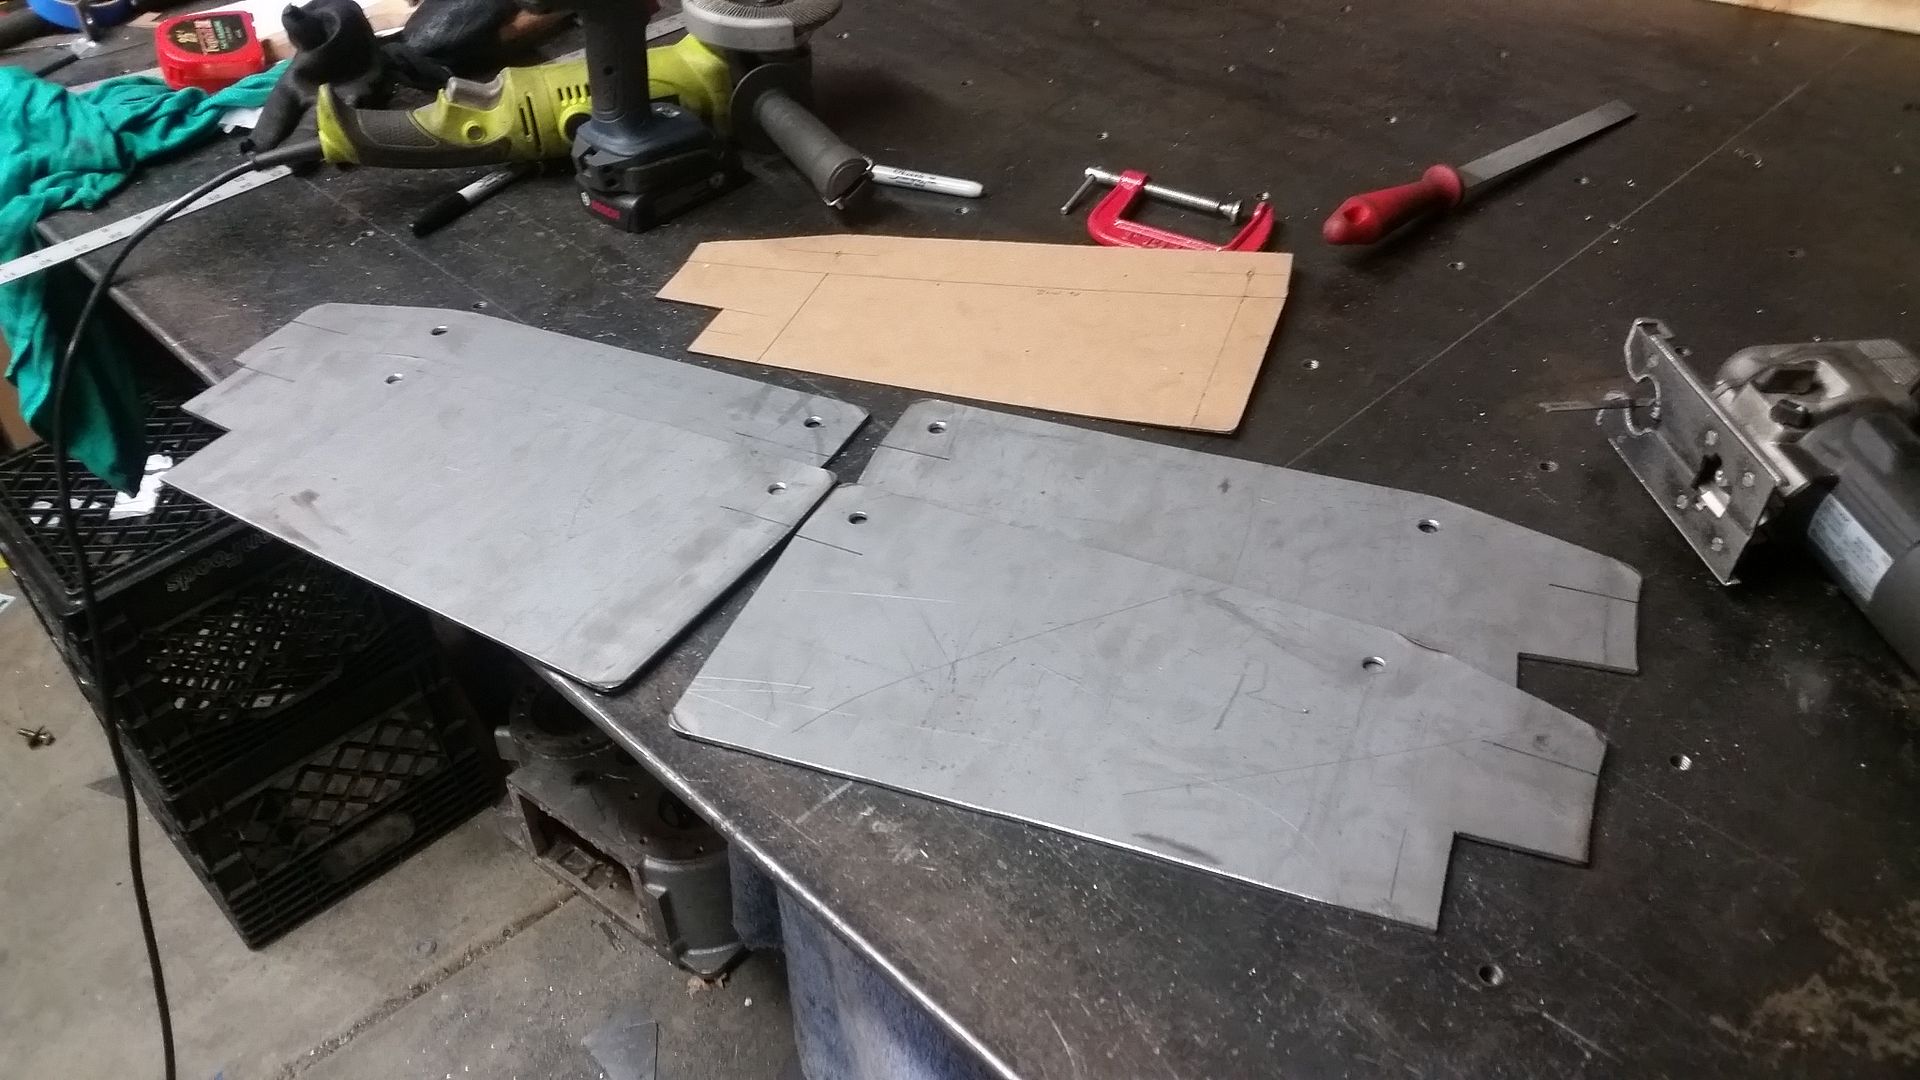
I put the seats back in and set them in place with the complete tunnel so I could pattern out the brackets. It wasn't as simple as I thought it was going to be. There are a few places where the seat slider is pretty tight on things.

I was just going to make a big U-shape bracket that was going to bolt to the seat, but that would have put the legs of the bracket outboard a bit too far. I decided to do individual L-shape brackets that will bolt the the seat mounts but the vertical leg of the bracket will be to the INSIDE of the seat. This moves the leg away from the tunnel on the inside slider on both sides.

I decided to mount the seats at a 6 degree base angle. That should allow the seat to move up as it moves forward slightly. I don't like the way a flat seat bottom cushion feels anyway. I mounted the seats as low as practical. I can add a spacer between the slider and the seat if things are too low.

I will make a matching L-shape bracket that will basically mount to the floor pan. I will just weld those brackets in place. The rear mounting bolt for the seats will be on top of the B-pillar floor spreader. That should make the mounting system very strong without having add a lot more cage structure ( remember, not a racecar ).

The only complication is going to be the inside mount on the passenger seat over the transfer case hump. I think that bracket system is going to have a few more parts to allow the removal of the tunnel as intended. I will start with the same base bracket shape that matches the others, but I will have to take a BIG notch out of it for the t-case.
 
I ran into that same problem on the FJ40 buggy I built last year. I'm curious to see what you come up with for the passenger side bracket. I should have angled the seats like you are. Though not much, it would have lowered them a bit. That truck's seating position was tall, but then we also ran the OEM under seat fuel tank.
 

Metcalf

Expedition Leader
I ran into that same problem on the FJ40 buggy I built last year. I'm curious to see what you come up with for the passenger side bracket. I should have angled the seats like you are. Though not much, it would have lowered them a bit. That truck's seating position was tall, but then we also ran the OEM under seat fuel tank.

Yeah, my seats are lower than stock I think. I basically mounted them as low as practical based of the passenger seat slider clearing the transfer case hump on the tunnel.

I was laying awake last night thinking about that passenger side inner bracket. Basically, I think I am going to have a 3-pc bracket. 1- That is the L-bracket that will bolt to the seat slider. This will have 3 mounting bolt holes. 2- A frame body mounted bracket that will weld to the B-pillar floor spreader and the floor with a pad. This will have the rear and middle mounting hole. 3- A bracket that will be welded to the tunnel. It will extend rearward to capture the rear and middle mounting hole. The mounting bolts will sandwich everything together to tie it all together. It will be a bit of work, but I only have to do this for that one bracket location.
 

Metcalf

Expedition Leader
My bite for the day...


The heater is making a difference in the shop. It was down to about 20F and I was able to come home and work without preheating the area.

I was able to bend all the seat brackets up and install a pair on the drivers seat for a test fit. Overall it worked out really well. The brackets look like they will clear everything easily on the drivers side easily. I will need to trim the flange on the tunnel for sure. The front inside corner of the drivers seat is pretty darn close to the tunnel.

Now I need to make the next set of brackets that will weld onto the B-pillar spreader and the floor pan. Once I see how everything bolts together I will see what kind of extra space I have on the large brackets for holes and dimple dies. There is a decent amount of space under the drivers seat that I need to develop some kind storage system for.

The bracket for the inside of the passenger side is going to be more complex for sure....

Man I need a cnc plasma table or something. Making repeat brackets in this size takes a decent amount of time for sure.
 

ajmaudio

Adventurer
What was the soft hammer face made from if I may?

Experiment time!


I think I have a way to make a satisfactory flange bend for the rear cabin panels. This is basically a very easy way to make a tight bend in sheetmetal. This is 16 gauge cold roll and it moved like butter. I knew I needed a sharper inside radius so I dug through the scrap bin looking. Angle iron seems to have the sharpest radius in the right place while being the most common to find. This angle iron almost had a sharp corner. There is going to be some material spring back so I don't think the sharper corner is a huge deal.

One of the stumbles with doing this type of bend is that it takes a LOT of hammer work. Typically that hammer work leaves the edge slightly bumpy. You need to hit the material thousands of times to eliminate any high or low spots...or planish it...or run it through a wheel. I decided to 'automate' the process slightly by using an air chisel. It is a hammer that hits with a decent amount of force at a fairly high rate much higher than my little arm can swing a body hammer.

The last piece of the puzzle was the hammer. With a steel hammer form edge, if the hammer is also steel, you run the risk of shearing the material off during the working process. It also leaves those pesky marks. I had played around with this in the past and found some references to a process called 'flow forming' basically this typically uses a 'soft' hammer to form sheet metal into a female mold. The biggest bonus about the slightly 'soft' hammer is that since the crown shape is very low it doesn't leave marks in the working material. This left no visible marks on the material.


Here is how the test bend looks hanging on the tube. You can see how tight the inside radius is by the air gap because of the different radii. I can't believe that a sheet metal brake would be able to do a bend much tighter than that?

There are also no hammer marks on the material and the panel is nice and smooth. I think I will mess it up more when I have to shrink the flange to create the corner radius. I need to play around with that on a test part. I wonder what I will have to do to clean up those jaw marks?


Here is what the test bend looks like from a little further away. I think that will look like once it it done? The flange will be trimmed down a little bit. I need to order up my bulb seal and see where the mounting lip will have to go to flush the rear window panel to the rear of the body. I was thinking that perhaps a touch of inset might look good too? 1/4"? The rear panel will be tack welded to the rear belt line tube and the mounting lip for the seal. With the edge mount bulb mount seal on that lip it should cover up all the welding. I think I should find something to bond the panel to the tube on the vertical surface? Anyone have any ideas for that?

I'm pretty happy I found a solution. Yippee!
 

ajmaudio

Adventurer
If your gona have carpet etc.... put some dynamat type deadening material on pre-carpet to help with your oil canning noise etc

That is an idea.

I do think I will be using some panel adhesive to help deal with some of the panel overlap on the rear panels. That should help with some of the rattles with the overlap top edge design of the rear panels. I don't want to weld the inside. I think that will warp things too much.

A 1/4" deep might be a bit deep if I want to hide the window panel in there. I suspect the frame of the window will be a bit close to 1.25 thick installed. I'd like to be able to provide a little padding and/or carpet on the rear wall to help protect the window panel. It would be nice if the rear window panels where completely hidden in that 1.5" space....

If I press something into the panel it will be less than 1/8" deep I think. That will provide a lot of structure.

Thank you for the suggestion.


Also ... am I going to be the first one to ask for more details on the 60 inch brake? Been Toying with building something like this for a while....
 
Last edited:

Metcalf

Expedition Leader
What was the soft hammer face made from if I may?

It is actually the face off of a soft hammer. I pullet it off and turned it to fit in the case. If I had to guess, it is some kind of HDPE material...maybe nylon.
If you look into flow forming with an rivet gun, you can find some information in the hot rod community.
 

Metcalf

Expedition Leader
If your gona have carpet etc.... put some dynamat type deadening material on pre-carpet to help with your oil canning noise etc

Also ... am I going to be the first one to ask for more details on the 60 inch brake? Been Toying with building something like this for a while....

I'm not sure how fancy I am going to get with the interior. If I am happy with the design of everything I might have it sprayed in bedliner. Then perhaps have some carpet panels that clip into place for the critical areas. I'm not sure. I do want the interior to remain rather easy to clean and weather-proof.

The brake isn't anything fancy. A picture should be pretty self explanatory for the design. Overall it has been working very well. I have a wider bottom die system, with the same laminated technology, that I need to install for bending thicker material ( that reduces tonnage requirements )
 
I'm facing the same issue right now with a CJ5 I'm restoring. I've got the body tub in bare metal and I'm doing all the repairs on a rotisserie, but the toe boards do pop back and forth a tad. I really don't want to use any kind of a liner, because A- it's not original, and B- I have seen so many poor liner applications that actually trap water. I've been trying to stress the panels by spot welding right in the middle of the span and then super-cooling the weld. It works to shrink the metal a bit.

If you come up with any ideas on a liner, one that flows really well, I'd really be interested in hearing about it.

BTW - I've been leaving the shop lights on at night to keep the temps in the shop from getting too low. It really does help, but my electrical bill is going to be crazy this month.
 

Metcalf

Expedition Leader
One seat is mounted! That felt like a big bite that I didn't chew all the way....


I have three of the floor mounts that can be the same basic bracket. I had posted the chipboard pattern before. Cutting multiples of the same bracket is always a ton of fun. I don't really mind making singles, but multiples brings up the need for a plasma table in the shop...

All the seat brackets are the same 10 gauge cold roll material. It is basically 0.135" thick stuff. Overall I really like working with it. I don't see the need for anything thicker for the most part.

I added a 1" flange to the bottom of the floor brackets to spread the load out a bit. The mounts also wrap around the 2x2x1/8" box tube B-pillar spreader at the floor.


Before I could mount the seats, I needed to trim the floor flange of the new tunnel to give me a little extra room for the seat brackets. That was a decent amount of work for sure. I trimmed down the firewall flange also. I like it a lot better now, it looks much less intrusive with that flange trimmed and angled to the fastener locations. It will also make mounting the gas pedal assembly a lot easier as it frees up some critical space in that area.


Here you can see the seat mounts tack welded into place on the floor. I will complete the stitch welding to the floor in the future after mockup is done. I think finishing everything as you go to be too time consuming and open for problems in the future if you need to modify something.


And finally. A seat mounted! The seat uses the full range of the slider with the seat on a comfy seat back angle. I am a little depressed in that the head rest kinda gets in the way eventually. I may look into removing the cover and foam to see if I could bend the tubular support structure forward a little bit. I think that help a bit to make for more possible room inside when the rear panels are in place.

Scooting the seat all the way forward should allow someone with shorter legs to drive very comfortably. With the seat all the way forward and the back also tipped forward, I have a decent amount of access to behind the seats. It could be better, but it isn't bad or anything. I think to get the seat to flip/tumble the mounting system would have to be a lot more complex.

It felt REALLY good to be able to sit in the vehicle on the final seat mount! Now I need to finish up the passenger side. Most of the brackets where the same, but I will have to chop up the inside bracket to clear the tunnel. There will also be an additional bracket to allow the tunnel to be tied into the B-pillar, but still be removable. I hope that will be pretty easy to finish up next week. After that is done I get to move onto something new!

I think I am going to work on the modifications to the grill shape and start on the mounts for that. I also need to start thinking about the structure for the bed floor. Once those two items are done....the last things that need to be built while the vehicle is leveled....I can stick the spring back into it and get a better idea of the stance this thing is going to have!
 

Metcalf

Expedition Leader
I short but productive evening...


I was able to 95% finish all the brackets for the passenger seat mount. It ended up being a little more complex than the drivers side because of the transfer case portion of the tunnel.

I had to add one more mounting hole, for a total of 3, on the inside mount to tie everything together. The inside seat bracket has 3 parts. 1- That is the bracket that bolts to the bottom of the seat slider. It has all 3 mounting holes. 2- That is the bracket that will weld to the tunnel. It has the forward and middle mounting hole. 3- That is the bracket that weld to the B-pillar. It has the middle and rear mounting hole. By combining them all you end up with a strong assembly that bridges the entire seat mount, but still allows for the tunnel to be removed. Part 1 fits between parts 2 and 3 which is a little odd for assembly, but was the only way I could think to be able to disassemble the tunnel. The tunnel needs to be able to shift slightly to the passenger side and then lift up about 1.5" to clear the body side brackets.

I still have to pull the brackets apart one more time to add the last holes, prep the welding surfaces, and then tack weld everything in place. Tons of fun.

Then I can move onto something else!
 

Metcalf

Expedition Leader
The passenger seat mount is all done. Yipee. Man that feels good. I don't know what it is about being able to sit in the thing for the 1st time knowing what the seat will feel like....but it always does it for me...


Seat all the way back.....


Seat all the way forward. I am happy my guesswork was good on the shifter location. I might stick an inward bend in it or shorten it to clear the passengers left leg. It should be ok, but if I want to get picky....


I thought I would take a few pictures of the passenger seat bracket assembly since it was hard to explain in text. Basically, I needed a bracket system that would tie three independent parts together. The seat mount, the tunnel, and the body/b-pillar. The seats have to come out to pull the tunnel, but I don't think that is really a bad thing. The tunnel is pretty large. I still may add a few access panels in key areas of the tunnel, but don't know for sure...

Time for something new.....
 
Seat brackets look great. Very clean.

Access holes? I might consider access panels instead, as in, maybe a whole removable top or area around the t-case front output. I don't know what access from under the truck is like, but just think about what kind of repairs you might need to do on the trail. If the whole t-case has to come out, can you get to everything without removing the tunnel? Then again, if the whole case needs to come out, so you have to remove the seat...big deal.

Either way, access to the shifter linkages and the hdw that secures the t-case to the trans would be a bare minimum.
 

Metcalf

Expedition Leader
I'm going to have to do something for access to the transfer case shift linkage for sure. I have the air shift center diff stuff in the same area. Beyond that I just don't know. Pulling the tunnel isn't too hard for bigger jobs. I'm thinking I might be able to provide access via some oversize **** boots to key areas also.

I need a break from interior stuff for a bit to think on it. I am going to work on cutting up the grill and the cooling package next...
 

Forum statistics

Threads
185,789
Messages
2,878,230
Members
225,329
Latest member
FranklinDufresne
Top