You are using an out of date browser. It may not display this or other websites correctly.
You should upgrade or use an alternative browser.
You should upgrade or use an alternative browser.
Build - Fiberglass & Foam Truck Camper
- Thread starter underkill
- Start date
Hello Guys,
You seem to be moving along well and I imagine that now you have started the inside it feels like your creation is coming to life. Now I have been thinking this for a while now and am I correct in thinking that it is the Lady who is writing this thread?? and from the photos getting the dirty dusty jobs. If so I take my hat off to you Mam and say Jason you are an extremely lucky man to have such a handy/hard working Lady. I have been building a car for over ten years and I can count the number of times my wife has even been down to look at it on one hand and only my daughter has helped with sanding and I'm still hearing about that!! When I sell this car for a HUGE amount I'm going to start my Camper project and I doubt I'll see my wife anywhere until the interior is due for design and I know she is very good at that stuff. Love following your progress. Cheers Leon (NZ)
You seem to be moving along well and I imagine that now you have started the inside it feels like your creation is coming to life. Now I have been thinking this for a while now and am I correct in thinking that it is the Lady who is writing this thread?? and from the photos getting the dirty dusty jobs. If so I take my hat off to you Mam and say Jason you are an extremely lucky man to have such a handy/hard working Lady. I have been building a car for over ten years and I can count the number of times my wife has even been down to look at it on one hand and only my daughter has helped with sanding and I'm still hearing about that!! When I sell this car for a HUGE amount I'm going to start my Camper project and I doubt I'll see my wife anywhere until the interior is due for design and I know she is very good at that stuff. Love following your progress. Cheers Leon (NZ)
underkill
Active member
You're correct Leon! I'm the female half of the fabrication team!Hello Guys,
You seem to be moving along well and I imagine that now you have started the inside it feels like your creation is coming to life. Now I have been thinking this for a while now and am I correct in thinking that it is the Lady who is writing this thread?? and from the photos getting the dirty dusty jobs. If so I take my hat off to you Mam and say Jason you are an extremely lucky man to have such a handy/hard working Lady. I have been building a car for over ten years and I can count the number of times my wife has even been down to look at it on one hand and only my daughter has helped with sanding and I'm still hearing about that!! When I sell this car for a HUGE amount I'm going to start my Camper project and I doubt I'll see my wife anywhere until the interior is due for design and I know she is very good at that stuff. Love following your progress. Cheers Leon (NZ)
") Both of us are engineers. I usually get the tasks involving cramped spaces and small hands, whereas Jason gets the ones involving lots of torque.
Both of us are engineers. I usually get the tasks involving cramped spaces and small hands, whereas Jason gets the ones involving lots of torque. If your wife sews she may end up being a valuable asset if you do a pop up with canvas!
underkill
Active member
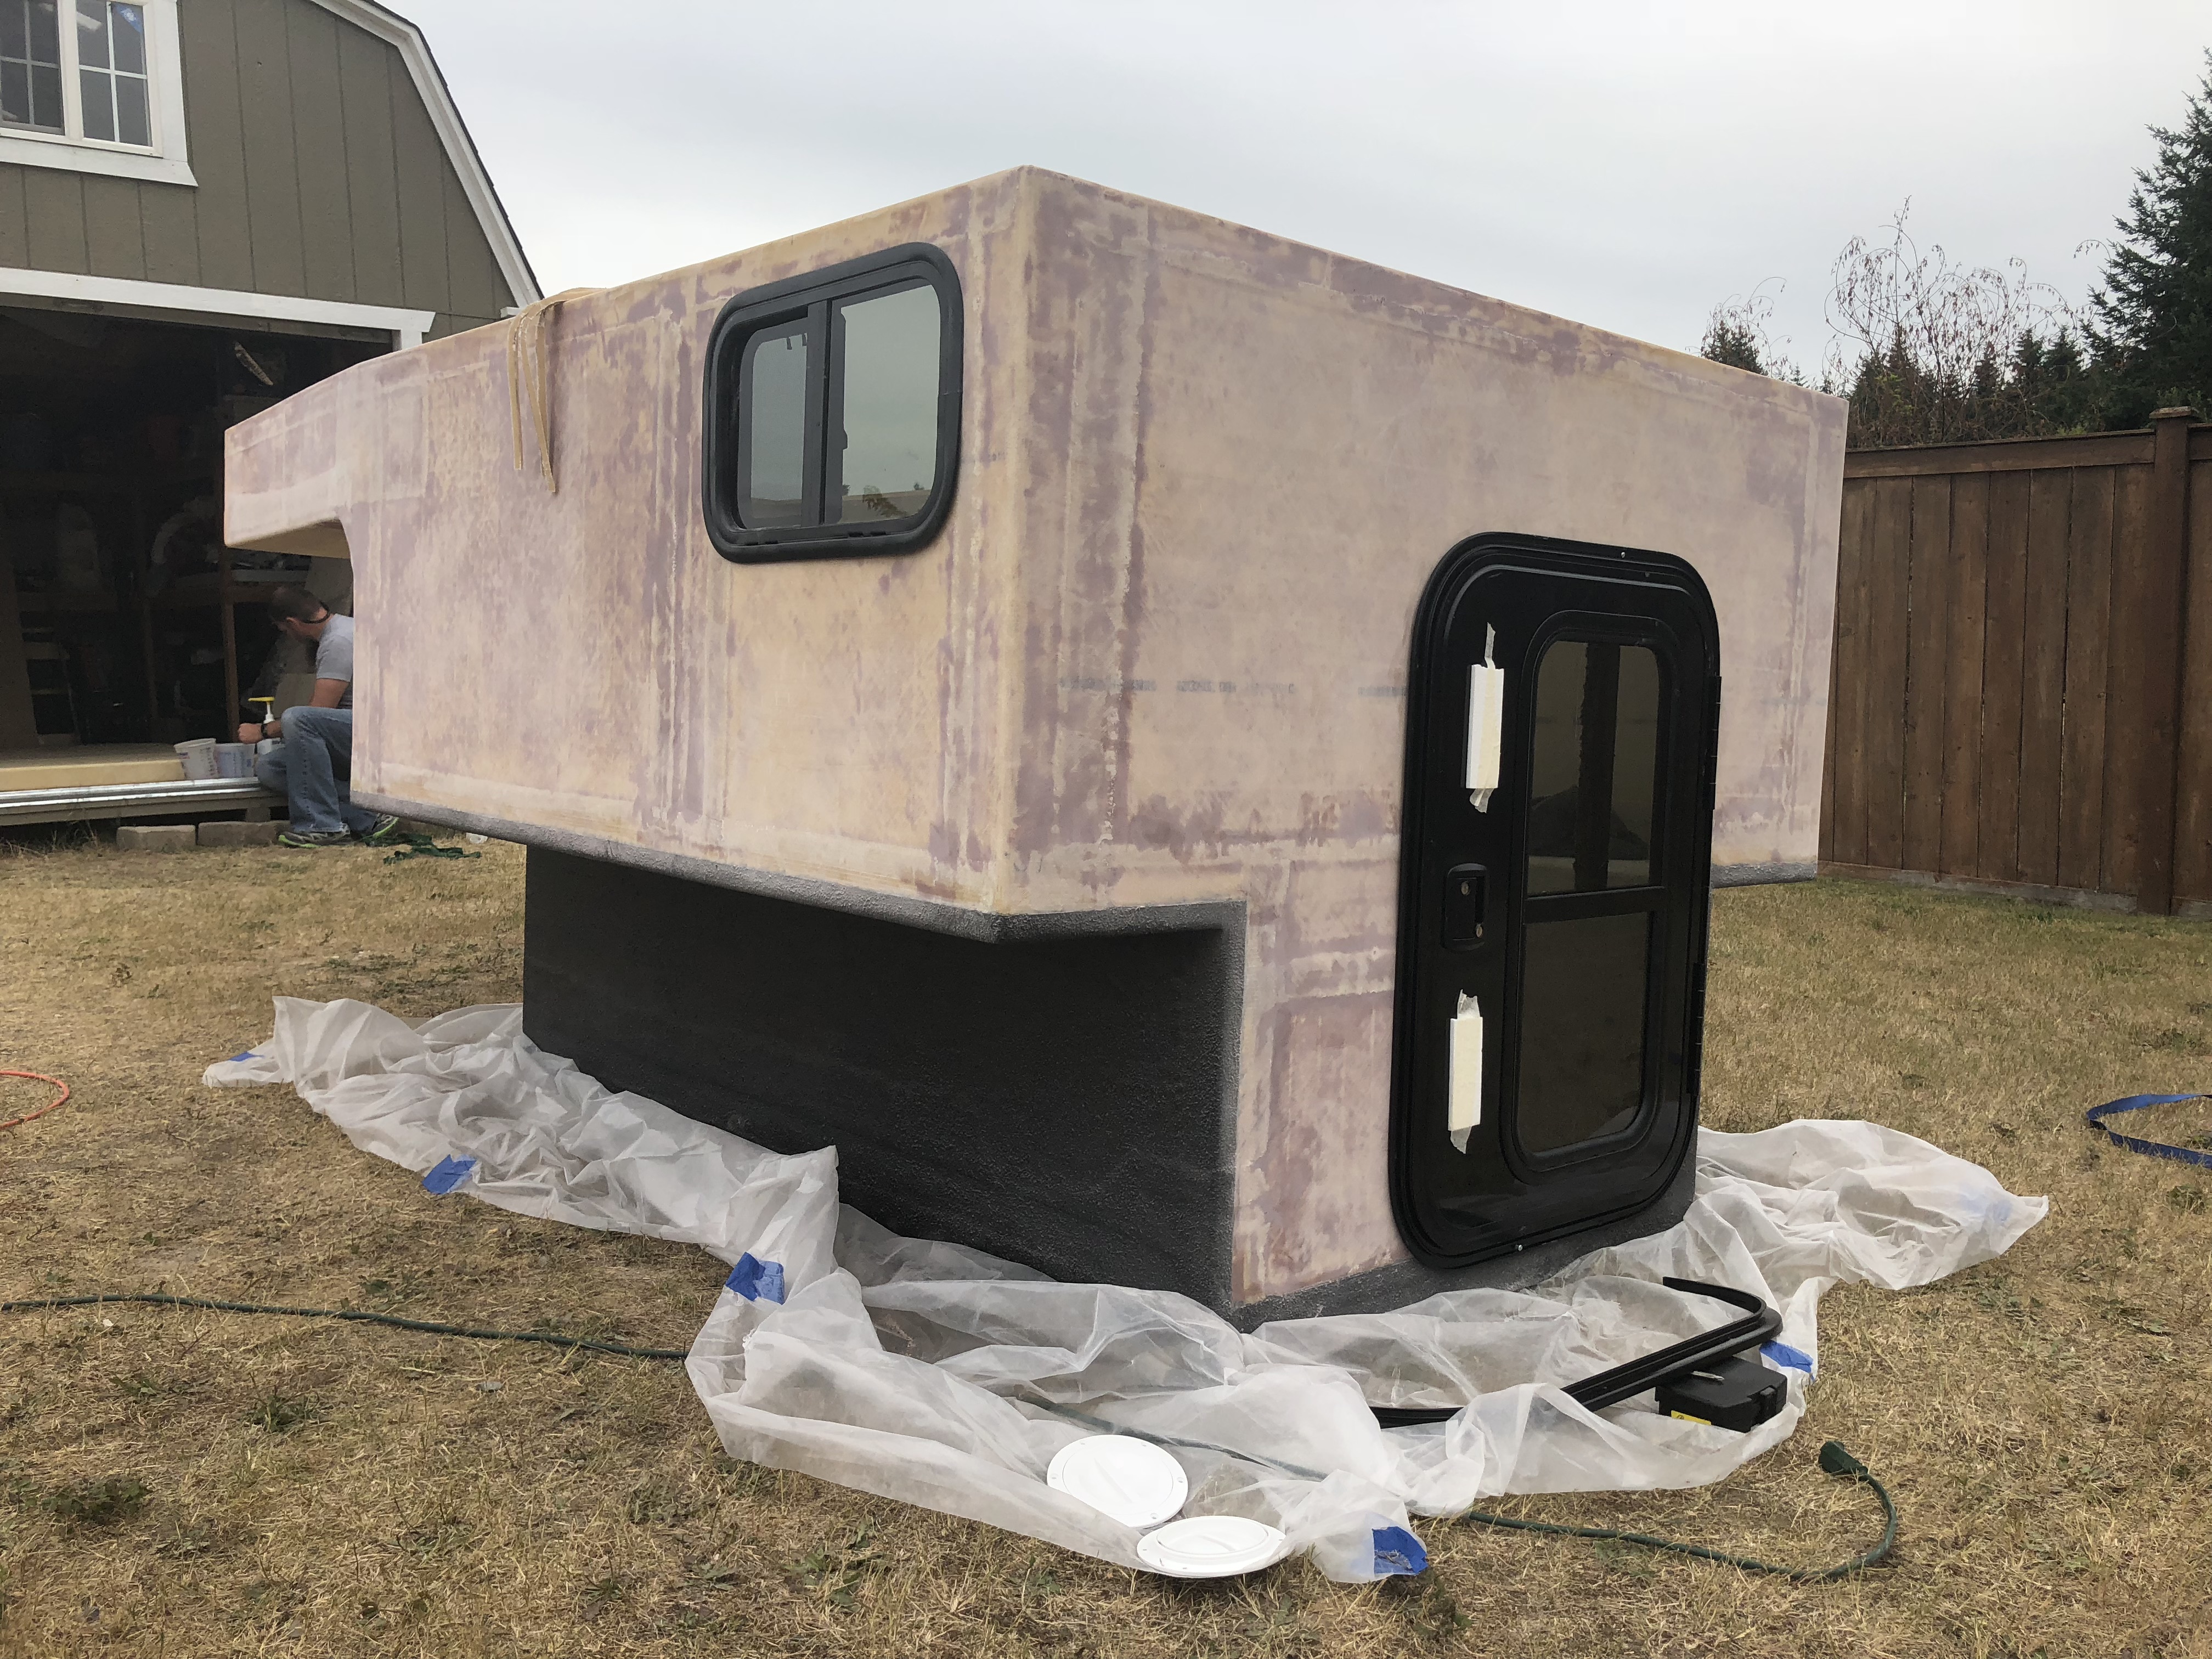
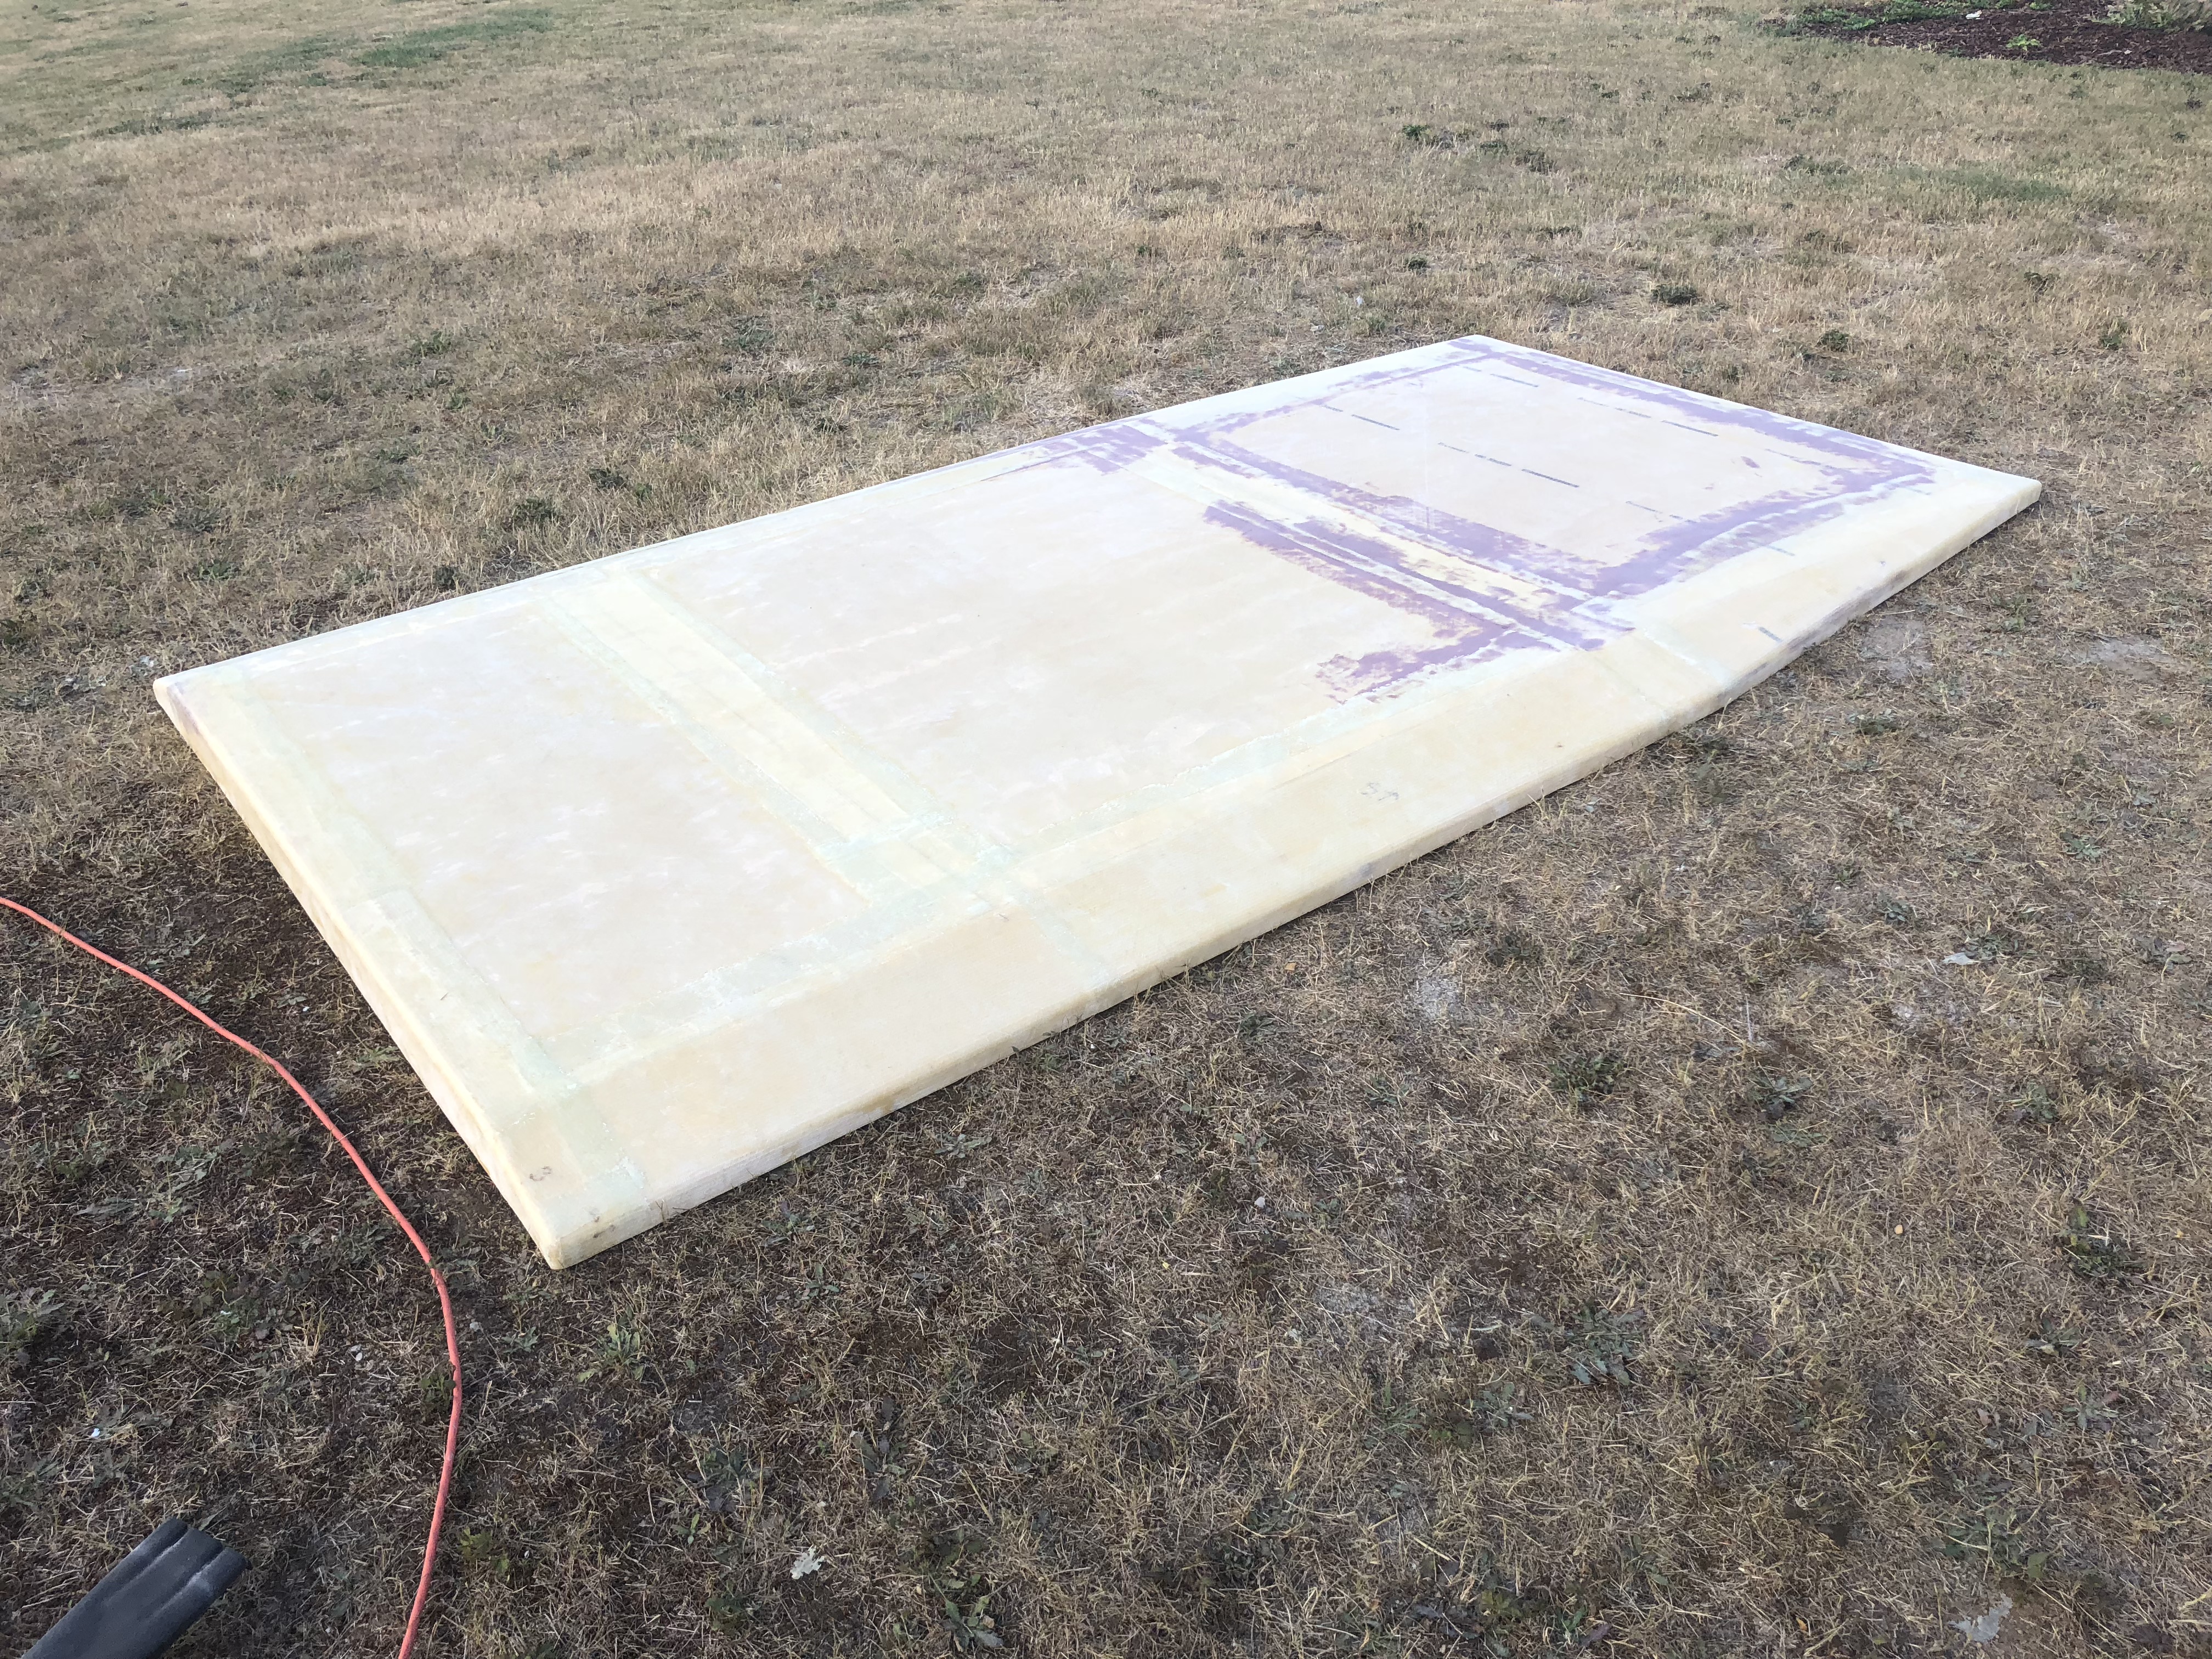
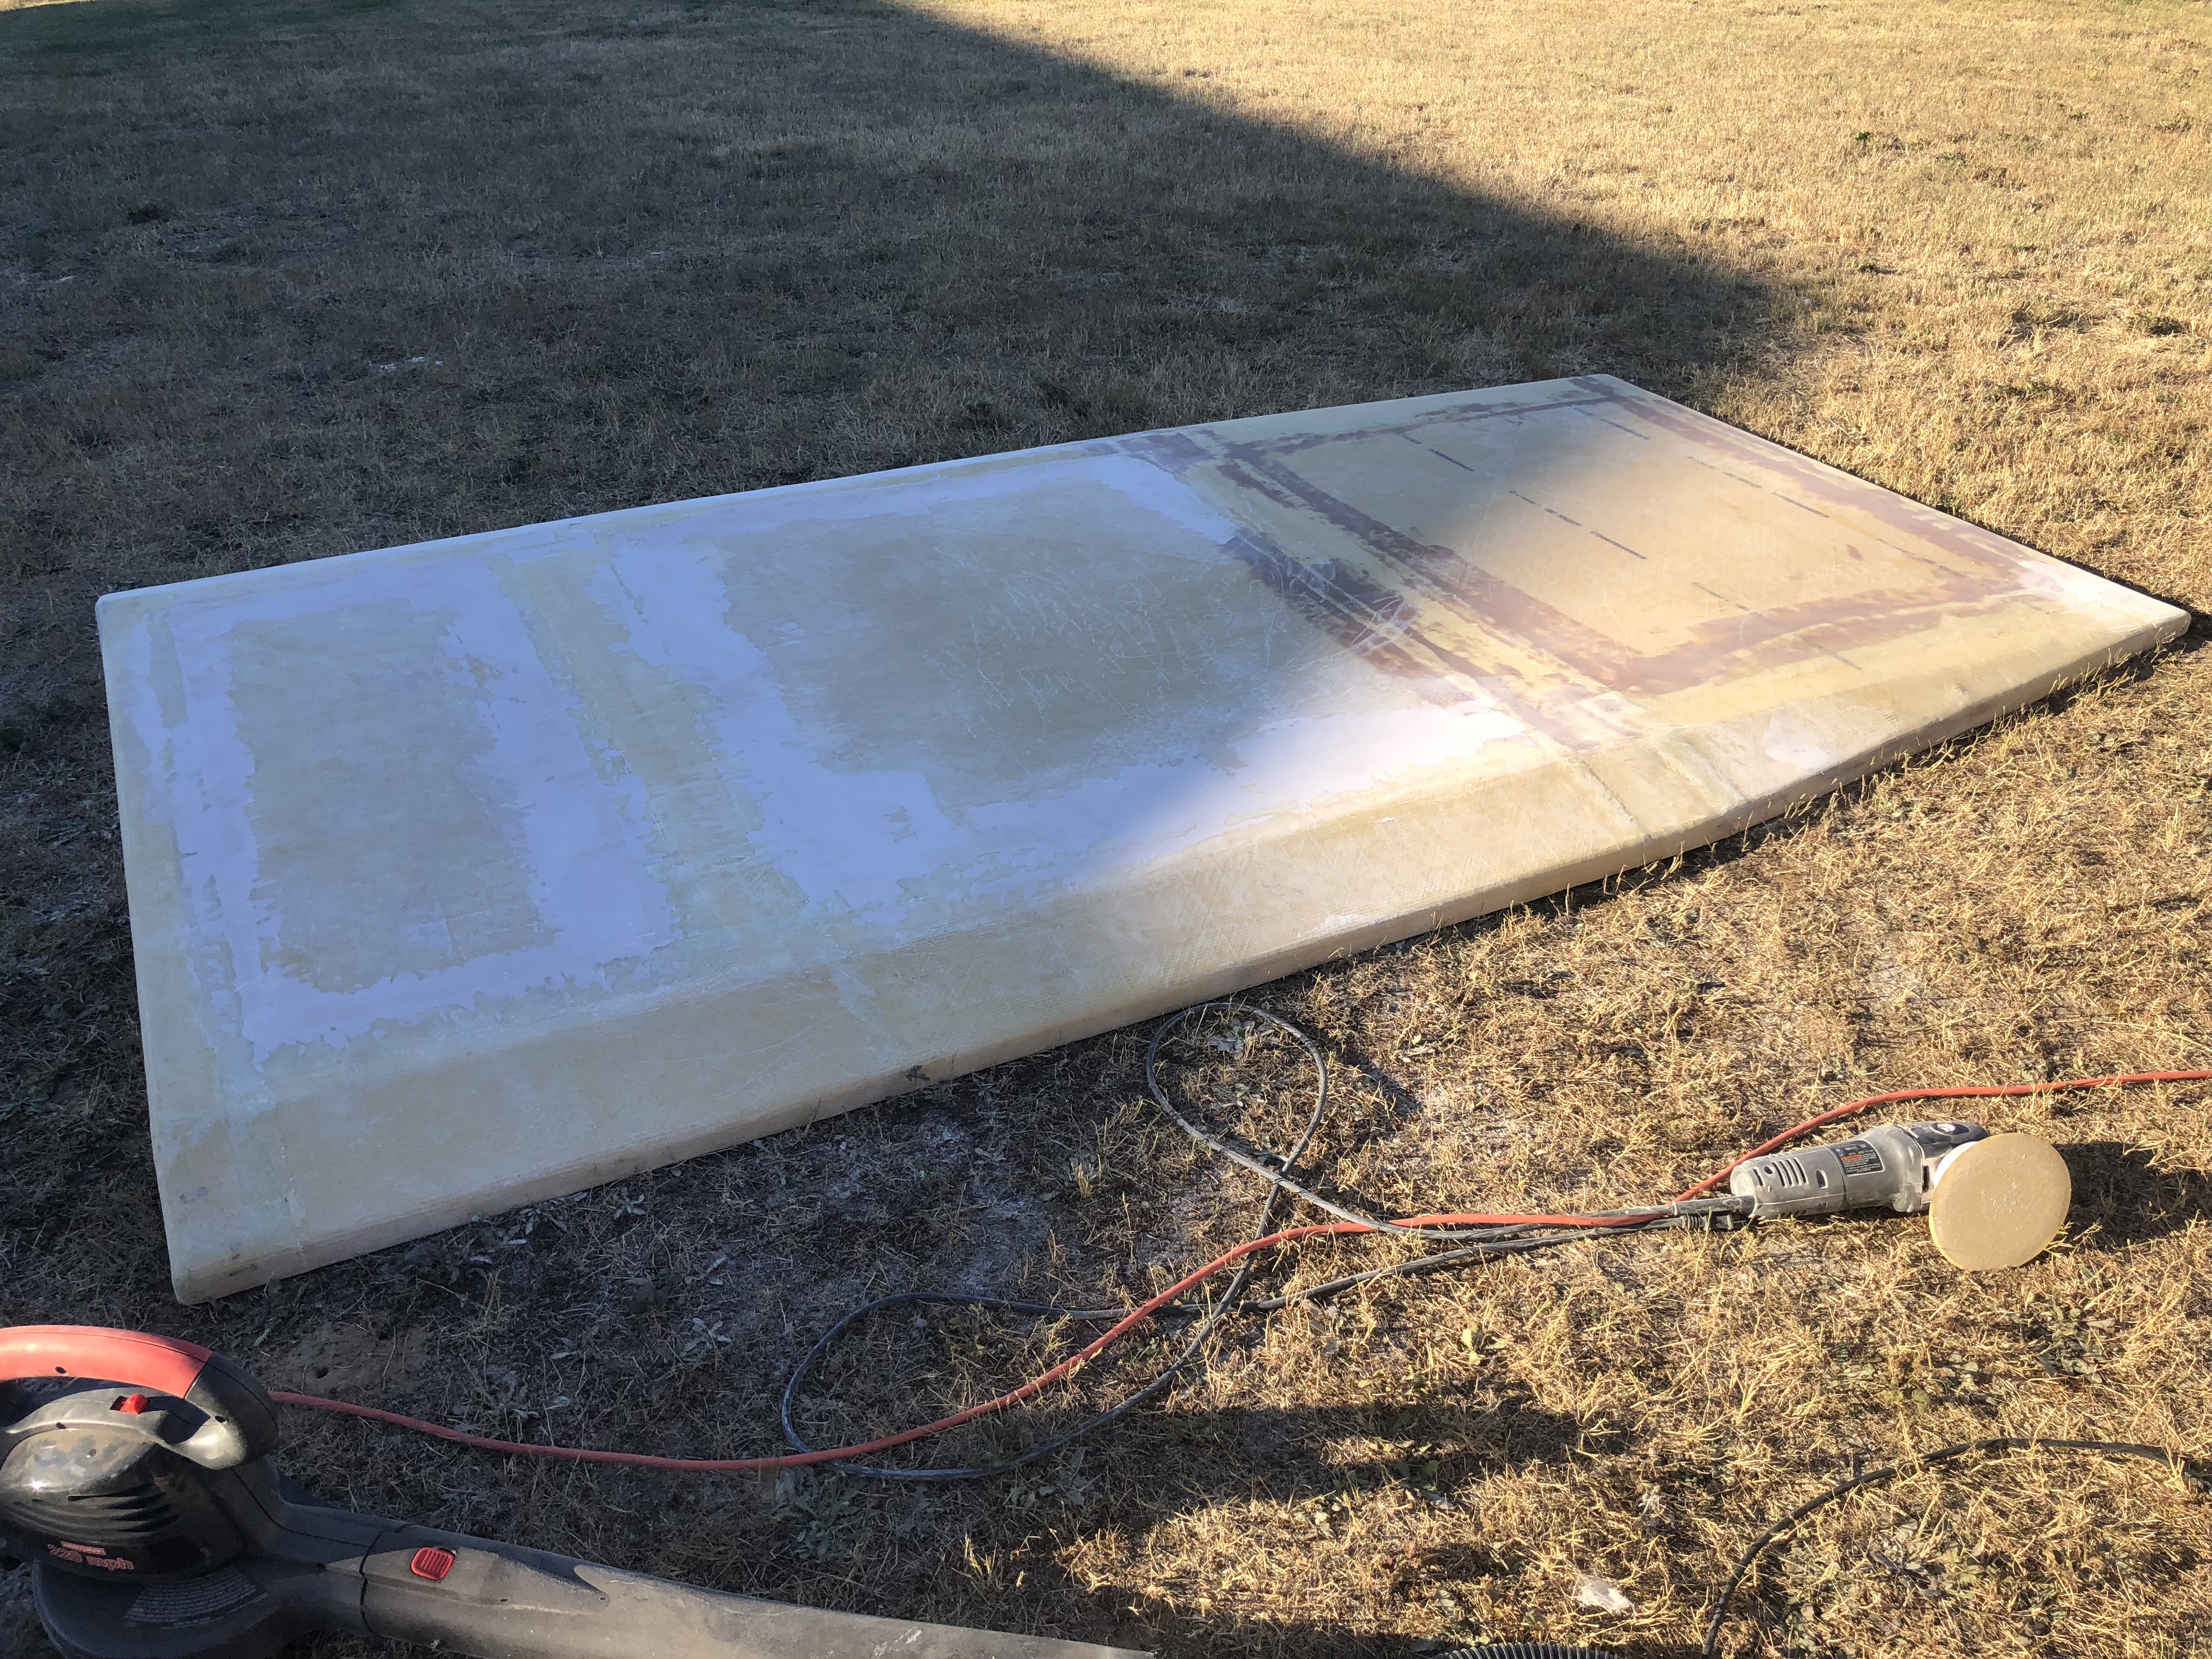
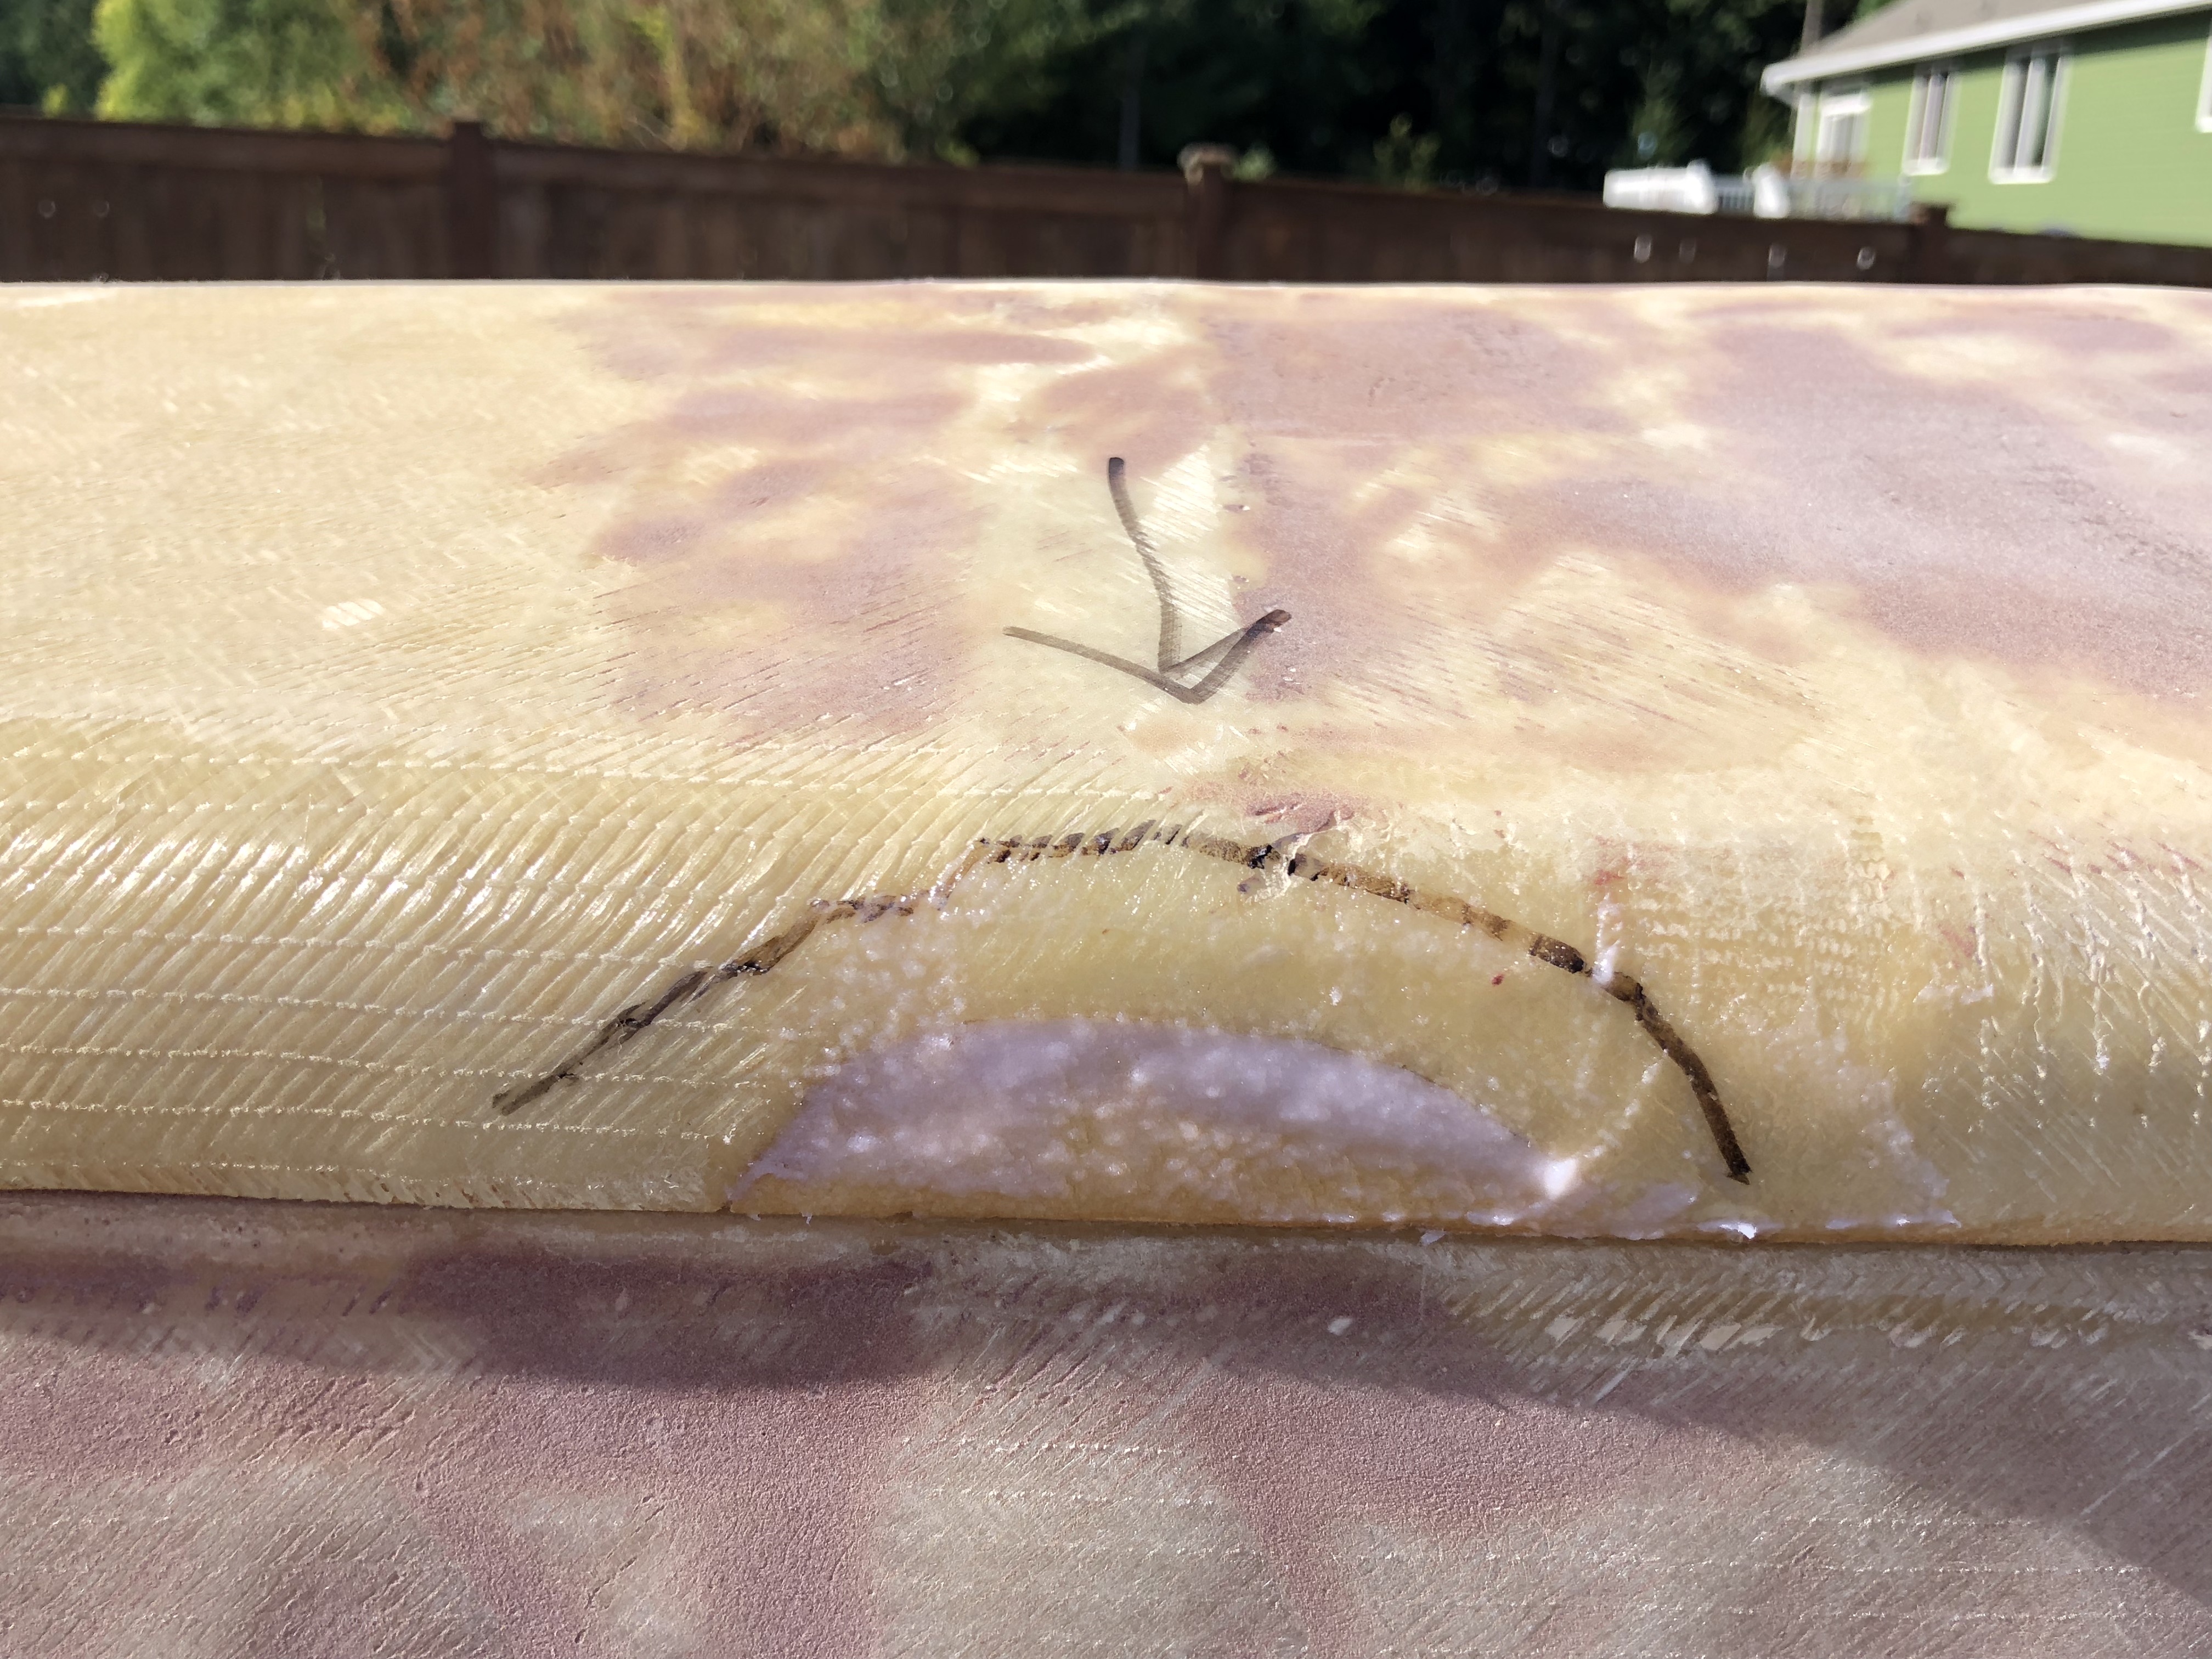
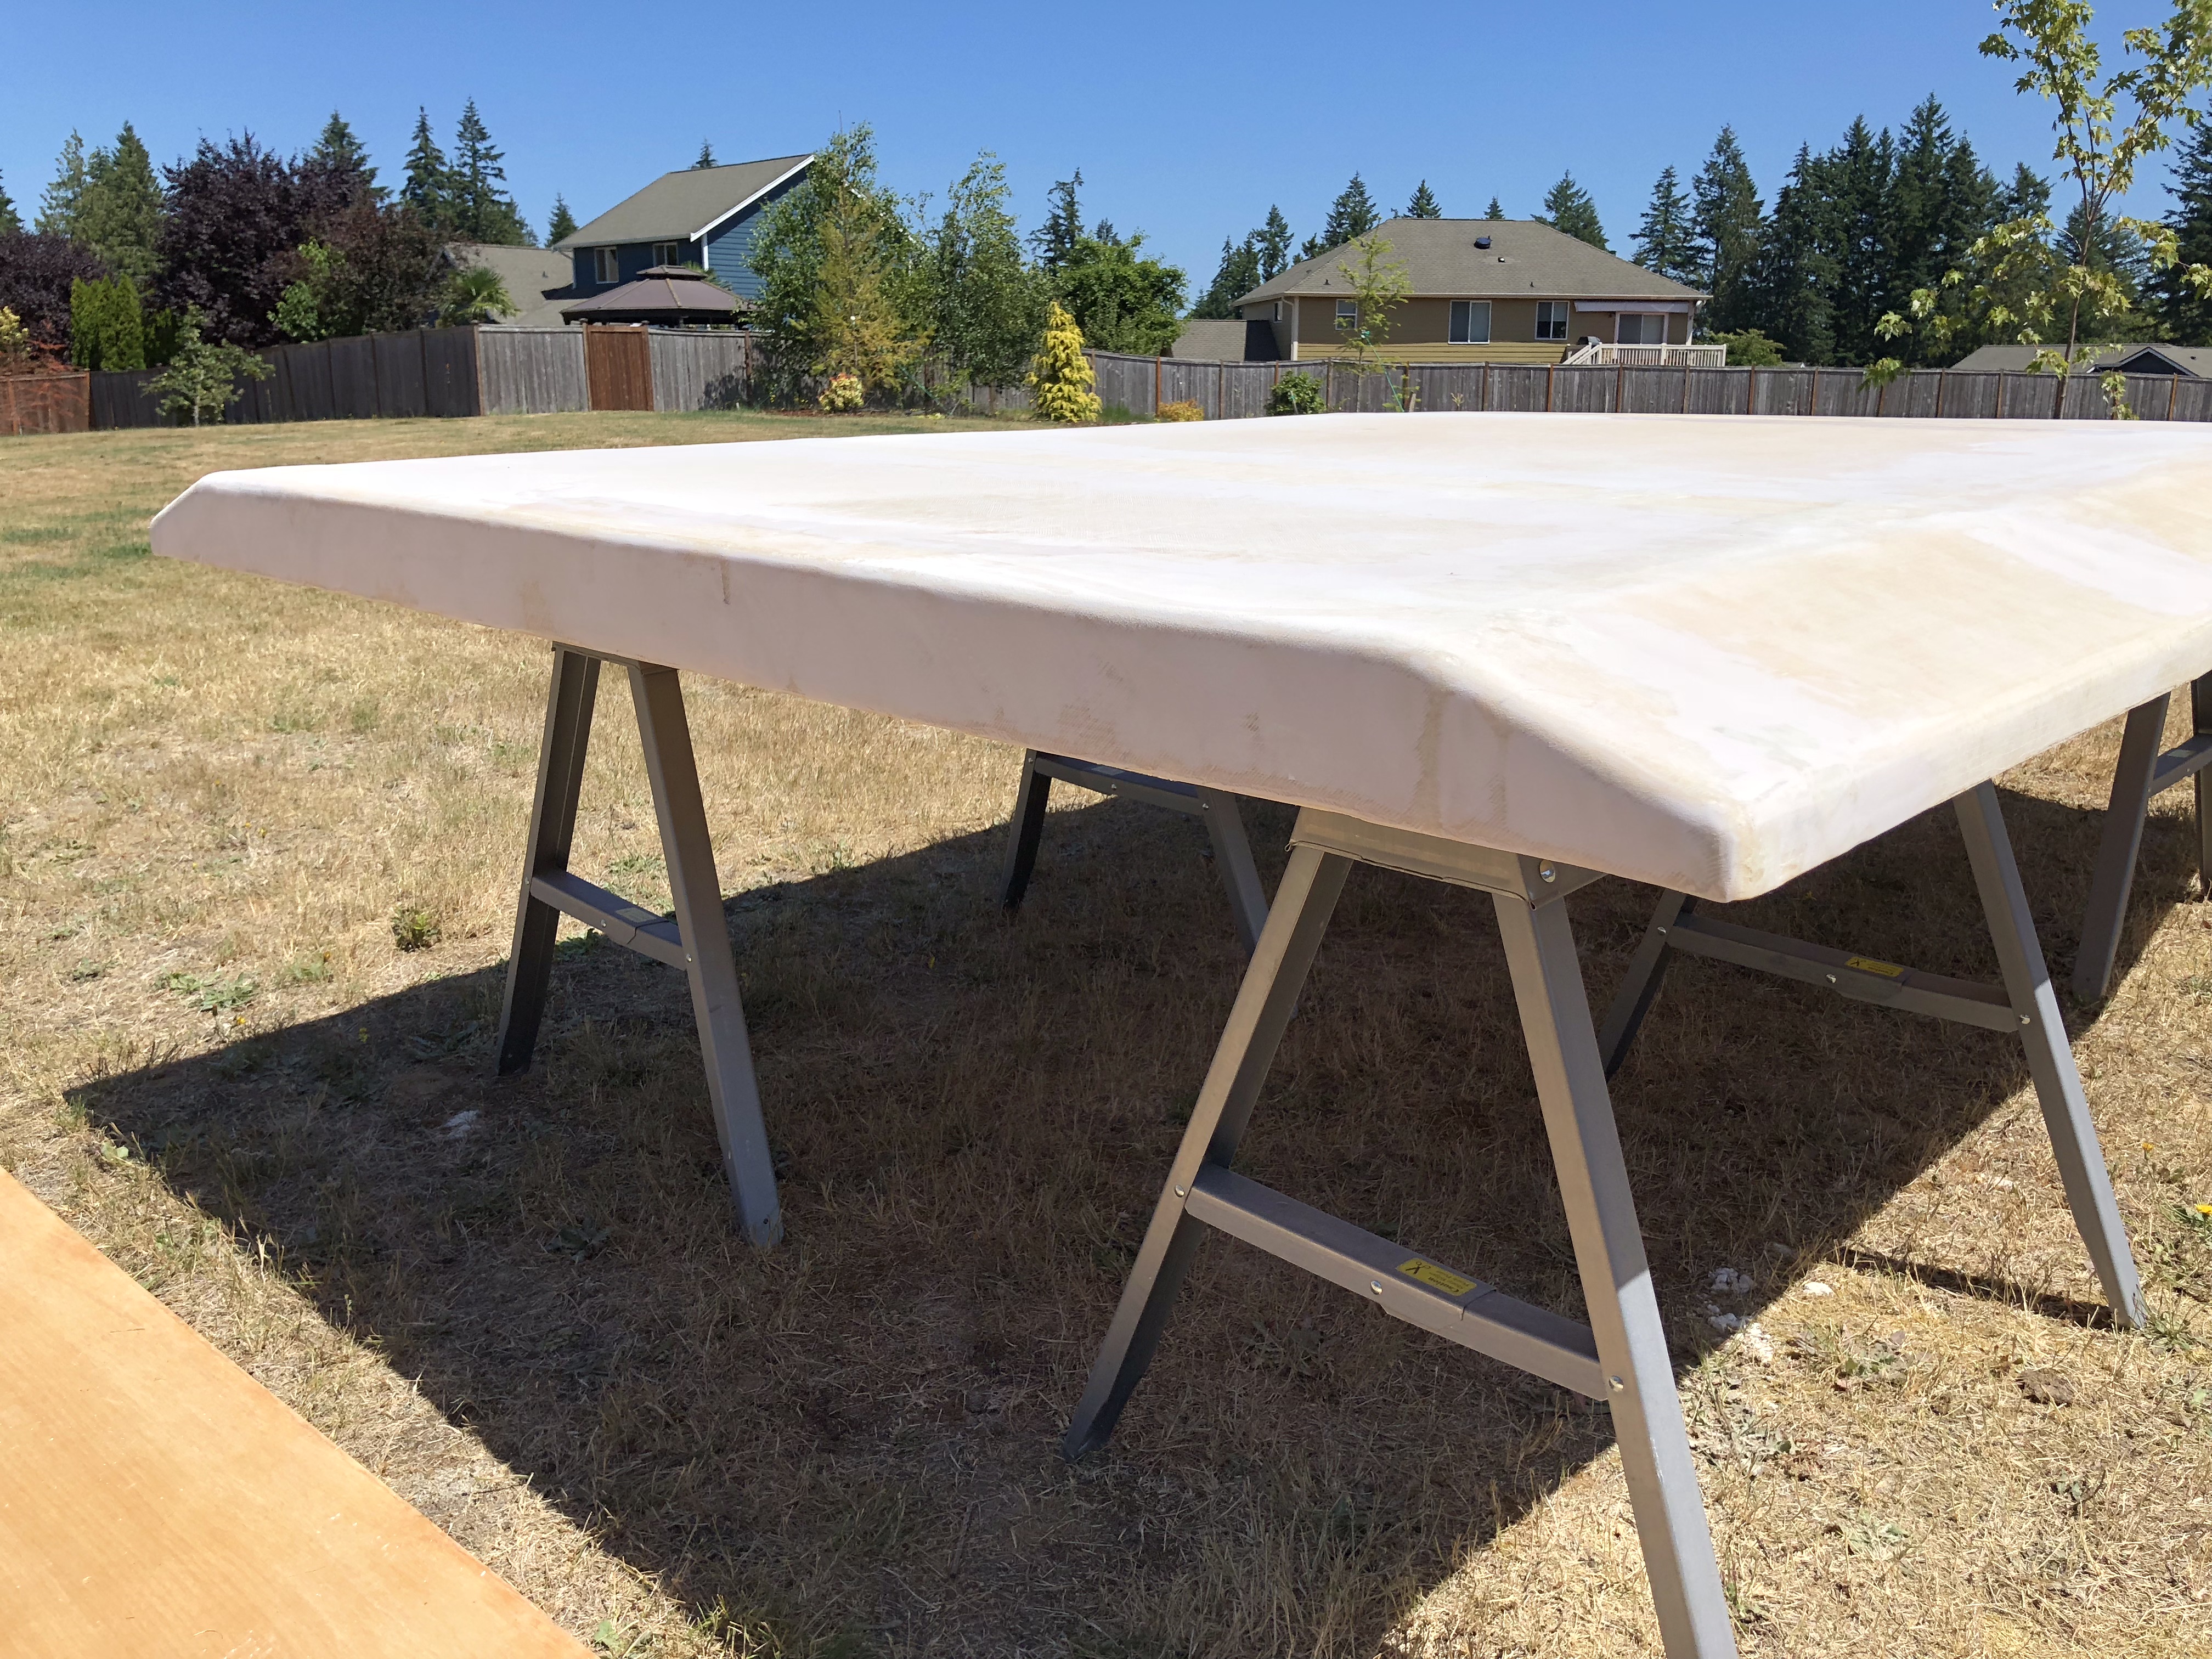
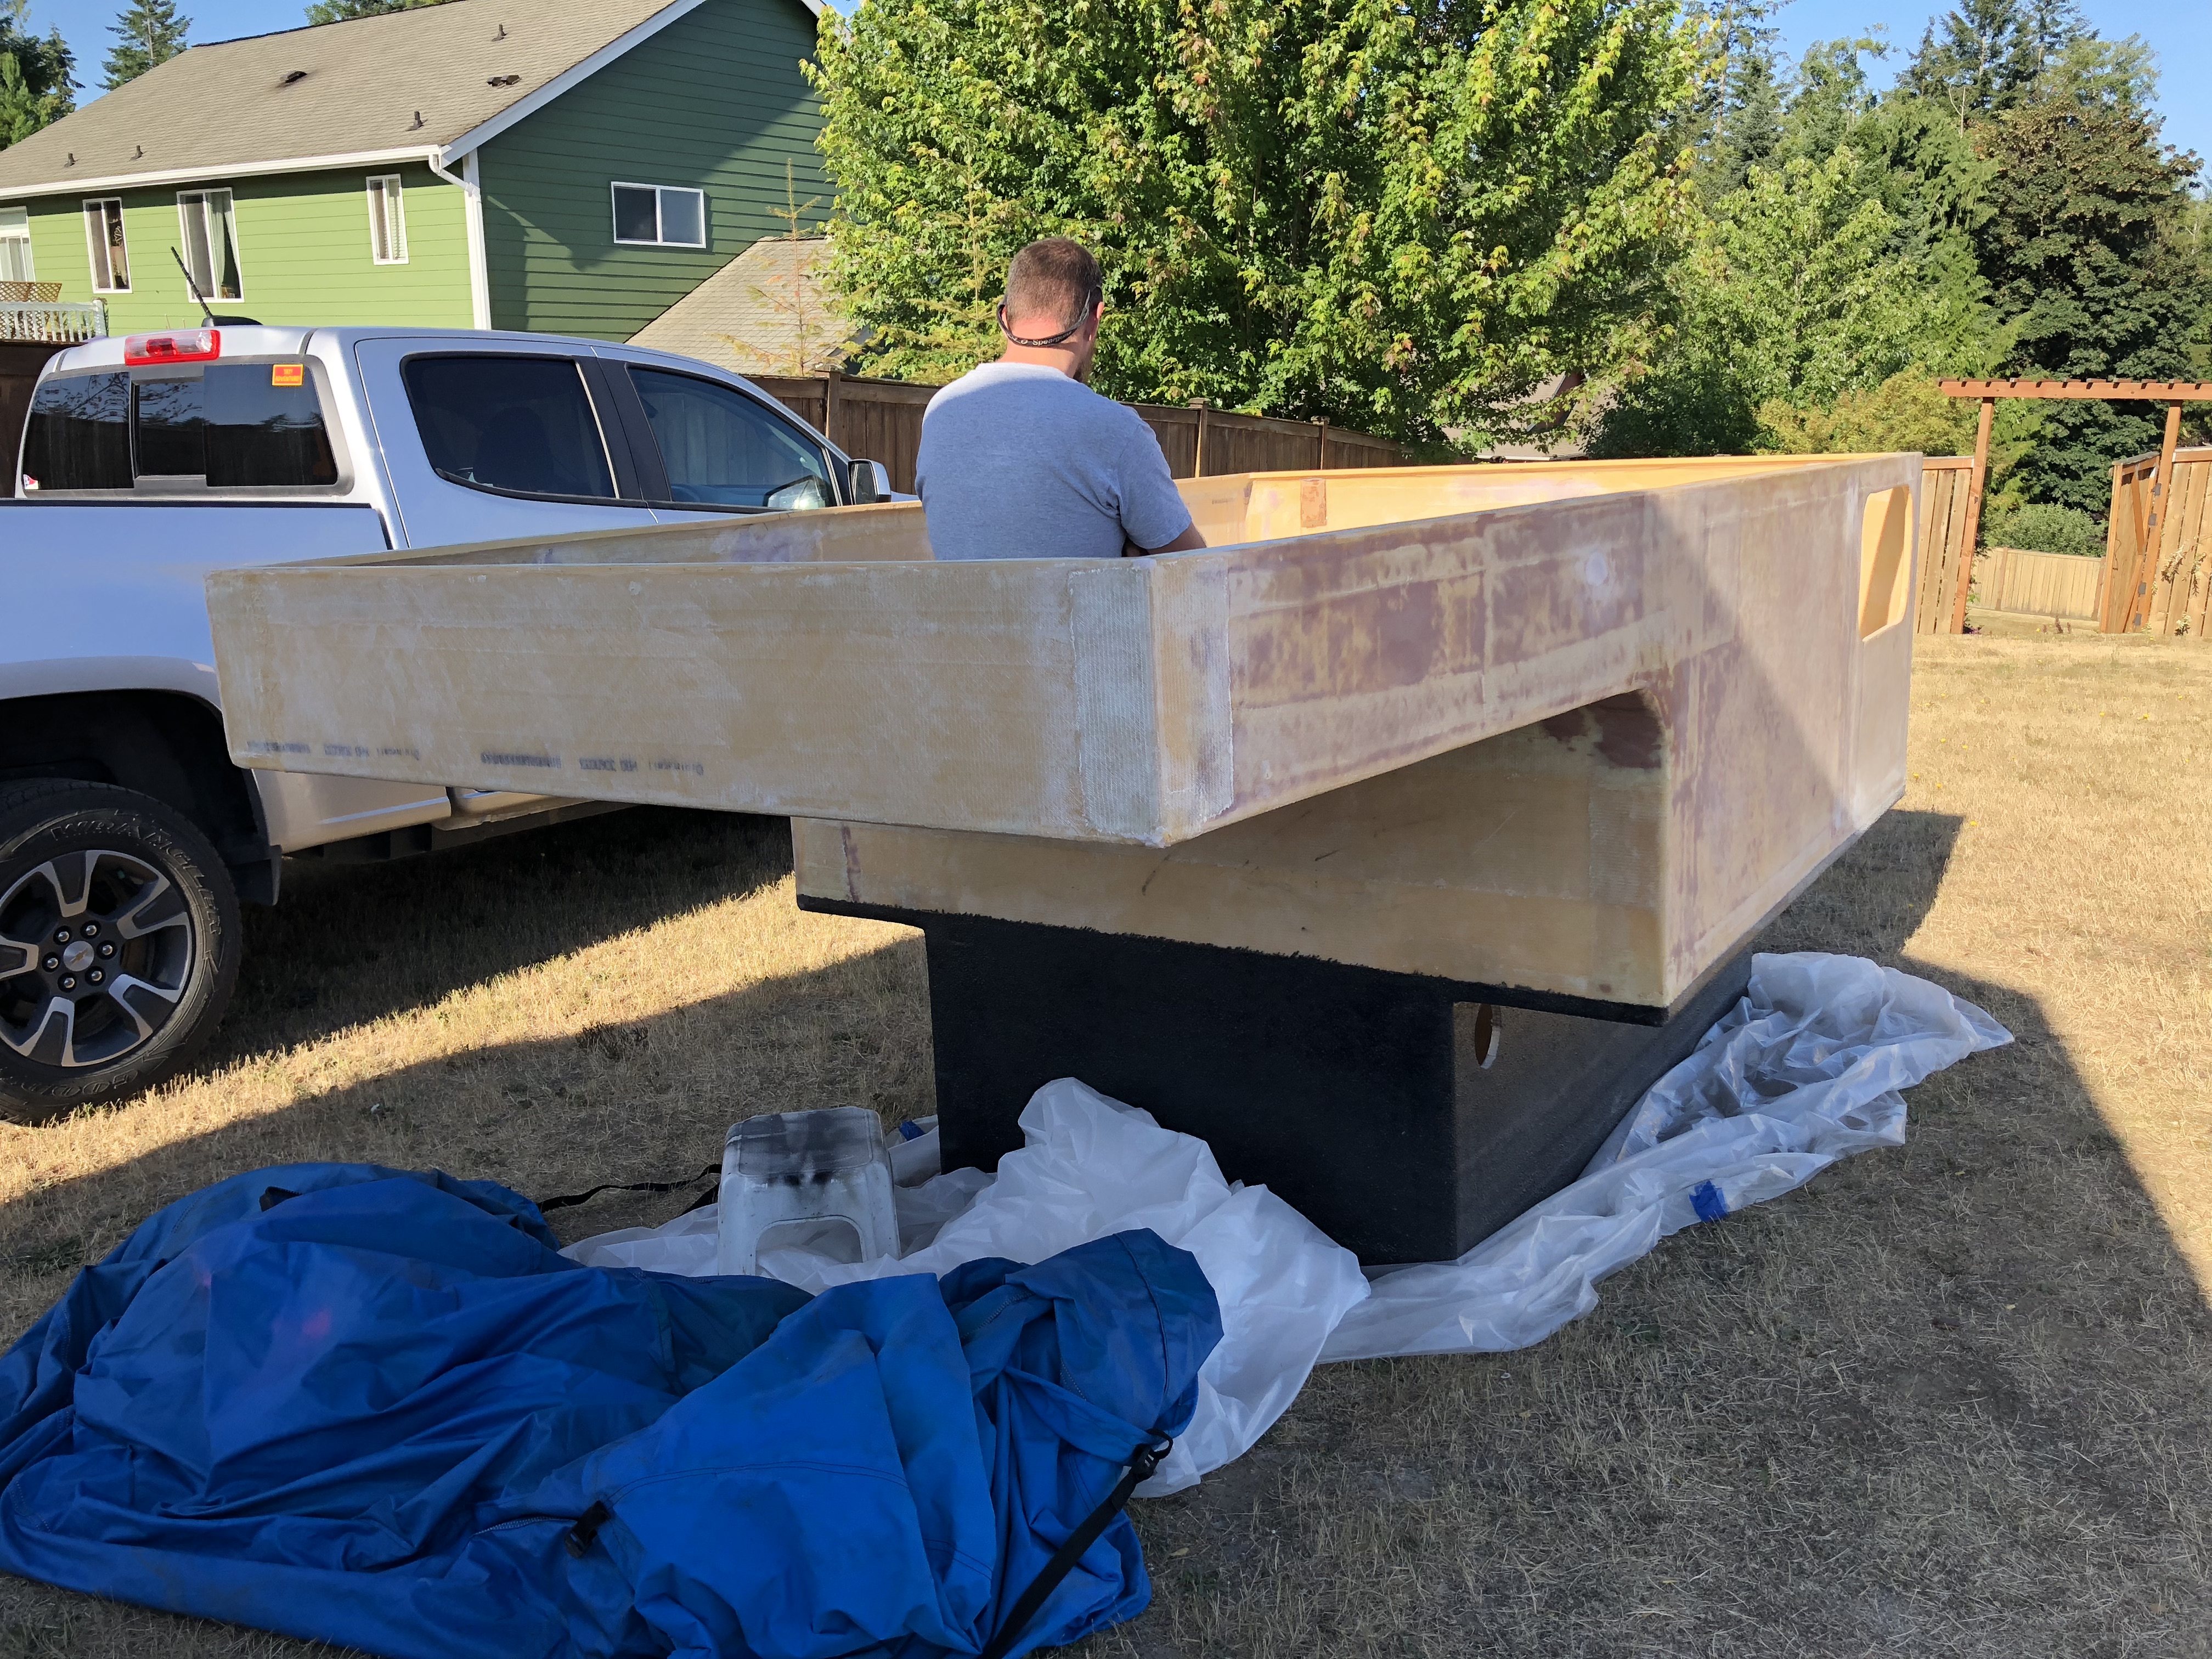
Now that the camper shell is so close to being "done" I really really wanted to get it painted soon! If anything just for the motivation factor of seeing it in paint! There was still a lot of prep work to do though. I made sure to be extra careful where the bedliner bled up onto the fiberglass. That was truly a pain in the ass to sand.
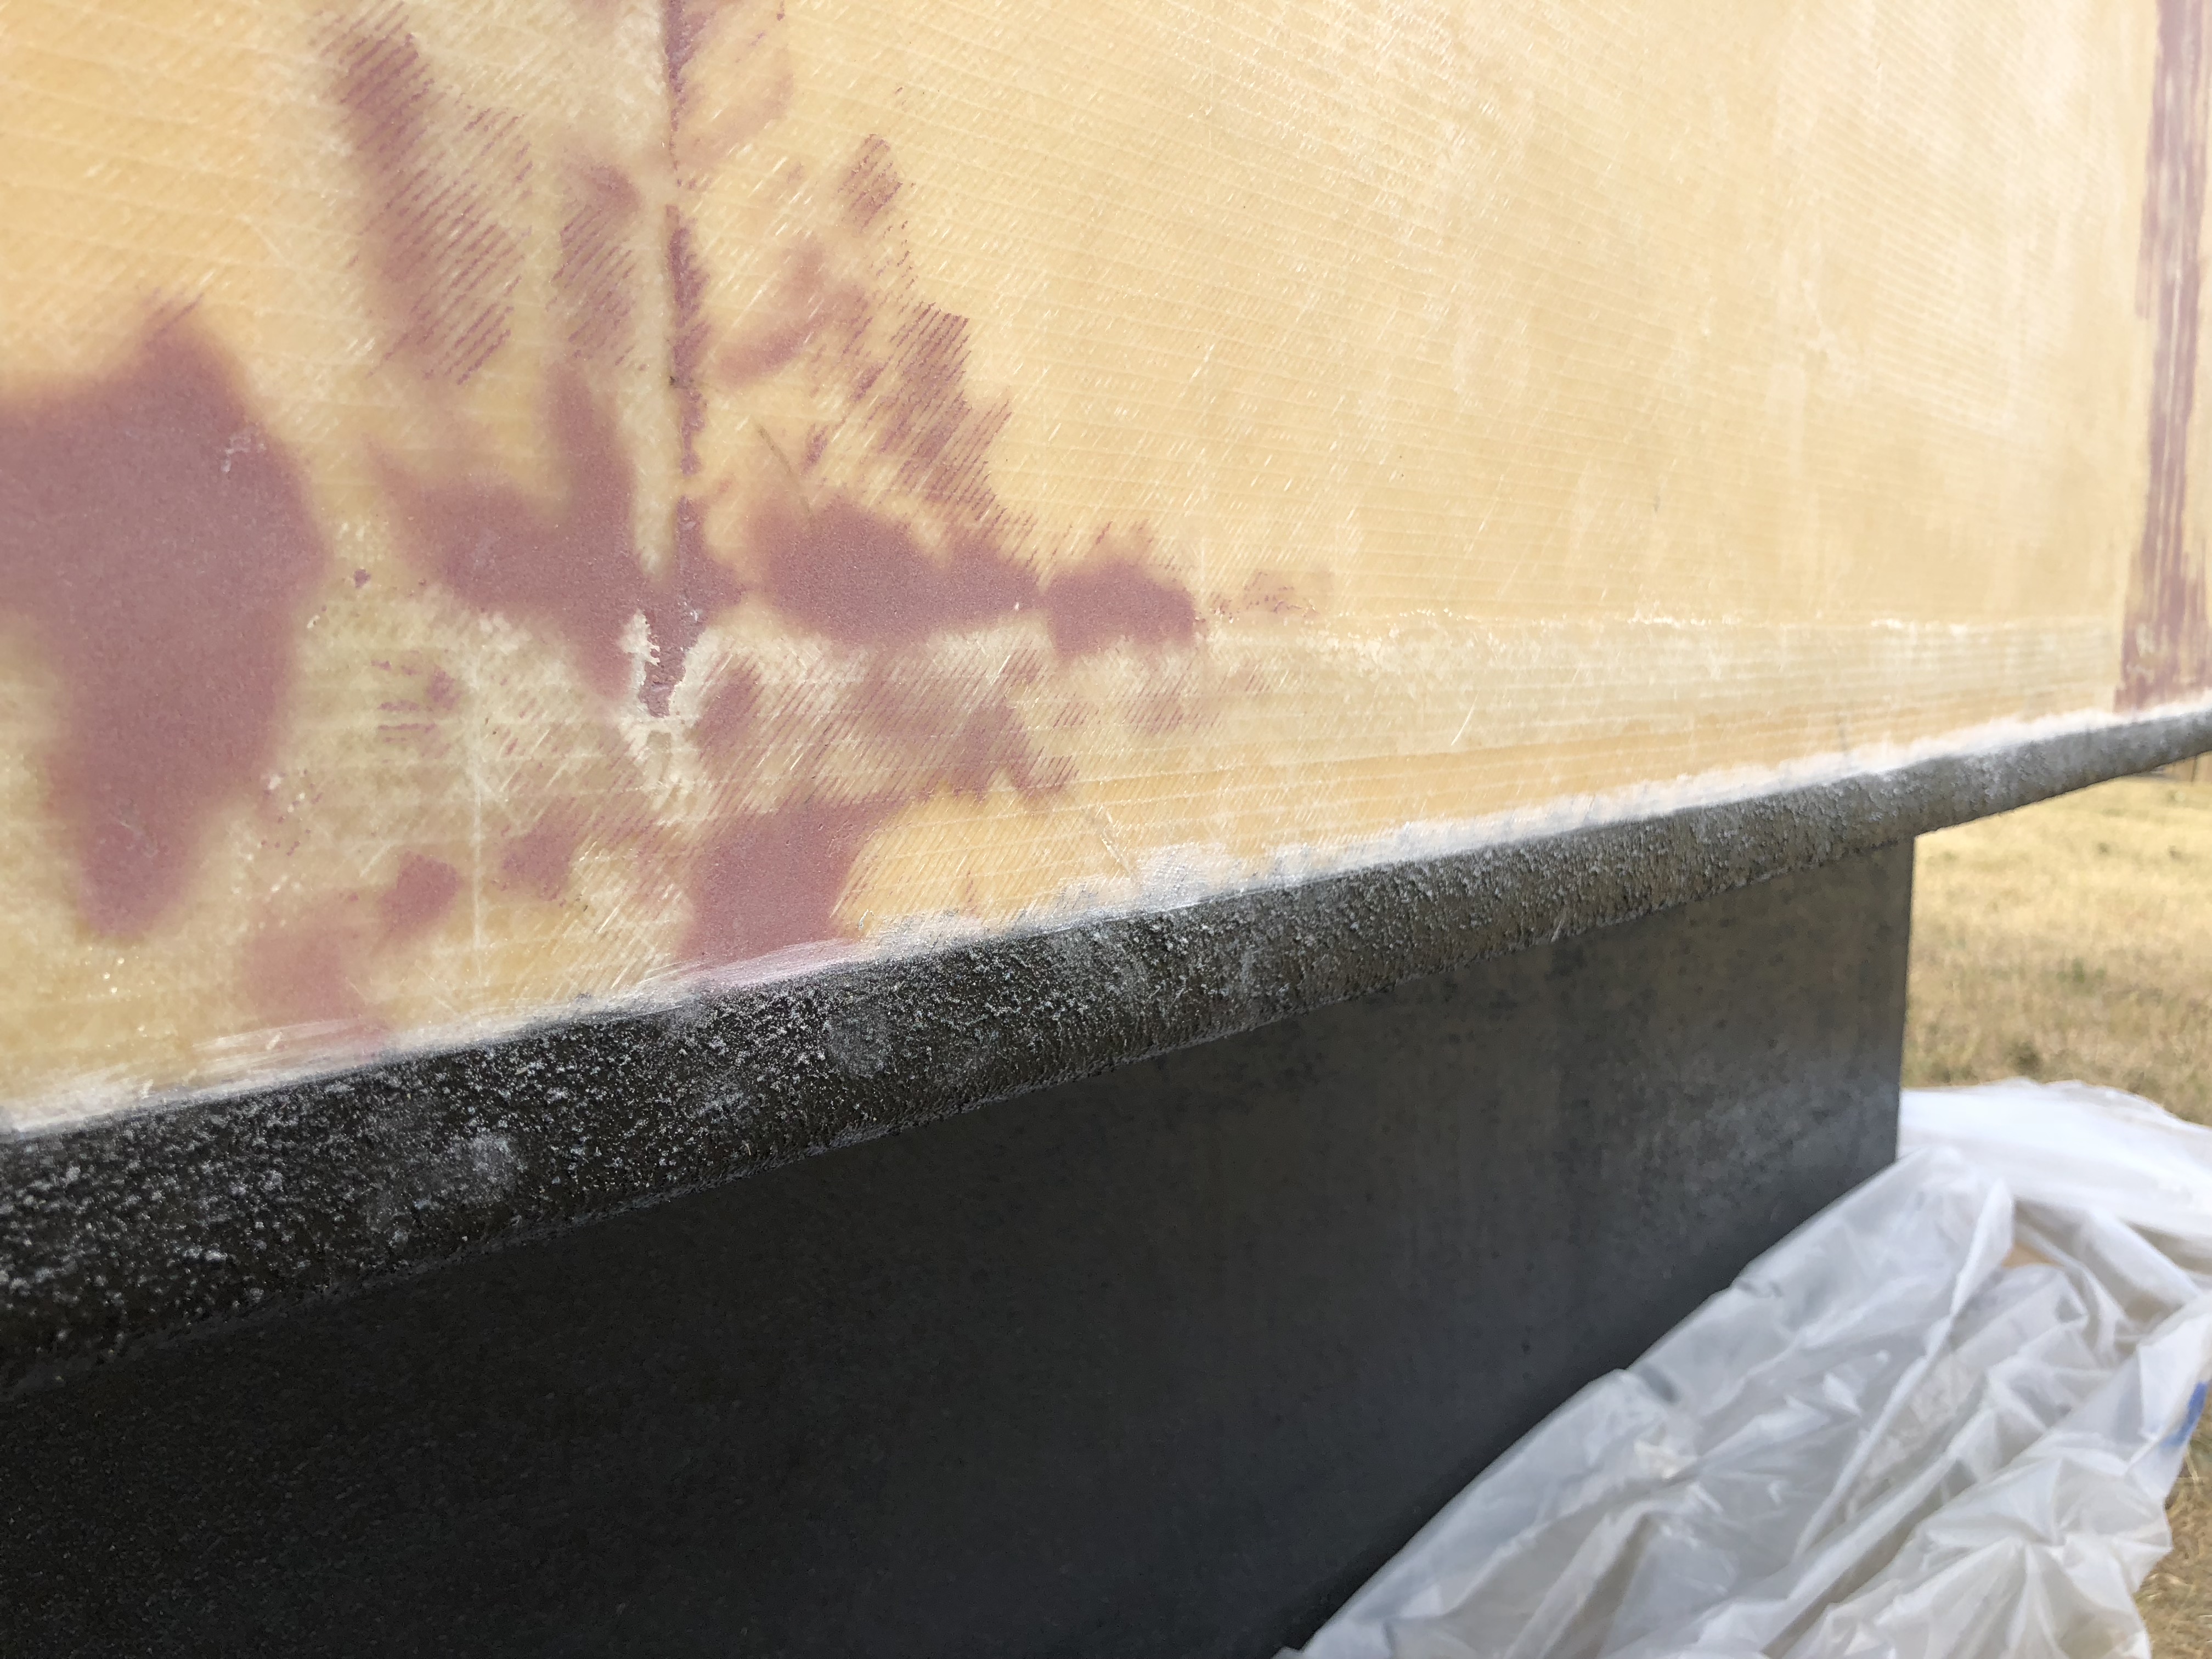
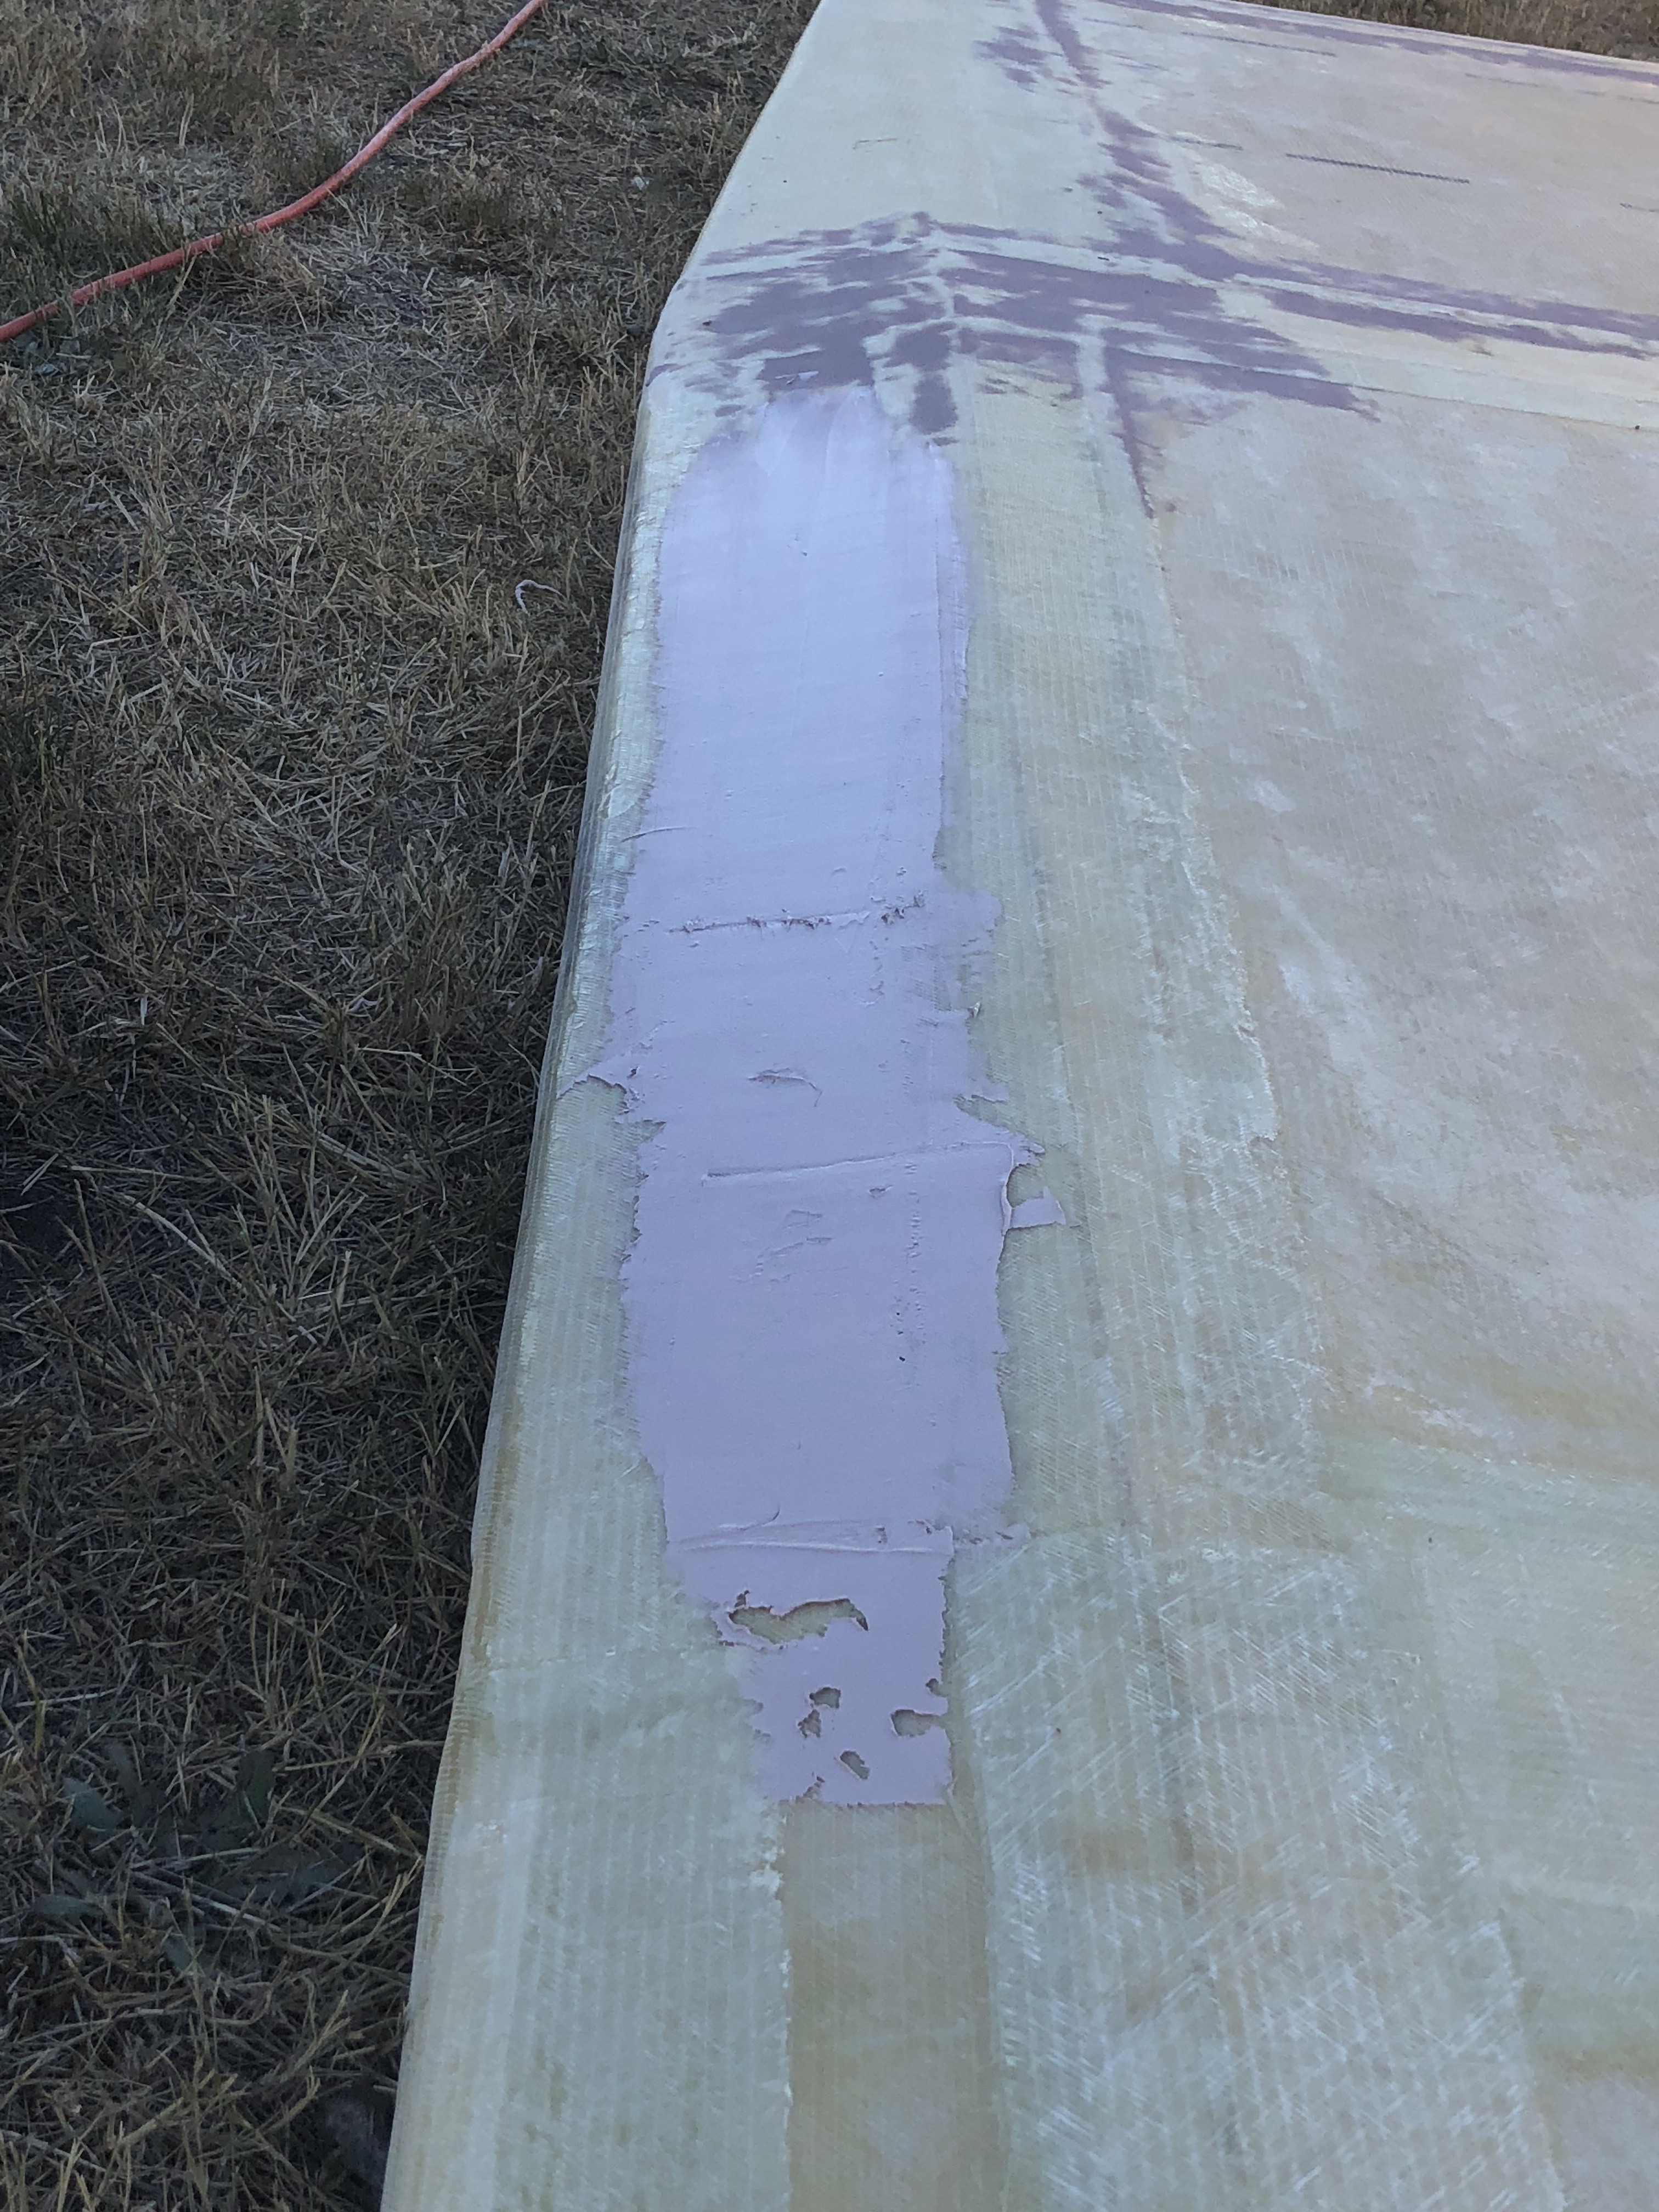
Since the fiberglass was so thick, the overlap between them is very obvious. I mixed some epoxy and filler material and ended up with what amounts to extremely expensive Bondo... The entire camper got a layer of that. I ran out of epoxy entirely just as I finished, which is both convenient and frustrating because now I need even more epoxy to keep working.
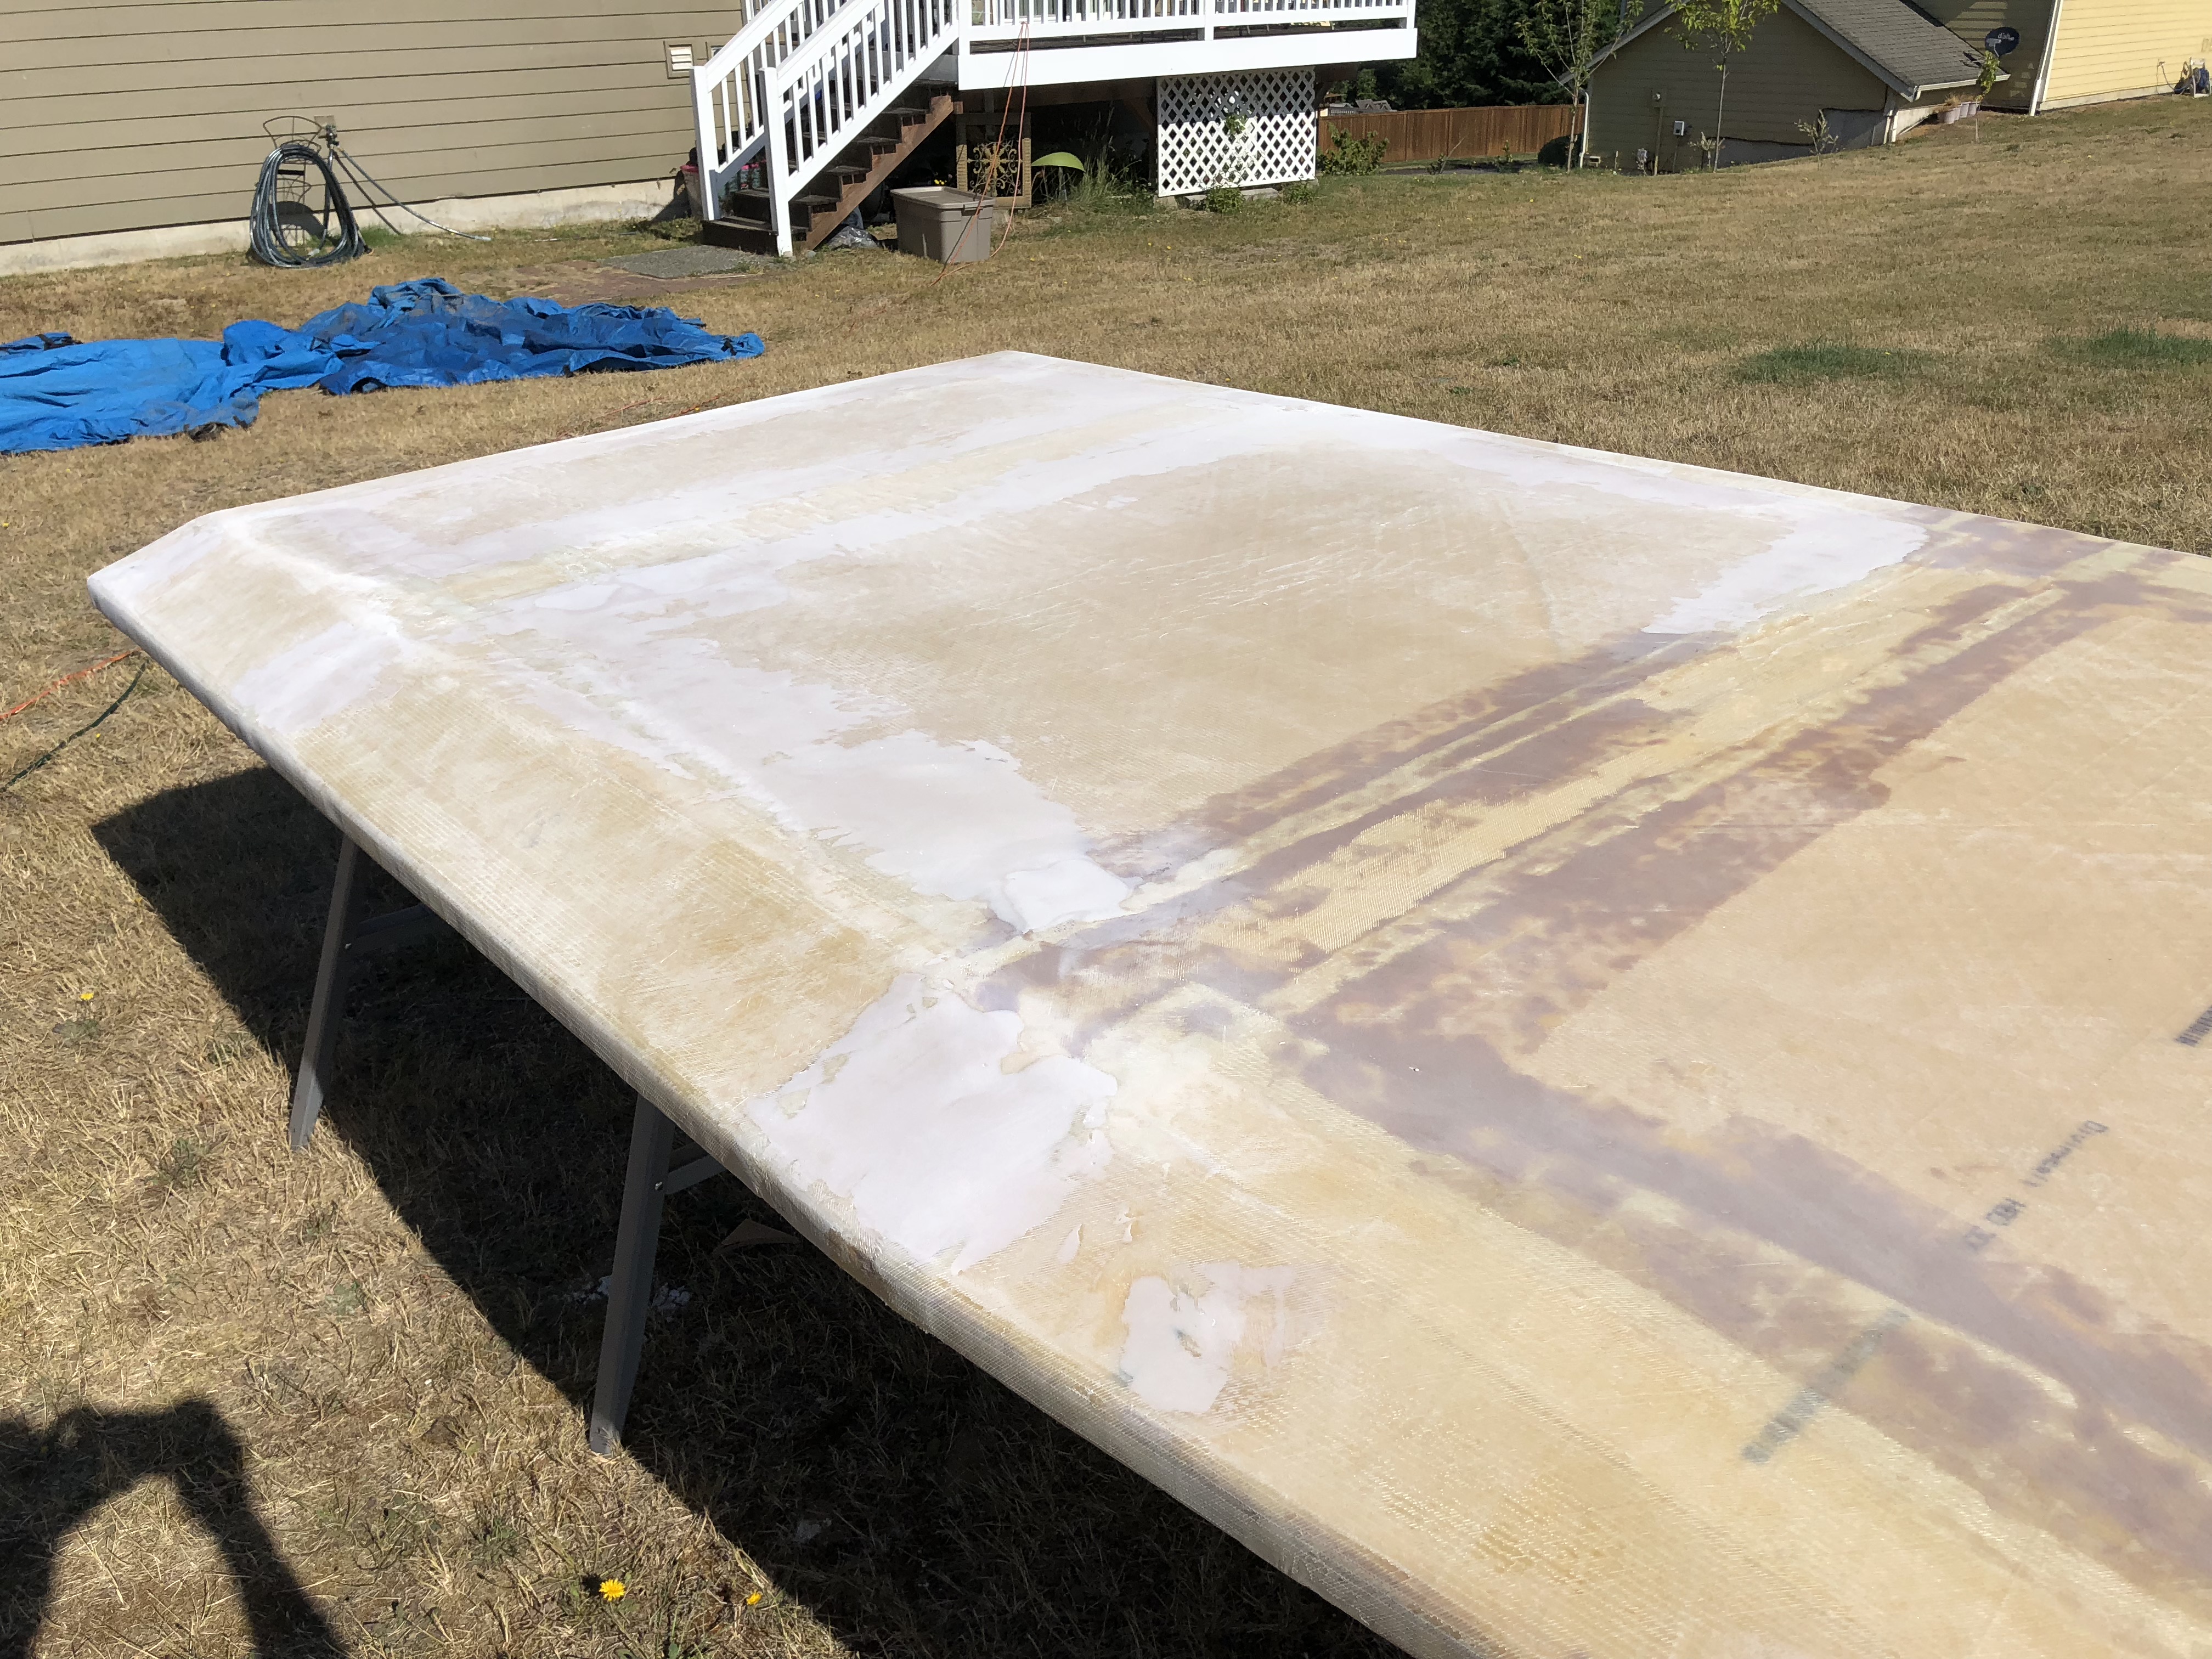
While the filler on the shell was setting up, I moved back over to the roof and sanded the inside. Since the filler still hadn't hardened I flipped the roof over and did the other side.
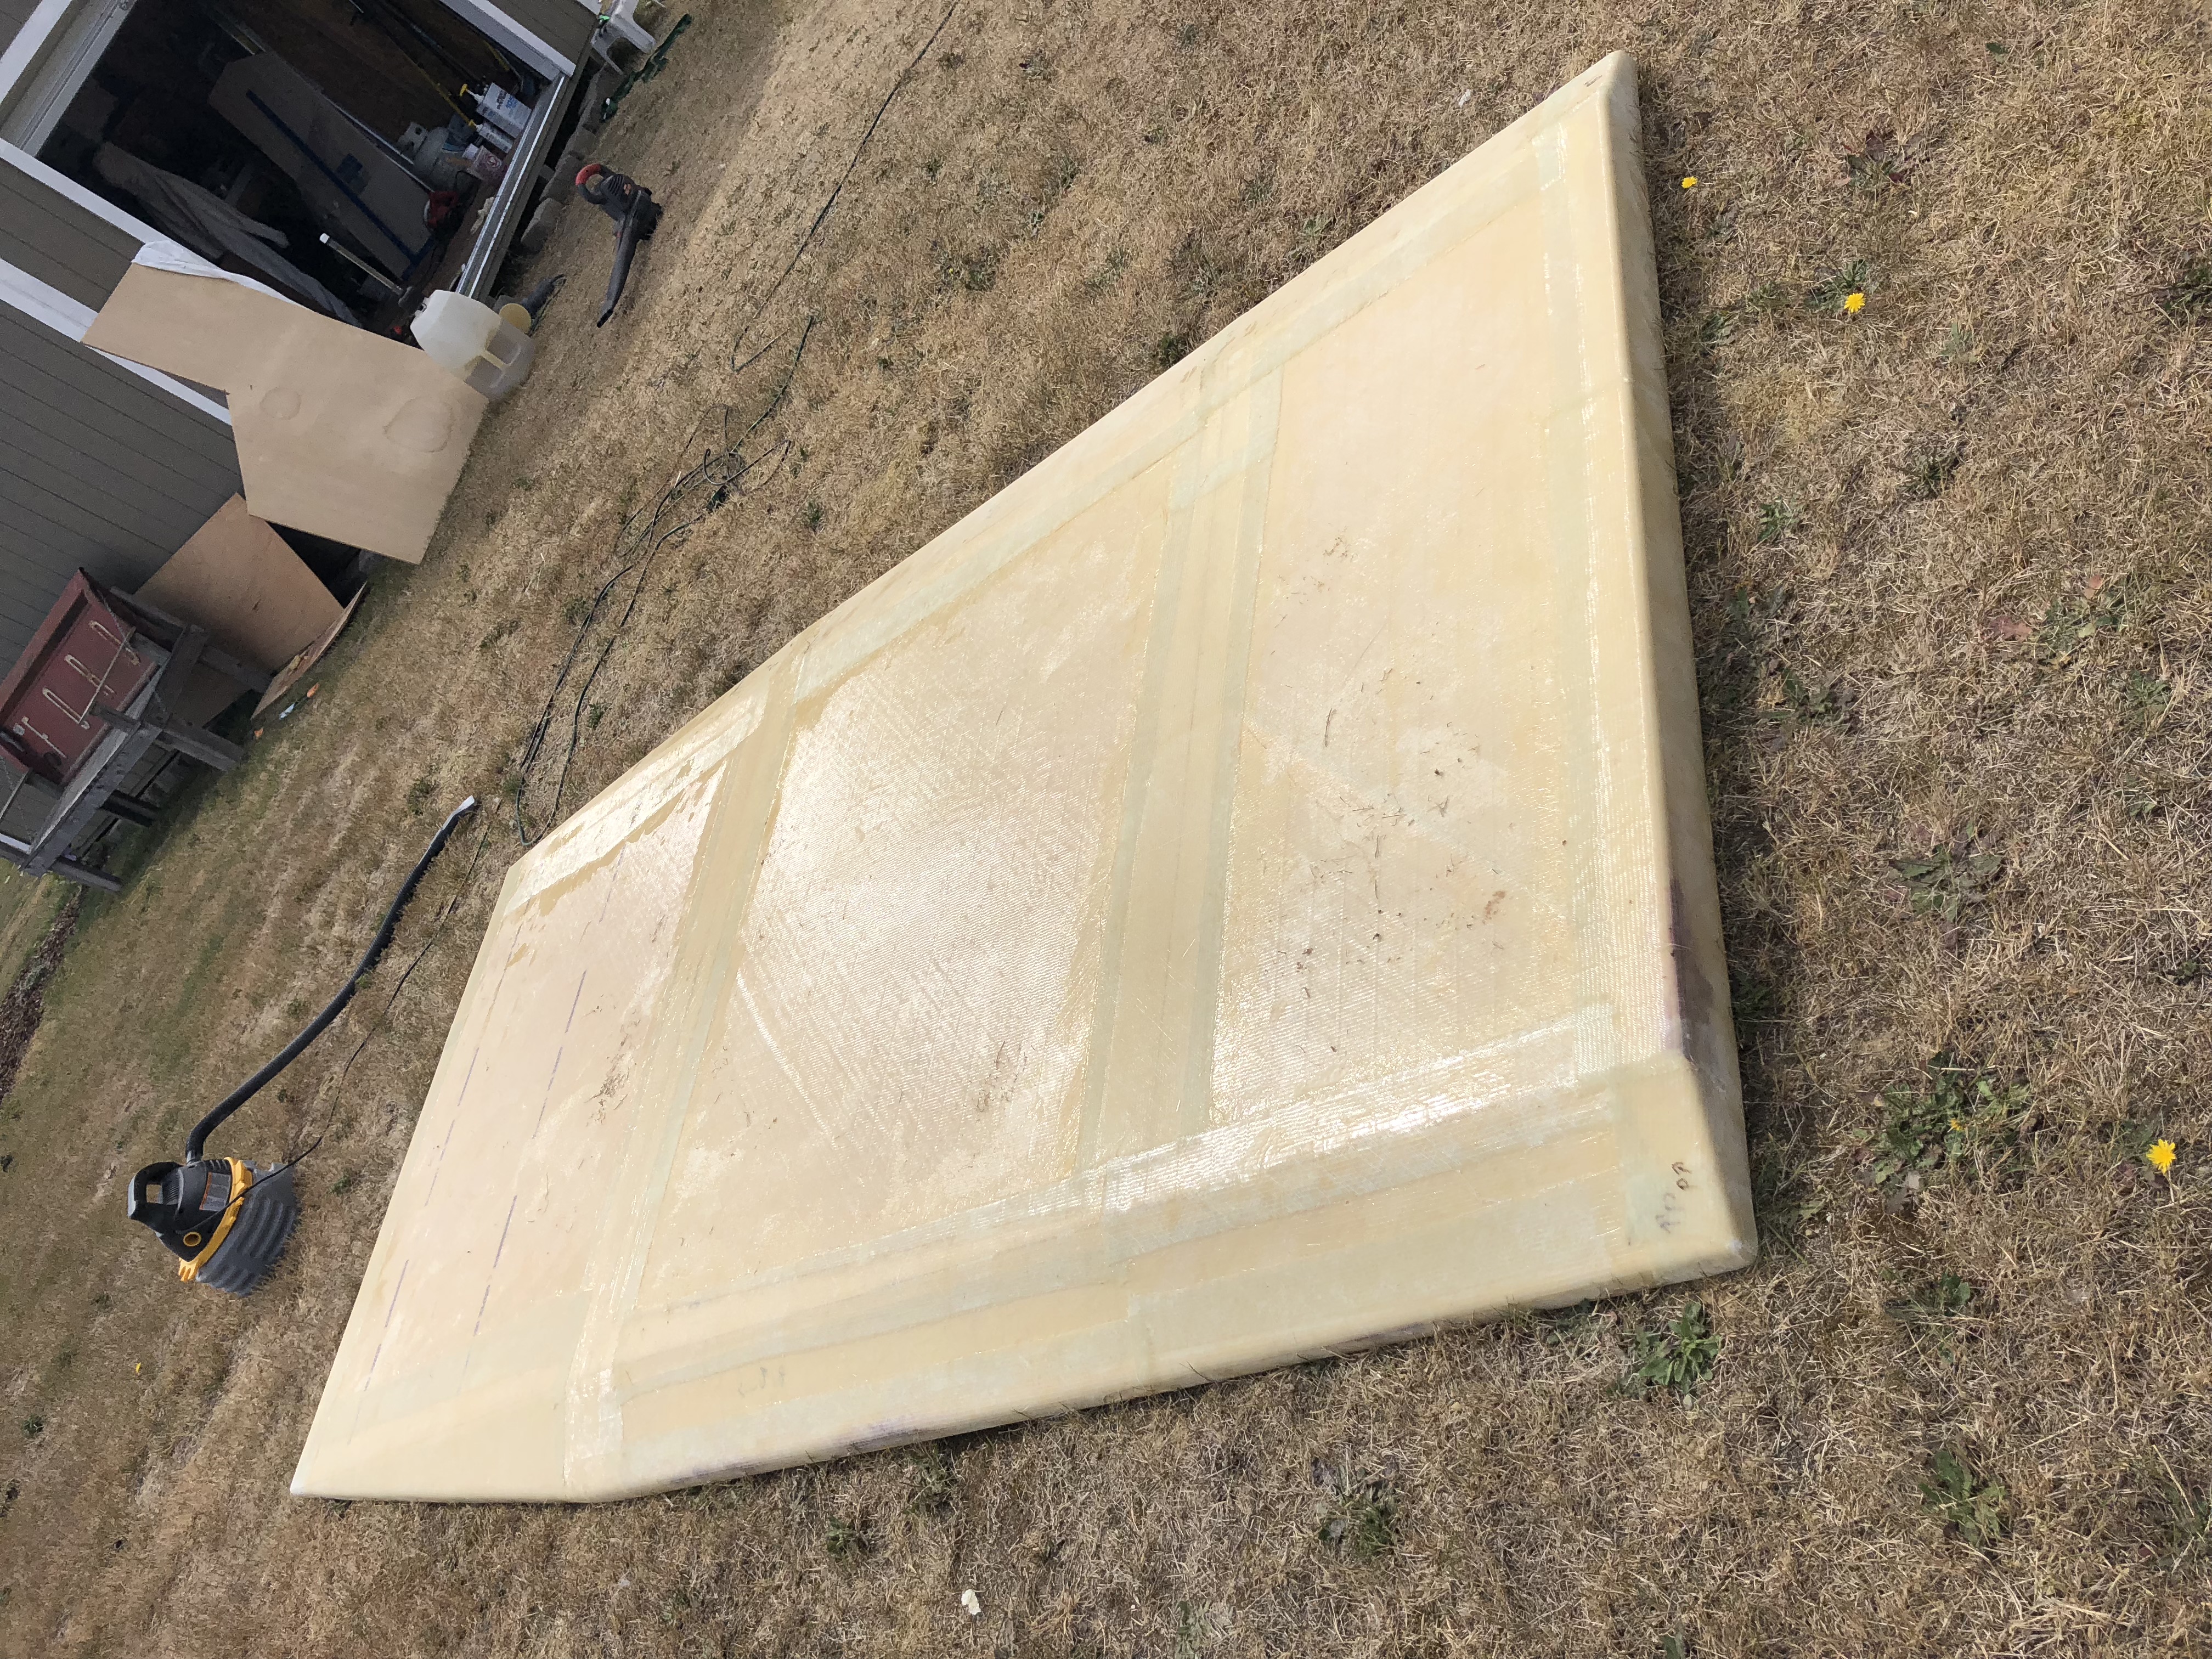

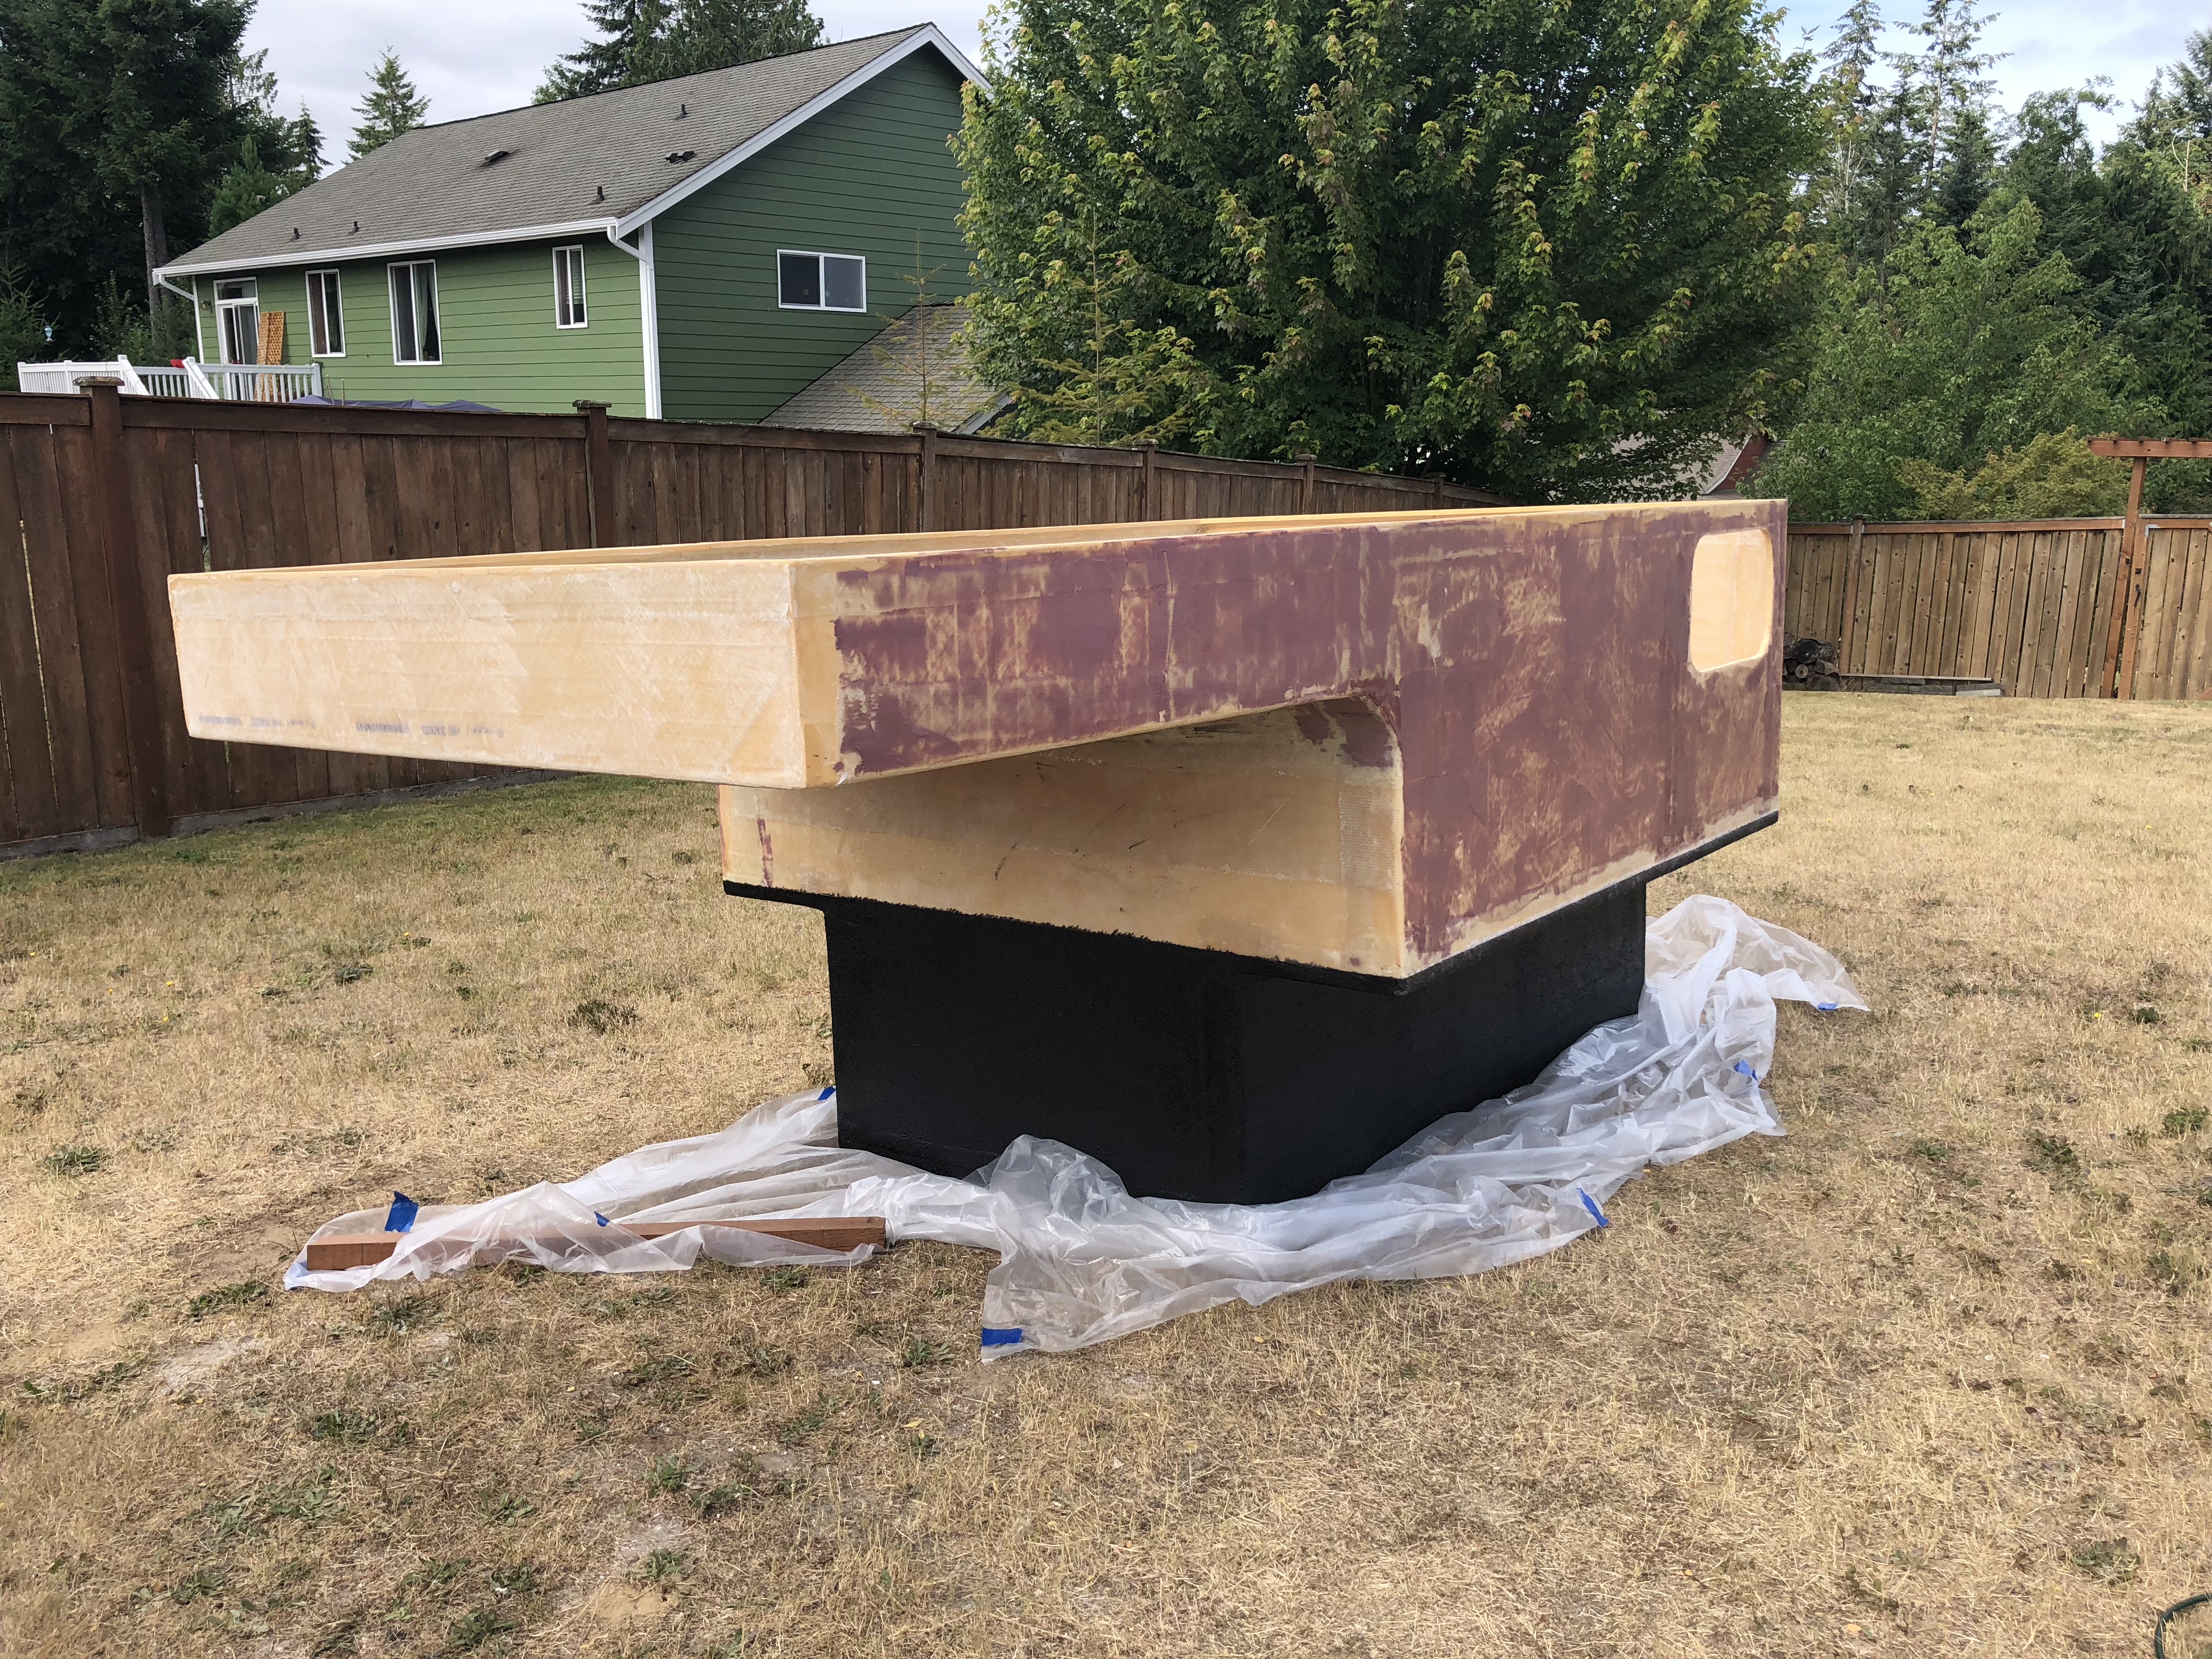
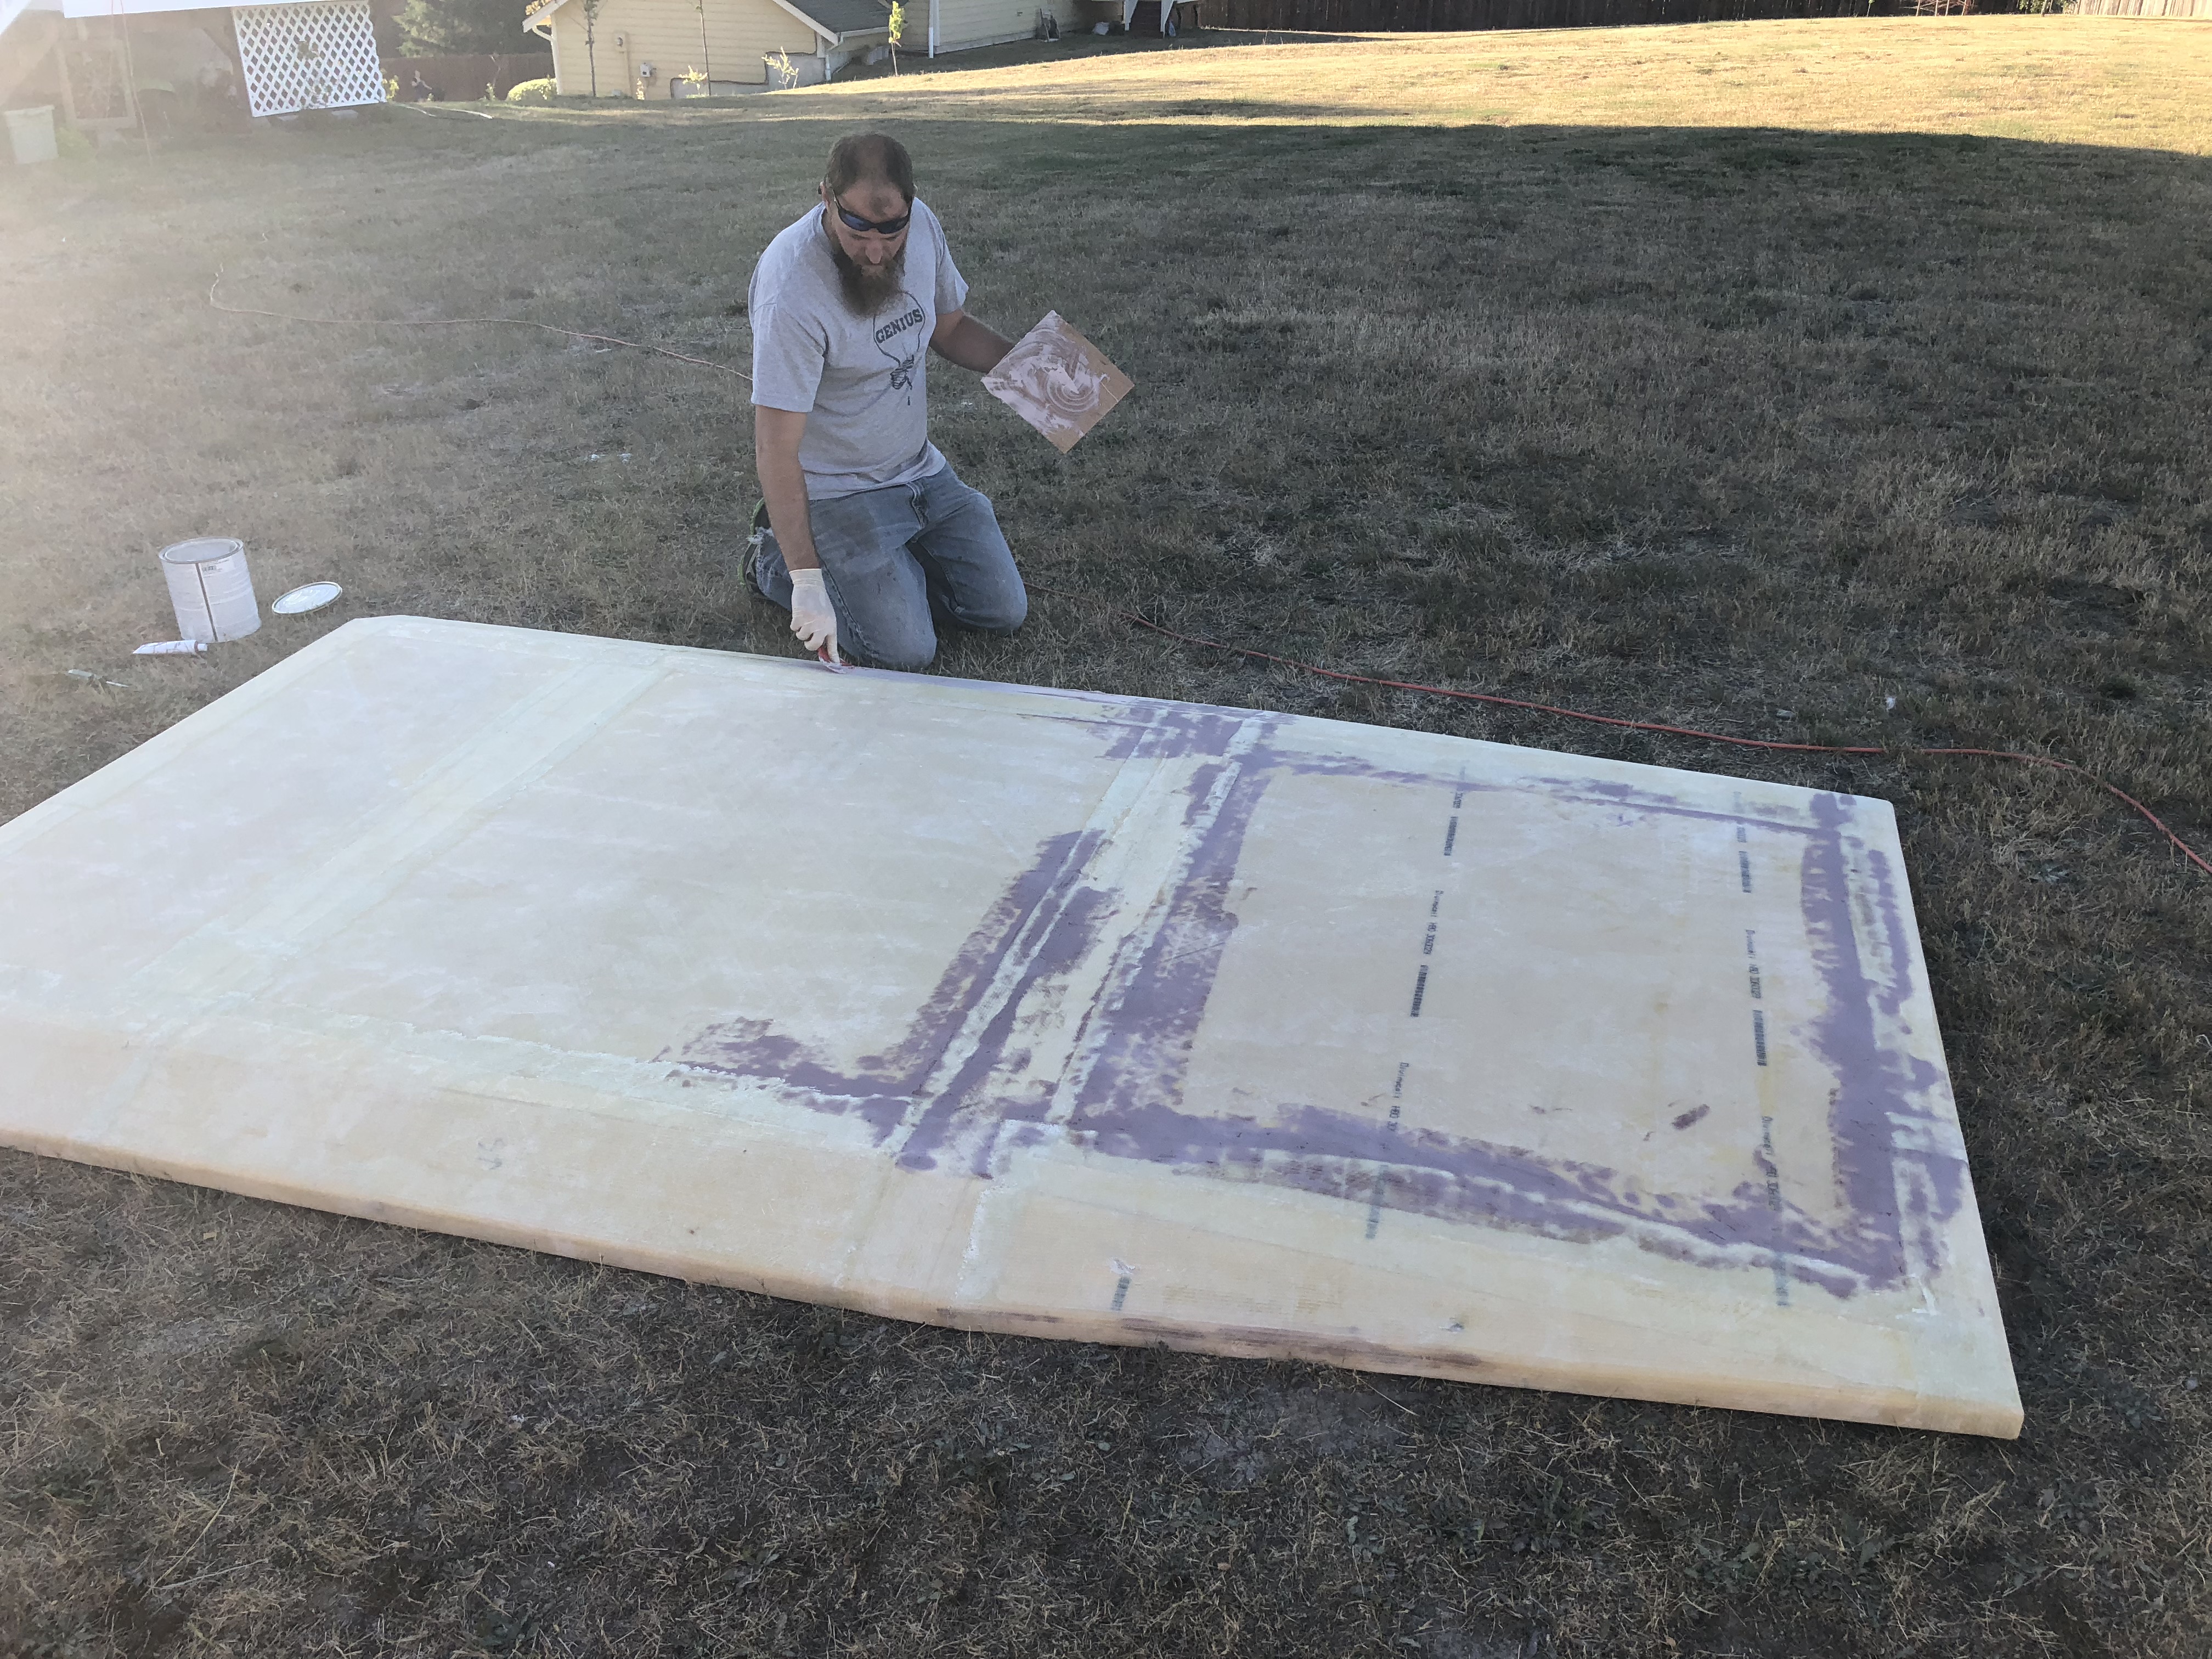
Sanding the filler on the shell took way longer than I thought it would. With Jason and I both working it still took a few hours. (a few hours covered in Tyvek with a respirator is still way too damn long!)
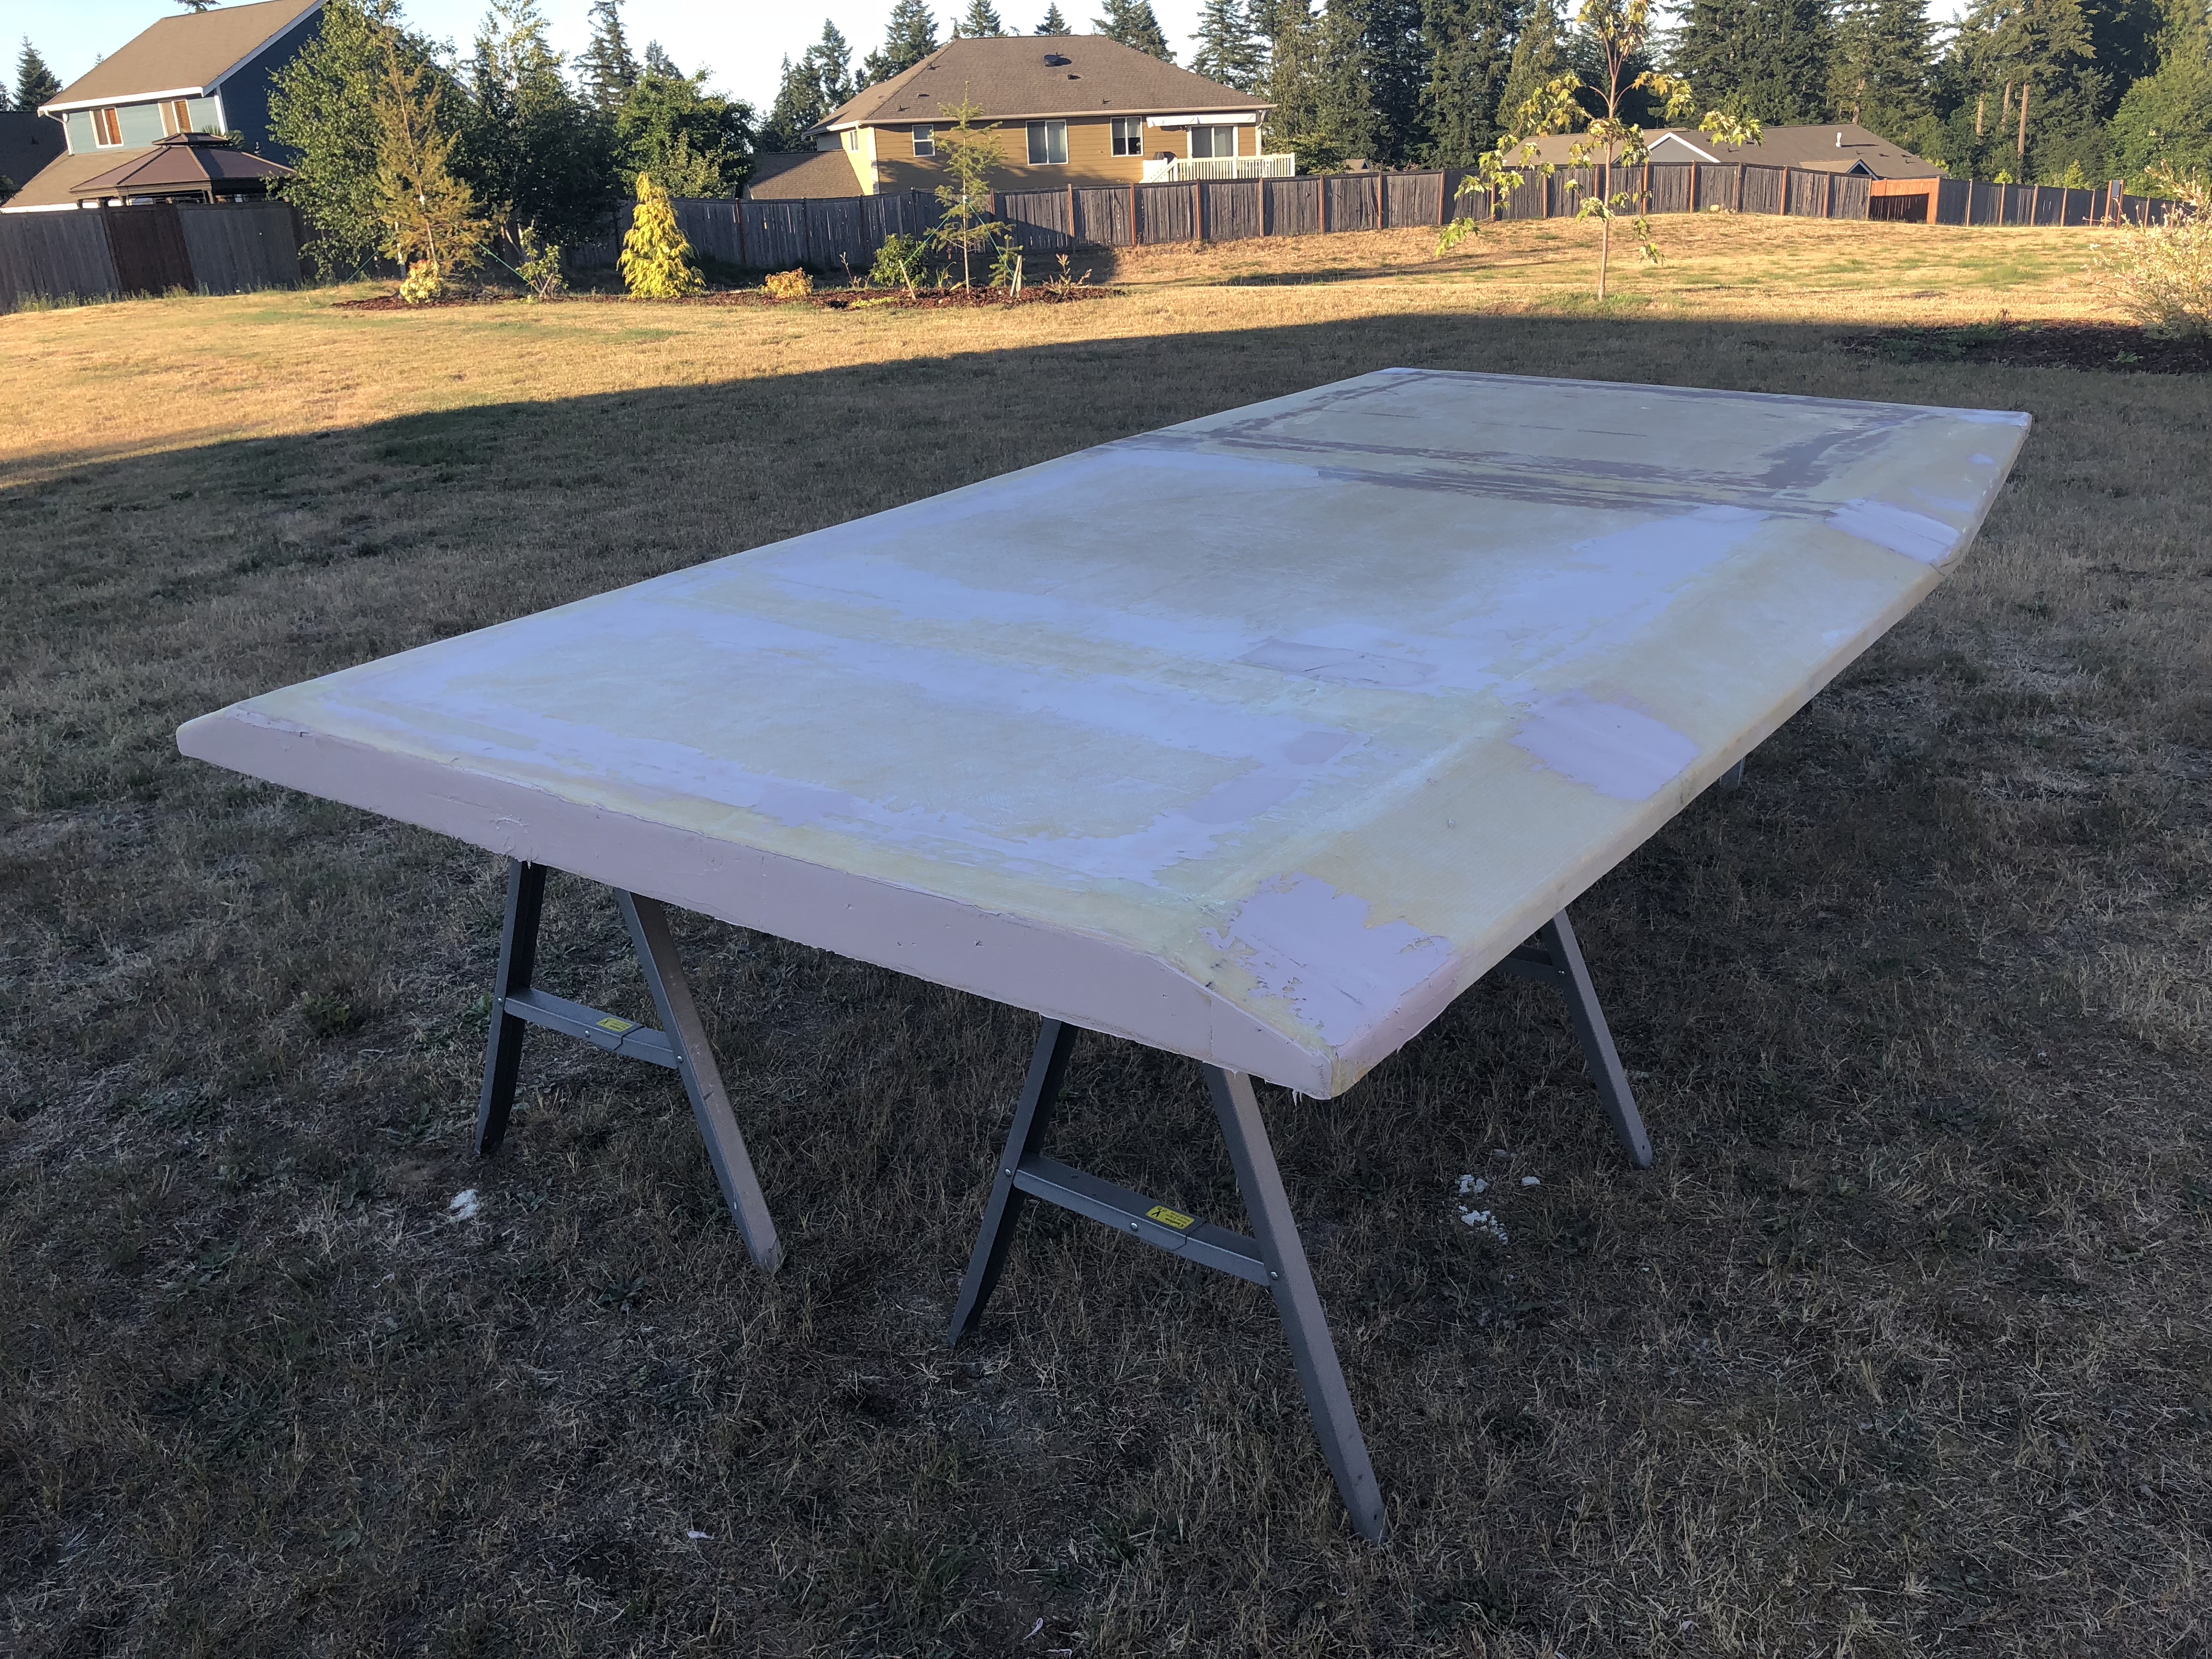
The filler fixed the texture of the fiberglass, but there are still fairly obvious seams and waves. This isn't going to be a show camper because honestly I hate bodywork. We deemed the camper finish "good enough" and decided to call it.
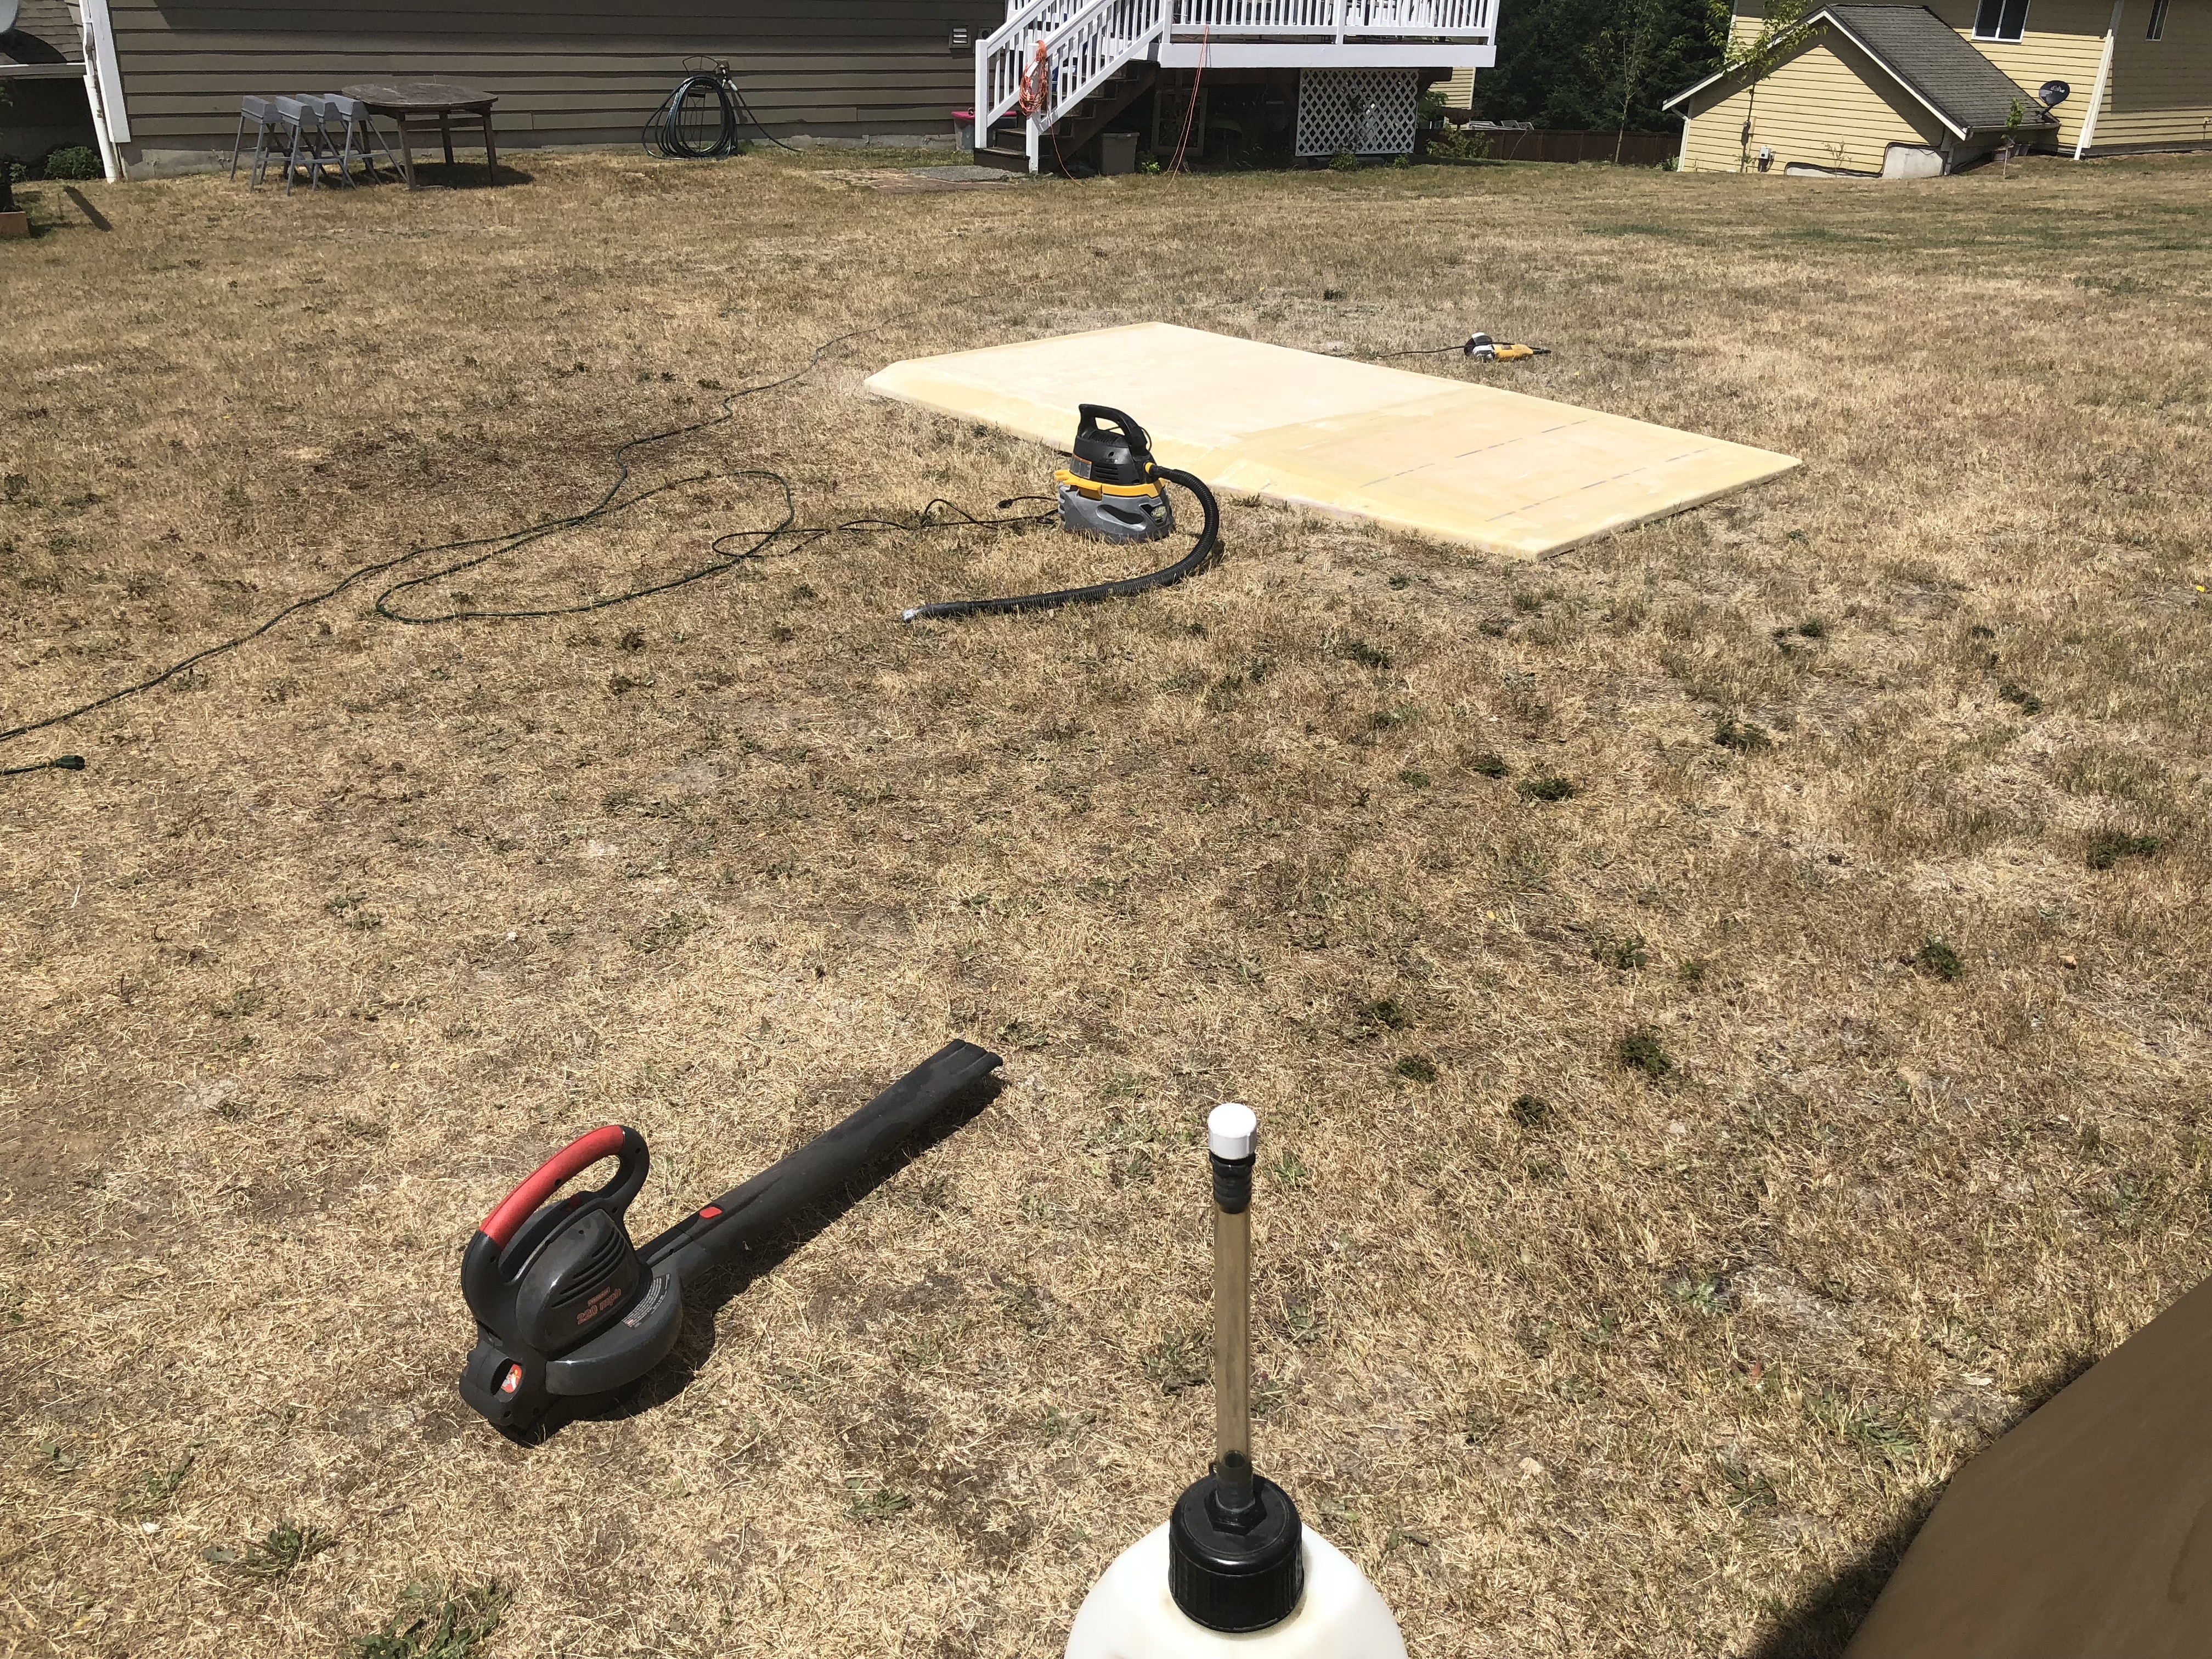
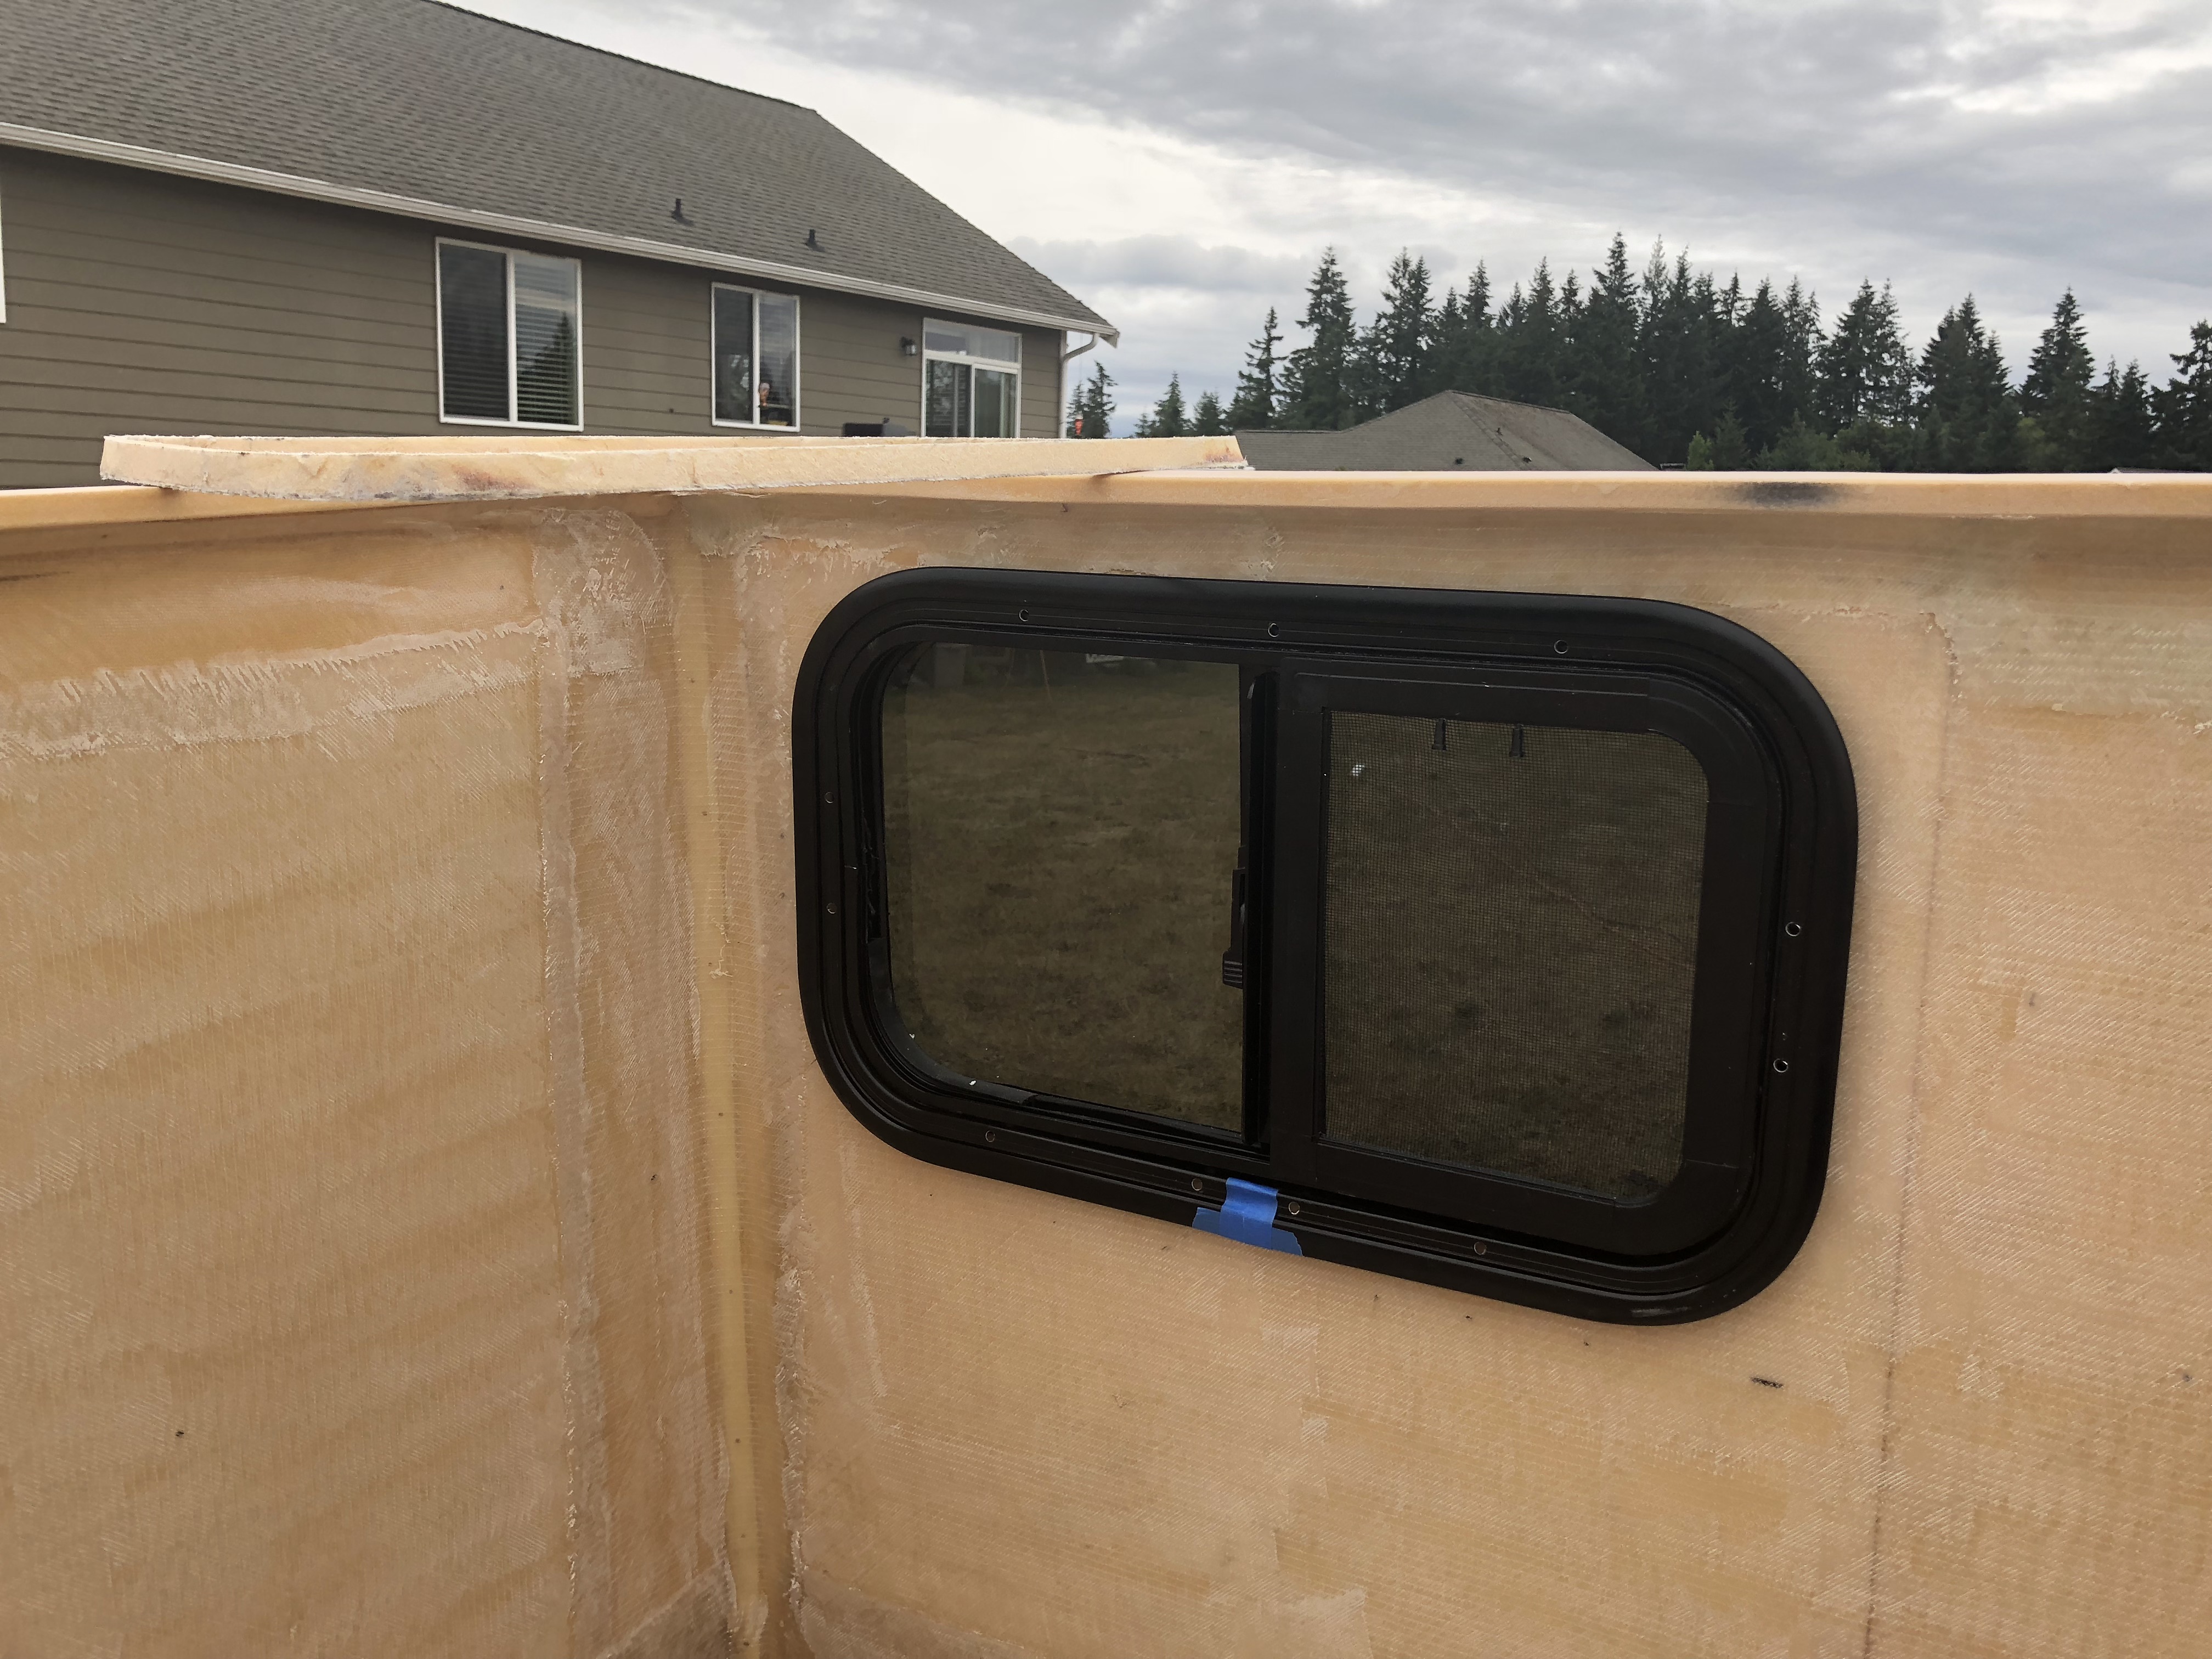
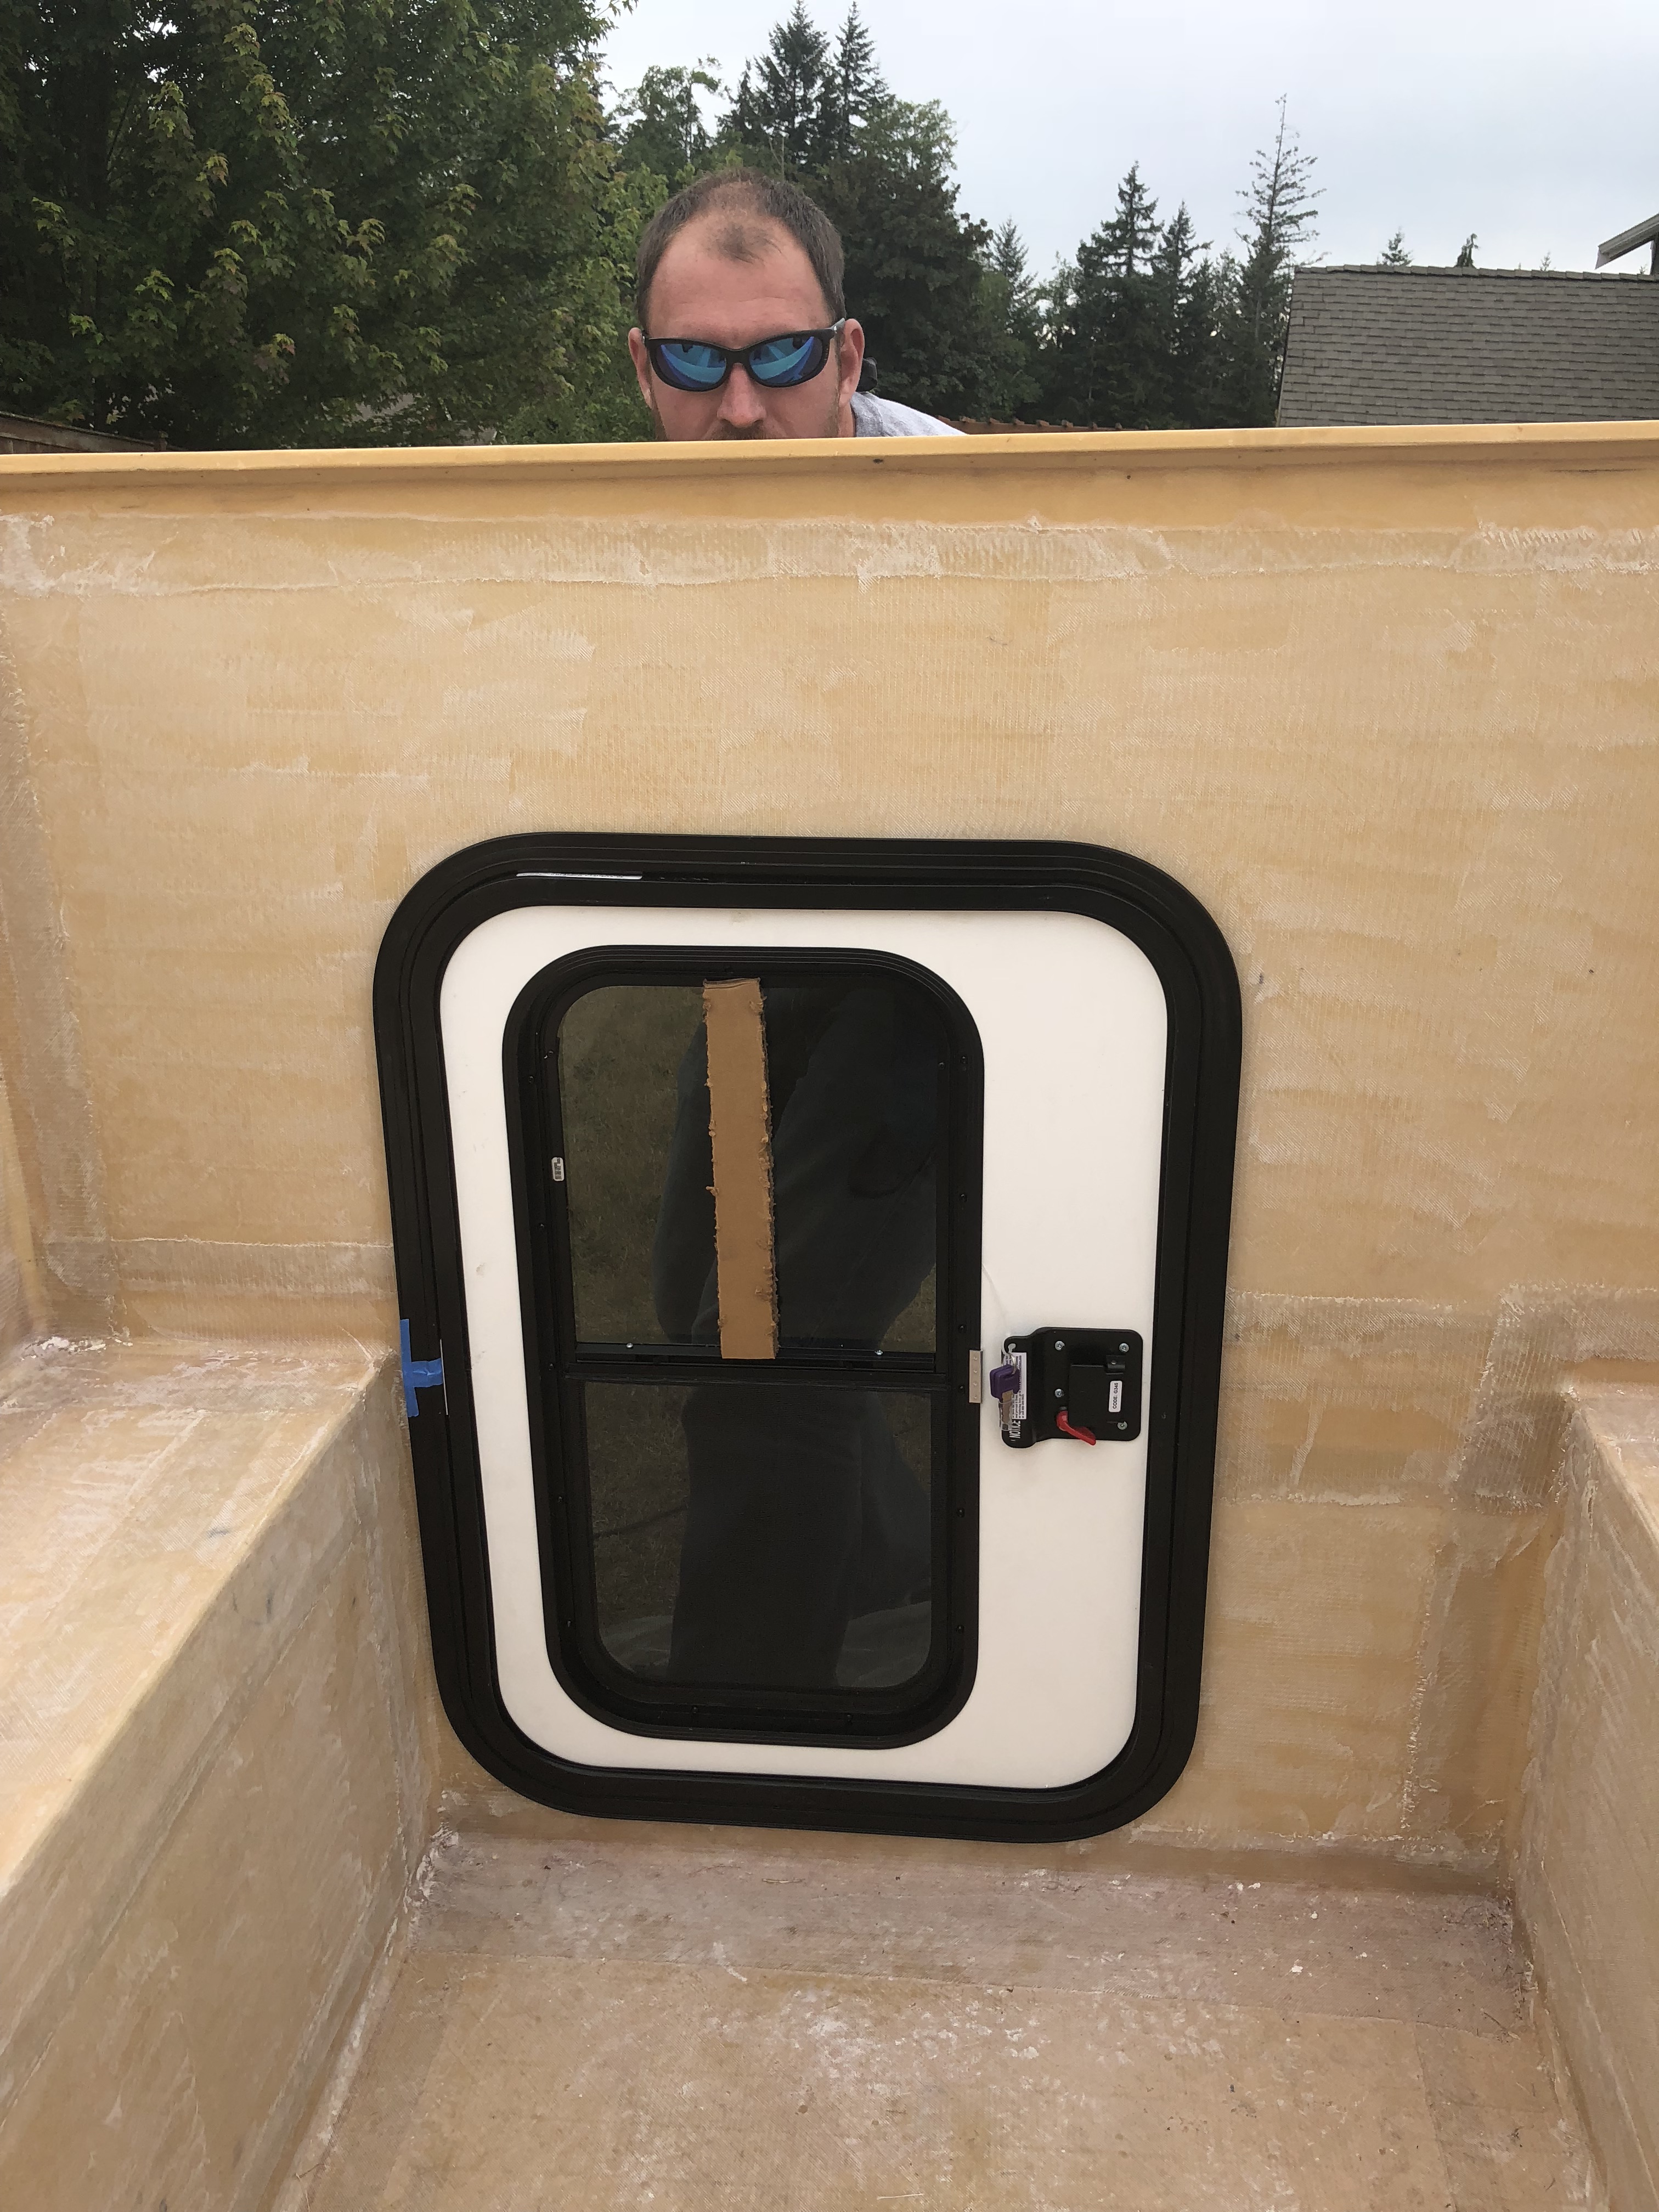
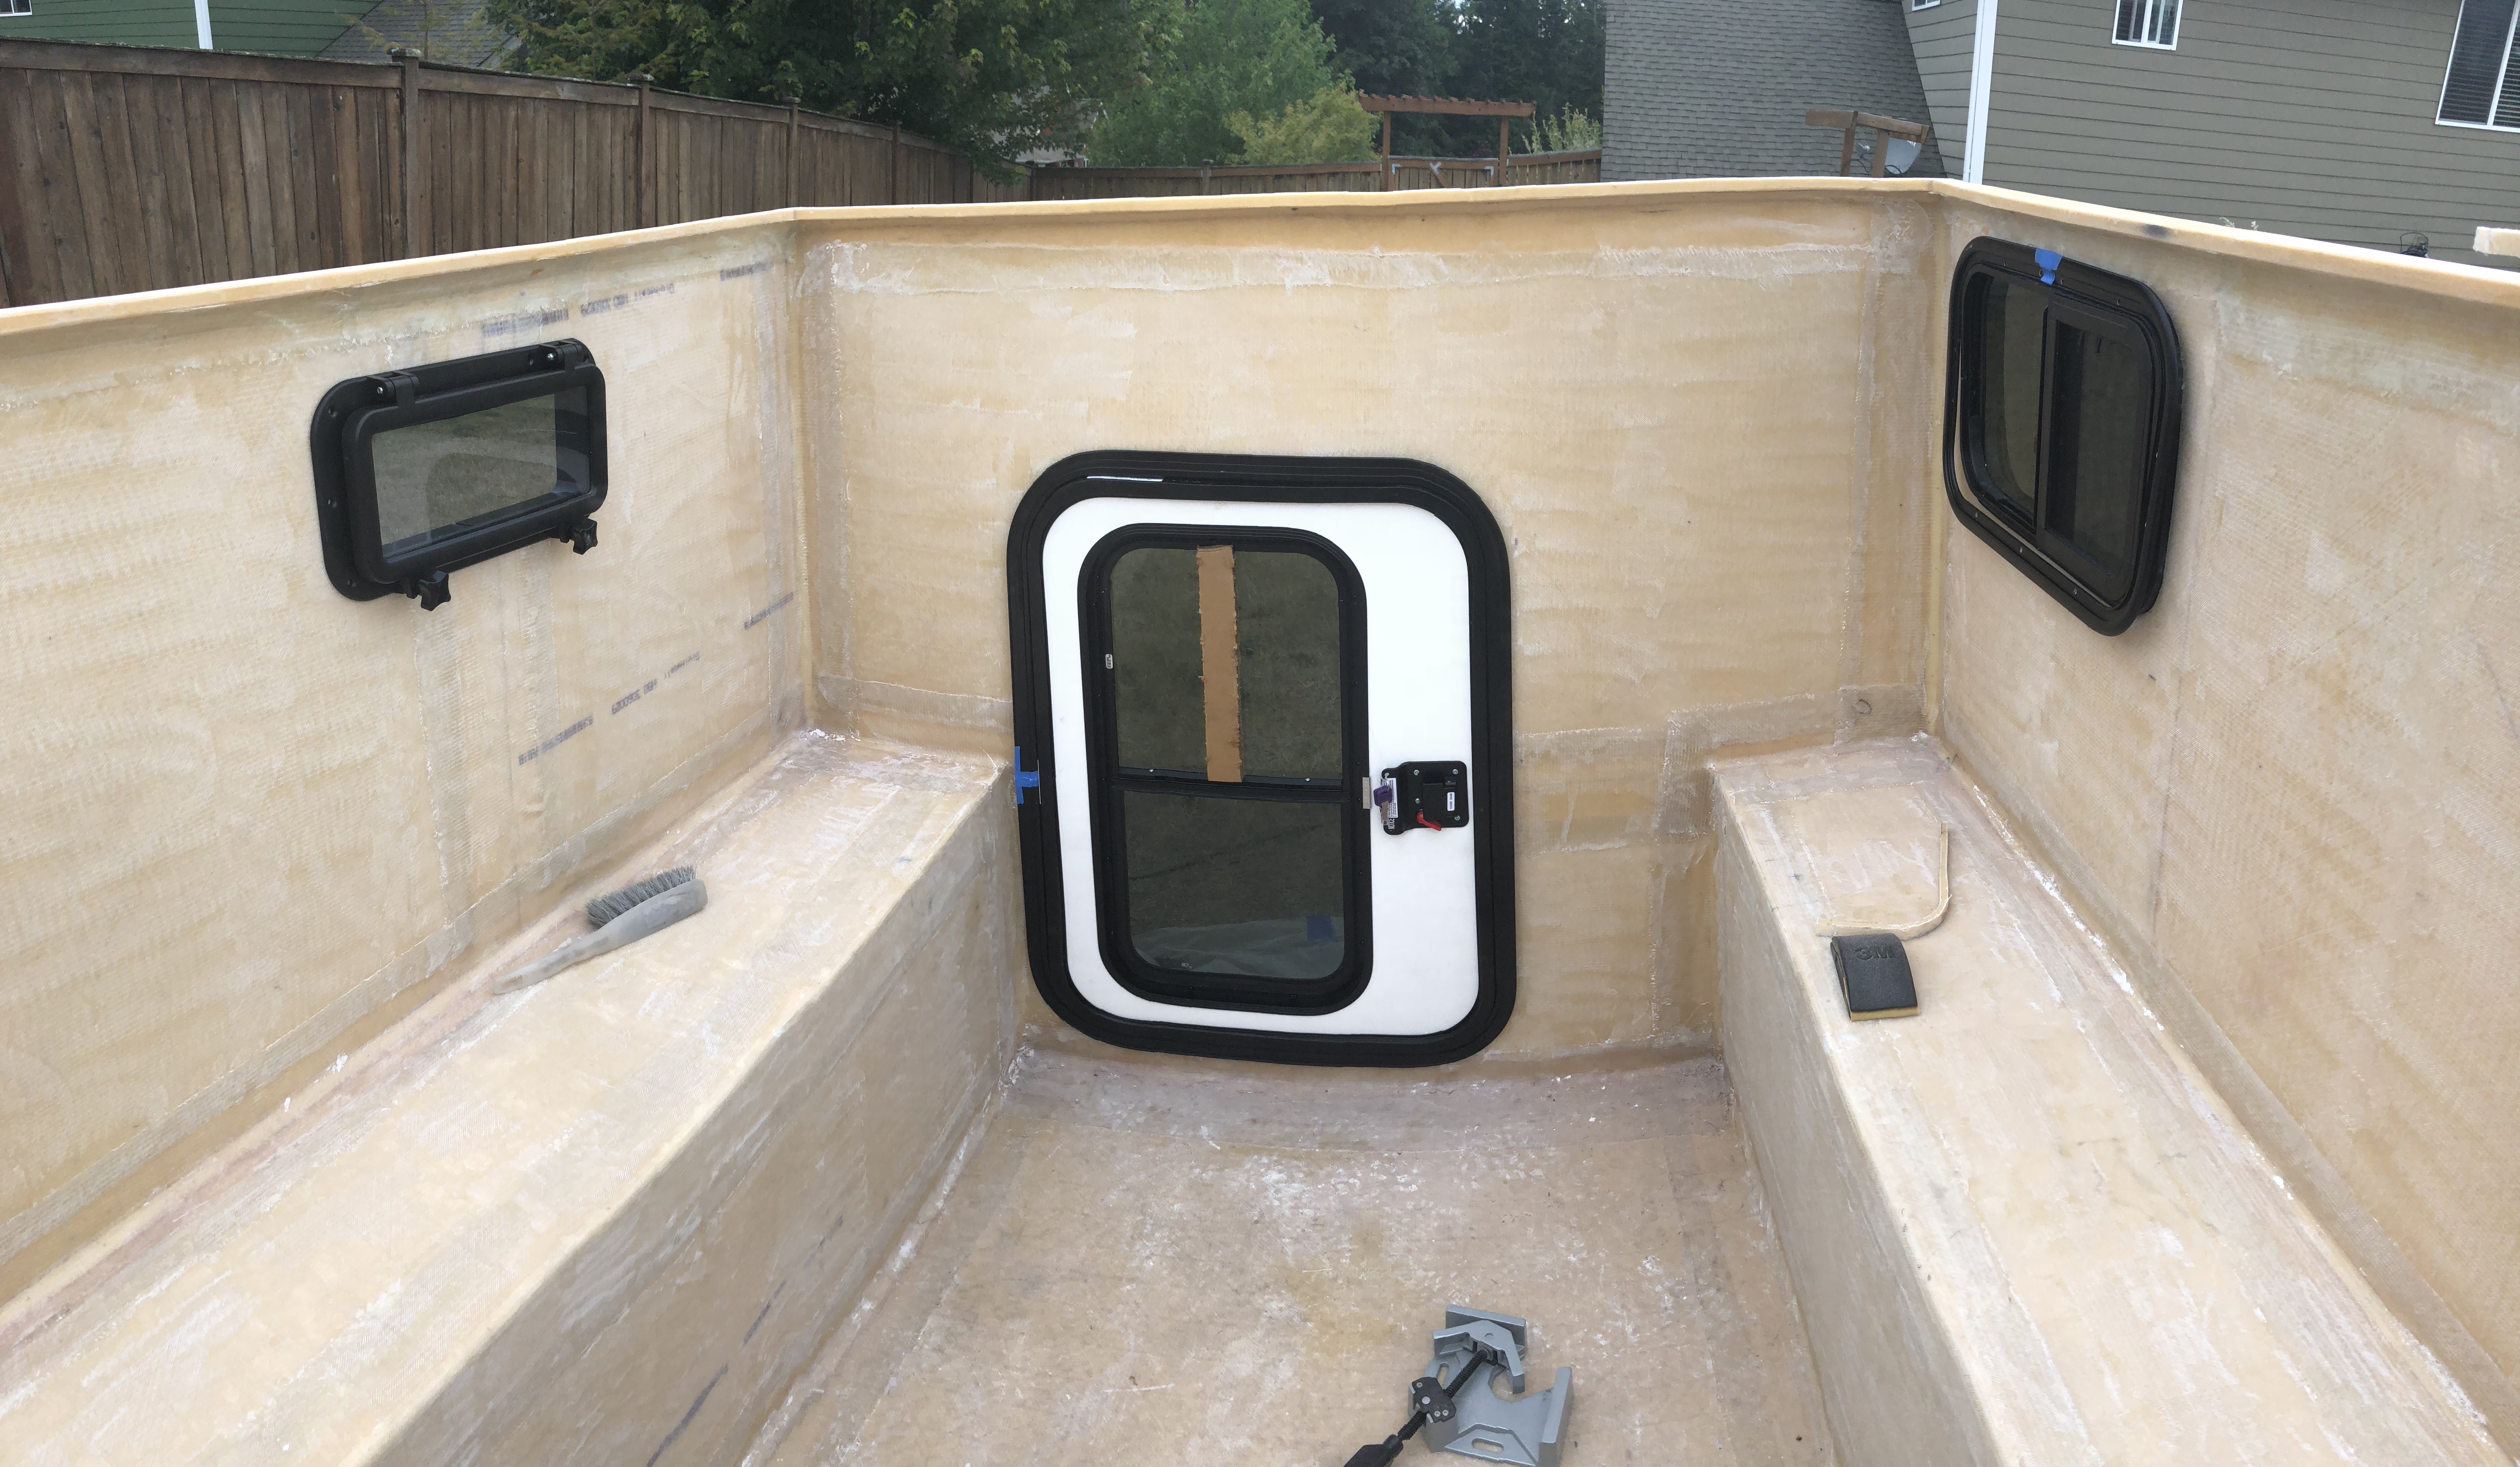
After spending all day sanding, we decided to switch gears and drill the holes for the windows and doors before final paint.
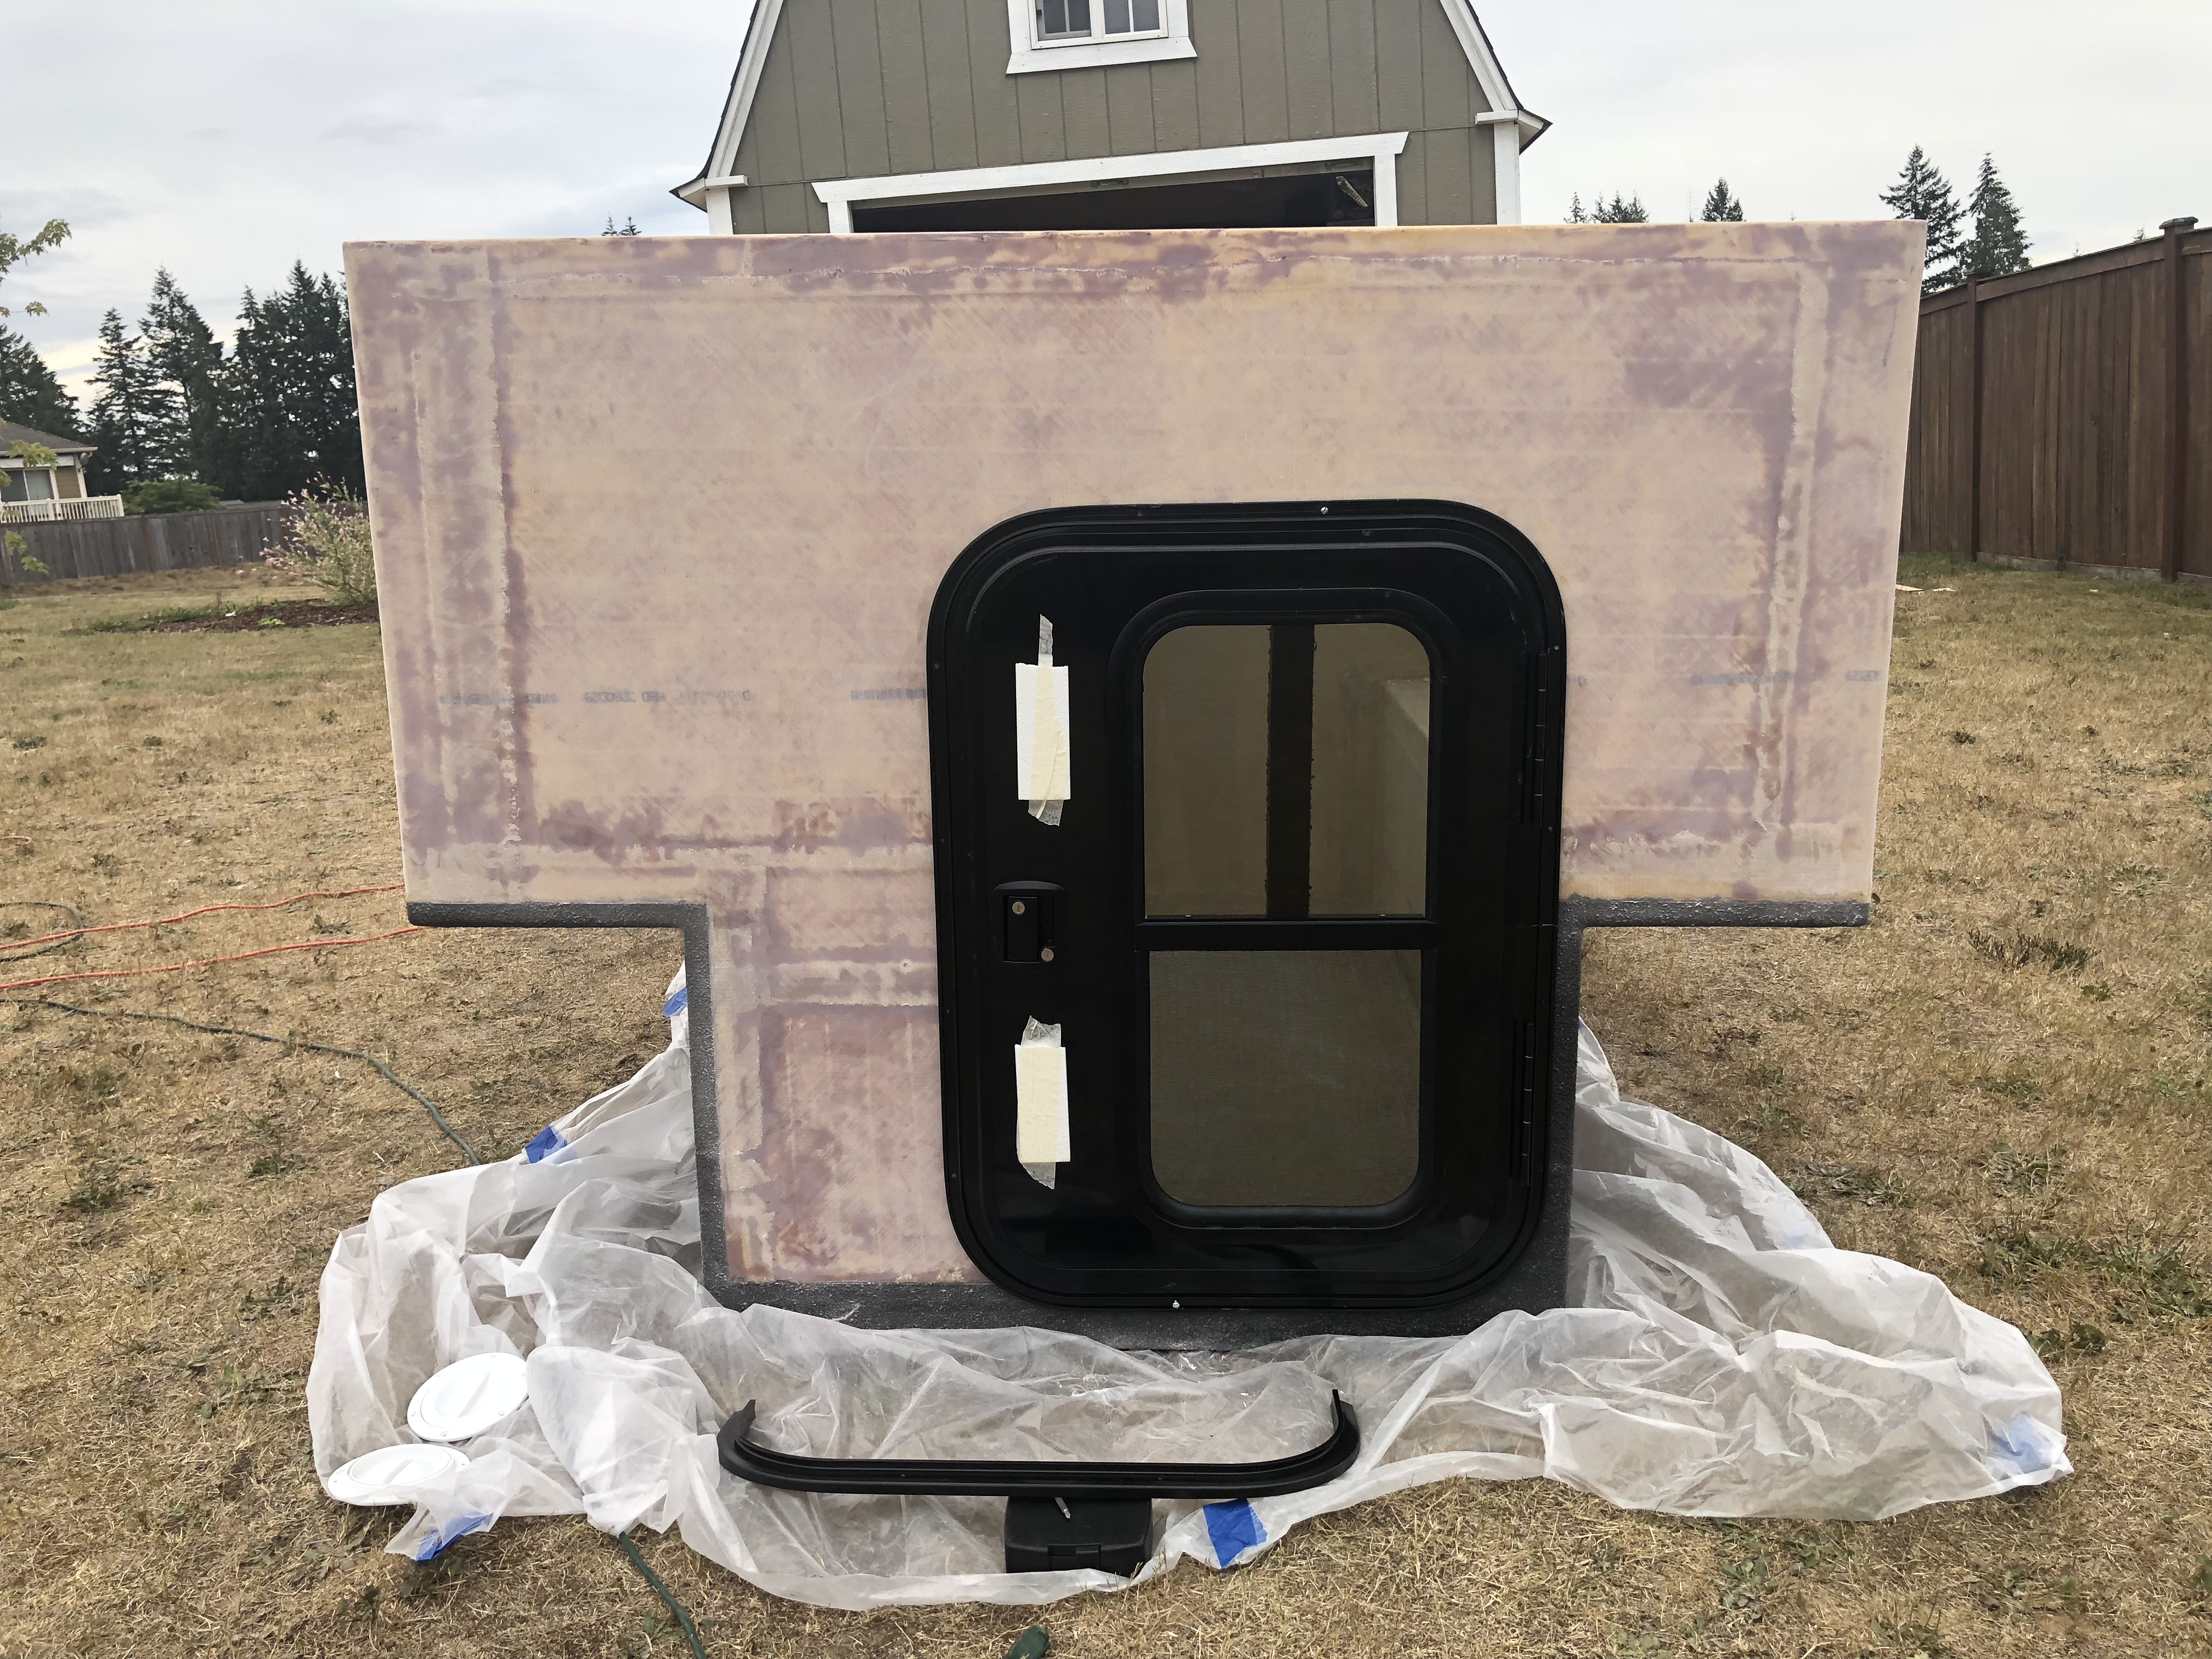
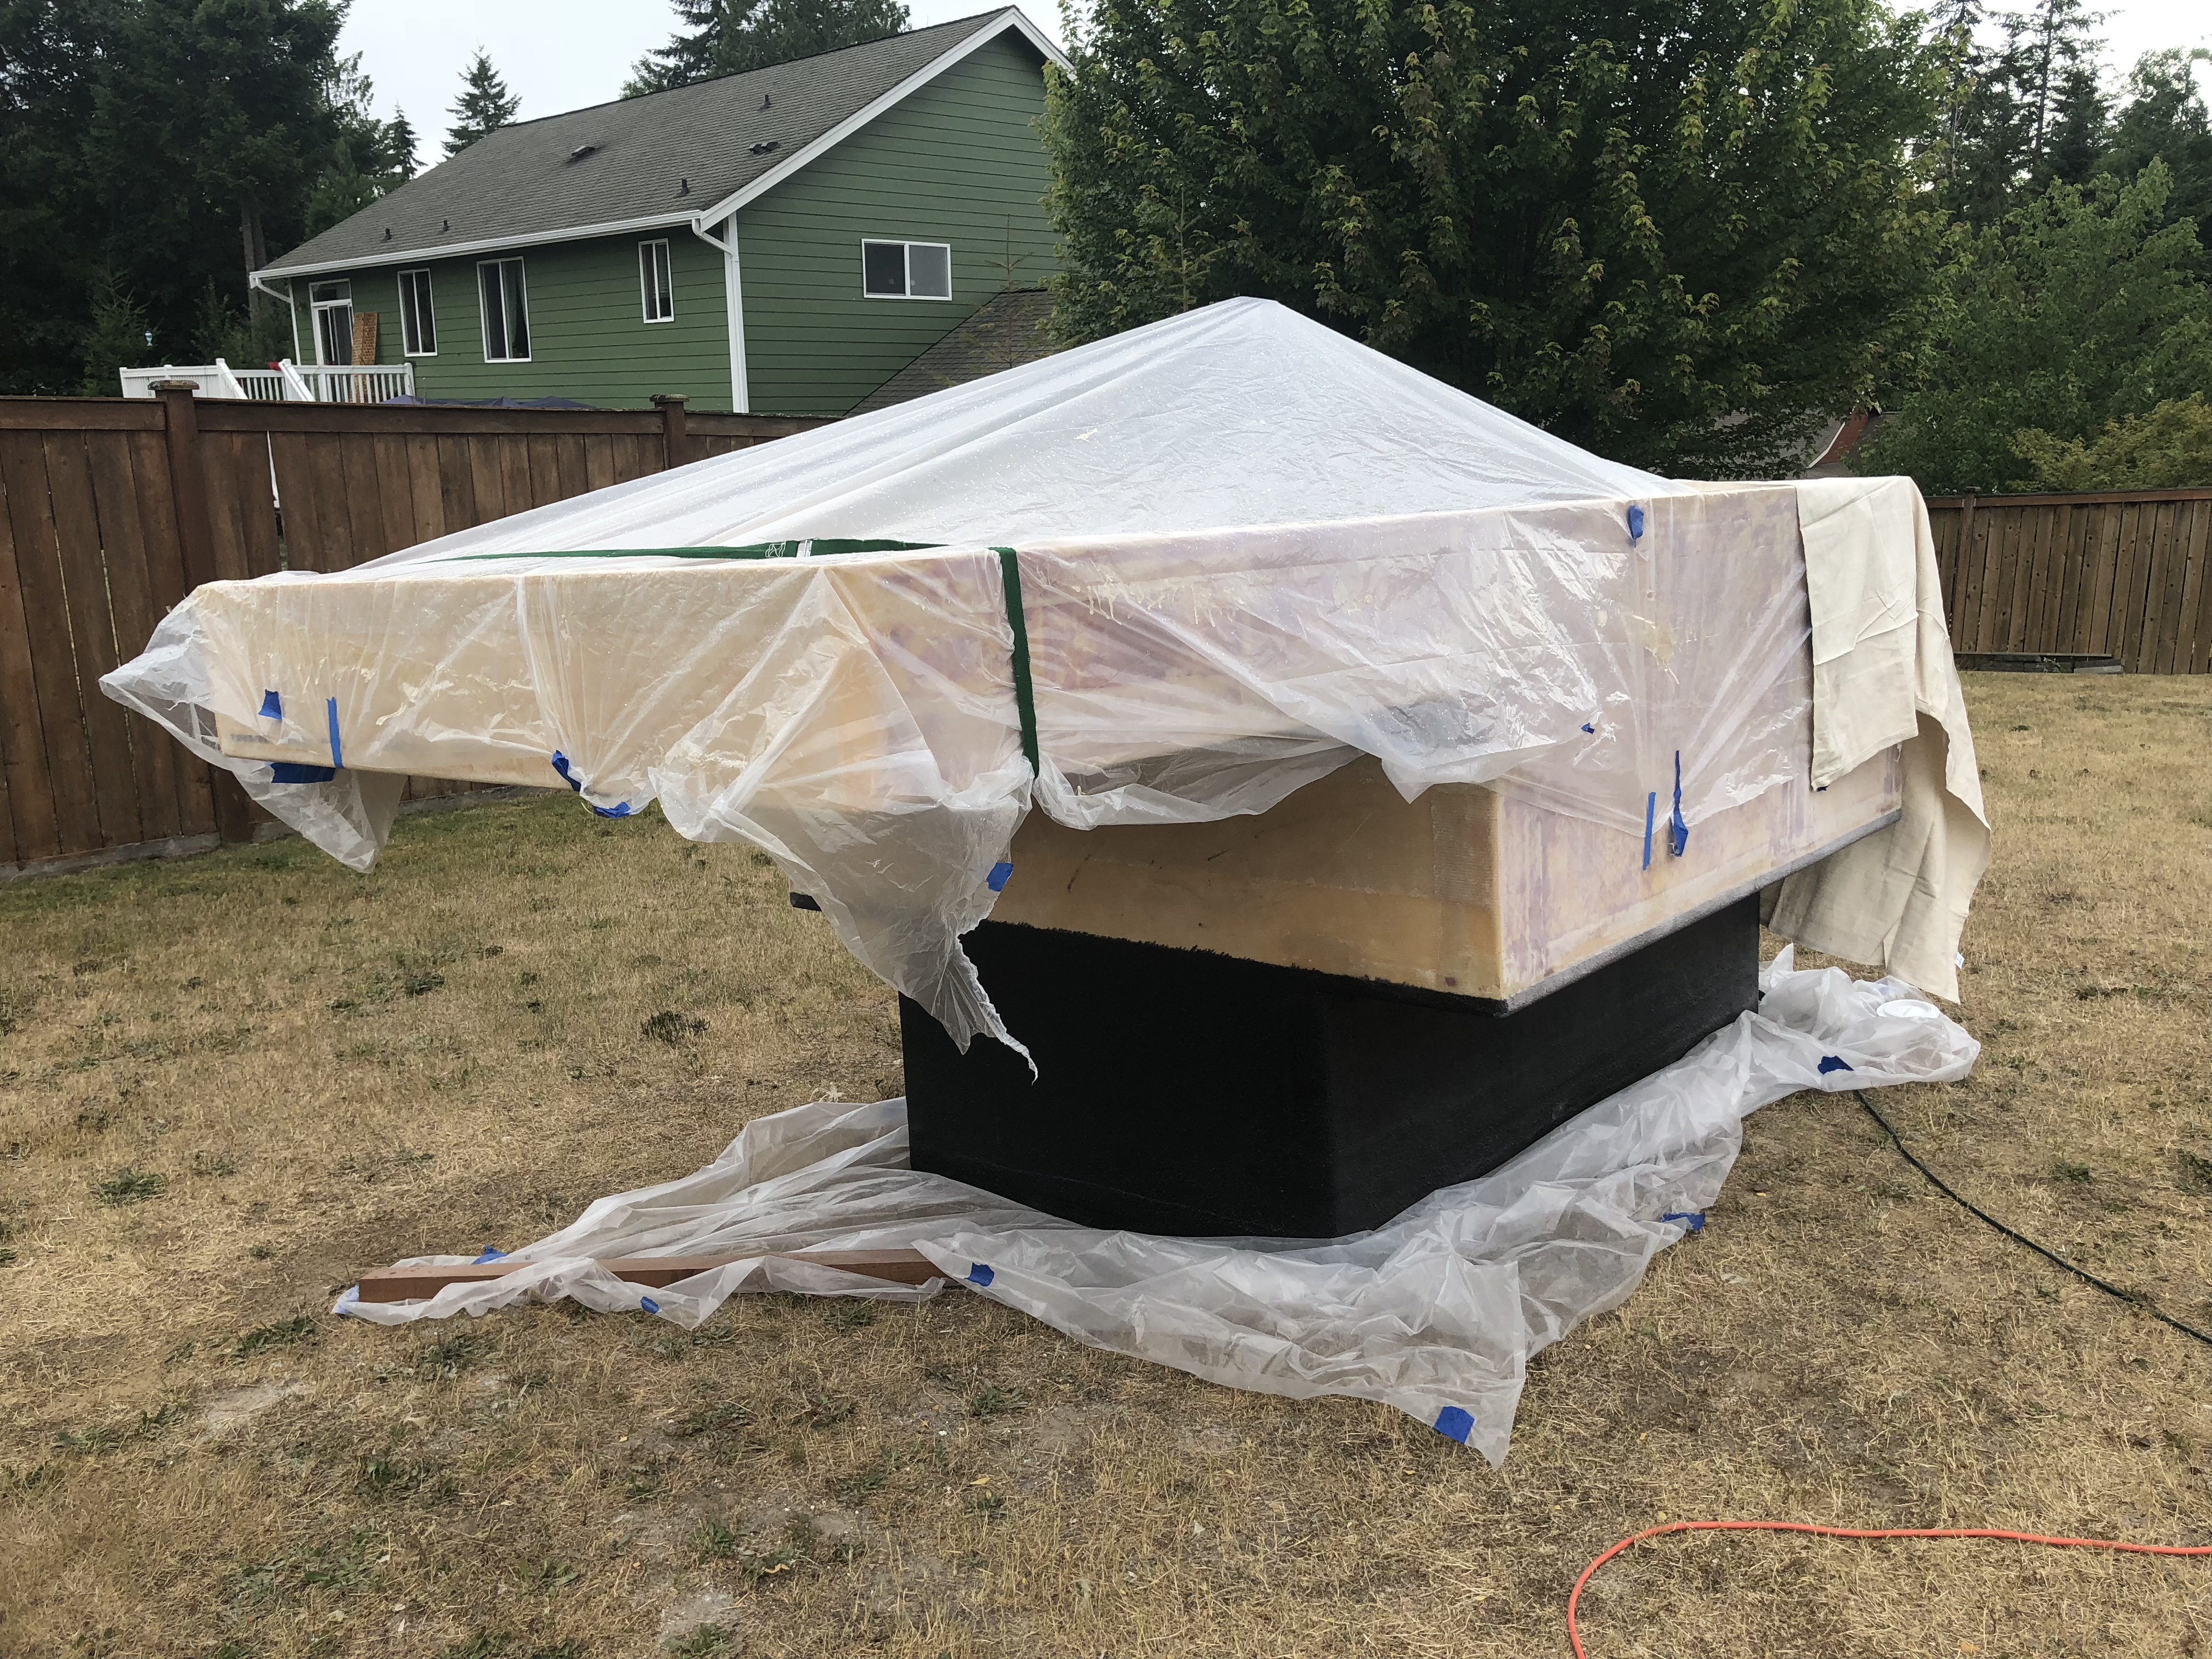
At this point it started to rain! Since we weren't going to get the shell into the shed in time, I did the best I could to cover it. An actual rain cover is on my list of things to make eventually!
Since epoxy is so expensive we decided it was a bit of a waste to use it as body filler and got some actual Bondo since the roof has some pretty obvious overlapping seams.
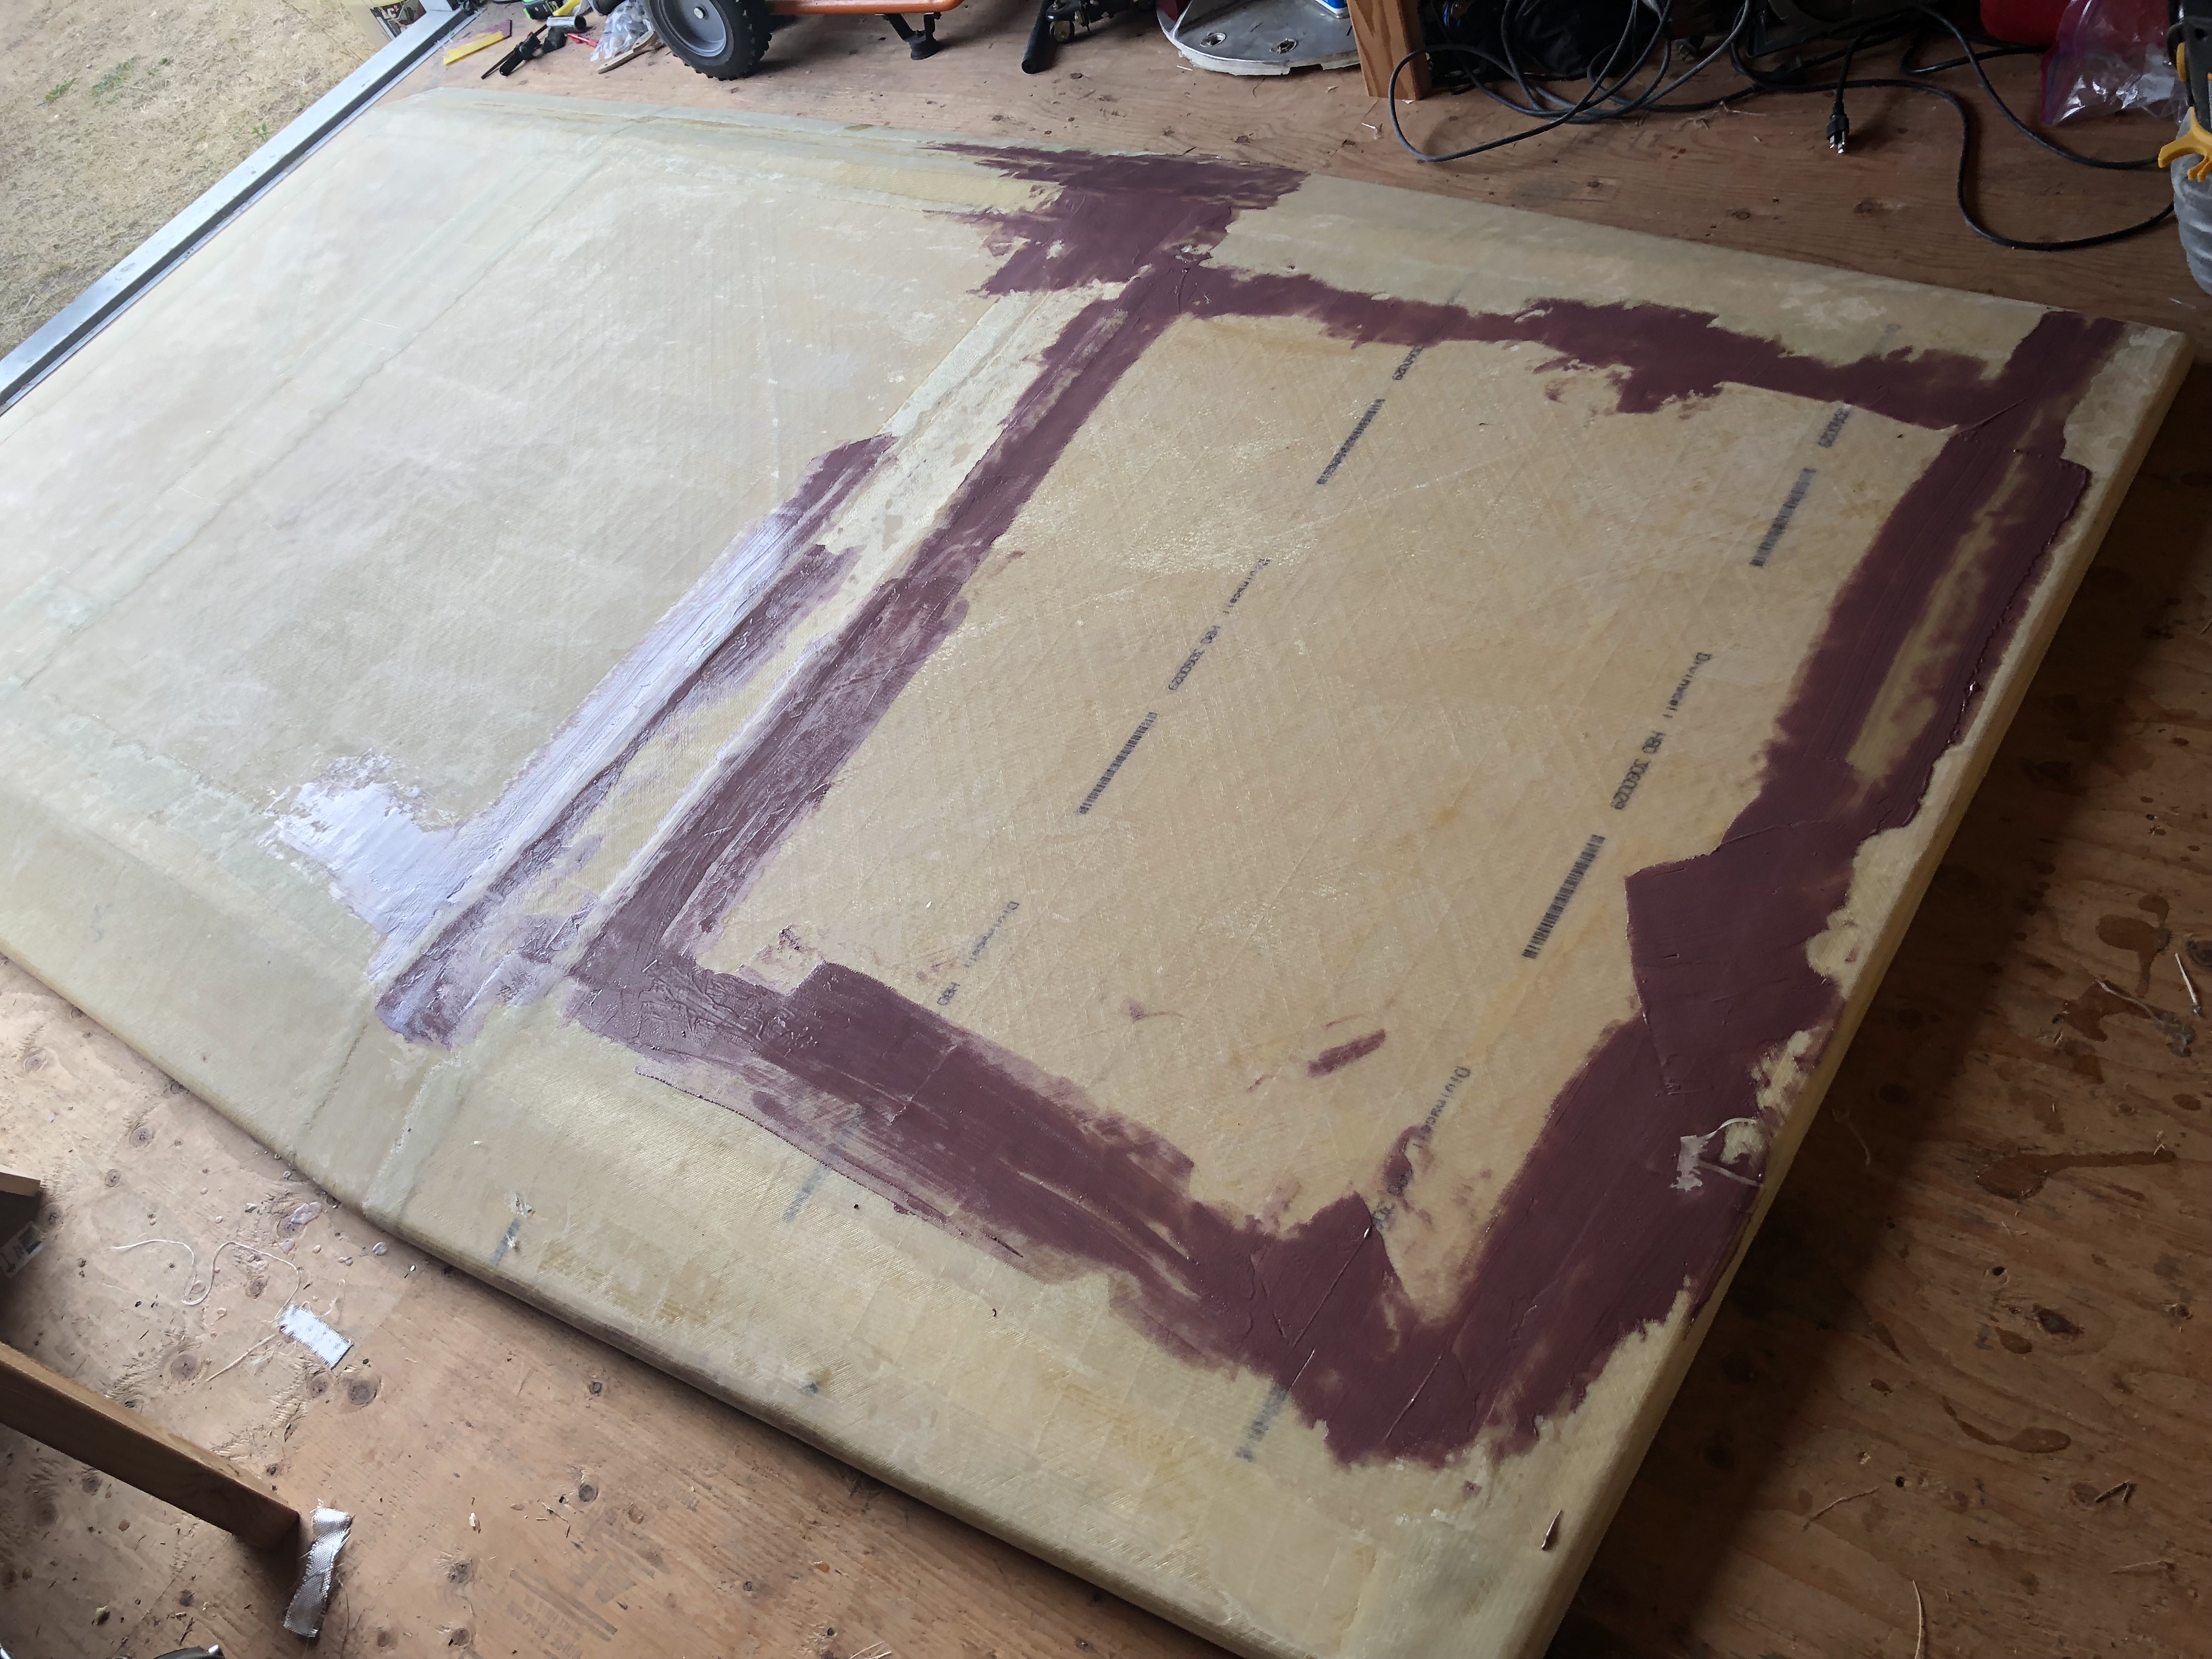
Since the fiberglass was so thick, the overlap between them is very obvious. I mixed some epoxy and filler material and ended up with what amounts to extremely expensive Bondo... The entire camper got a layer of that. I ran out of epoxy entirely just as I finished, which is both convenient and frustrating because now I need even more epoxy to keep working.
While the filler on the shell was setting up, I moved back over to the roof and sanded the inside. Since the filler still hadn't hardened I flipped the roof over and did the other side.
Sanding the filler on the shell took way longer than I thought it would. With Jason and I both working it still took a few hours. (a few hours covered in Tyvek with a respirator is still way too damn long!)
The filler fixed the texture of the fiberglass, but there are still fairly obvious seams and waves. This isn't going to be a show camper because honestly I hate bodywork. We deemed the camper finish "good enough" and decided to call it.
After spending all day sanding, we decided to switch gears and drill the holes for the windows and doors before final paint.
At this point it started to rain! Since we weren't going to get the shell into the shed in time, I did the best I could to cover it. An actual rain cover is on my list of things to make eventually!
Since epoxy is so expensive we decided it was a bit of a waste to use it as body filler and got some actual Bondo since the roof has some pretty obvious overlapping seams.
underkill
Active member
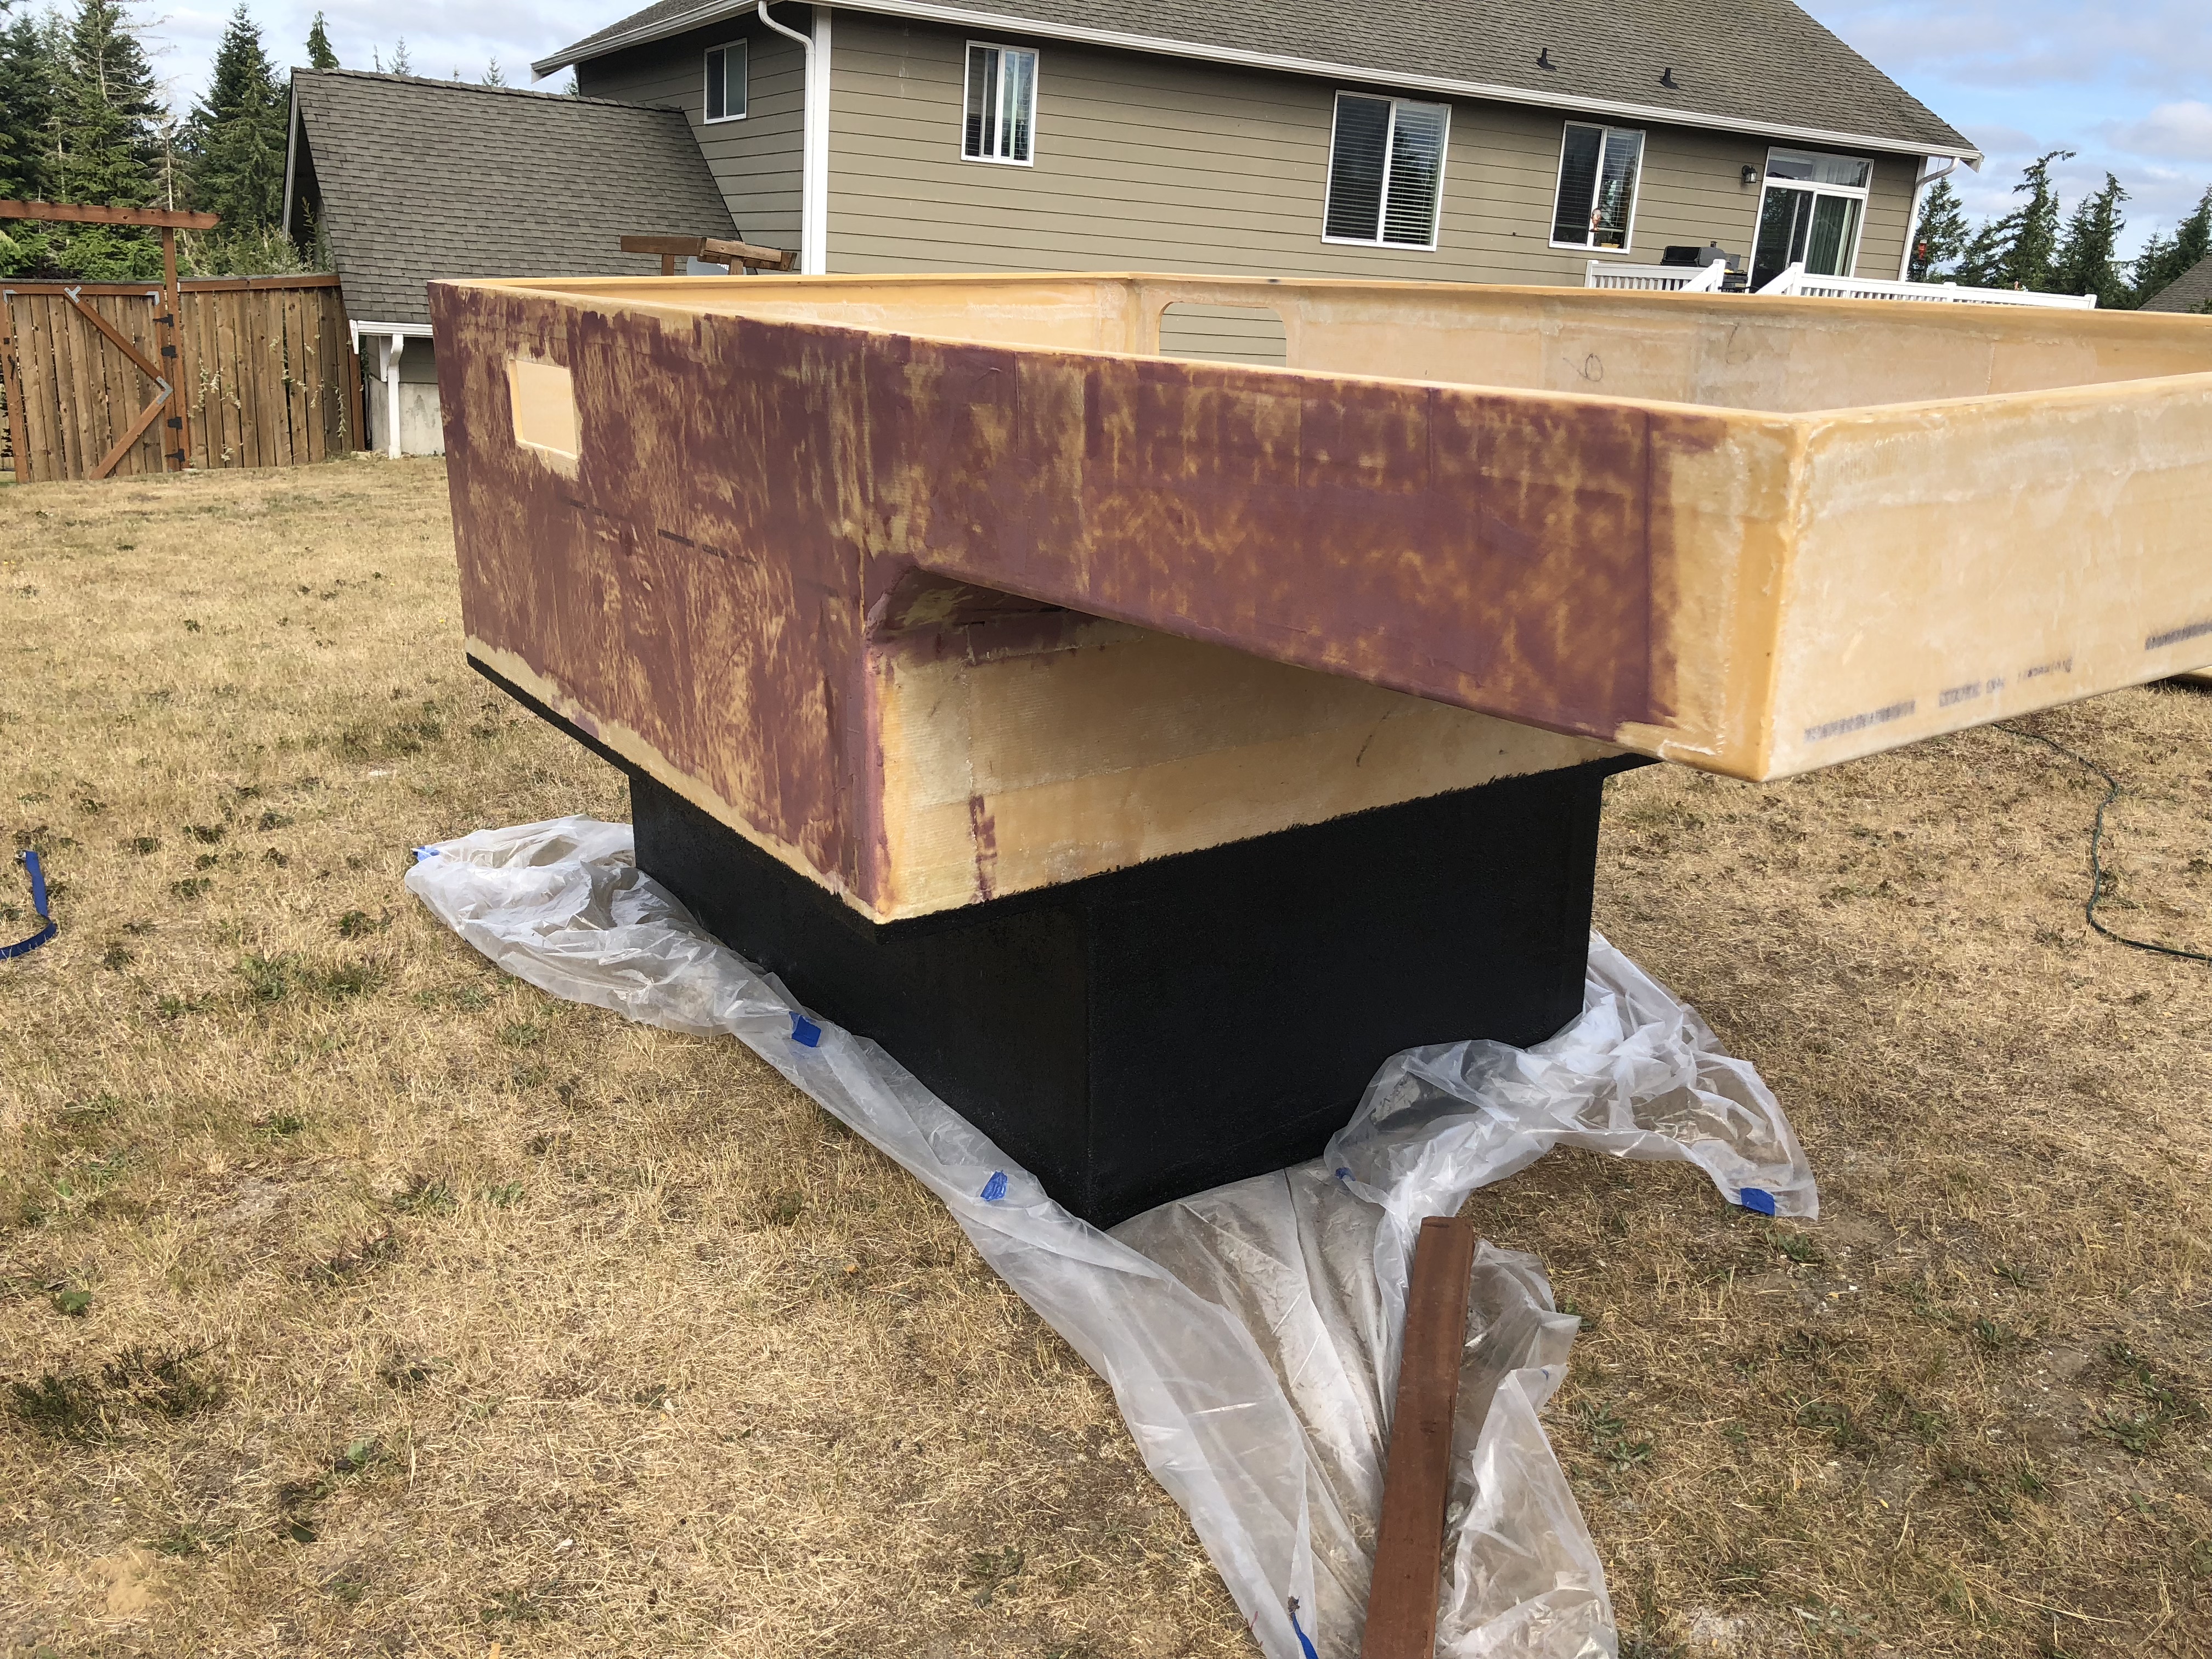
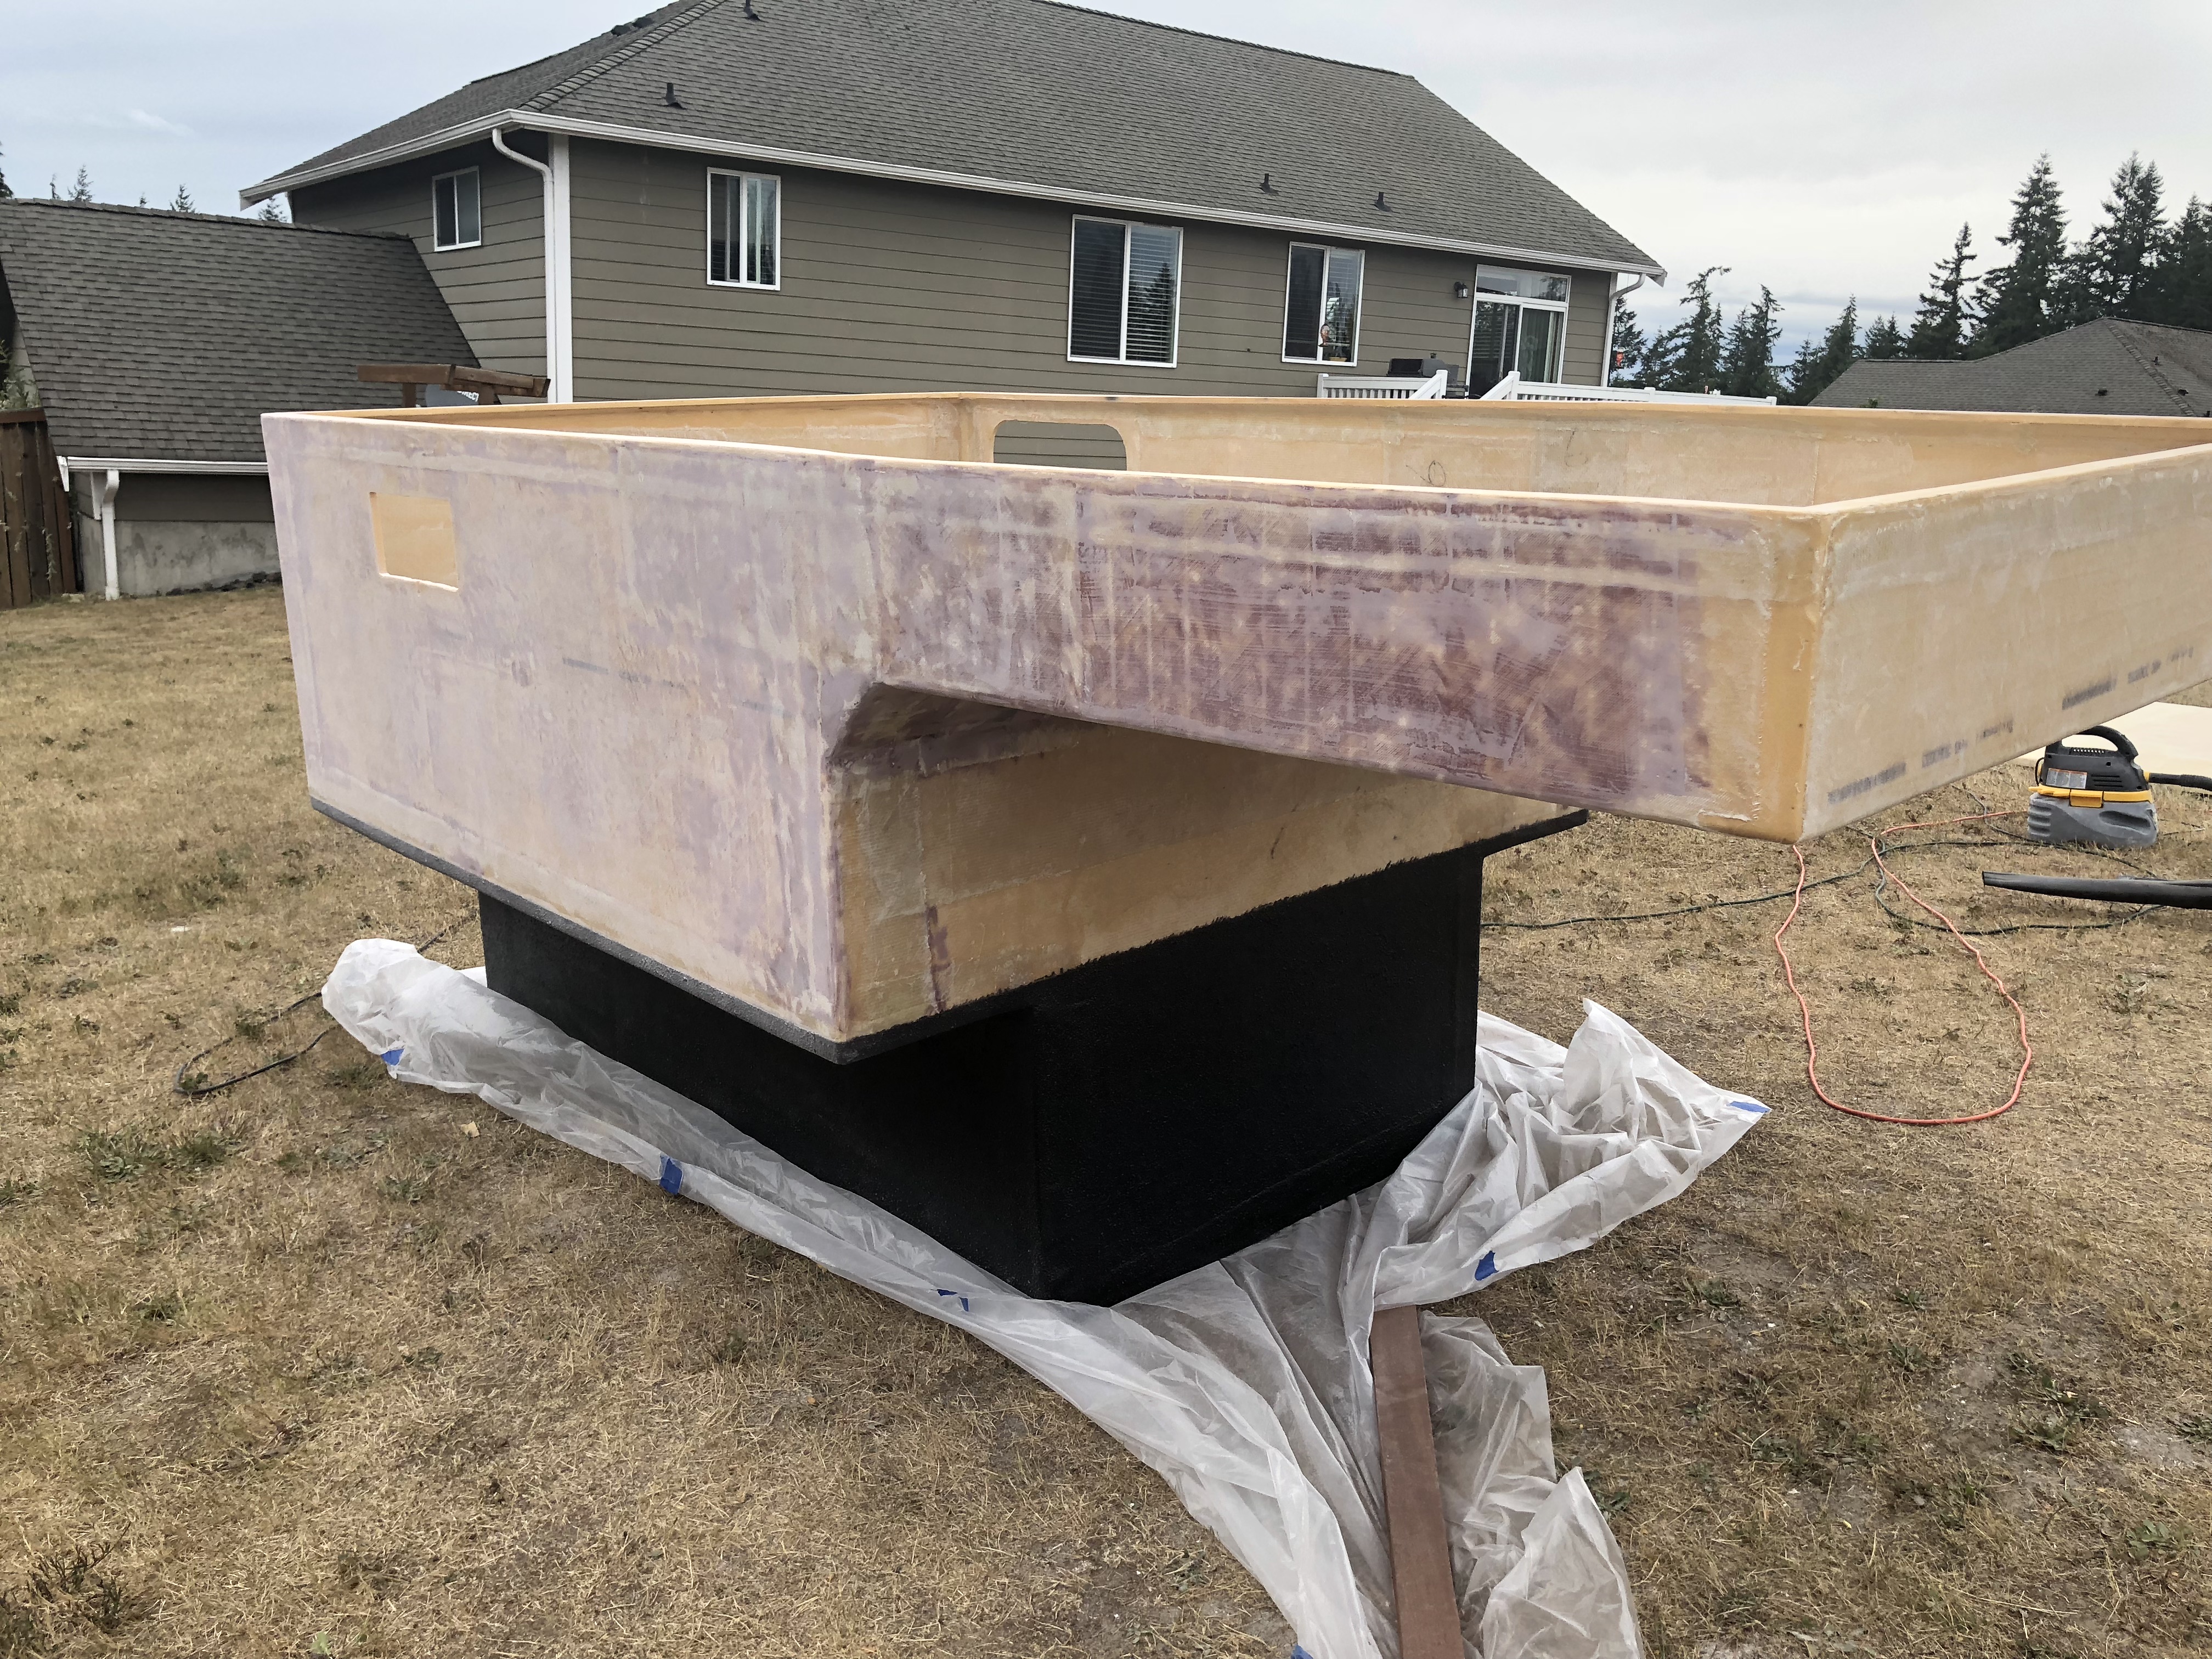
Looks like we still have a lot of prep work to do before paint. That's what I get for being so hopeful! Still had a few corners to touch up that were missed yesterday and there were still a few fiberglass shards left. (We always find them when moving the camper around. ouch!) The interior needed some more filler also.
We needed more Bondo on the roof.
We put quite a bit of Bondo on, knowing we'd be sanding most of it off.
Paint prep isn't really very exciting and we didn't get a lot of pictures today. I really hate using Bondo because of all of the horror stories of car restorations gone wrong. In hindsight, the Bondo hasn't cracked at all yet even having used the camper quite a bit by now! The roof does still flex slightly, but the bodywork is holding up great!
underkill
Active member
we're now into an infinite loop of filling and sanding. It's starting to look really nice though!
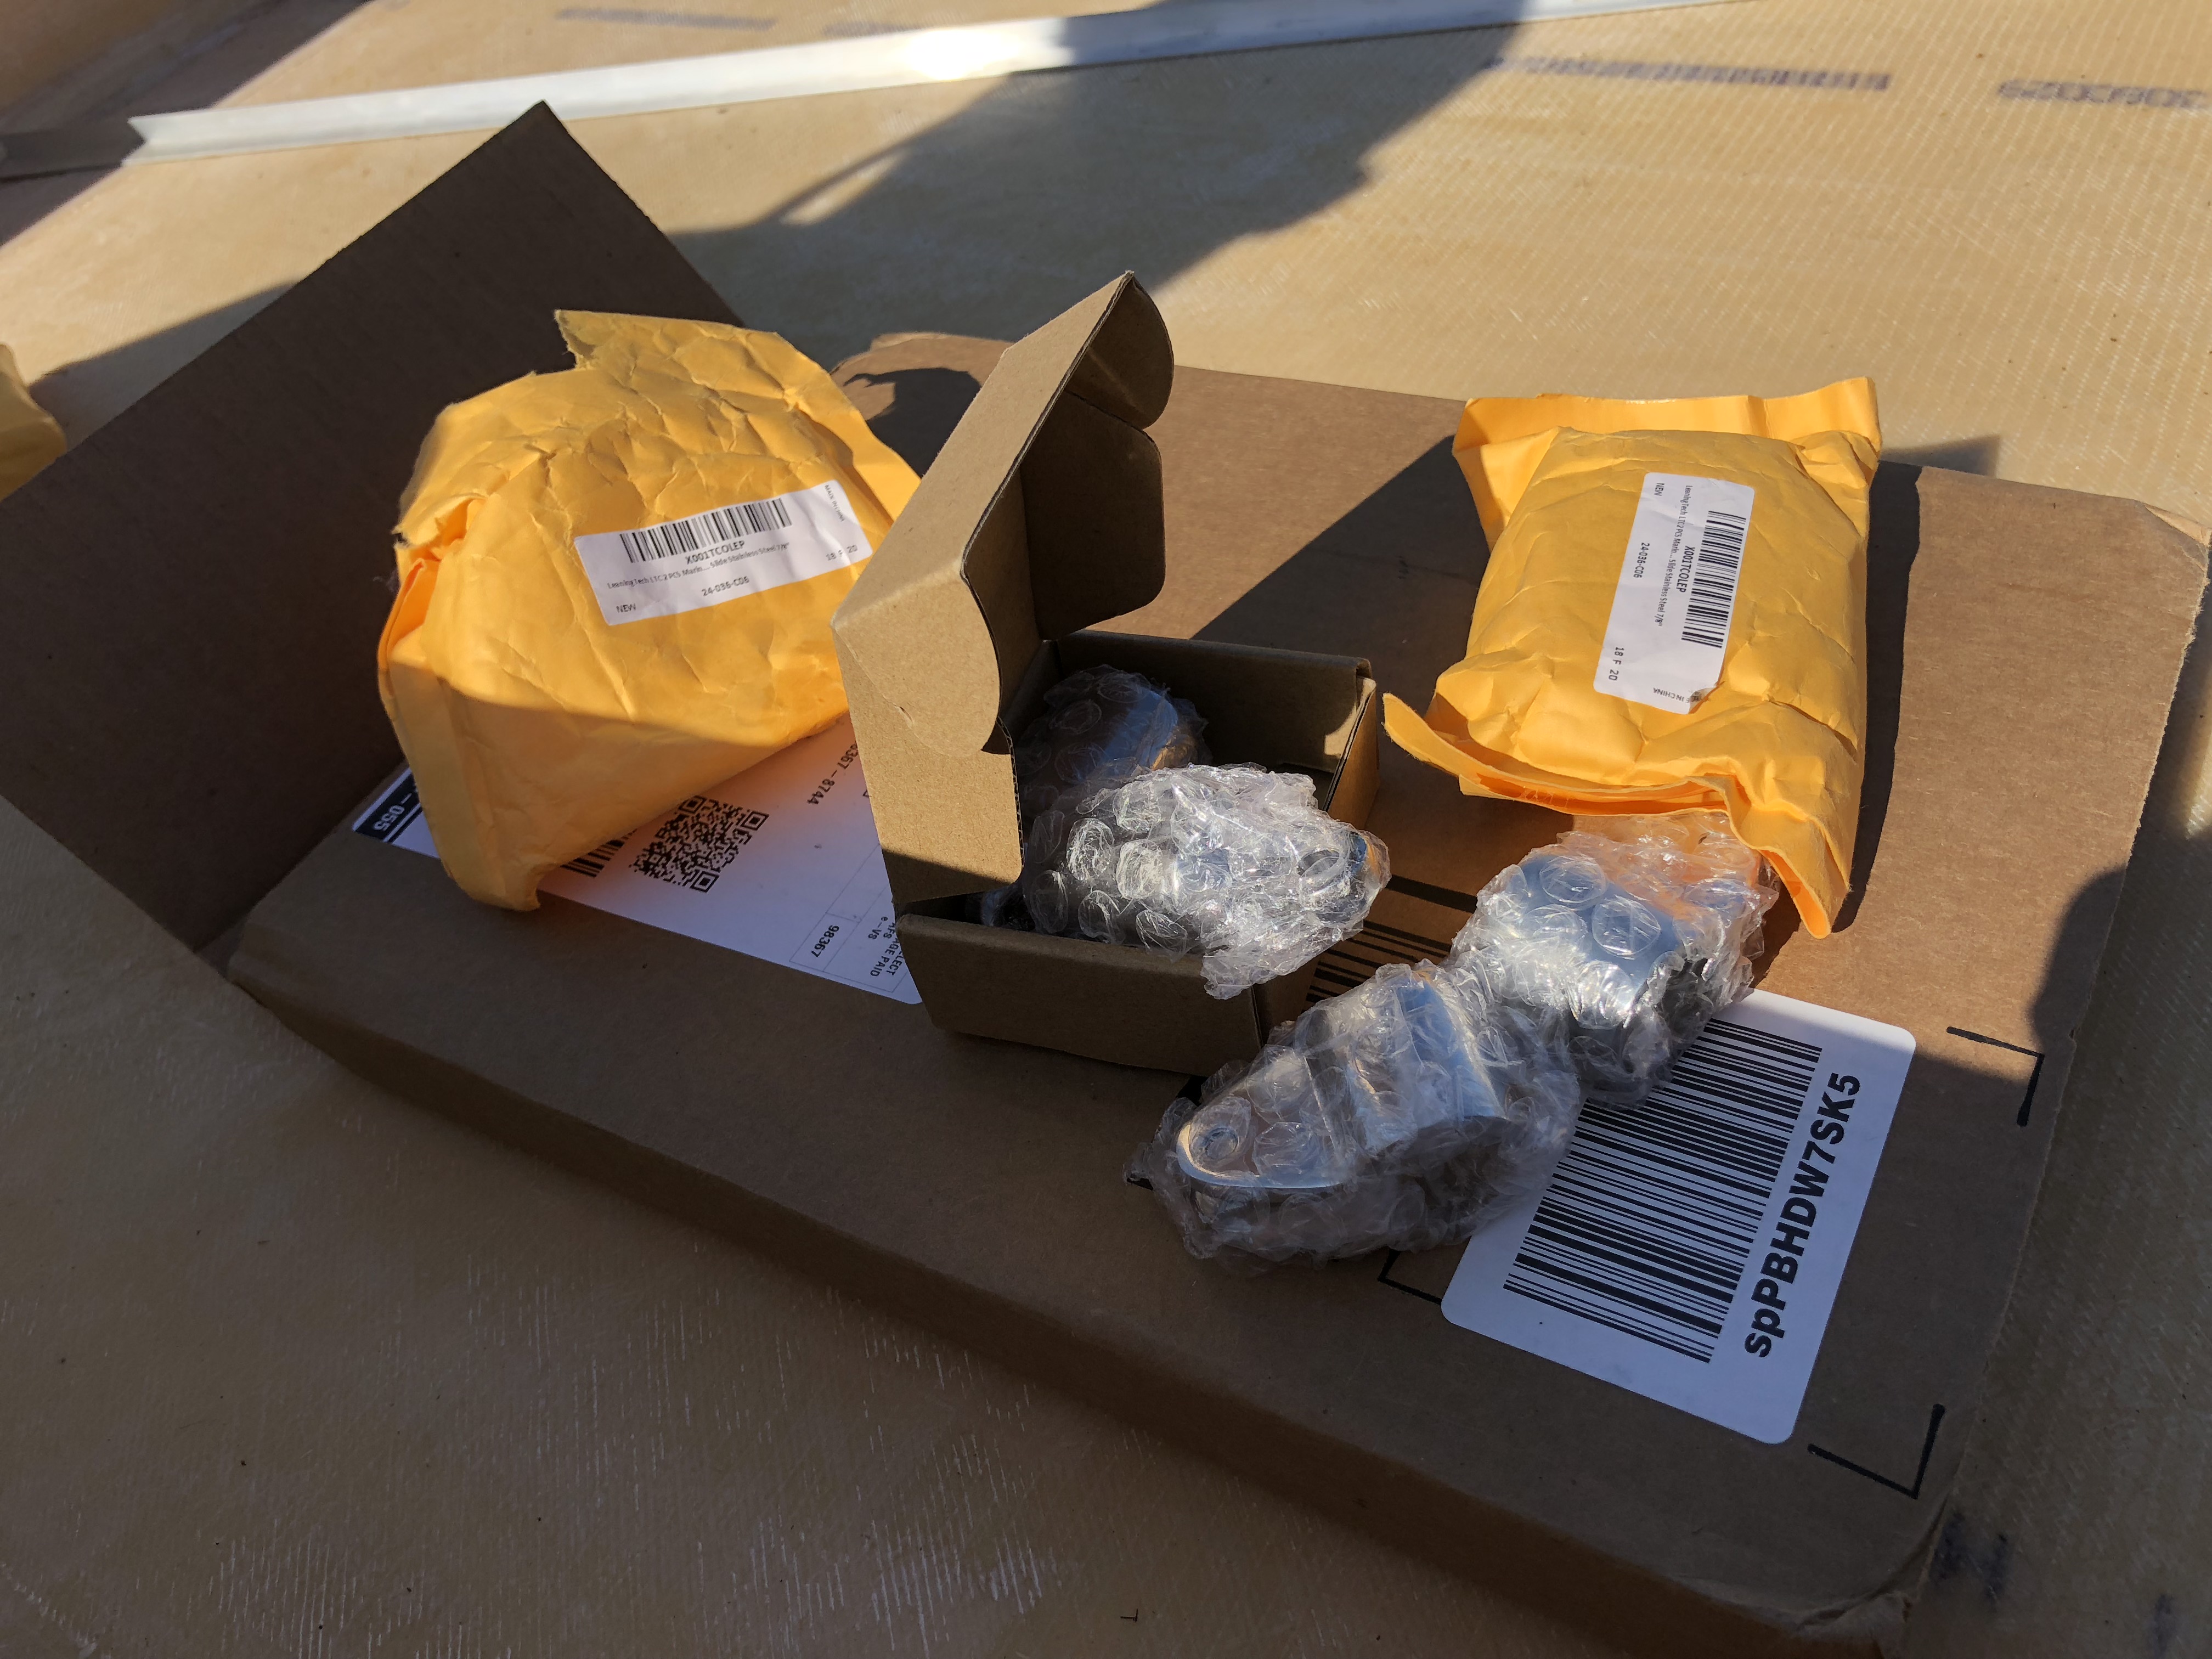
We've also been ordering a ton of stuff from Amazon so it's starting to feel like Christmas over here at the house!
We're planning on using a water bladder instead of a solid tank due to space constraints.

We also got this mysterious looking box from China!
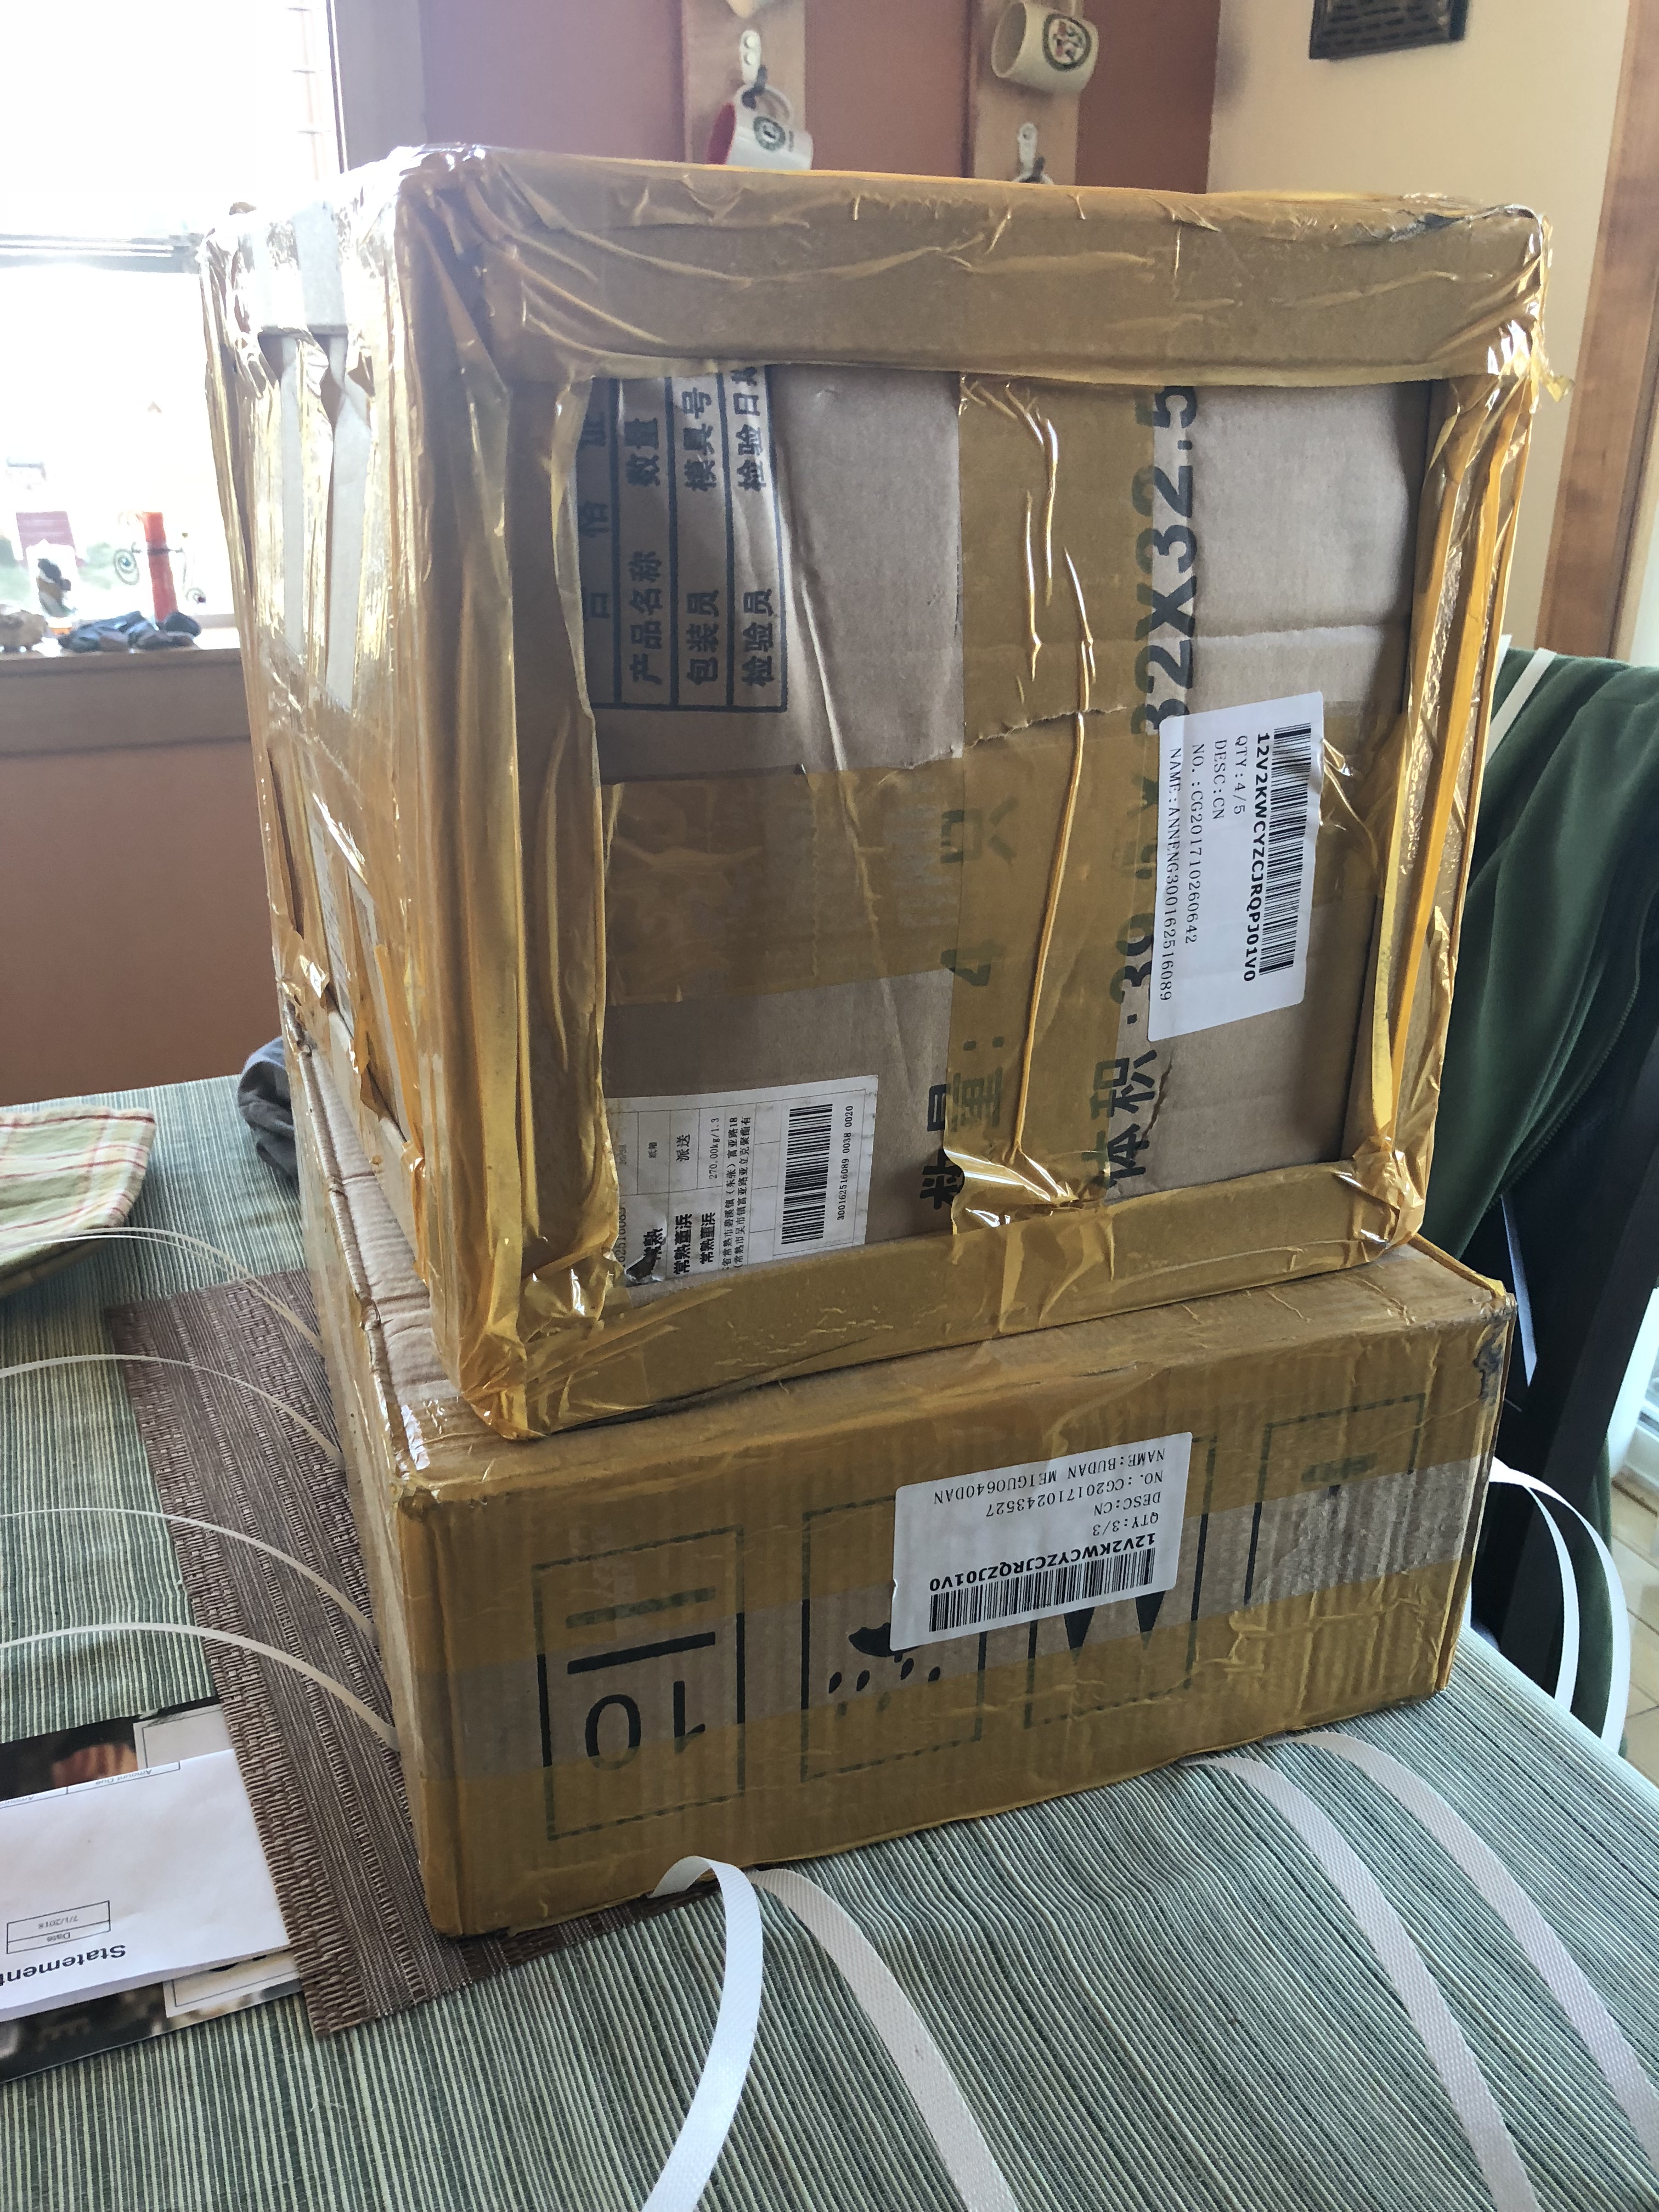
What was in the box?! Our shiny new diesel heater! We had a name brand Webasto in our sailboat and loved it, so we ordered this one for around $500. It includes the fuel tank, pump, exhaust, wiring...everything. I figured it was worth the gamble before spending an order of magnitude more.
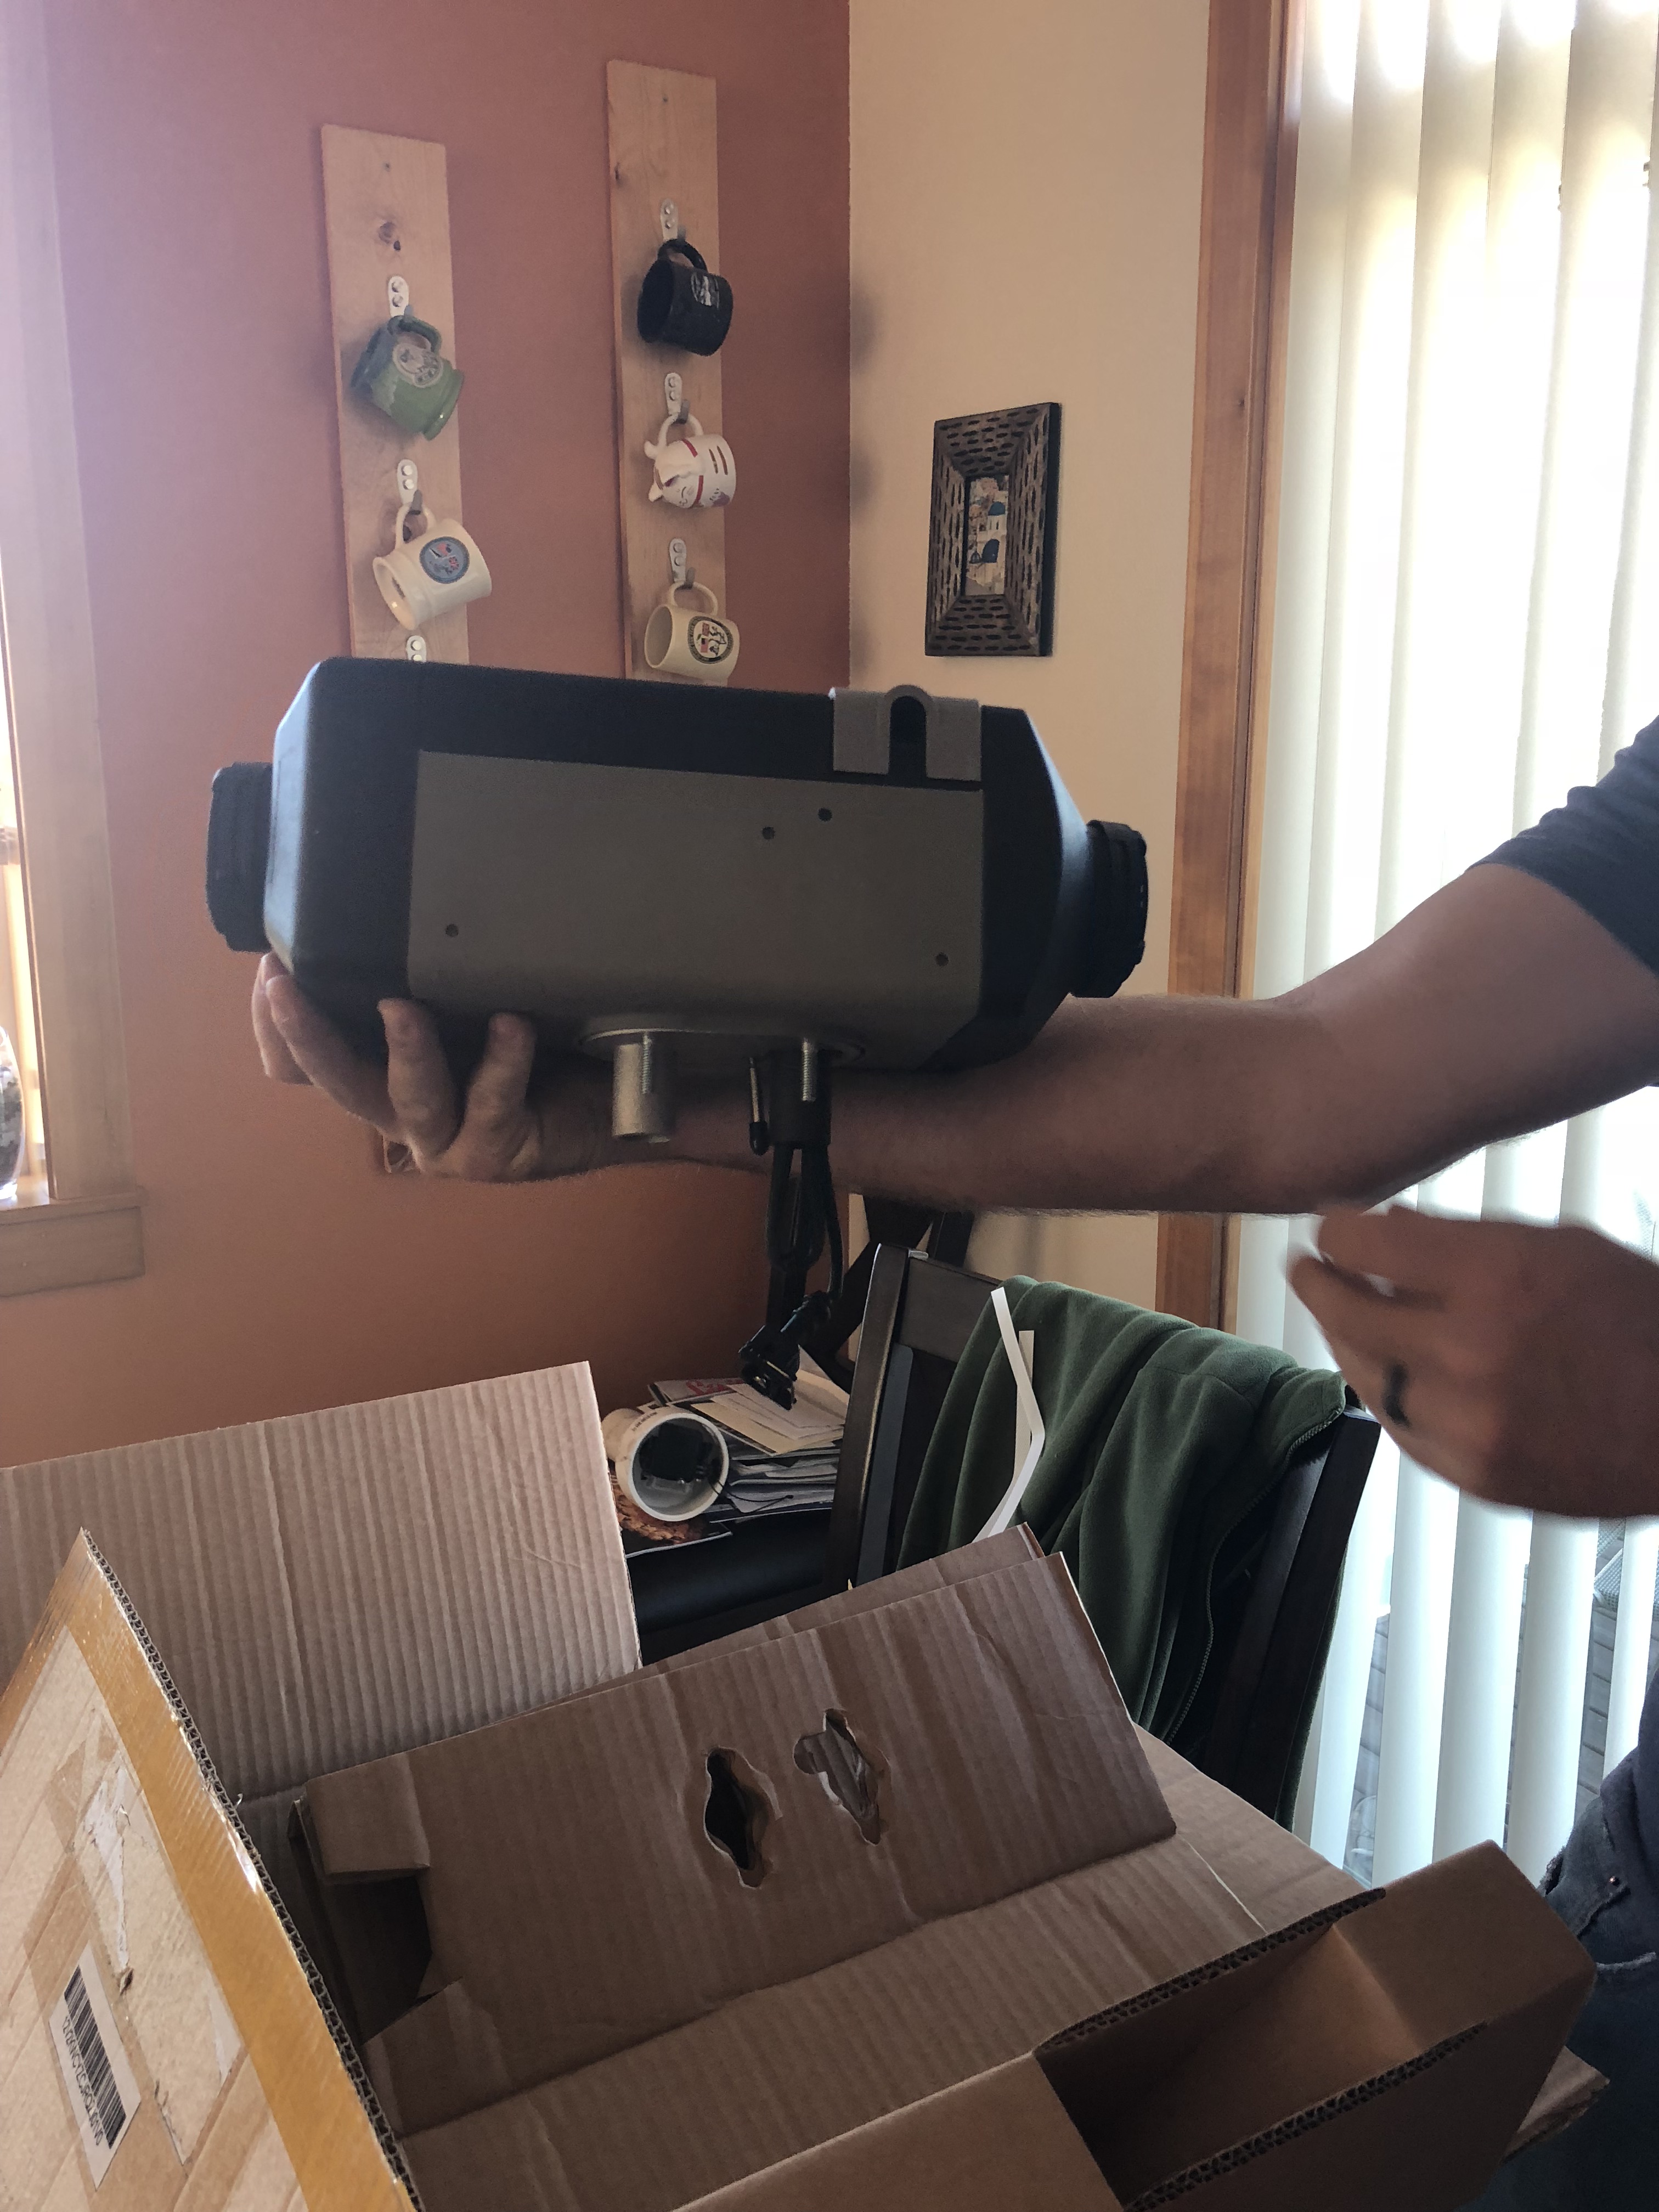
It's the cutest thing ever... seriously tiny!

The muffler is the size of a pork chop...
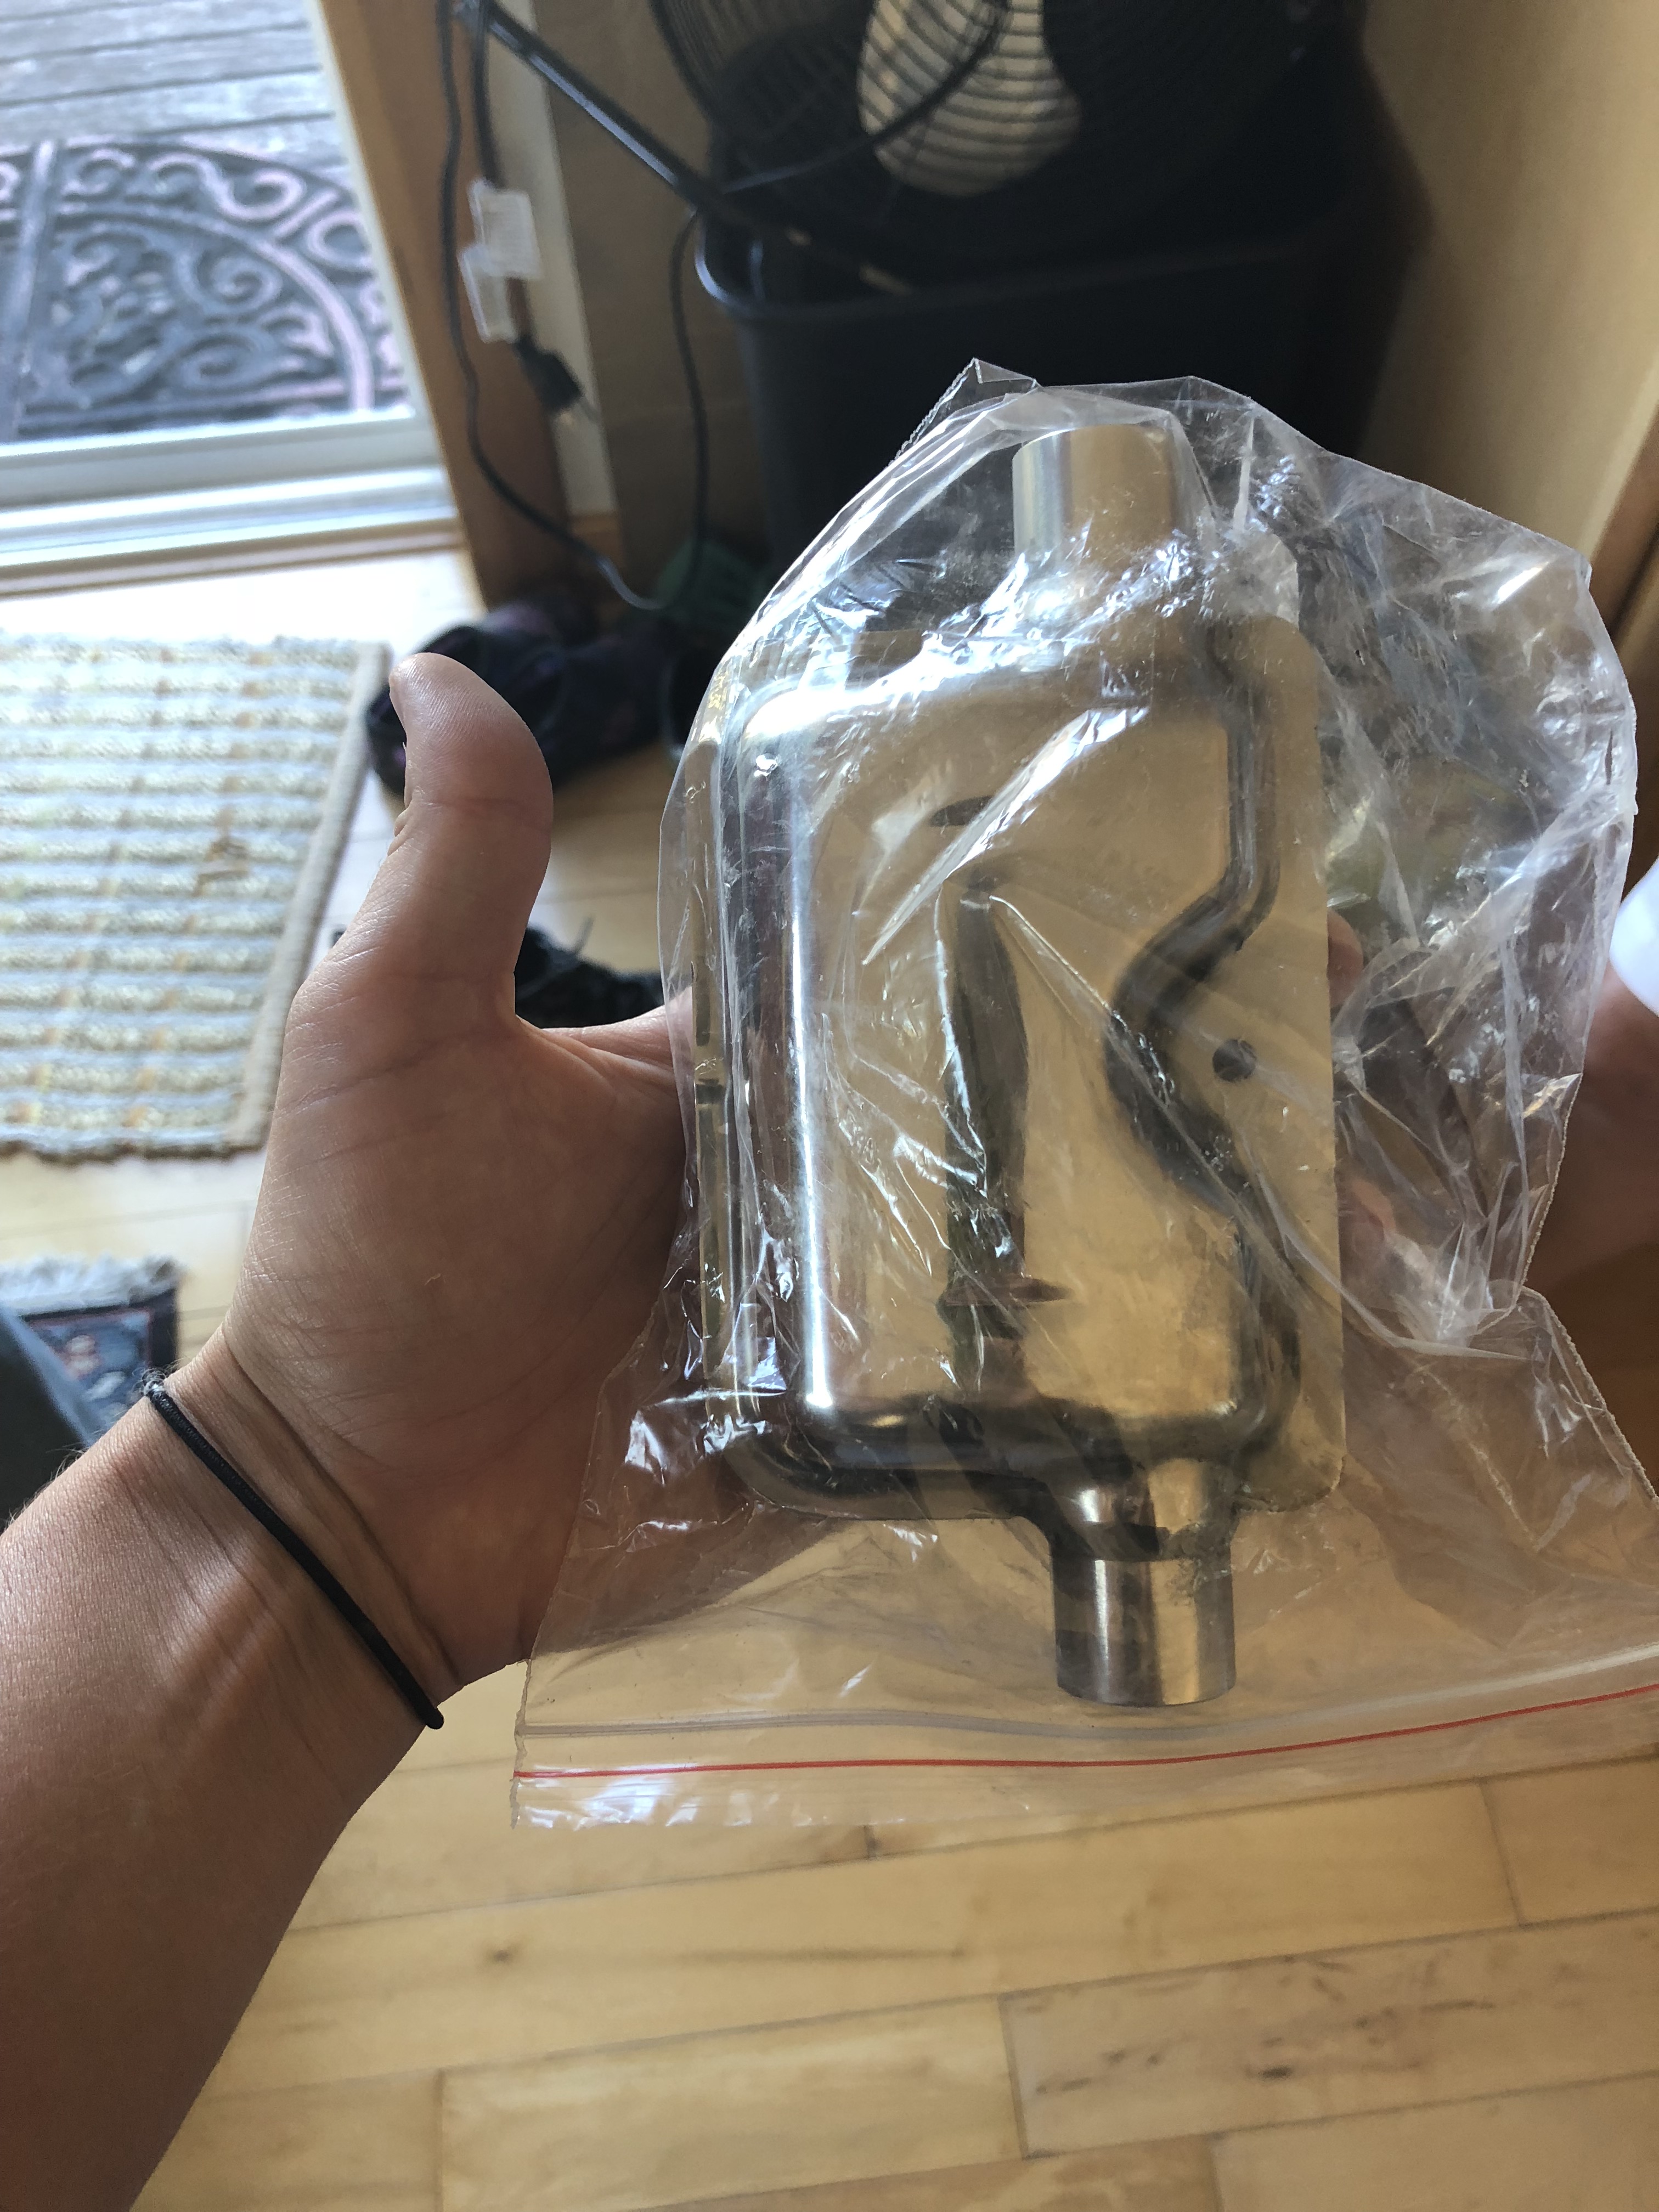
Obviously there's more to come on this, but I wanted to share! I liked the idea of forced air diesel, because it's more efficient than propane and we don't have a good place to mount a propane that that would be large enough to run a heater and a stove.
We've also been ordering a ton of stuff from Amazon so it's starting to feel like Christmas over here at the house!
We're planning on using a water bladder instead of a solid tank due to space constraints.
We also got this mysterious looking box from China!
What was in the box?! Our shiny new diesel heater!
We had a name brand Webasto in our sailboat and loved it, so we ordered this one for around $500. It includes the fuel tank, pump, exhaust, wiring...everything. I figured it was worth the gamble before spending an order of magnitude more.
It's the cutest thing ever... seriously tiny!
The muffler is the size of a pork chop...
Obviously there's more to come on this, but I wanted to share! I liked the idea of forced air diesel, because it's more efficient than propane and we don't have a good place to mount a propane that that would be large enough to run a heater and a stove.
underkill
Active member
We had previously given a lot of thought to the logistics of the pop top and how we were going to do it with hinges and whatnot, but couldn't quite figure out how to make an entire hinge along the front edge work with the eventual nose cone (fun fact: we were overthinking the waterproofing) and I couldn't figure out how to make the uneven pop up hinges like they use on the VW vans. That led us eventually to this fantastic youtube video of a camper rebuild that we essentially copied, only with better materials!
CLICK HERE FOR VIDEO ON YOUTUBE!
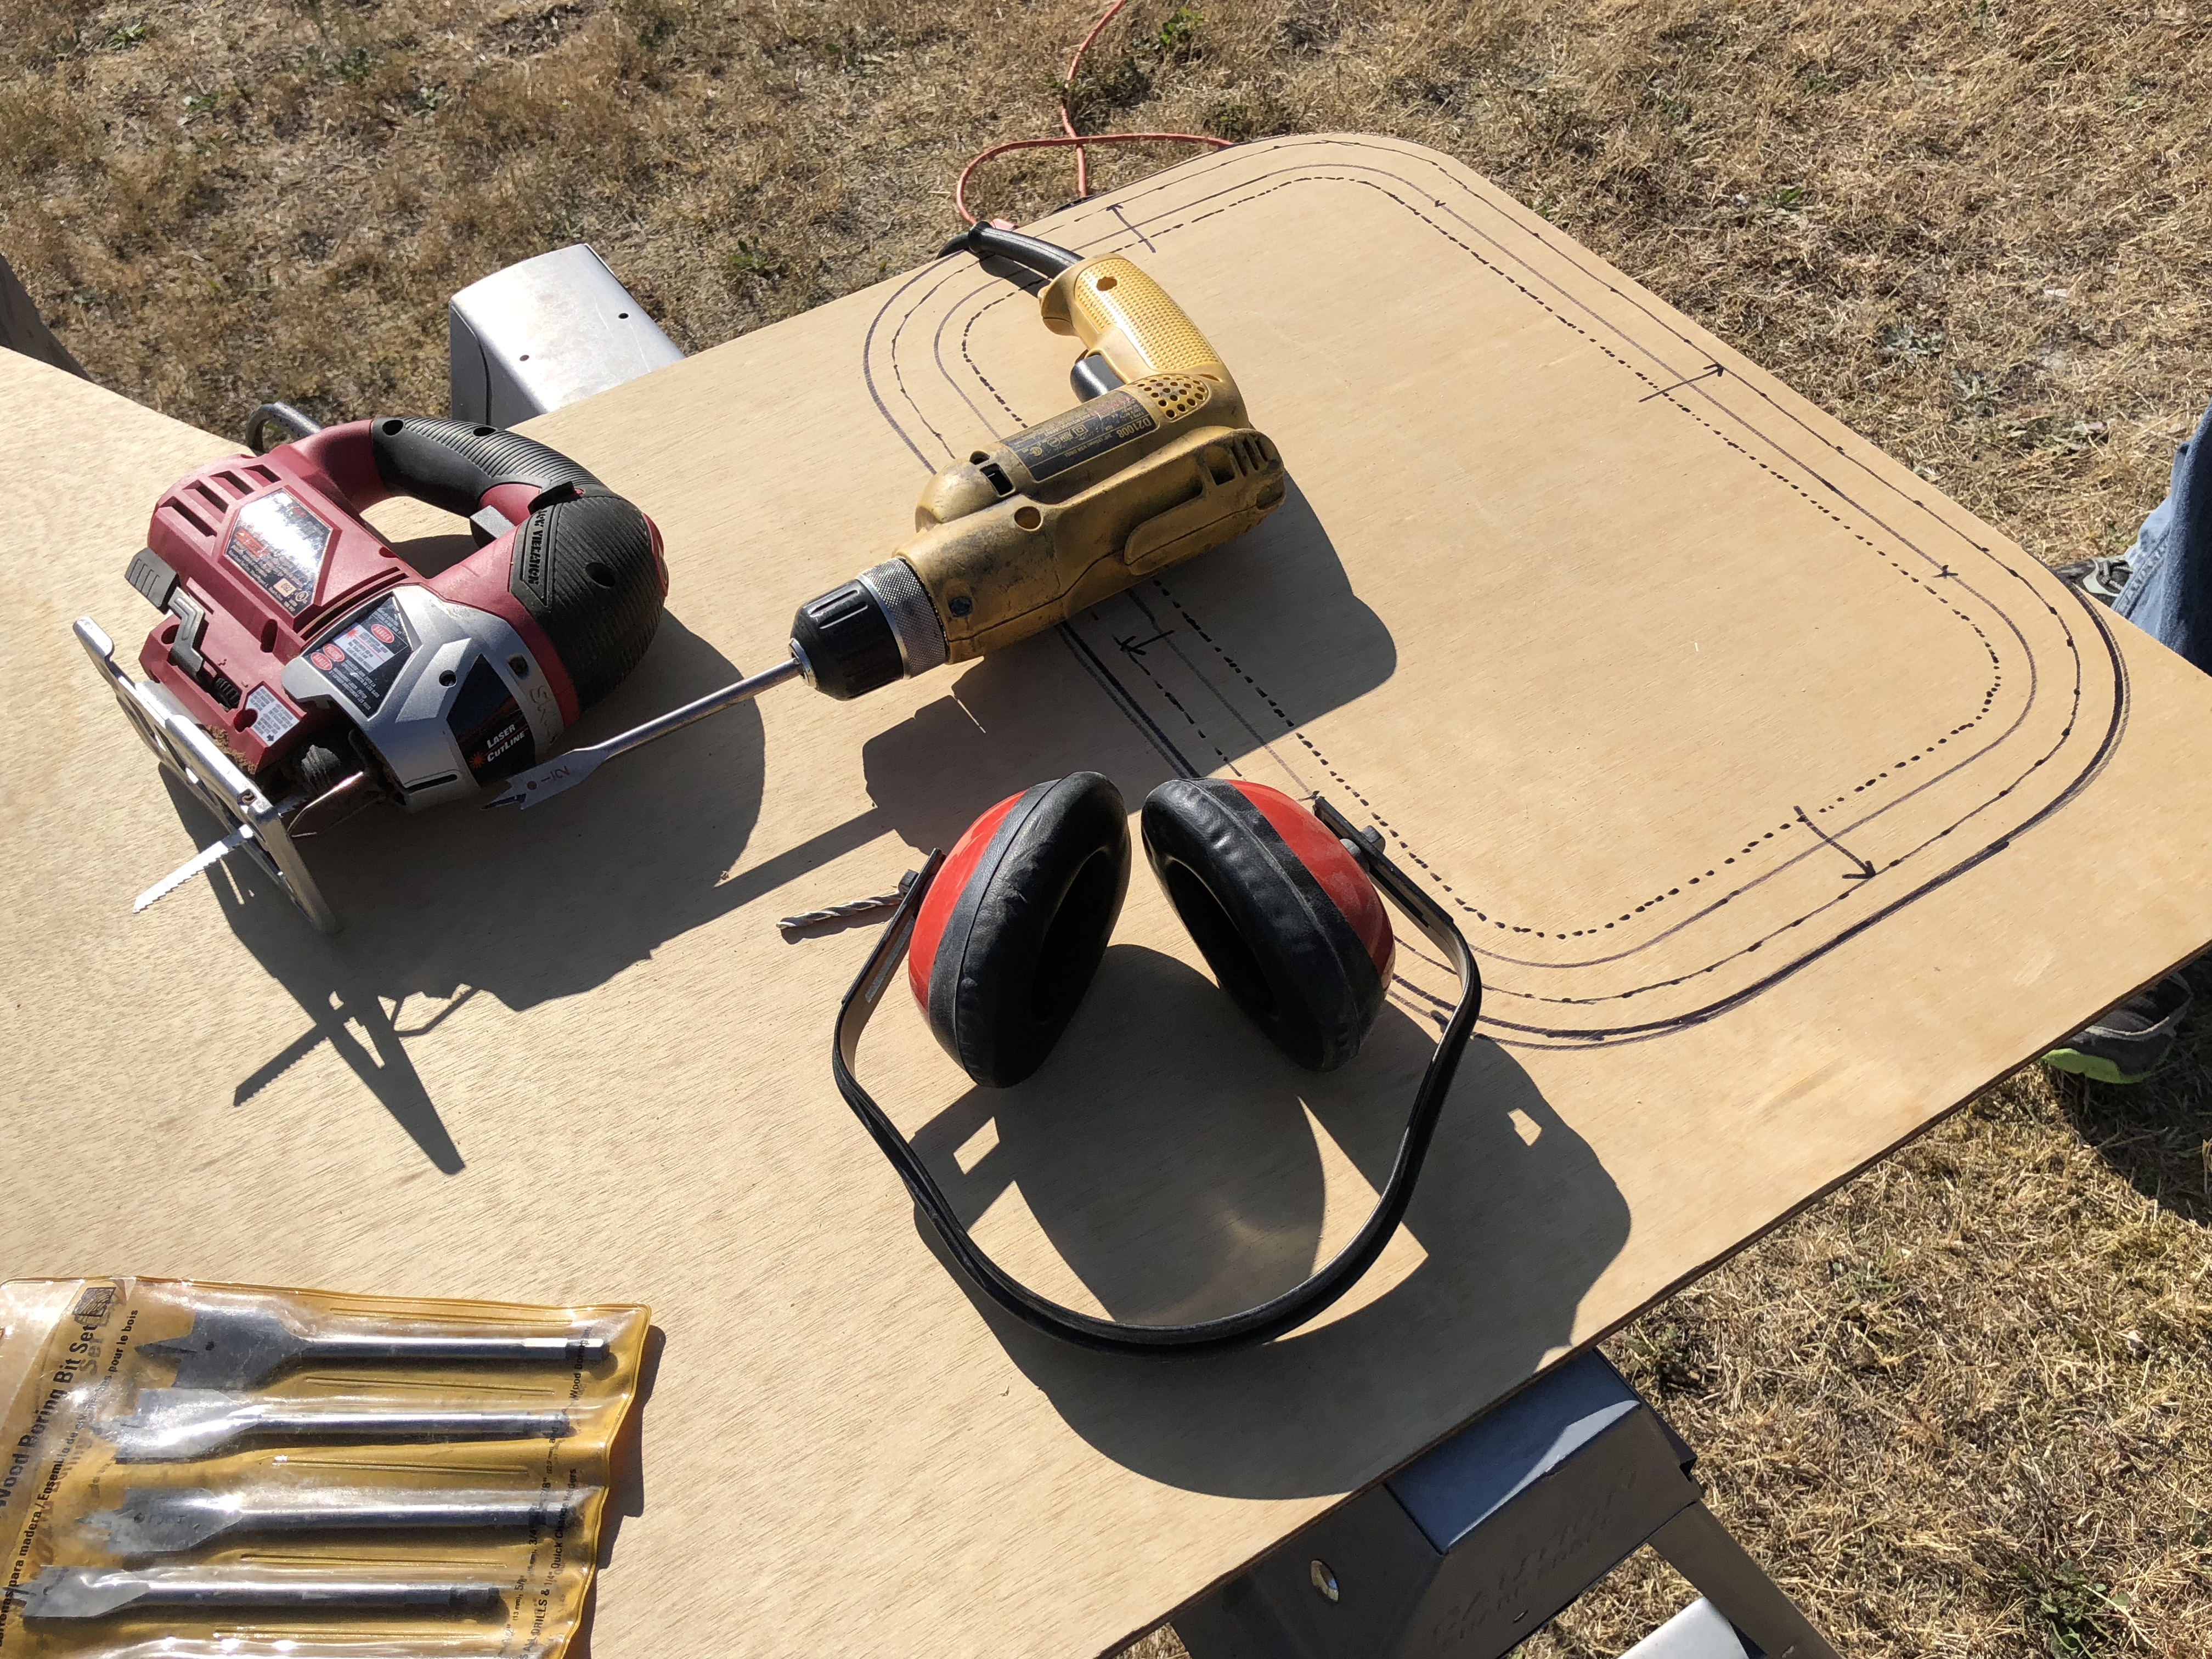
So.. that doesn't look that hard at all! Time for another crappy Microsoft Paint rendering!
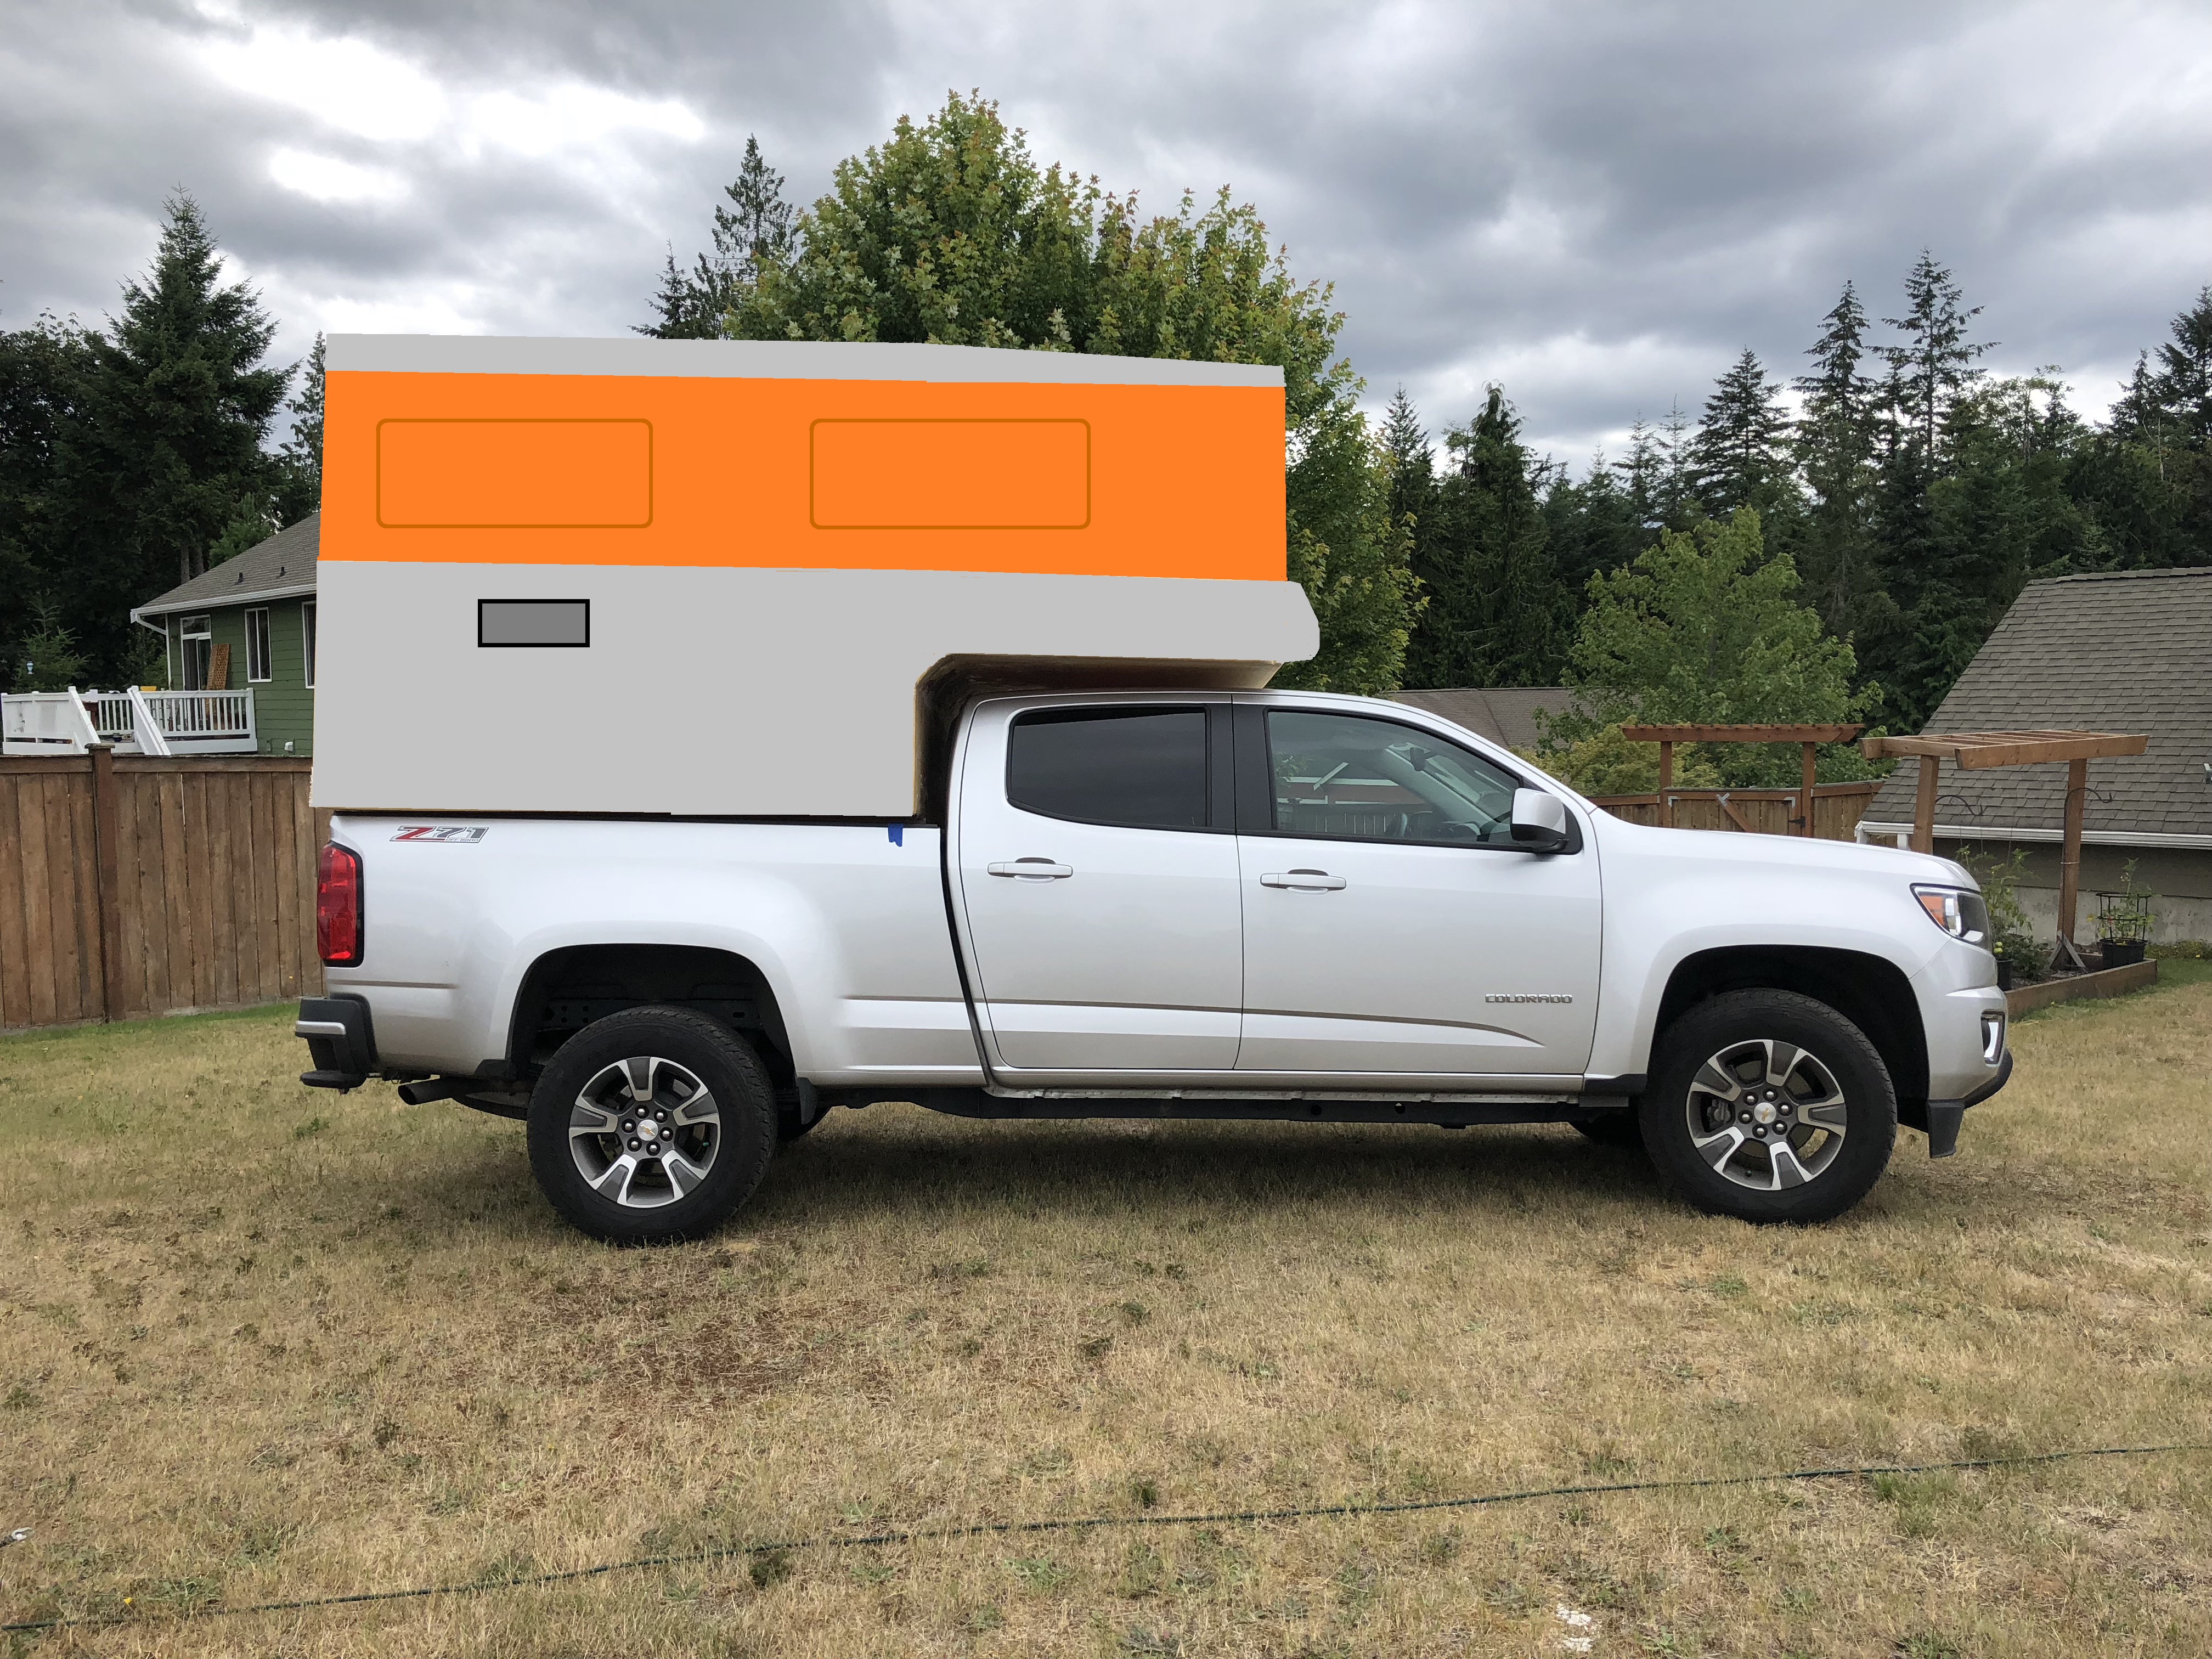
One thing we didn't like about the guy in the Youtube video was the way he joined the conduit together... Since we're boat people, we decided to use boat bimini cover pieces that you can get on Amazon.
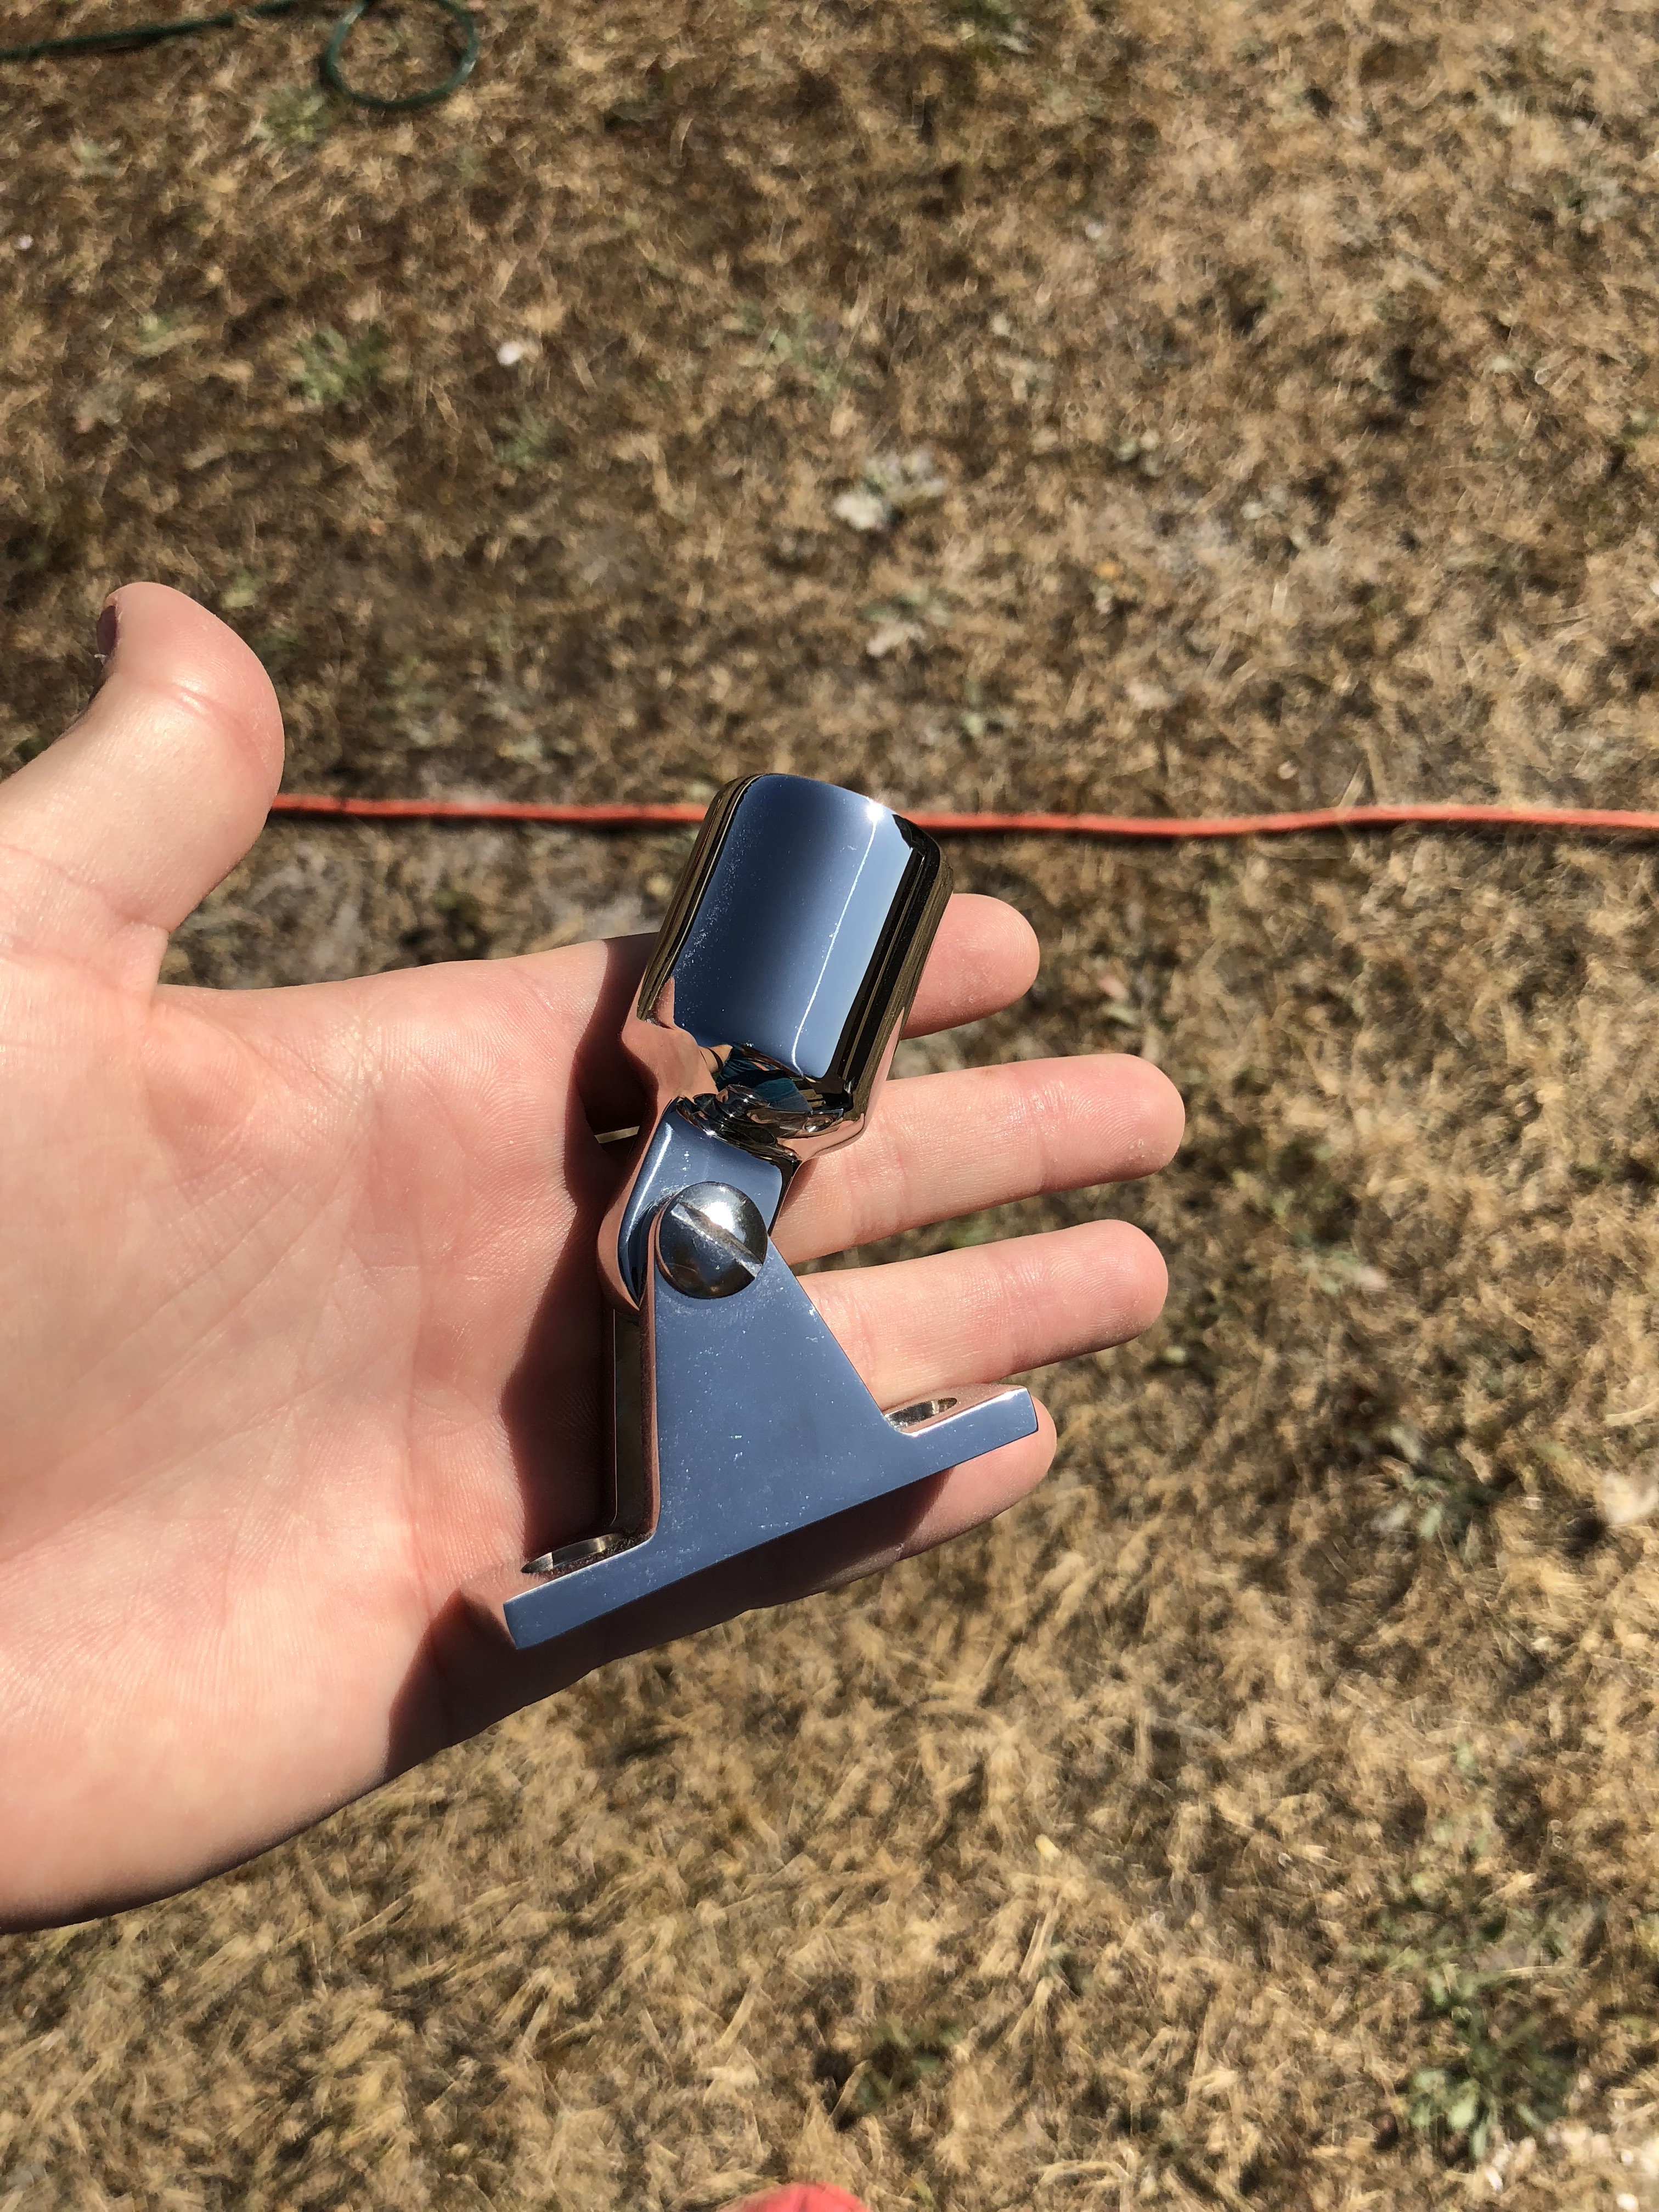
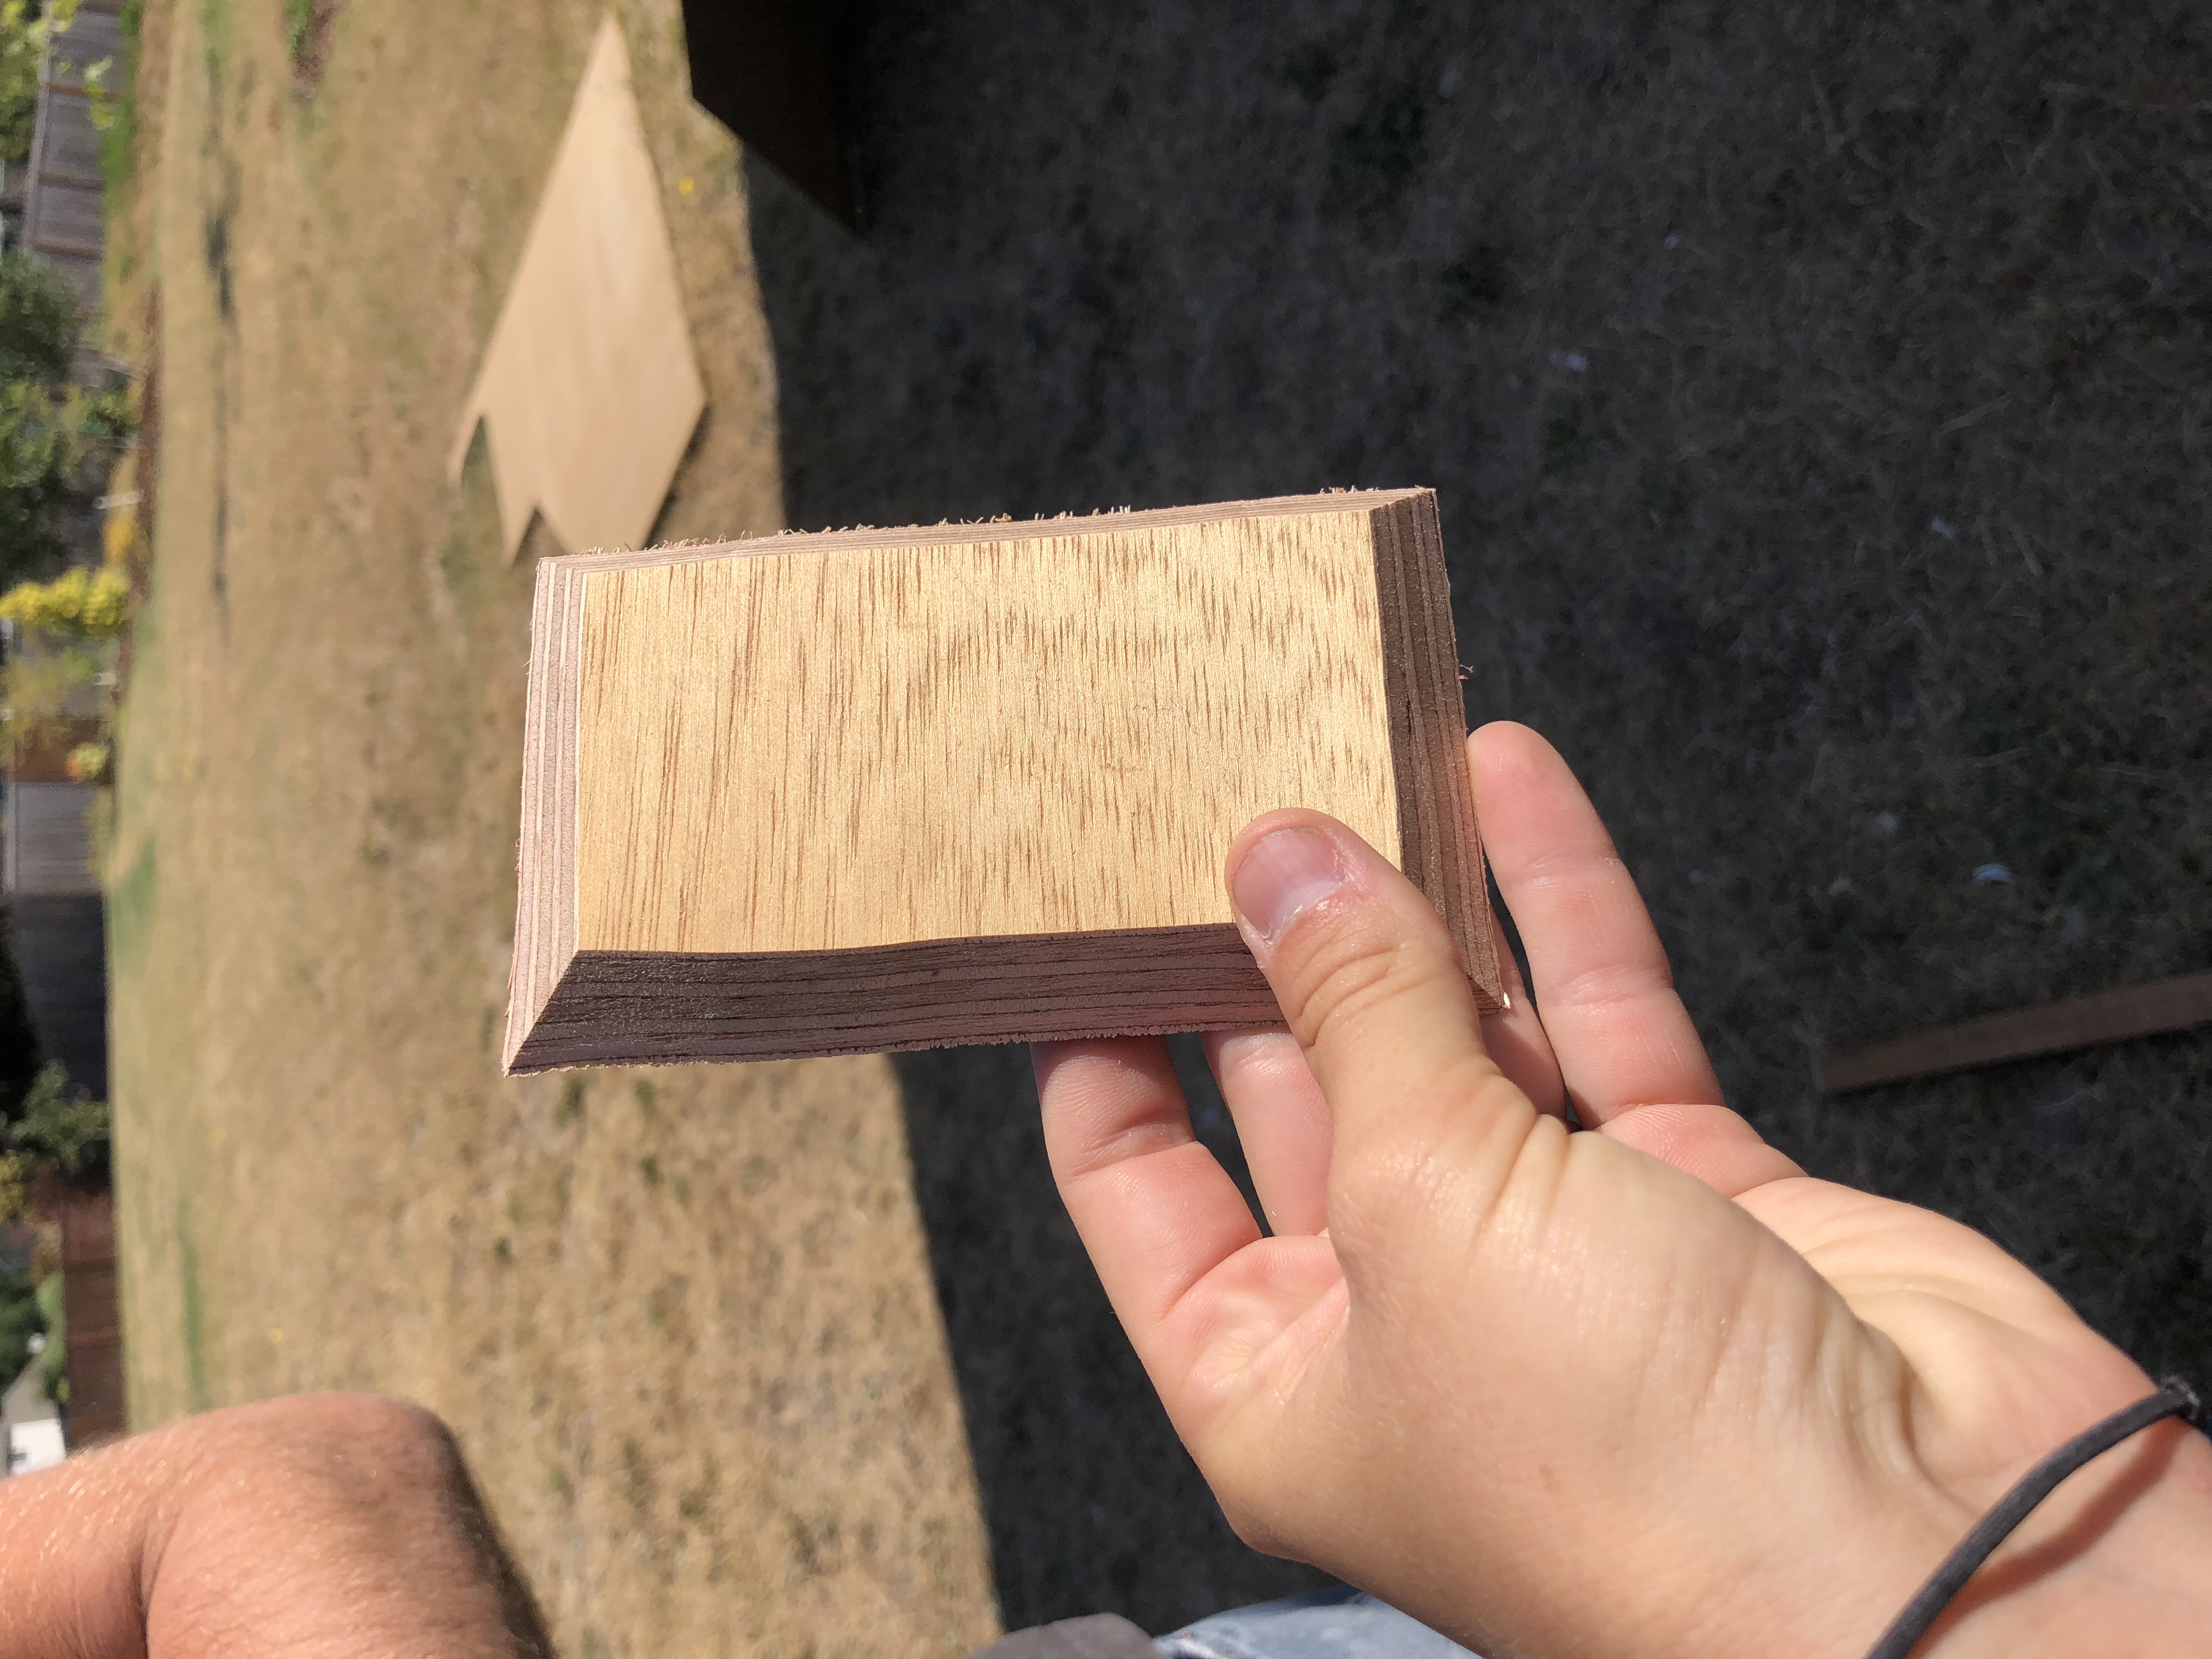
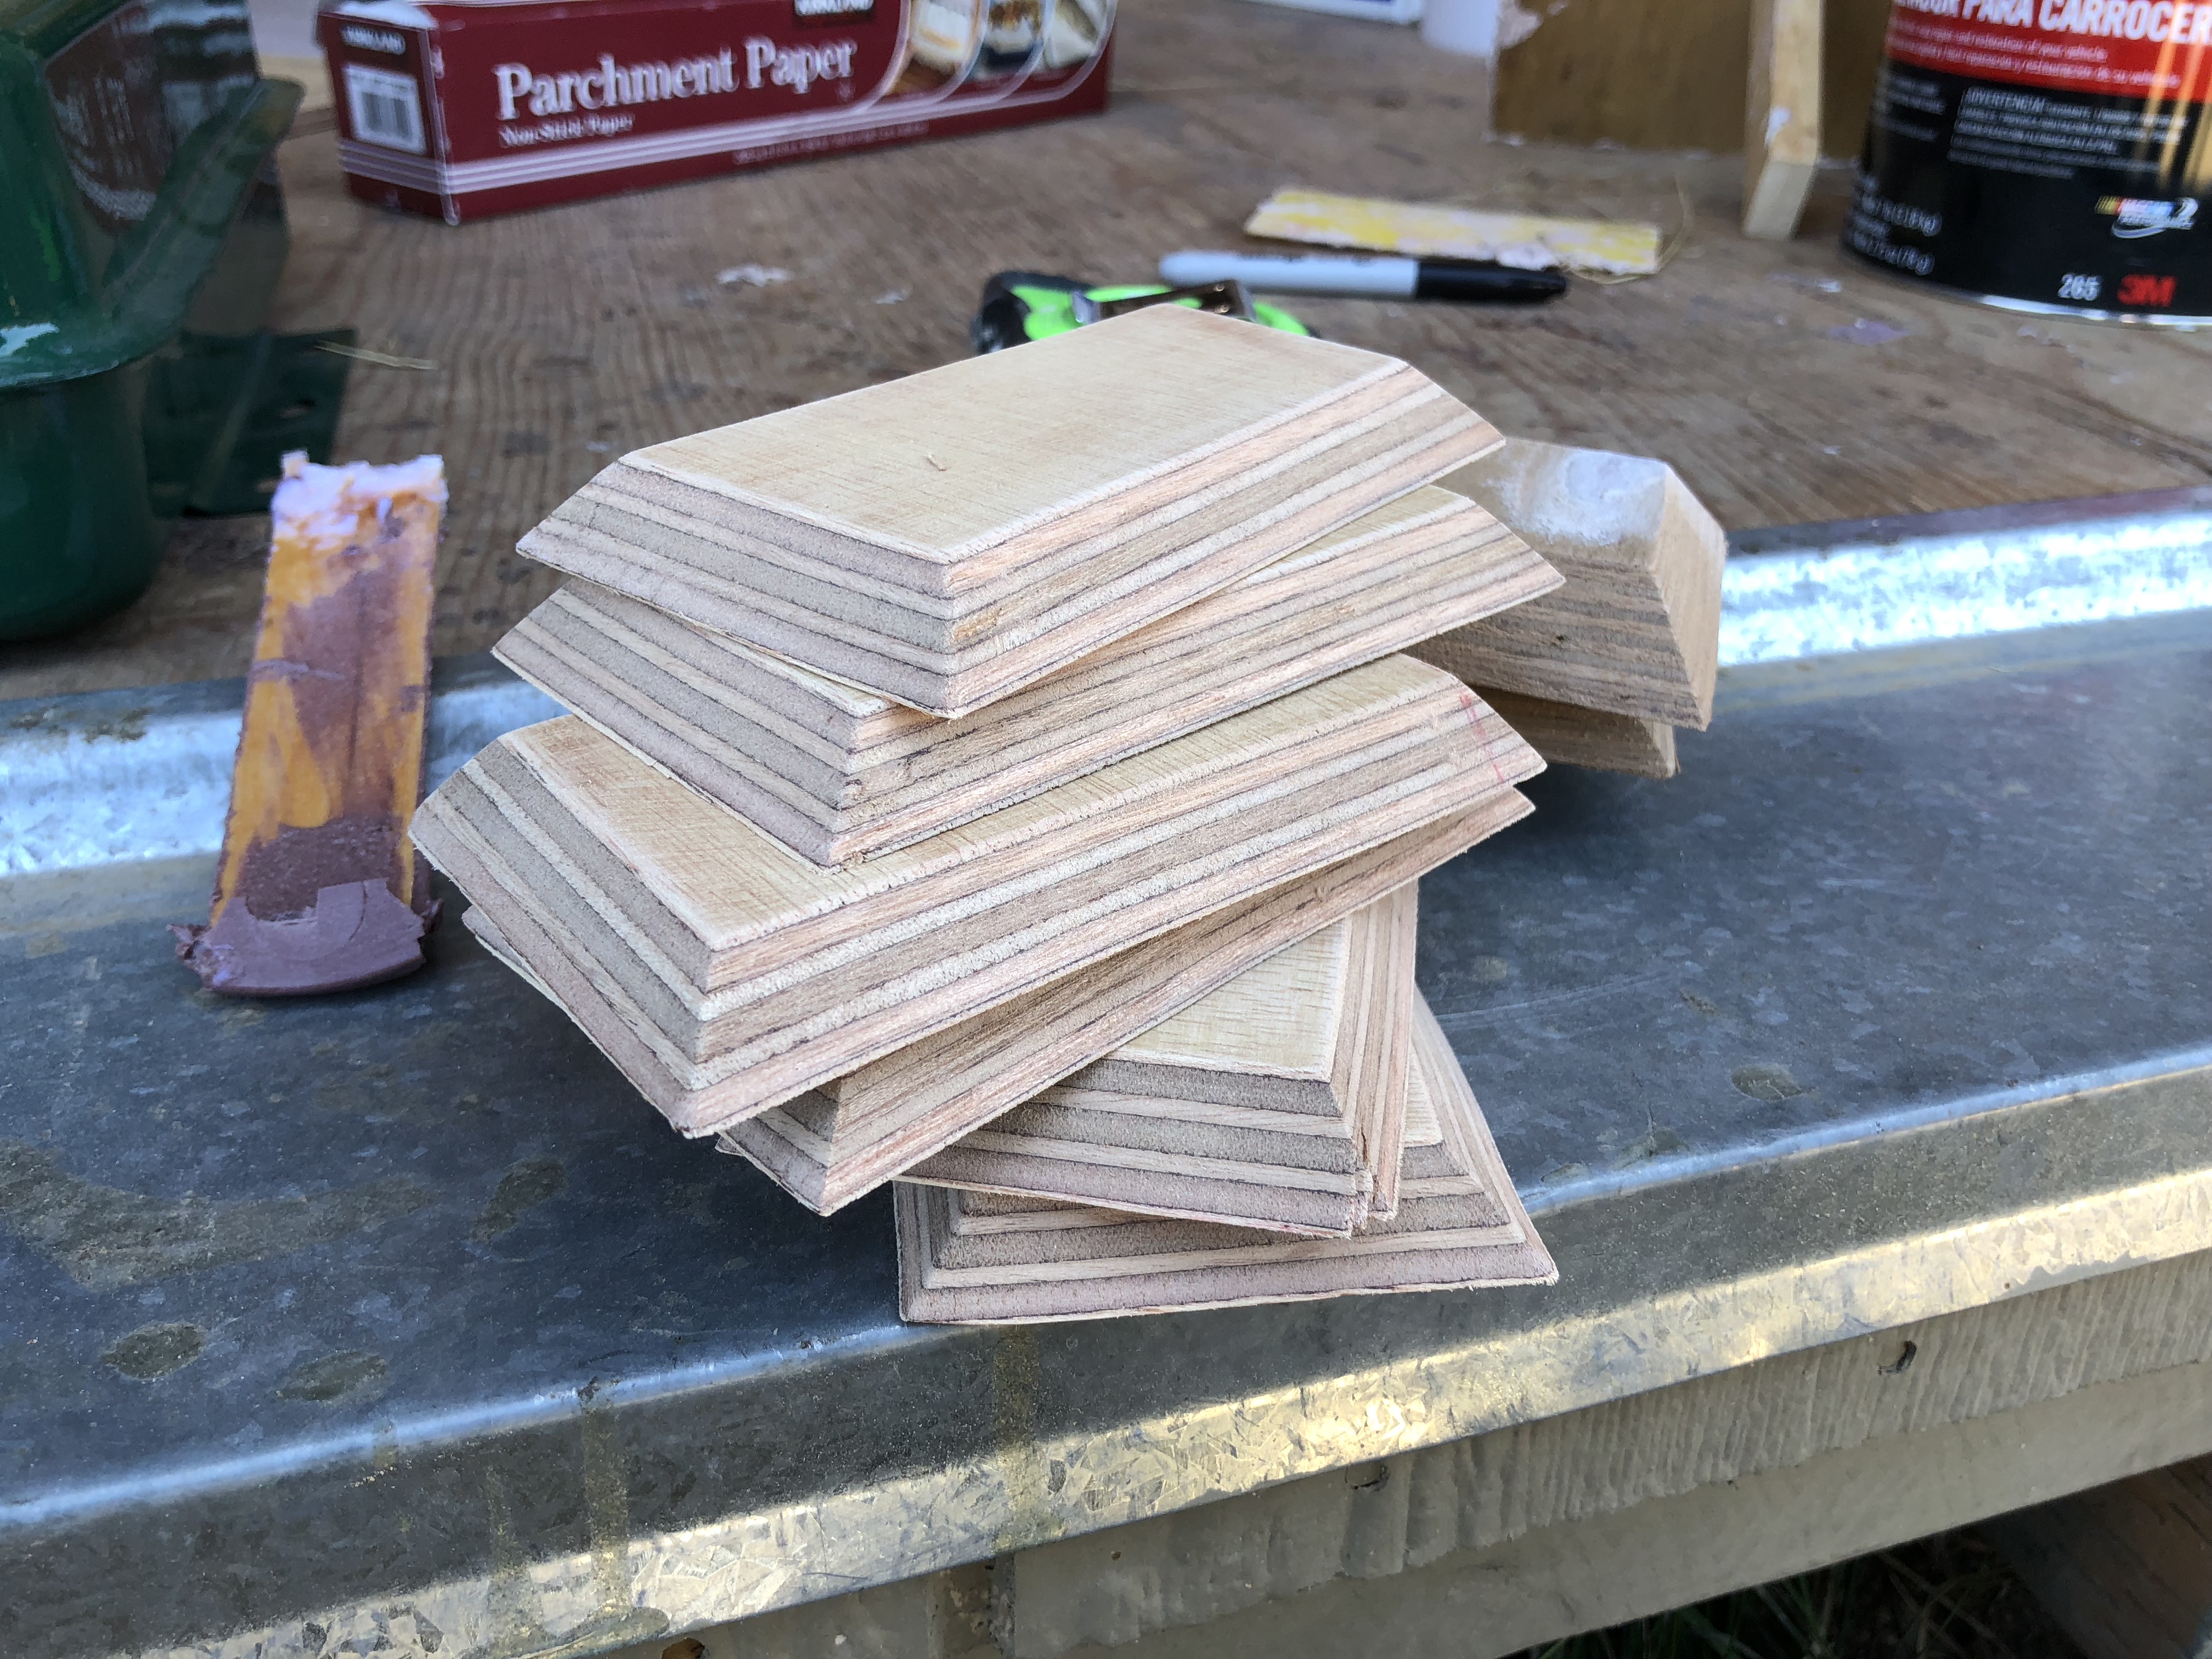
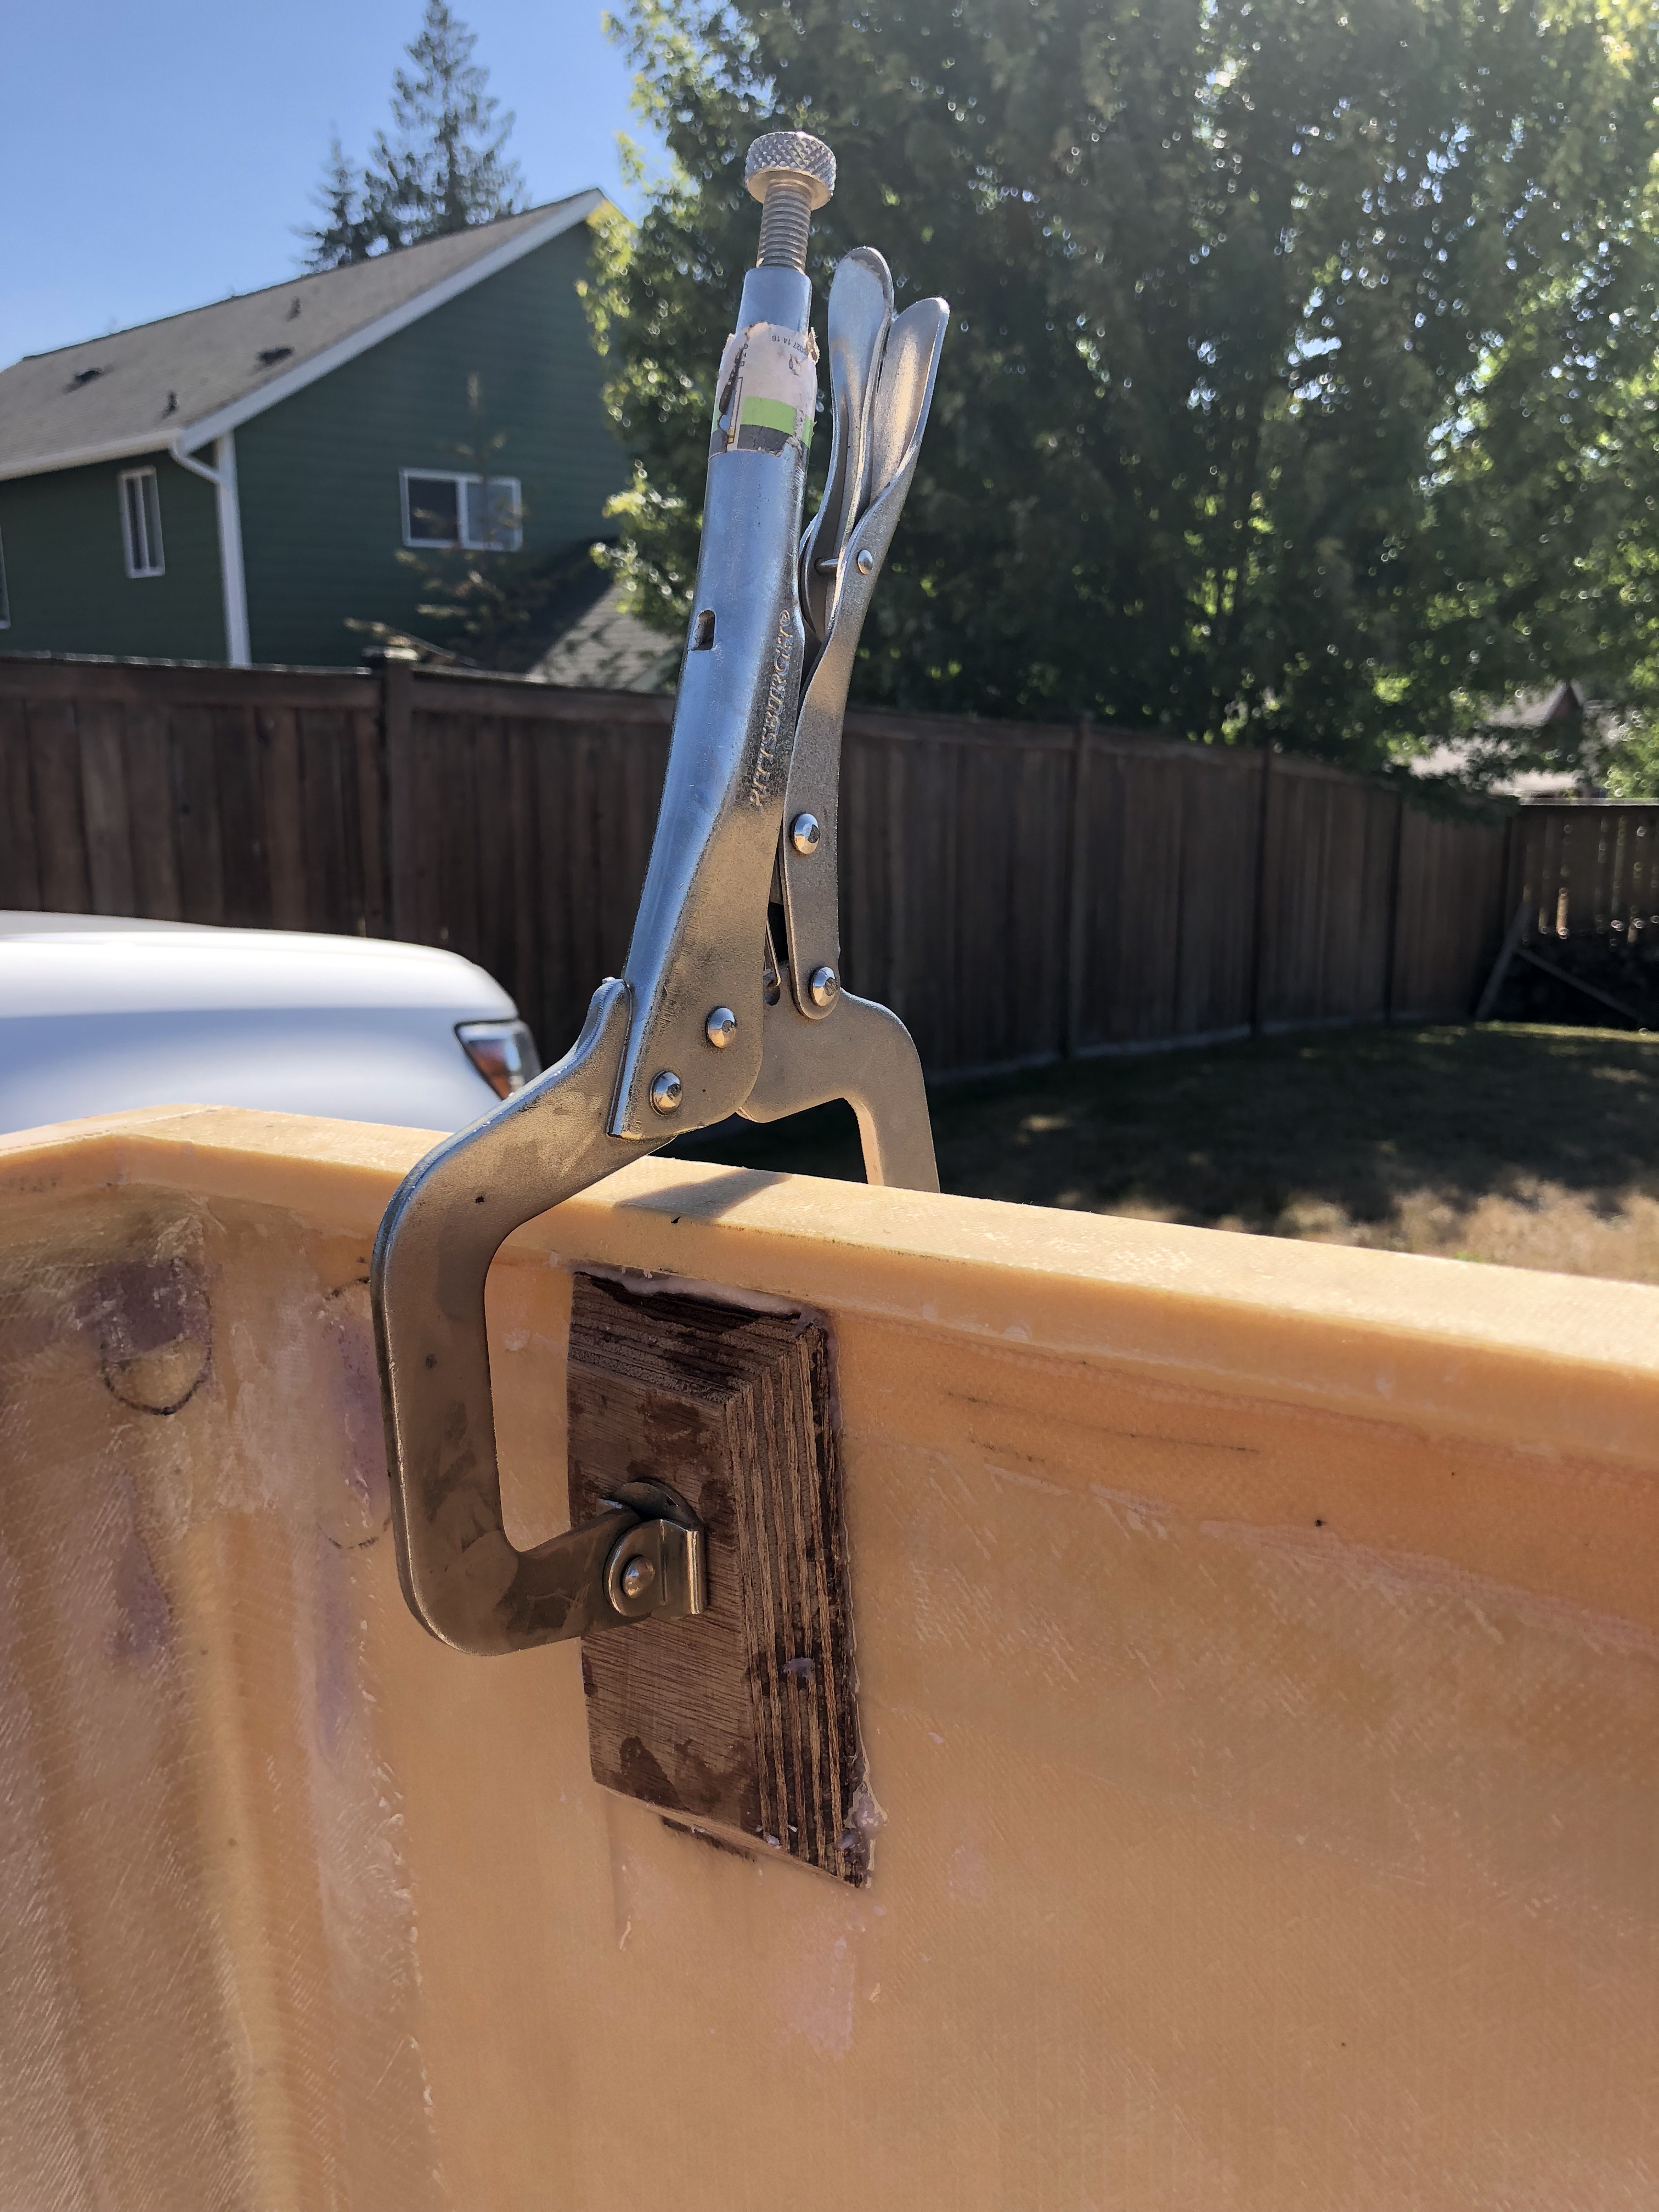
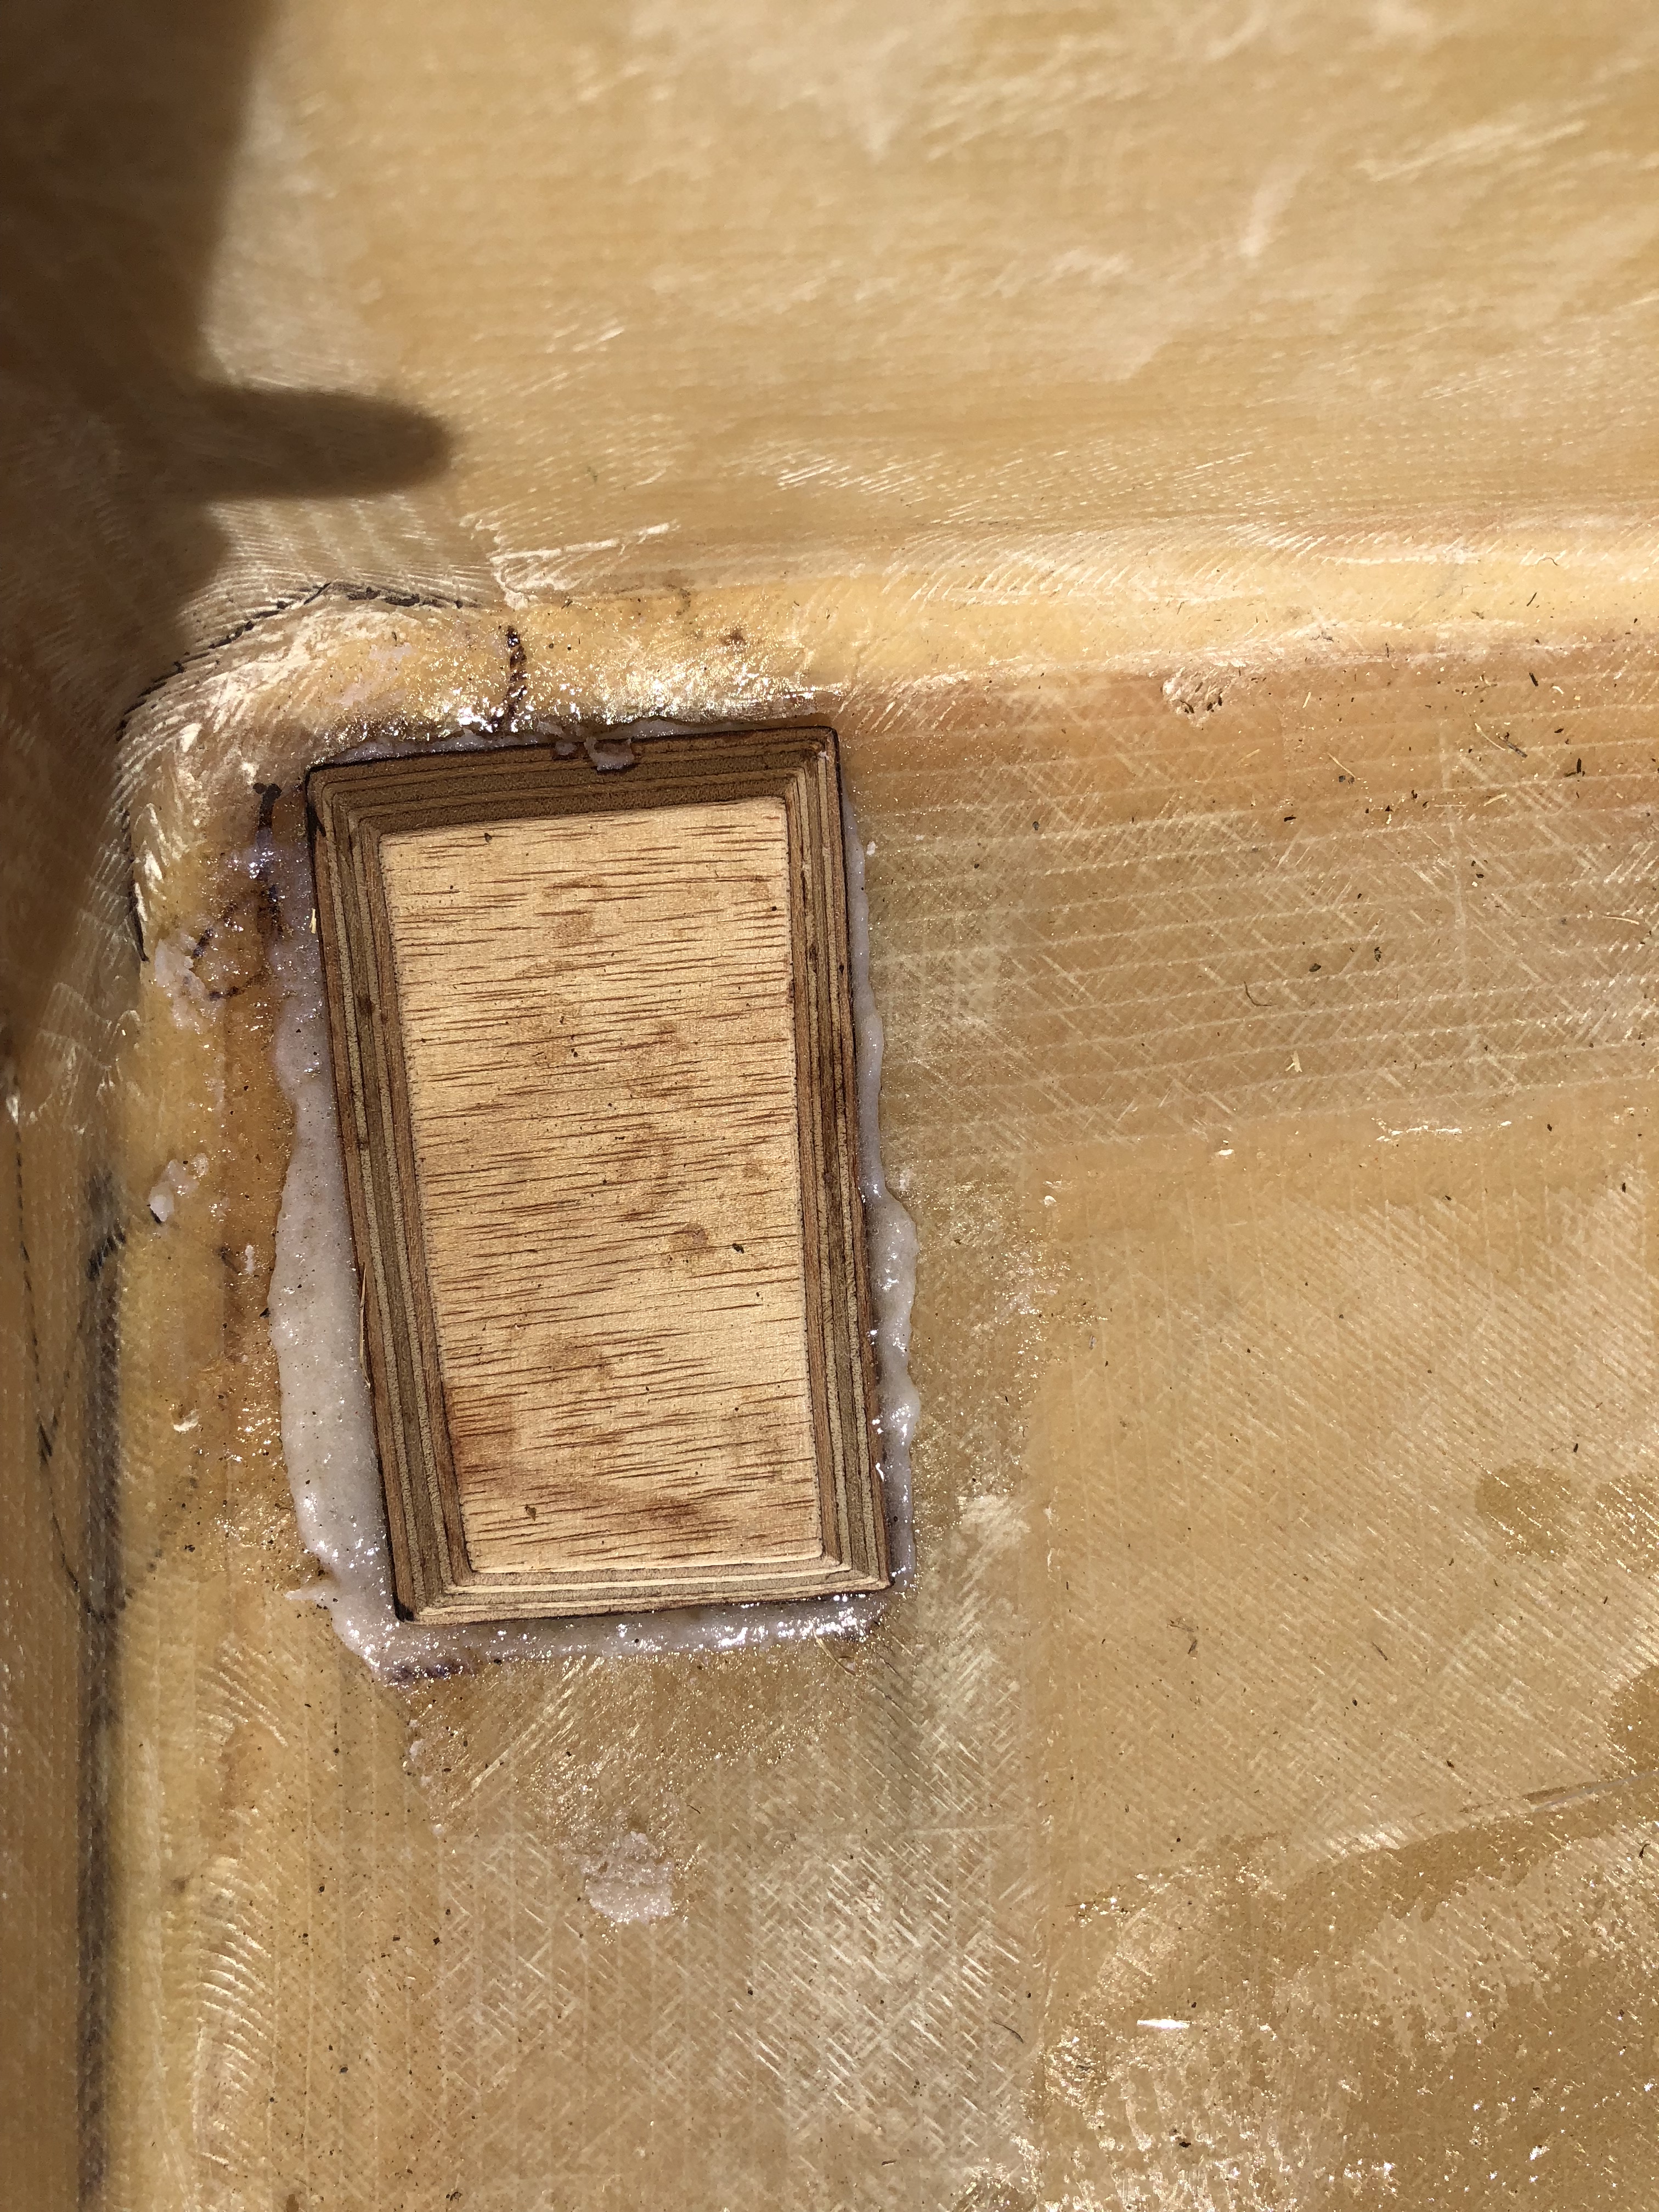
Since we're world champion over-engineer-ers Jason made some backing plates out of scraps of thick marine plywood.
We're going to have the backing plates at all 8 connections to the camper so we have something solid to mount the hardware to!
CLICK HERE FOR VIDEO ON YOUTUBE!
So.. that doesn't look that hard at all! Time for another crappy Microsoft Paint rendering!
One thing we didn't like about the guy in the Youtube video was the way he joined the conduit together... Since we're boat people, we decided to use boat bimini cover pieces that you can get on Amazon.
Since we're world champion over-engineer-ers Jason made some backing plates out of scraps of thick marine plywood.
We're going to have the backing plates at all 8 connections to the camper so we have something solid to mount the hardware to!
Last edited by a moderator:
underkill
Active member
The more we work on prepping the shell for paint, the more spots we find that need touch up filler...

We still have Bondo to sand... but at least it's not itchy like fiberglass!
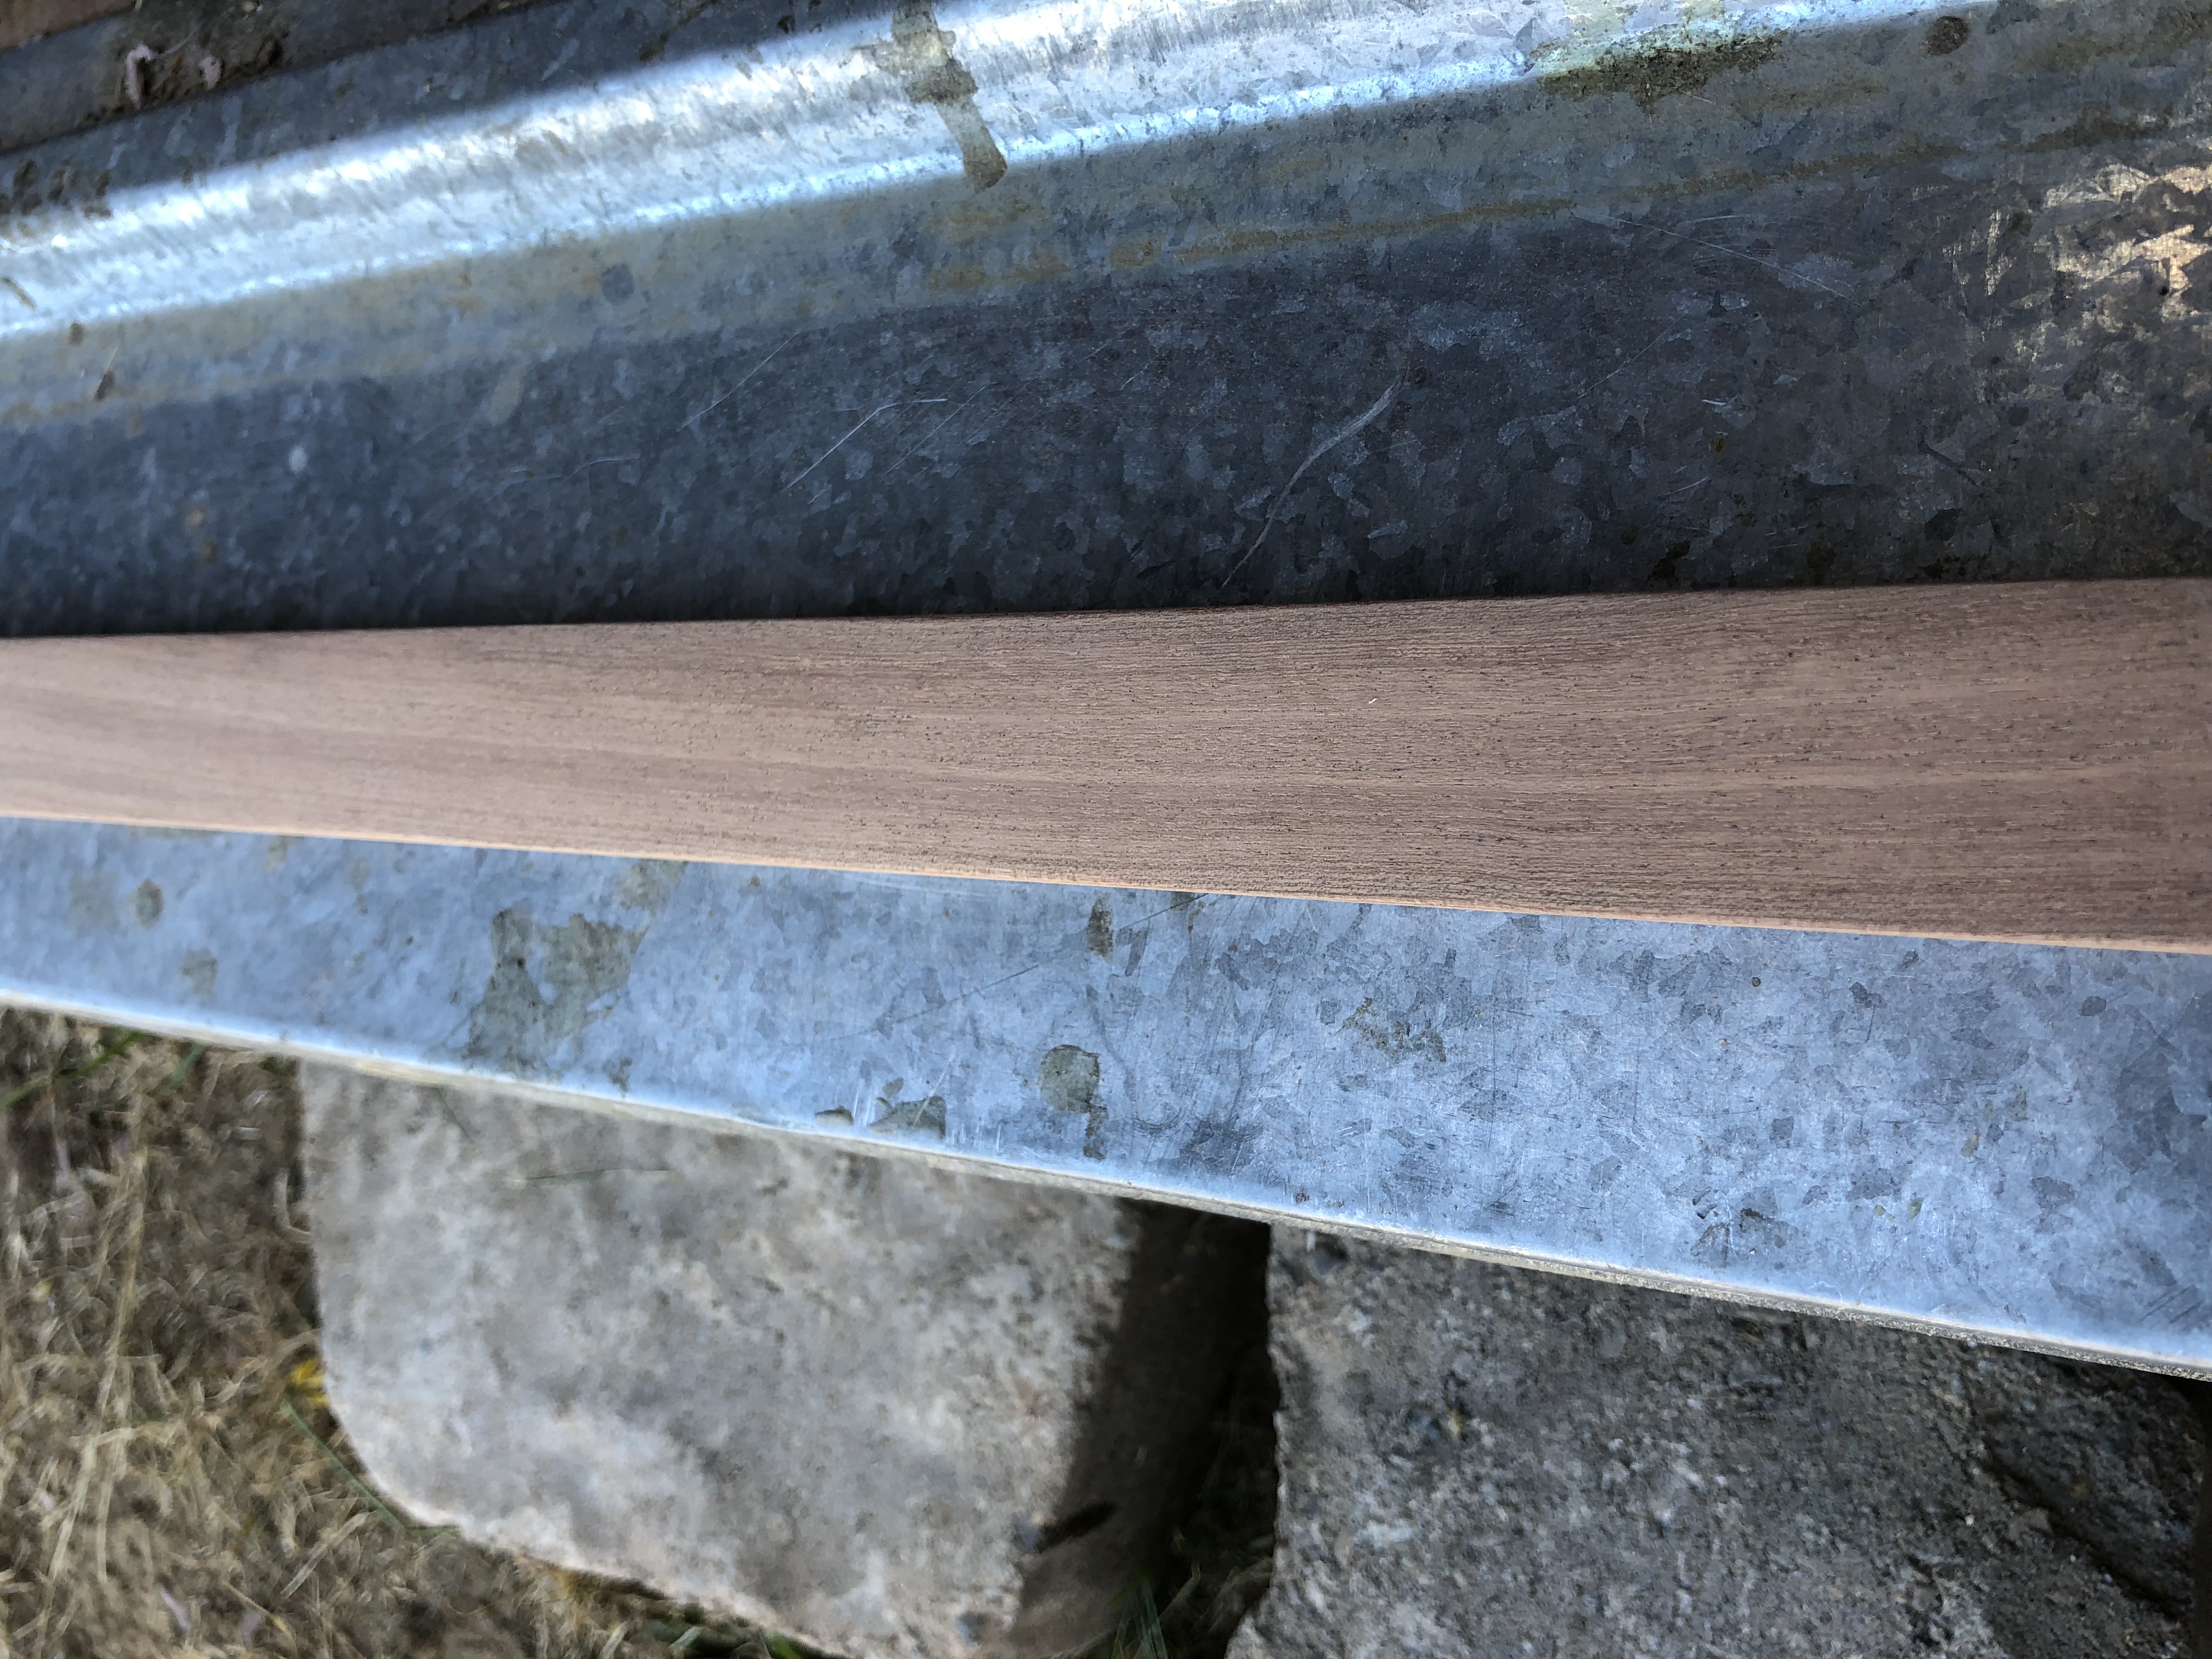
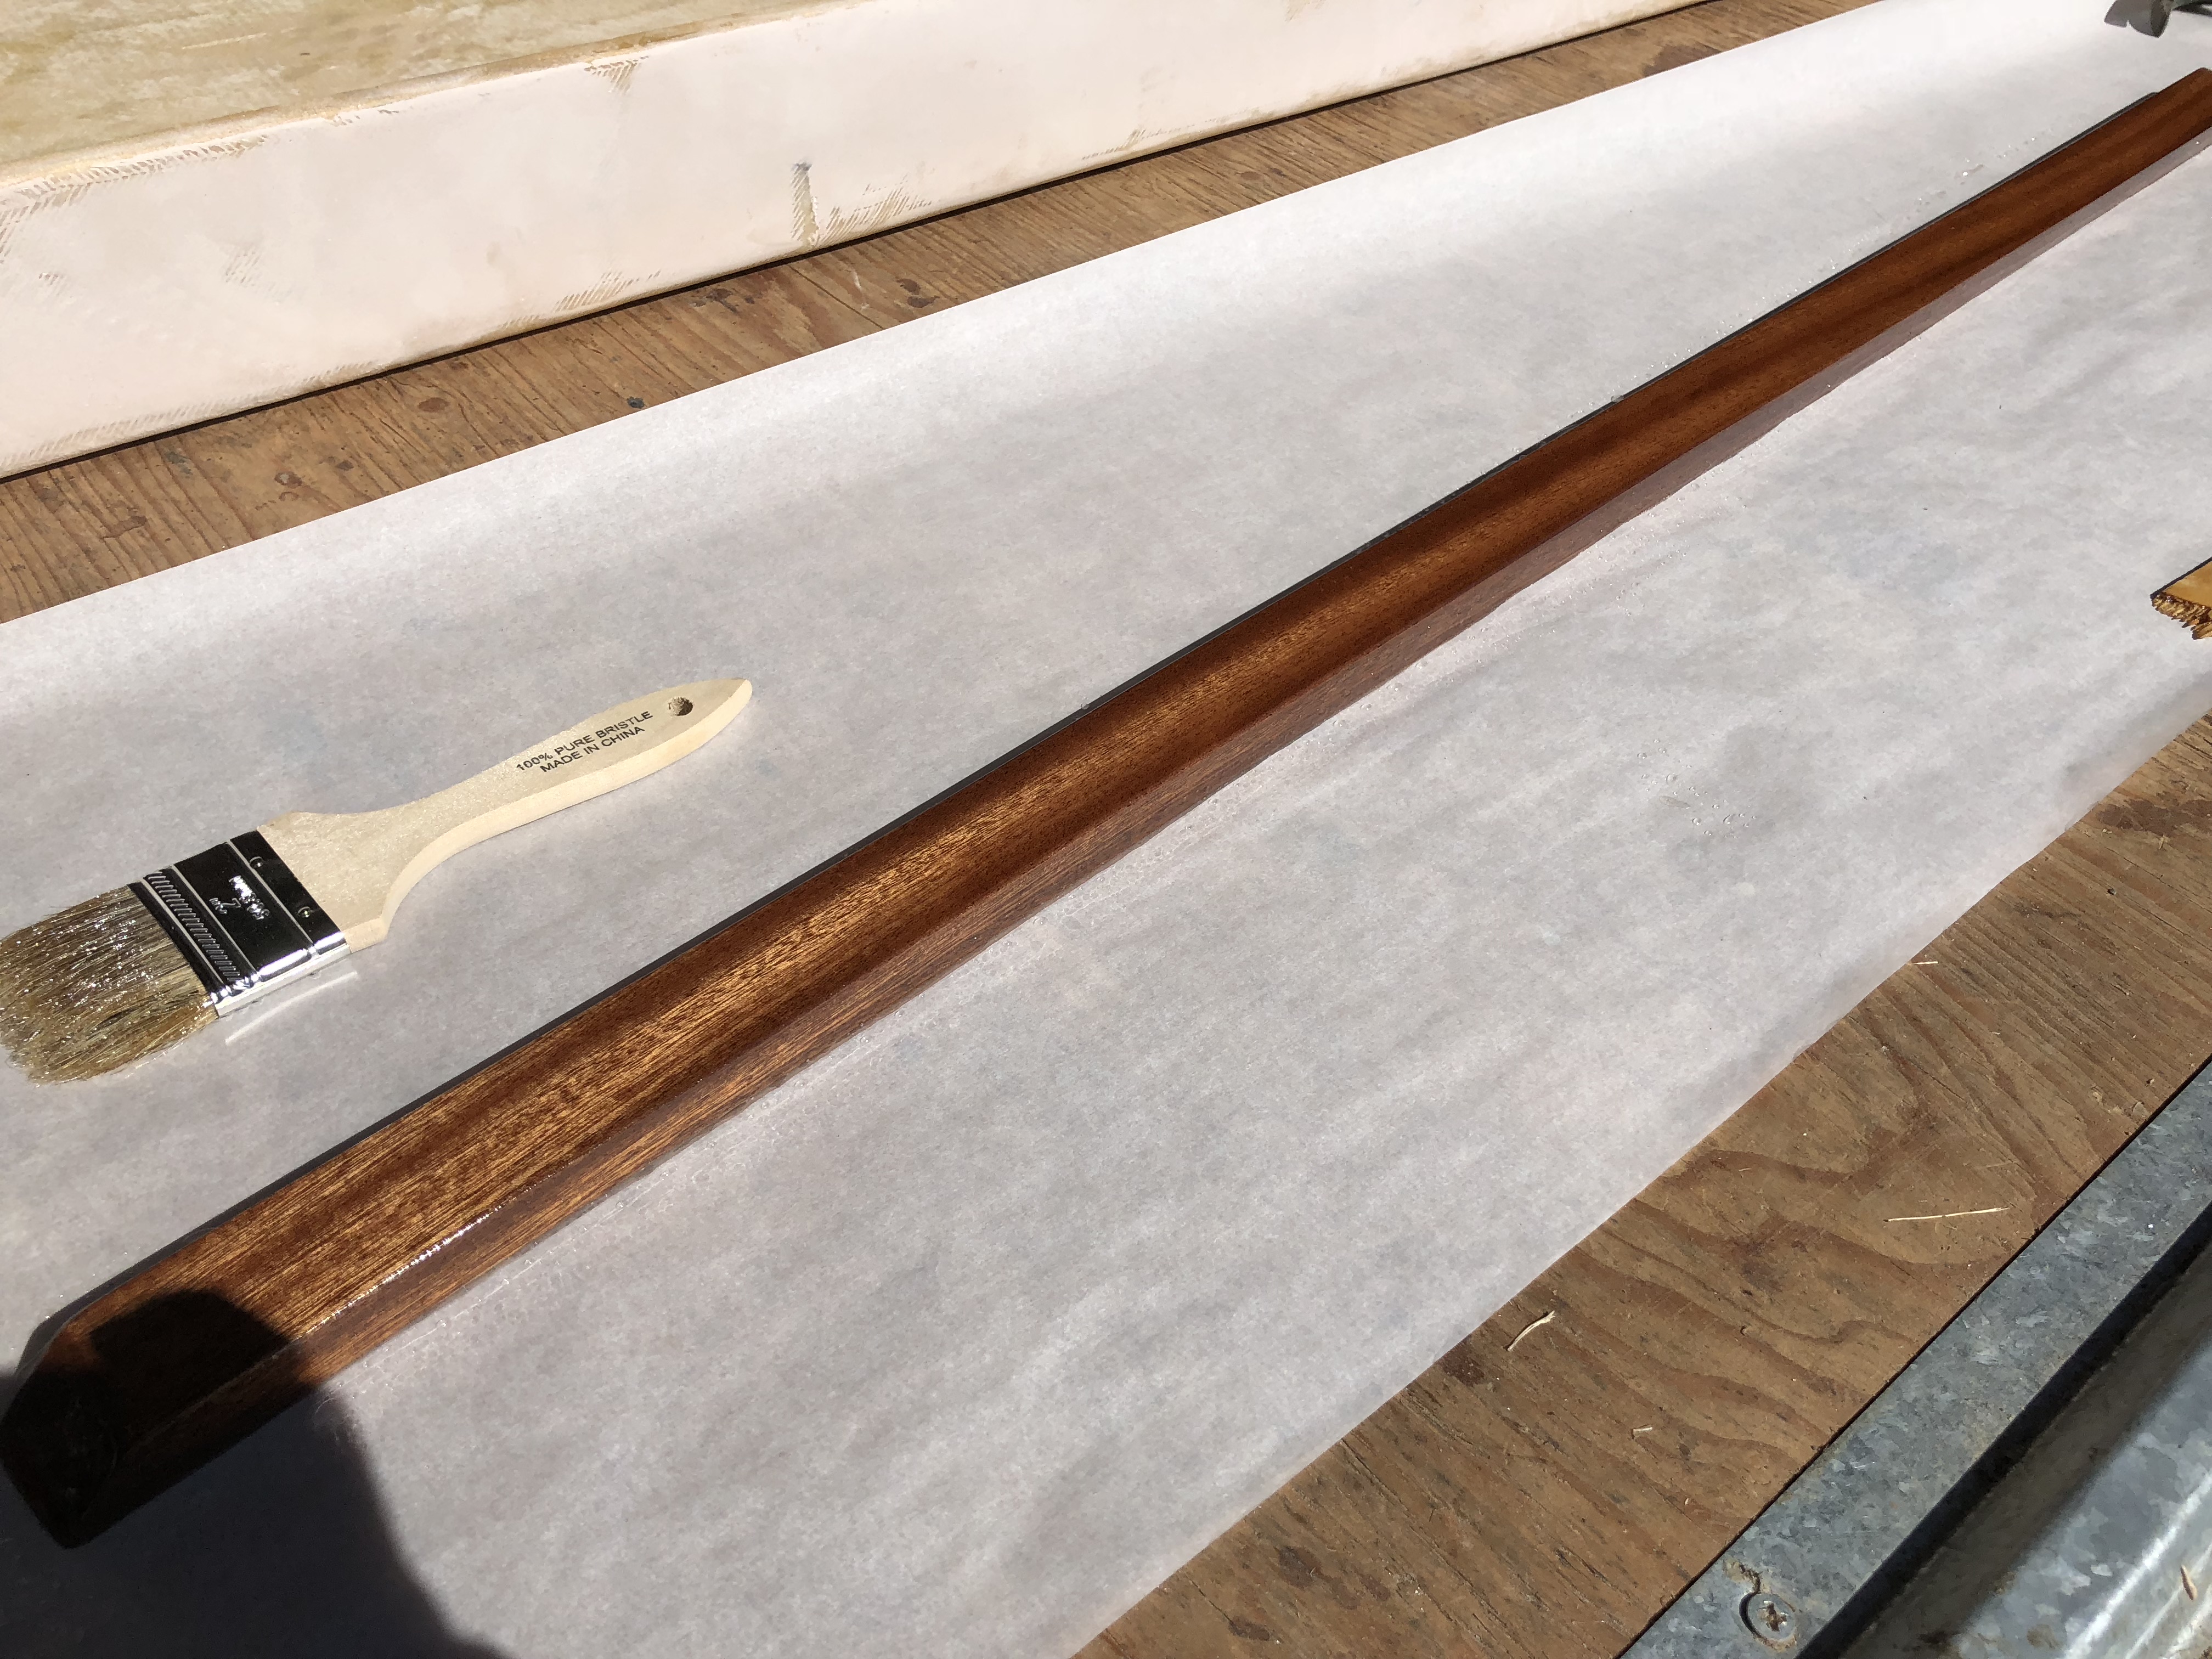
While the epoxy filler and new bondo were drying, I got to work on the wood piece that will eventually support the pull out bed along the front edge of the camper by the cabover. I started by digging around in the shed and found a really nice piece of mahogany that apparently started life as a boat plank. (never buy a wood boat... lessons have been learned)
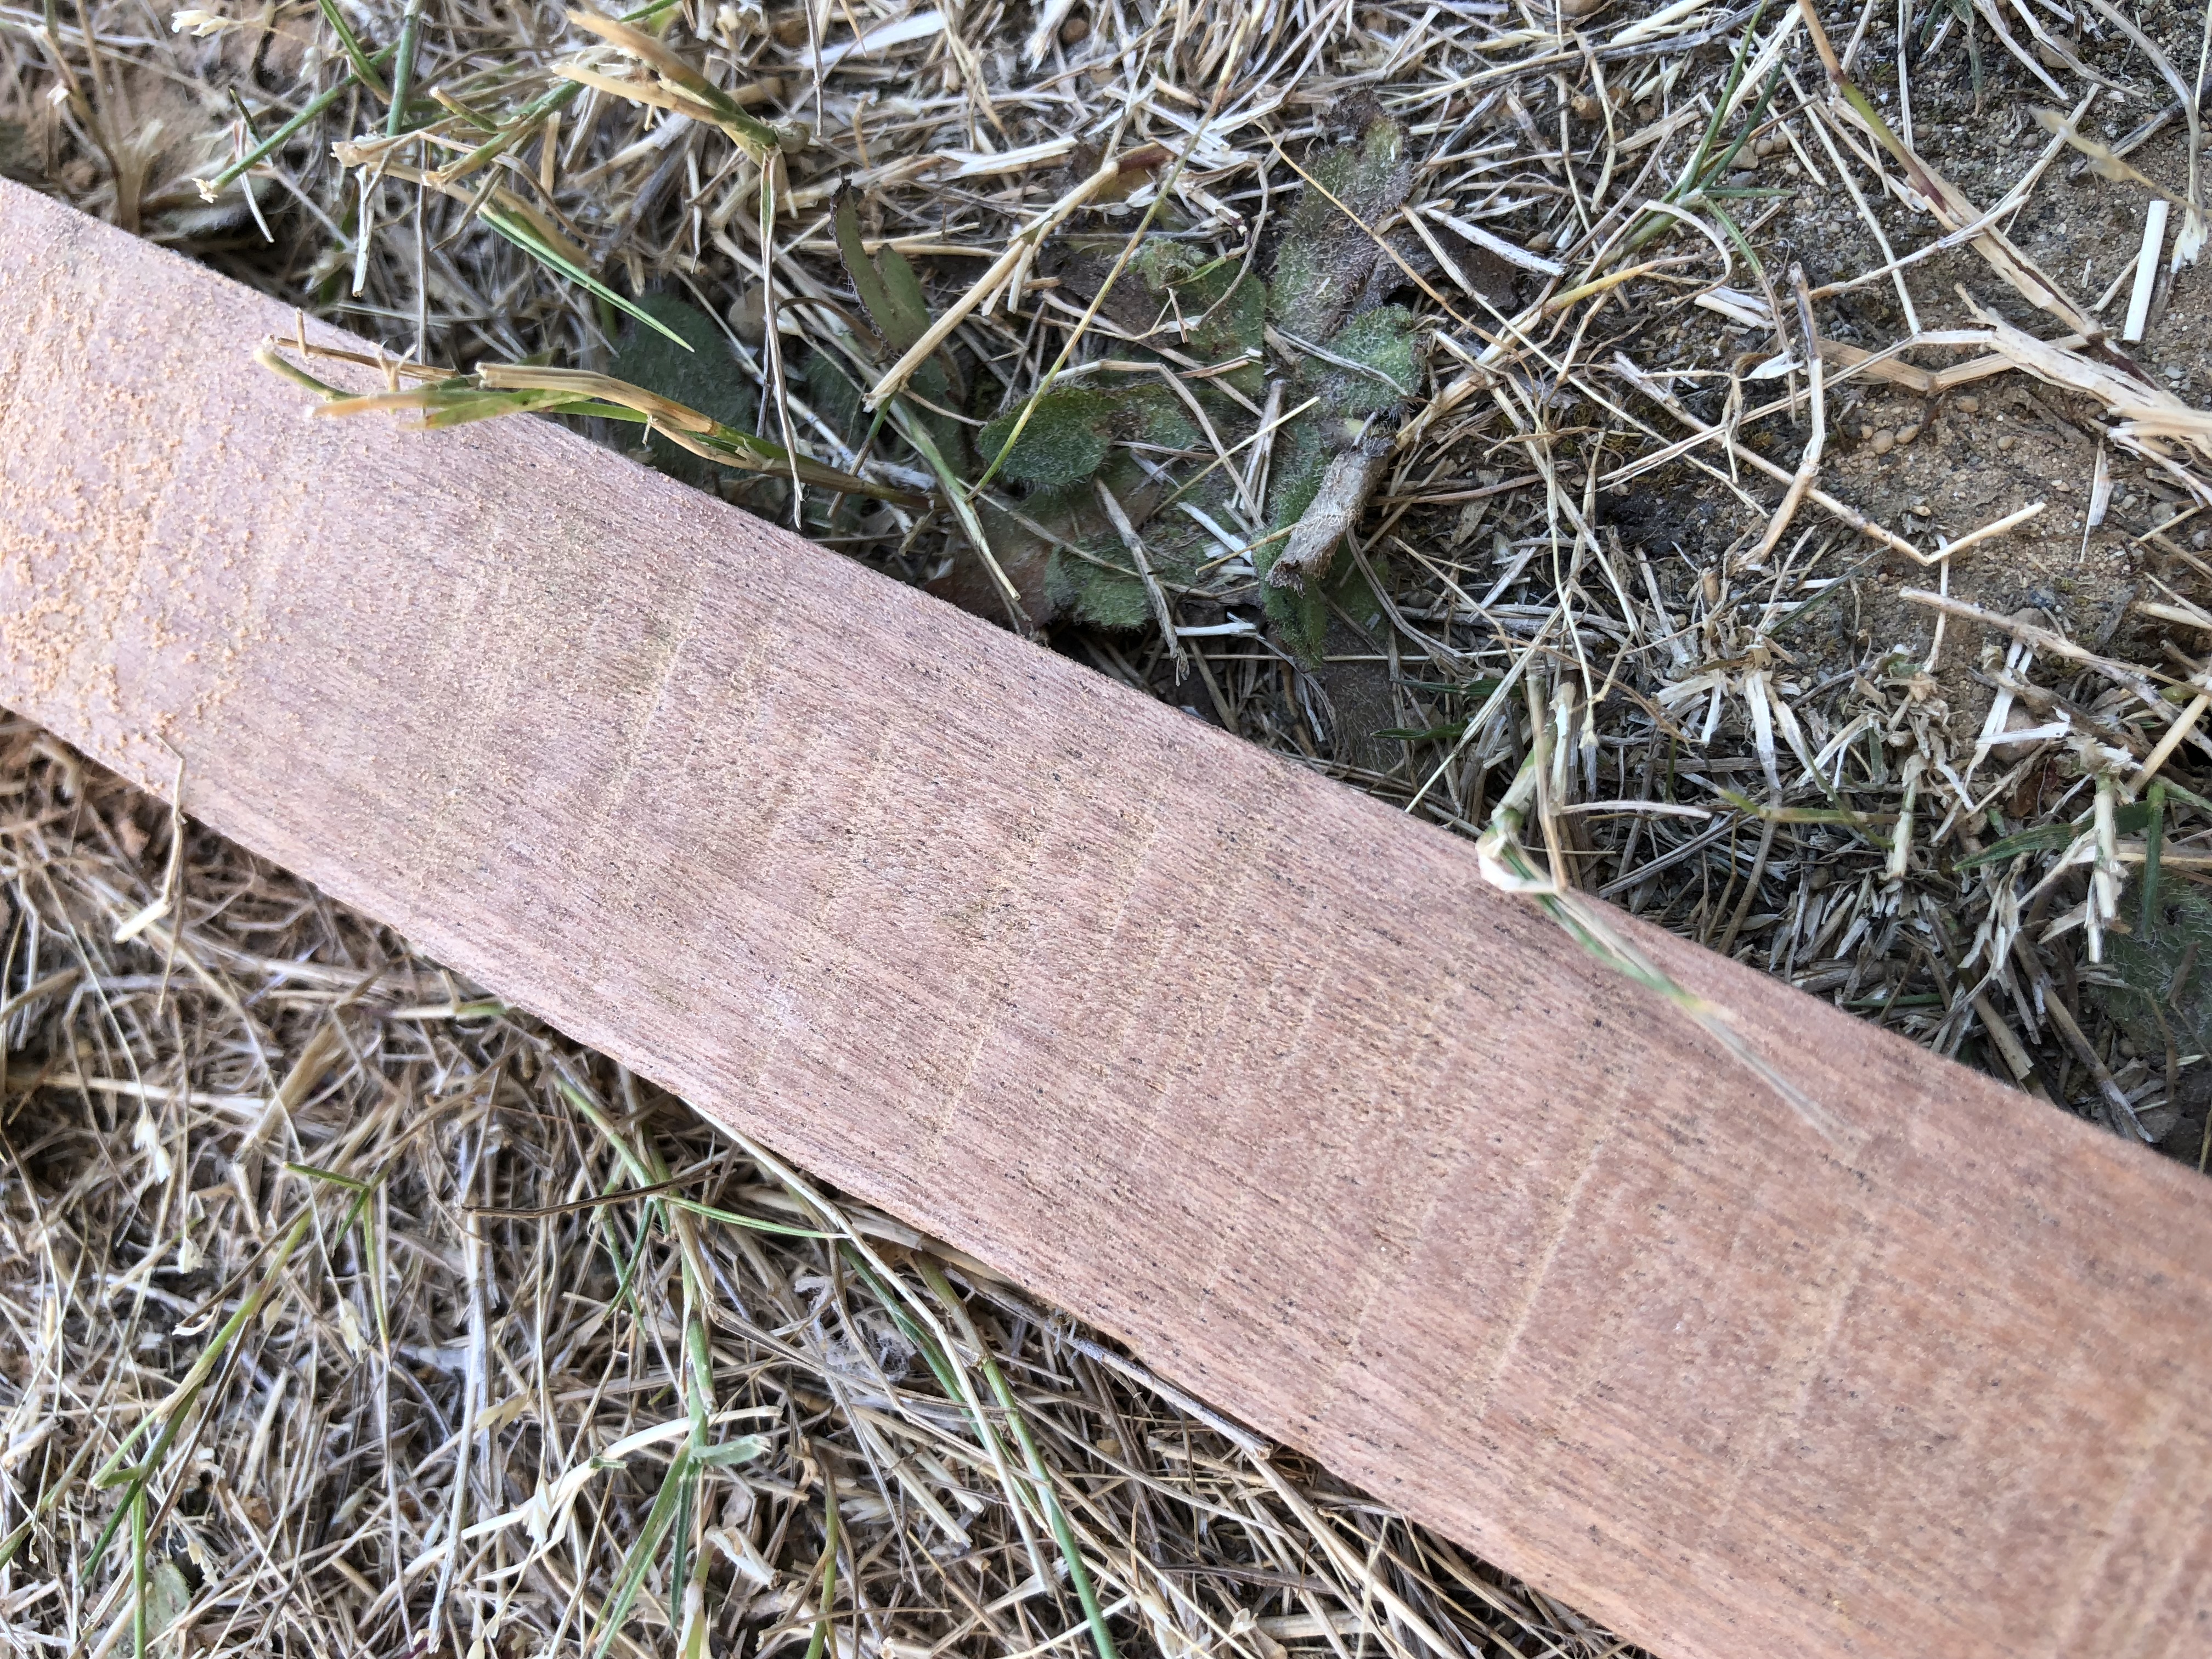
Here it is all sanded smooth. It's roughly 3' long. Should be more than enough to support two people along an edge. I wanted to have the support on the camper shell than overbuild the bed platform and have that weigh a ton.
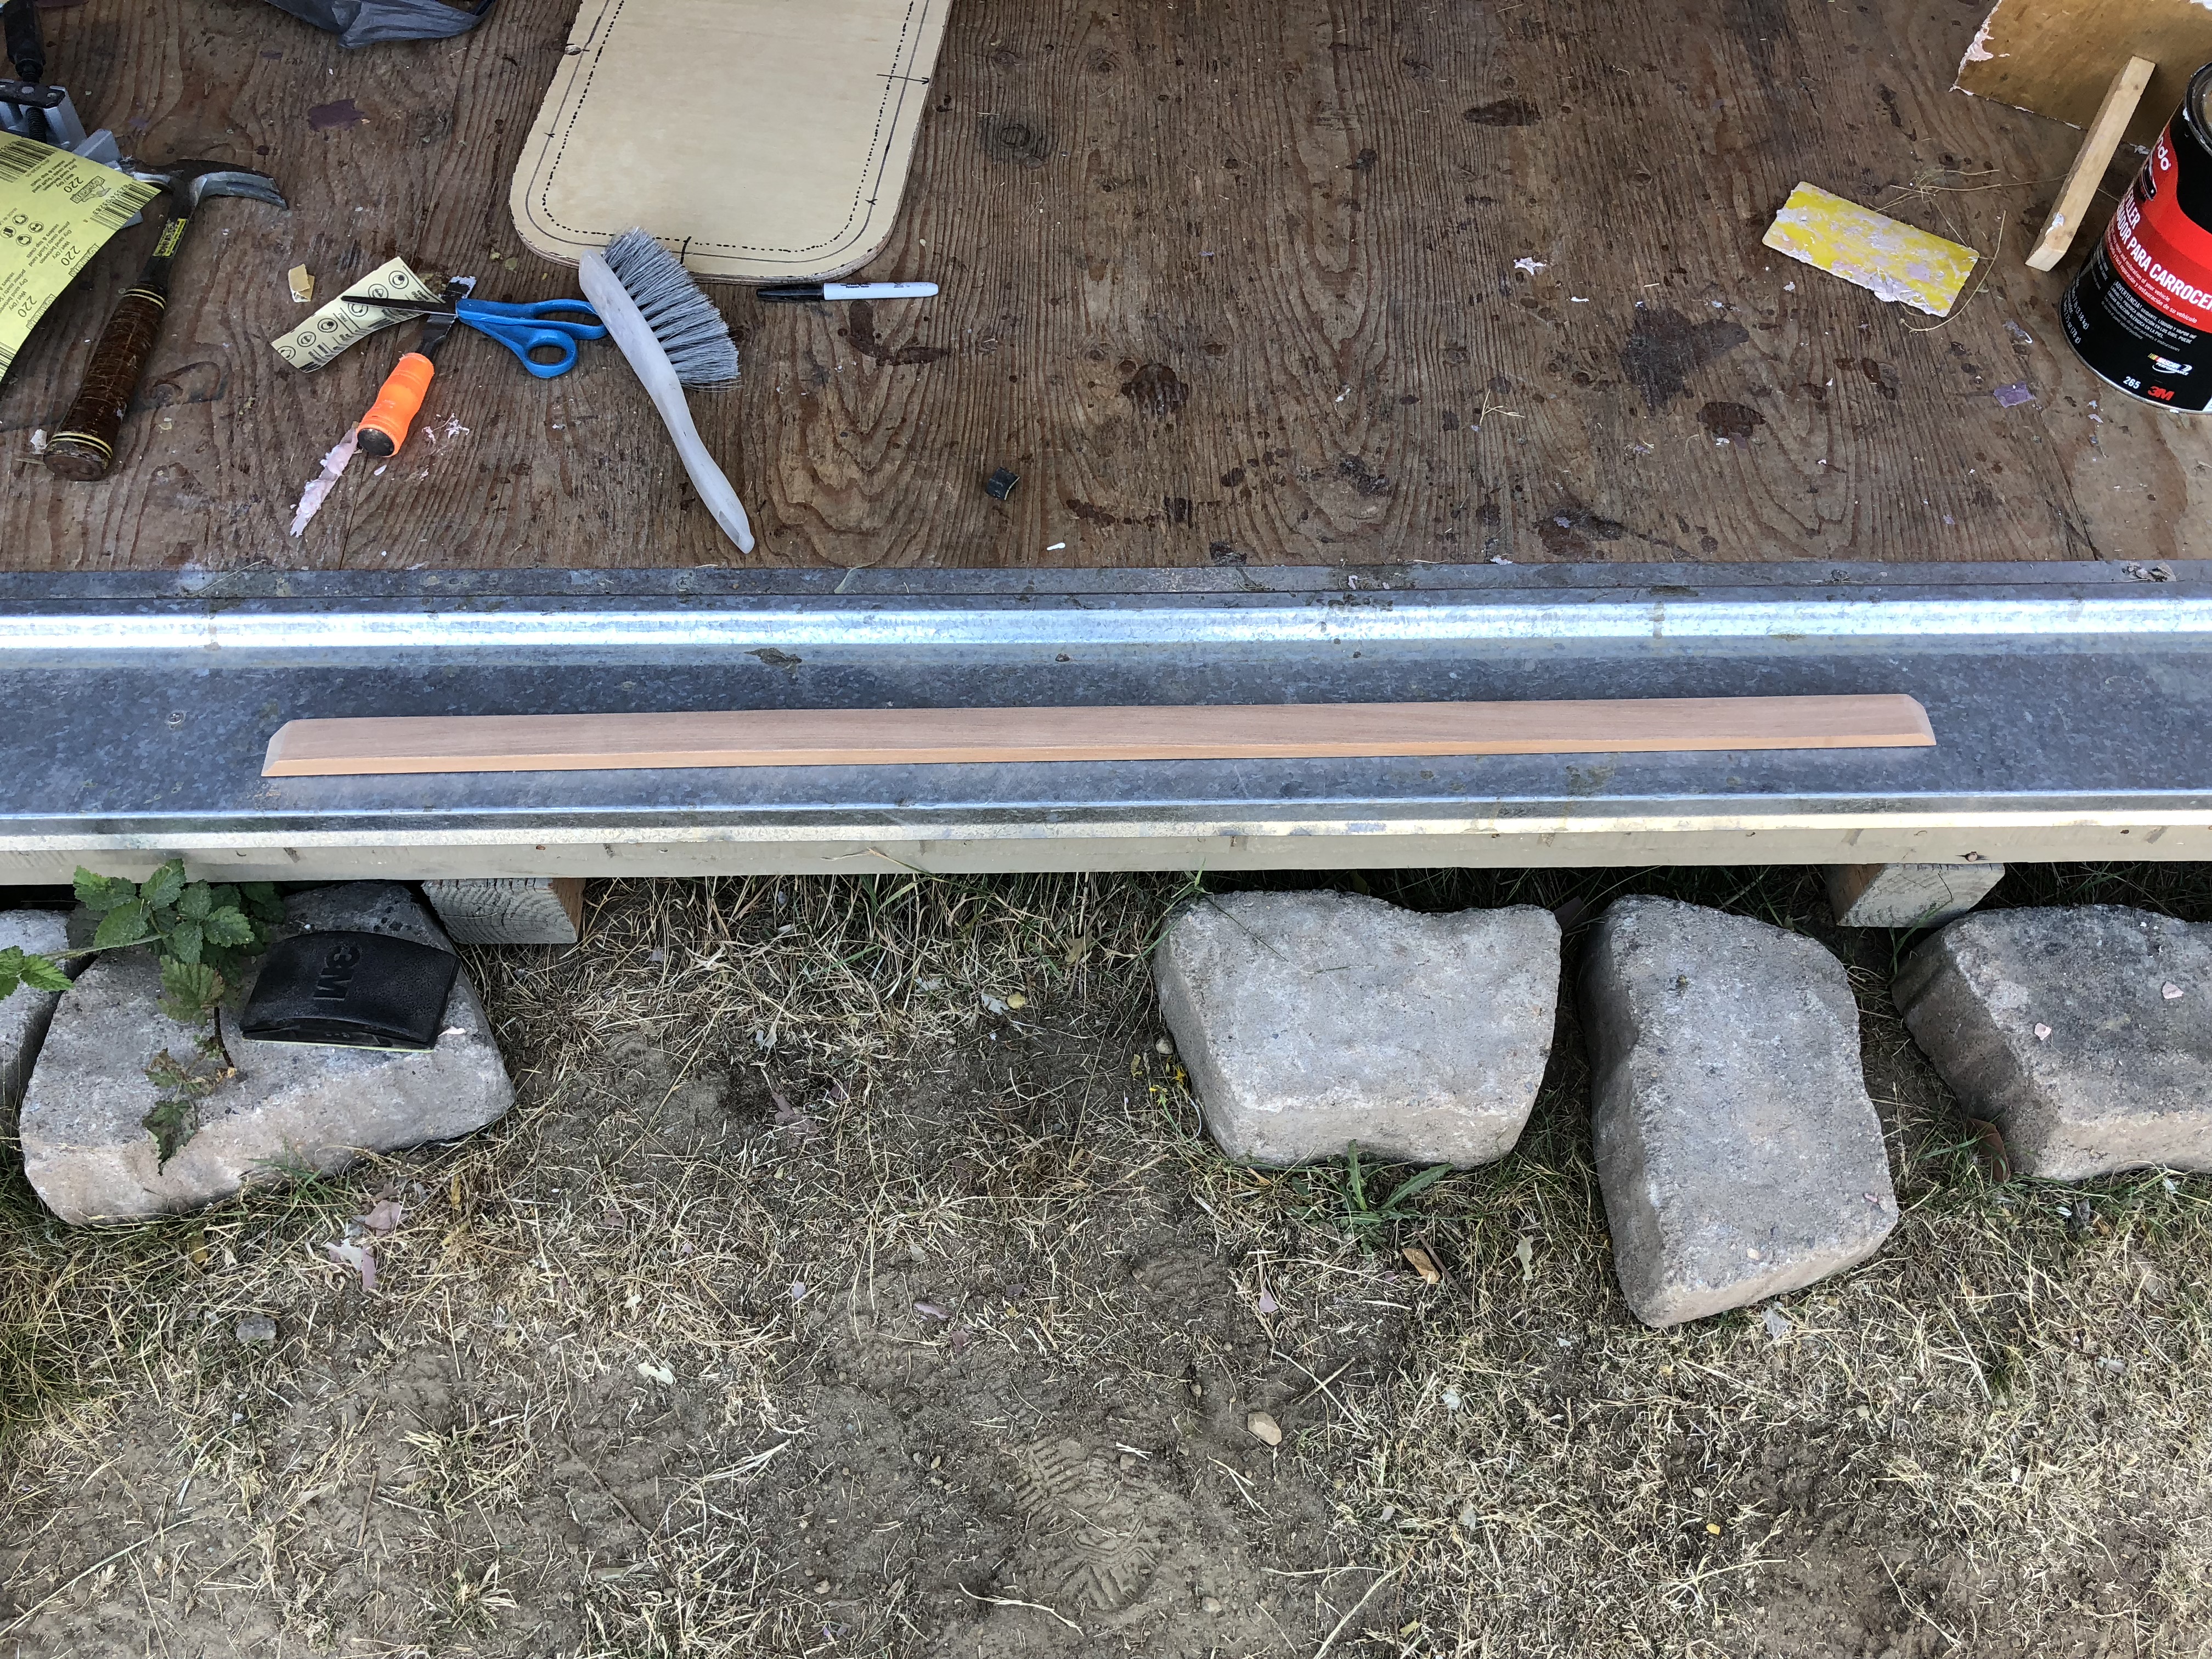
Look at that woodgrain! This is a classy camper!
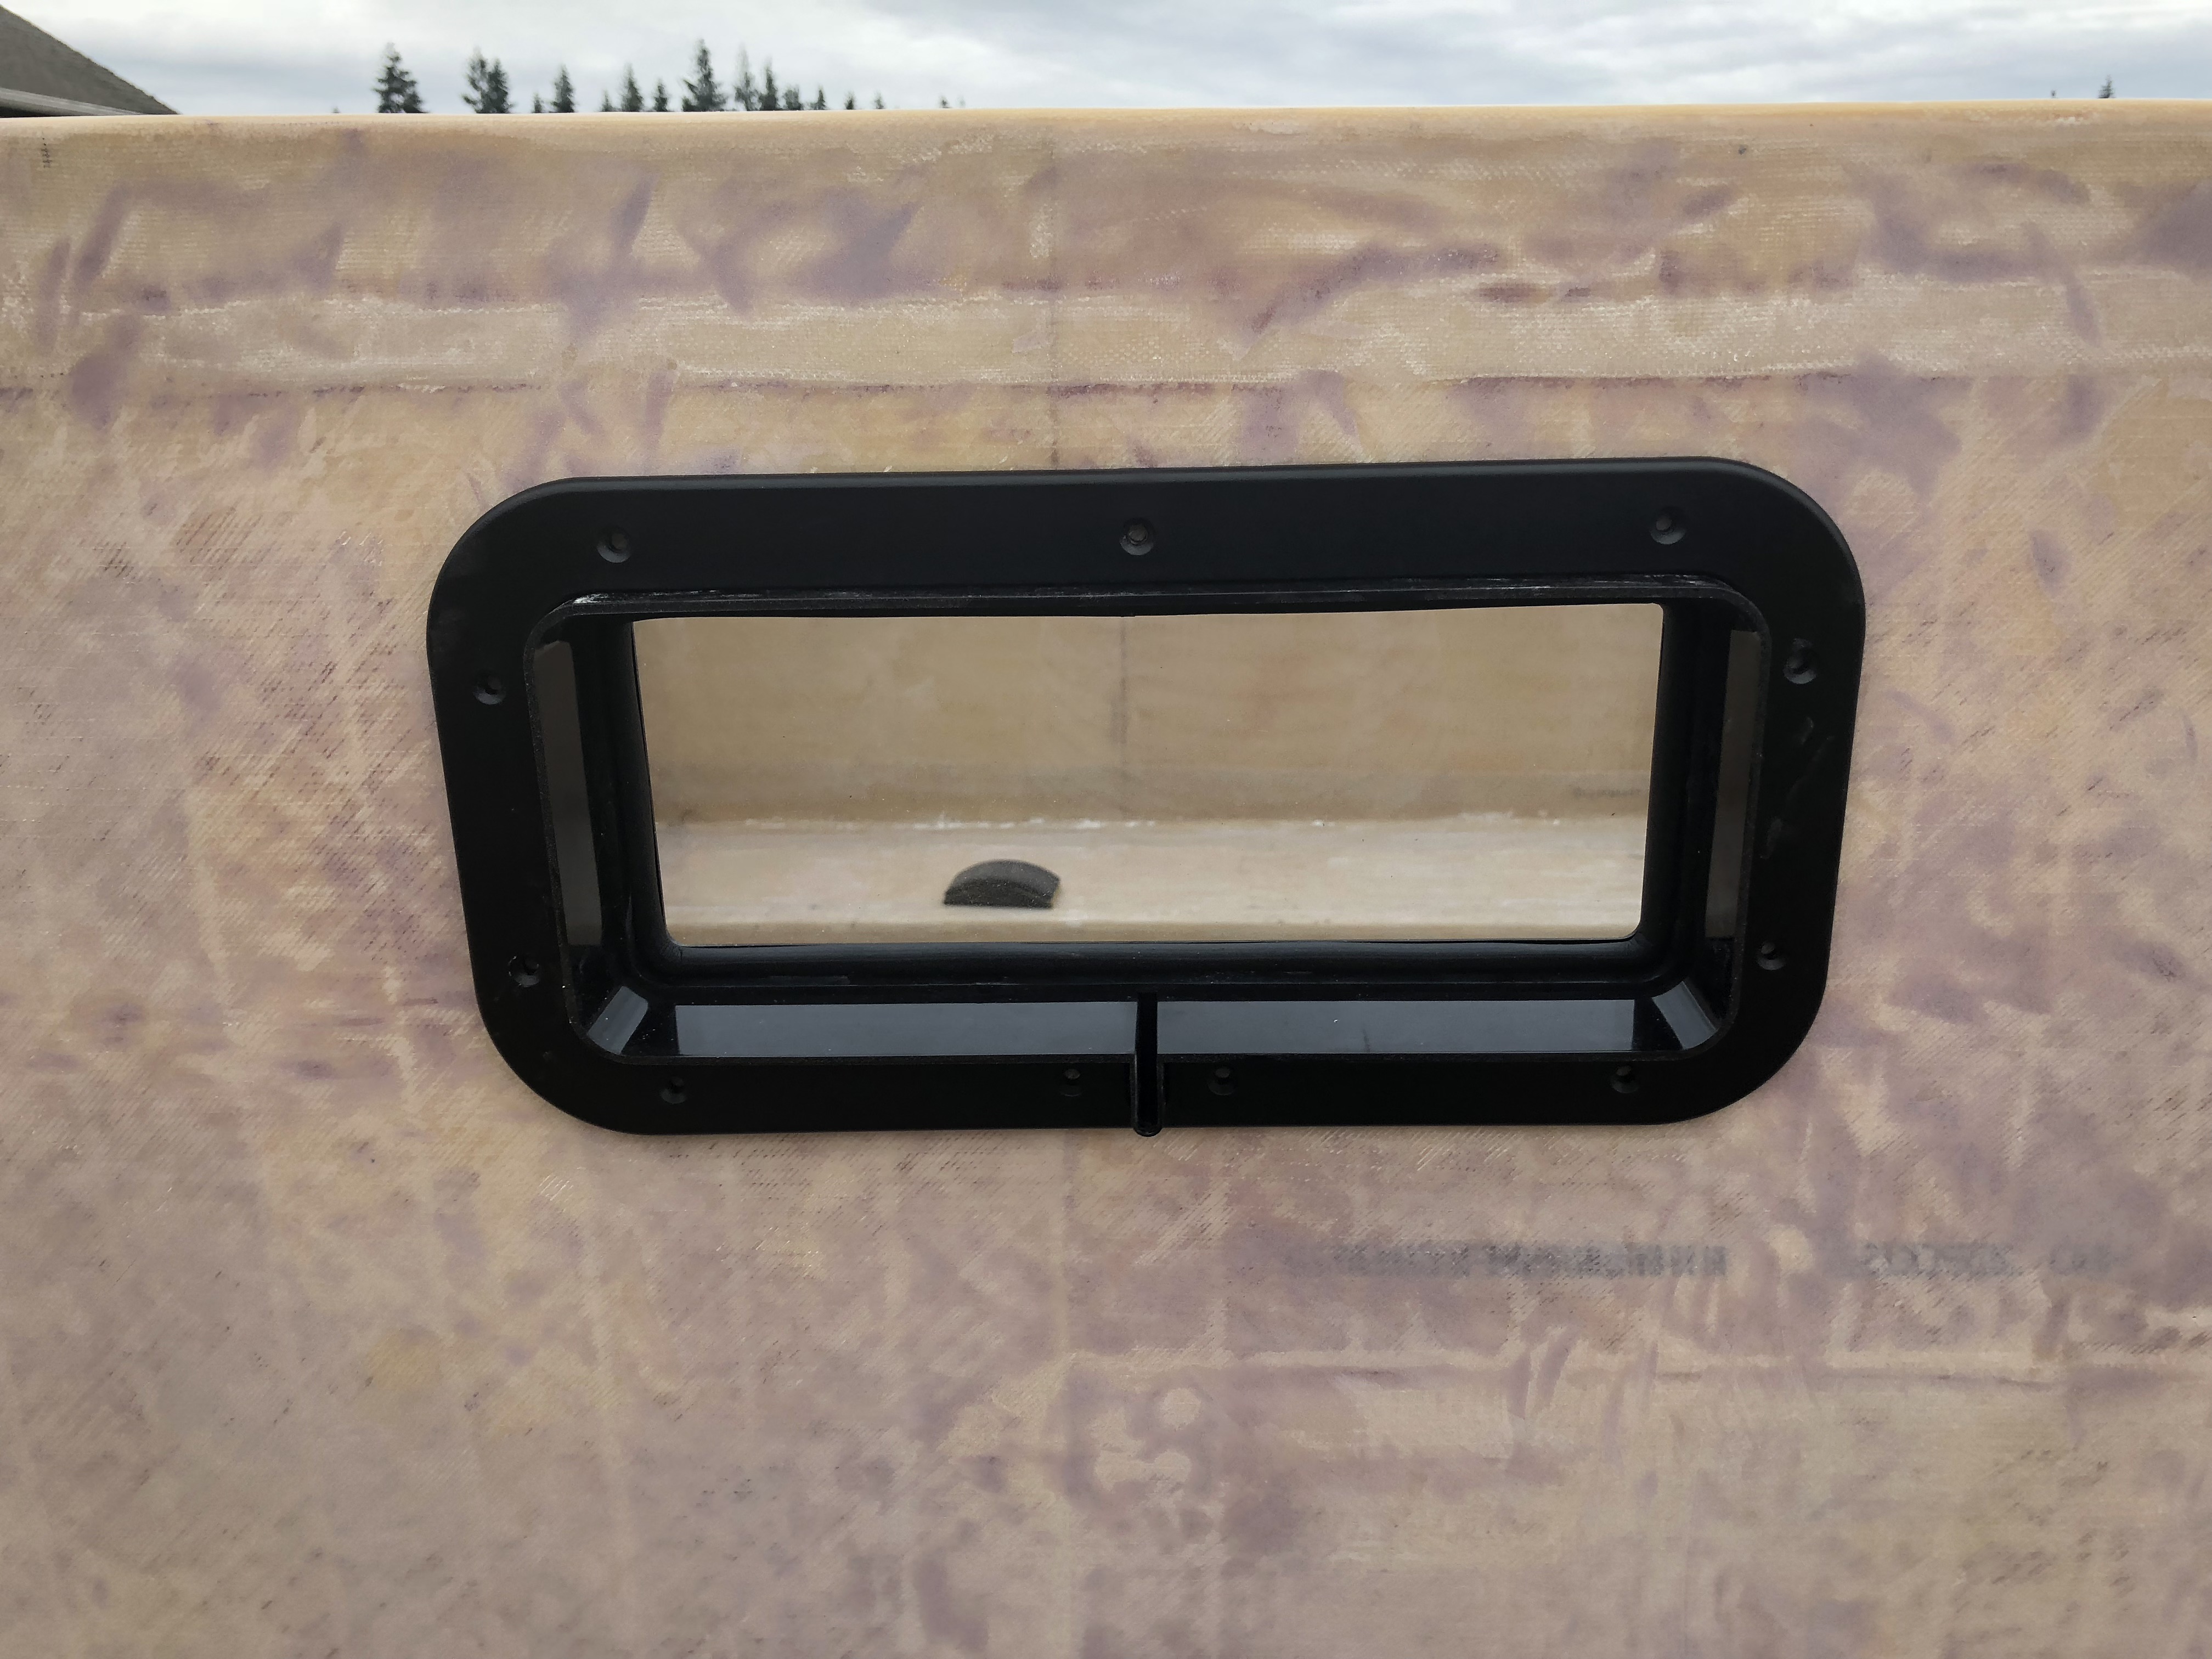
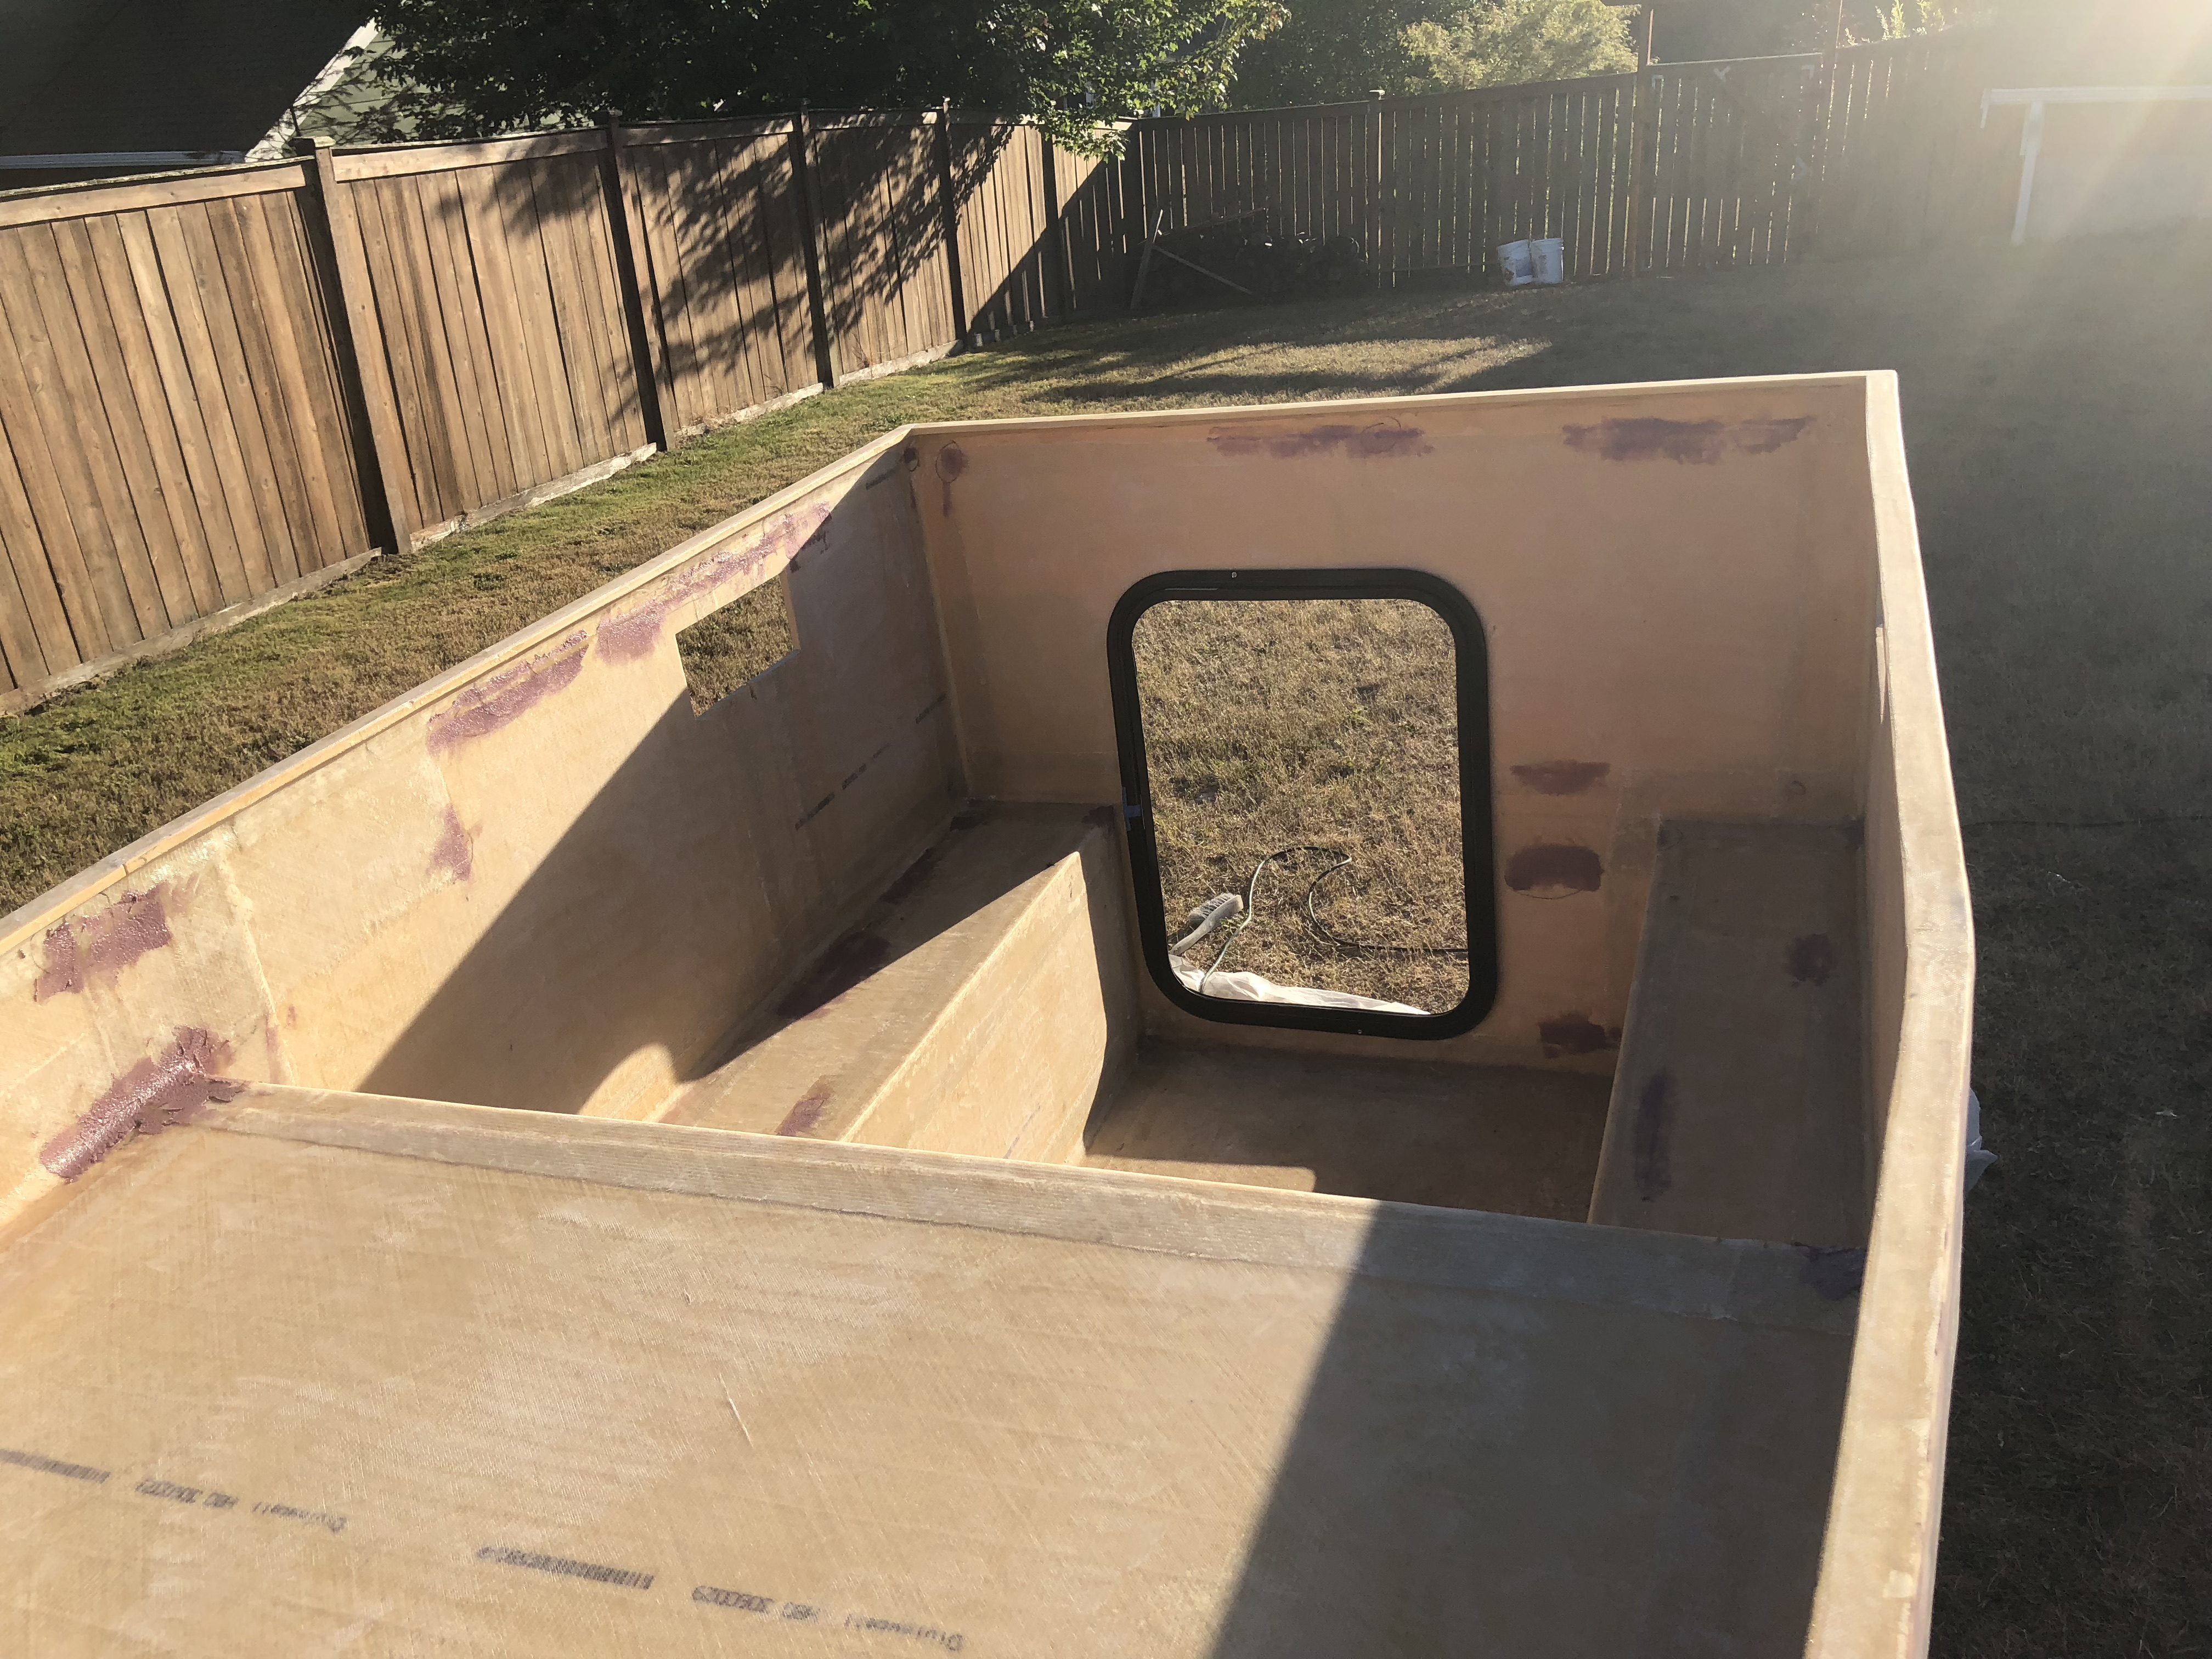
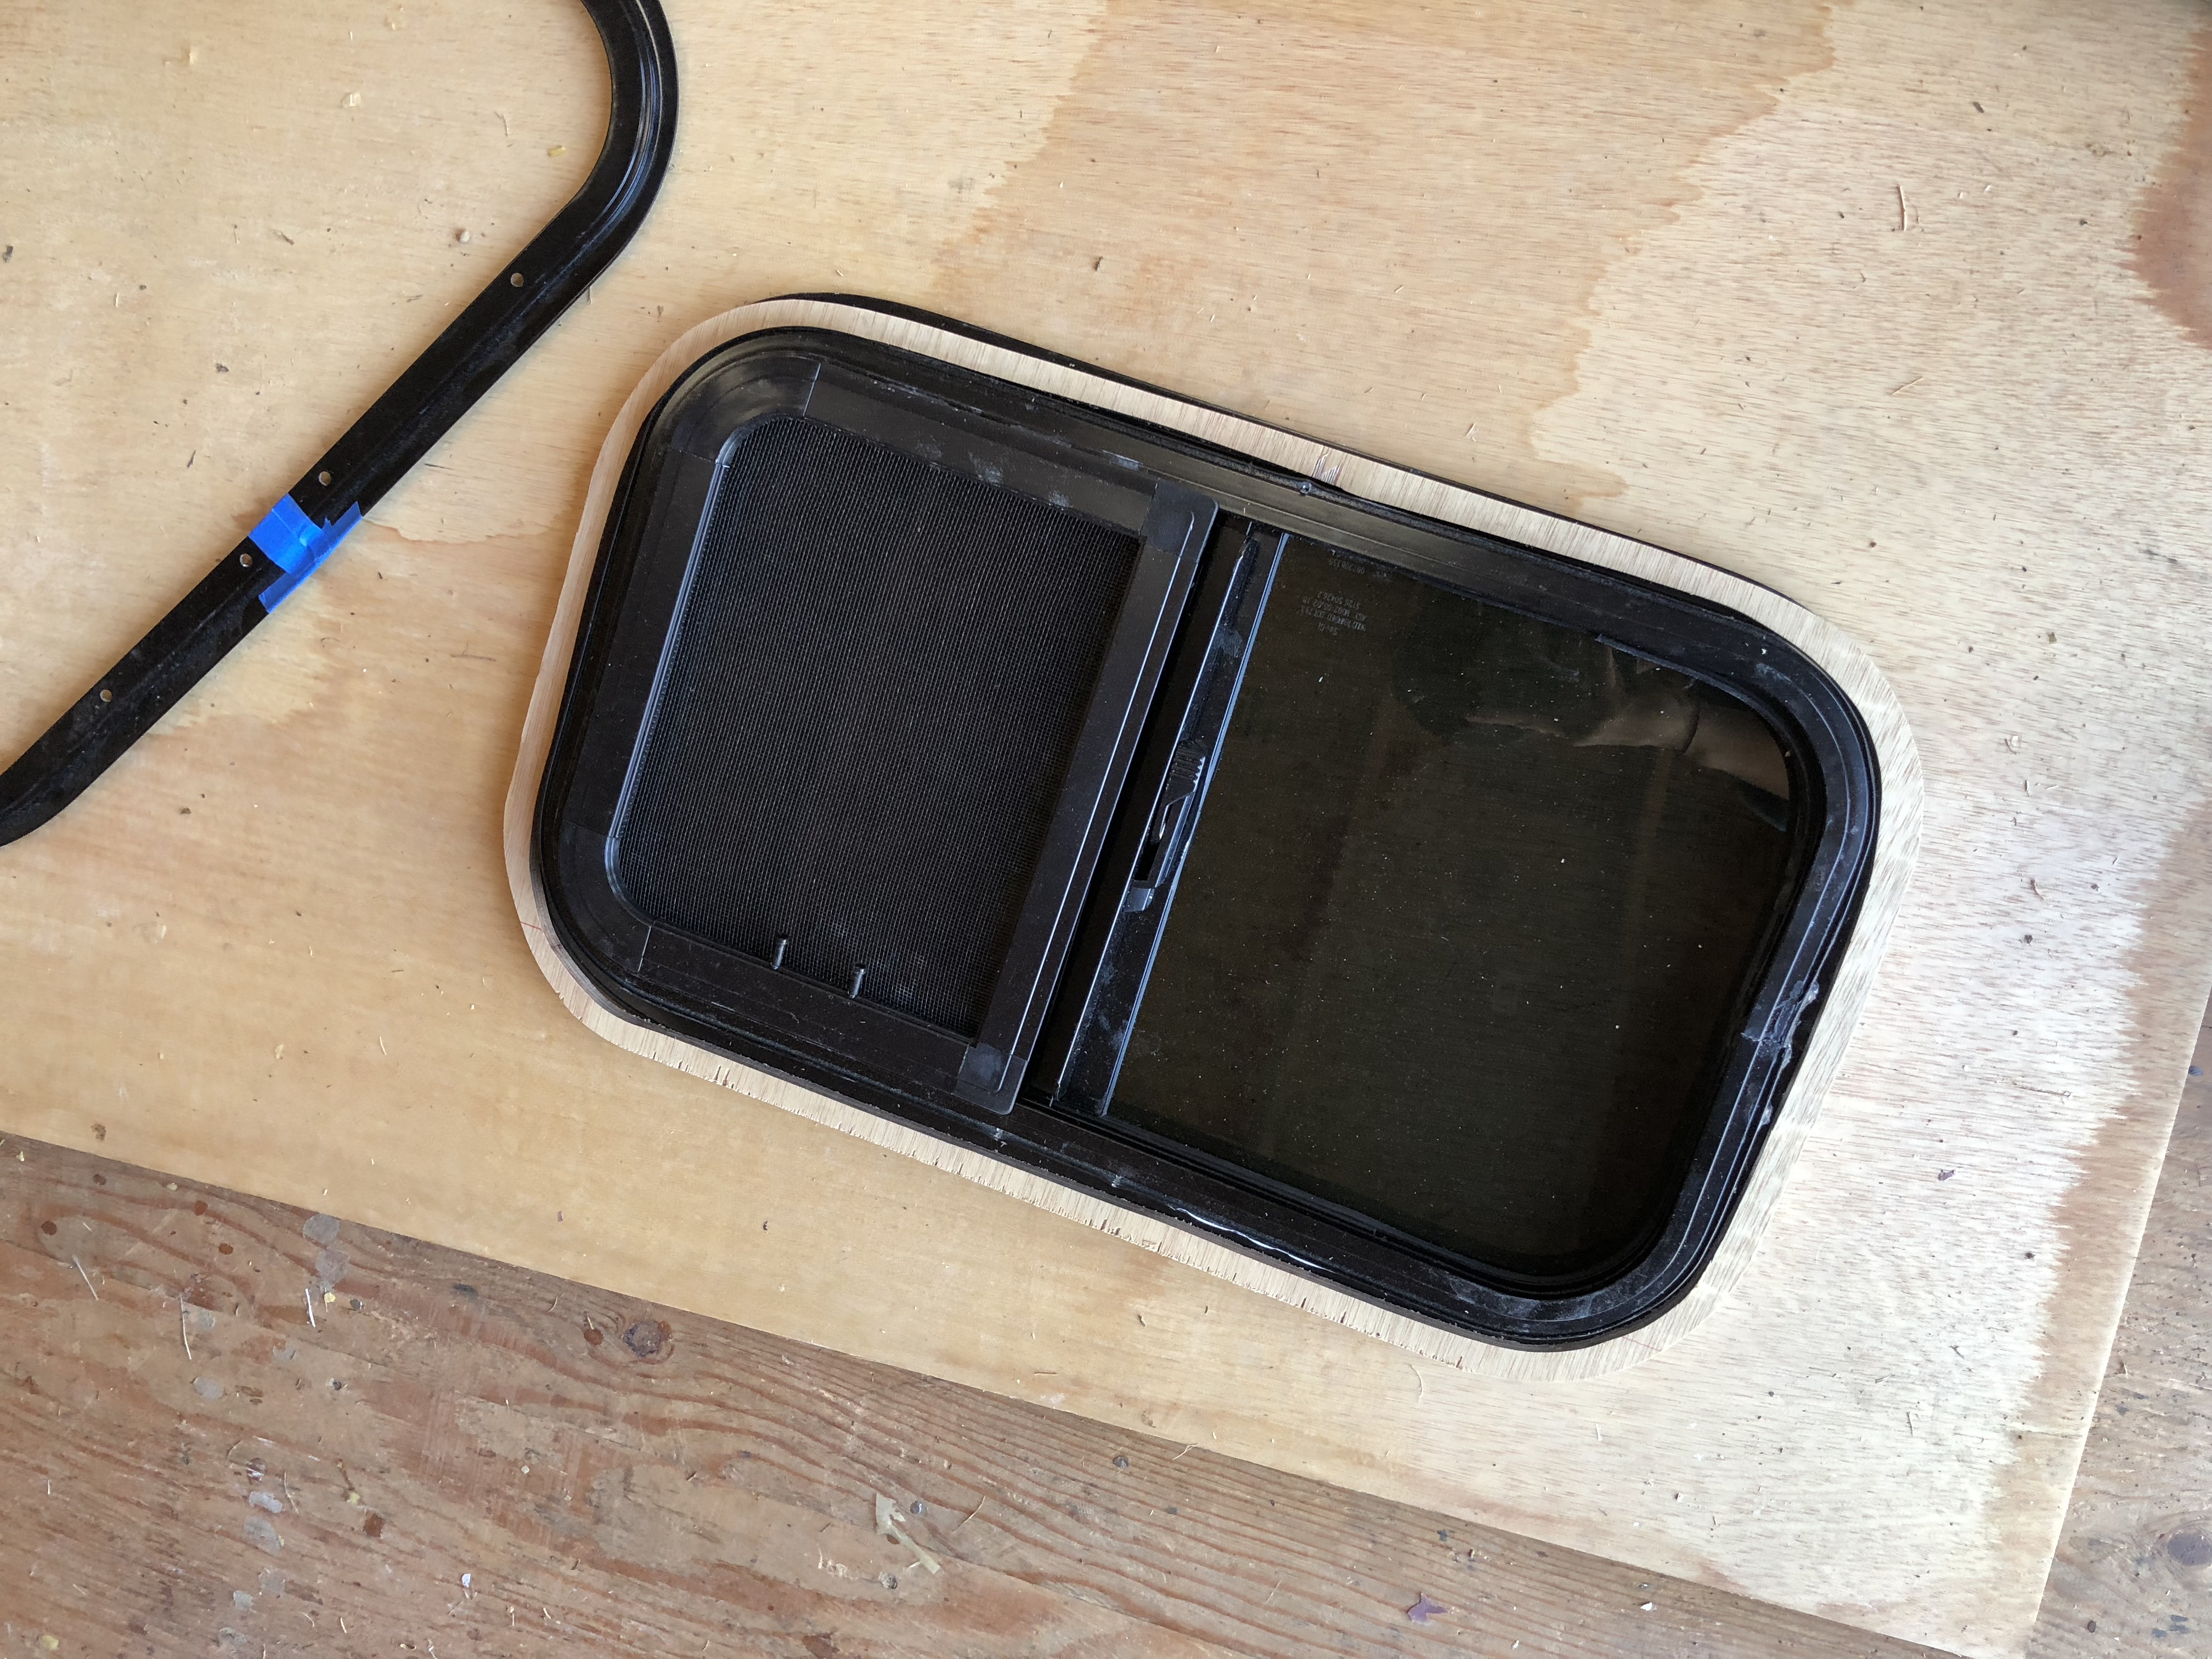
That will definitely look nice on the inside of the camper! Now that that was done and curing, we started working on the spacer for the window. The window that we bought was meant for people building teardrop trailers, usually out of 3/4" thick plywood. It was way too loose in our 1/2" thick foam, so we needed a 1/4" spacer.
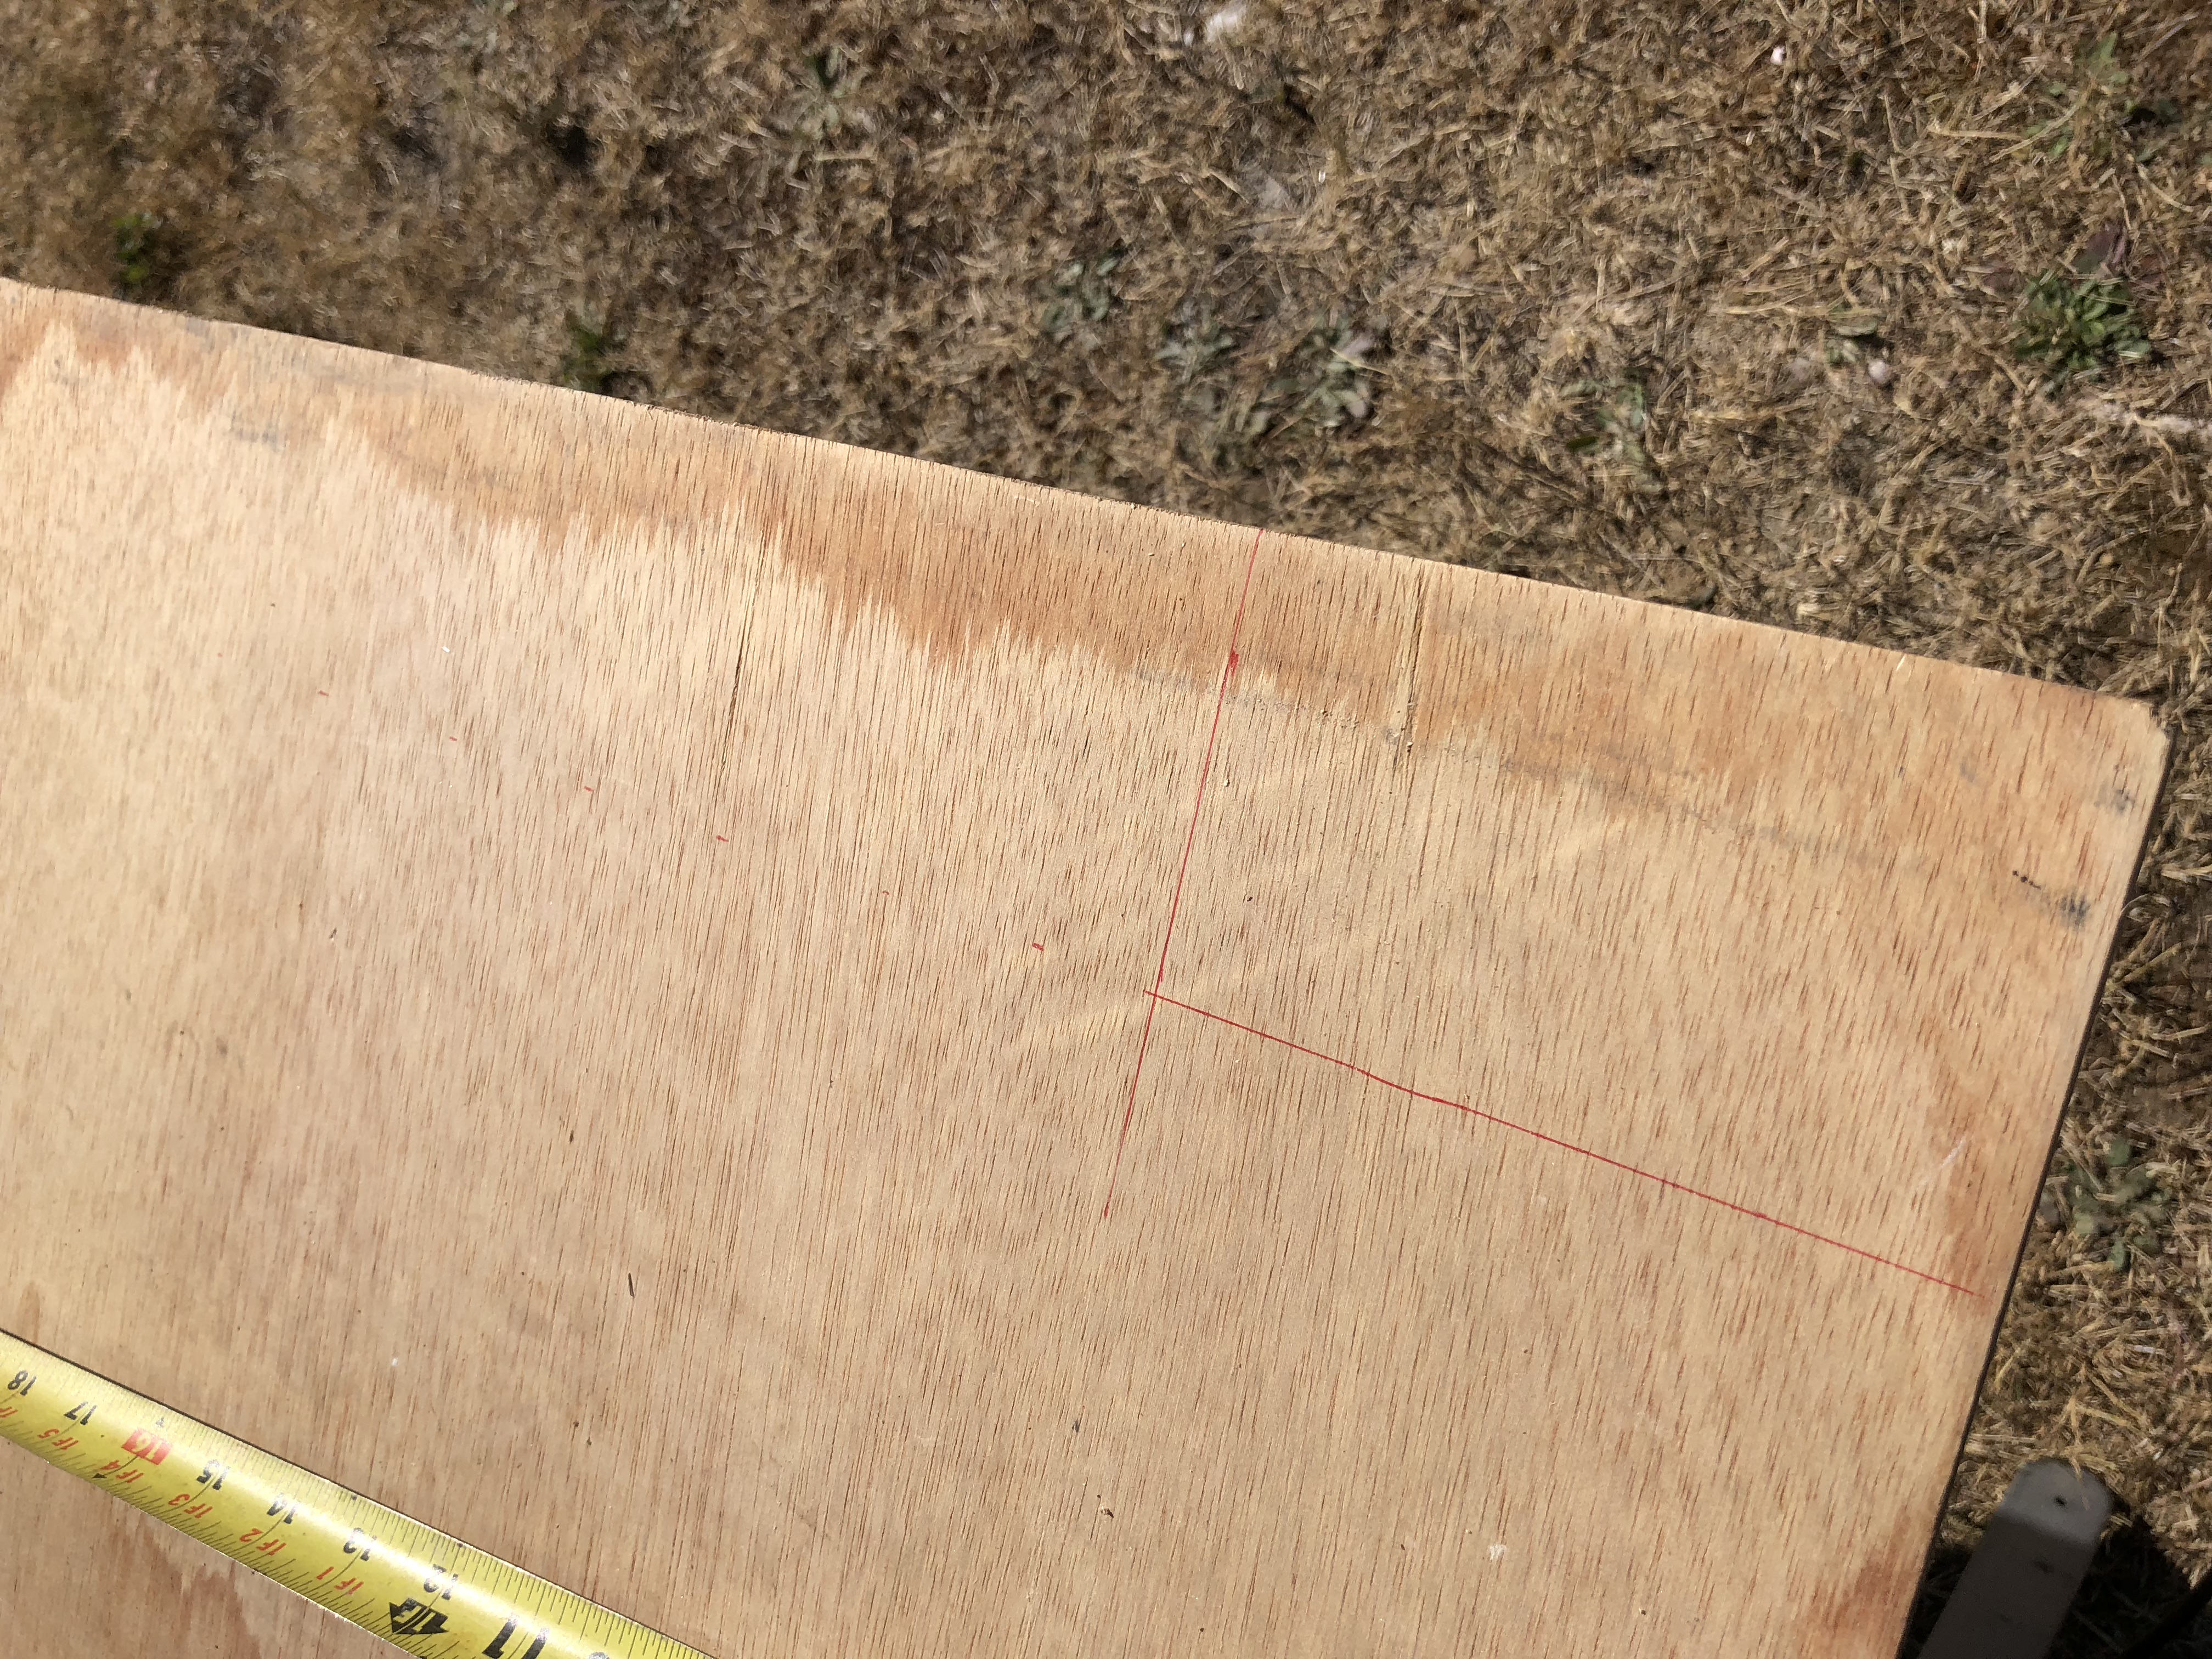
Of course we had a sheet of 1/4" marine plywood in the shed... So, it's game on! That was a lot of cutting, for a really tiny end result.. but it had to be done!
We still have Bondo to sand... but at least it's not itchy like fiberglass!
While the epoxy filler and new bondo were drying, I got to work on the wood piece that will eventually support the pull out bed along the front edge of the camper by the cabover. I started by digging around in the shed and found a really nice piece of mahogany that apparently started life as a boat plank. (never buy a wood boat... lessons have been learned)
Here it is all sanded smooth. It's roughly 3' long. Should be more than enough to support two people along an edge. I wanted to have the support on the camper shell than overbuild the bed platform and have that weigh a ton.
Look at that woodgrain! This is a classy camper!
That will definitely look nice on the inside of the camper! Now that that was done and curing, we started working on the spacer for the window. The window that we bought was meant for people building teardrop trailers, usually out of 3/4" thick plywood. It was way too loose in our 1/2" thick foam, so we needed a 1/4" spacer.
Of course we had a sheet of 1/4" marine plywood in the shed... So, it's game on! That was a lot of cutting, for a really tiny end result.. but it had to be done!
underkill
Active member
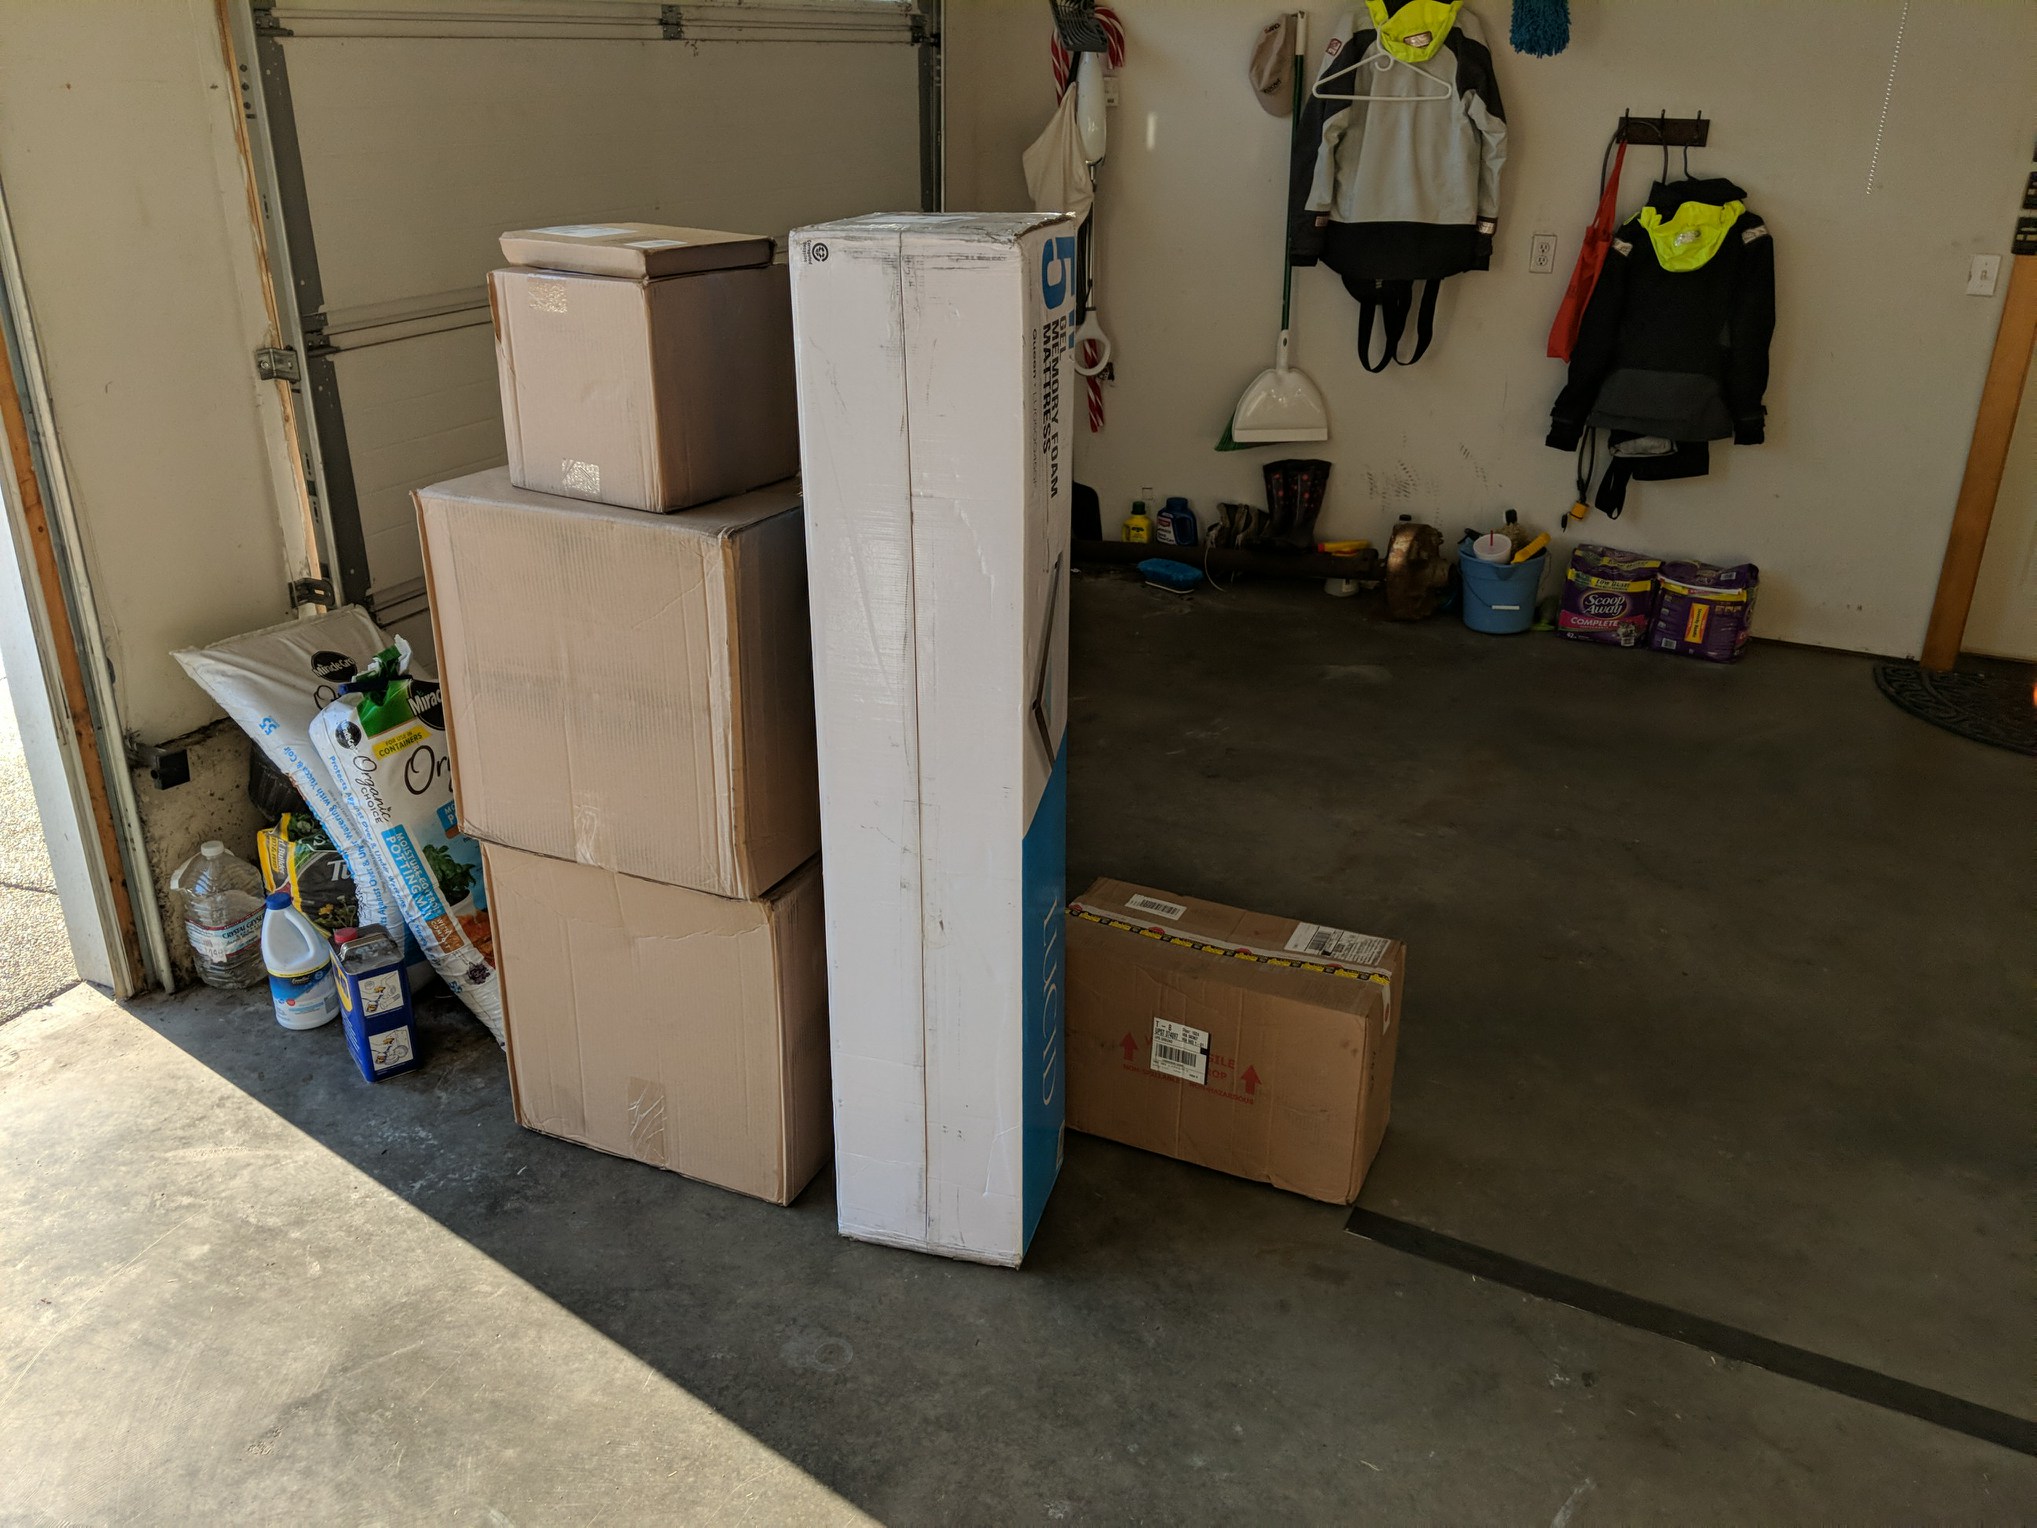
It's Christmas!!!!! (not really, but it looks like everything showed up at once!)
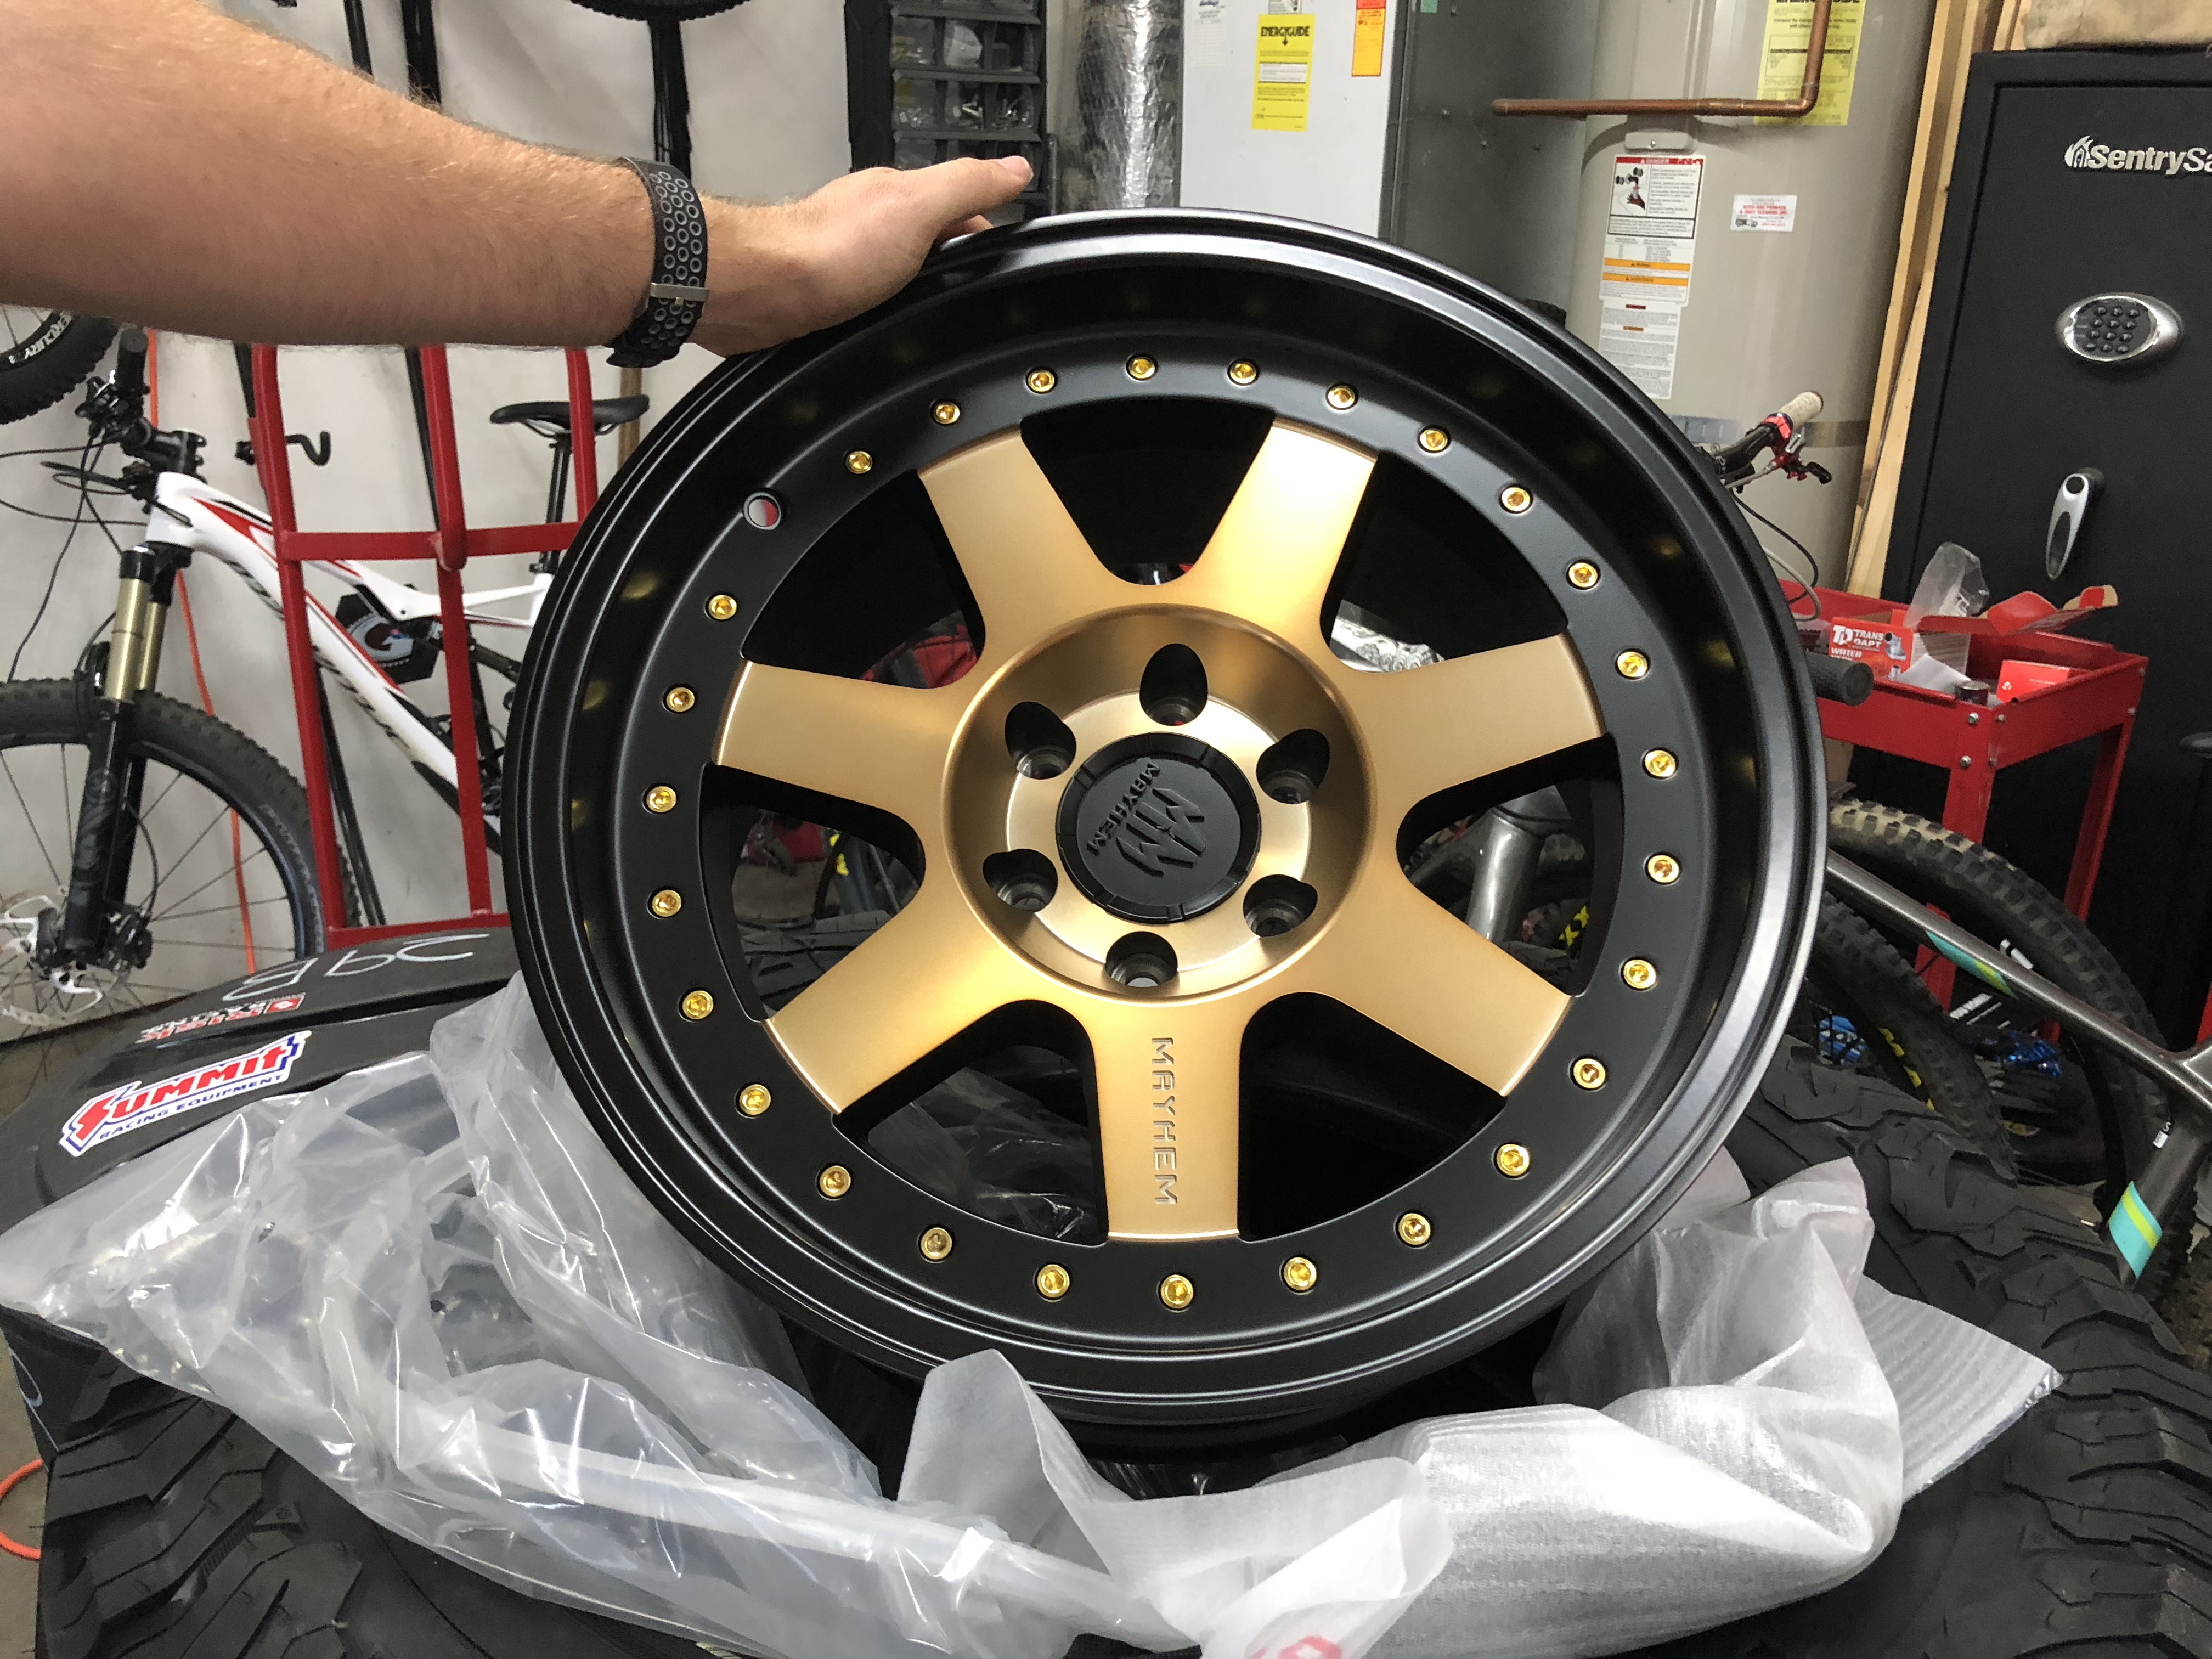
We got some new wheels for our truck!
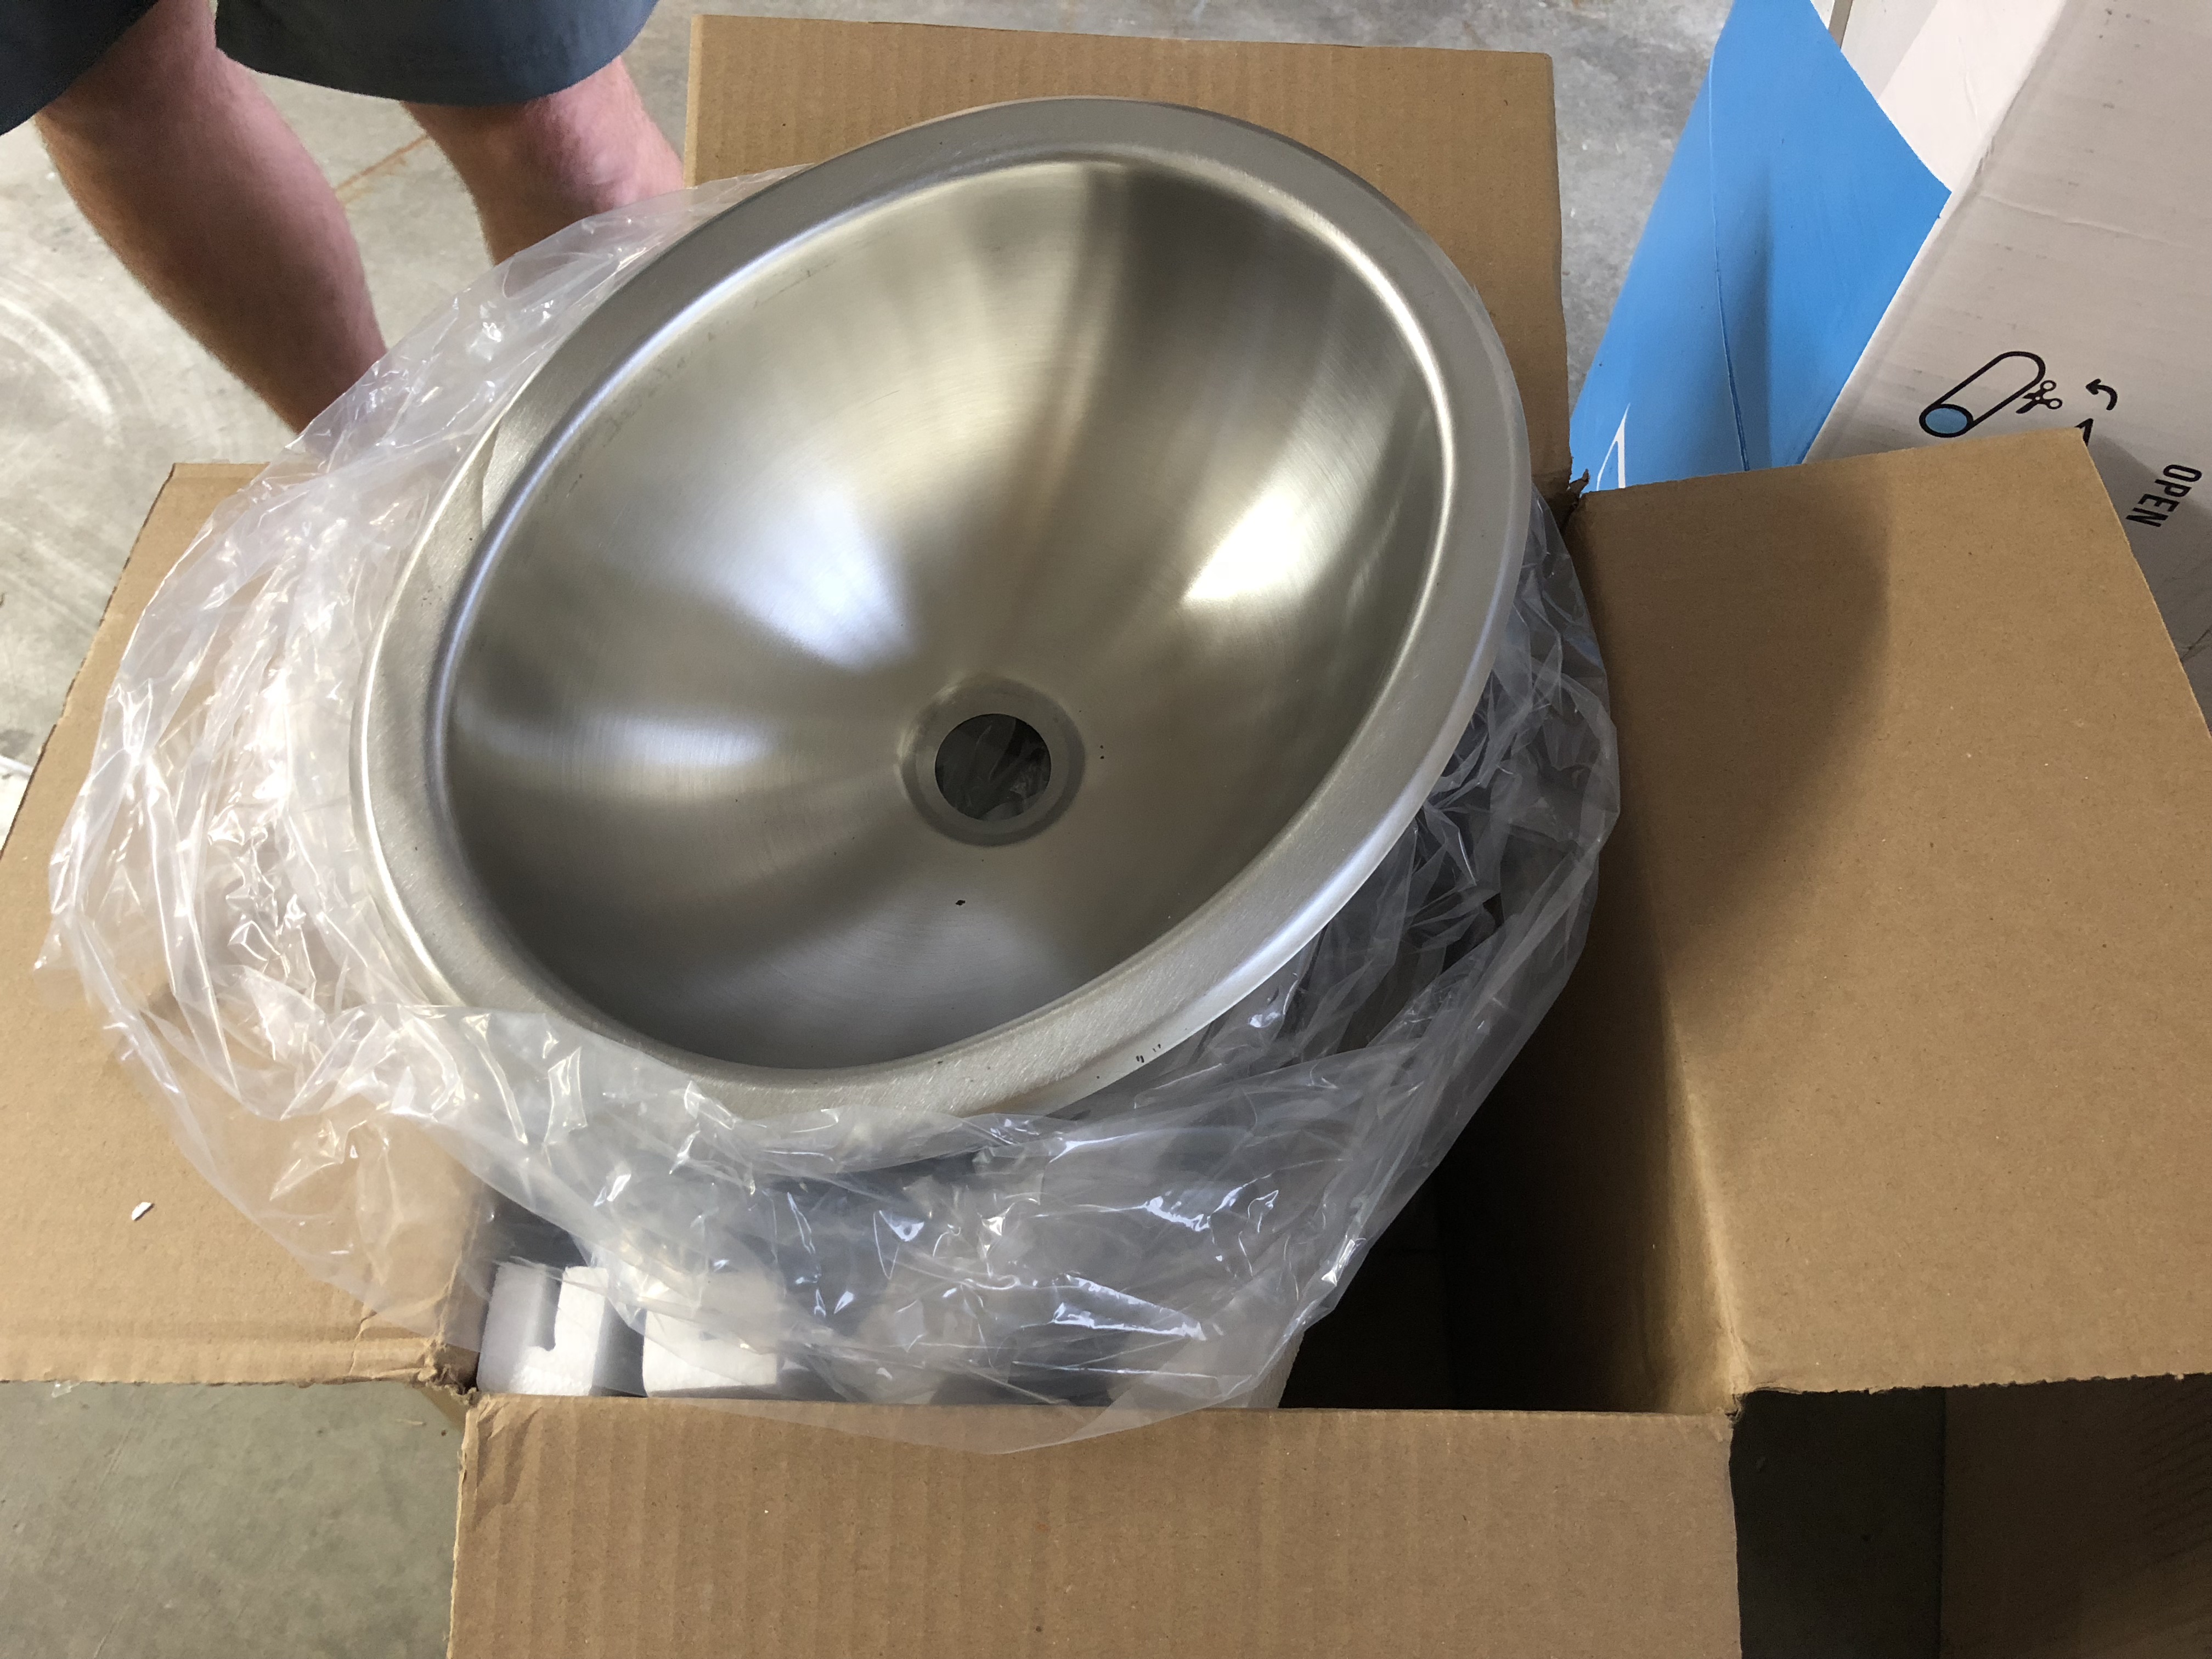
A tiny sink! it's 10" and 13" oval. I wanted one large enough to actually use, but small enough to not take up all of the counter space. In hindsight, I have enough counter space and this sink is almost uselessly tiny. I would get a bigger one next time and make a cover for it when it's not in use...
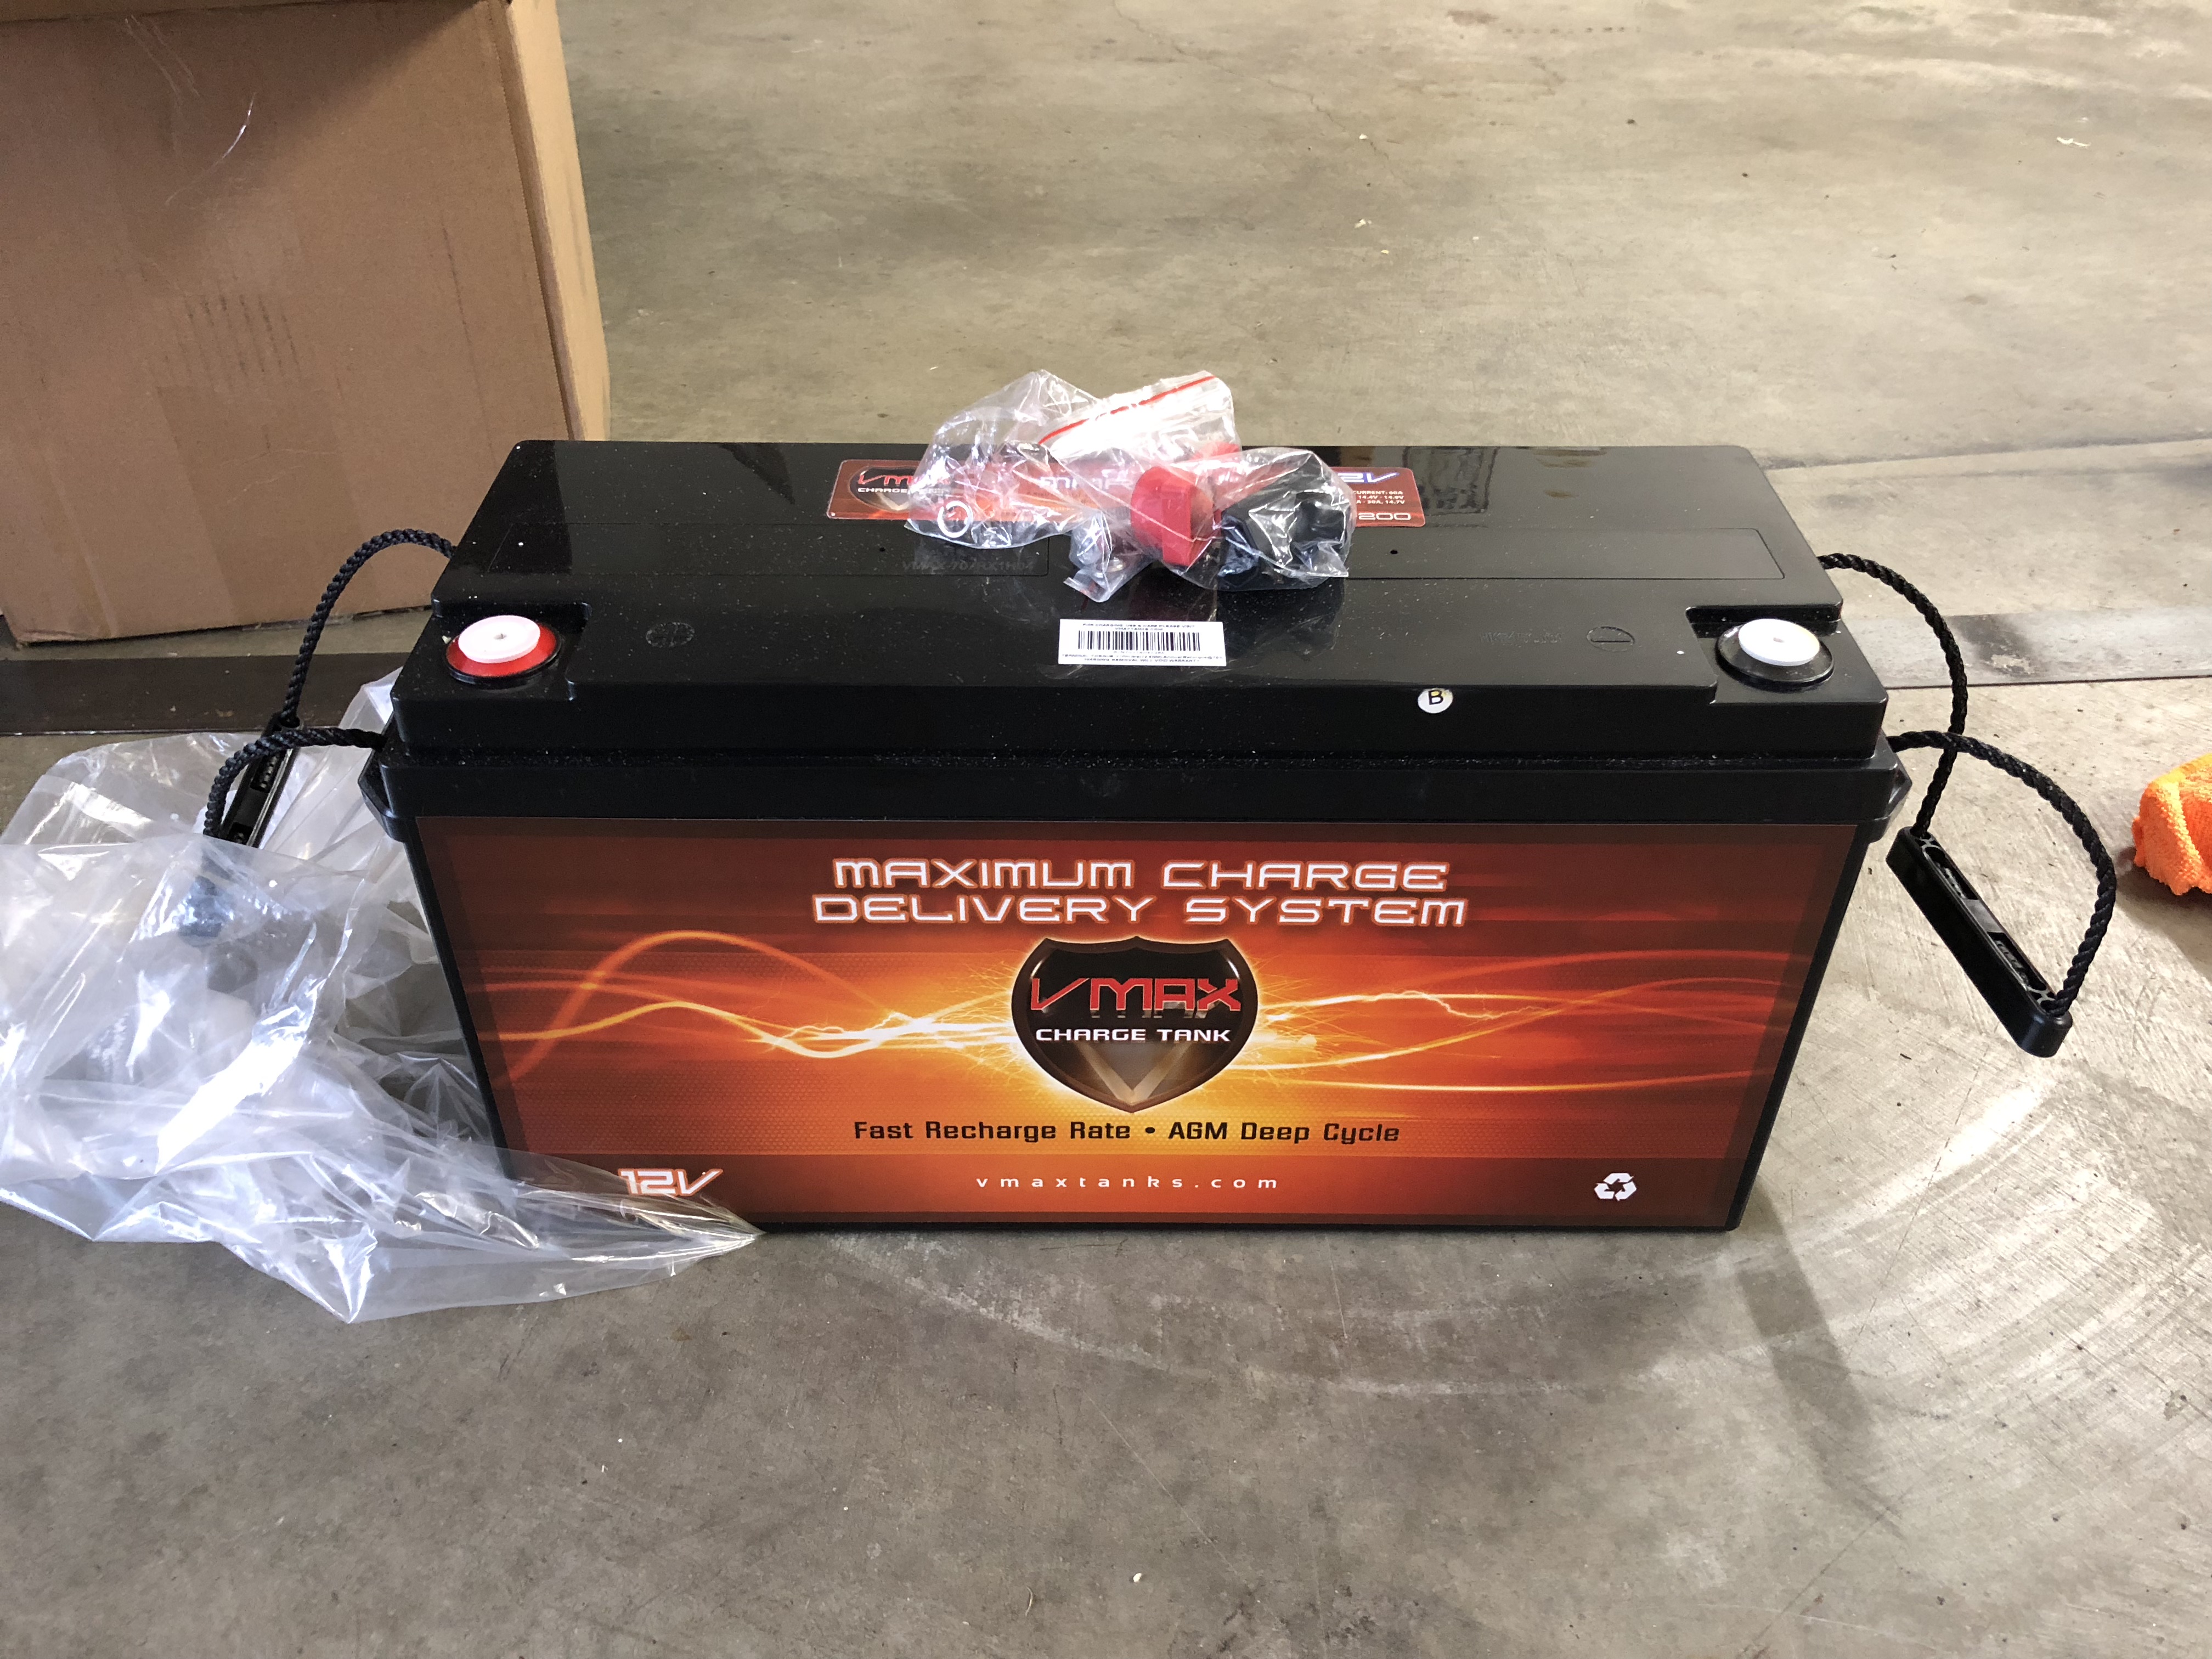
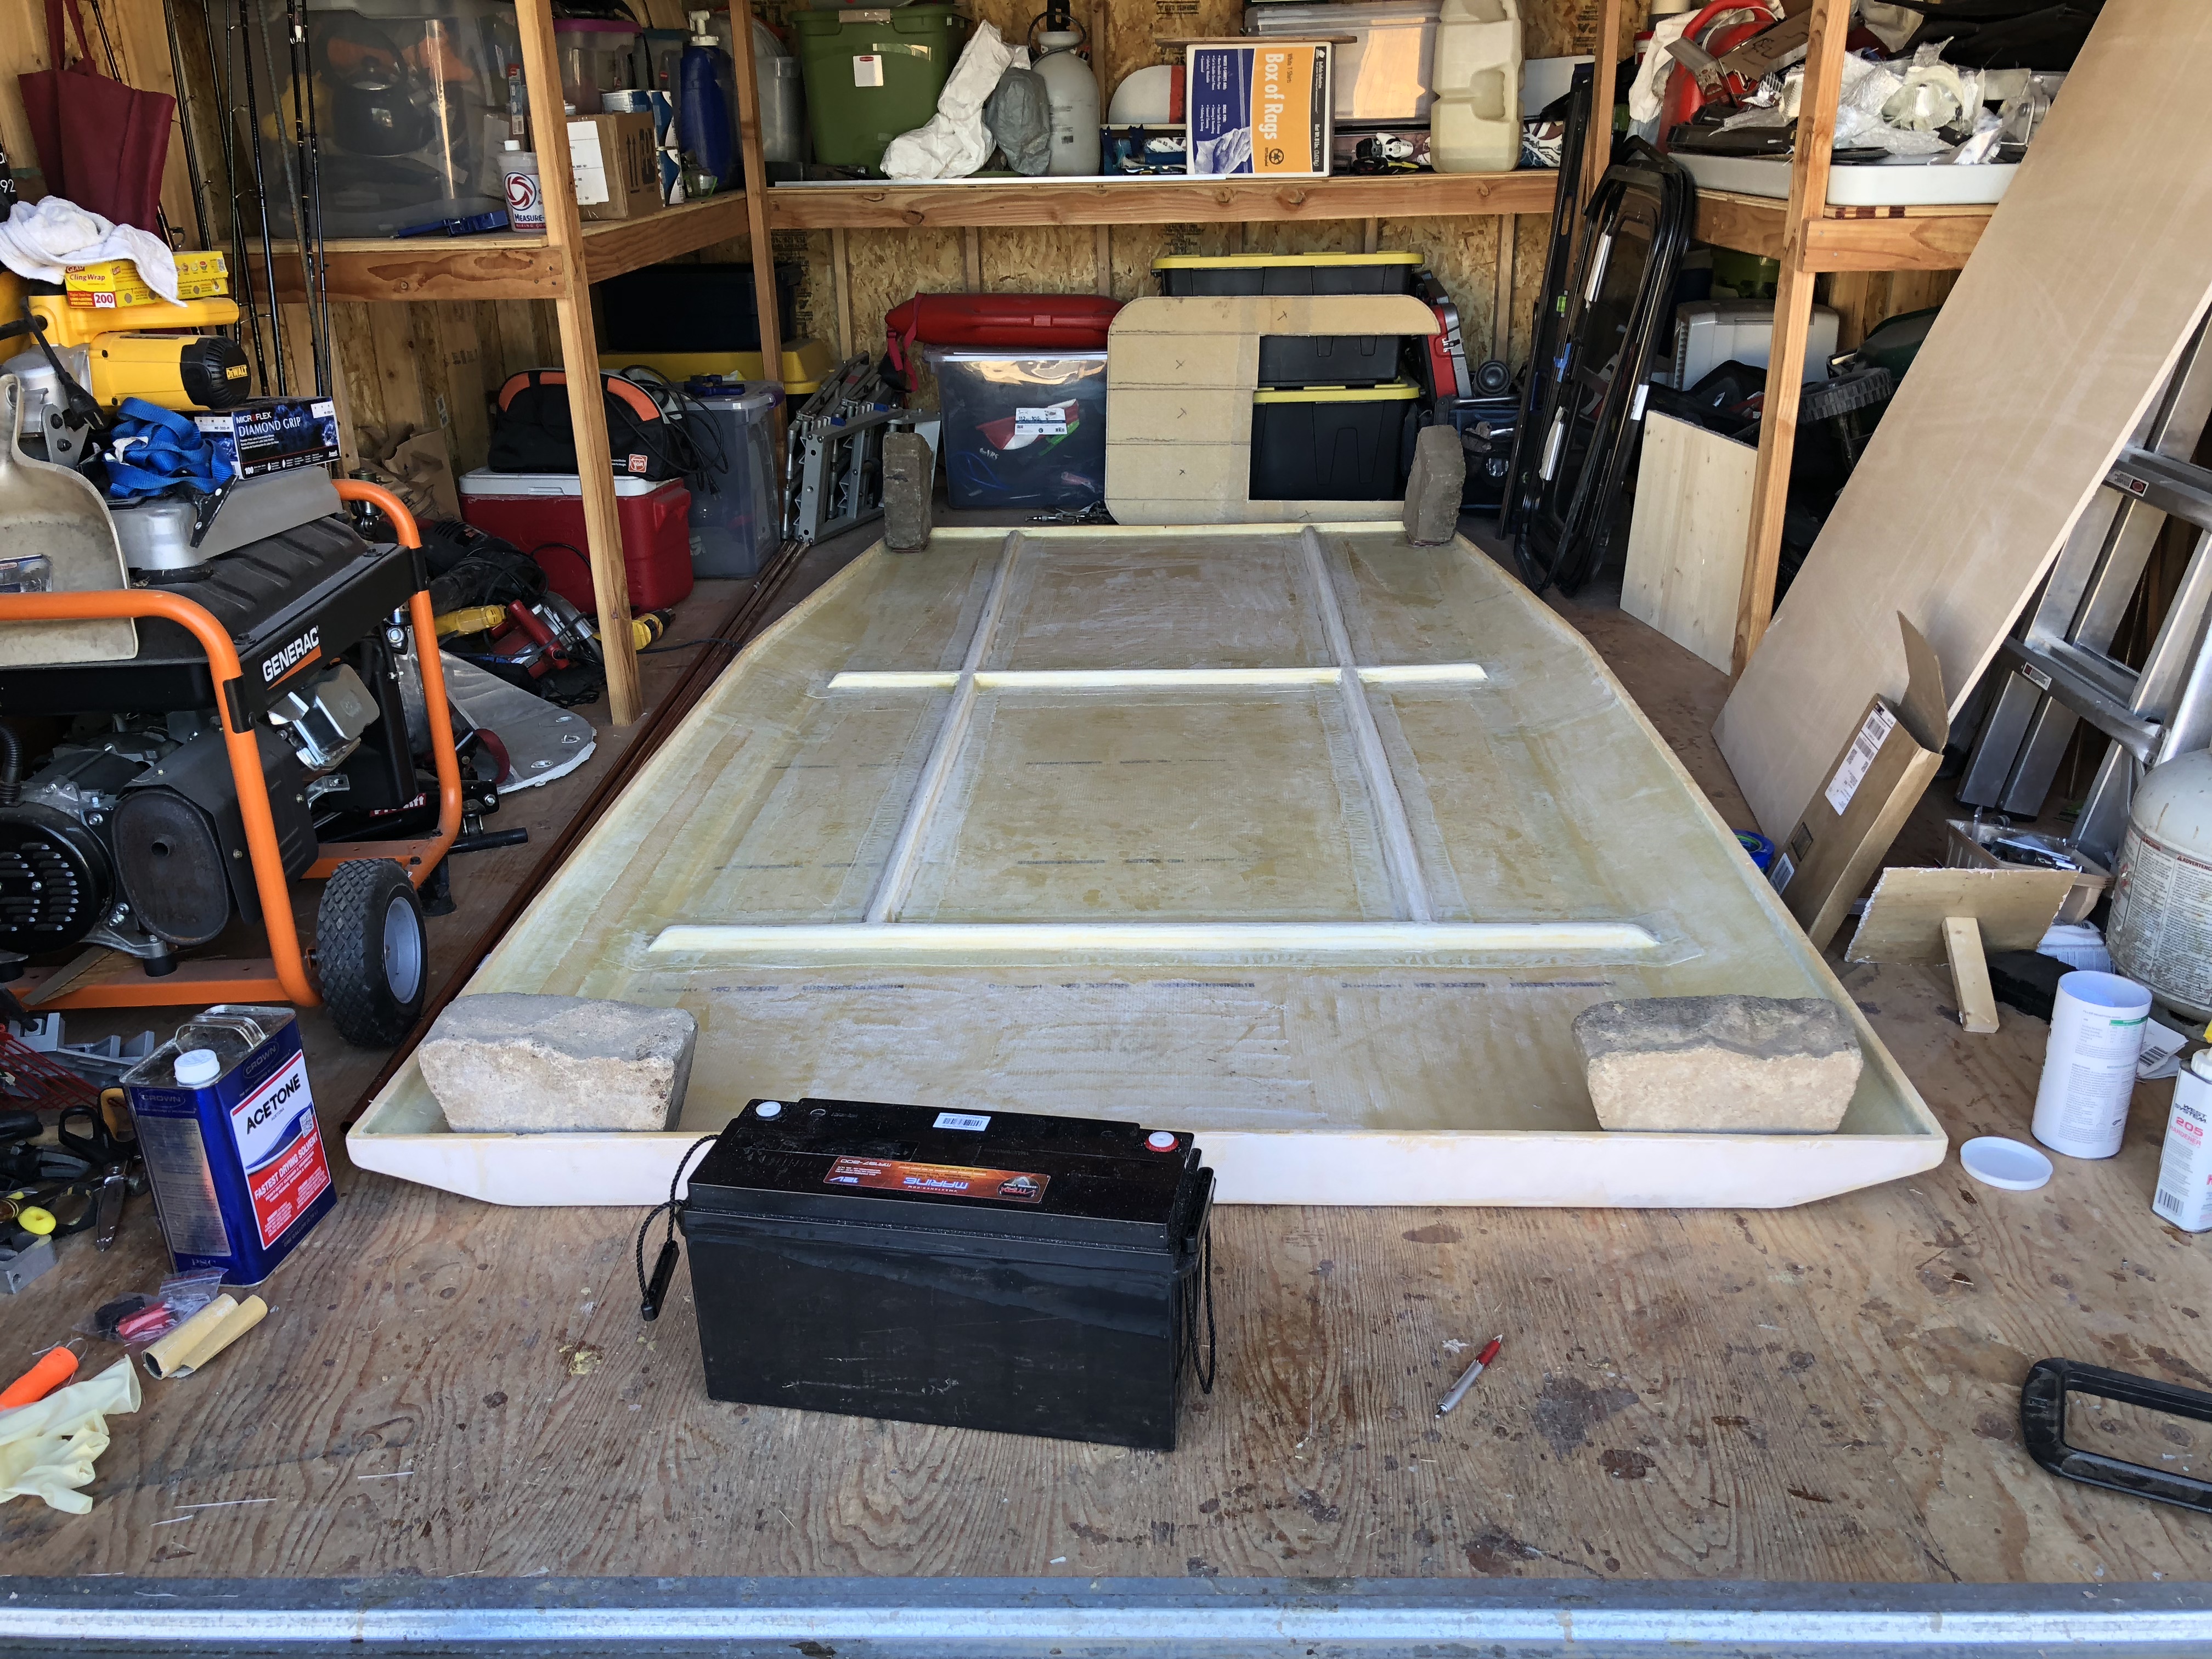
Battery! 200 amp hour Vmax Tank. Chosen mostly to be as large as possible but it had to fit in the spot we set aside for it.
We also got a 5" thick memory foam mattress off amazon.... hope it's comfy!
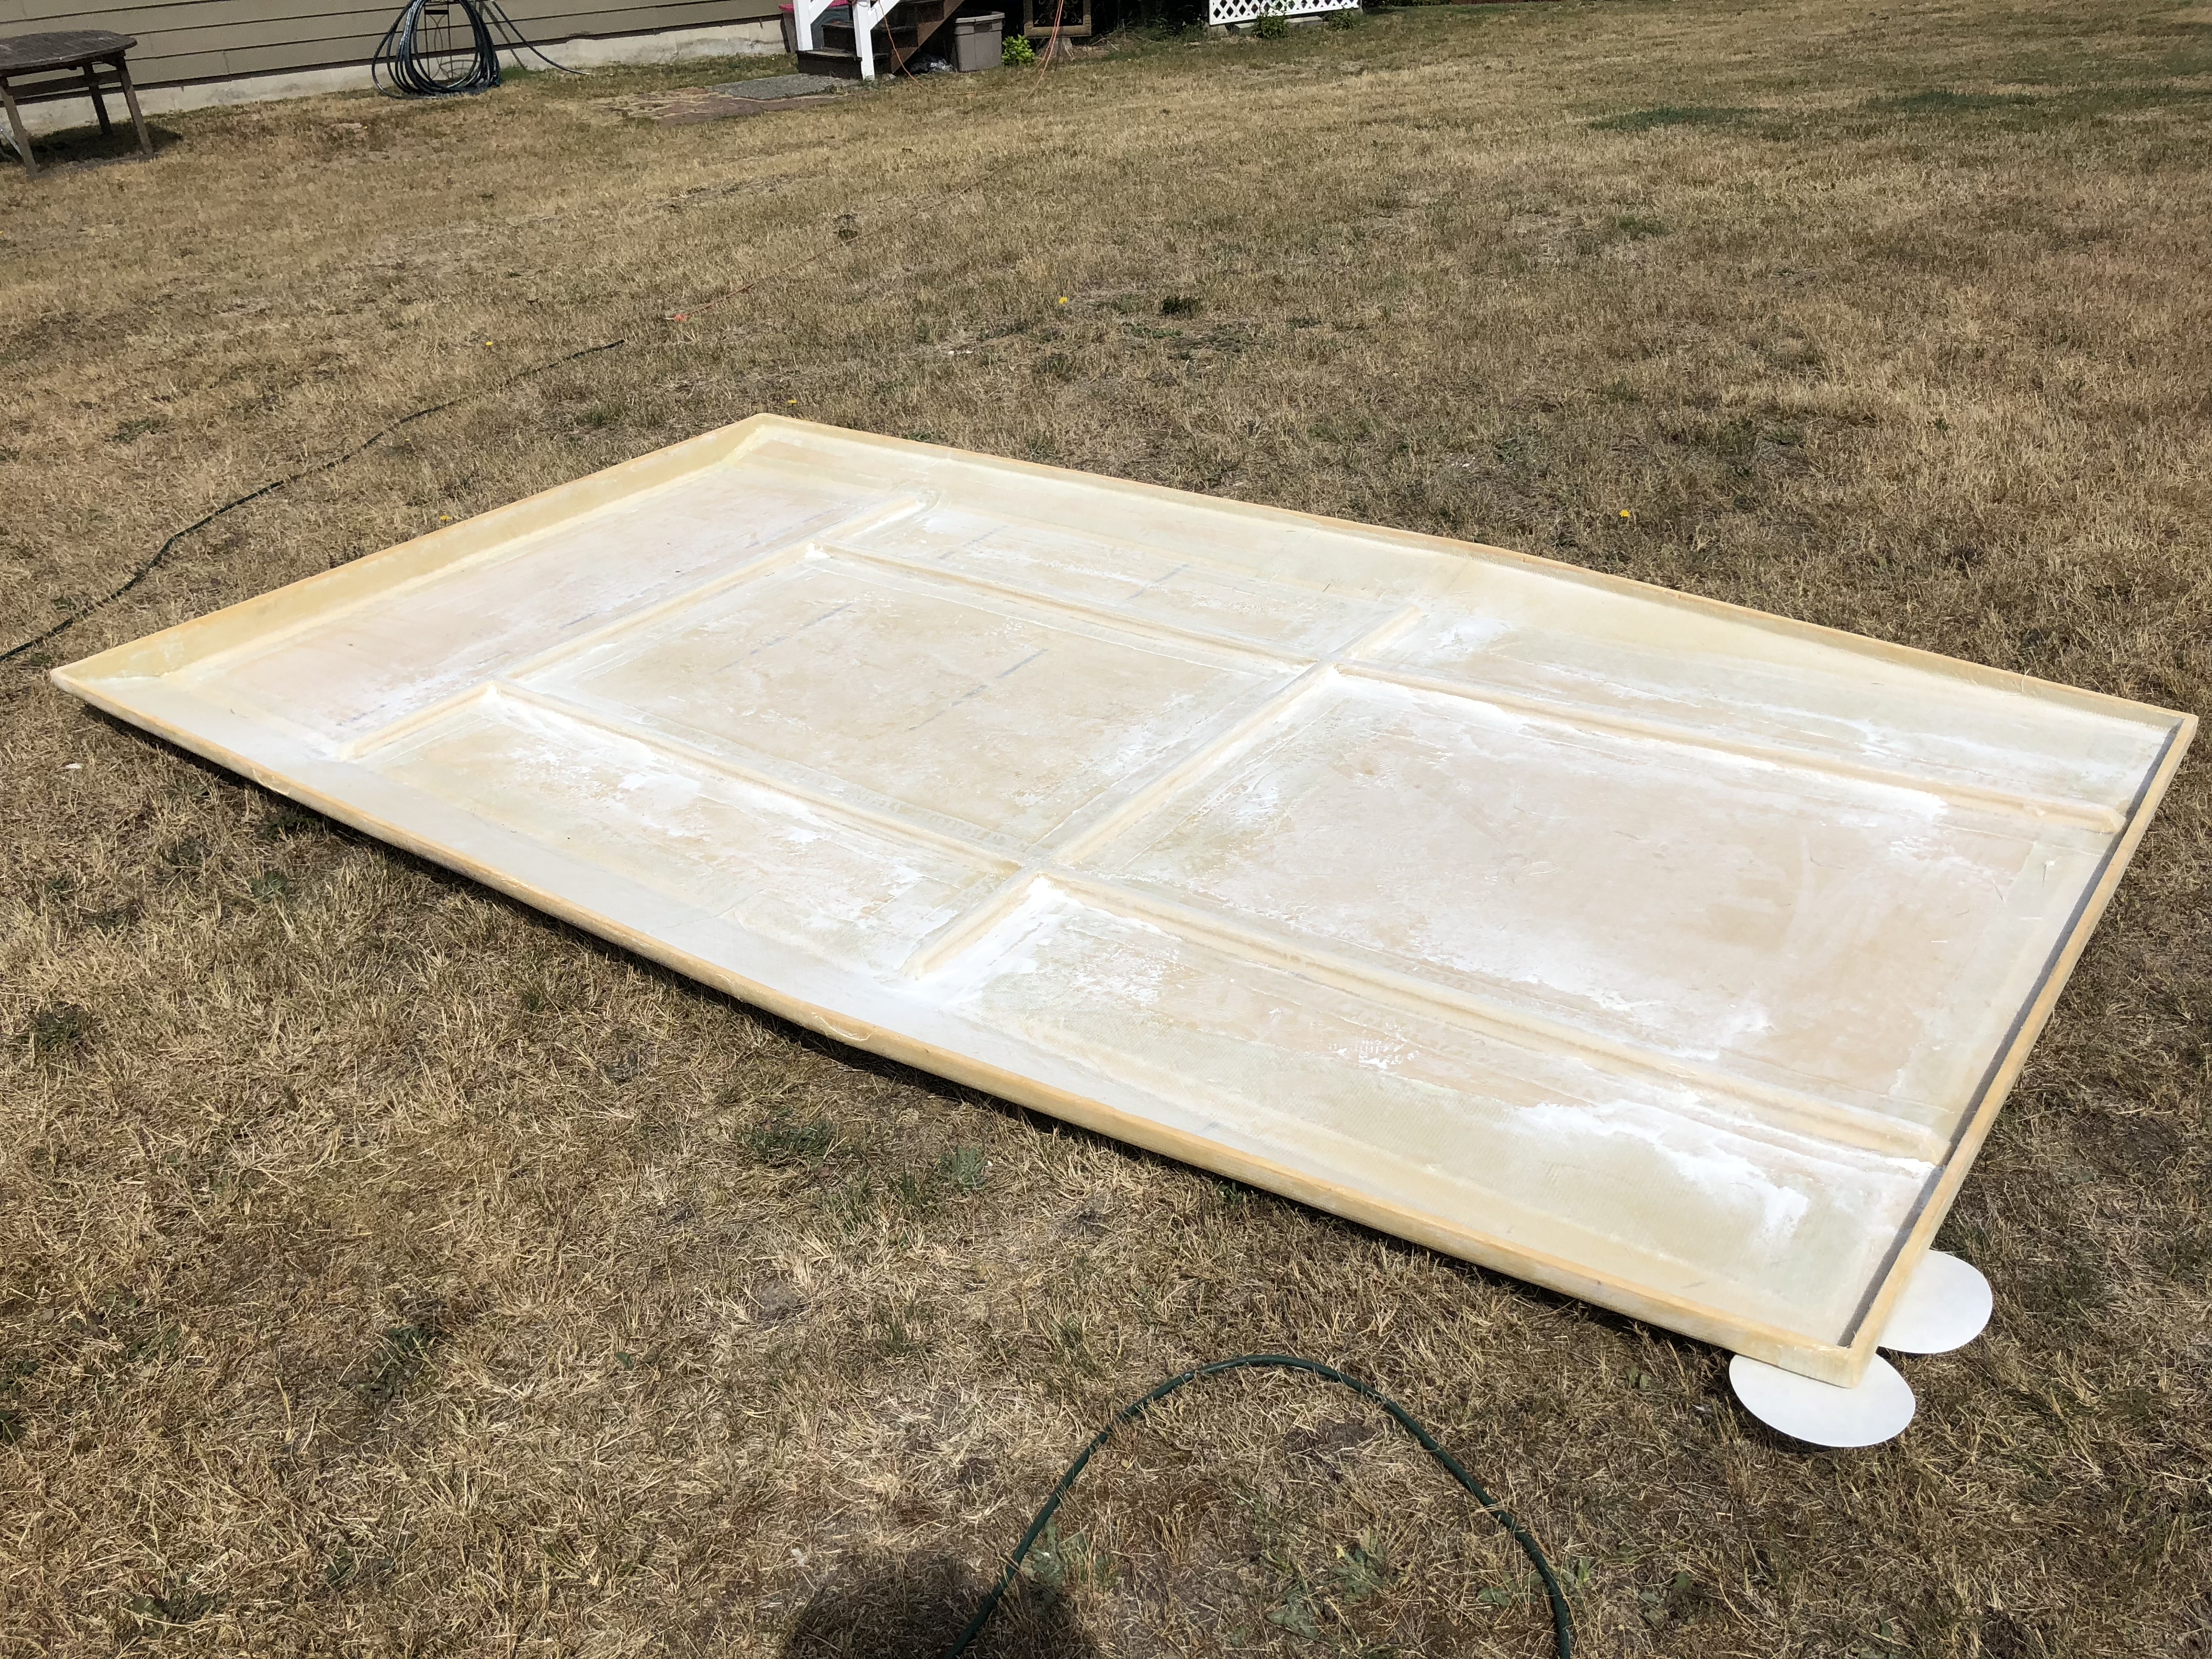
We're stillll sanding the roof. I know no one will ever see up there, but I'll know. and it has to not look awful...
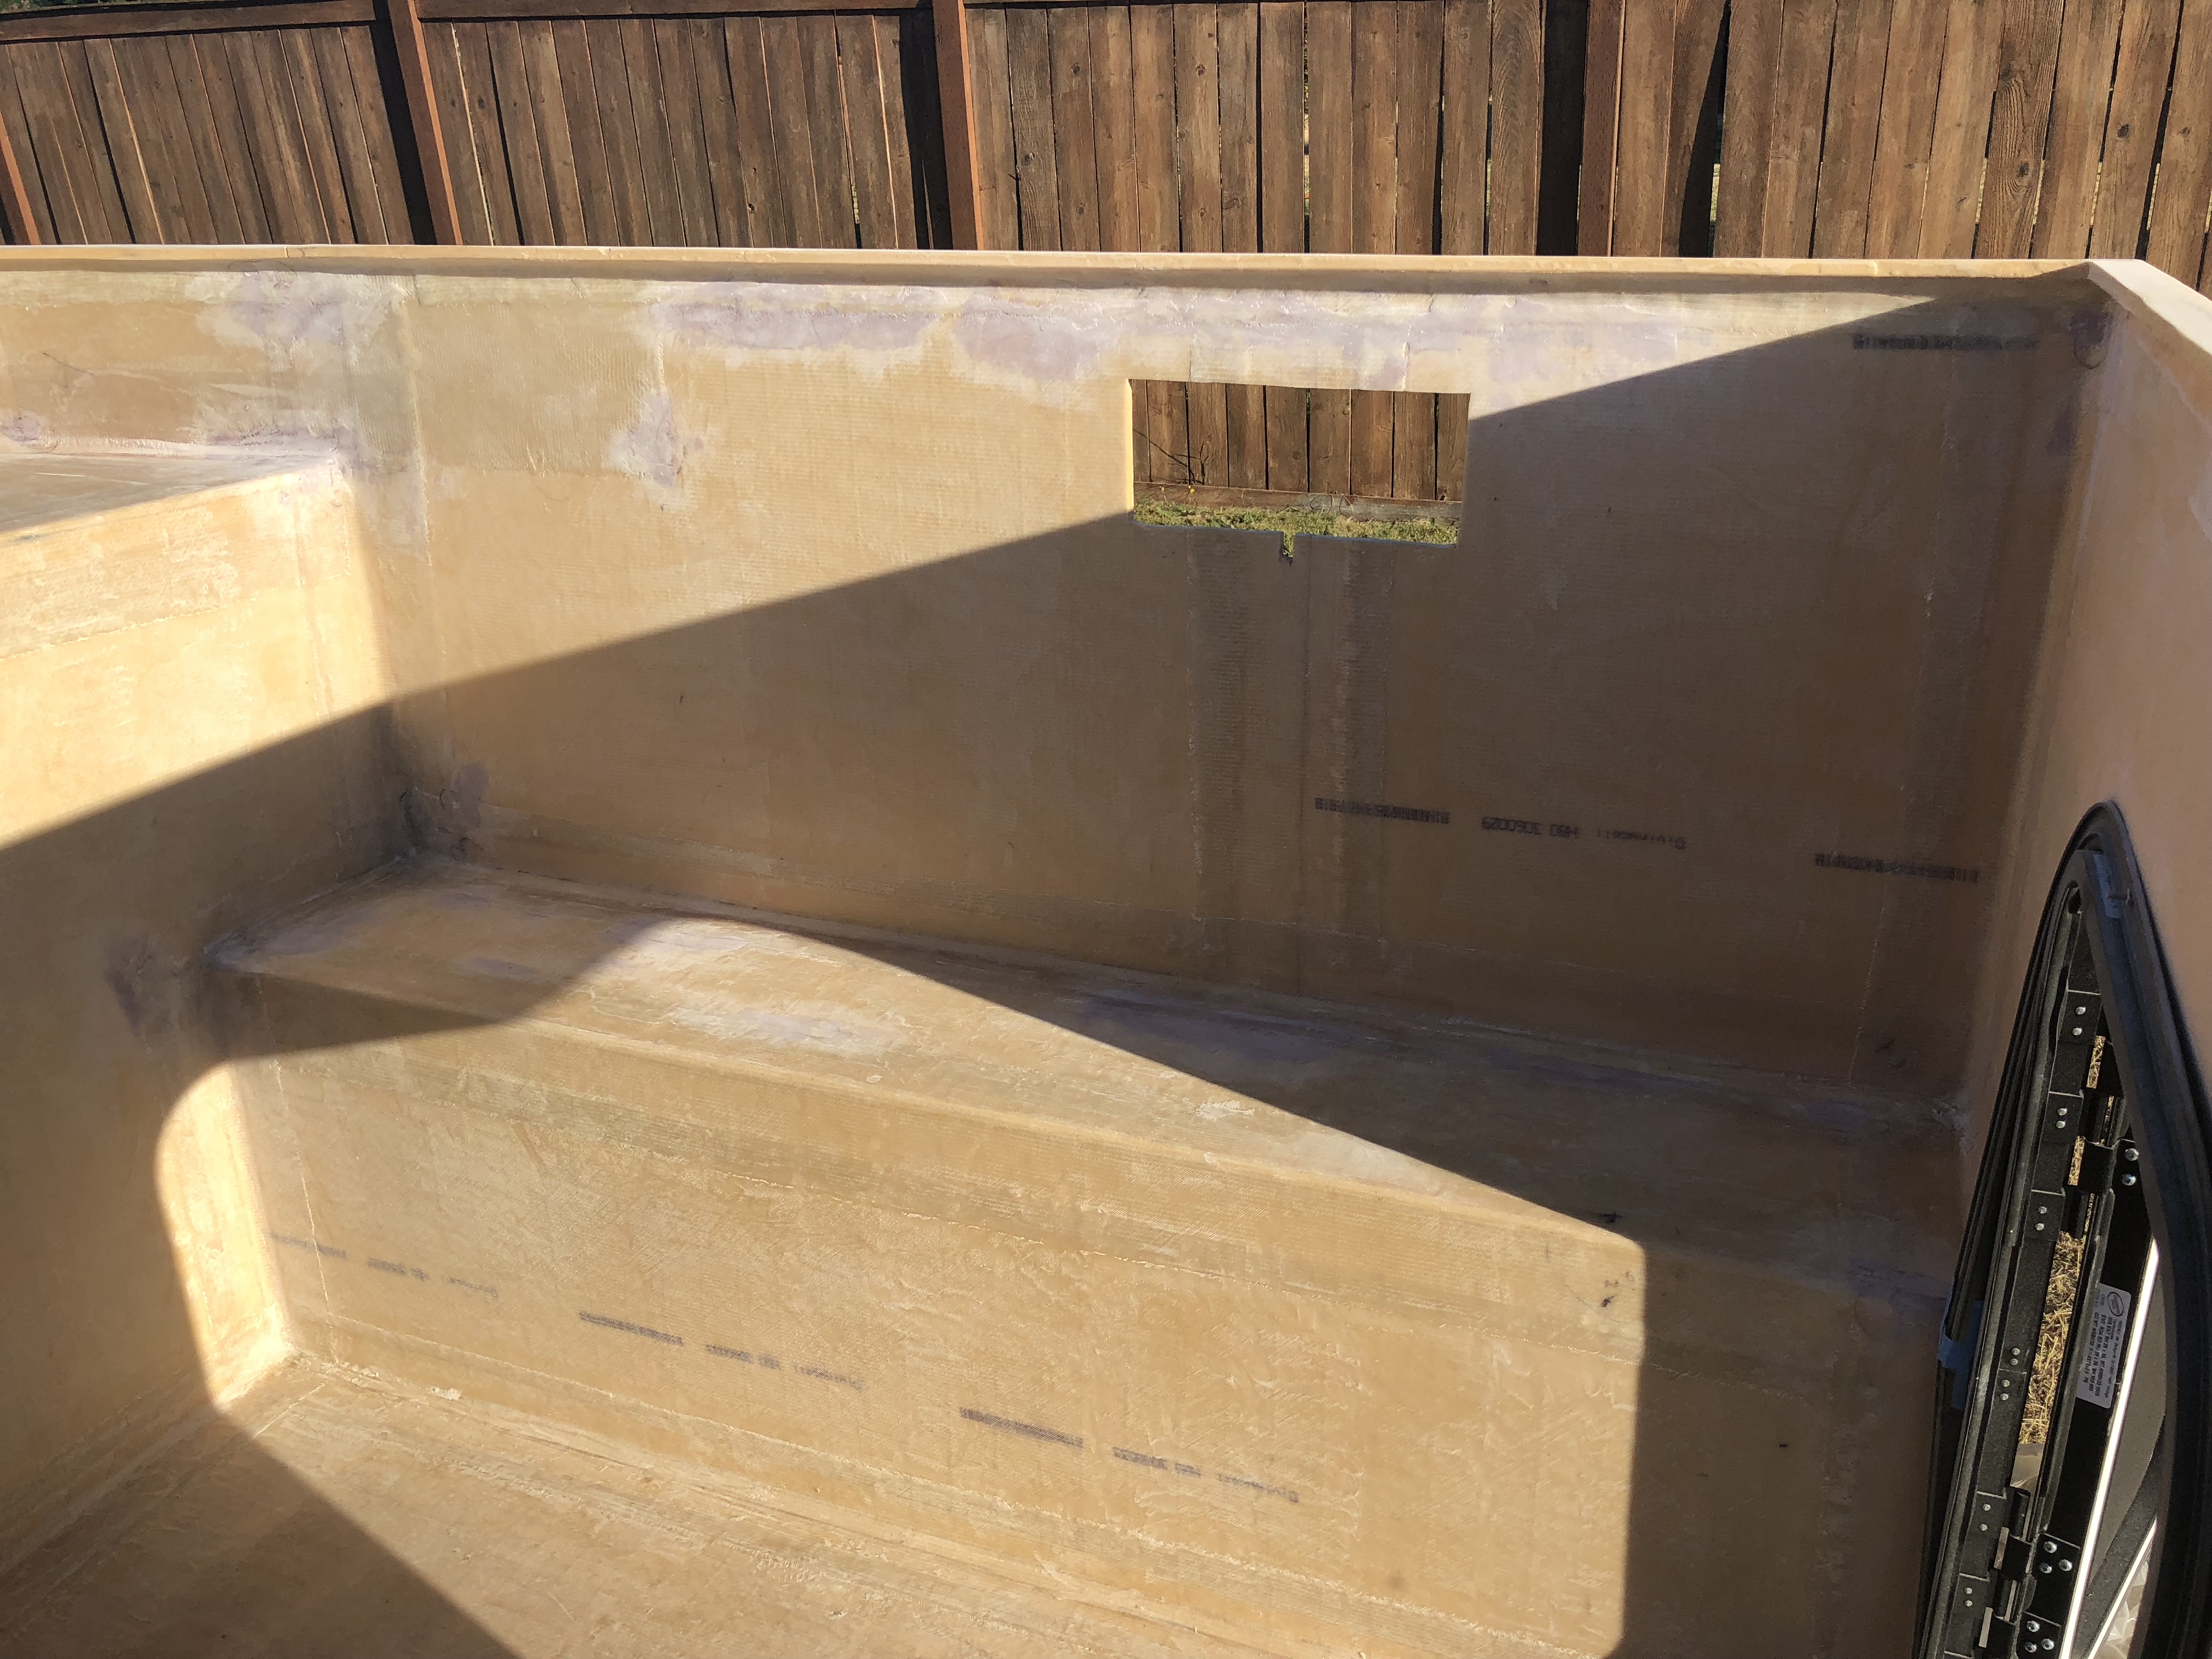
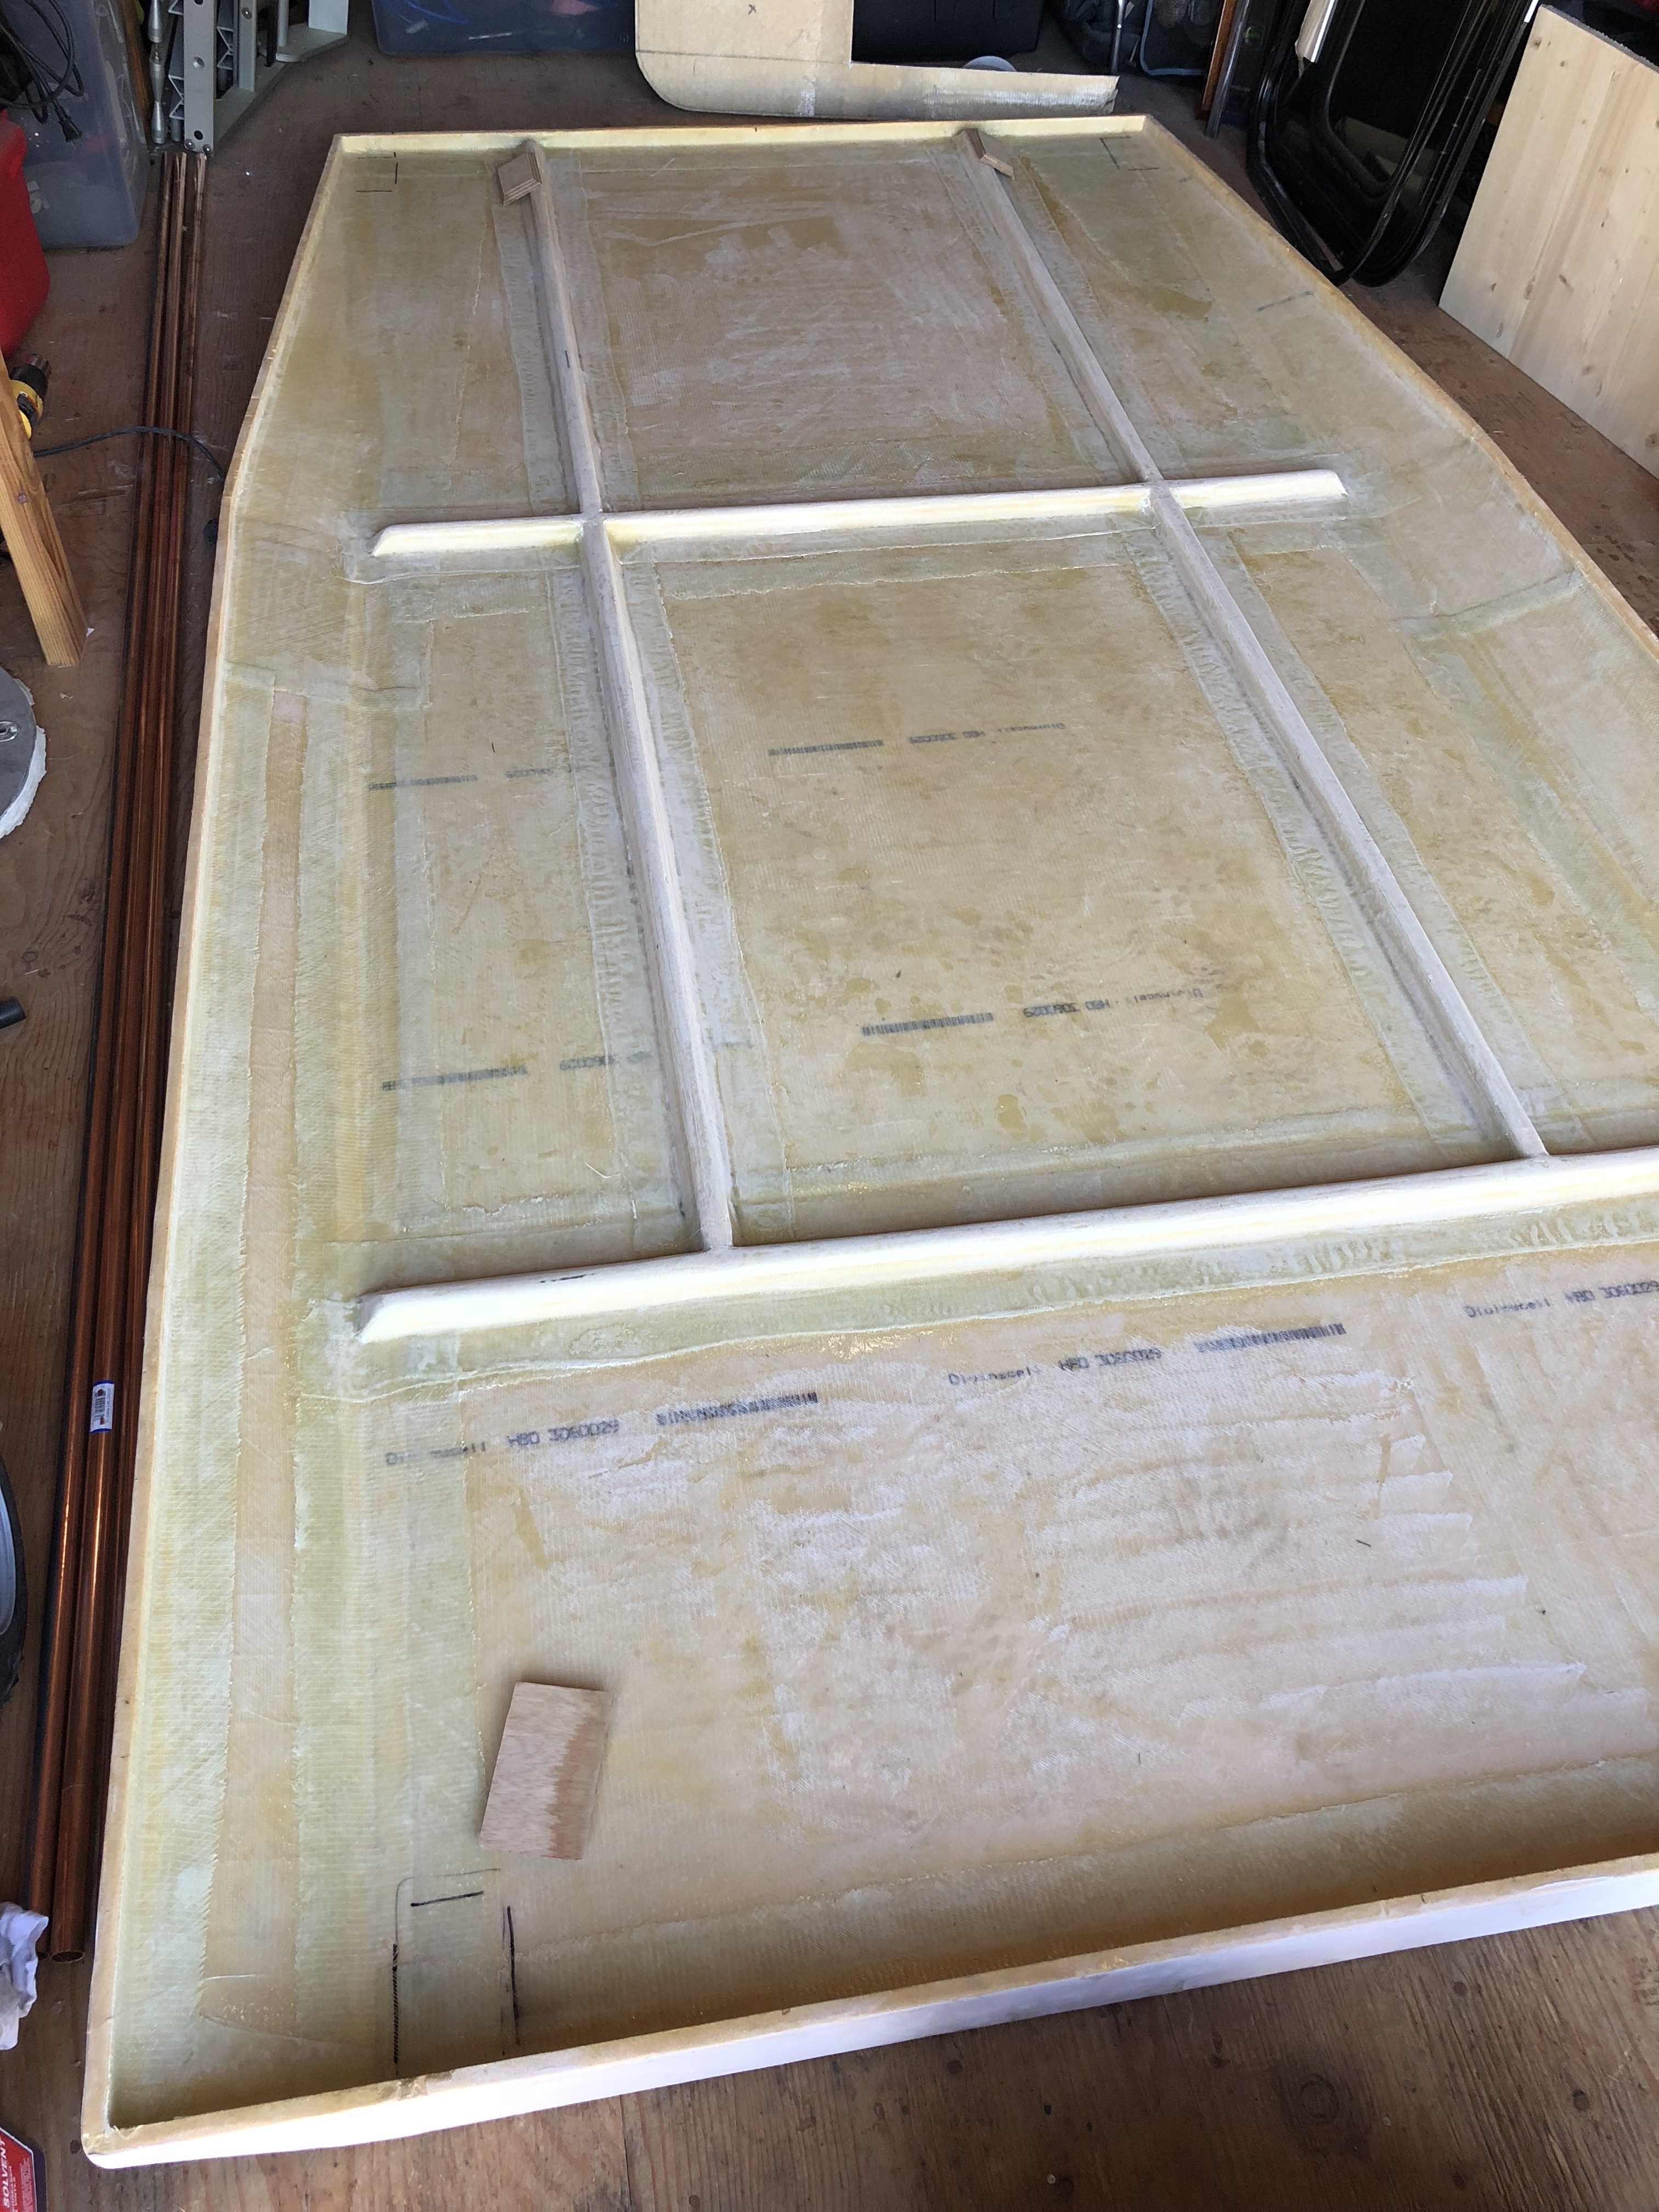
Turns out that we're not even done with fiberglass yet... We finally decided to officially ditch the nose cone idea and deal with it later... So we had to finish up the edges at the front of the cabover.
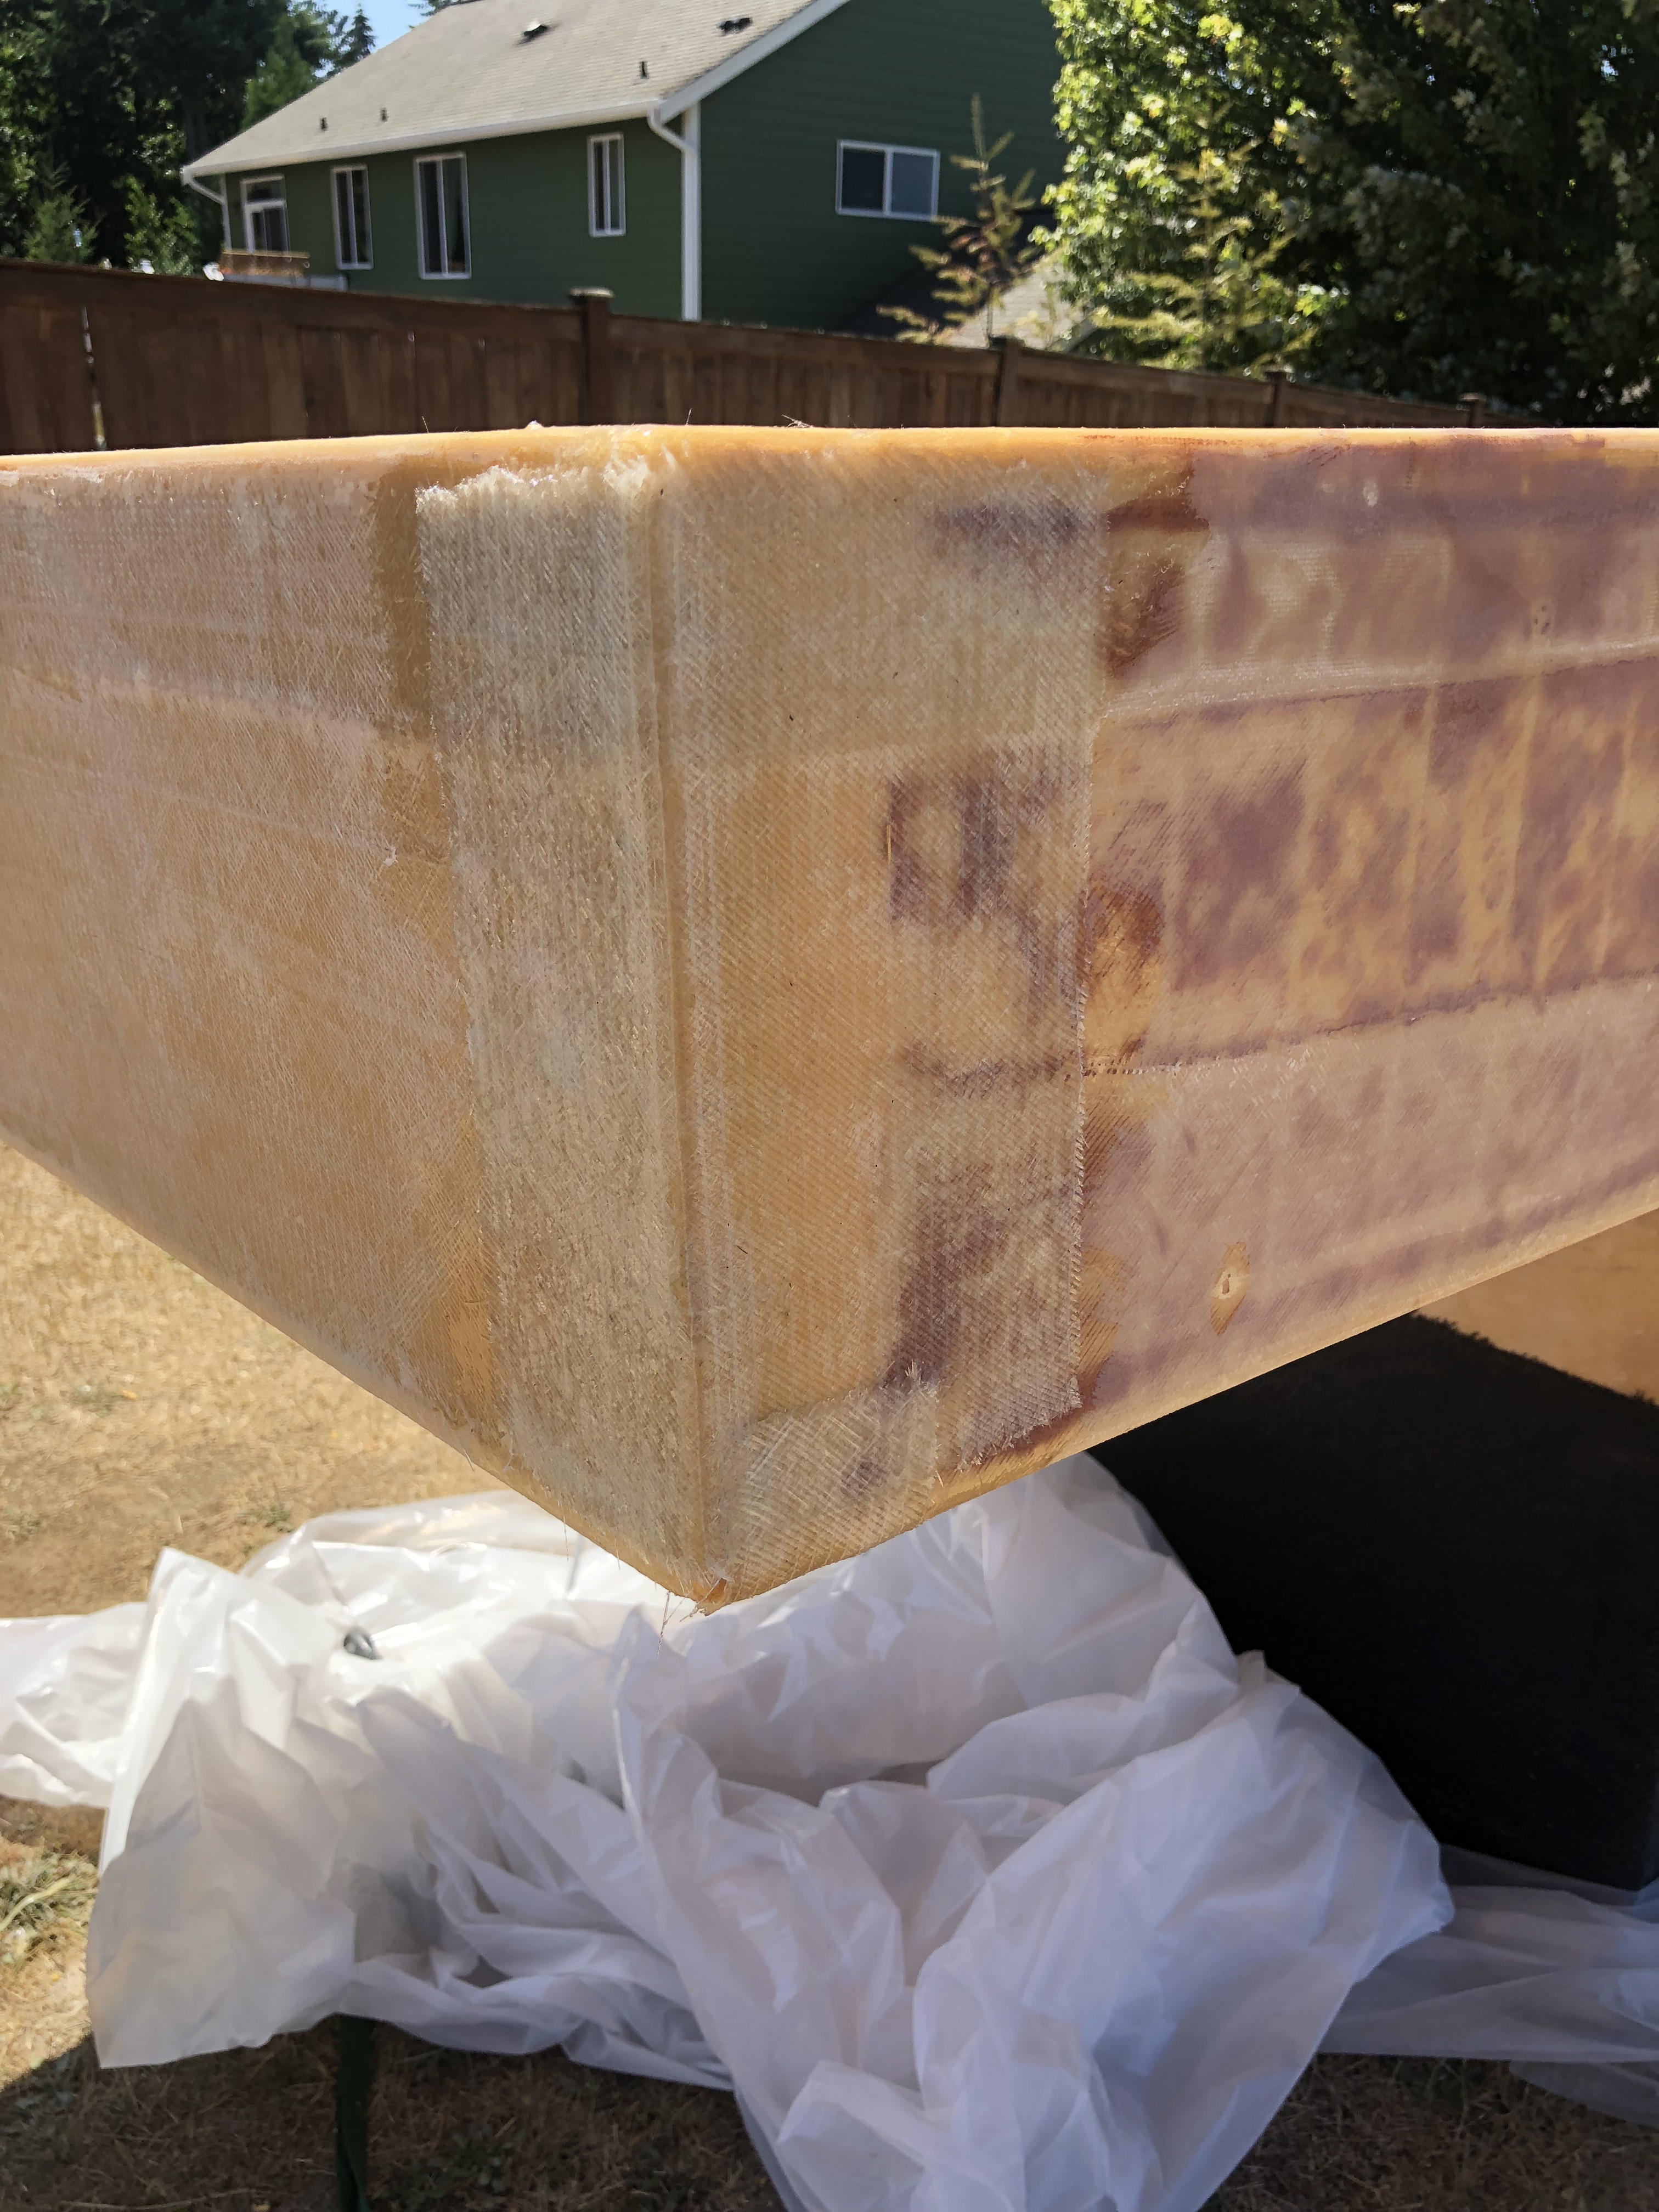
We also marked where the tie down points in the camper were going to go and added another layer of fiberglass there just in case.
The camper is going to be tied in 4 places to the 4 hooks on the inside of the truck bed. It shouldn't weigh enough that that will pose any problems at all and I really didn't want anything sticking outside the bed of the truck.
We got some new wheels for our truck!
A tiny sink! it's 10" and 13" oval. I wanted one large enough to actually use, but small enough to not take up all of the counter space. In hindsight, I have enough counter space and this sink is almost uselessly tiny. I would get a bigger one next time and make a cover for it when it's not in use...
Battery! 200 amp hour Vmax Tank. Chosen mostly to be as large as possible but it had to fit in the spot we set aside for it.
We also got a 5" thick memory foam mattress off amazon.... hope it's comfy!
We're stillll sanding the roof. I know no one will ever see up there, but I'll know. and it has to not look awful...
Turns out that we're not even done with fiberglass yet... We finally decided to officially ditch the nose cone idea and deal with it later... So we had to finish up the edges at the front of the cabover.
We also marked where the tie down points in the camper were going to go and added another layer of fiberglass there just in case.
The camper is going to be tied in 4 places to the 4 hooks on the inside of the truck bed. It shouldn't weigh enough that that will pose any problems at all and I really didn't want anything sticking outside the bed of the truck.
underkill
Active member
We mixed up some filler and epoxy and glued the roof mechanism backing plates to the shell.
Fun fact: buy actual square cinder blocks for this project.
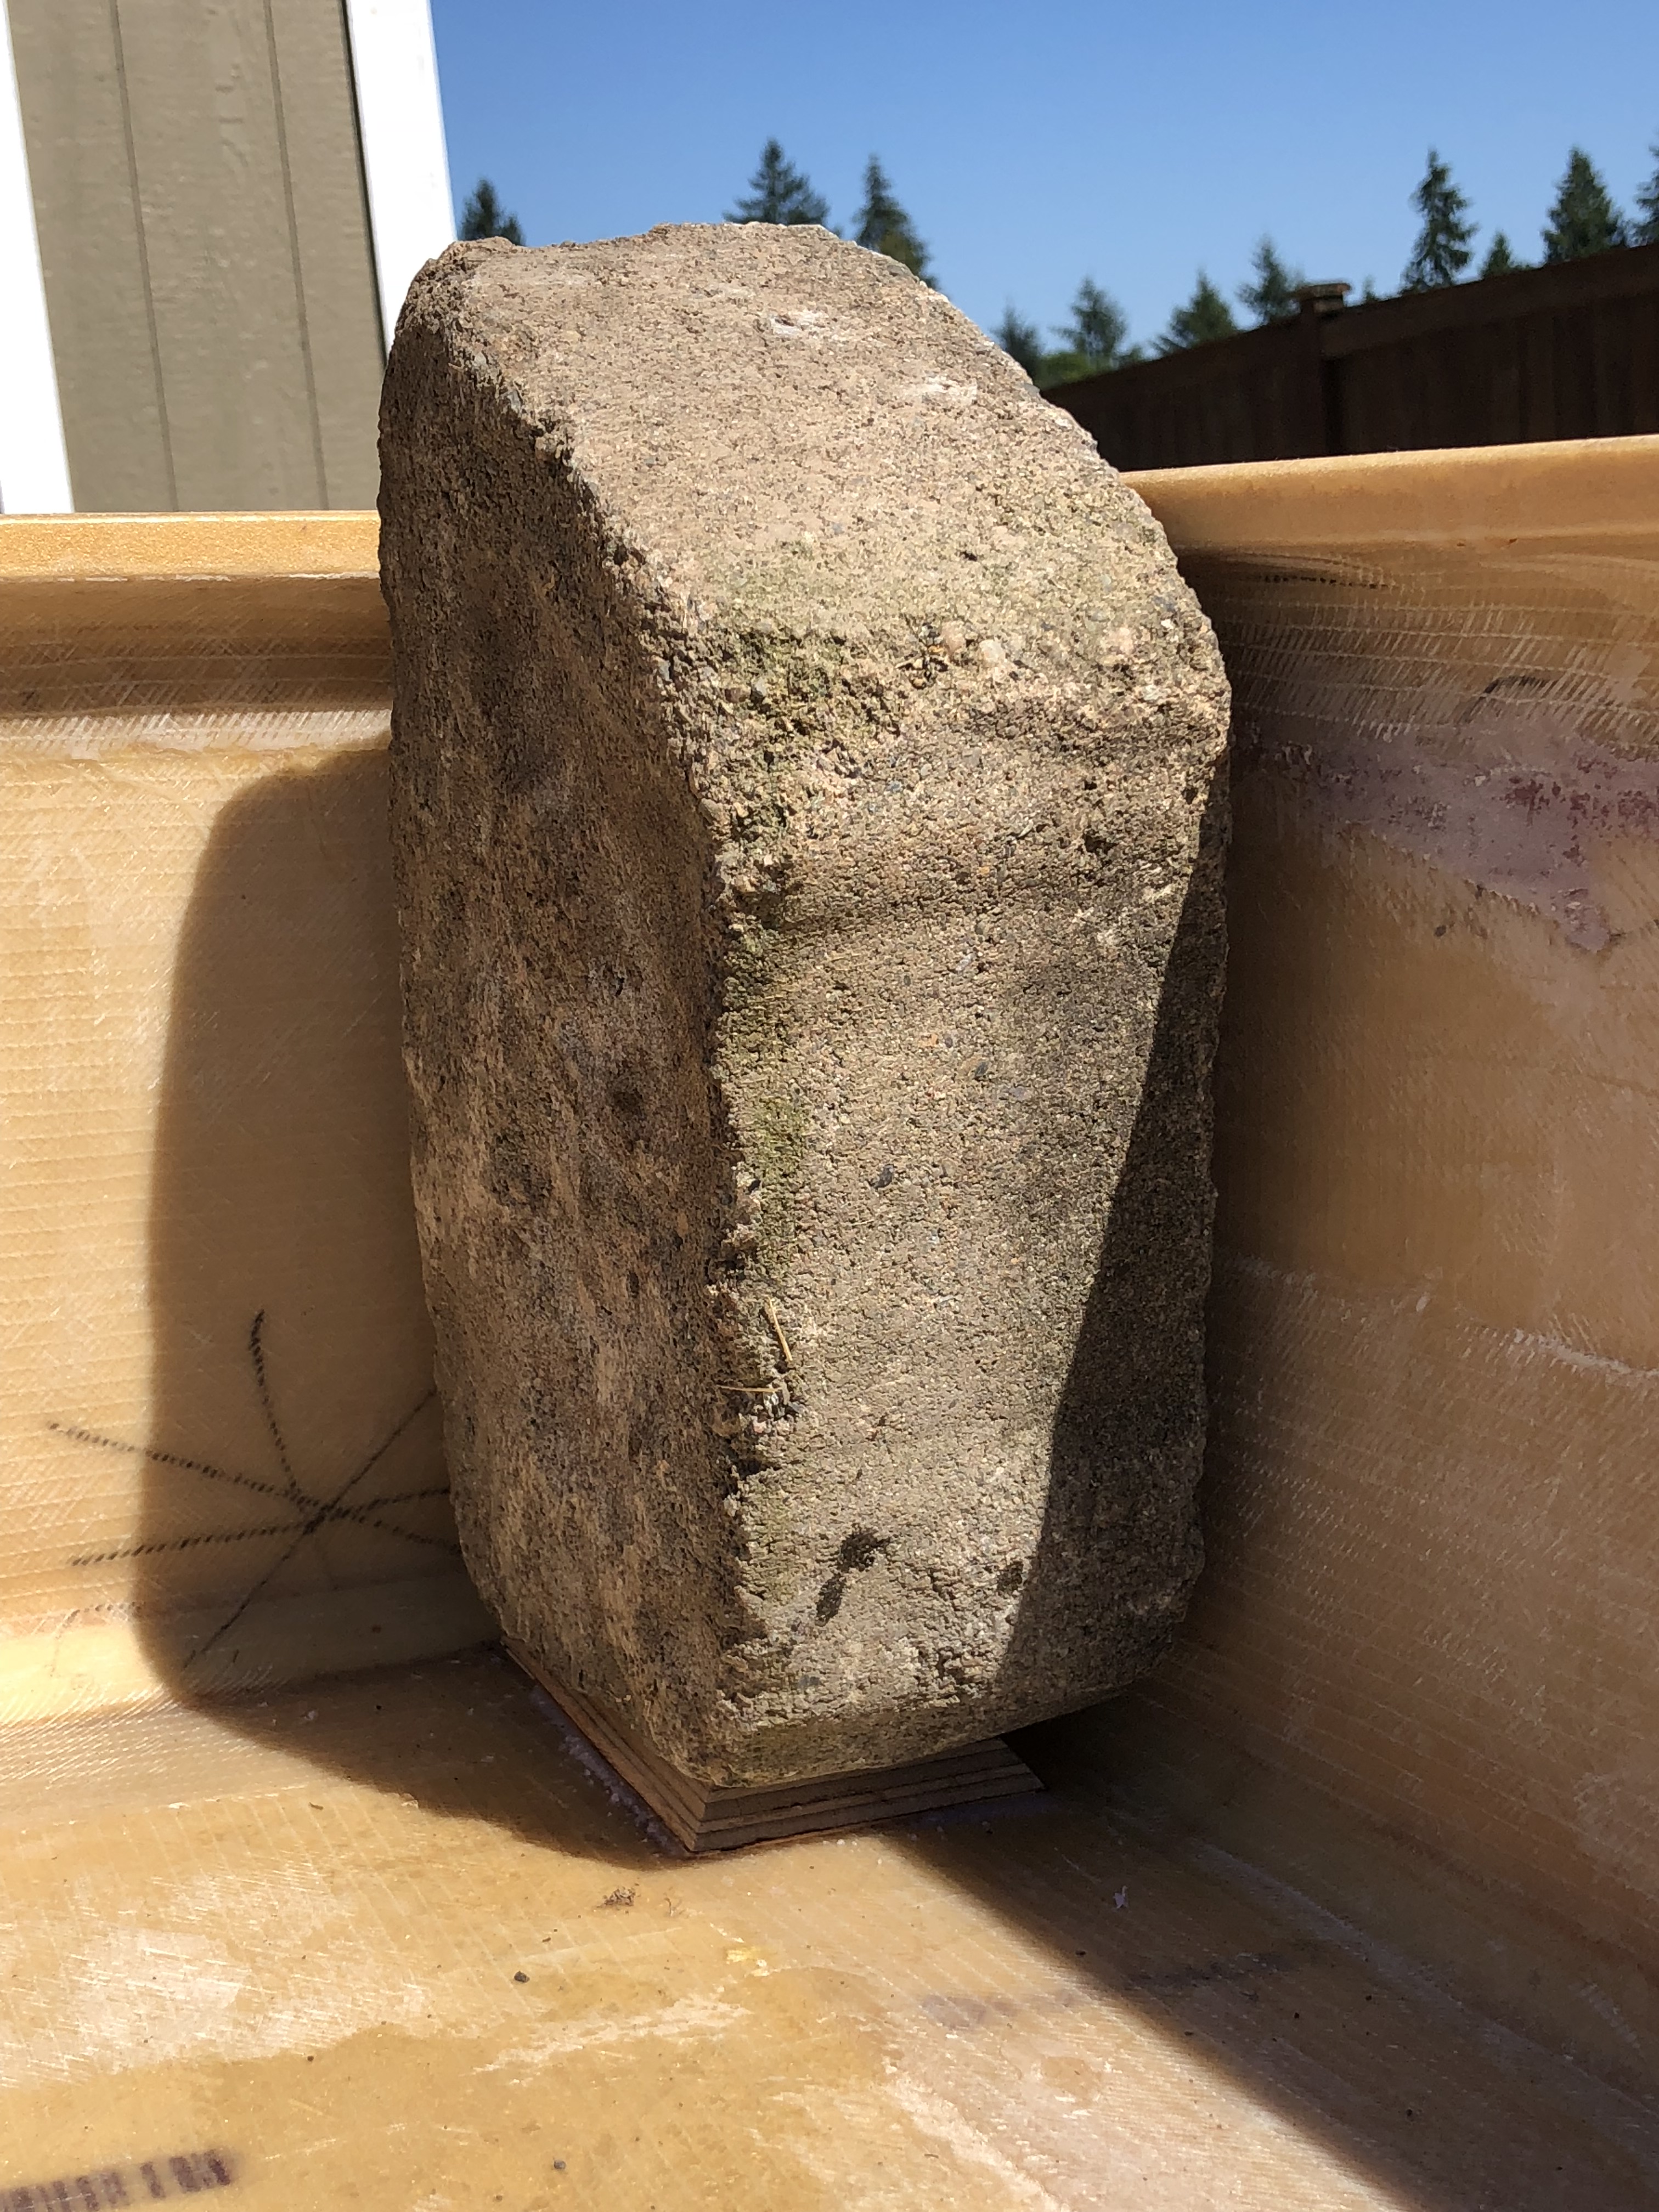
That should hold just fine!
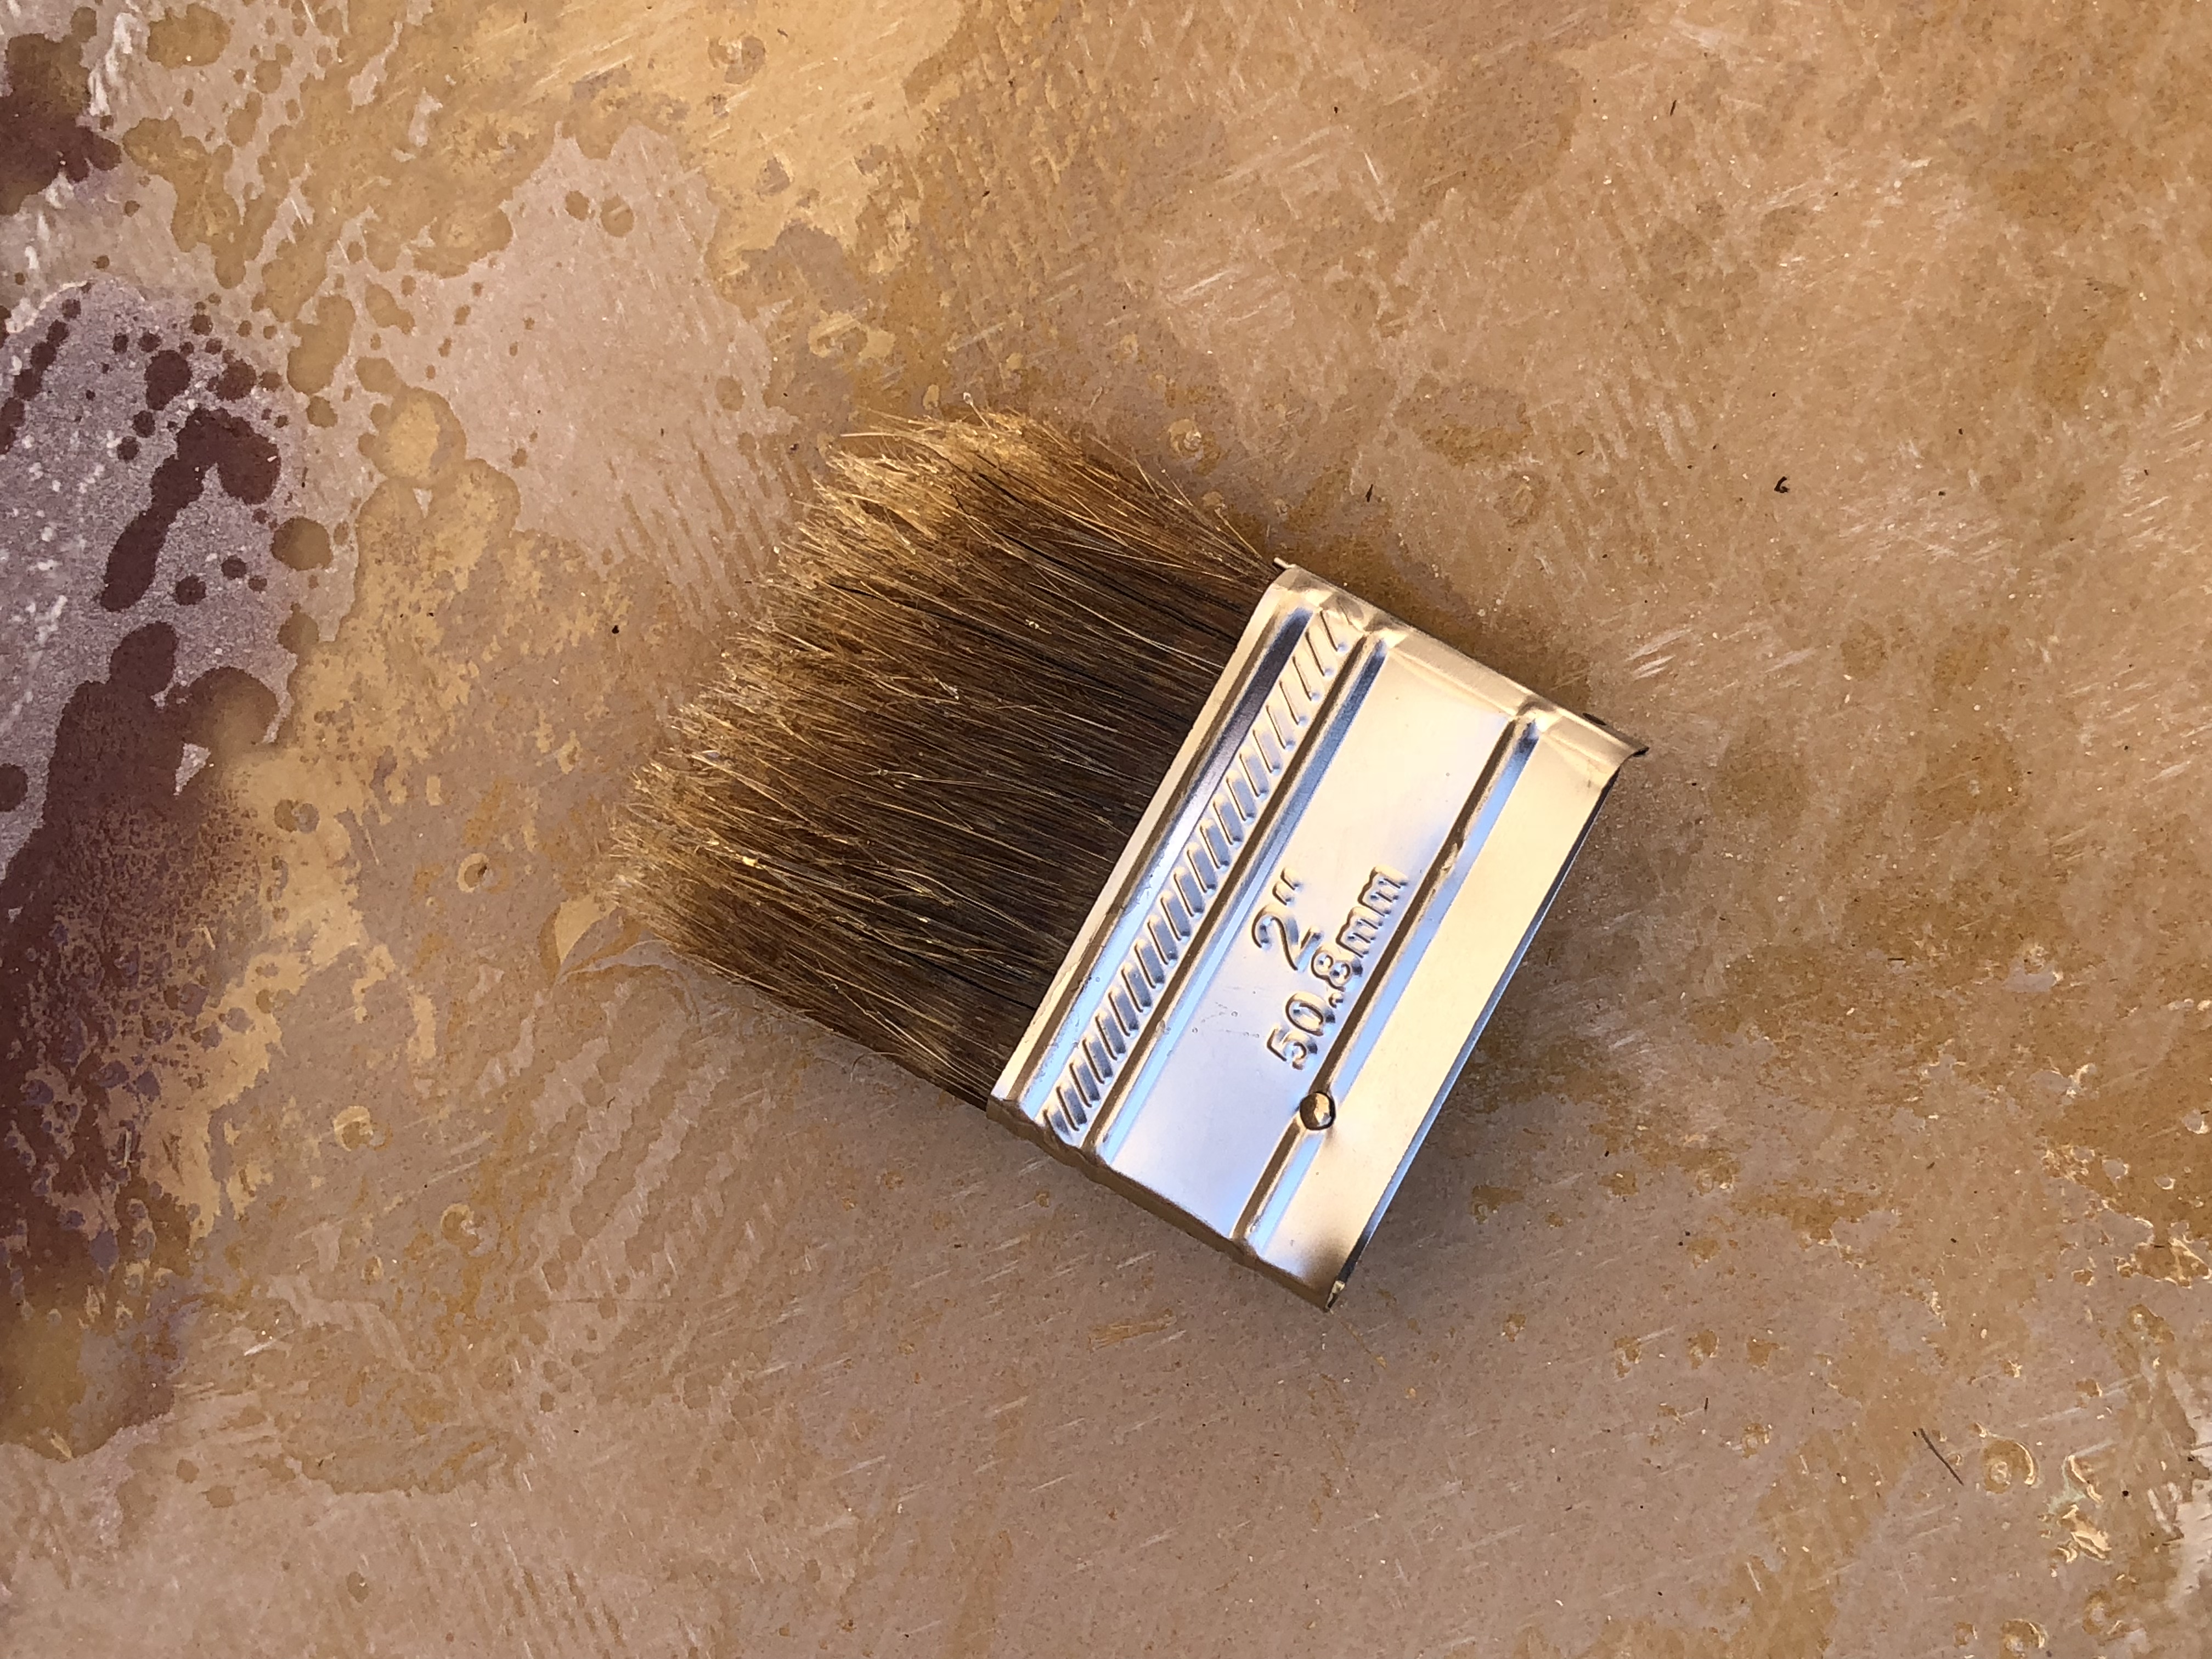
Well, it was bound to happen eventually... I finished some fiberglass and left my paintbrush sitting on the camper... Whoops...
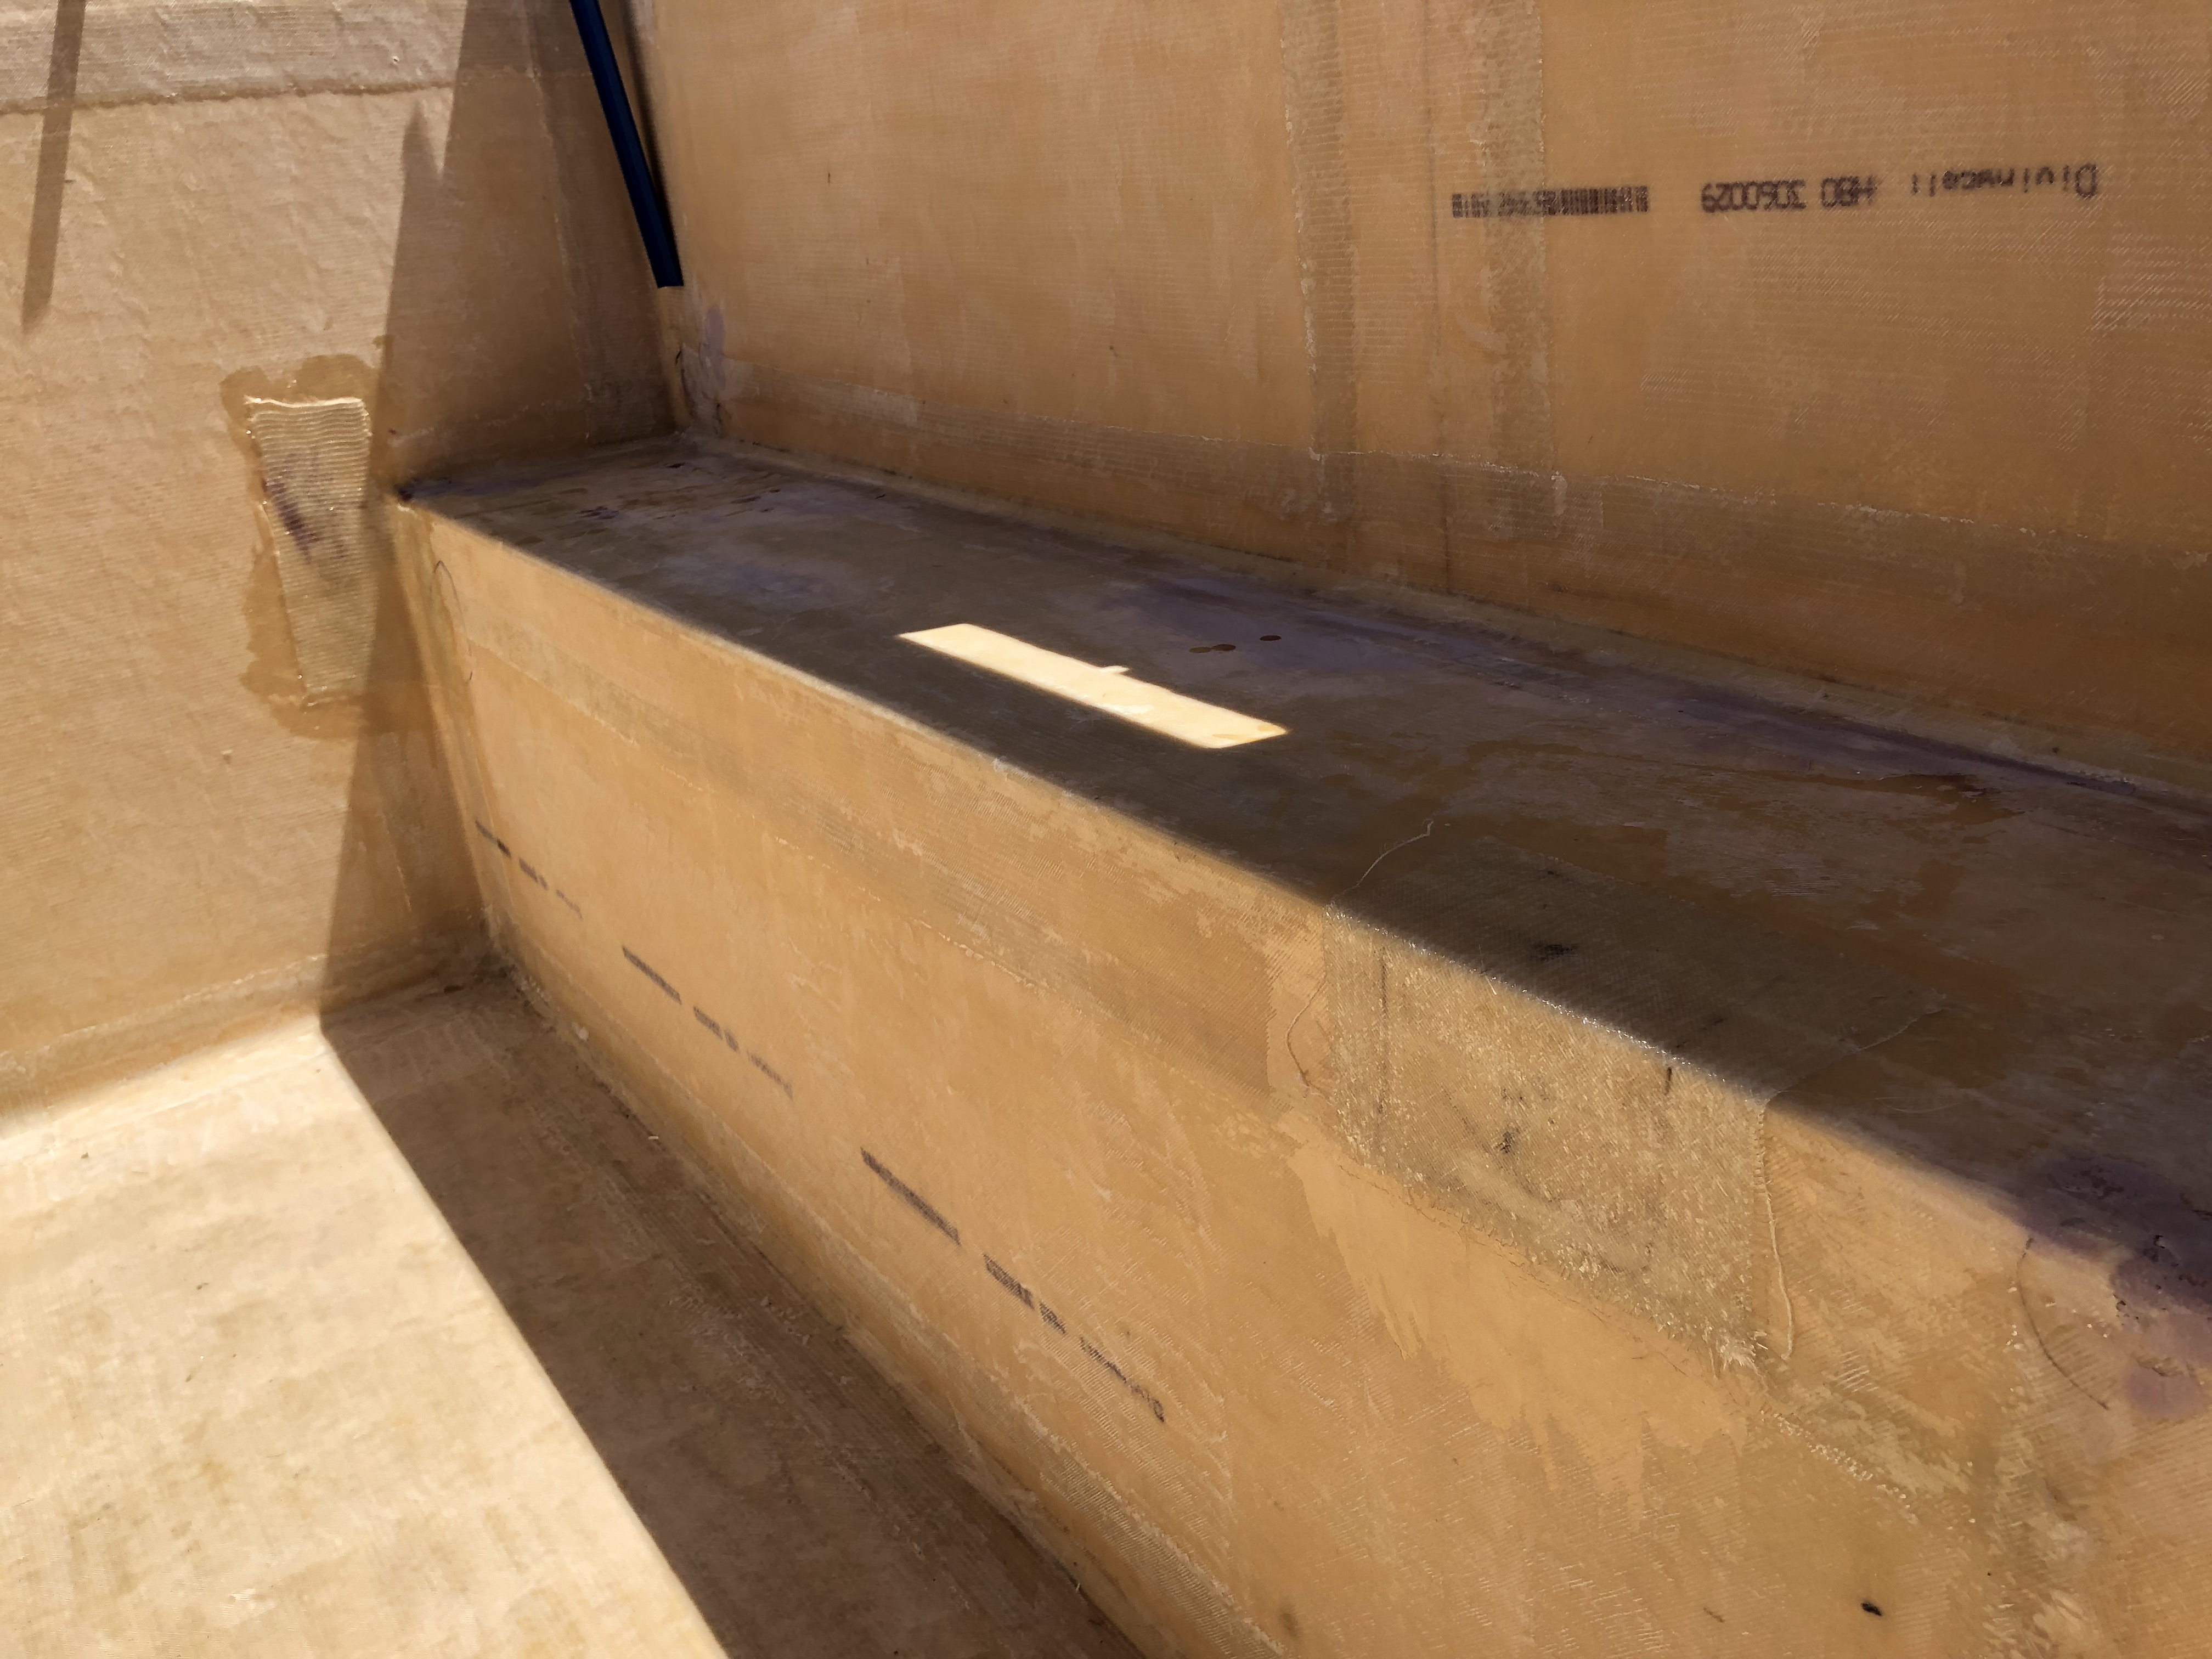
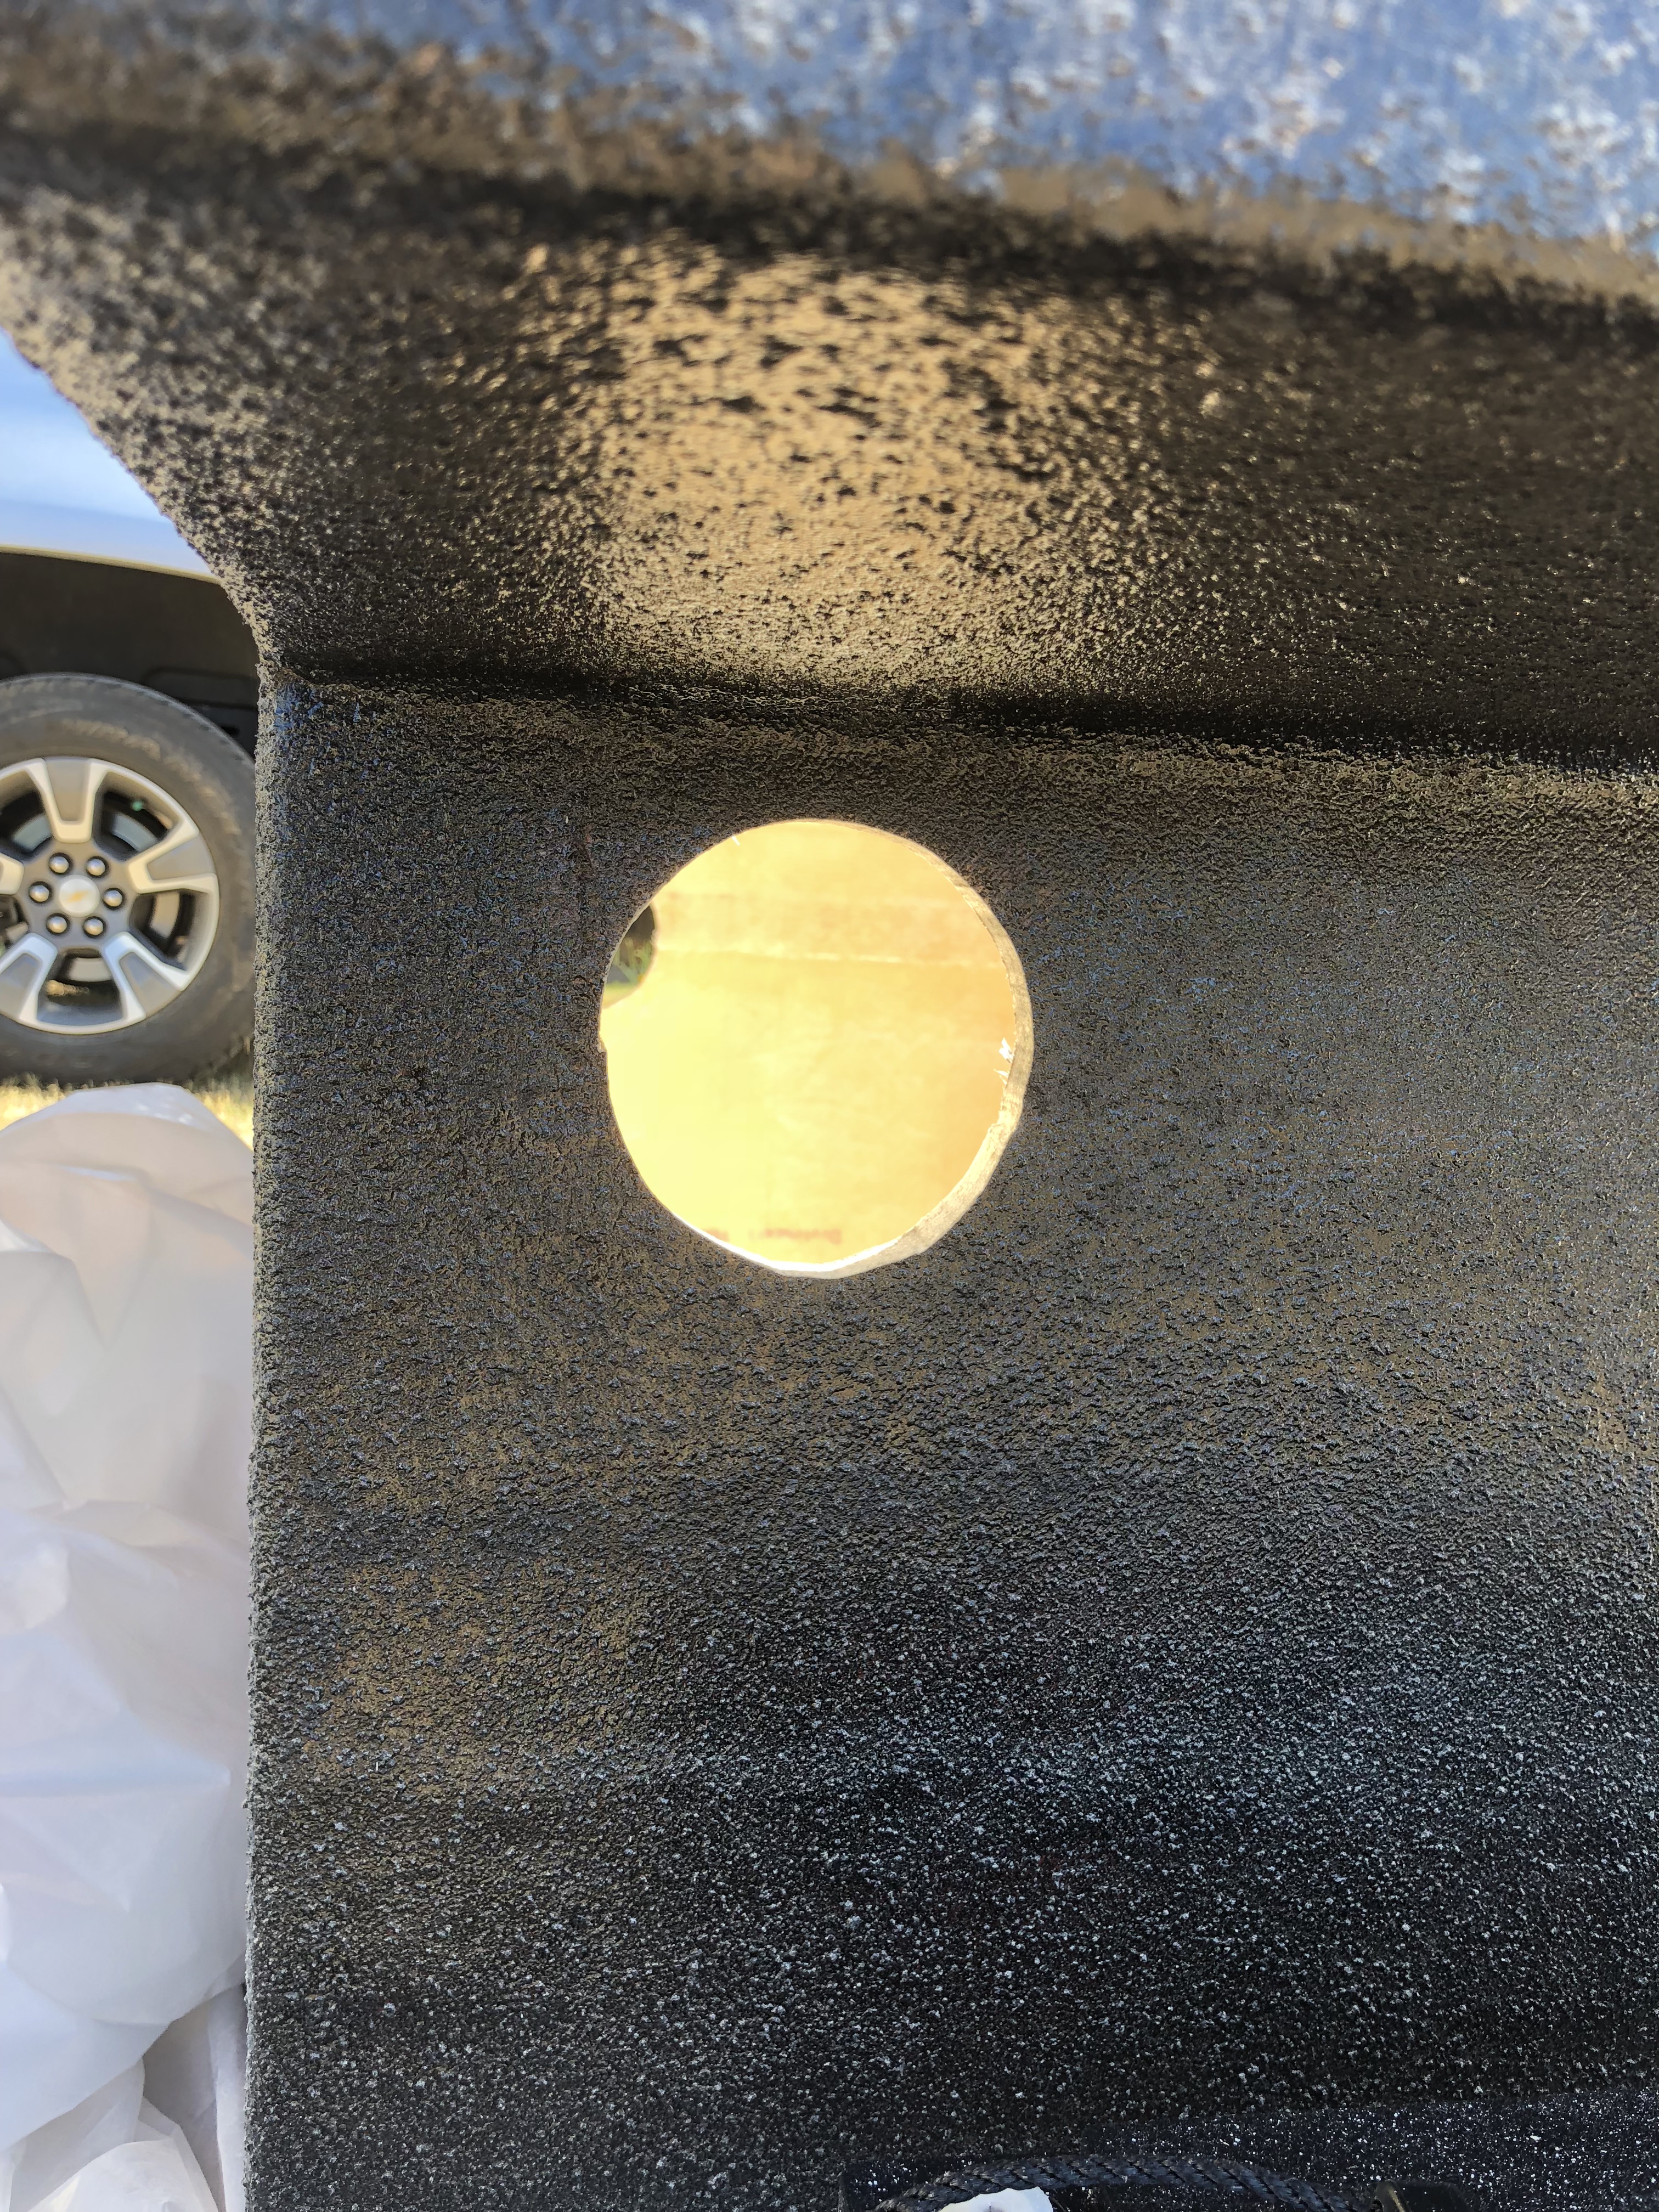
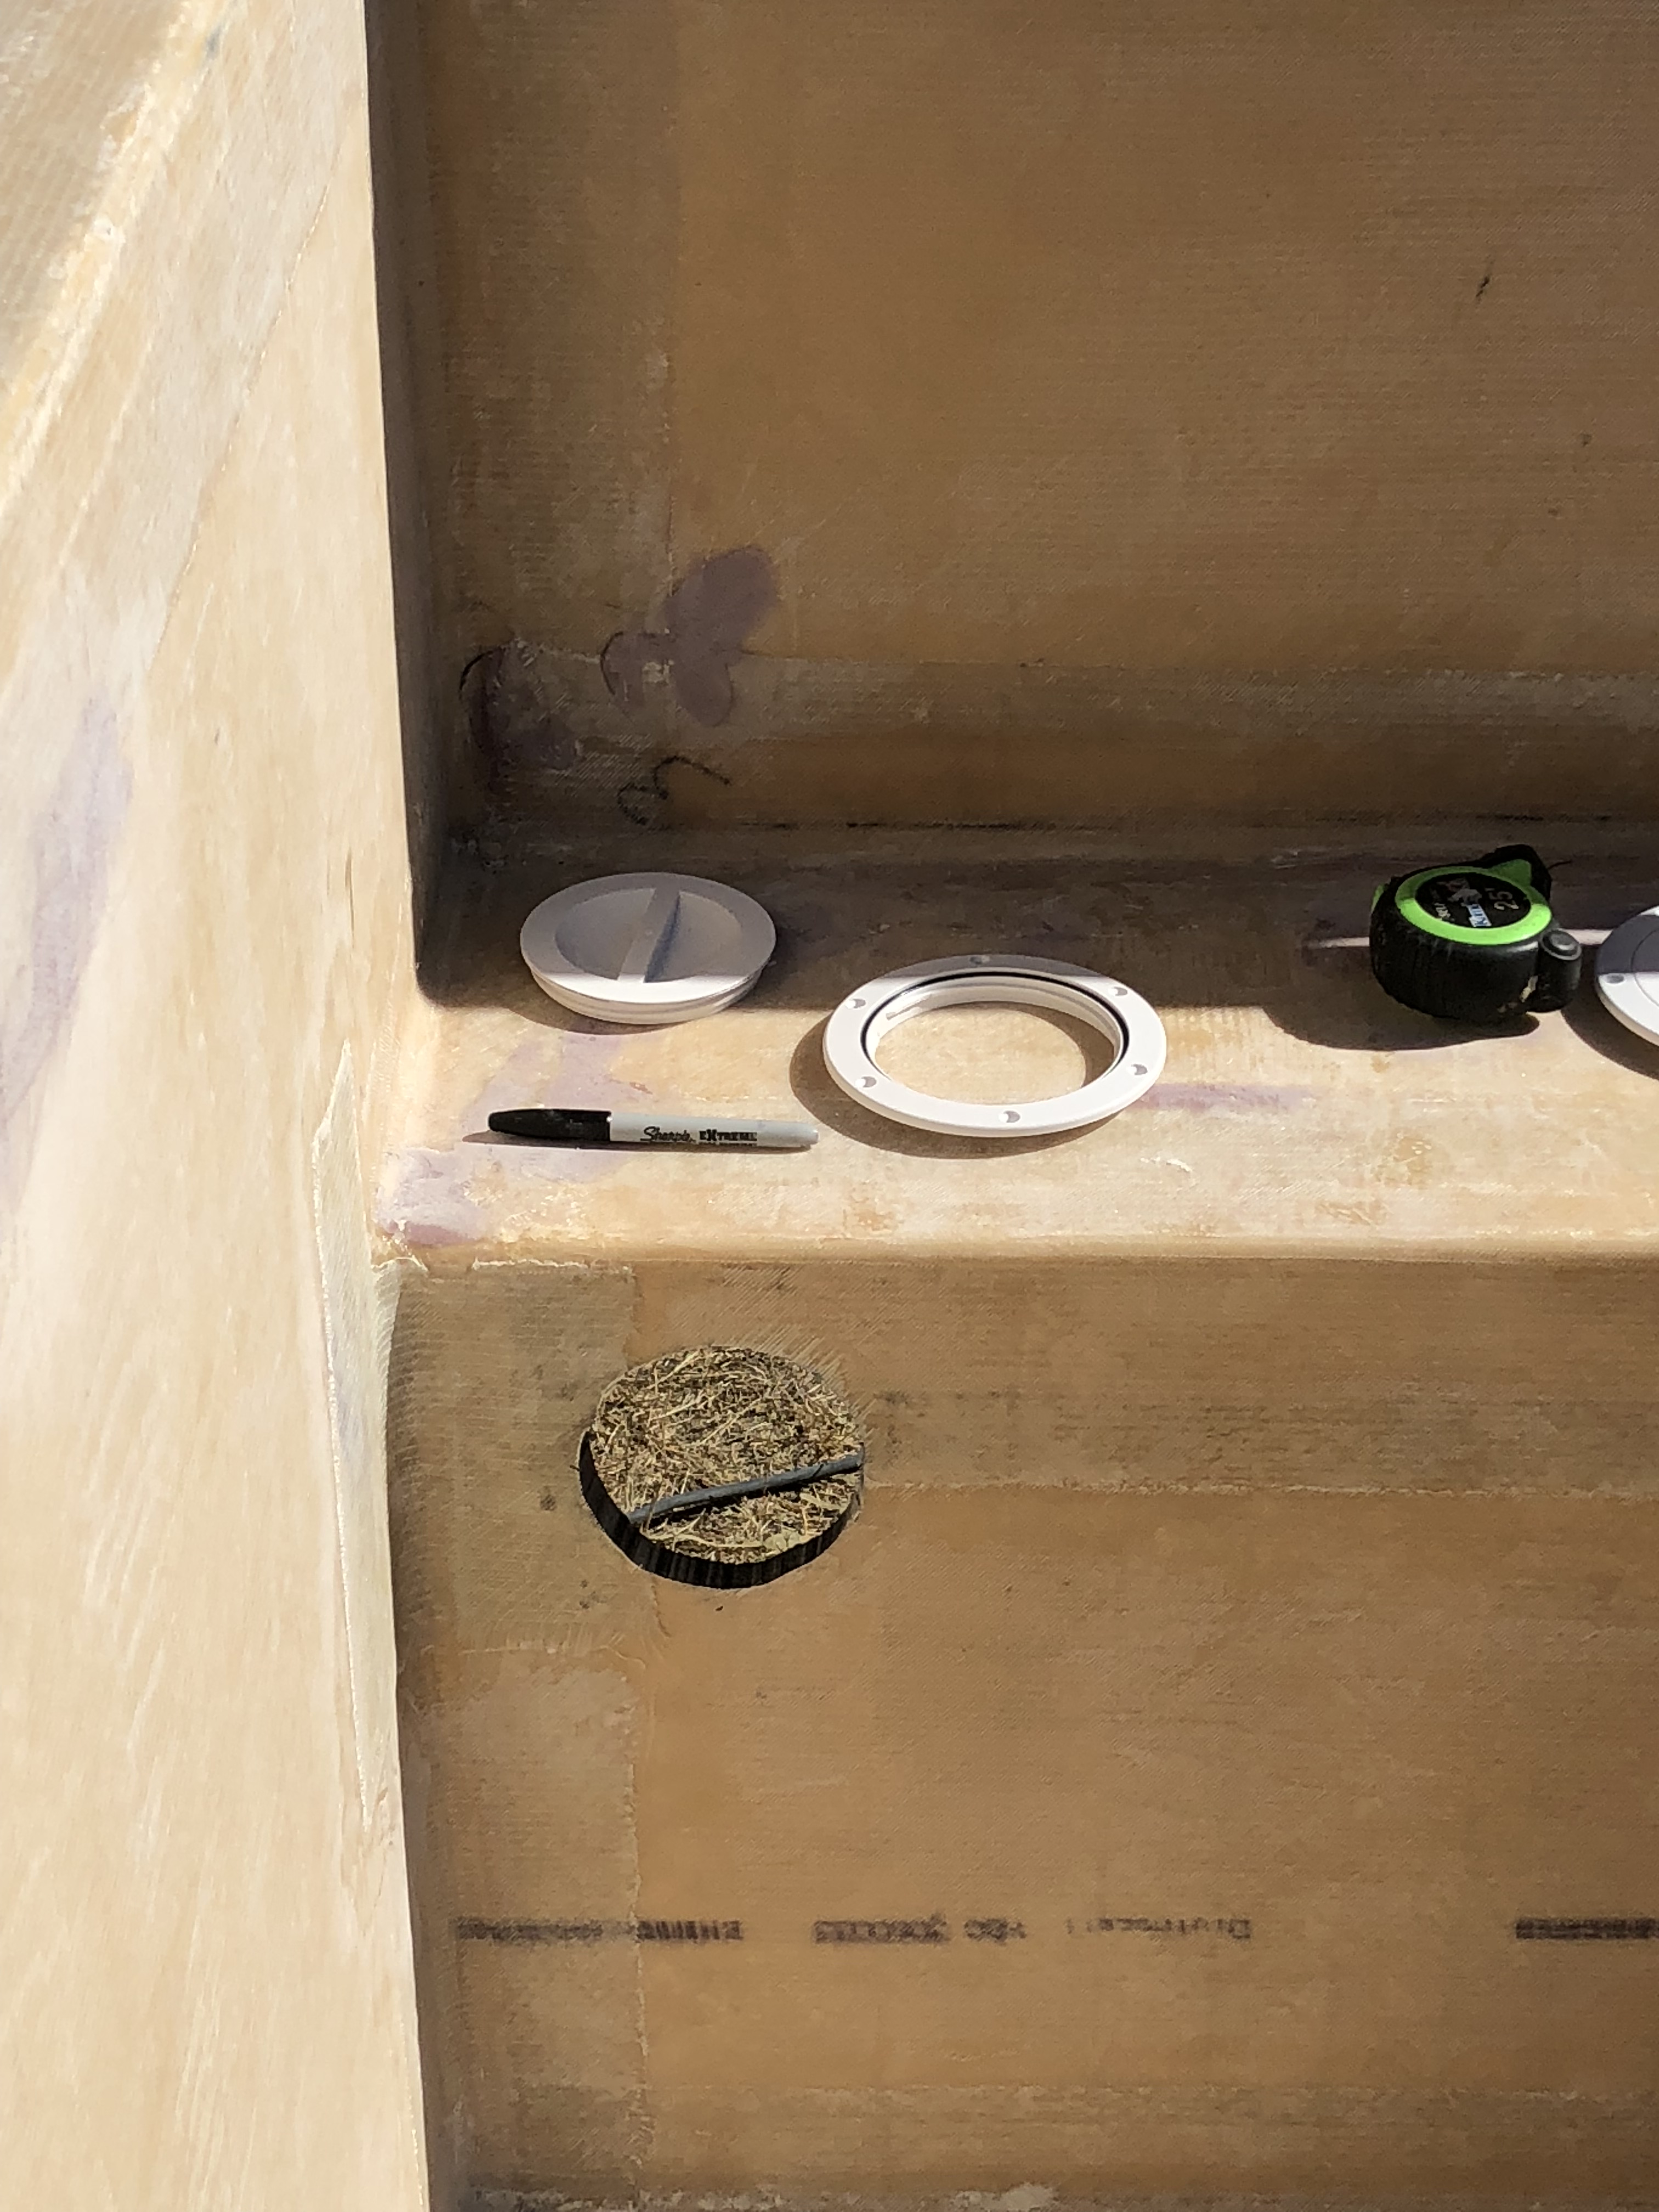
Since we're using turnbuckles to tie down the camper, we have no way to access the forward ones from the outside. I bought some 4" threaded boat access plates off Amazon (see a trend here?) If I were to do this part over I'd go 6". My tiny girl hands fit fine.. I don't think Jason is ever going to be able to go camping without me. (which is fine! )
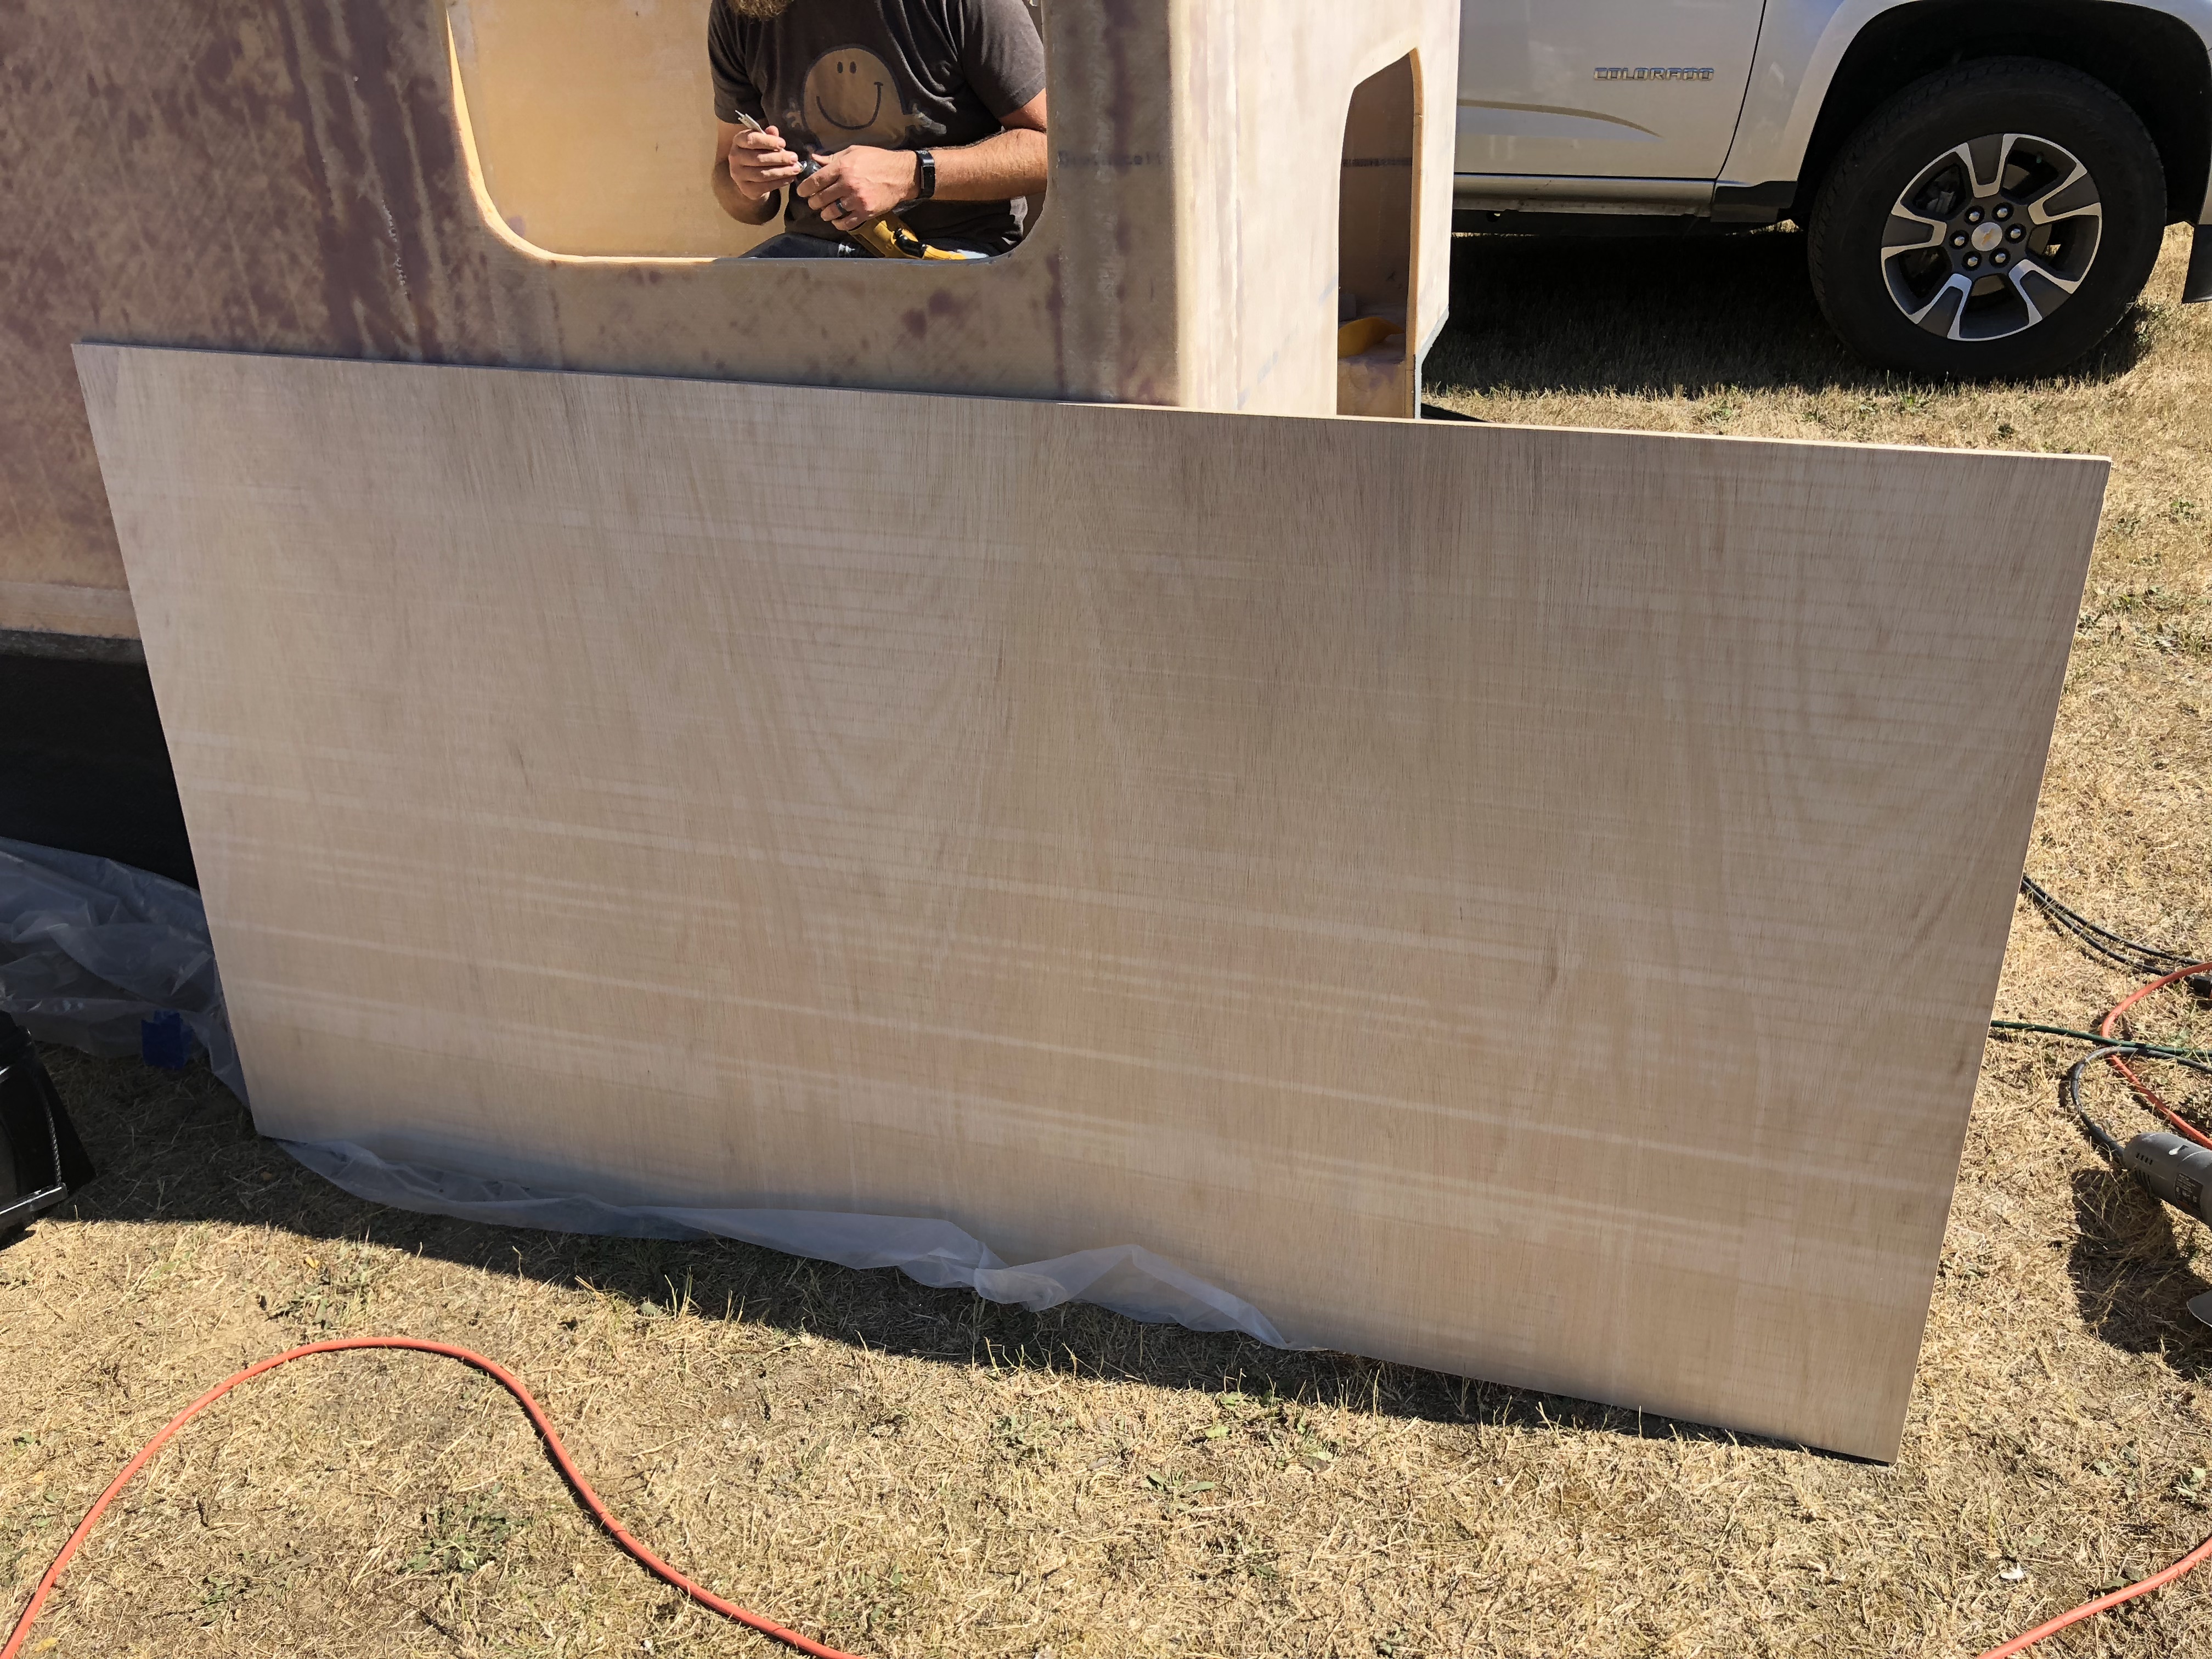
Today was kind of a mixed bag of random projects. We finished the access holes and then went back to working on the bed slide! We thought about doing fiberglass over foam like we did for the shell, but didn't think we'd be able to wrap glass around the edges, since it would be square. We decided on a piece of balsa wood. It would be plenty strong, but also lightweight. Since weight savings were our first priority, we were willing to spend a little more money on it.
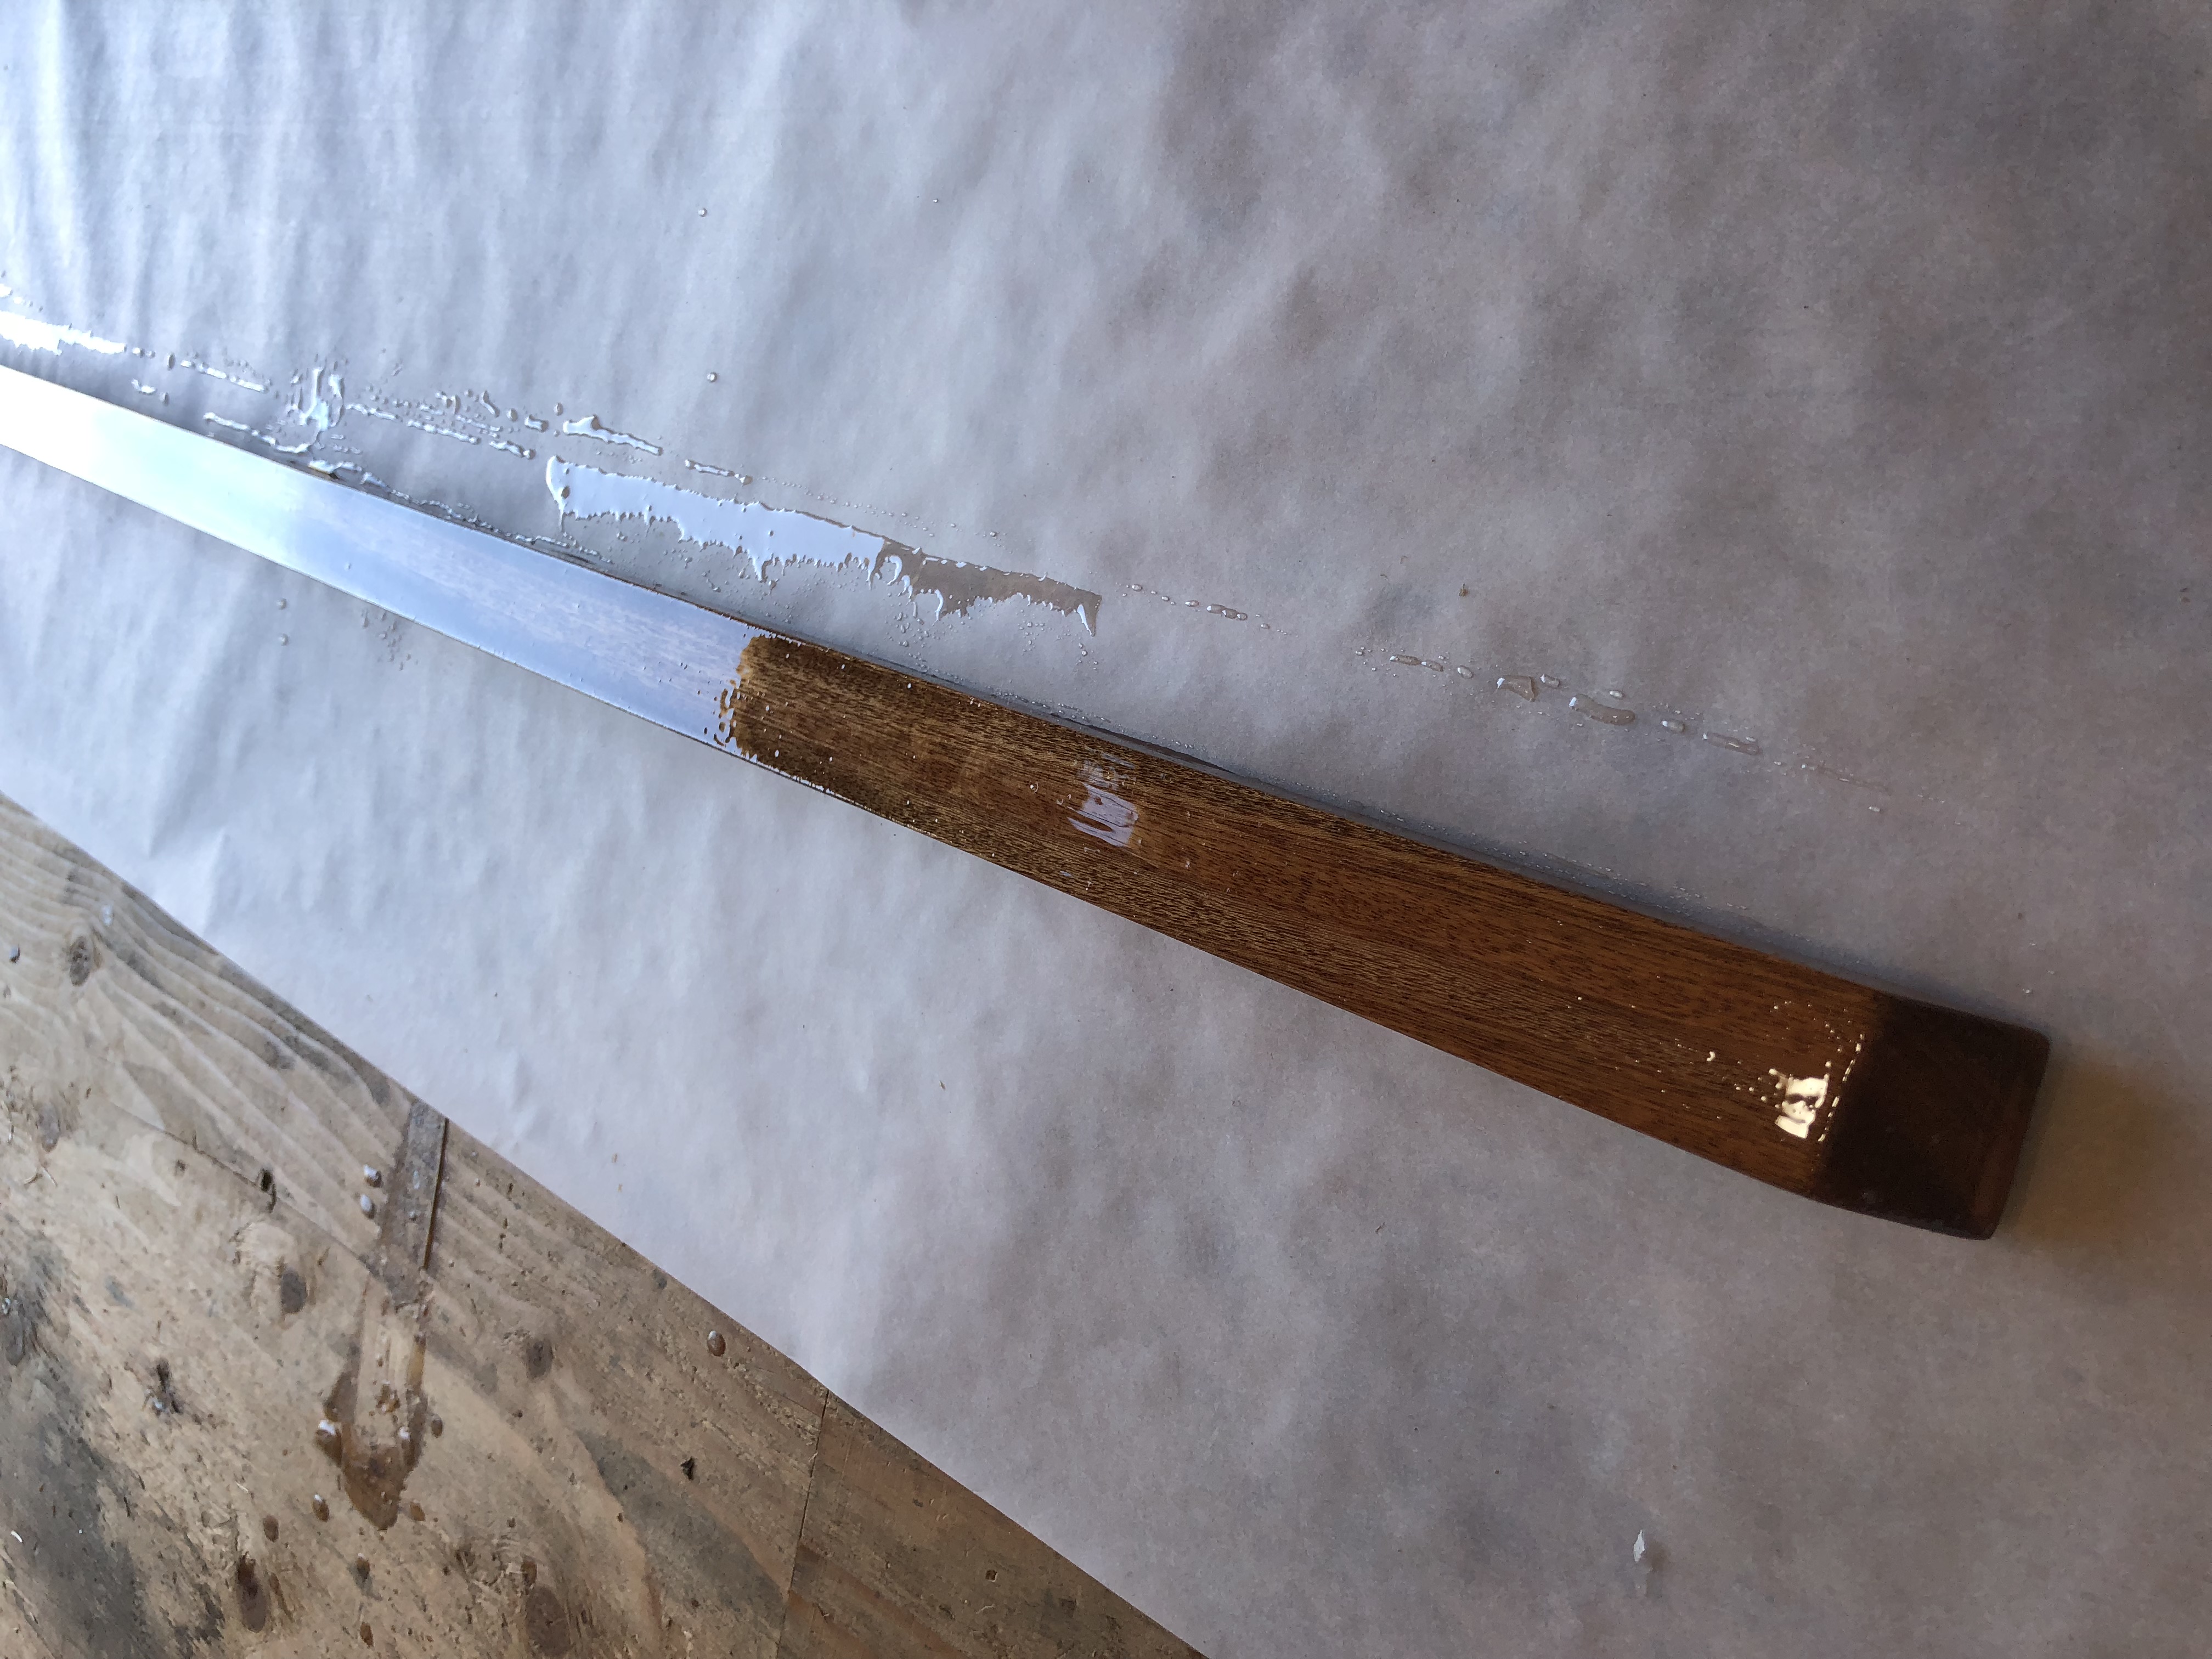
I also sanded and added another coat of epoxy to the bedslide support. It looks super pretty!
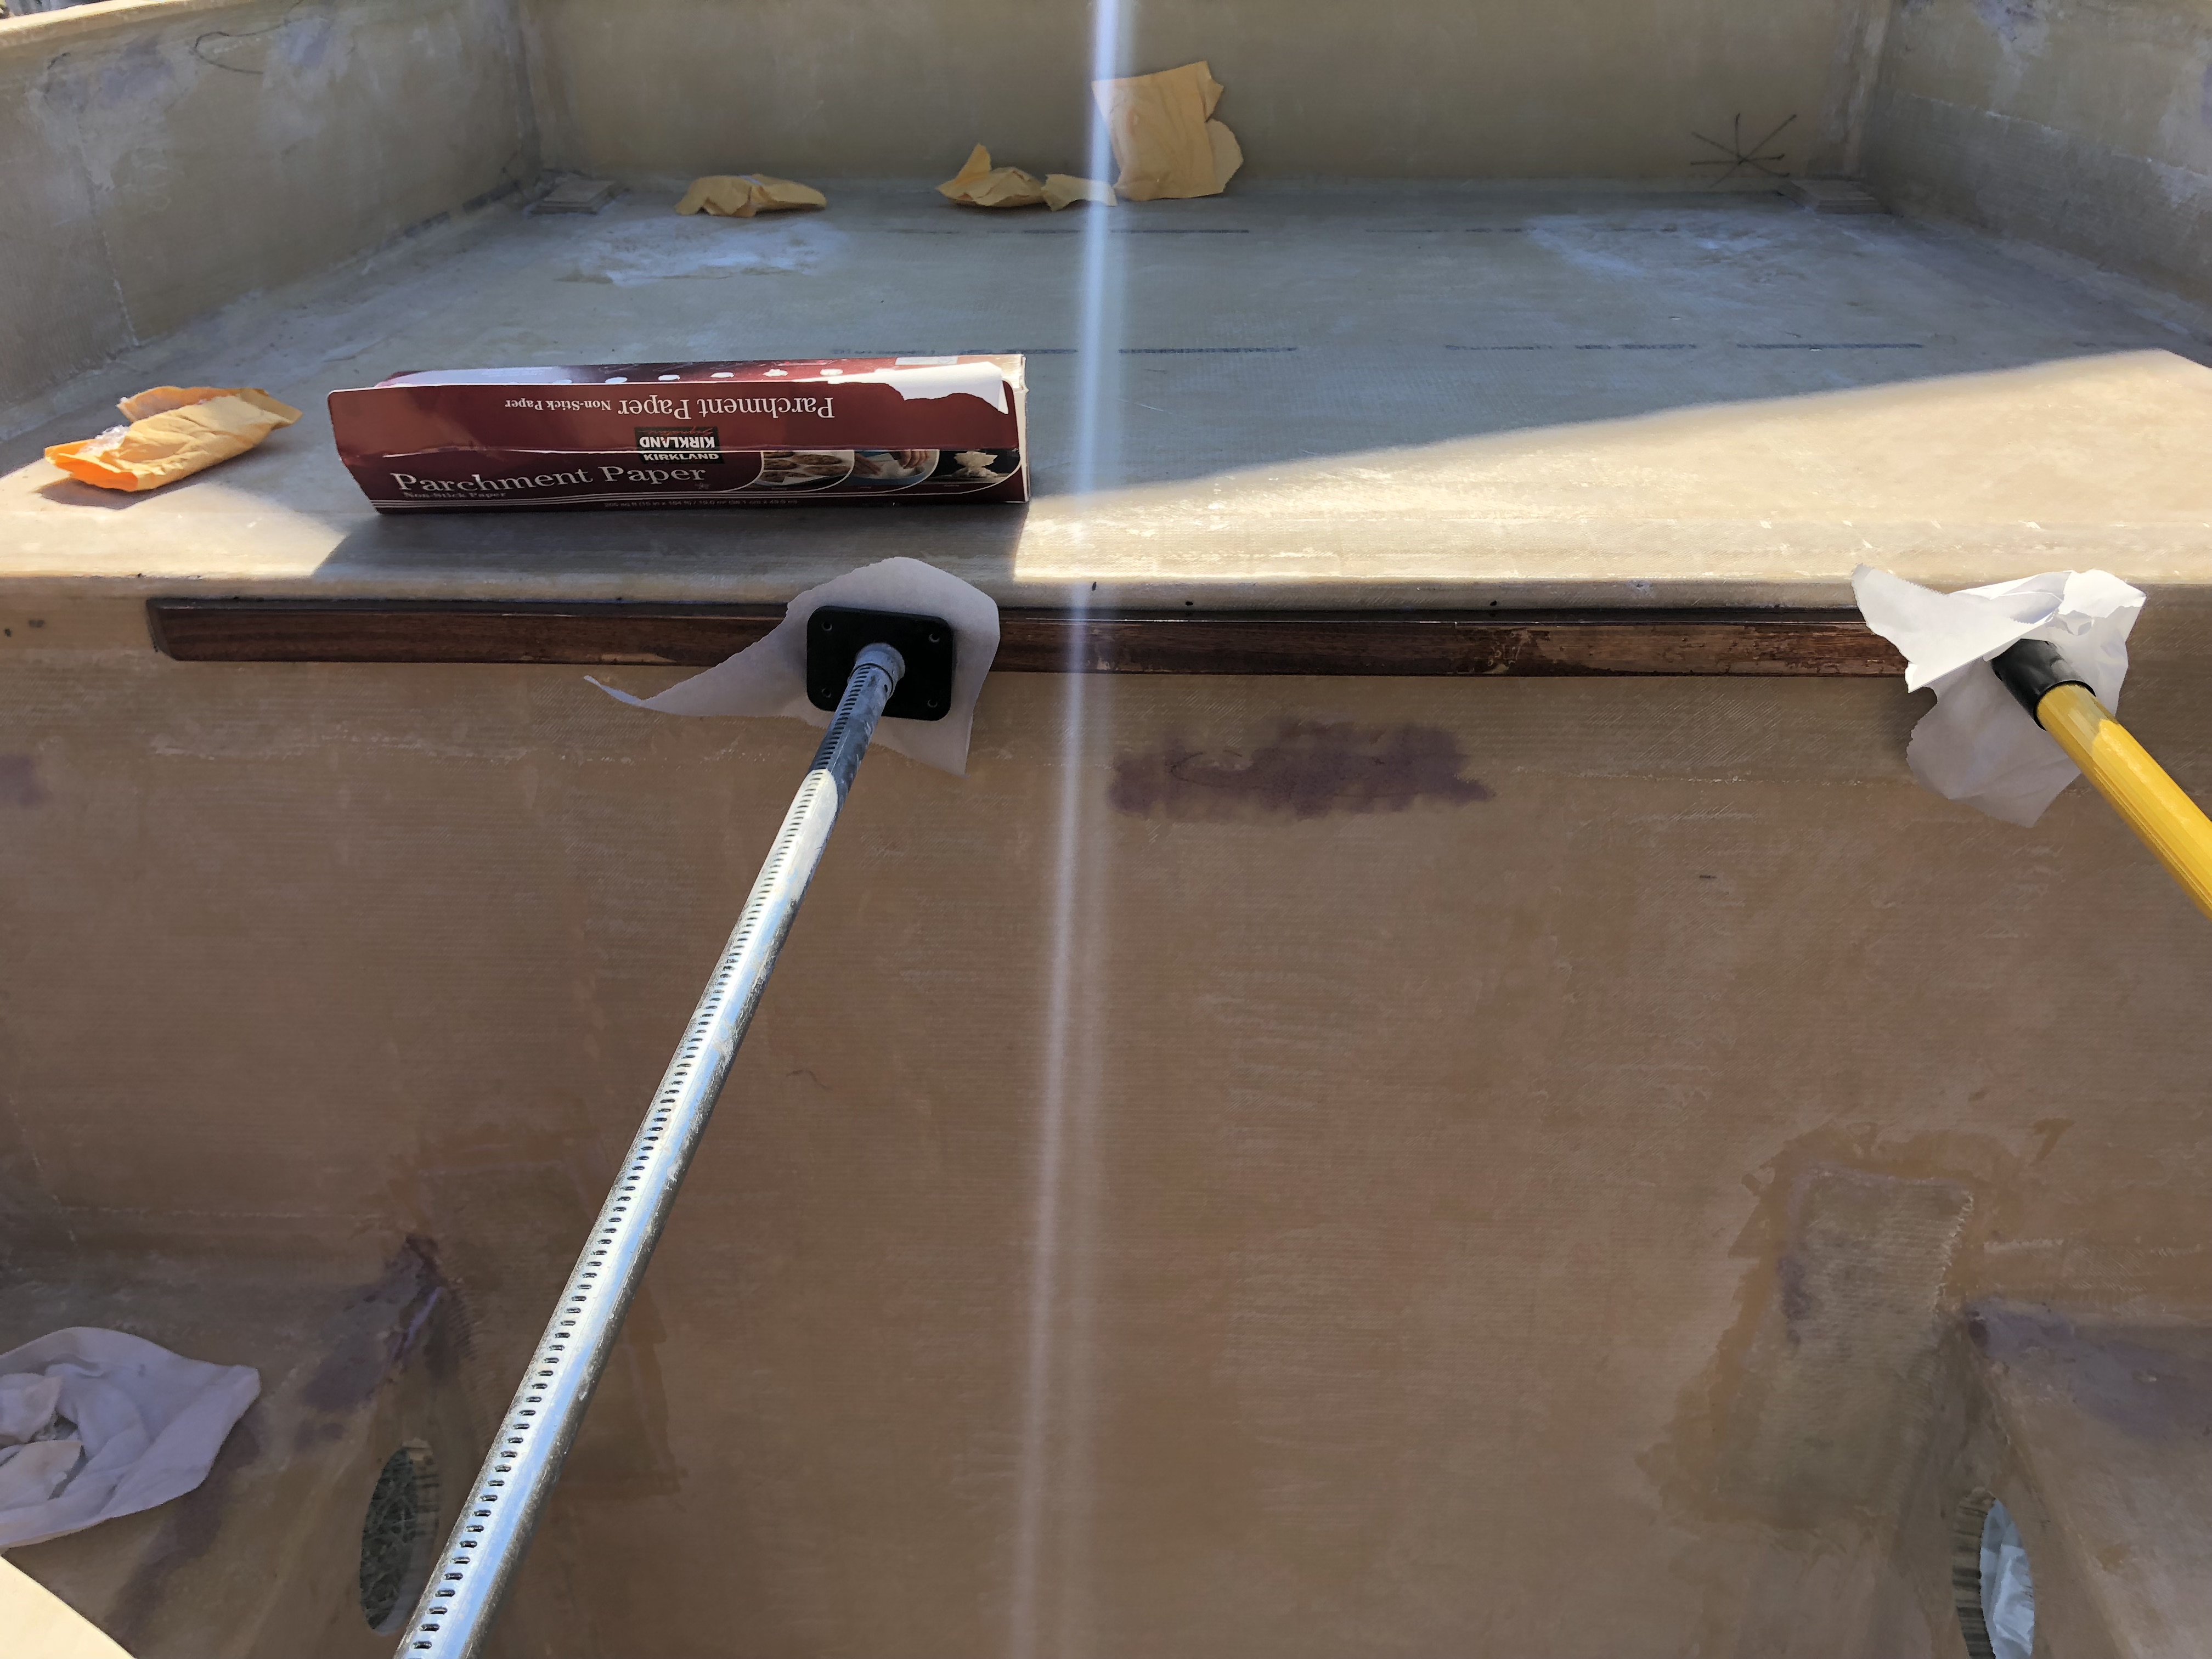
At this point mom is getting pretty pissed that I not only stole all of her toothpicks, but I've also taken the roll of wax paper to use for garage projects... She'll live! (fun fact: buy your own toothpicks and wax paper)
I also found the old boat cover for our fishing boat that I was storing underneath the patio. The shape is completely wrong, but it's a huge piece of waterproof fabric that will be good to keep the camper out of the rain!

In celebration of our excellent progress Jason made homemade pulled pork BBQ that turned into amazing sandwiches!
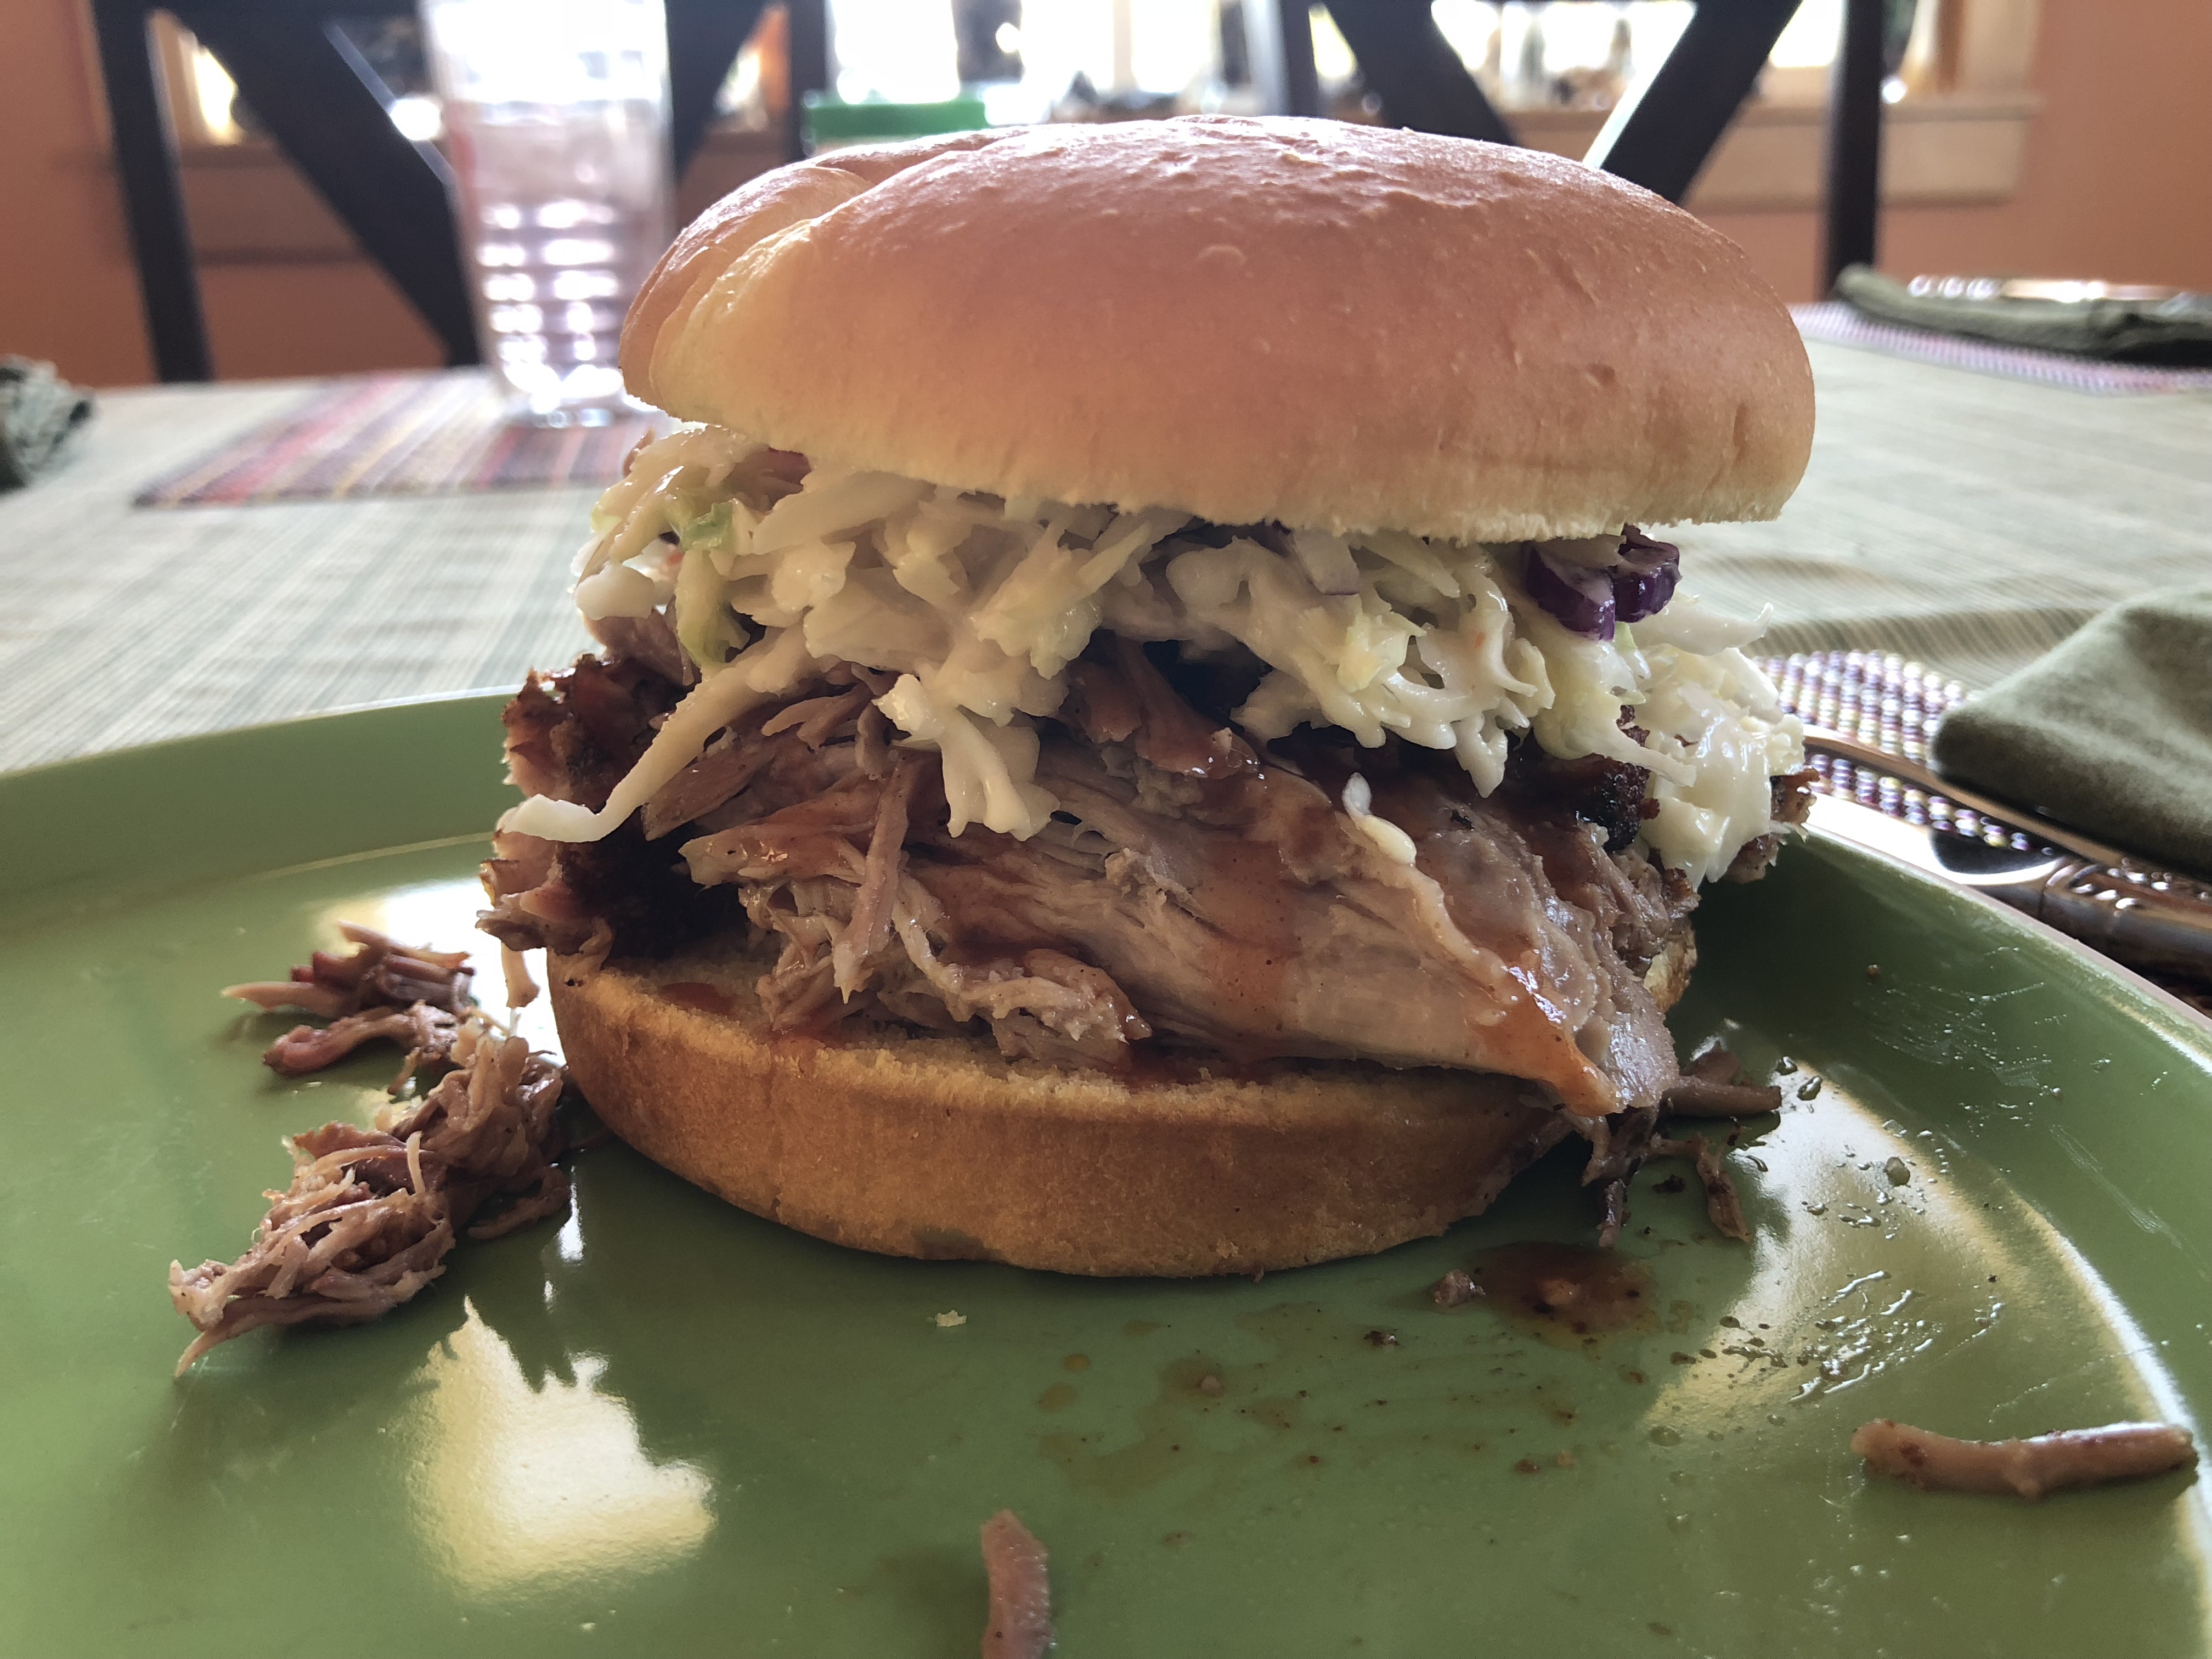
Excellent way to end a hard day of work!
Fun fact: buy actual square cinder blocks for this project.
That should hold just fine!
Well, it was bound to happen eventually... I finished some fiberglass and left my paintbrush sitting on the camper... Whoops...
Since we're using turnbuckles to tie down the camper, we have no way to access the forward ones from the outside. I bought some 4" threaded boat access plates off Amazon (see a trend here?) If I were to do this part over I'd go 6". My tiny girl hands fit fine.. I don't think Jason is ever going to be able to go camping without me. (which is fine!
)
Today was kind of a mixed bag of random projects. We finished the access holes and then went back to working on the bed slide! We thought about doing fiberglass over foam like we did for the shell, but didn't think we'd be able to wrap glass around the edges, since it would be square. We decided on a piece of balsa wood. It would be plenty strong, but also lightweight. Since weight savings were our first priority, we were willing to spend a little more money on it.
I also sanded and added another coat of epoxy to the bedslide support. It looks super pretty!
At this point mom is getting pretty pissed that I not only stole all of her toothpicks, but I've also taken the roll of wax paper to use for garage projects... She'll live!
(fun fact: buy your own toothpicks and wax paper)I also found the old boat cover for our fishing boat that I was storing underneath the patio. The shape is completely wrong, but it's a huge piece of waterproof fabric that will be good to keep the camper out of the rain!
In celebration of our excellent progress Jason made homemade pulled pork BBQ that turned into amazing sandwiches!
Excellent way to end a hard day of work!
Morning guys. My wife can't sew so we won't be doing a pop up. She is however an amazing cook and that makes up for any short comings she may have in my book. I'm a body guy and and know how much sanding is needed on projects like this so keep at it, it will be worth the time in the end finish. I had to build a F/G body for my car from scratch. Which means you make a "Body" which is known as a "Buck" then you make molds off the Buck, then you Lay up the "Actual Body" This took 2 yrs and you can only imagine how much sanding !!! so keep at it guys I feel ya. Cheers Leon (NZ)
underkill
Active member
I wonder if a high build primer would have been easier? You could have done a couple coats alternating colors for easier locating of high/low spots.
Great work BTW. Very few have the planning and skills to execute a scratch build like this.
We thought about high build, but figured that the fiberglass was still too textured and went straight to the filler. There's definitely a point of diminishing returns for the bodywork for us and we're pretty close to reaching it.
underkill
Active member
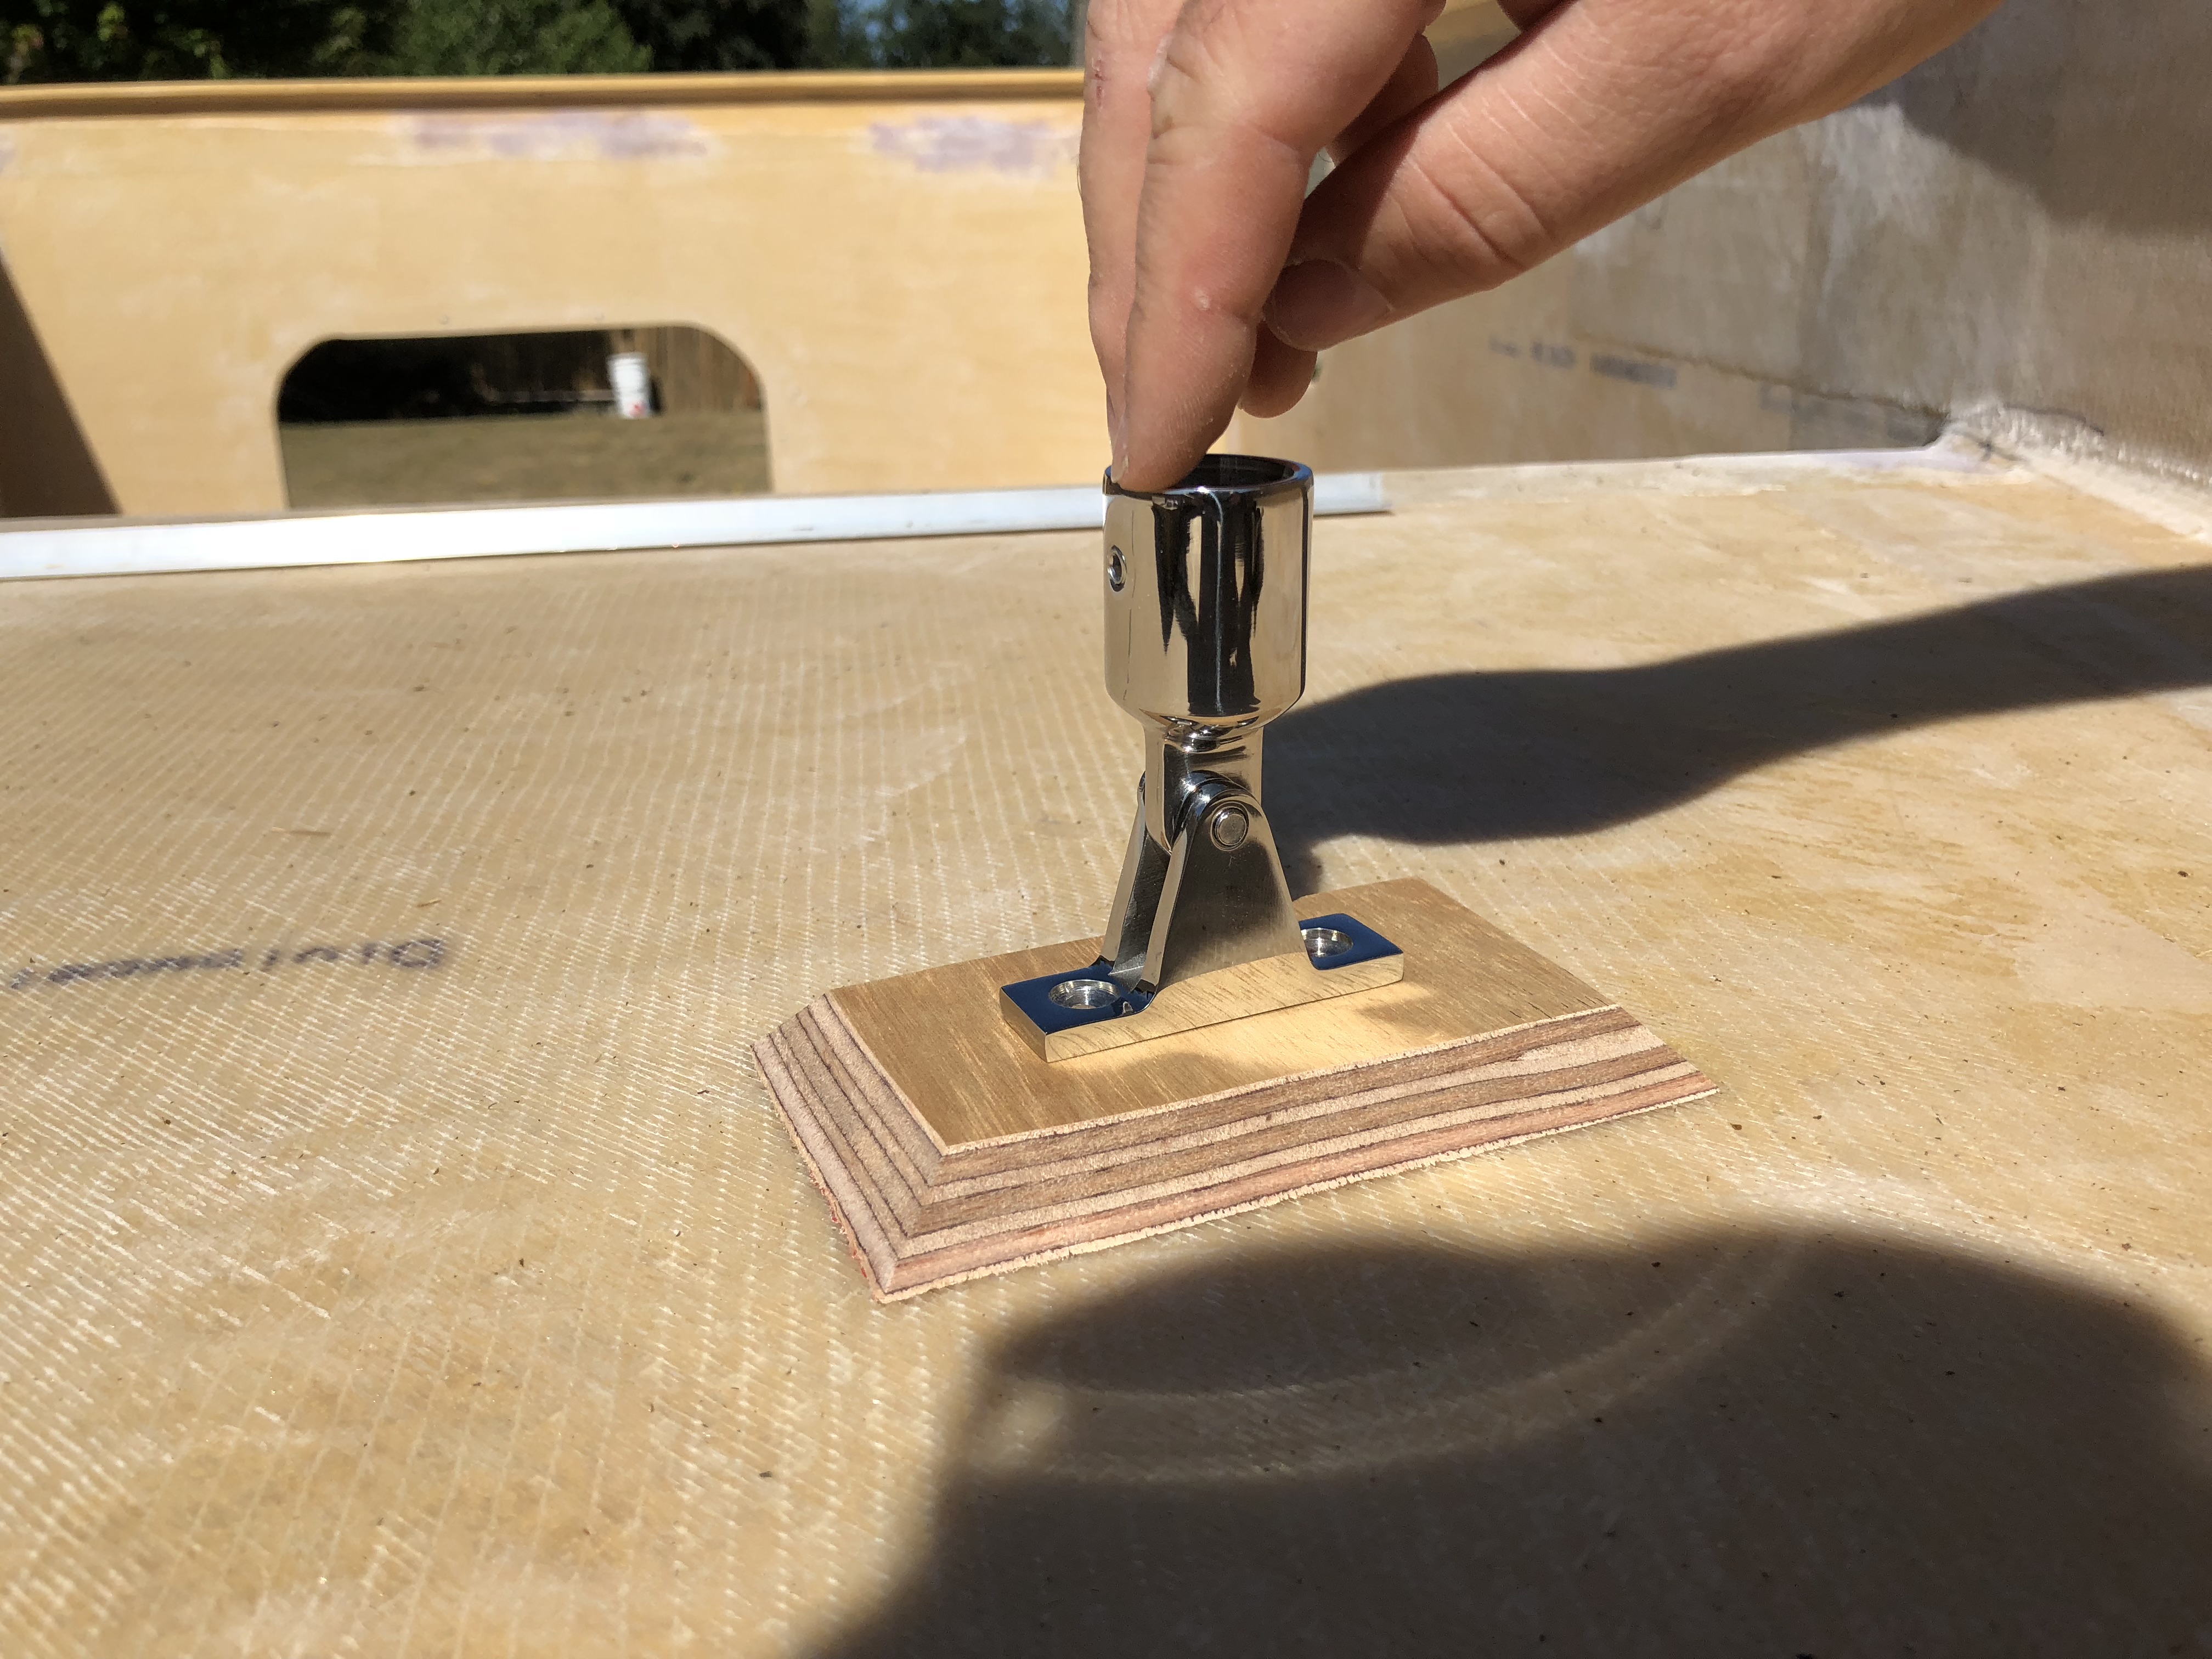
Today we epoxied the lift mechanism mounting pads to the roof.
It's almost embarrassing how much we used the leftover landscaping rocks on this project...
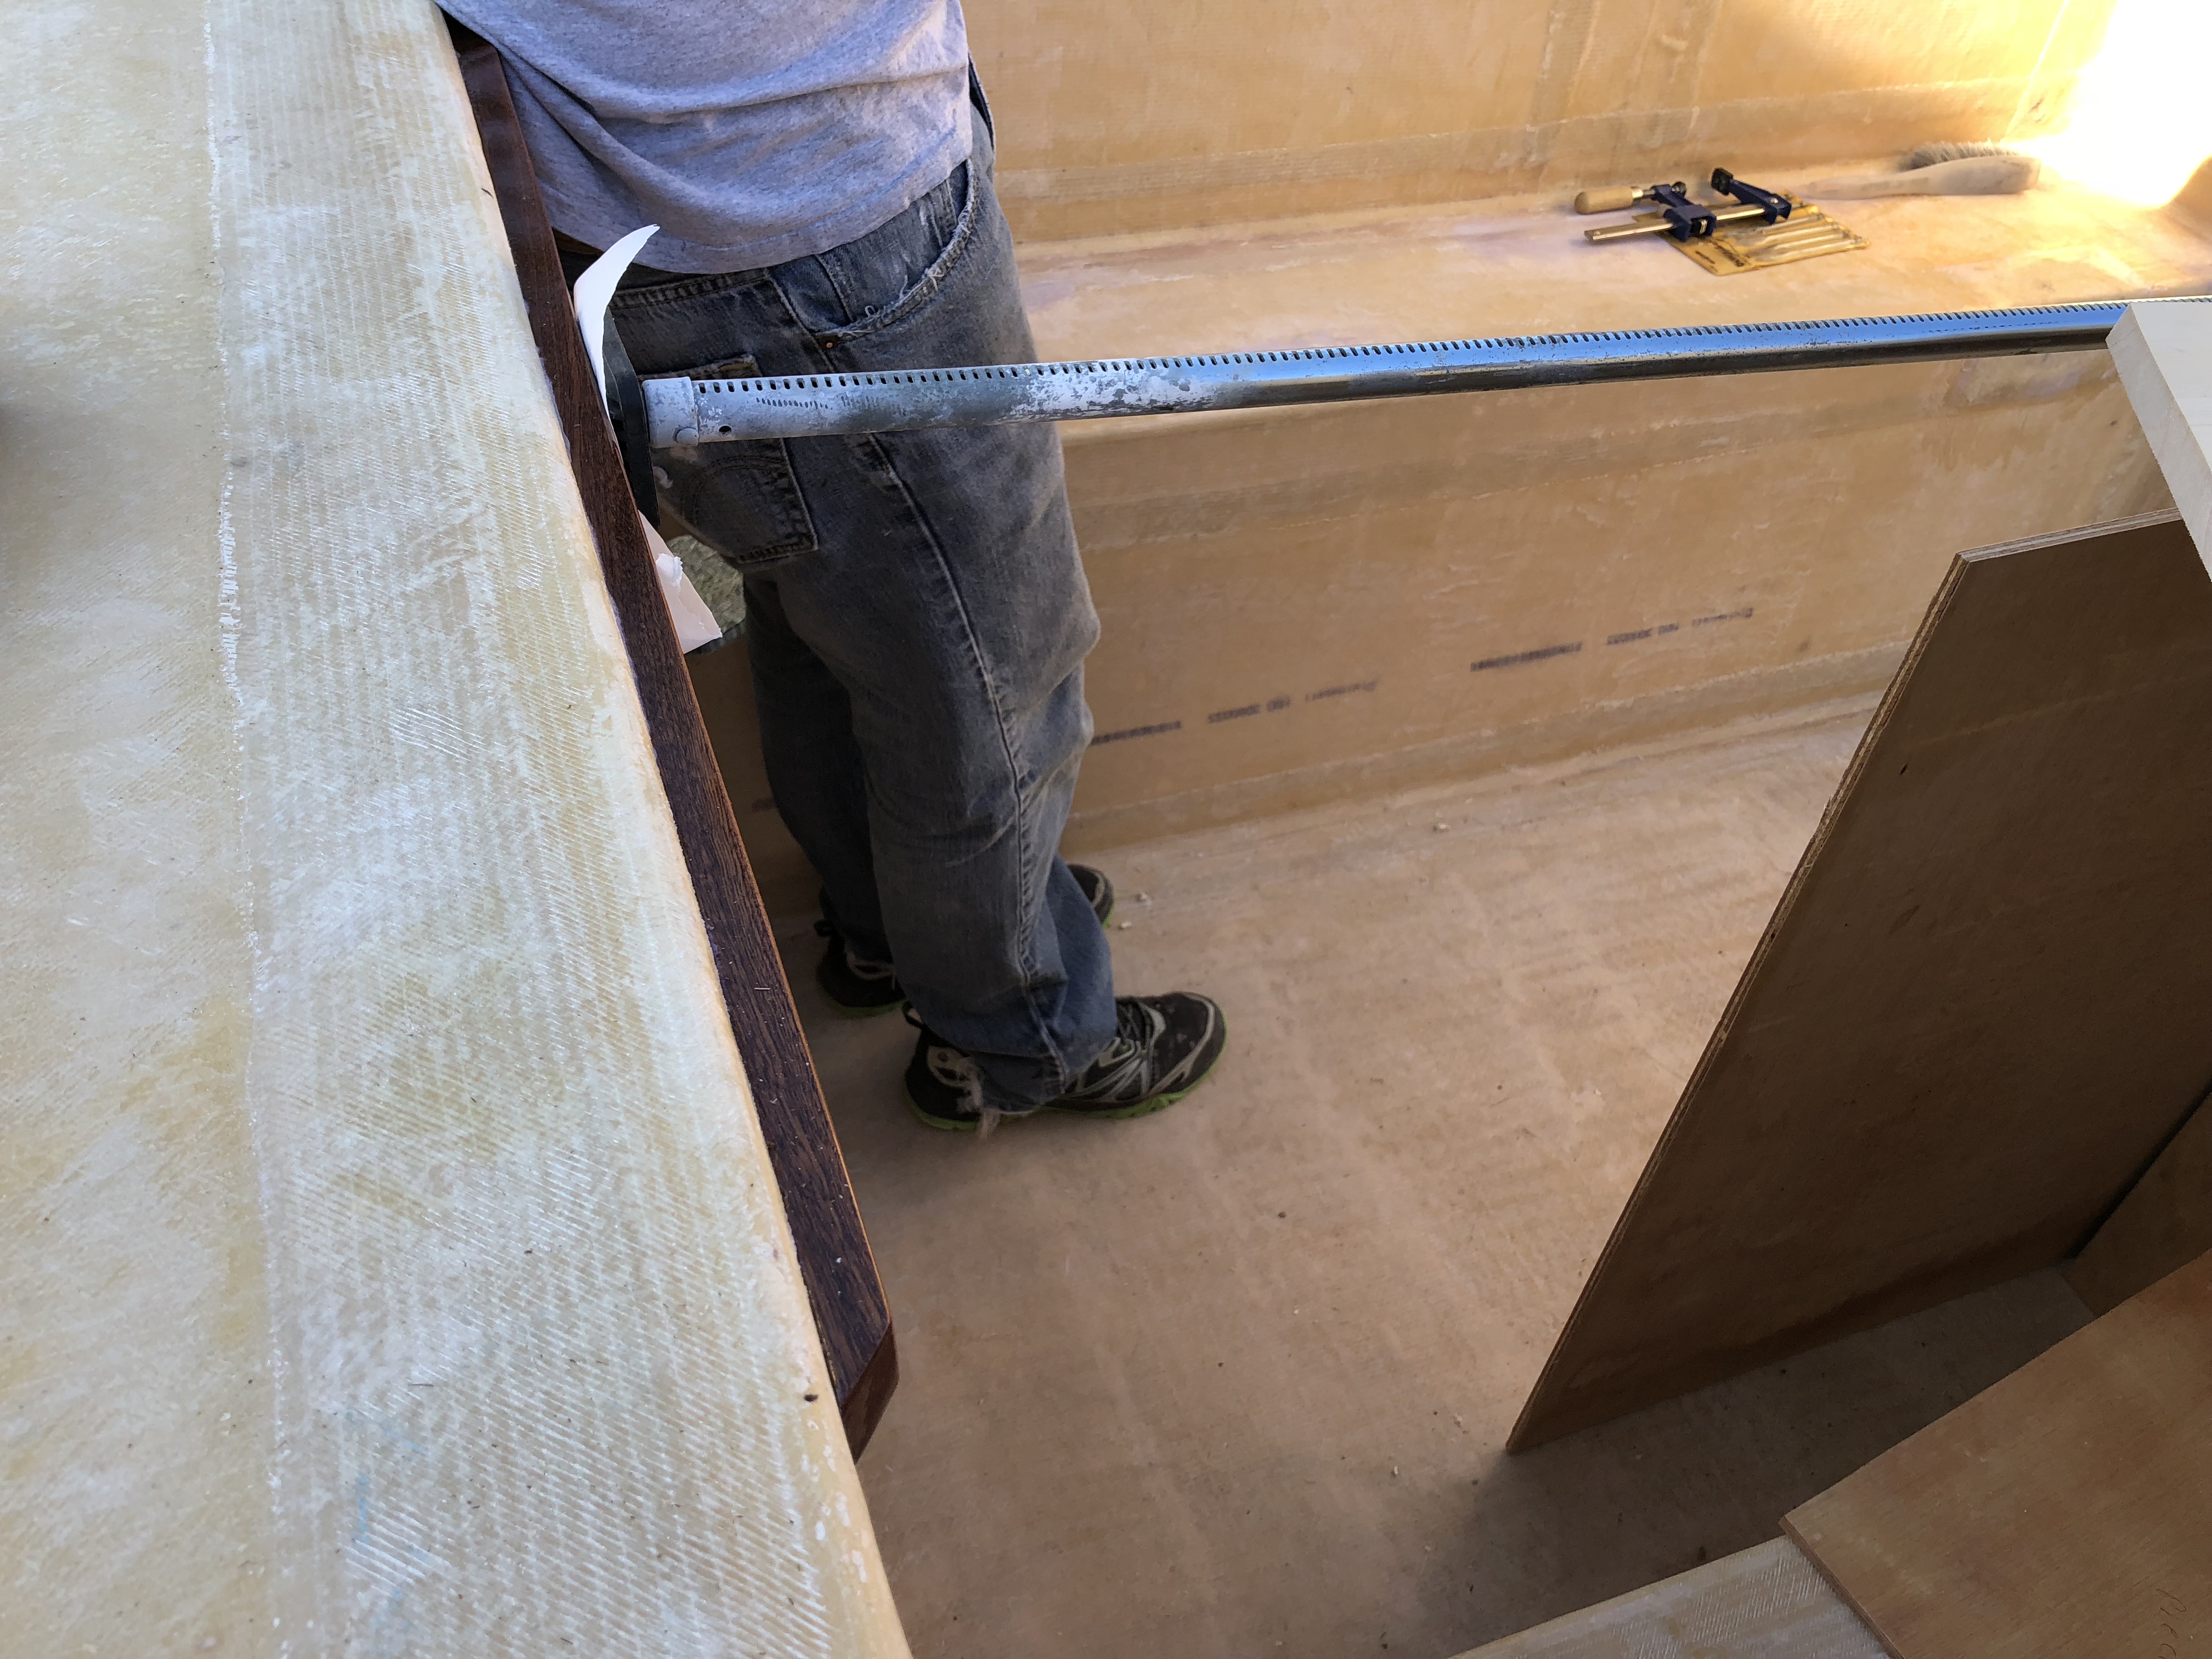
While I was messing around with the roof, Jason went ahead and epoxied on the bedslide support piece. We only had one think available to hold the piece against the bulkhead so Jason "had" to lean on the other side until it set up. Useful loitering...
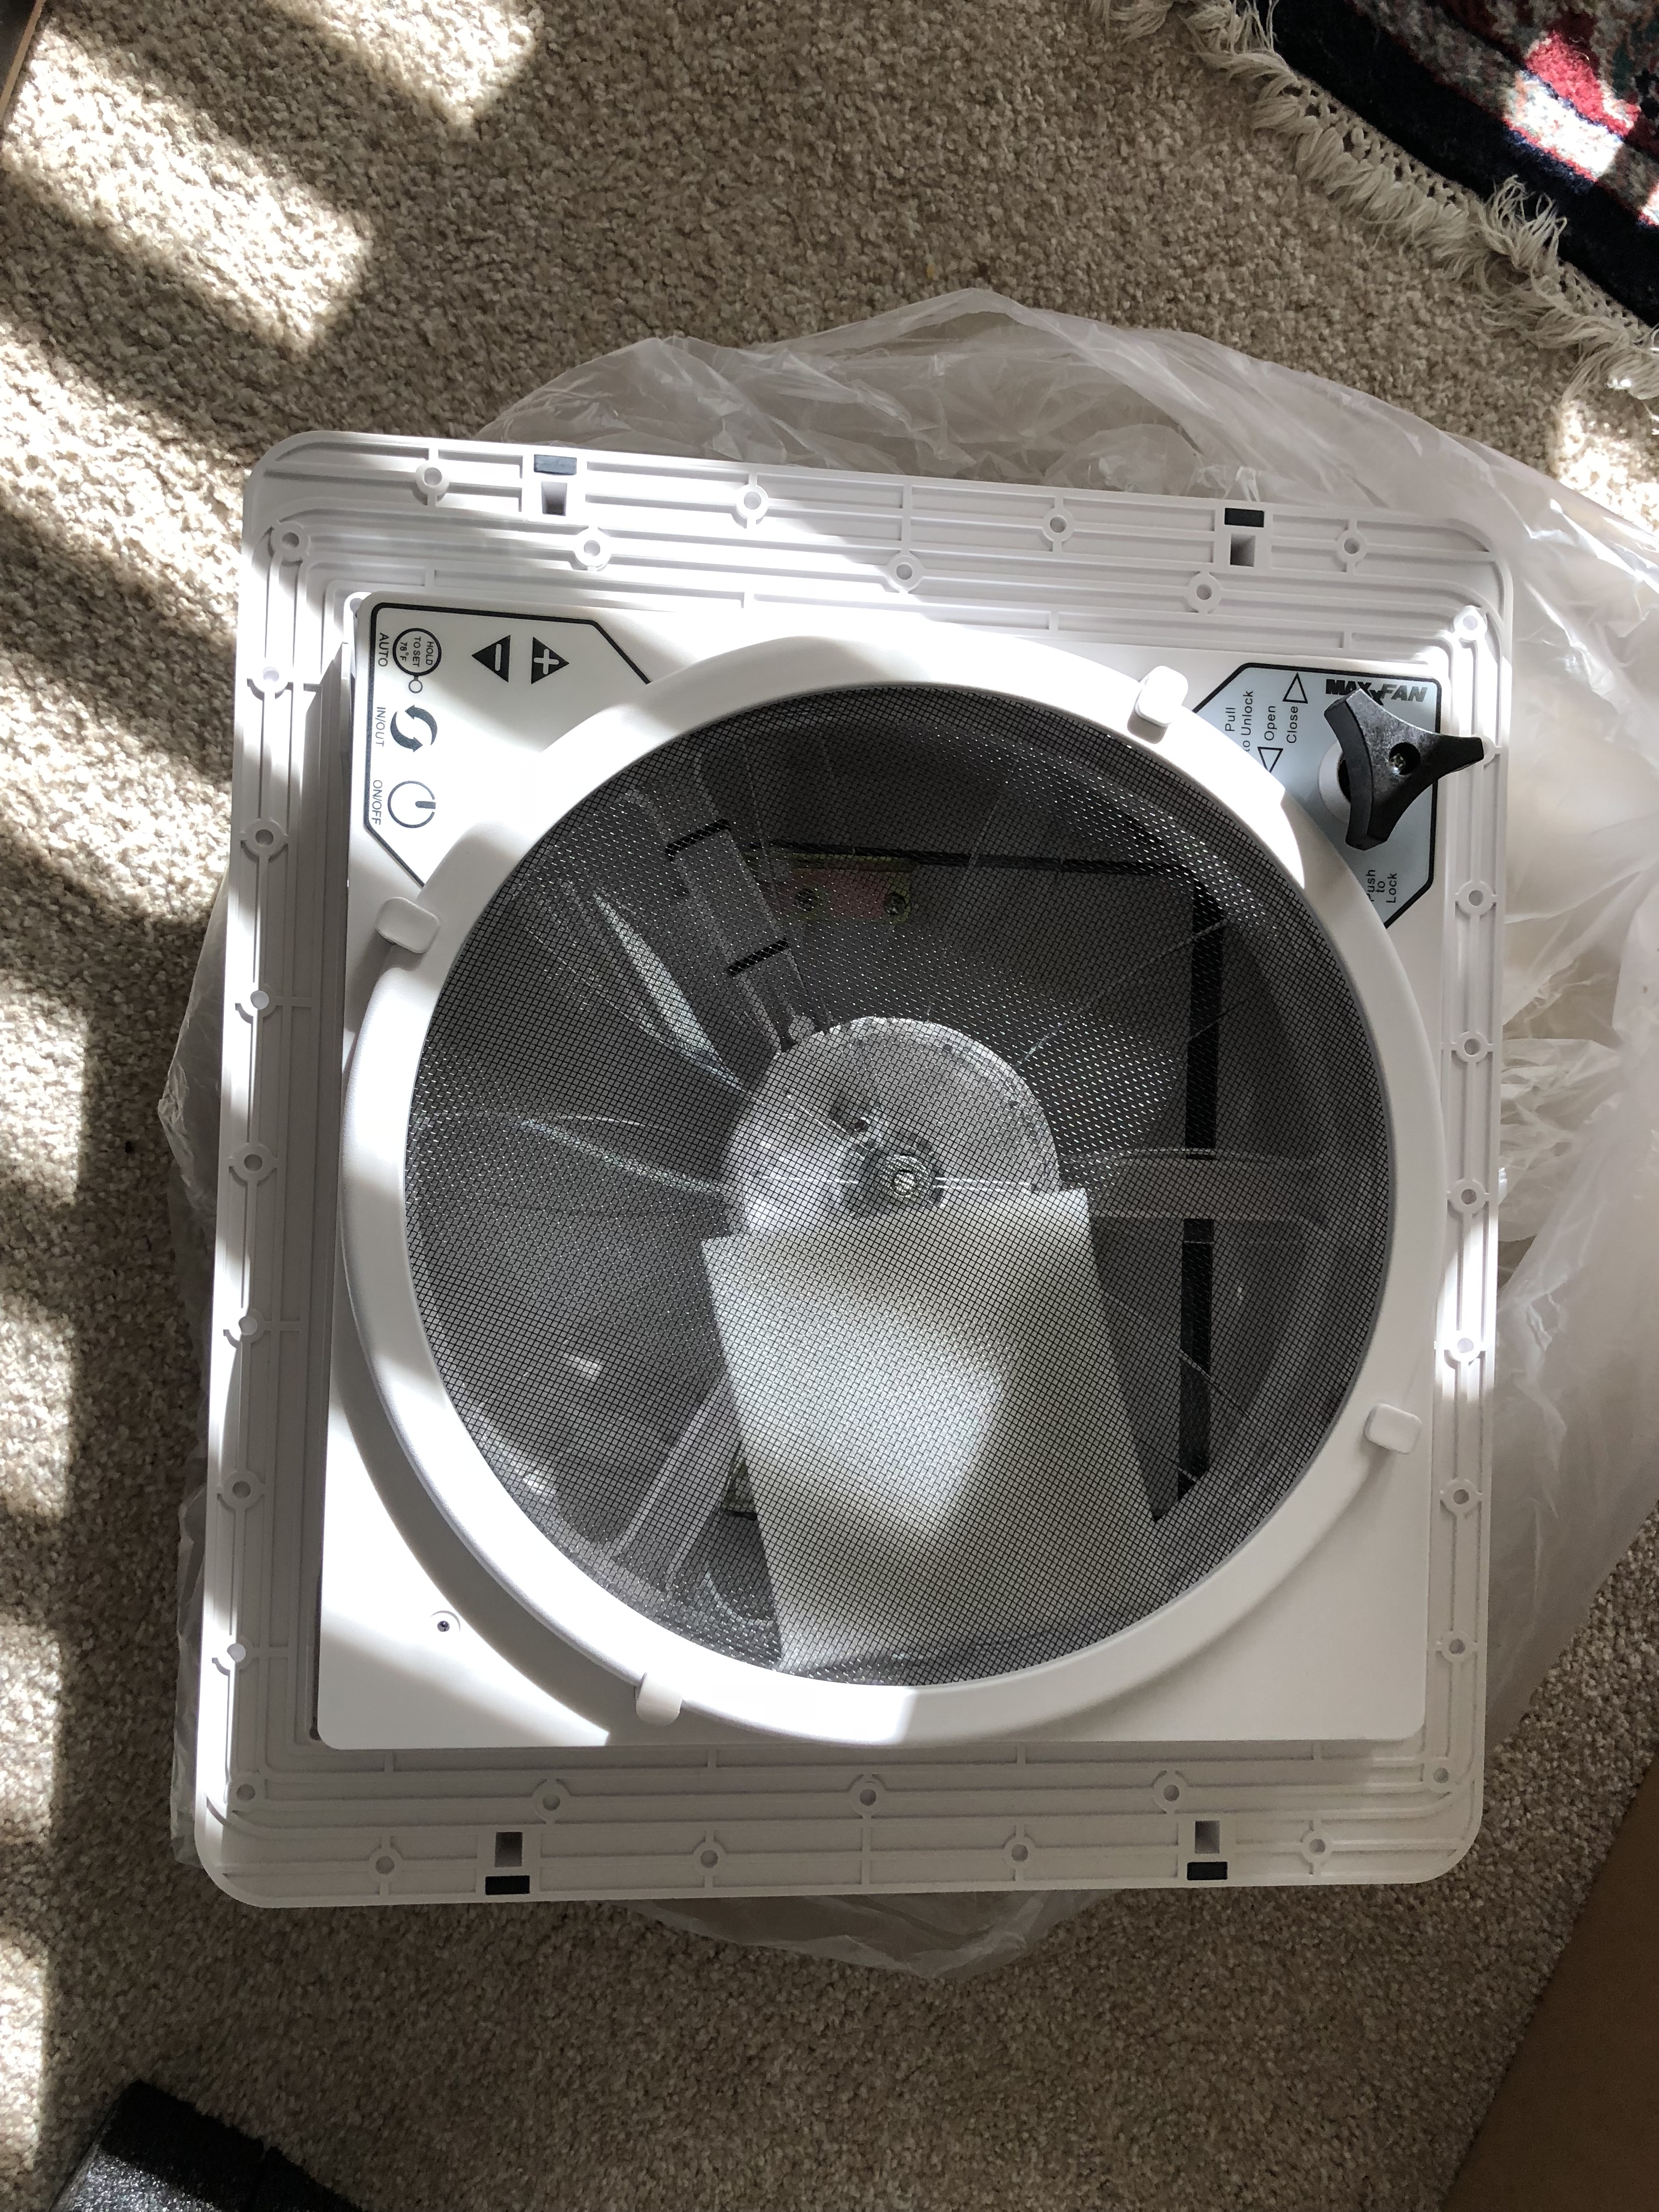
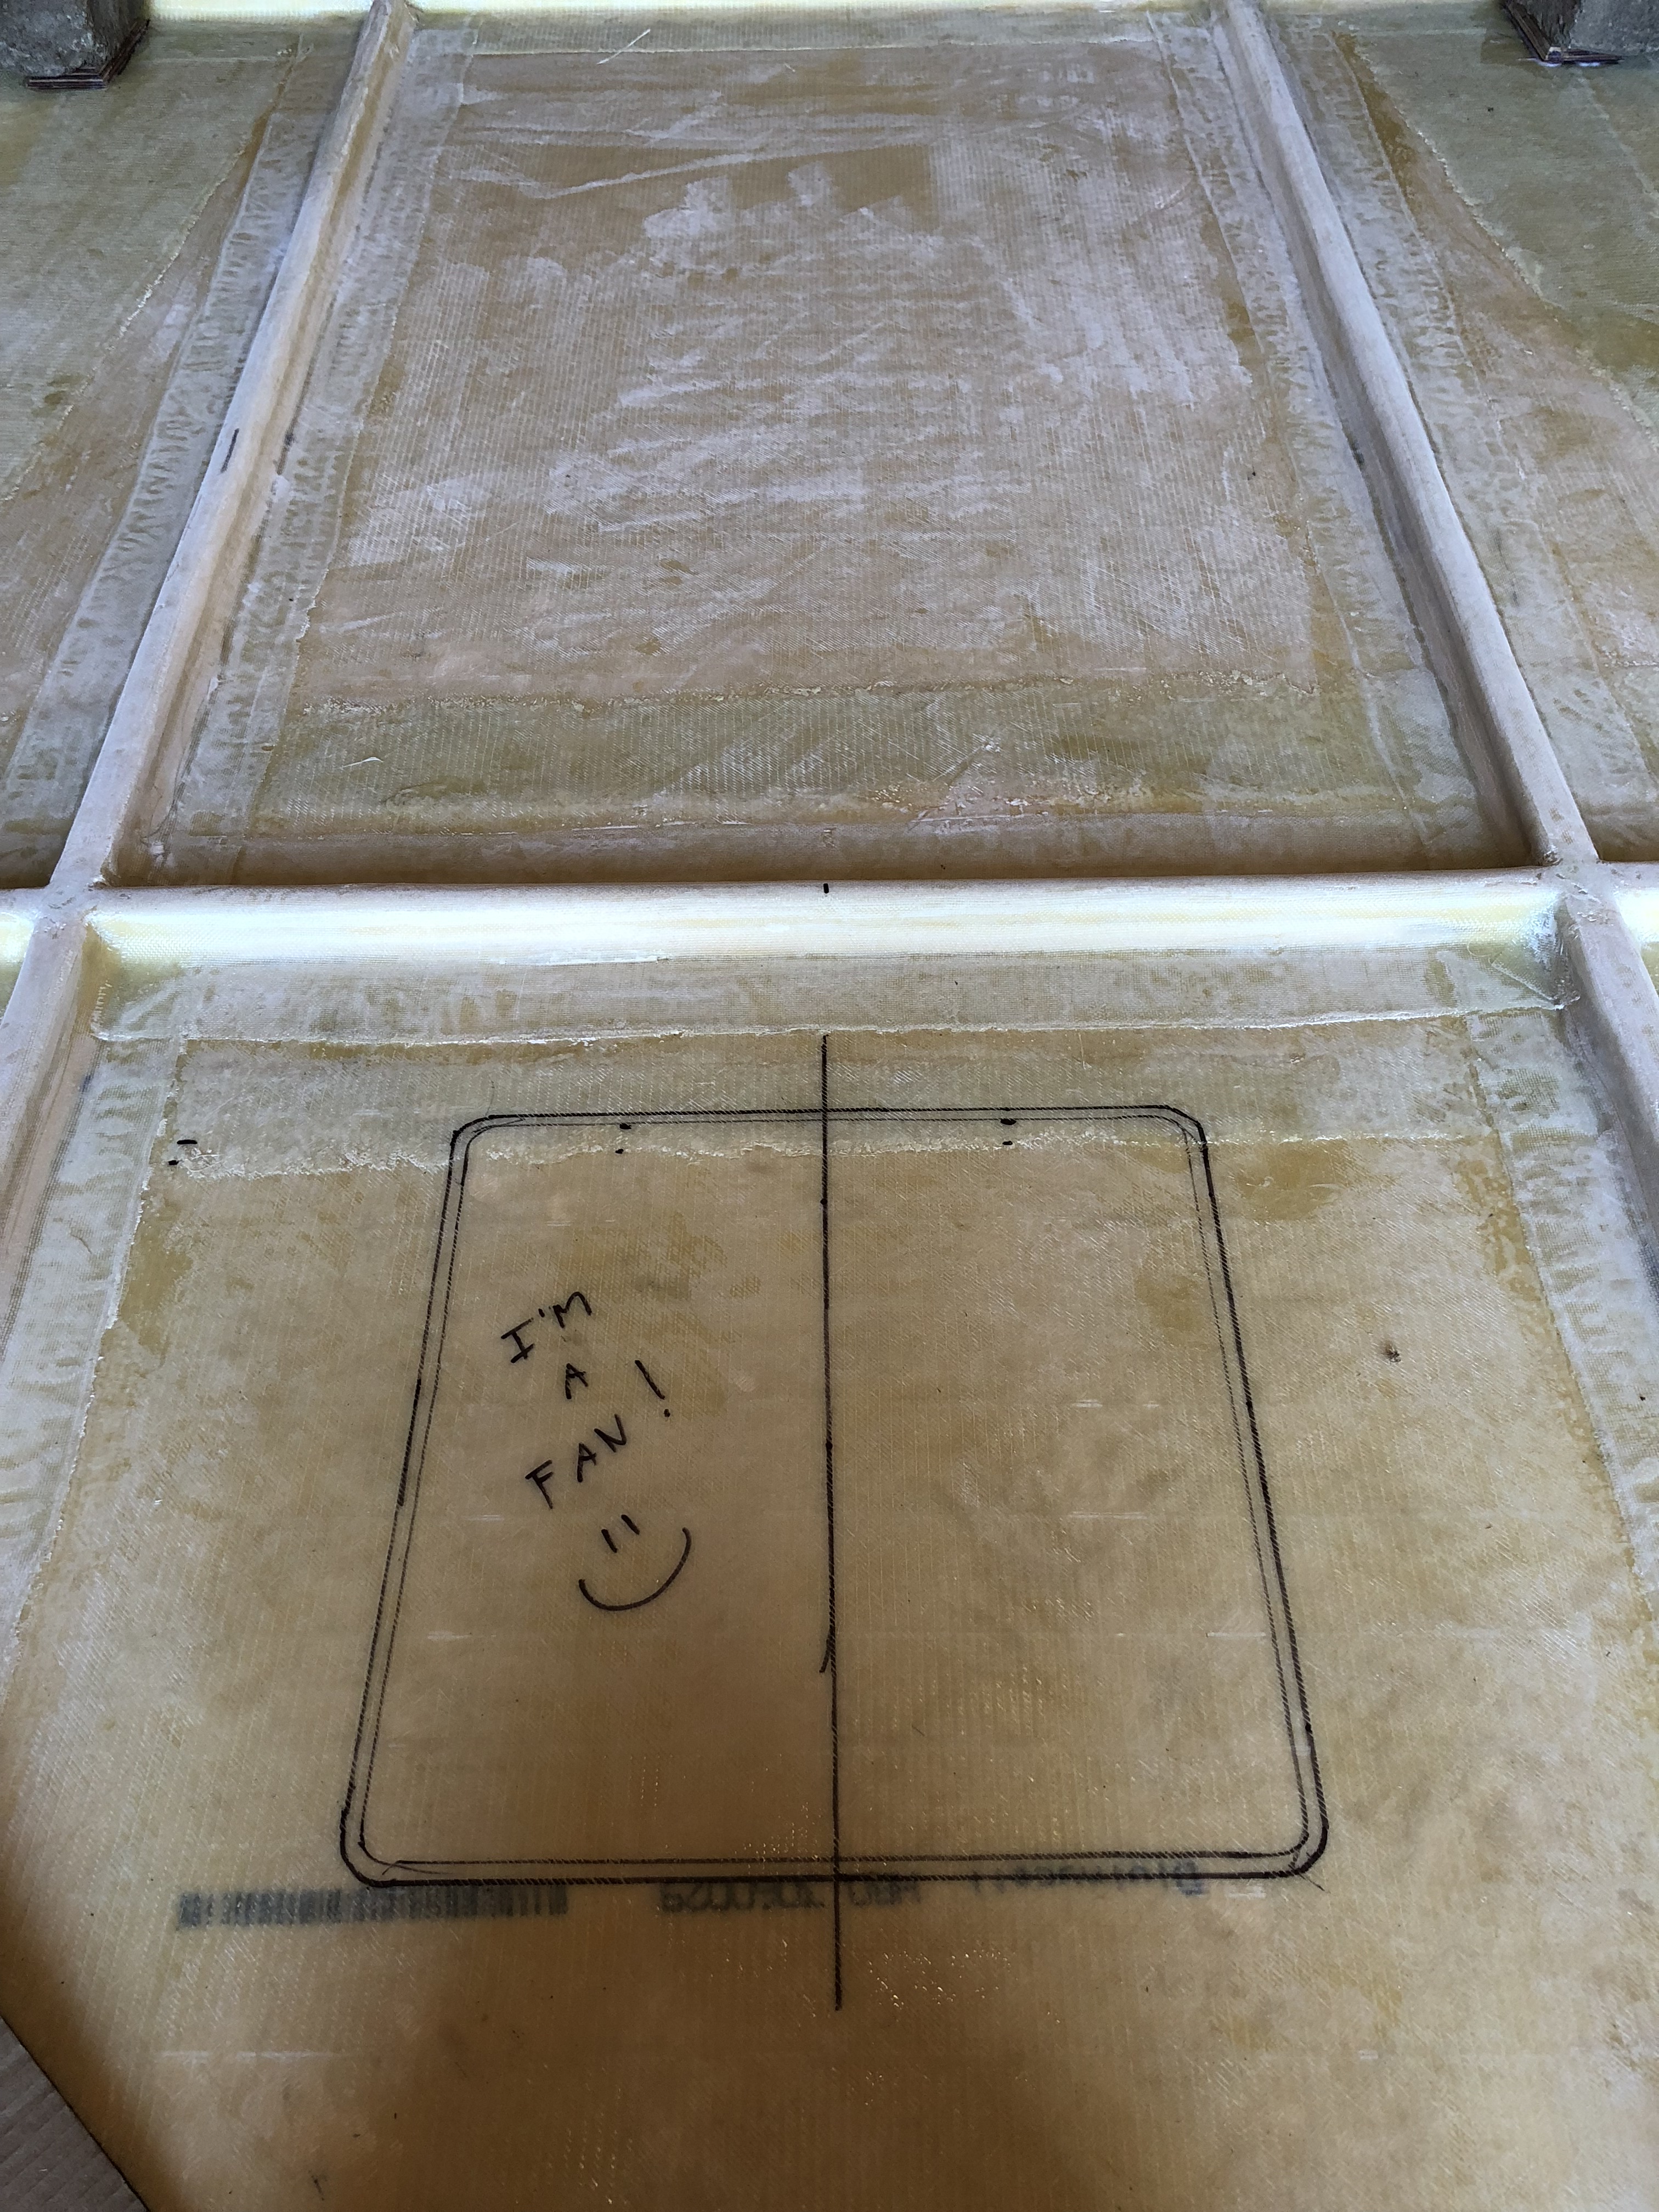
While Jason was "busy" I dug out the roof vent fan that we bought from the pile of Amazon boxes. We didn't spring for the full blown Maxxfan, this is a few models down but it flows a TON of air. In hindsight, I wish I had sprung for the nicer fan so it would be easier to leave it running when it's rainy. Up here in Washington State rain is kind of a big deal...
This location should put it just off the end of the bed!
I found a broom handle we could wedge against the bedslide so I could put Jason back to work!
So our plan for the interior of the camper included a 2 person dinette at the forward edge. I was going to make little boxes for the seat backs and use those to support the sides of the bedslide because that should be super sturdy, extra storage never hurts, and it would bring the seats a little closer to each other for a little more comfort. I just have to start cutting plywood!
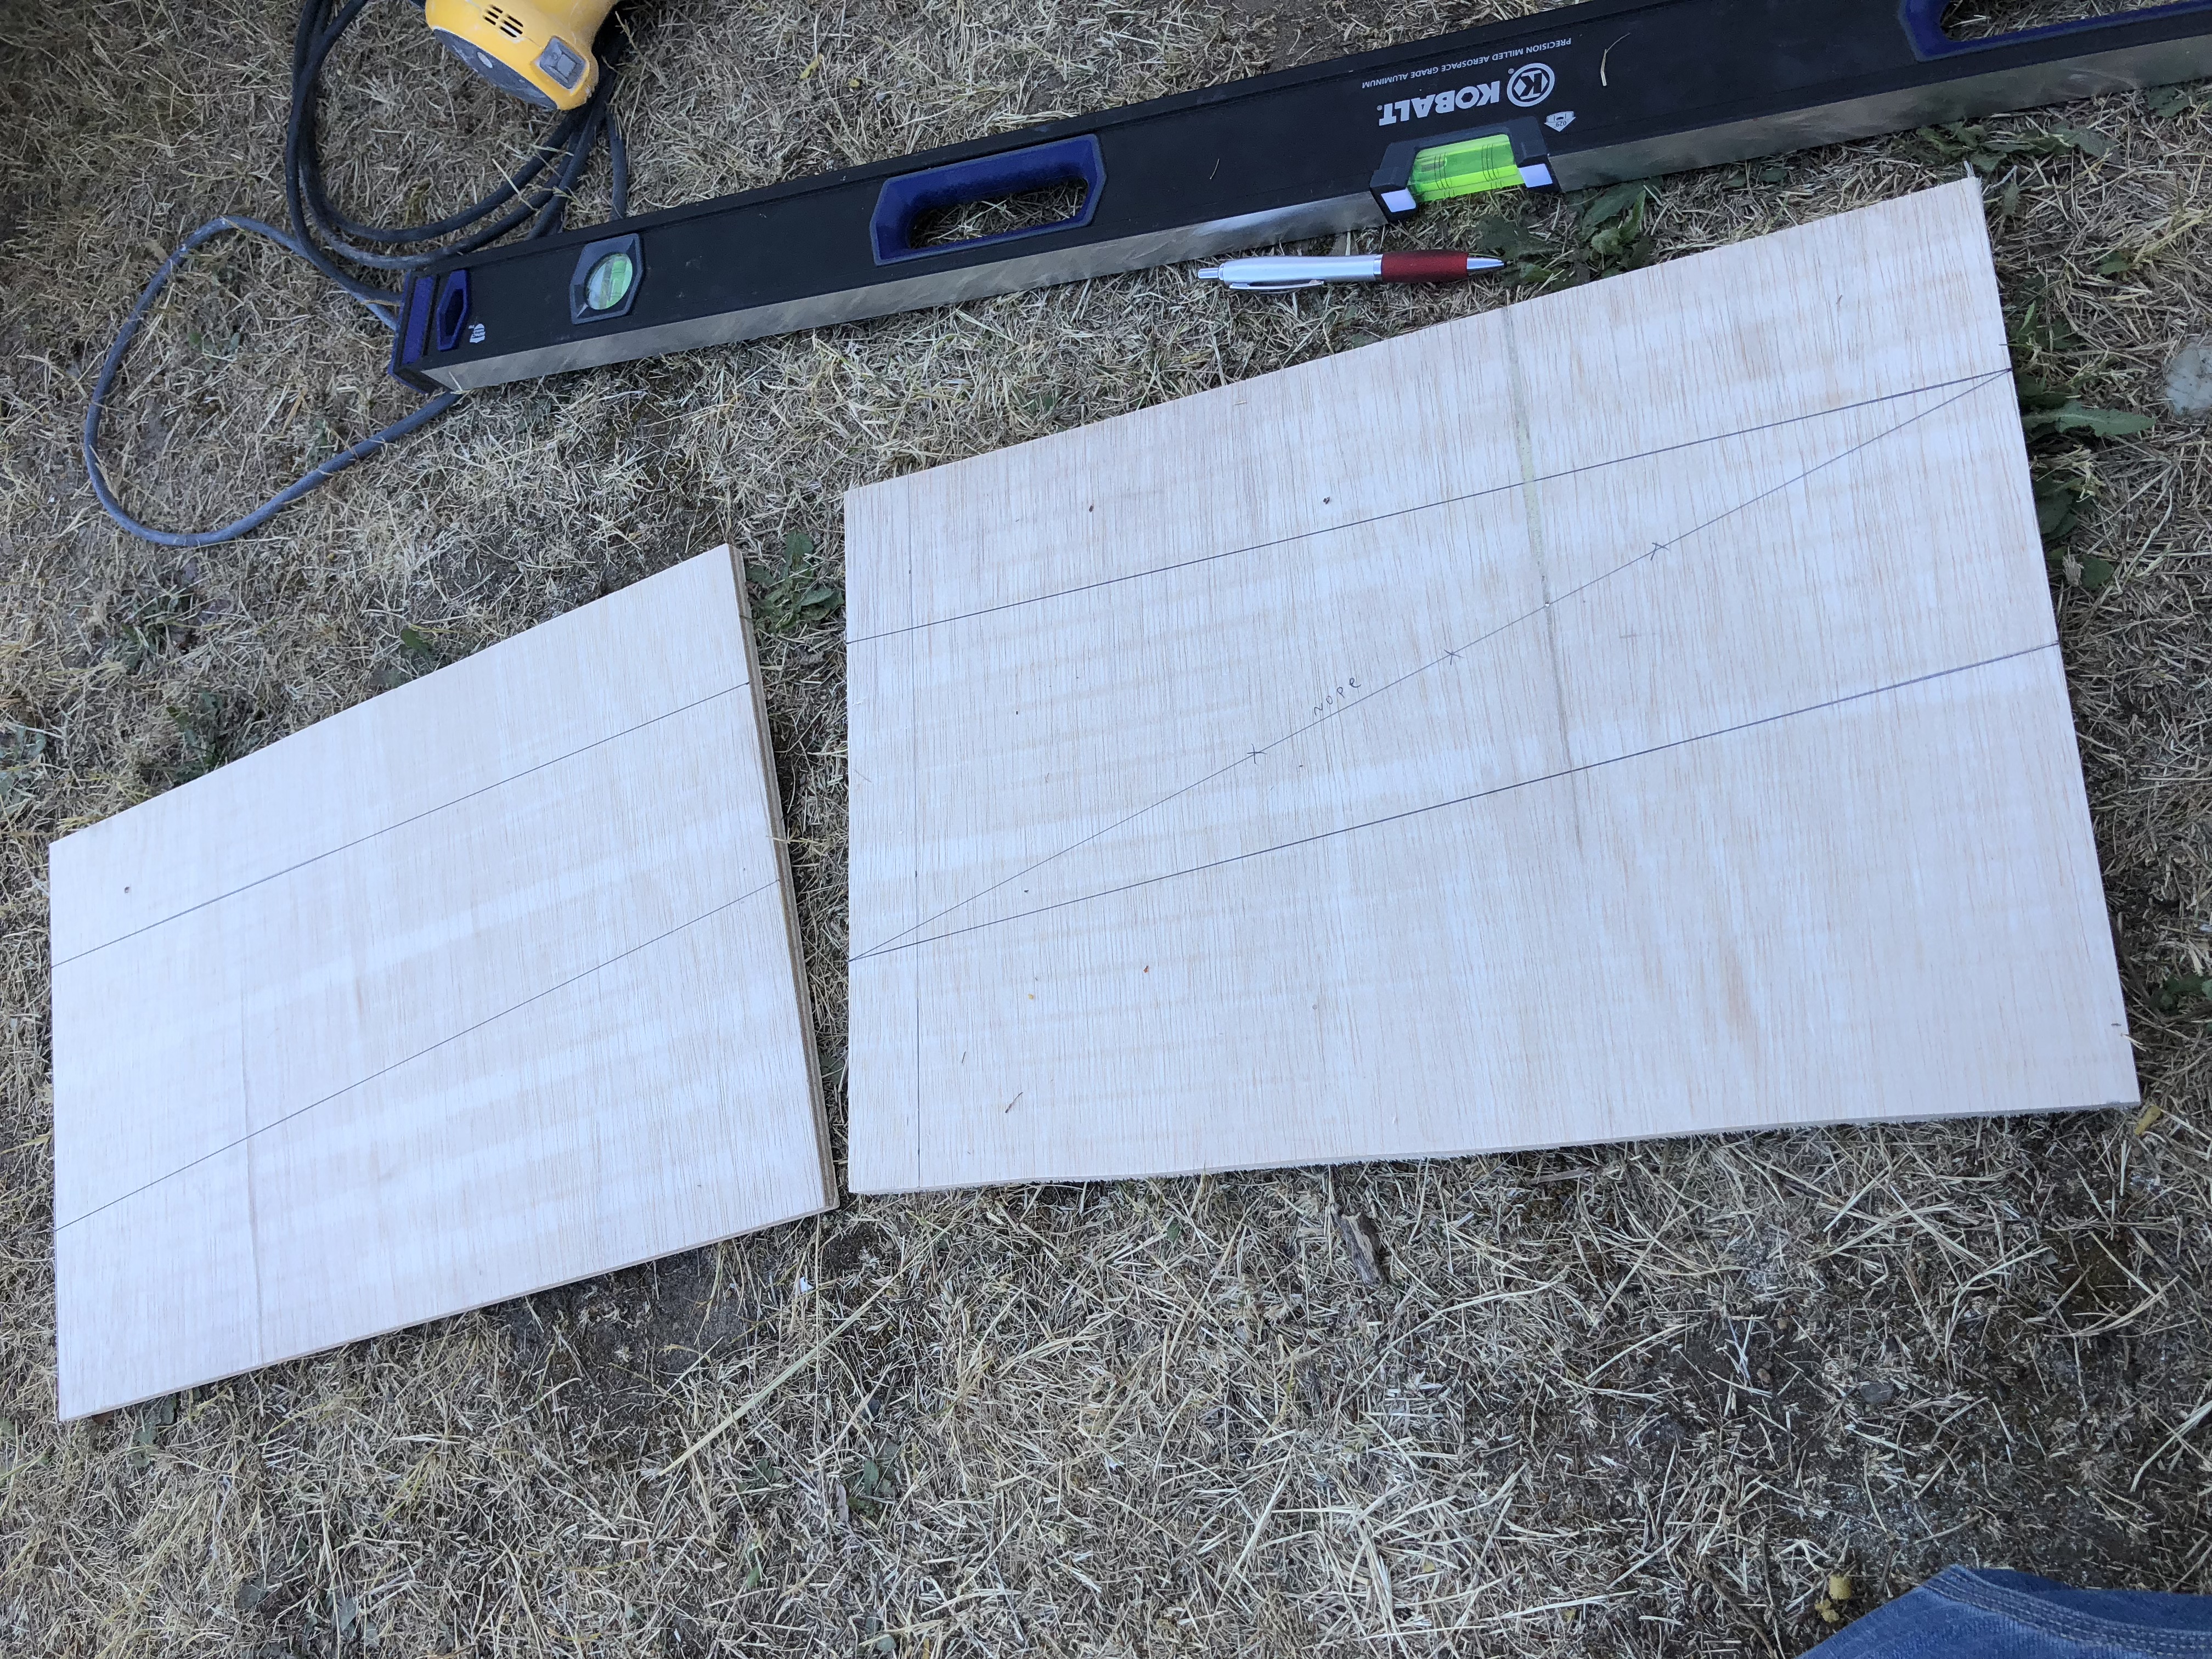
In a fit of extreme attention to detail, Jason thought to put a nice, comfy 2" taper to the seat backs. (it worked great! the seats are comfortable even without cushions!)
Bedslide is done! It should look really nice when everything else is painted!

Jason got to work on the dinette because he had a plan! (I rarely have a plan, so he wins this round)

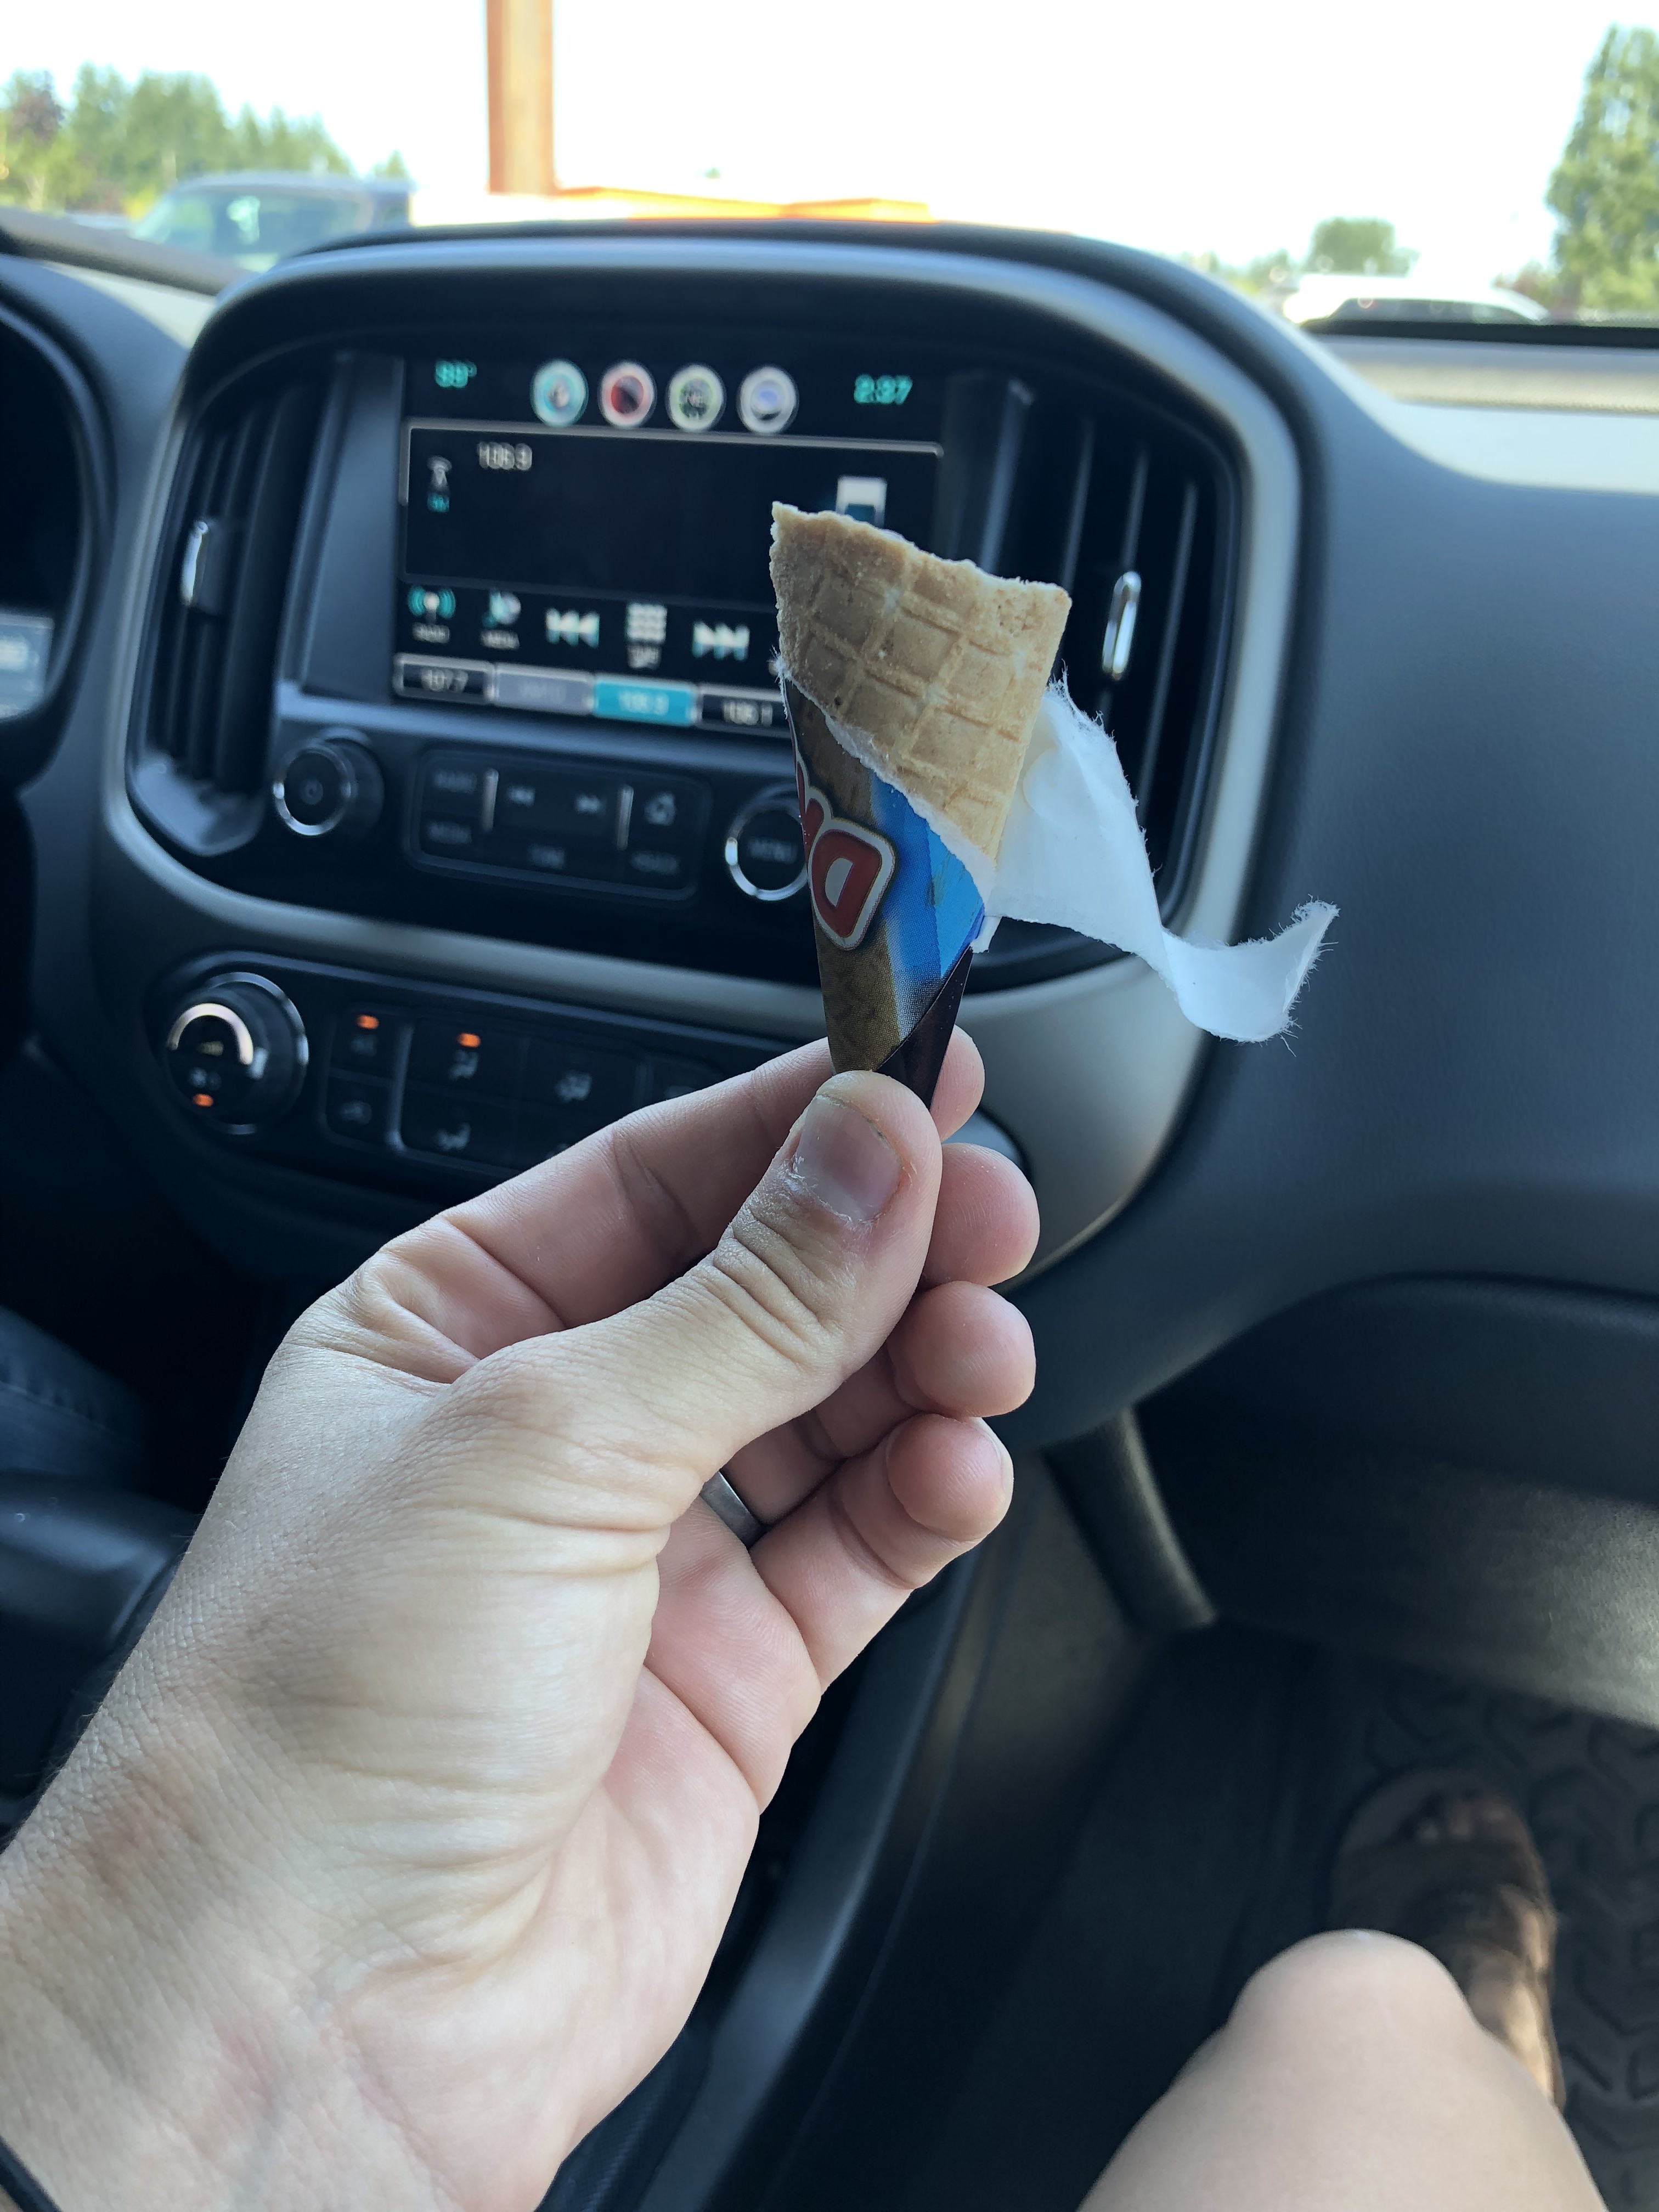
We had to run to Ace Hardware for tools and supplies. Since it was super hot outside we may have loitered a little bit in the air conditioning (since our house doesn't have it...) and bought an ice cream! Or rather, Jason bought an ice cream and then it broke in half and I got the broken bit. Score!
It's almost embarrassing how much we used the leftover landscaping rocks on this project...
While I was messing around with the roof, Jason went ahead and epoxied on the bedslide support piece. We only had one think available to hold the piece against the bulkhead so Jason "had" to lean on the other side until it set up. Useful loitering...
While Jason was "busy" I dug out the roof vent fan that we bought from the pile of Amazon boxes. We didn't spring for the full blown Maxxfan, this is a few models down but it flows a TON of air. In hindsight, I wish I had sprung for the nicer fan so it would be easier to leave it running when it's rainy. Up here in Washington State rain is kind of a big deal...
This location should put it just off the end of the bed!
I found a broom handle we could wedge against the bedslide so I could put Jason back to work!
So our plan for the interior of the camper included a 2 person dinette at the forward edge. I was going to make little boxes for the seat backs and use those to support the sides of the bedslide because that should be super sturdy, extra storage never hurts, and it would bring the seats a little closer to each other for a little more comfort. I just have to start cutting plywood!
In a fit of extreme attention to detail, Jason thought to put a nice, comfy 2" taper to the seat backs. (it worked great! the seats are comfortable even without cushions!)
Bedslide is done! It should look really nice when everything else is painted!
Jason got to work on the dinette because he had a plan! (I rarely have a plan, so he wins this round)
We had to run to Ace Hardware for tools and supplies. Since it was super hot outside we may have loitered a little bit in the air conditioning (since our house doesn't have it...) and bought an ice cream! Or rather, Jason bought an ice cream and then it broke in half and I got the broken bit. Score!
underkill
Active member
I had a blast shopping for how I was going to decorate the camper. It was always going to be a mix of rugged adventurer and pinterest-inspired glamping... but I stumbled across a really awesome looking idea for the countertop and table!
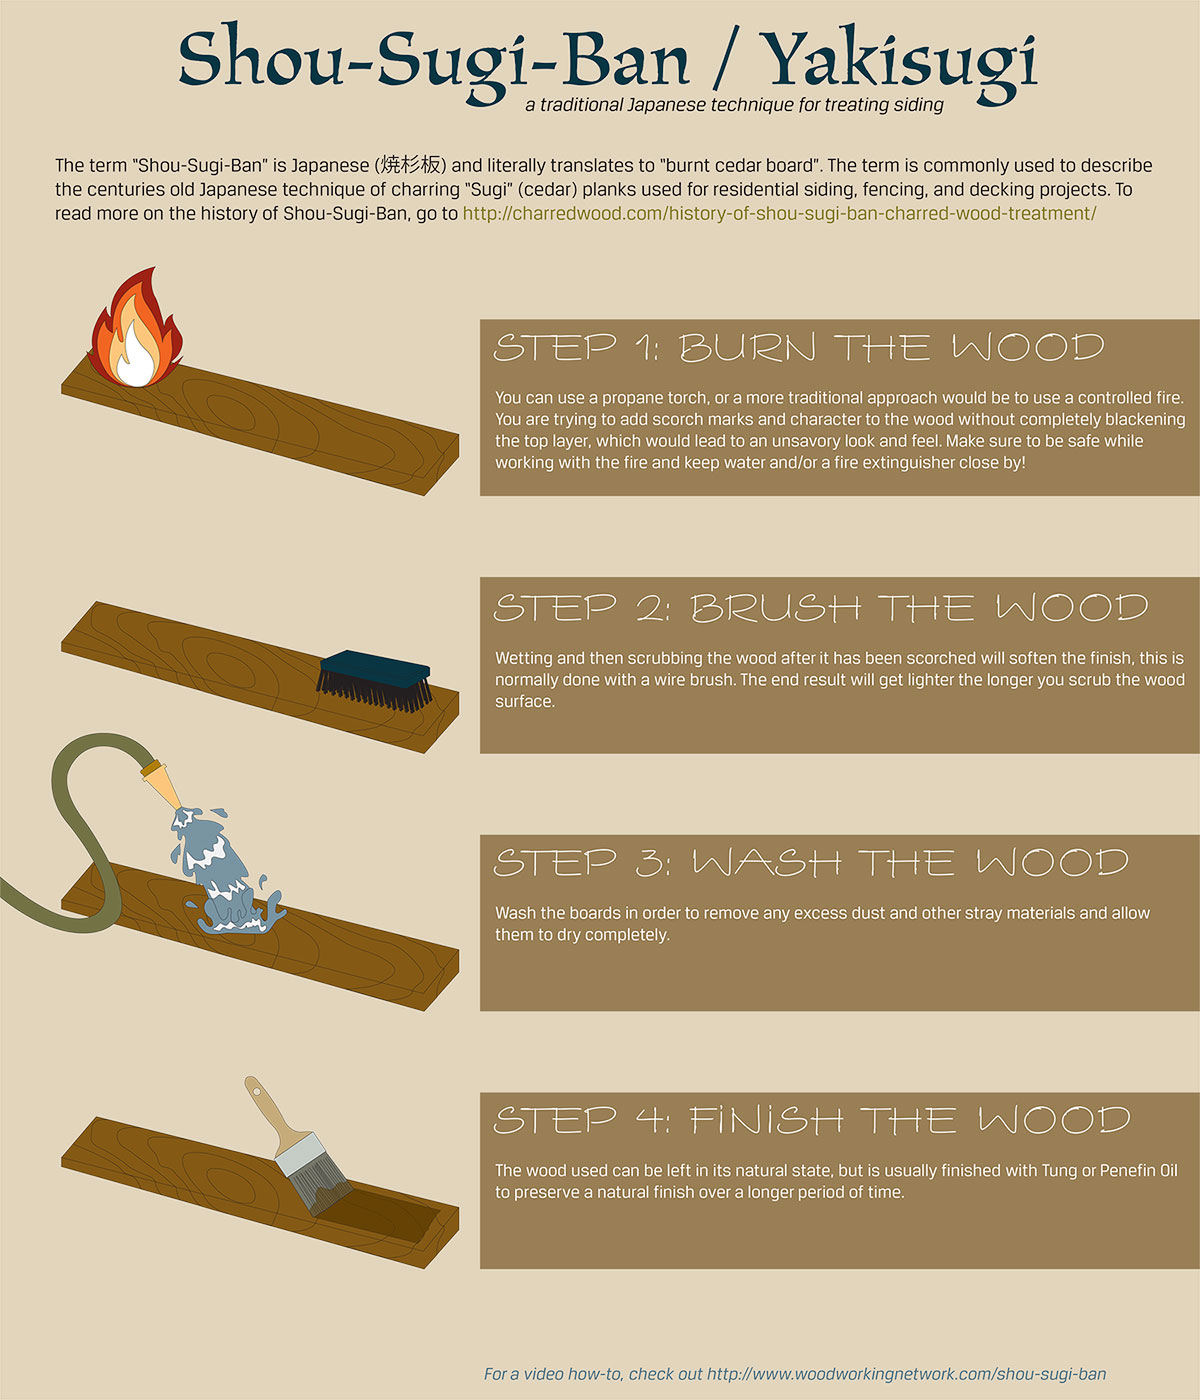
This is Shou Sugi Ban! I wholeheartedly approve of using a torch for any reason! Seriously, go google it, because people make some awesome looking wood projects with this technique!
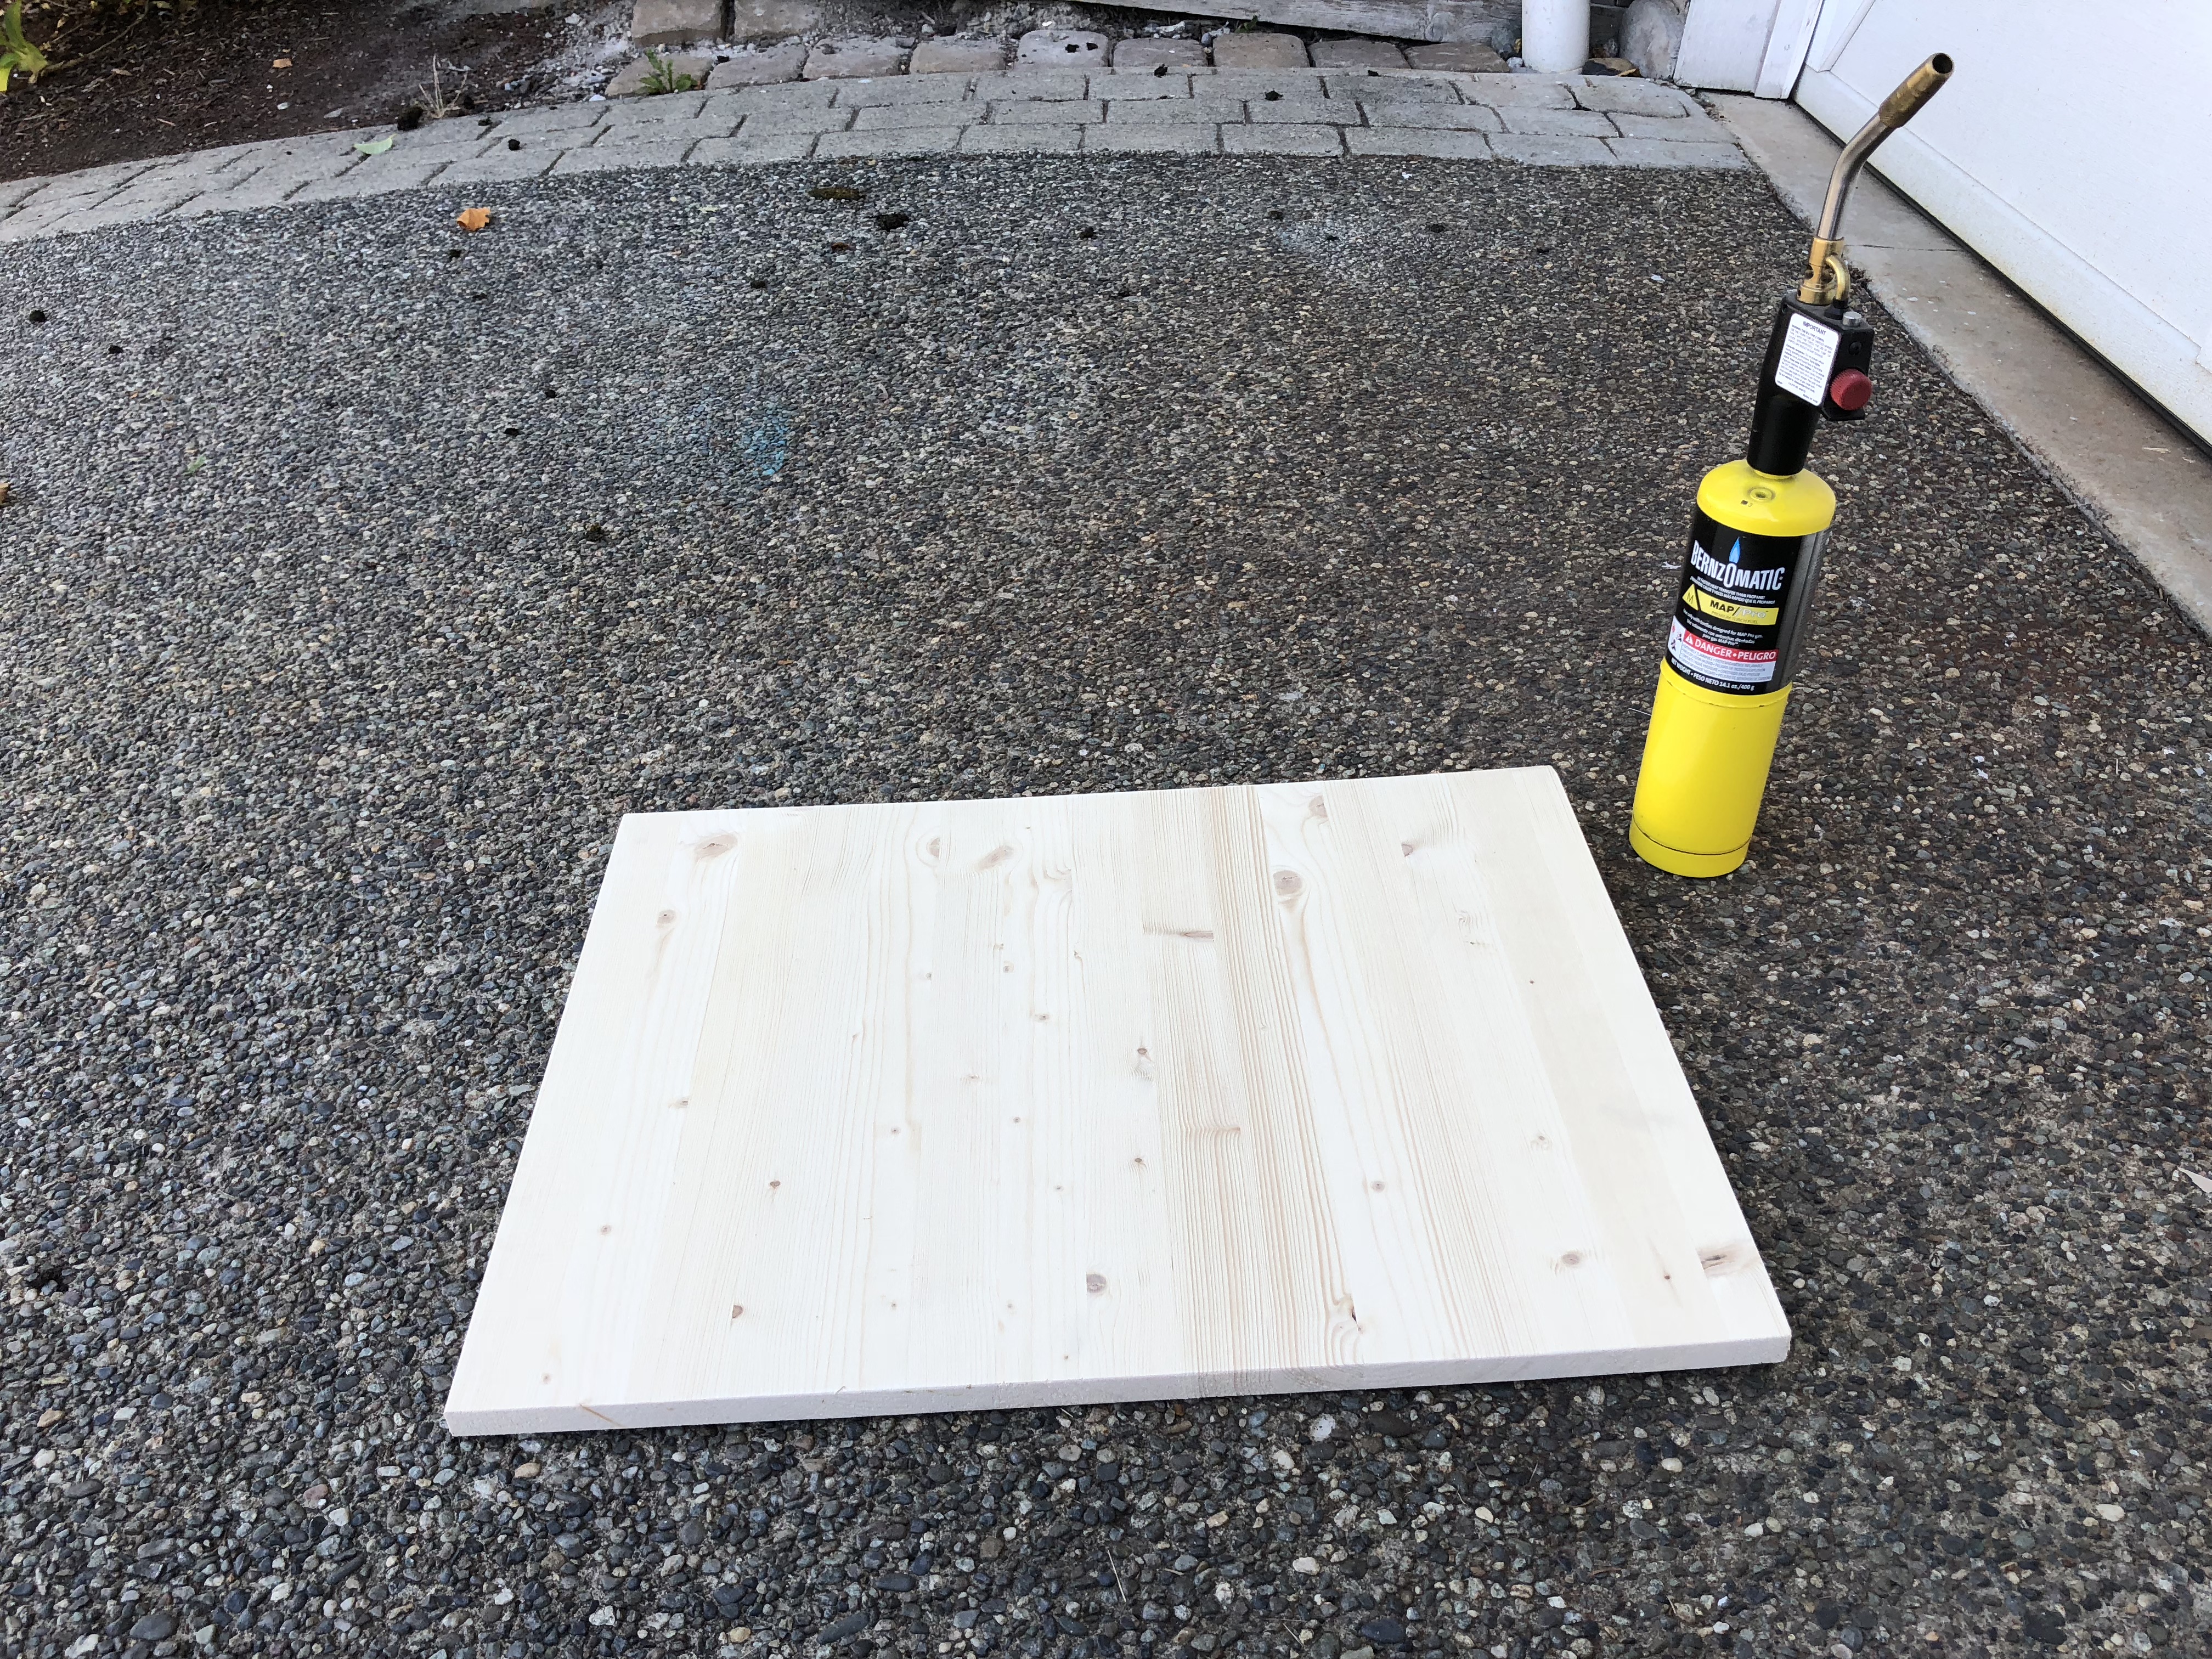
I started with this finish, which was lightly done and not really interesting in any way.
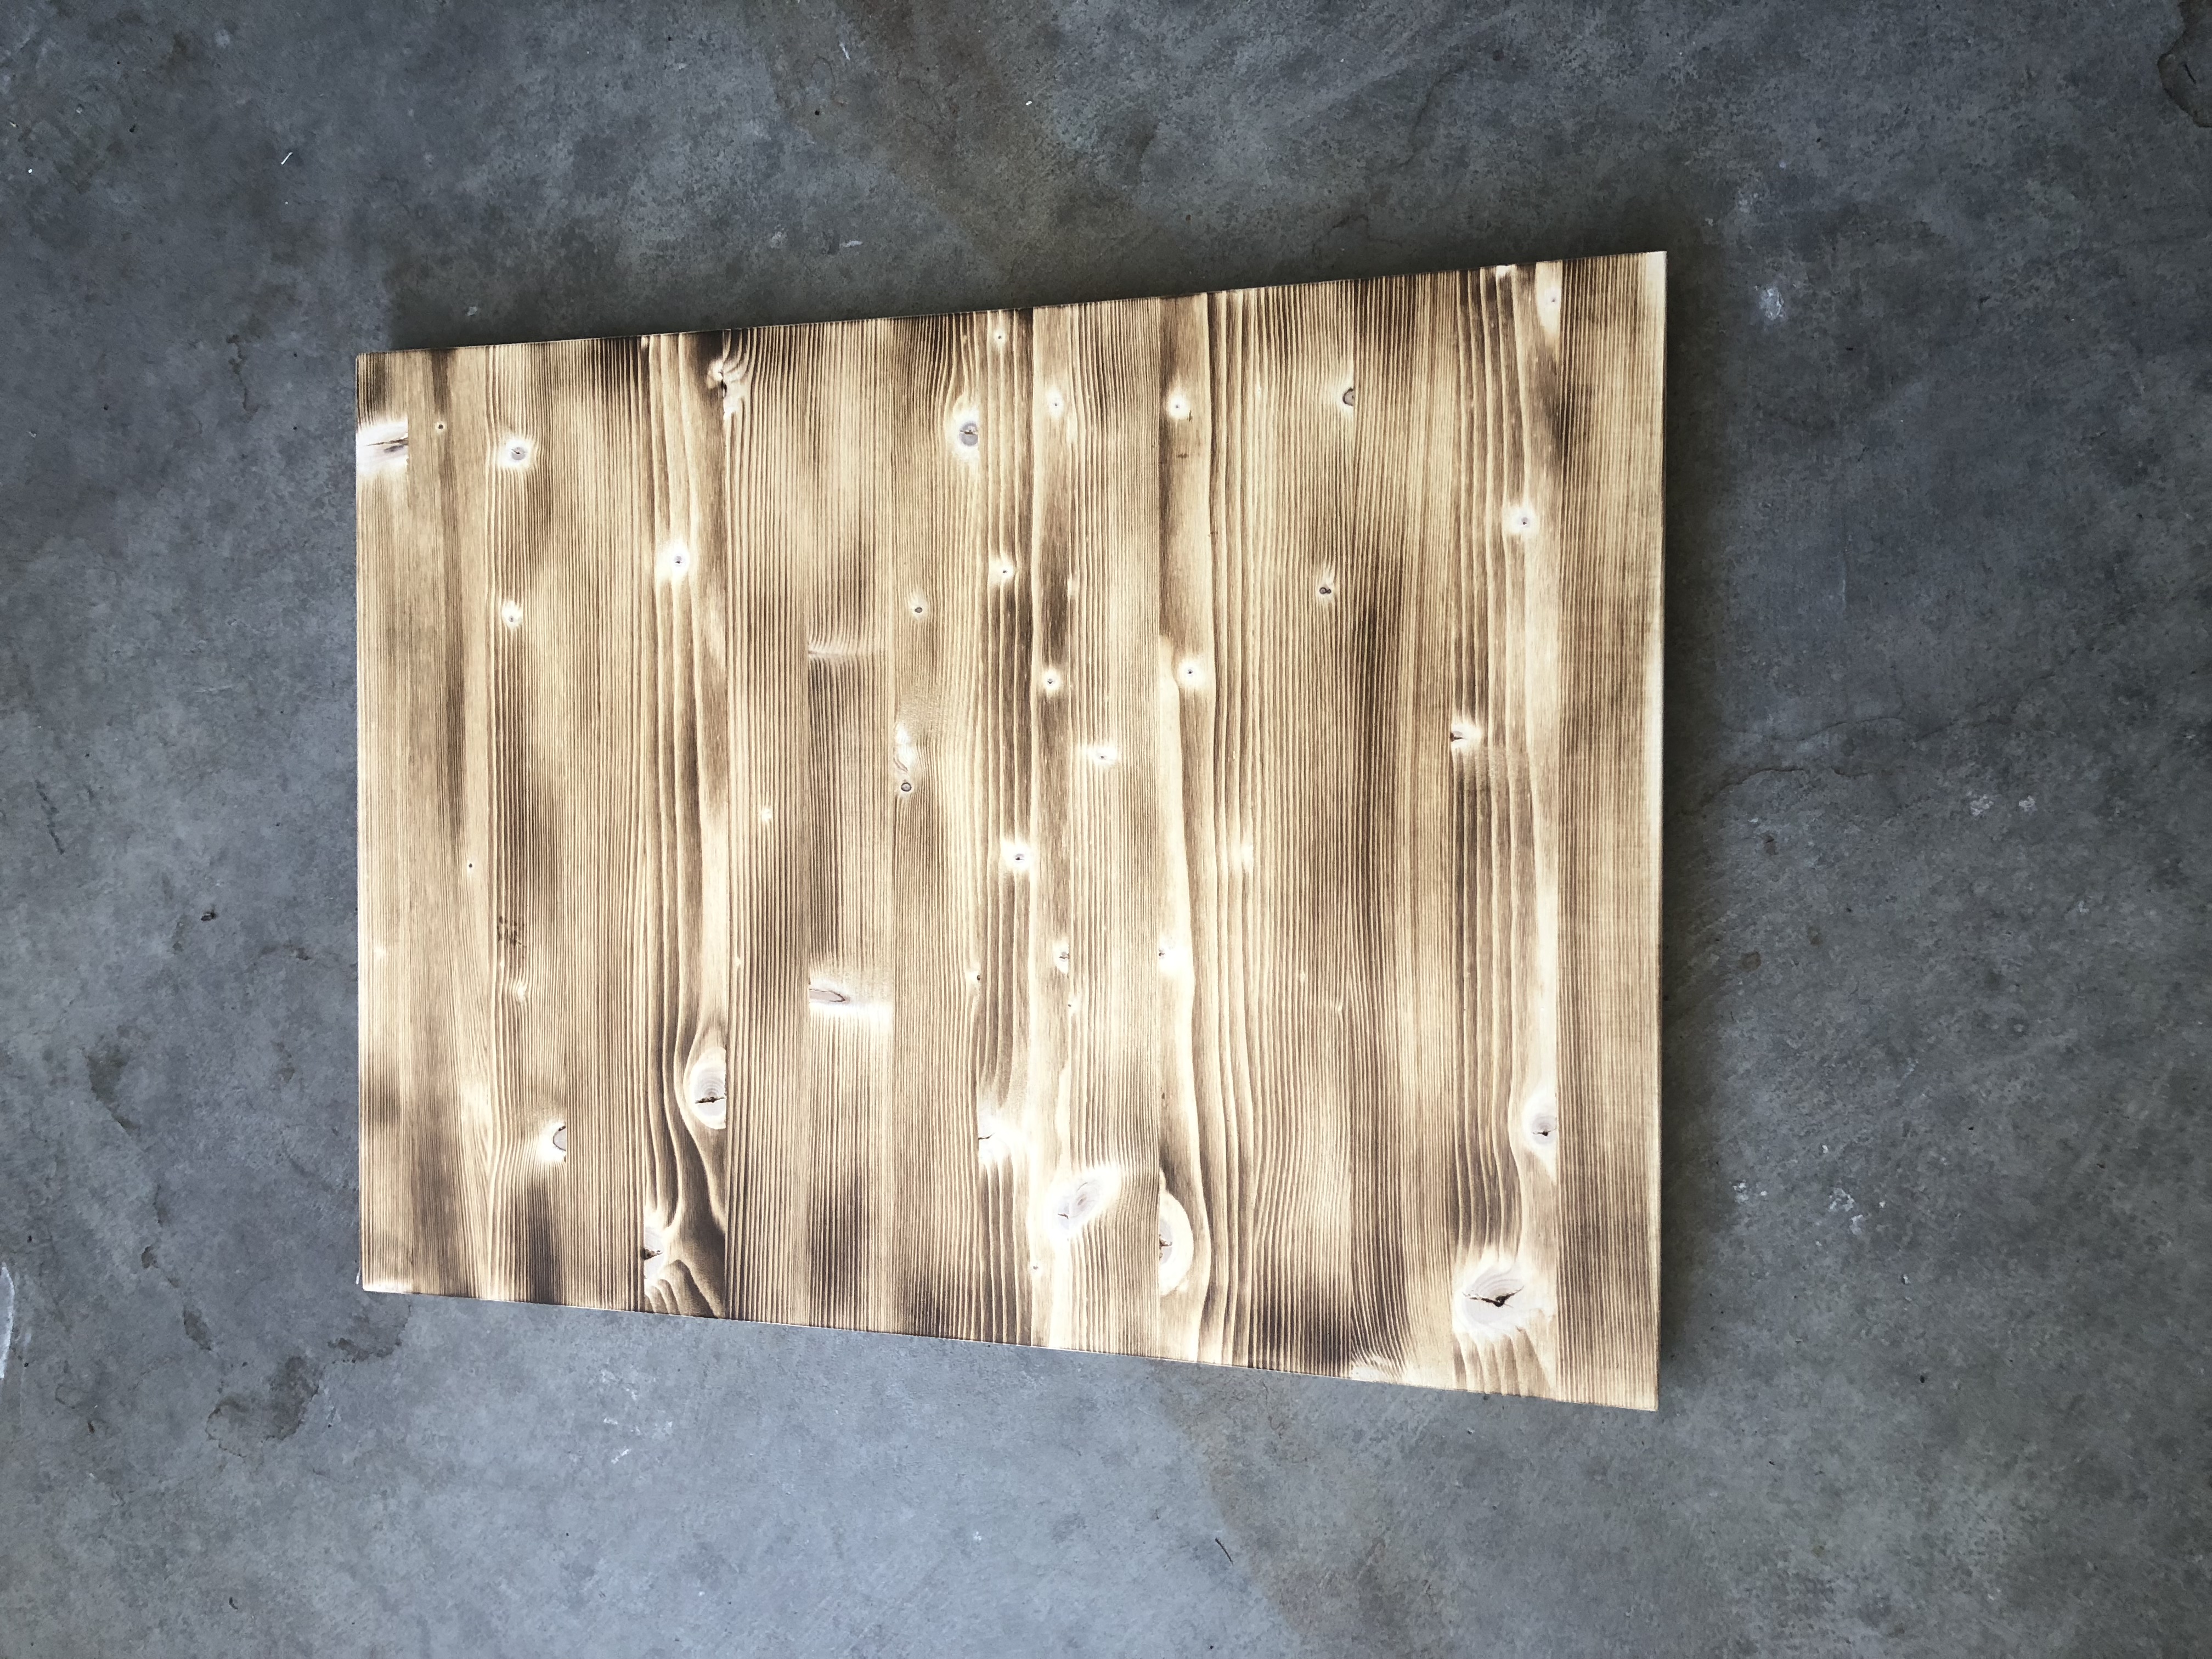
Here's the final darker finish.
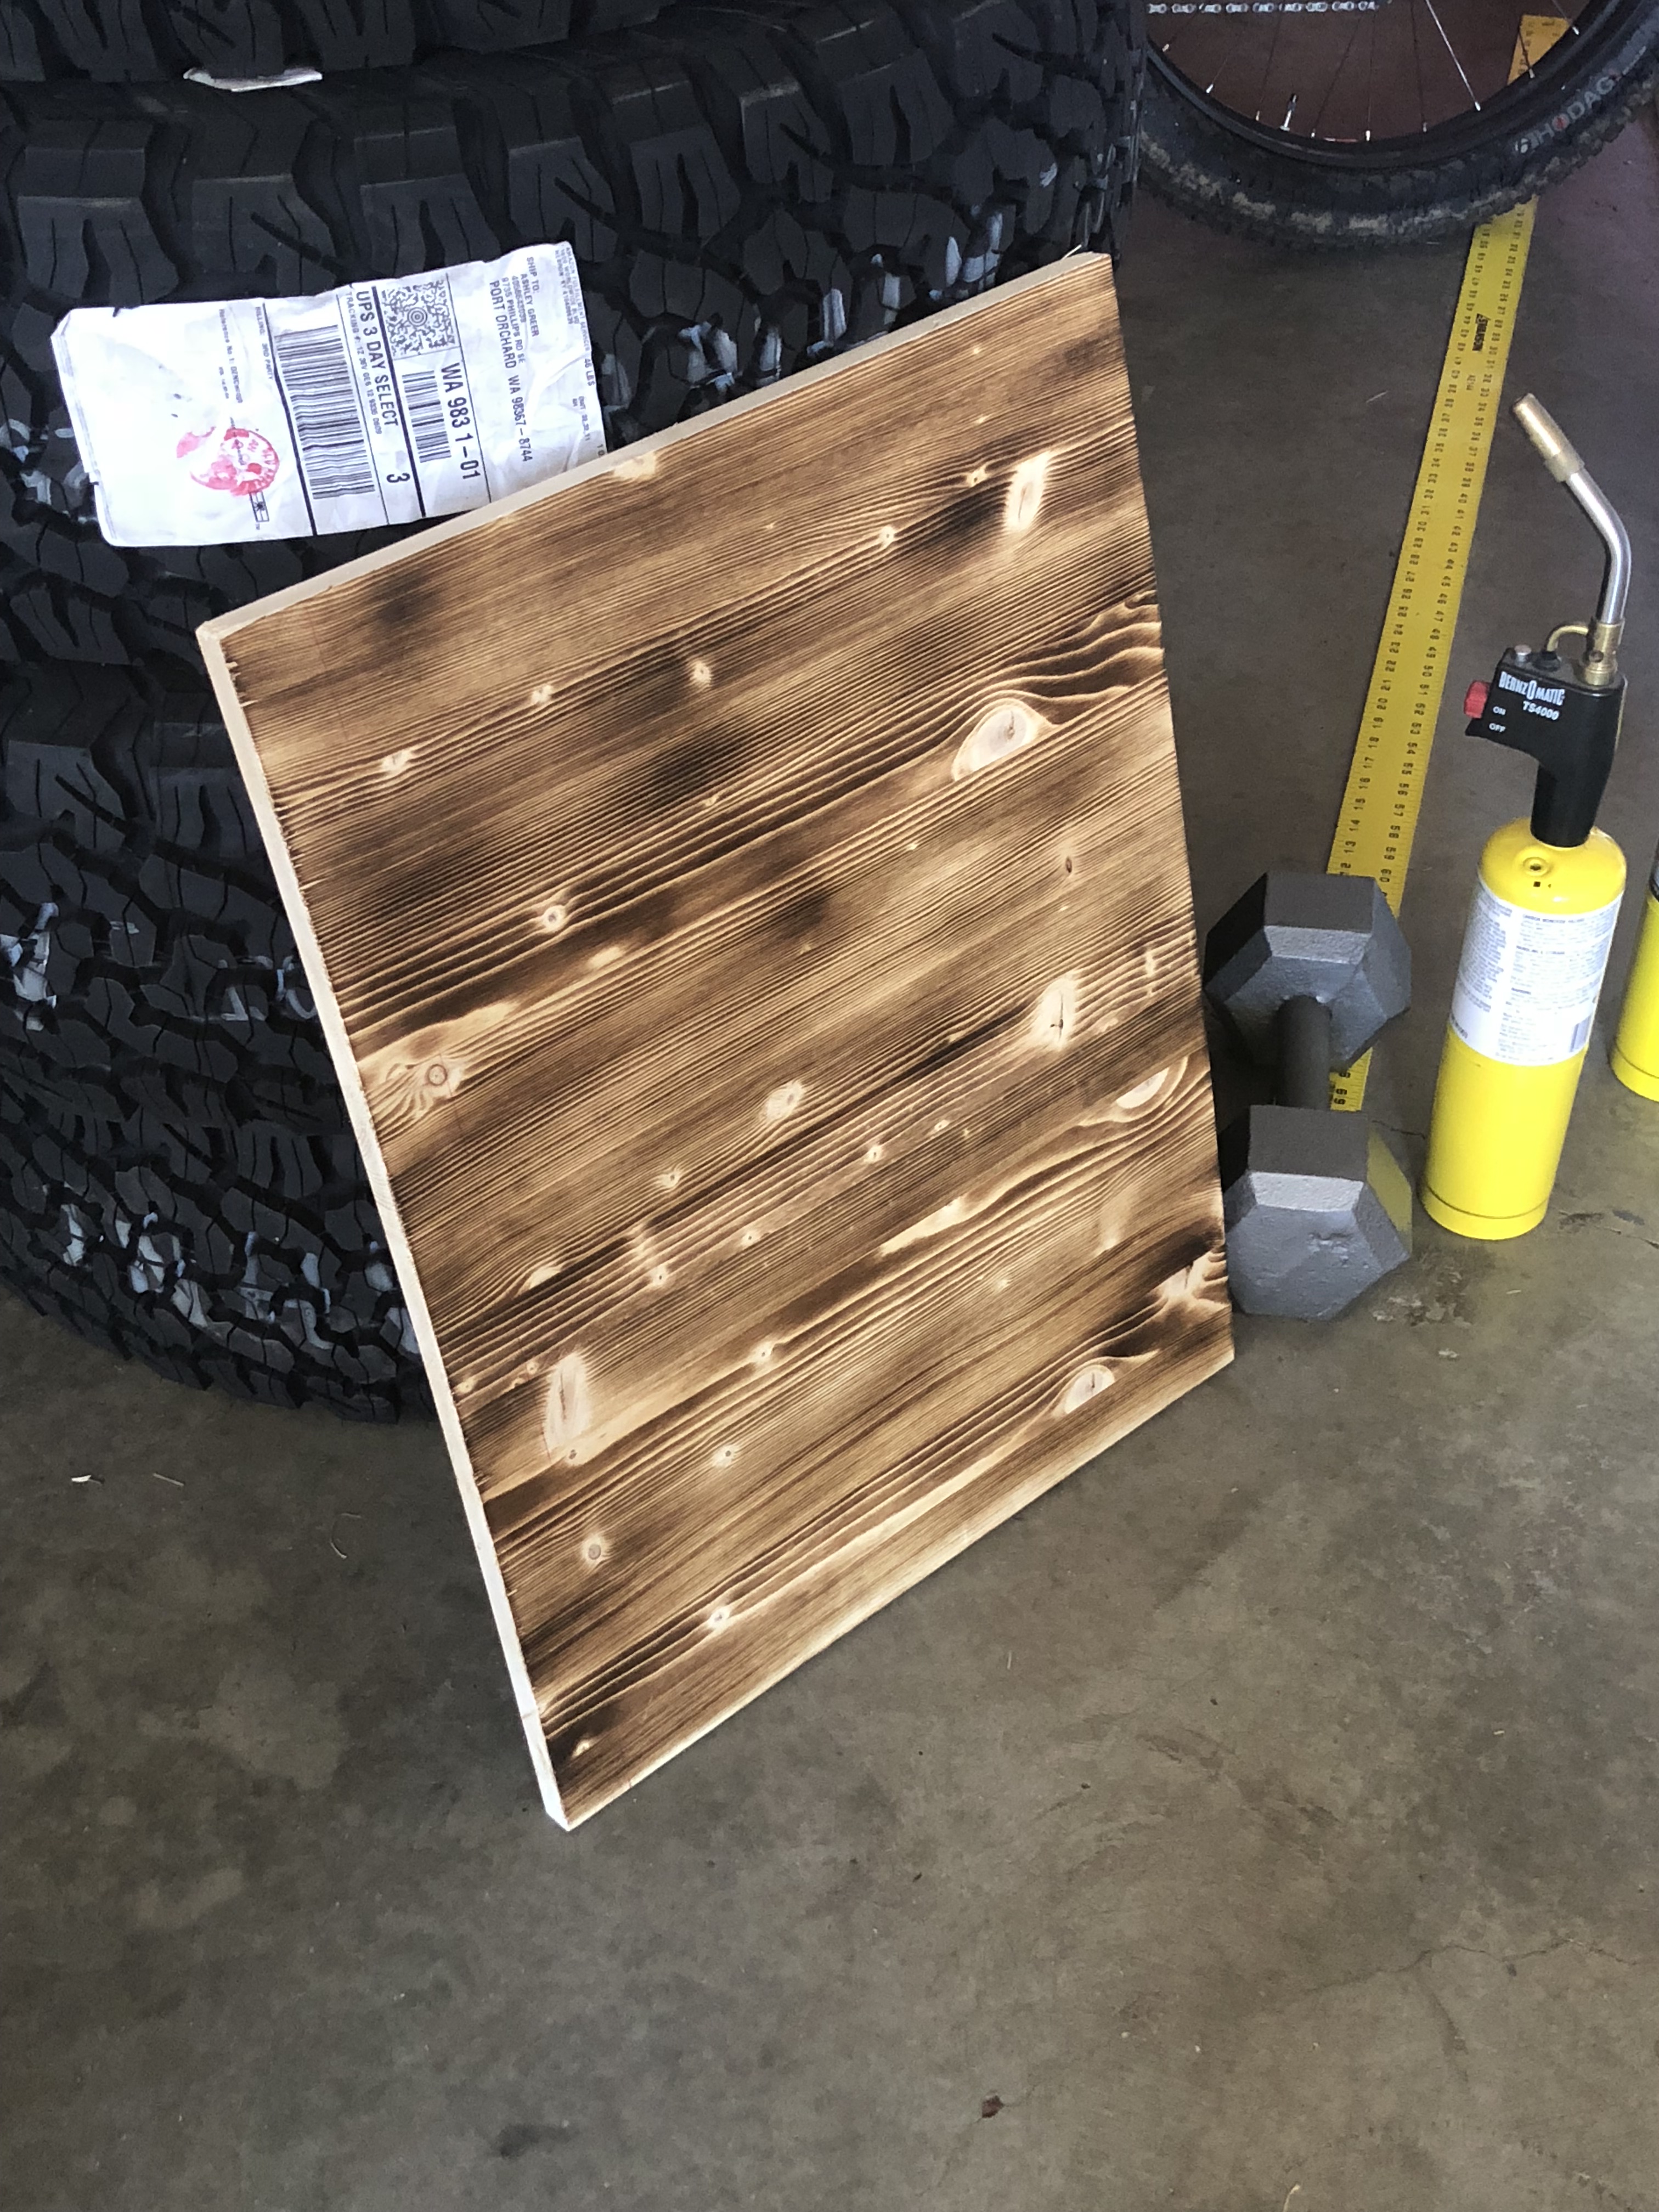
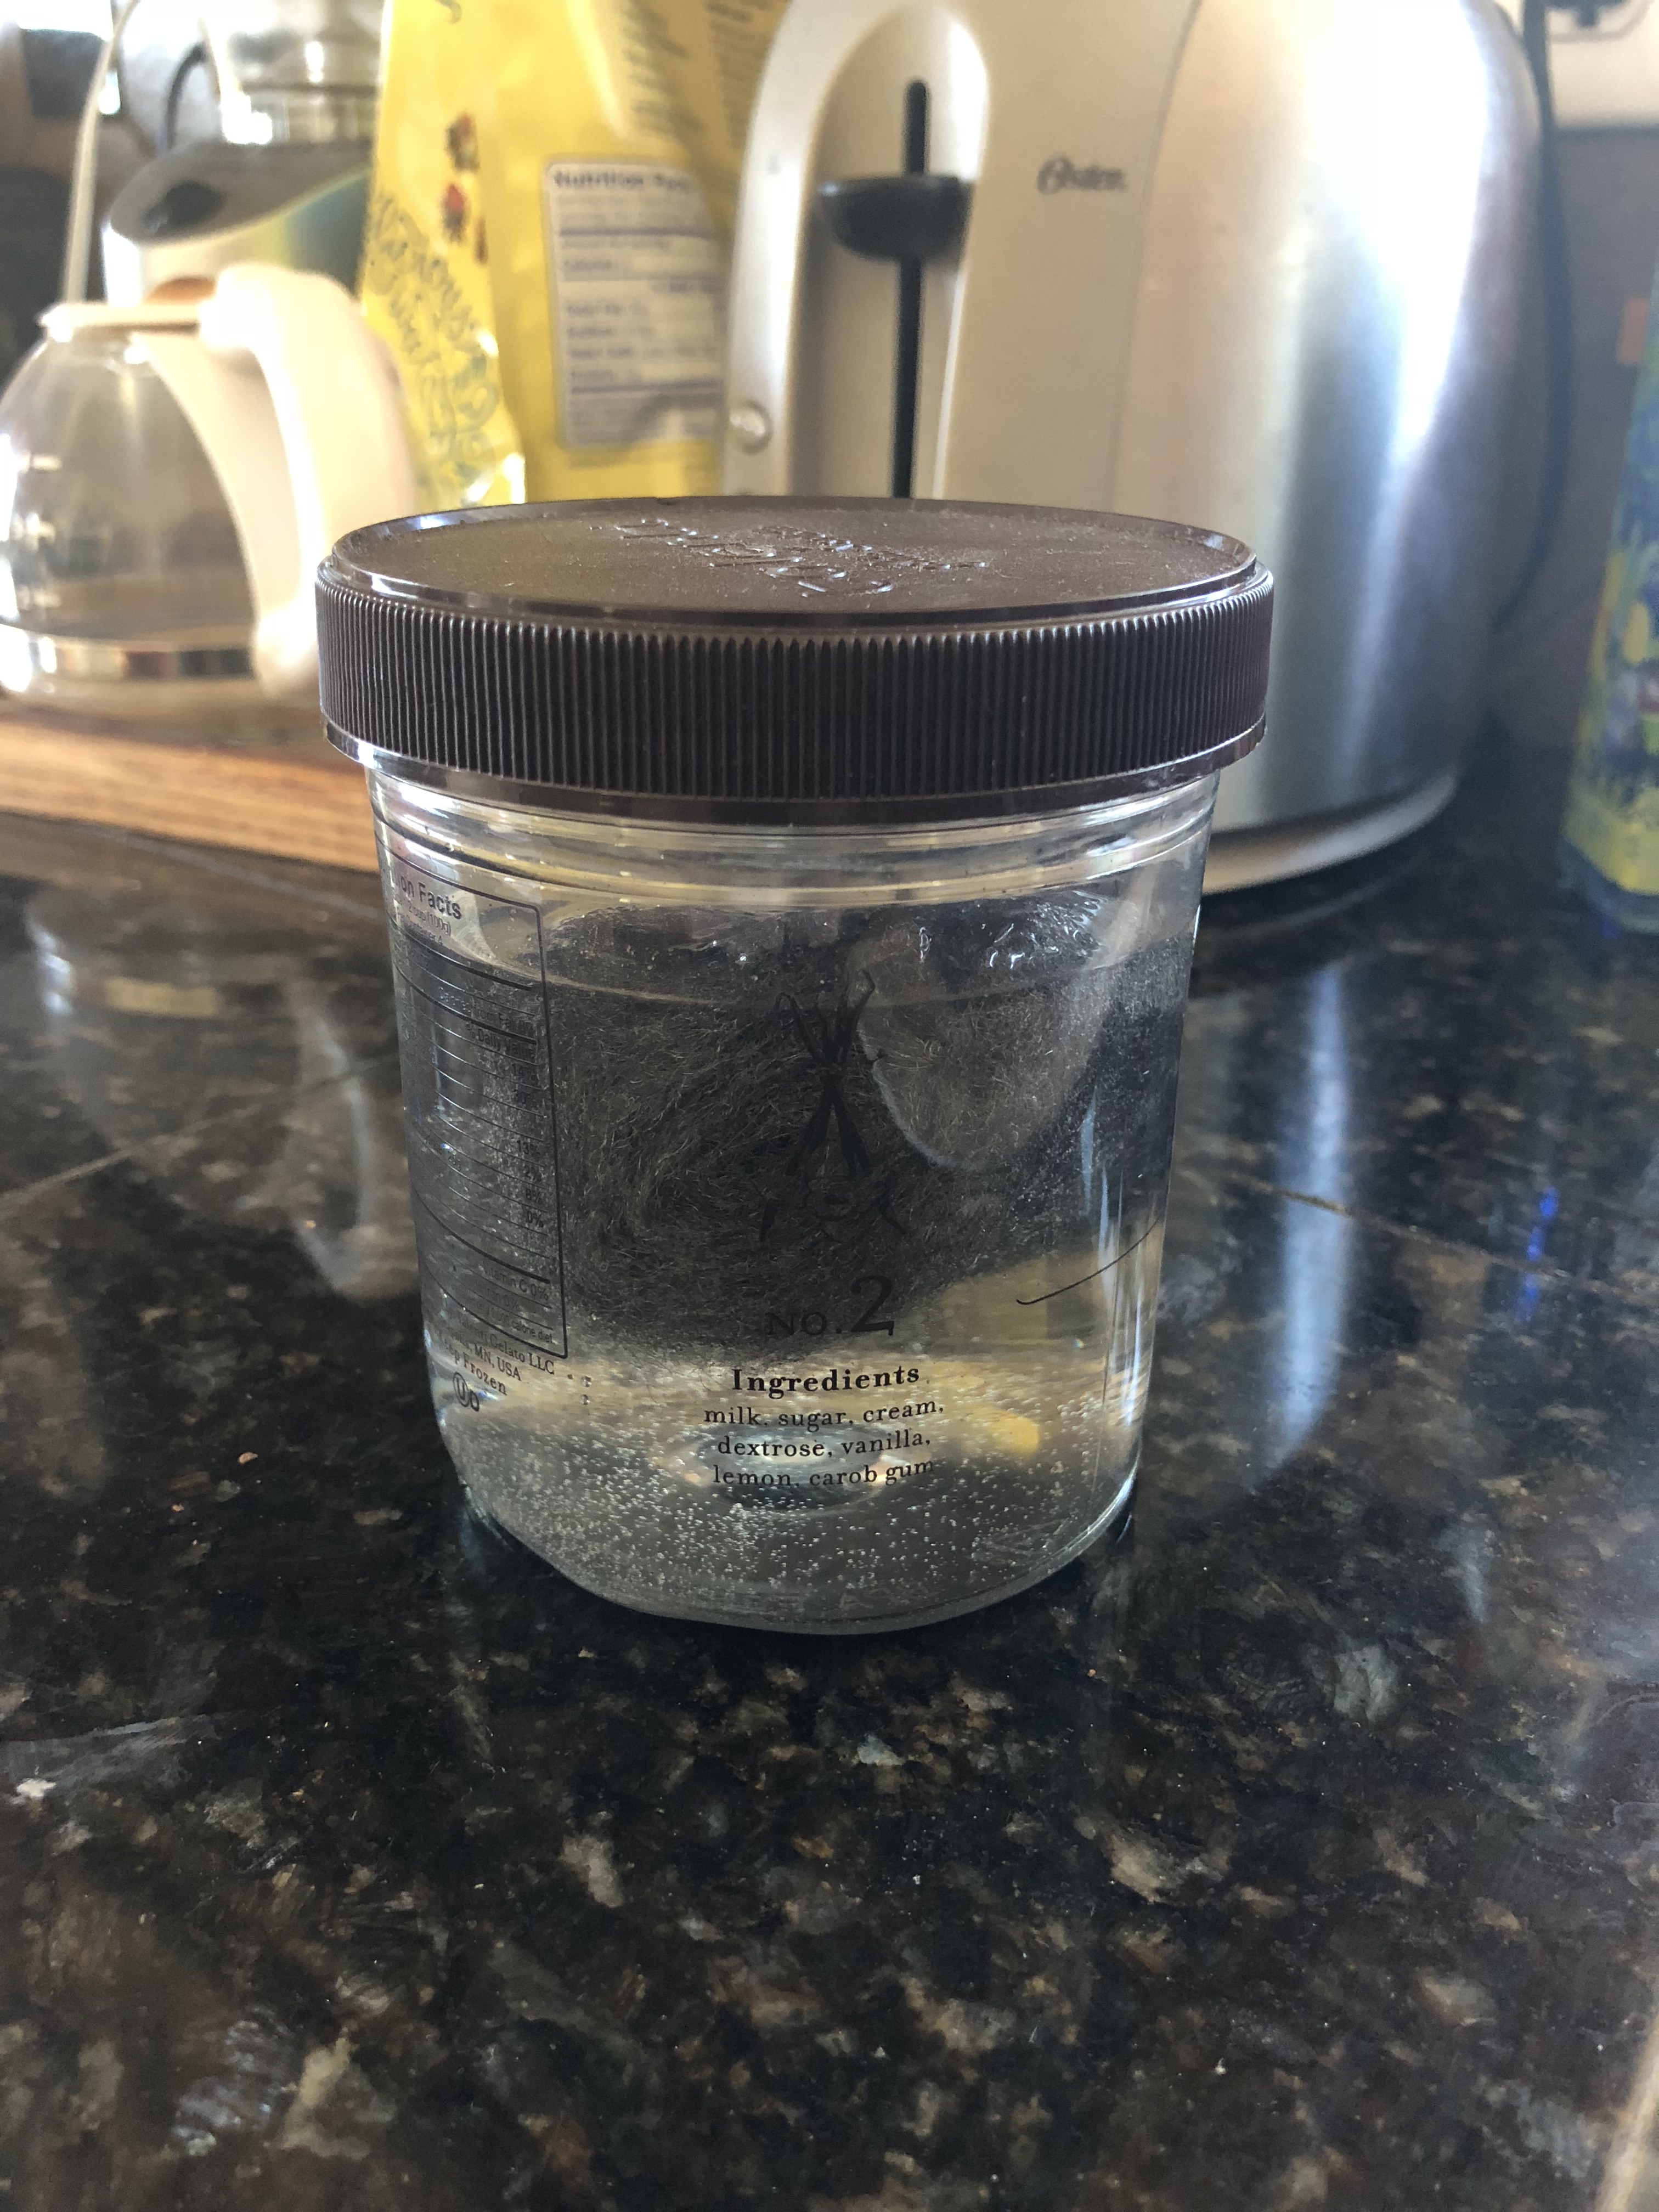
The wood I used isn't really meant for this sort of thing. It's laminated together and meant to be made into little tool carts and home crafts. I wanted something darker and less brown. There was a technique on Pinterest for how to make your own wood stain to make wood look weathered and gray, which was more what I was after. It involves putting steel wool into some vinegar and waiting for it to turn a color.
So that's that... More to come on how I end up ruining the table and countertop... While I was playing with chemistry, Jason was doing productive things and working on the dinette seats!
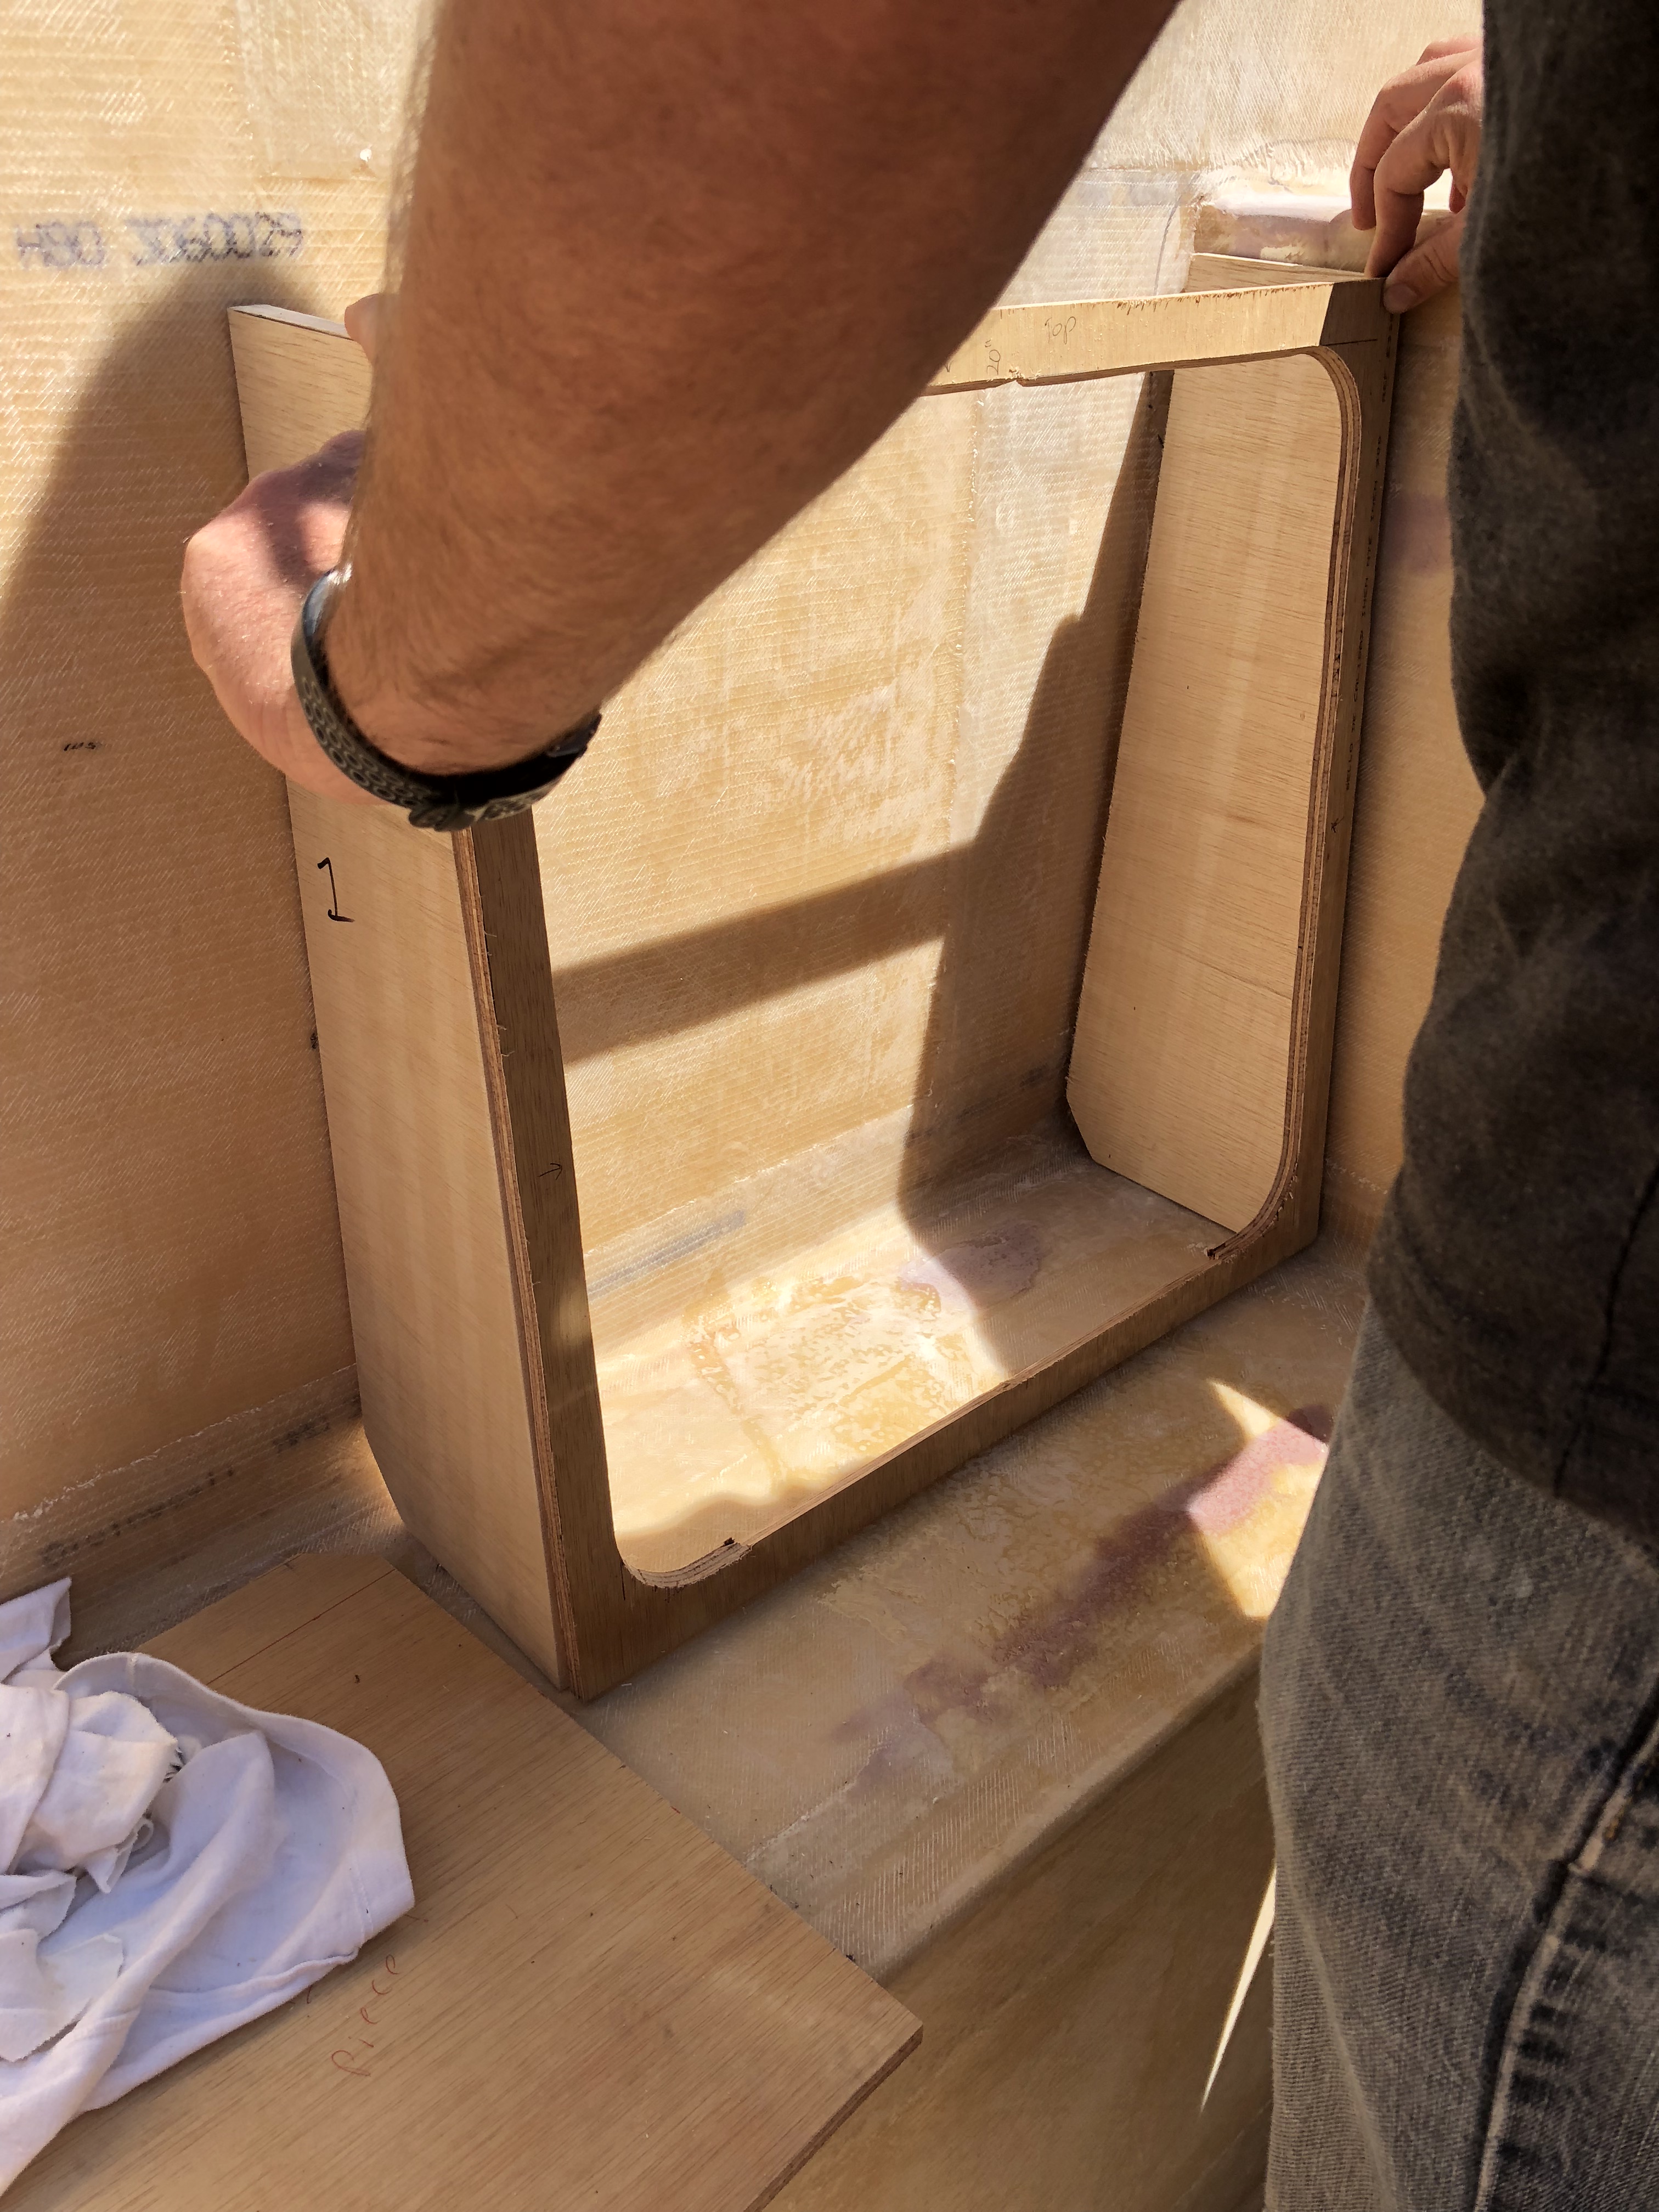
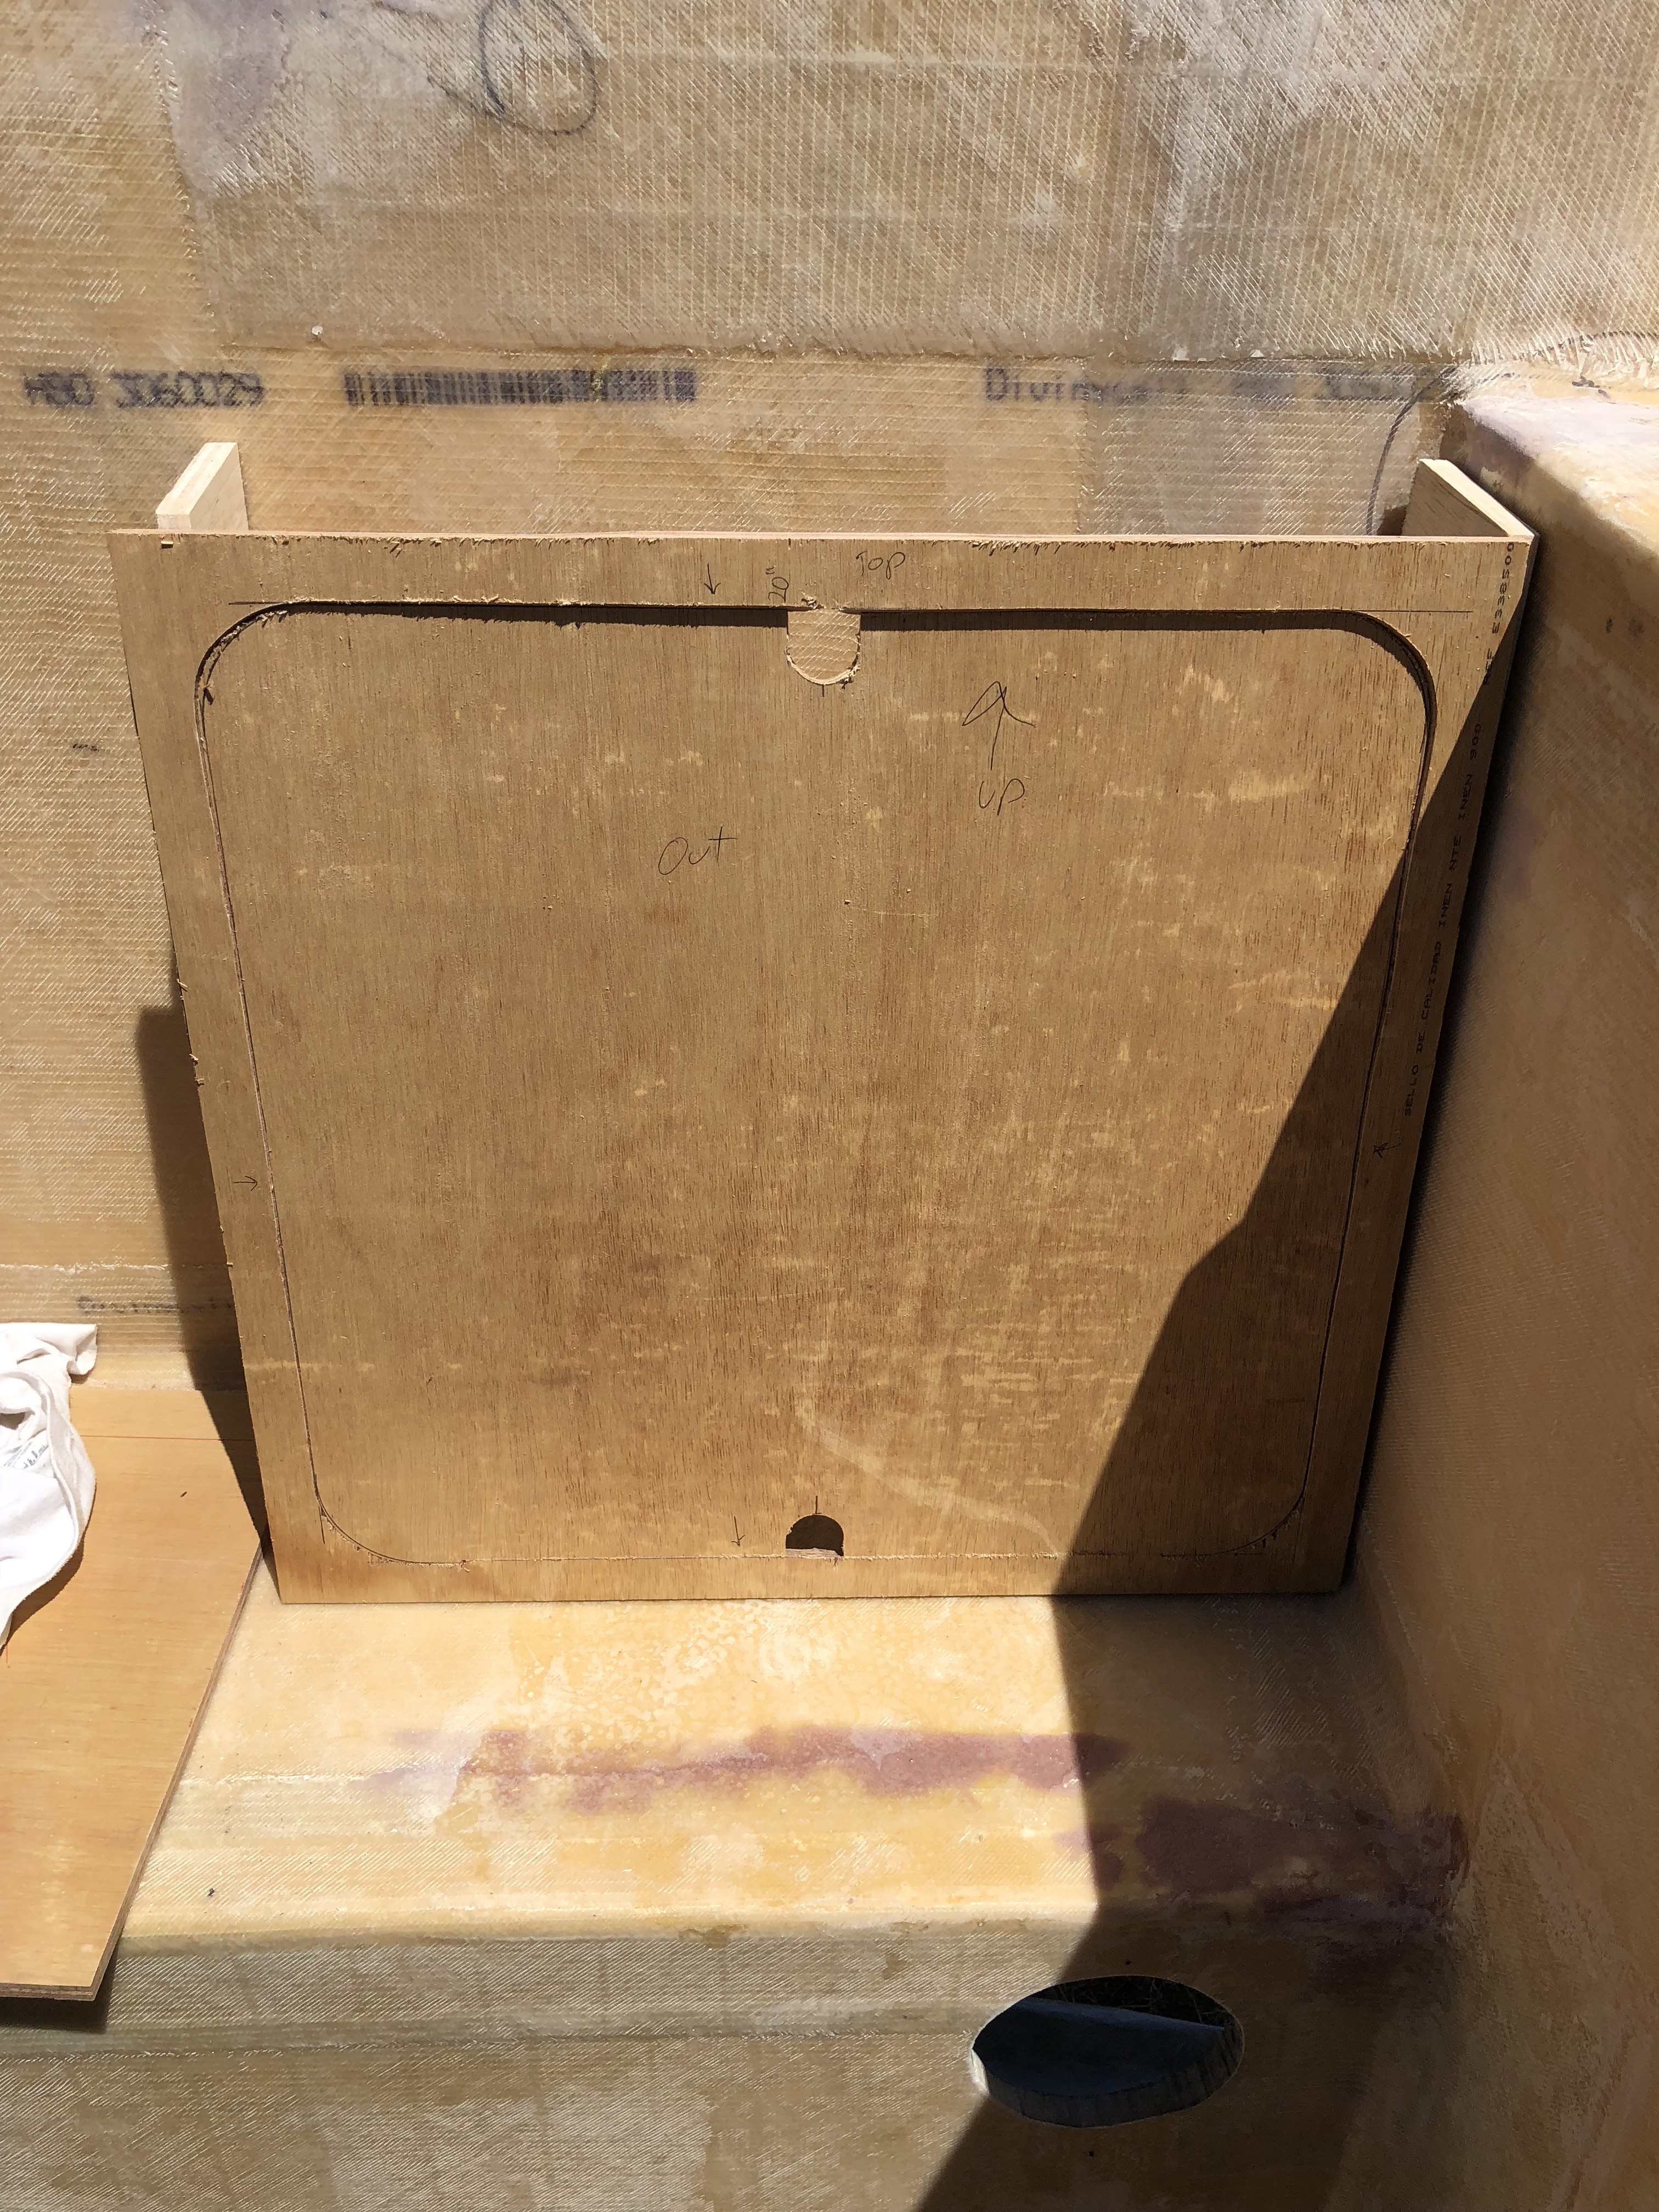
The design for the access panels was actually pretty clever. Jason cut the top and sides at an angle so the panel couldn't fall through into the cabinet but he cut the lower edge at the opposite angle so it kind of locks into place!
This is Shou Sugi Ban! I wholeheartedly approve of using a torch for any reason! Seriously, go google it, because people make some awesome looking wood projects with this technique!
I started with this finish, which was lightly done and not really interesting in any way.
Here's the final darker finish.
The wood I used isn't really meant for this sort of thing. It's laminated together and meant to be made into little tool carts and home crafts. I wanted something darker and less brown. There was a technique on Pinterest for how to make your own wood stain to make wood look weathered and gray, which was more what I was after. It involves putting steel wool into some vinegar and waiting for it to turn a color.
So that's that... More to come on how I end up ruining the table and countertop...
While I was playing with chemistry, Jason was doing productive things and working on the dinette seats!
The design for the access panels was actually pretty clever. Jason cut the top and sides at an angle so the panel couldn't fall through into the cabinet but he cut the lower edge at the opposite angle so it kind of locks into place!
Forum statistics
Members online
- albrow100
- SilicaRich
- shouldaboughtahat
- Earthvu
- 67 Fastback
- bozwell13
- TexasD-90
- mtaylo32
- Photomike
- Jess831
- RES
- chemspastic
- kevin4ma
- ExPo4Runner
- driveby
- Pra4sno
- Victorian
- Fadeagray
- DiscoDave3
- JoeSeff27
- Badluckbandwagon
- AKU500
- matttahoe53
- zerskier
- WillySwan
- Kodiak+World
- sam-aye-am
- waveslider
- rumin8
- John R
- Elkfitness
- CH261XL
- IdaSHO
- RoverGS
- rcintx
- Neikko
- kalibella
- Greenbarn
- wadingthroughlife
- adz0617
- Luinil Explorations
- Dino Mo
- svmaple
- BigSkySerf
- biedron
- lukewhunt
- Transit720
- oliklink
Total: 1,086 (members: 54, guests: 1,032)