Ripcord_
Member
Introduction:
I am fortunate enough to be able to camp an average of 40+ nights a year. I have tried many types of tent, but I was looking to make my camping setup faster and more livable. Wedge style camper toppers seem to be the perfect balance between improving comfort and preserving the truck’s capability. With their prices and lead times ($7k+ and 12+ months) being deal killers for me, I decided to make my own. How hard could it be?
I originally planned to make an aluminium fabricated camper, similar to Vagabond or AT, but the more I looked at the GFC I realized it would be a good starting point to DIY with minimal fabrication work and basic tools. GFC has a lot of custom parts made for their campers. By finding more standard replacements for them, you can keep the spirit of their camper design and keep costs down.
I will be making a few other changes from their design as well:
*I don’t like having to move bed sections around, so I will make the whole camper longer to enable a fixed opening and a fixed sleeping area. There will still be a removable panel to cover this opening.
*More room for blankets/pillows/tent material when closed, making it easier to close.
*Non-translucent roof. I want to be able to make it dark in there.
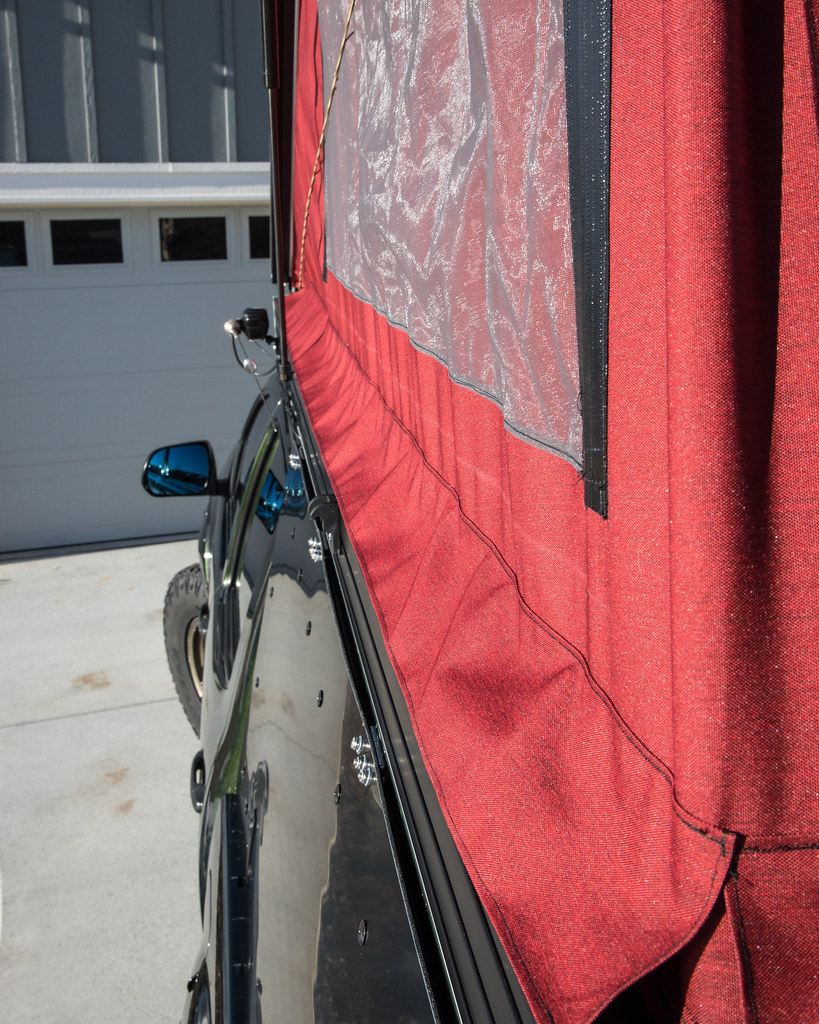
*Larger tent windows.
Parts / Retail Cost:
Realistically you could build this for $3,000.
This is assuming you do EVERYTHING yourself. You will need access to a welder & sewing machine at a minimum. Having a router, mill and laser cutter helps a lot as i’ll show, but isn’t necessary.
With that said, I am freely sharing my spreadsheet which has my recommended part numbers, quantities and vendors to build this camper at that price.
Link: Spreadsheet on my Google Drive
(This is the 2nd camper I've made, version 1 was nearly identical but with worse material choices and not as refined. It can be seen on the V1 tab)
Time:
This camper was A LOT of work, do not underestimate that fact. Took me at least 8 full days of work. It will be many more if you don’t have the special tools I mentioned. So depending on how often you have free time, it could take months.
Tools: (* optional, but helpful)
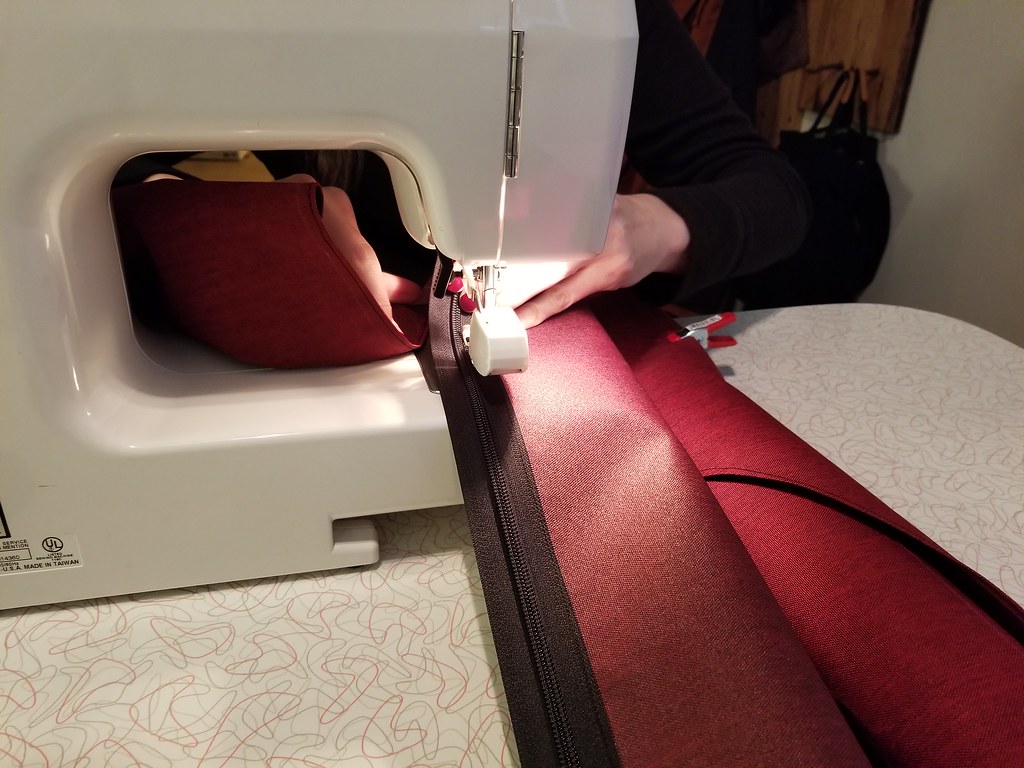
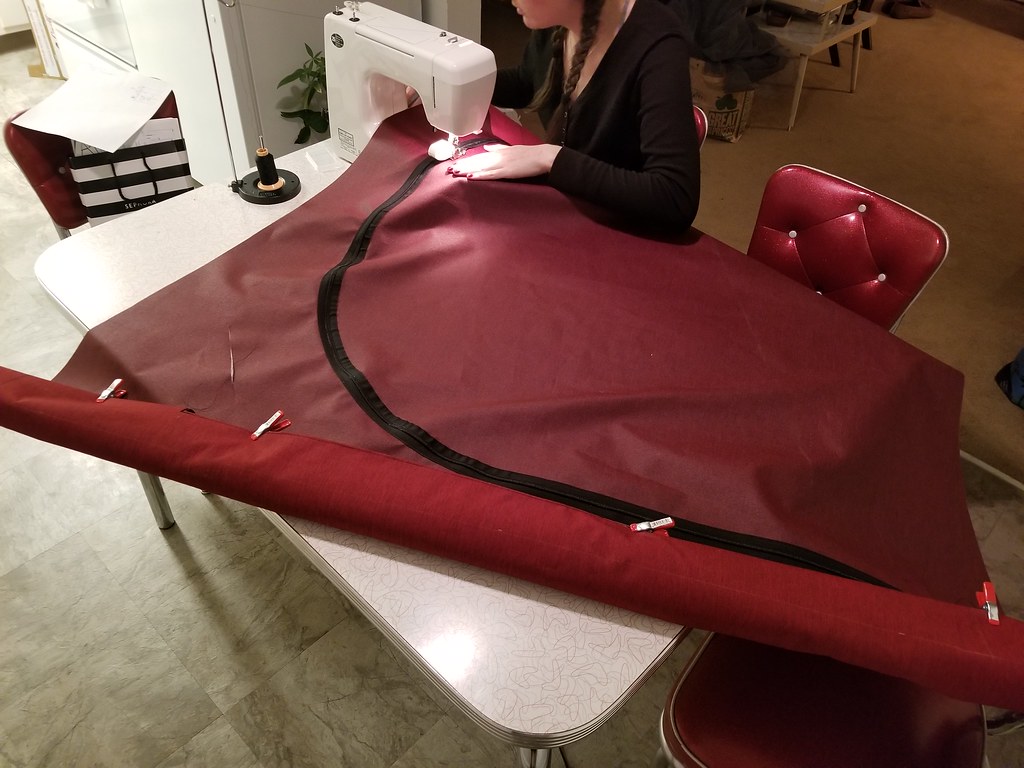
-Sewing Machine
-Bandsaw
-Welder
-Grinder
-Rivet gun
-Drill bits: 3/16”, 3/8”
-Countersink drill bit
-5/16”-18 thread tap (spiral flute)
-3/16” allen wrench
-1/2” socket
-*CNC Router*
-*CNC Mill*
-*CNC Laser cutter*
=============================================================
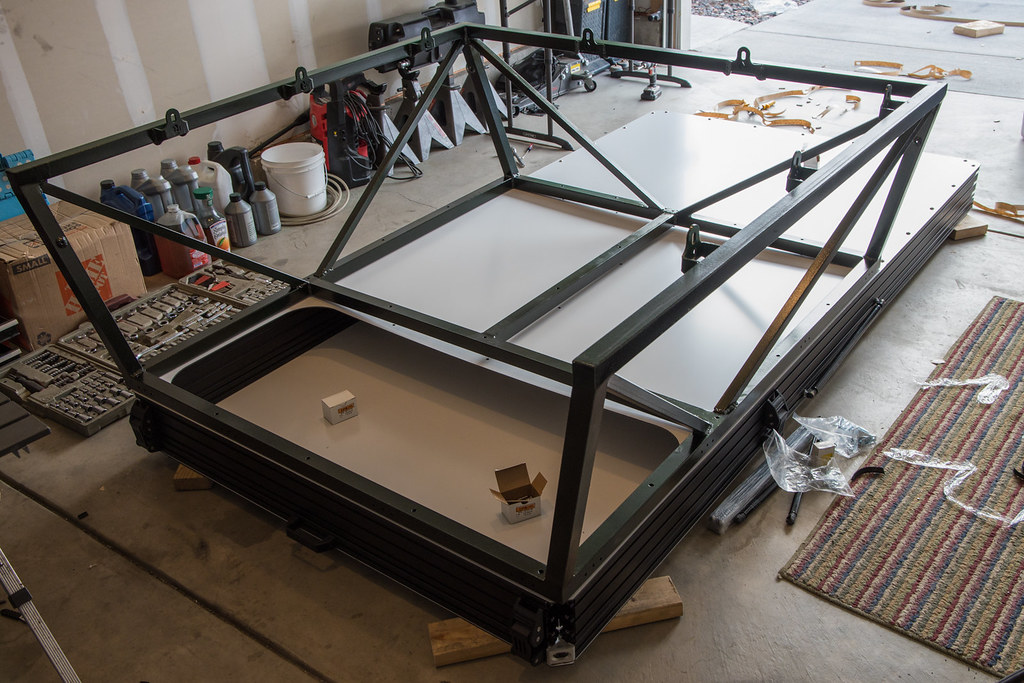
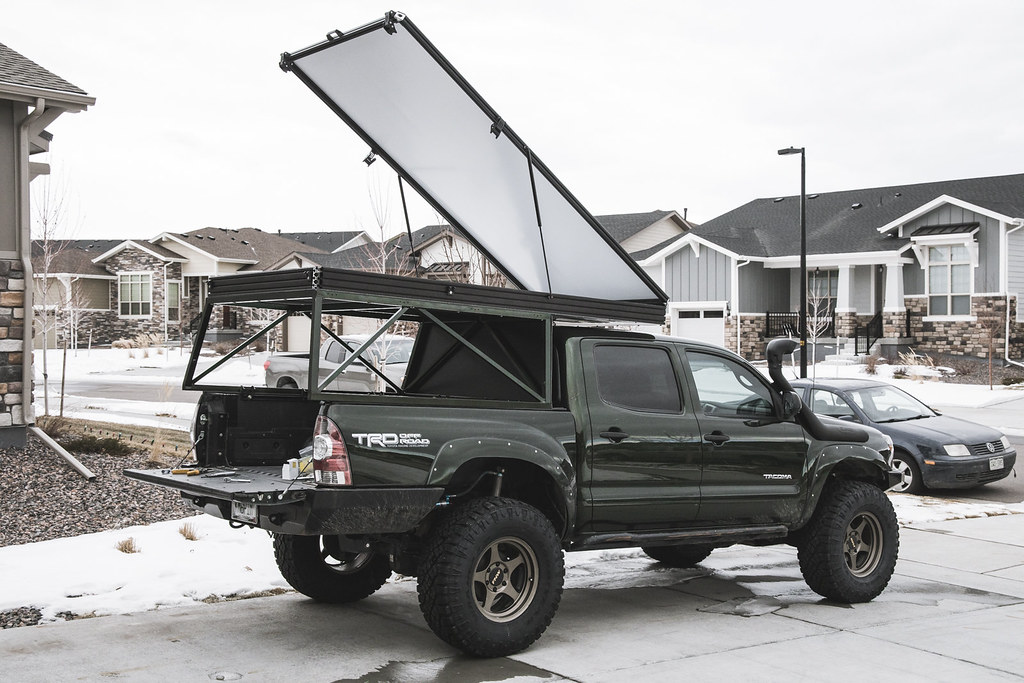
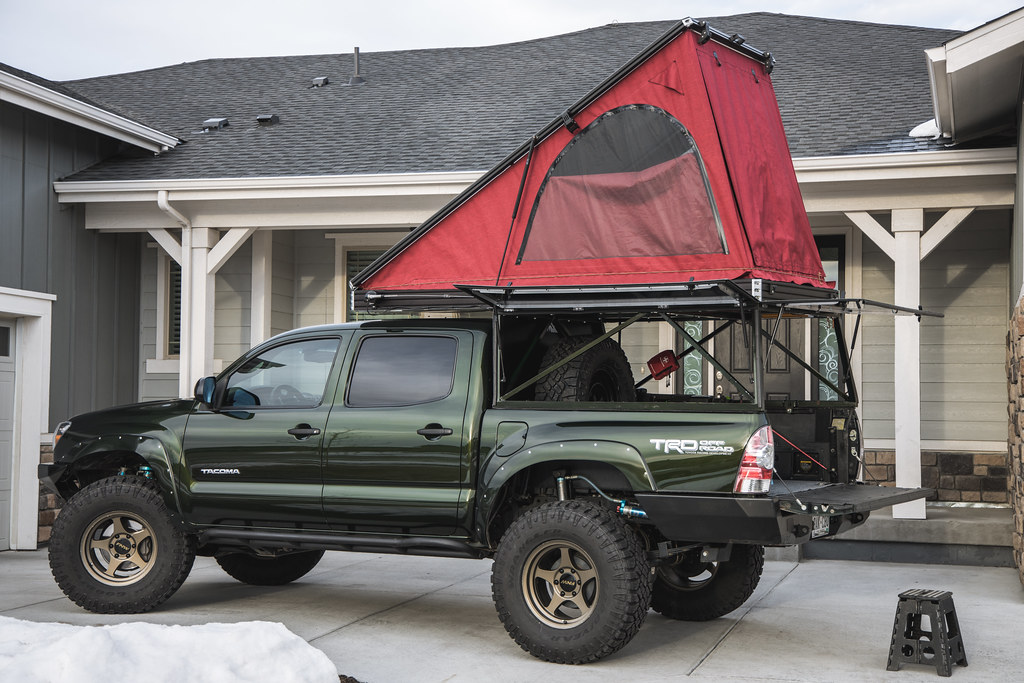
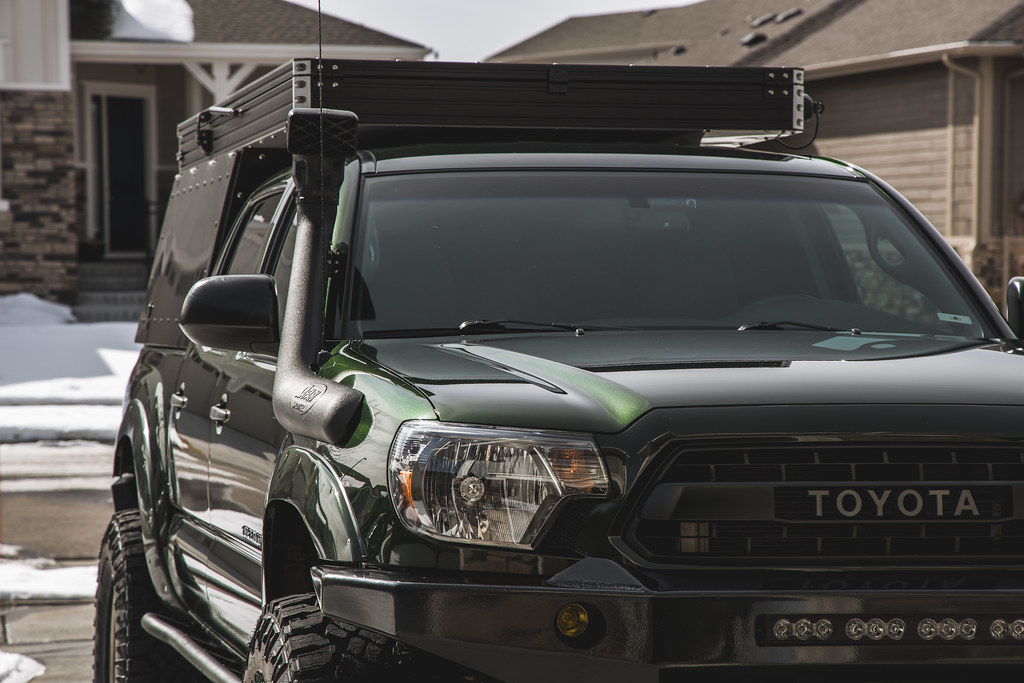
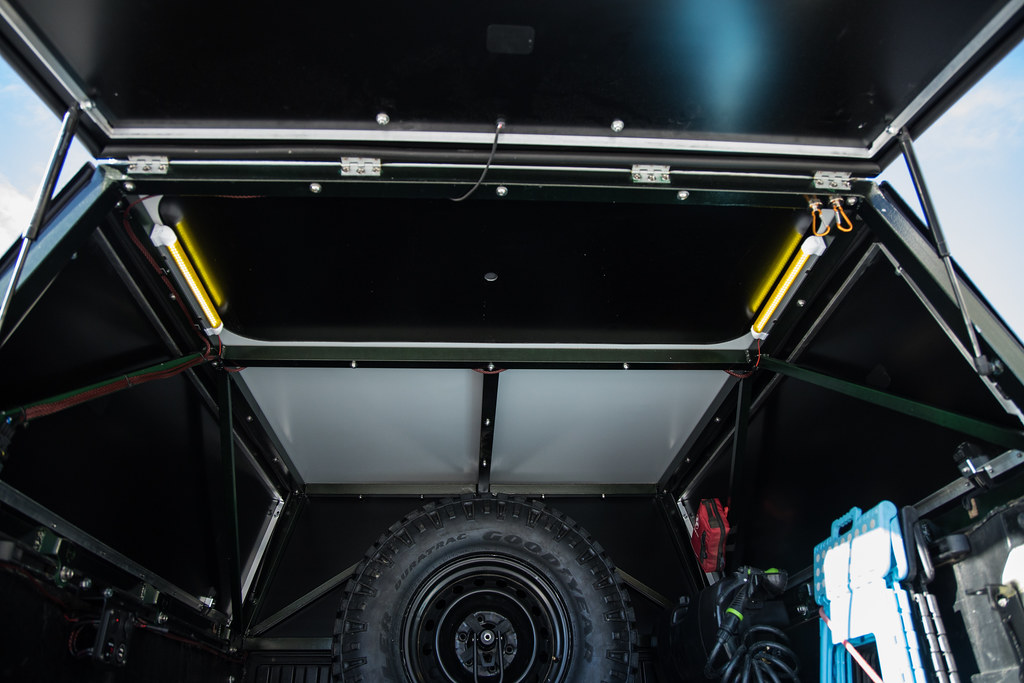
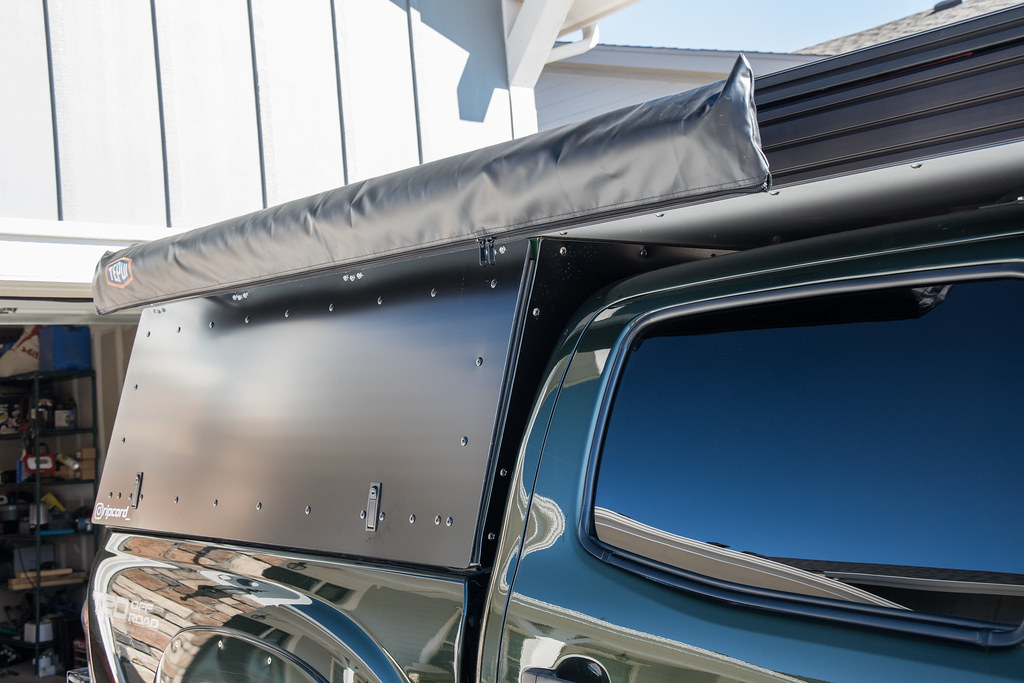
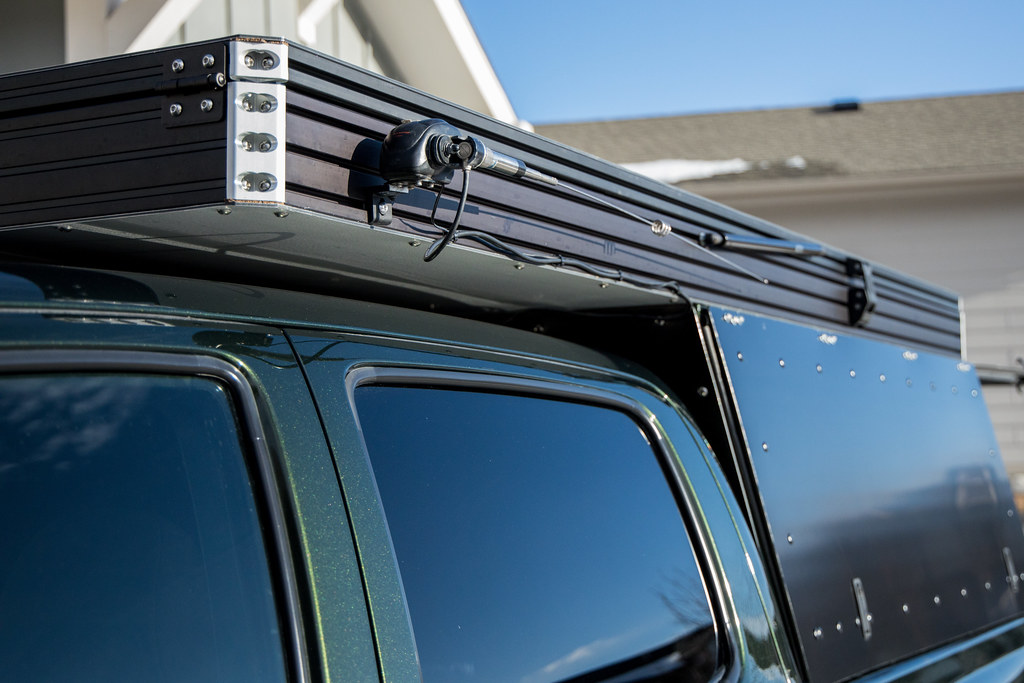
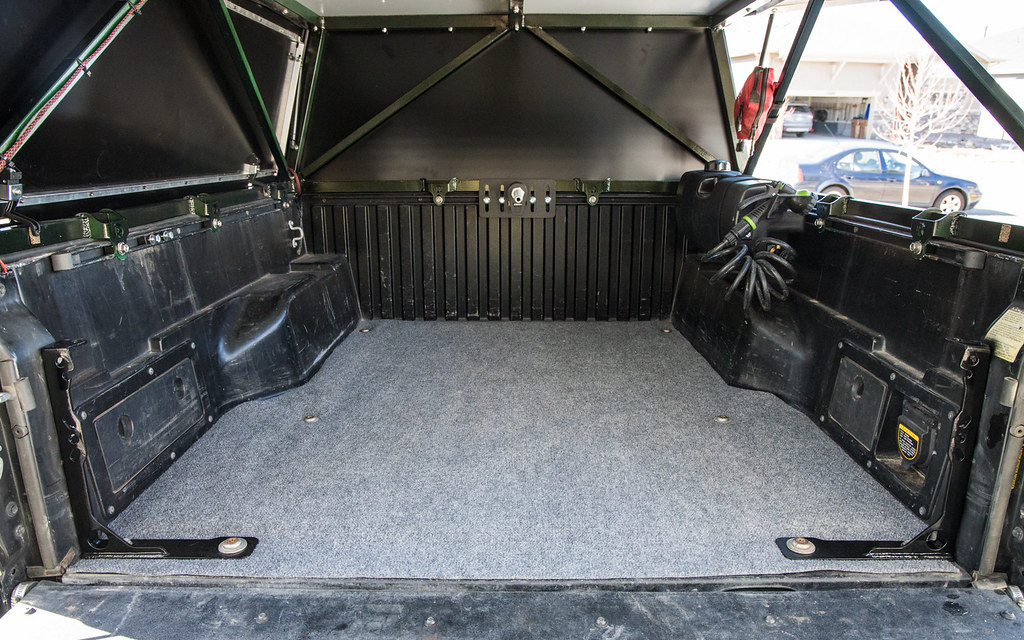
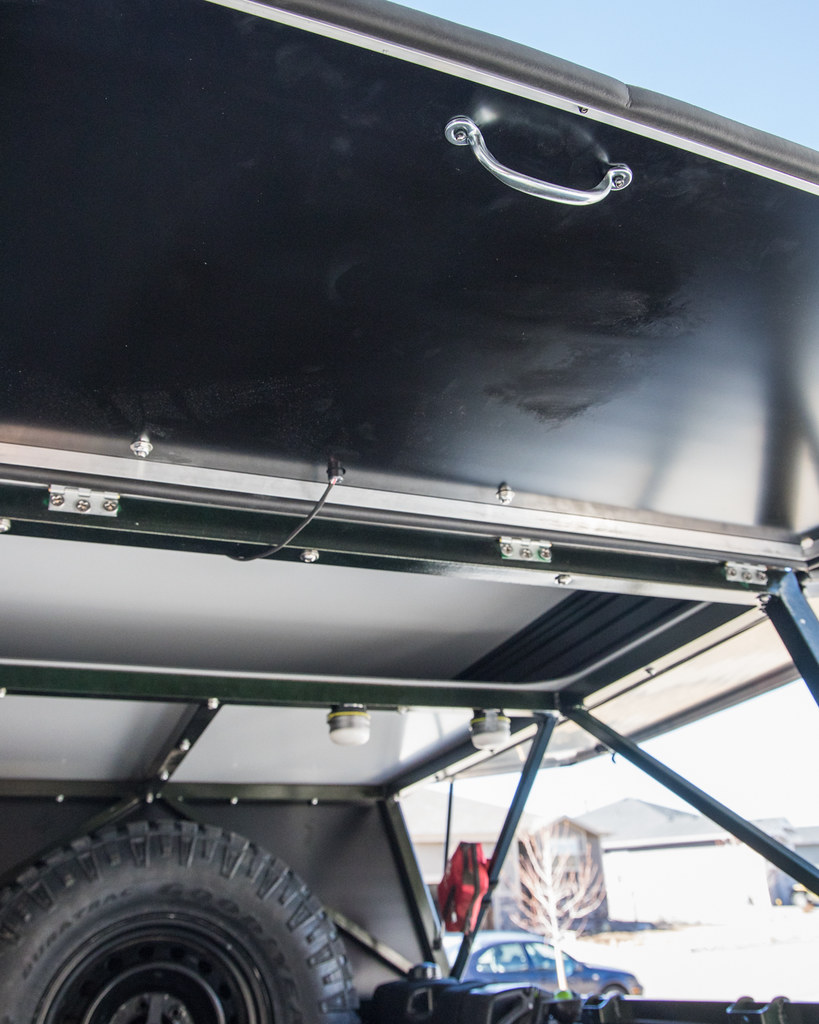
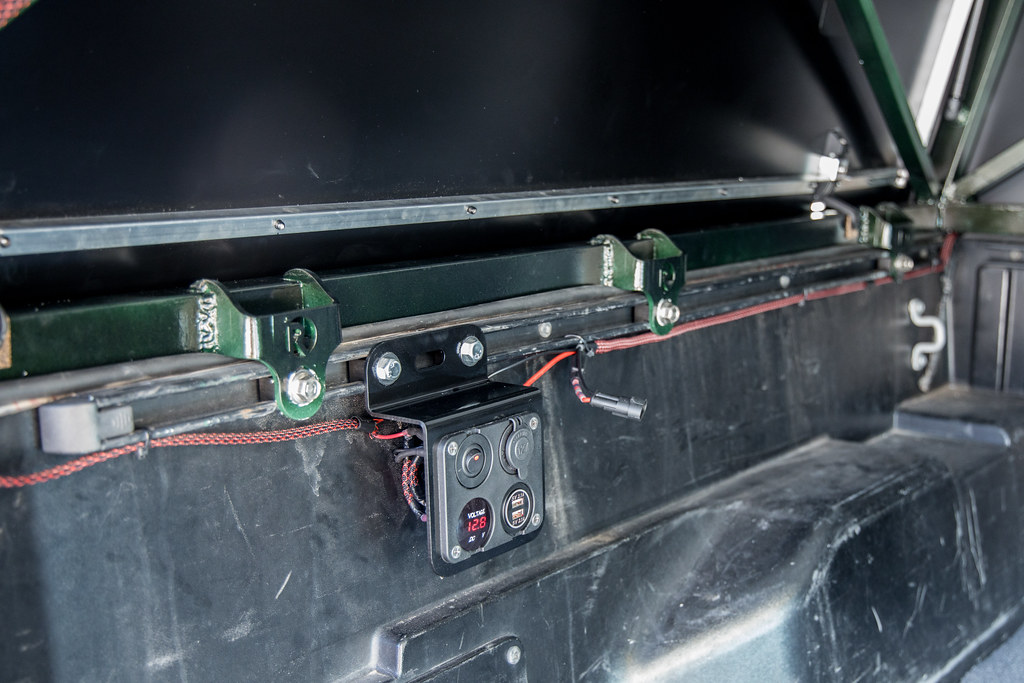
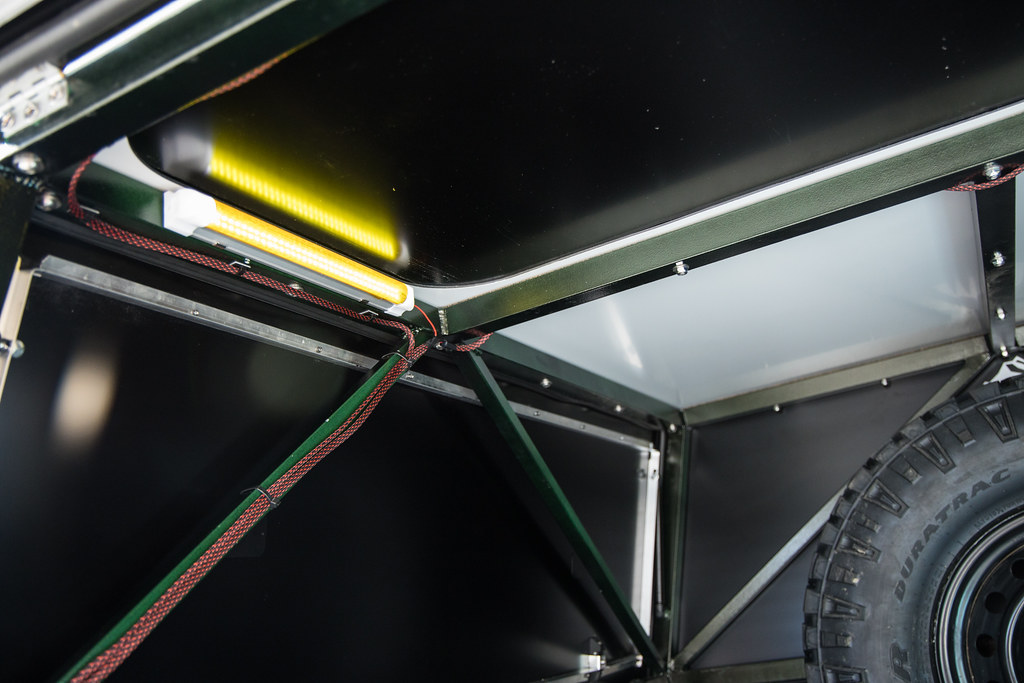
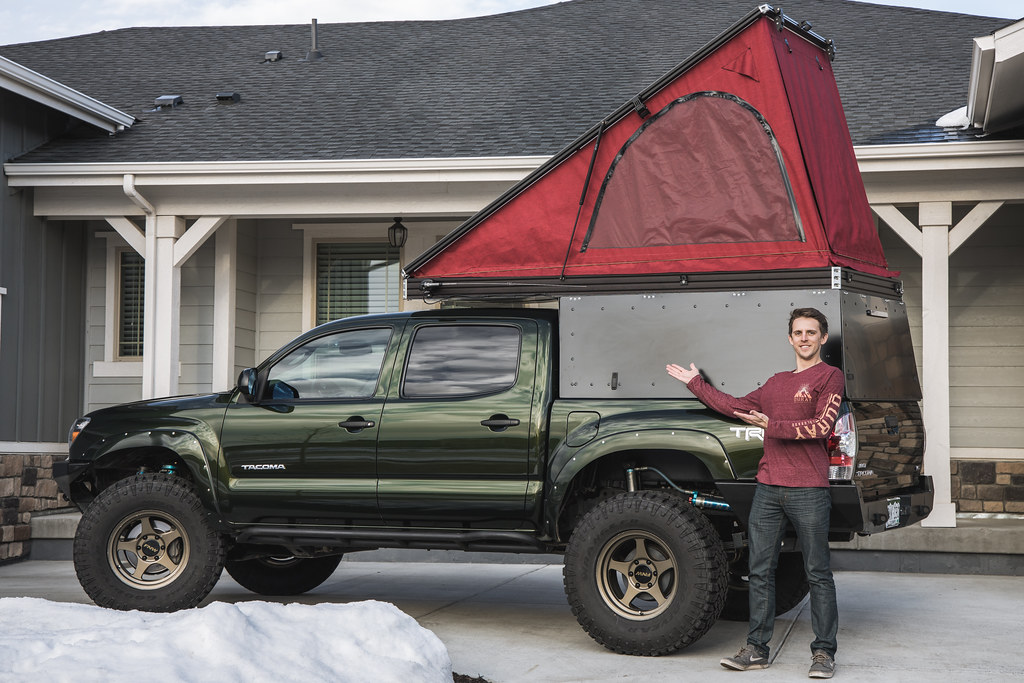
Here is the completed product.
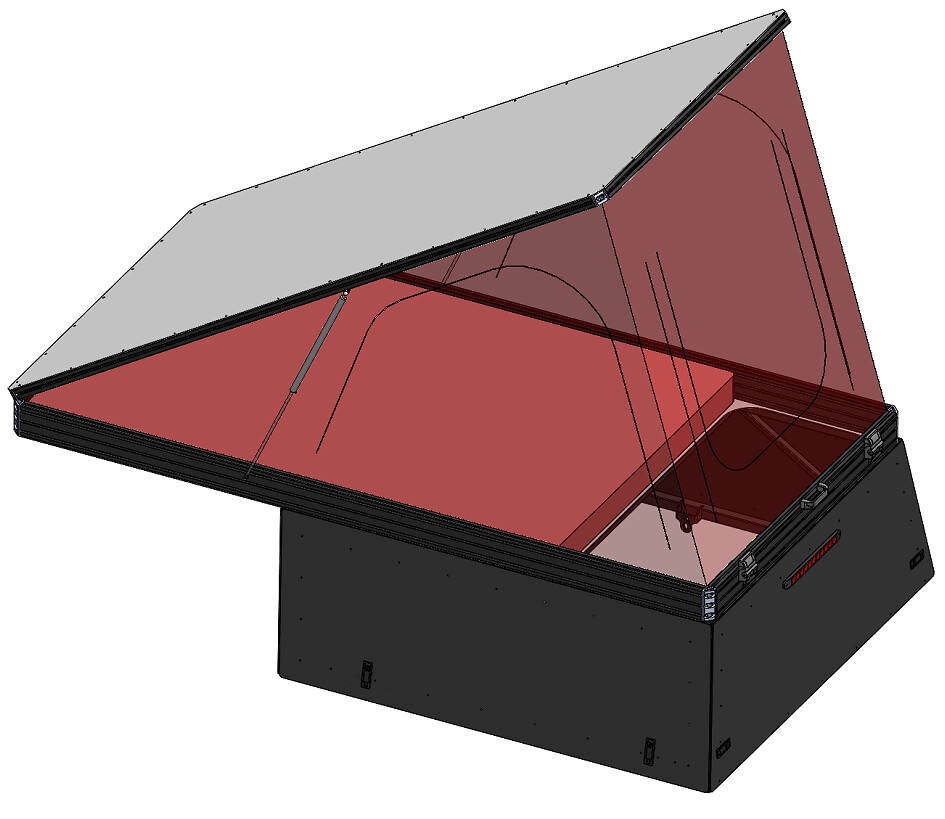
And my initial 3D model.
Digital files for the Floor / Roof / Lower panels / Spaceframe / Brackets & Canvas are available on my Shopify store (<-- Link).
=============================================================
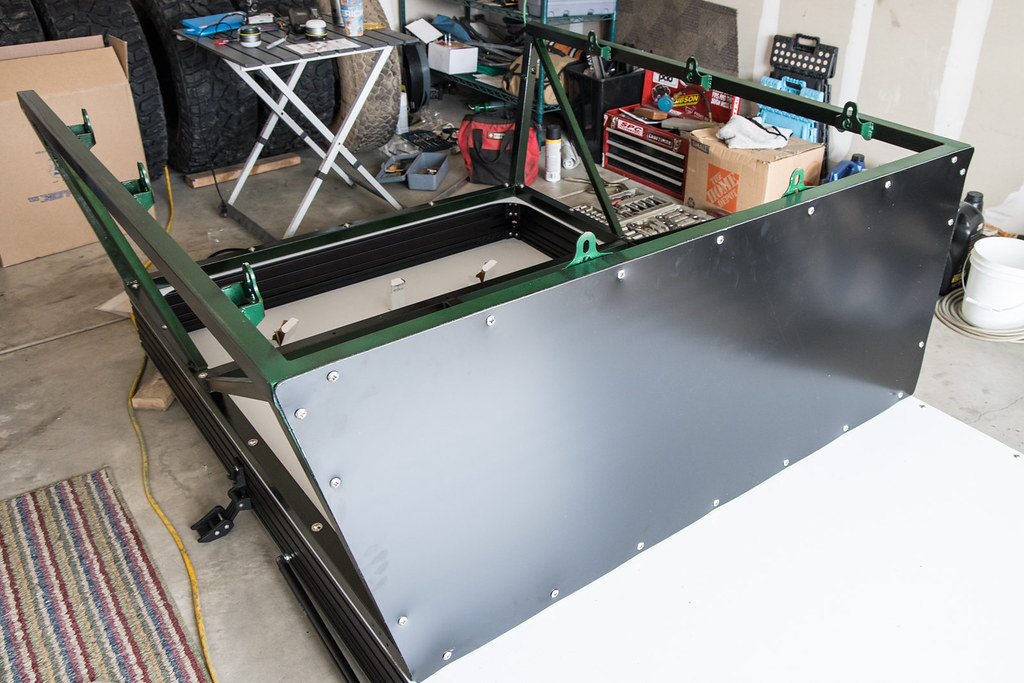
The Wedge:
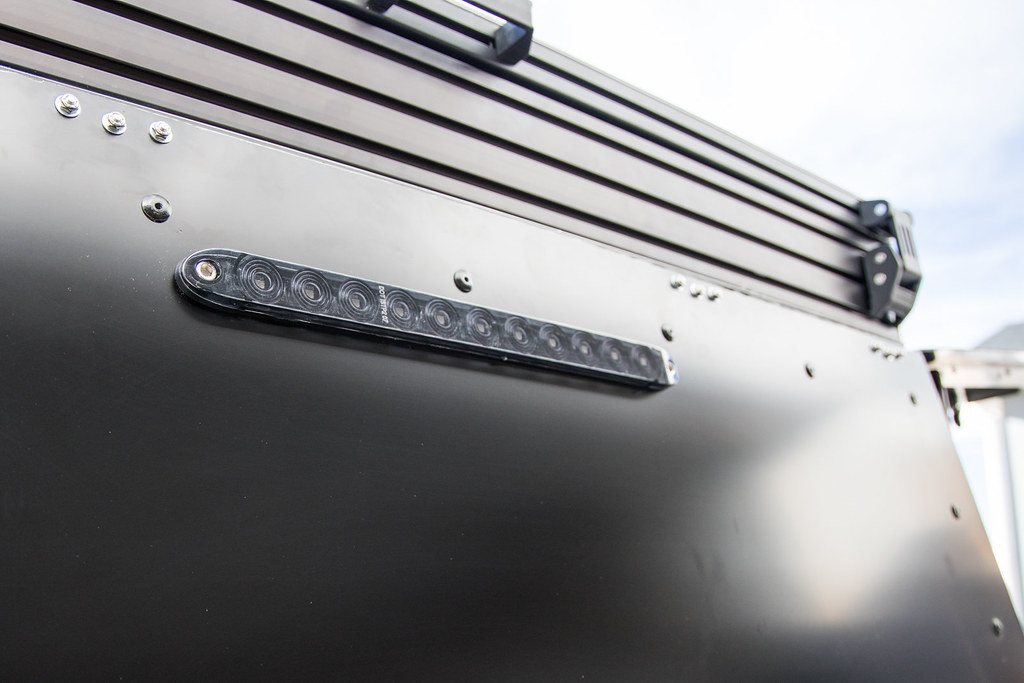
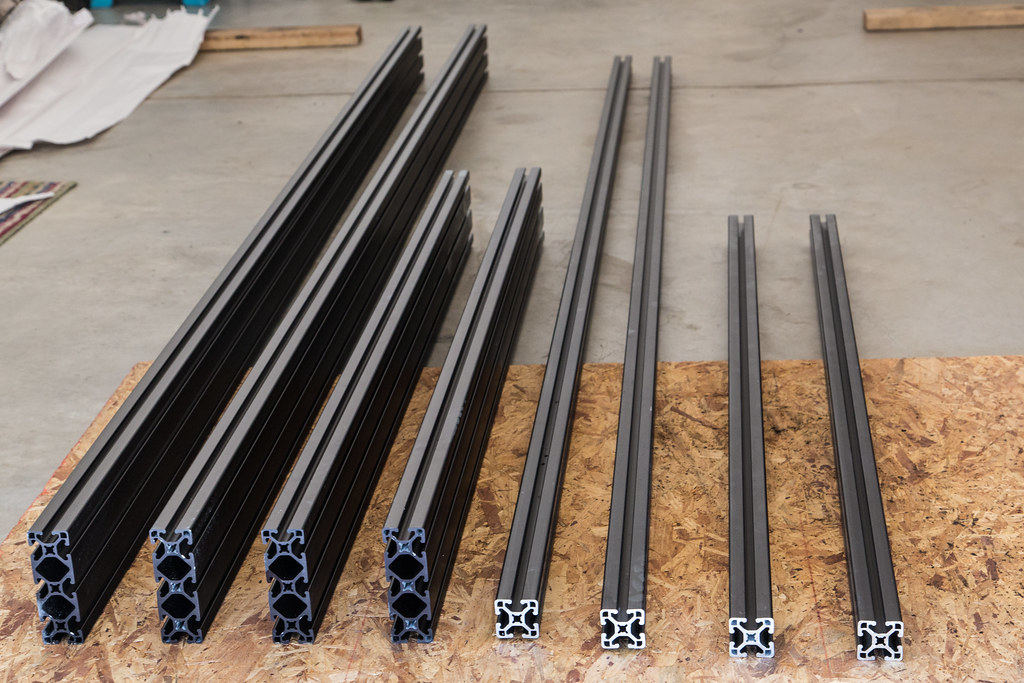
The wedge will be made of 1.5" wide (15 series) 8020 aluminium extrusions. You all know them as the material Sherpa Racks and Prinsu use for their crossbars, but they are more commonly used to make frames for enclosures in industrial settings and are also used to make some durable storage solutions. These extrusions are really easy to work with and make this stage of the build go by quickly!
I am using 4.5” tall extrusions on the bottom and 1.5” tall extrusions on the top, for a total wedge height of 6”.
To save some money, you could use 3” tall extrusions top and bottom (I did this on the first camper I built), but be advised that the lower half of the wedge is the main structural part especially with all the overhang this camper will have. Using 3” extrusions for the lower half can lead to it having more deflection under high loads (hitting potholes & rocks). The top half (roof) doesn’t need much support.
The first step is to cut the Extrusions to length (50” & 100”, 2 of each) and tap the ends with a 5/16”-18 spiral-fluted tap. The extruded holes in the ends are already the perfect size for this tap.
There is a whole suite of accessories for 8020 extrusions such as hinges, latches, seals and device mounts to structural parts like corner pieces and flanges. The entire setup is very modular and easy.
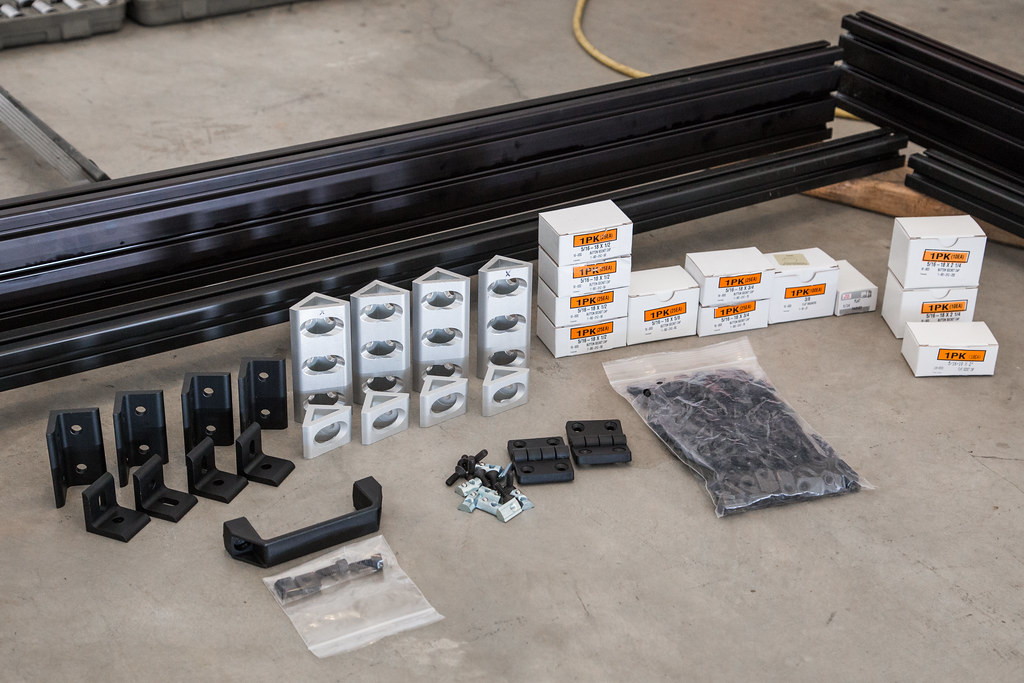
Everything attaches using slot nuts like these. All of the fasteners I am using are stainless steel also.

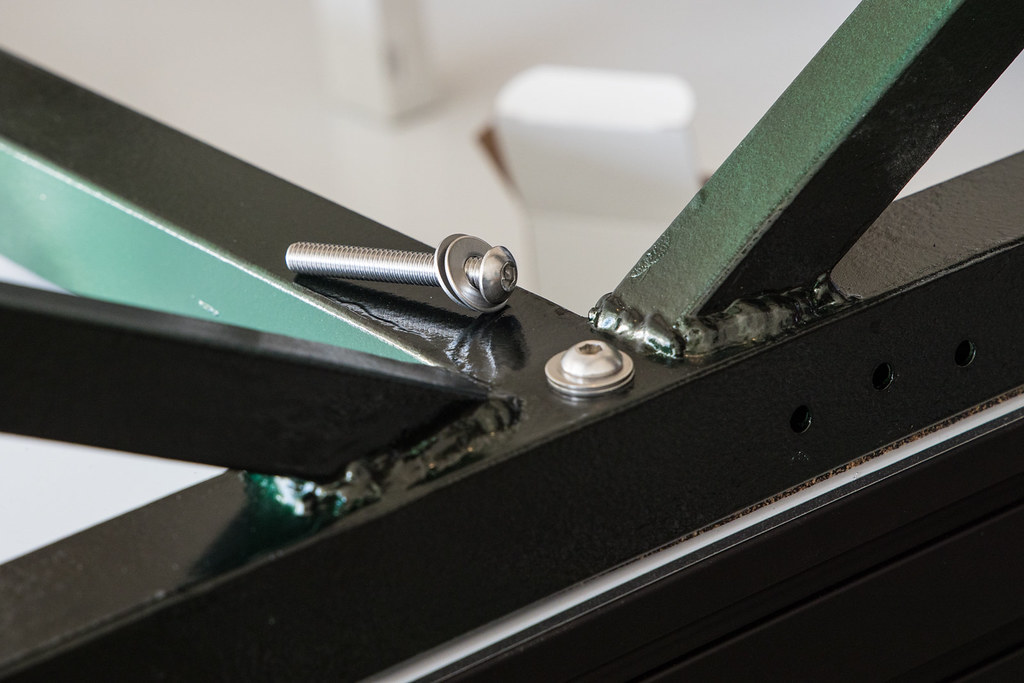
The interior corner brackets attach like so, both the short and tall ones.
I have since changed the spreadsheet to show a 4 hole interior corner for this short extrusion due to the gas struts wanting to twist things up with the 2 hole bracket shown here.
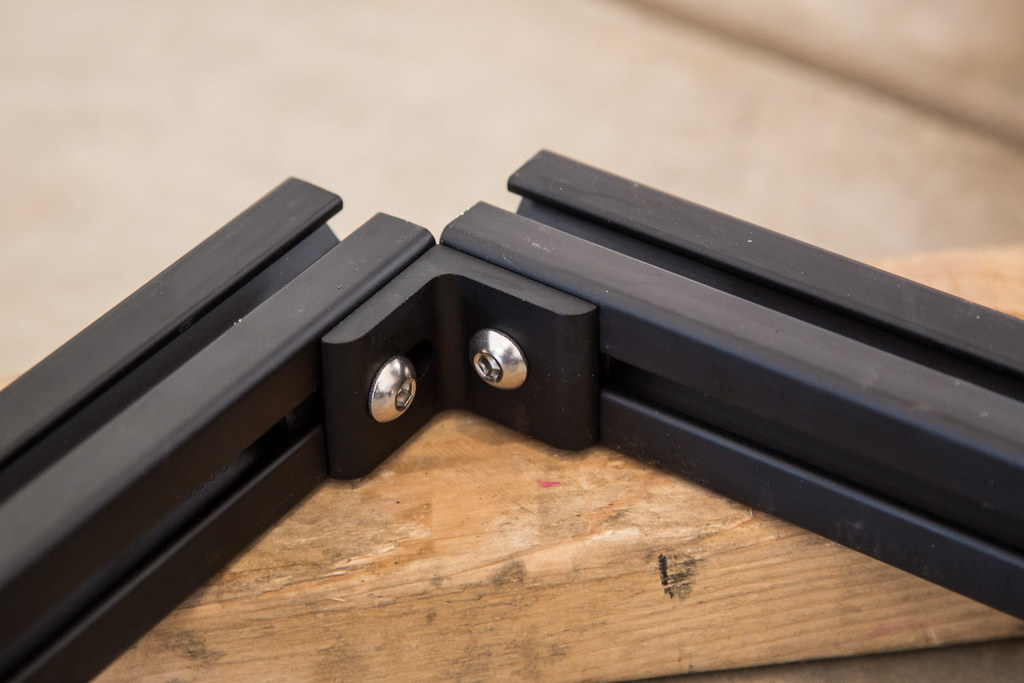
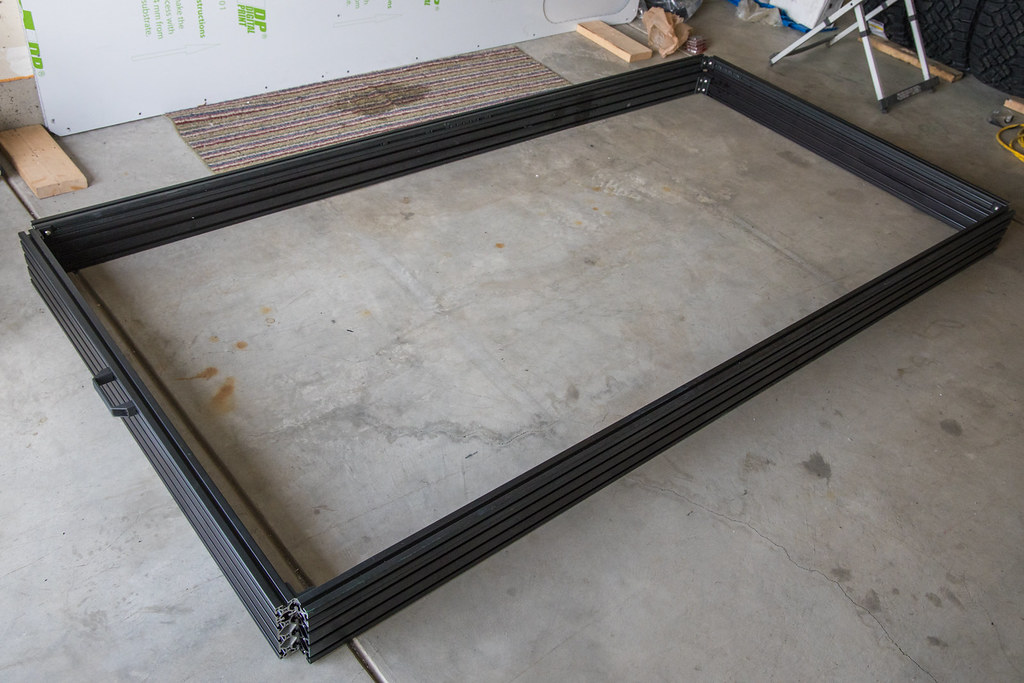
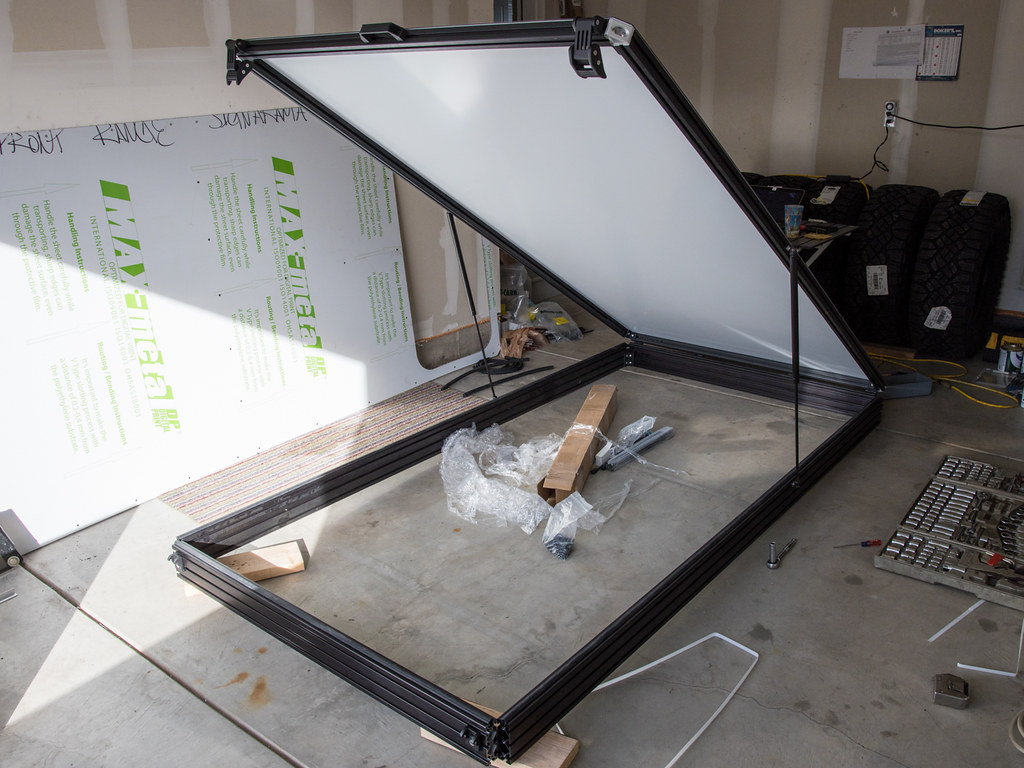
Frame halves fastened! See? I told you it was easy.
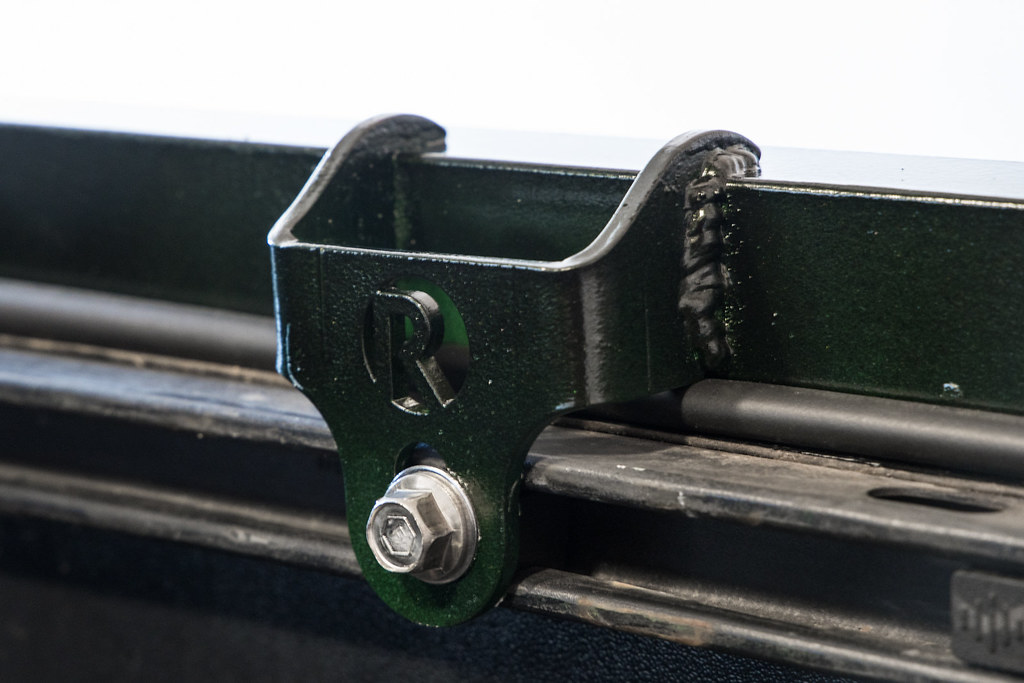
Place the wedge hinges close to the outside.

Fitting the gas struts using the slot nuts and 10mm ball studs. The struts for the wedge are 100 lbs 36”. One strut per side. It can take a bit of fine tuning to get it where you want.
You’ll need to stack a few washers, the studs are a tad long.

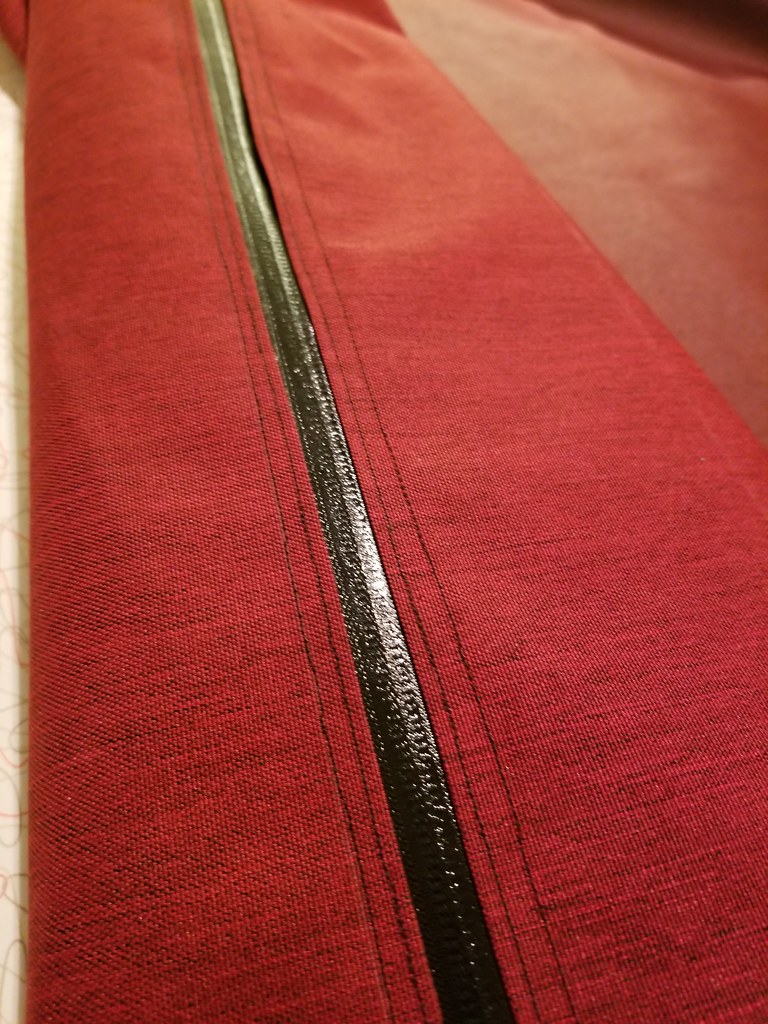
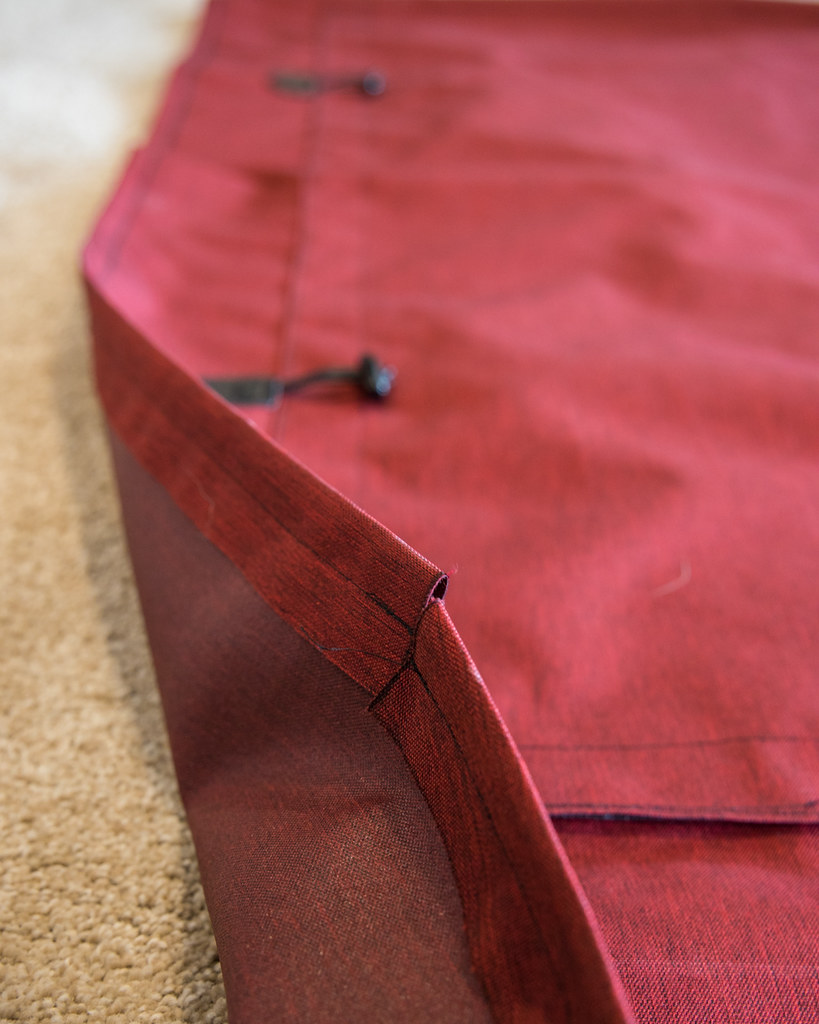
I used some of these bulbed seal strips to seal the wedge opening. This seal is designed to sit in the extrusion slots as shown.

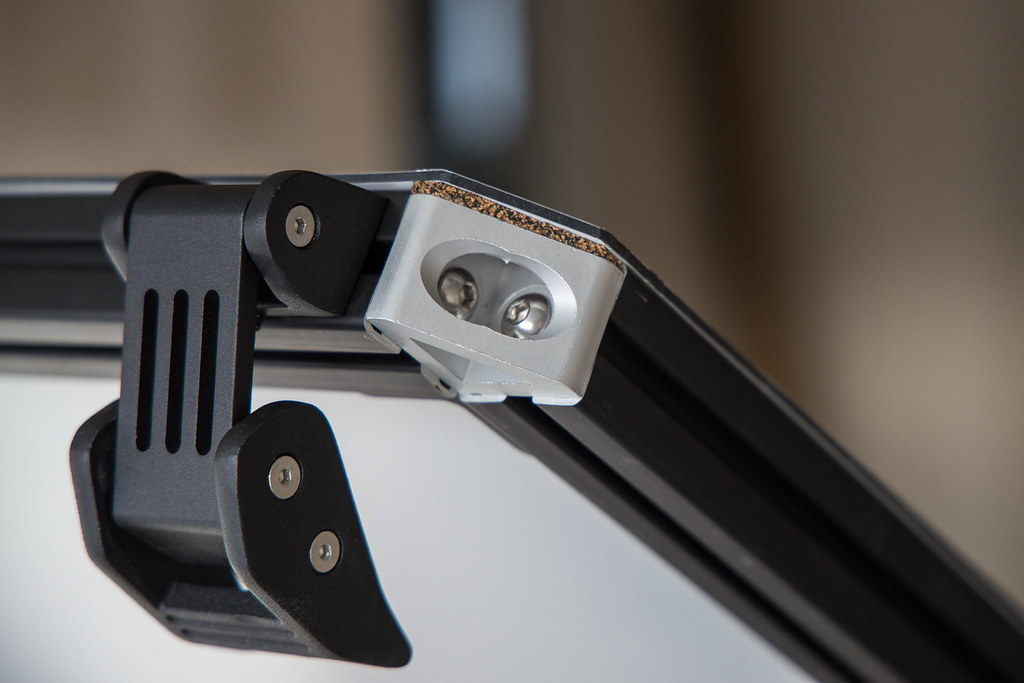
Aluminium Jeep JK hood latches work really well!
These latches do require a little tweaking. The top pivot had two tabs on the back that had to be ground down while the hook part needed one hole drilled out and countersunk (only using 1 bolt on that part).

I also added another latch on each side of the wedge, the gas struts want to push up on the small upper extrusion when closed and these extra latches help keep all of the seals in contact.

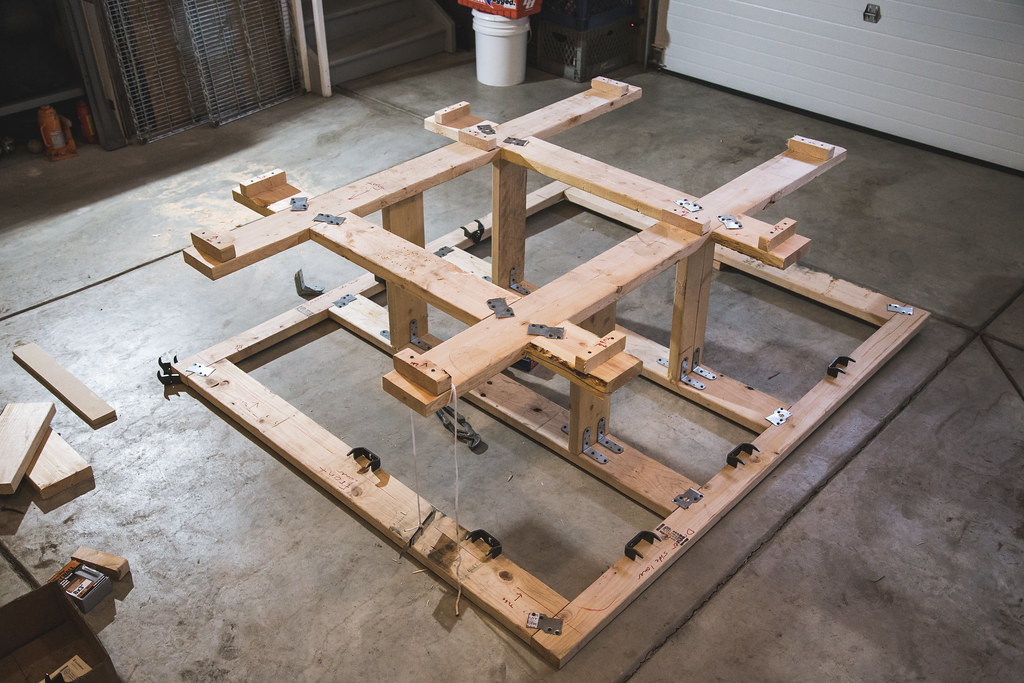
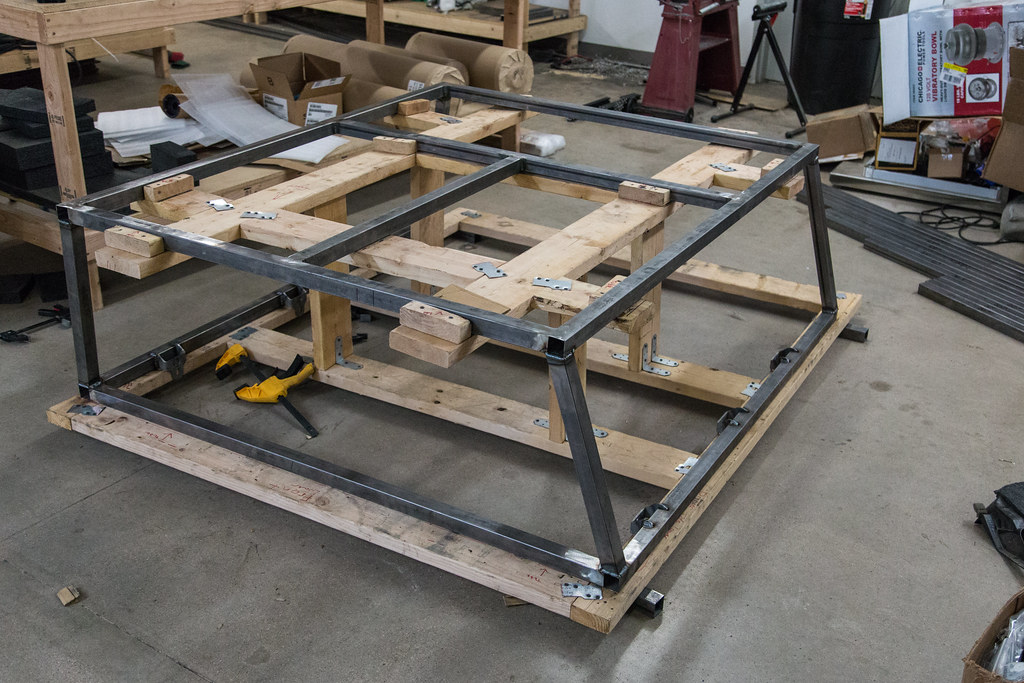
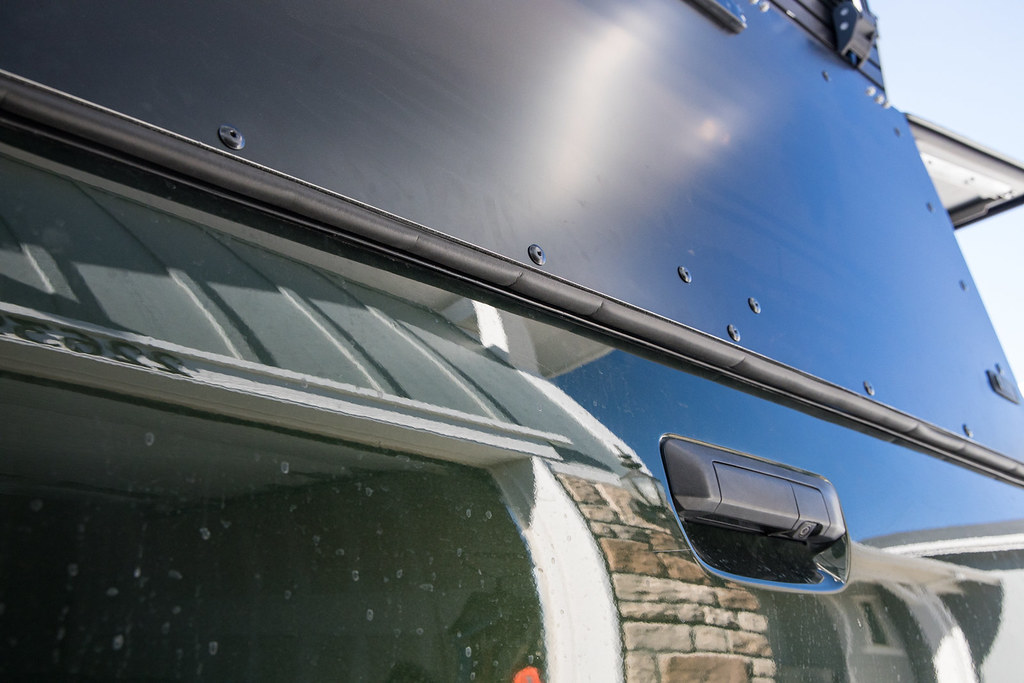
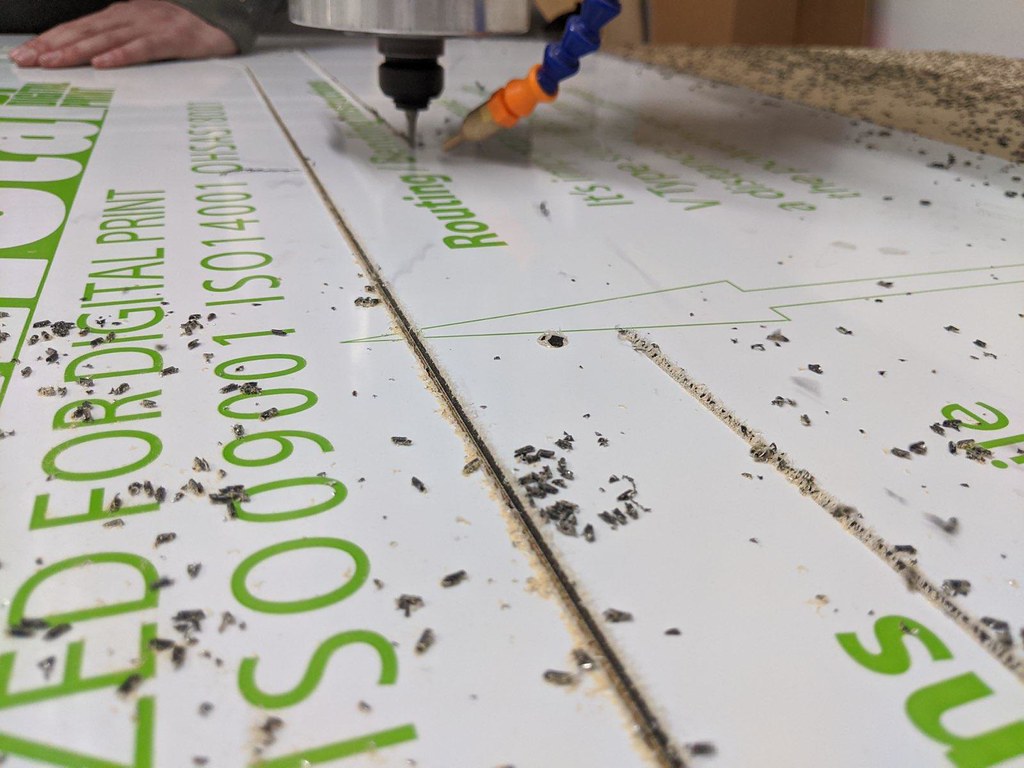
The Roof and floor are made from 3mm Aluminium composite panels called MaxMetal (AluPanel is another brand of this panel type). It is a plastic core sandwiched and bonded by two thin sheets of aluminium. It is much lighter and stiffer than equivalent sheets of plain aluminium. I got the sheets from a local sign shop. The max sheet size is 5’x10’ which is needed to do the entire roof & floor in one sheet each. My friends at Sherpa Equipment Company helped me router the panel out the sheet. I had all of the bolt holes and corner contours cut out as well, which is WAY better than having to drill those by hand.
Digital files for the Floor / Roof / Lower panels / Spaceframe / Brackets & Canvas are available on my Shopify store (<-- Link).
If you do not have a router, it is doable by hand with a jigsaw and drill but takes a lot of time and measuring.
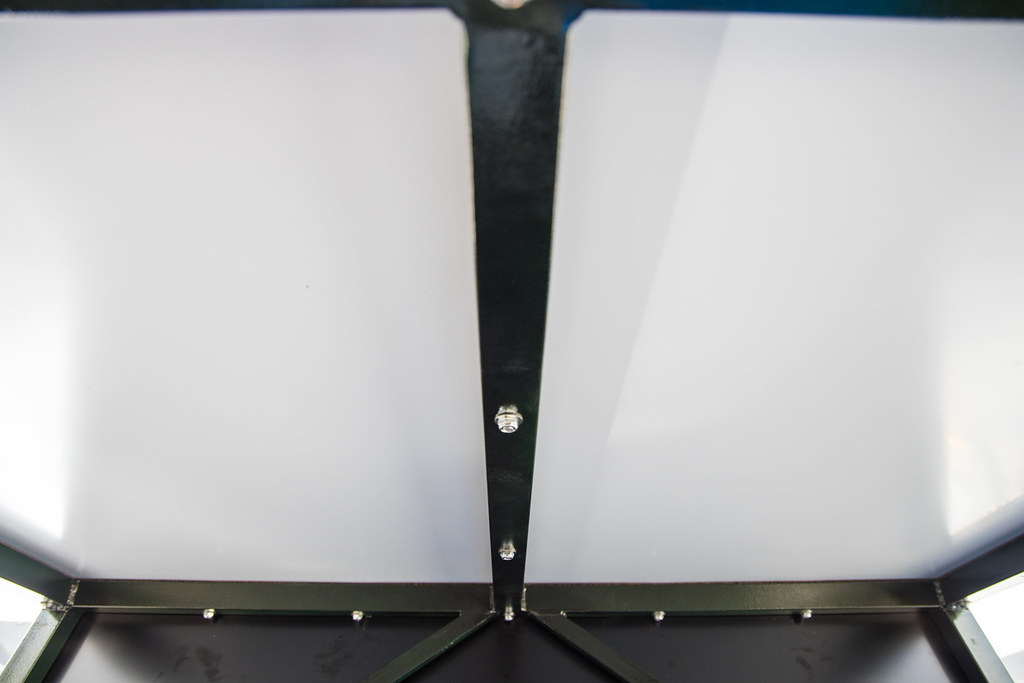
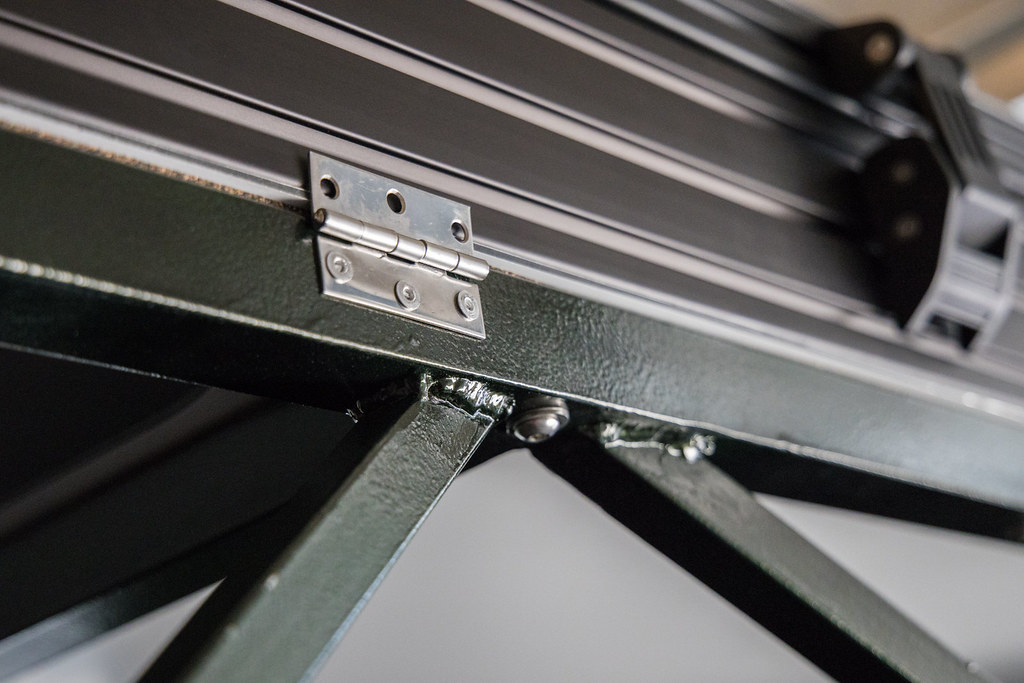
I fastened the roof to the 8020 extrusions along every edge using the slot nuts and short machine screws. The floor will be done similarly but the bolts will be longer where they go through the spaceframe.
Along this whole interface I used an extrusion weather seal similar to the bulbed seal above, but this one is meant as a fixed seal against a flat surface like these panels. Cut it into short pieces to fill the gaps between slot nuts.
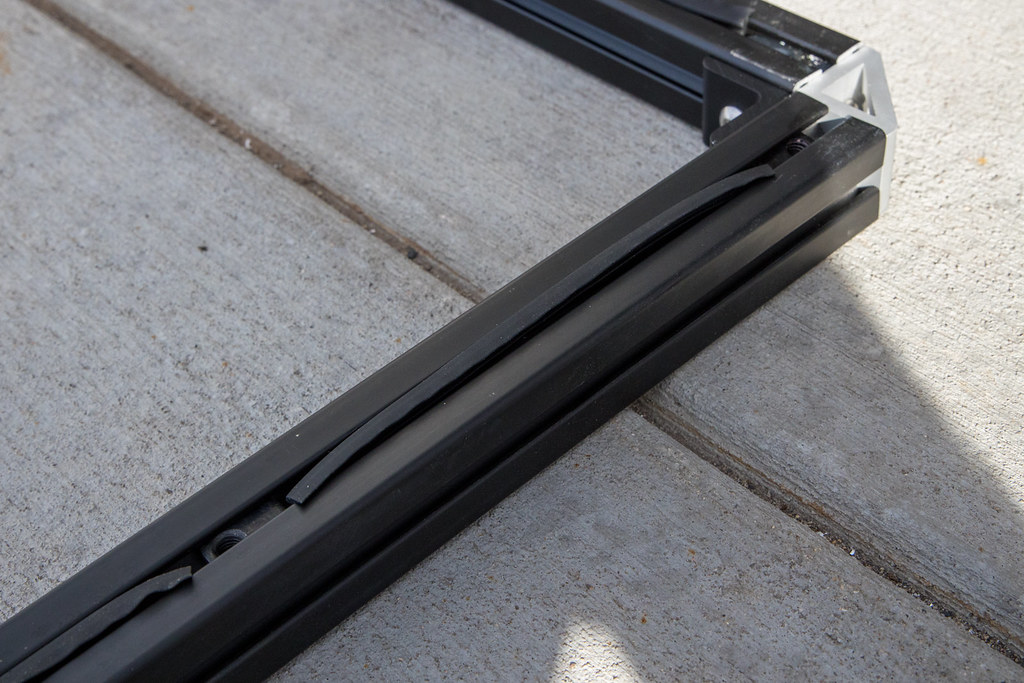
The corner pieces are not quite the same height as the extrusion, not sure why! So you will want to fill the small gap with some of the cork/rubber gasket on each corner.
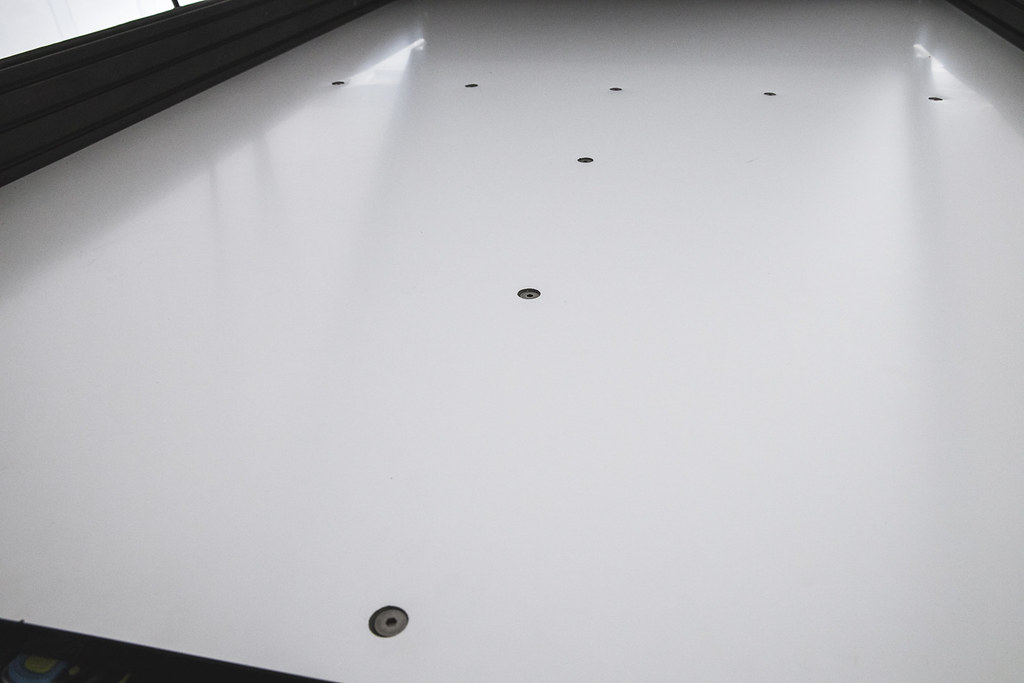
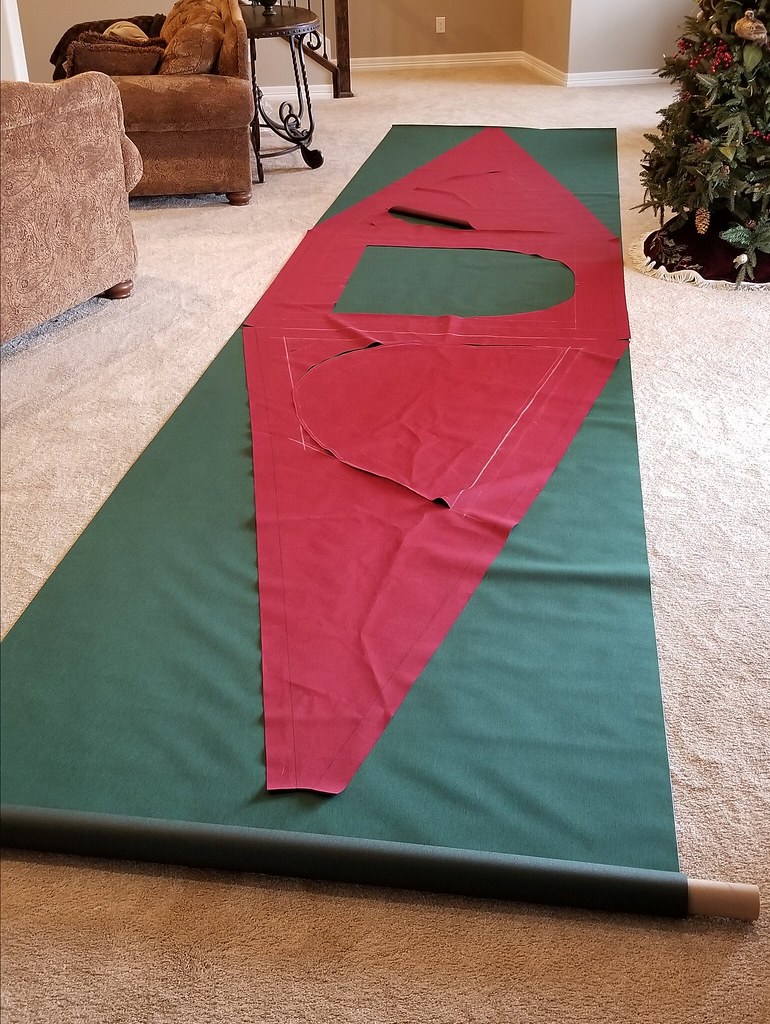
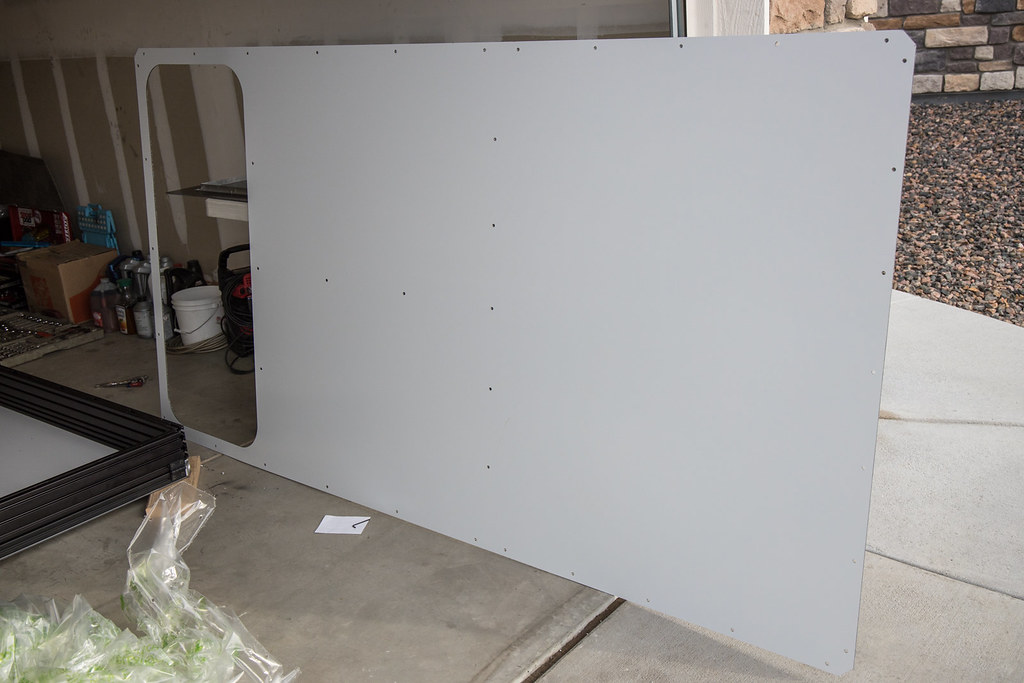
Here is the floor. The sleeping area will be 50in x 78in (close to a Full mattress that is 54in x 75in).
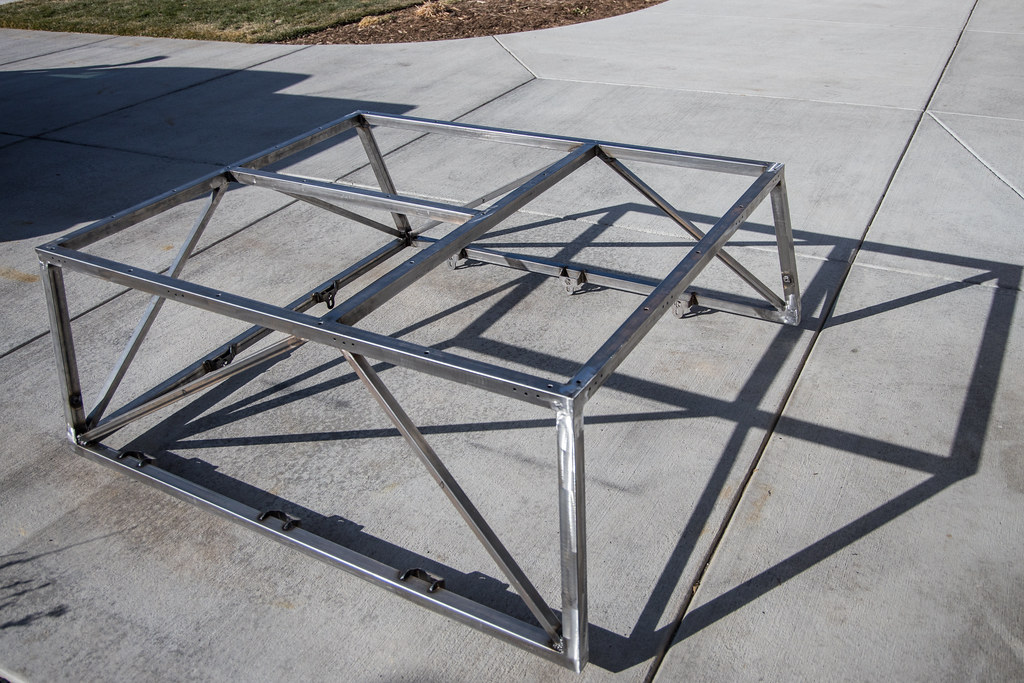
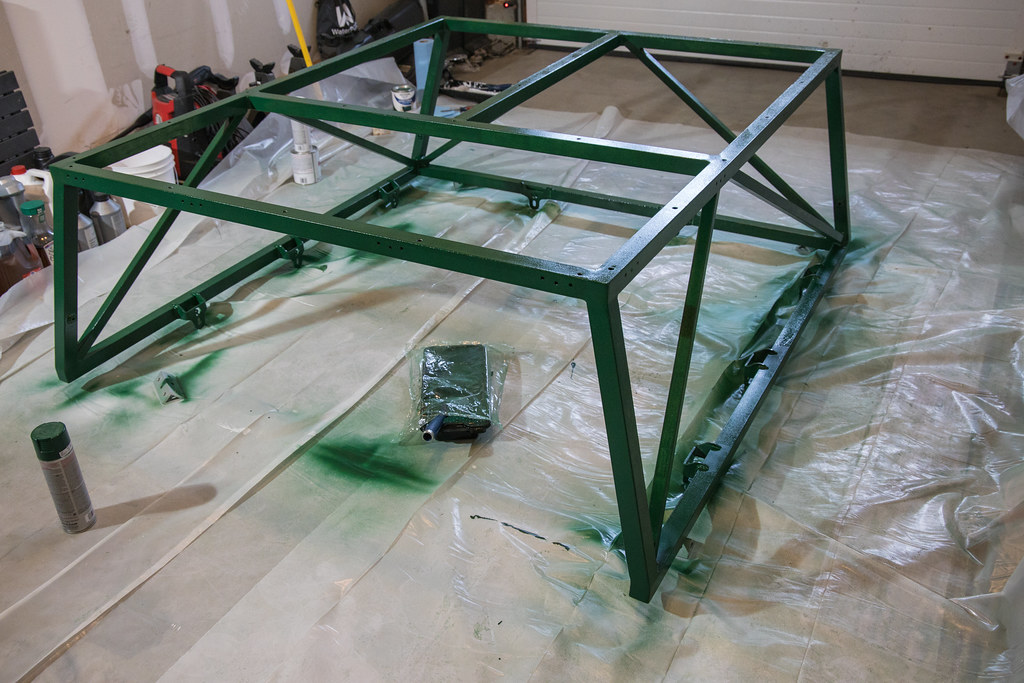
The remainder of the 100” floor length is for the entry/exit opening, which I mentioned has a cover. The holes in the middle are where the floor will be bolted to the spaceframe which provides extra support.
Digital files for the Floor / Roof / Lower panels / Spaceframe / Brackets & Canvas are available on my Shopify store (<-- Link).
This one is even more tedious to cut and drill by hand than the roof, but doable.

The lower extrusion’s exterior corner pieces are not available in the 4.5” tall version, but you can get the uncut lengths of the triangle shape and drill the holes yourself. This is where the CNC mill comes in handy. Another option is to stack 1.5” and 3” tall corner pieces. Probably the best course of action if you are lacking machining equipment.


I am fortunate enough to be able to camp an average of 40+ nights a year. I have tried many types of tent, but I was looking to make my camping setup faster and more livable. Wedge style camper toppers seem to be the perfect balance between improving comfort and preserving the truck’s capability. With their prices and lead times ($7k+ and 12+ months) being deal killers for me, I decided to make my own. How hard could it be?
I originally planned to make an aluminium fabricated camper, similar to Vagabond or AT, but the more I looked at the GFC I realized it would be a good starting point to DIY with minimal fabrication work and basic tools. GFC has a lot of custom parts made for their campers. By finding more standard replacements for them, you can keep the spirit of their camper design and keep costs down.
I will be making a few other changes from their design as well:
*I don’t like having to move bed sections around, so I will make the whole camper longer to enable a fixed opening and a fixed sleeping area. There will still be a removable panel to cover this opening.
*More room for blankets/pillows/tent material when closed, making it easier to close.
*Non-translucent roof. I want to be able to make it dark in there.
*Larger tent windows.
Parts / Retail Cost:
Realistically you could build this for $3,000.
This is assuming you do EVERYTHING yourself. You will need access to a welder & sewing machine at a minimum. Having a router, mill and laser cutter helps a lot as i’ll show, but isn’t necessary.
With that said, I am freely sharing my spreadsheet which has my recommended part numbers, quantities and vendors to build this camper at that price.
Link: Spreadsheet on my Google Drive
(This is the 2nd camper I've made, version 1 was nearly identical but with worse material choices and not as refined. It can be seen on the V1 tab)
Time:
This camper was A LOT of work, do not underestimate that fact. Took me at least 8 full days of work. It will be many more if you don’t have the special tools I mentioned. So depending on how often you have free time, it could take months.
Tools: (* optional, but helpful)
-Sewing Machine
-Bandsaw
-Welder
-Grinder
-Rivet gun
-Drill bits: 3/16”, 3/8”
-Countersink drill bit
-5/16”-18 thread tap (spiral flute)
-3/16” allen wrench
-1/2” socket
-*CNC Router*
-*CNC Mill*
-*CNC Laser cutter*
=============================================================
Here is the completed product.
And my initial 3D model.
Digital files for the Floor / Roof / Lower panels / Spaceframe / Brackets & Canvas are available on my Shopify store (<-- Link).
=============================================================
The Wedge:
The wedge will be made of 1.5" wide (15 series) 8020 aluminium extrusions. You all know them as the material Sherpa Racks and Prinsu use for their crossbars, but they are more commonly used to make frames for enclosures in industrial settings and are also used to make some durable storage solutions. These extrusions are really easy to work with and make this stage of the build go by quickly!
I am using 4.5” tall extrusions on the bottom and 1.5” tall extrusions on the top, for a total wedge height of 6”.
To save some money, you could use 3” tall extrusions top and bottom (I did this on the first camper I built), but be advised that the lower half of the wedge is the main structural part especially with all the overhang this camper will have. Using 3” extrusions for the lower half can lead to it having more deflection under high loads (hitting potholes & rocks). The top half (roof) doesn’t need much support.
The first step is to cut the Extrusions to length (50” & 100”, 2 of each) and tap the ends with a 5/16”-18 spiral-fluted tap. The extruded holes in the ends are already the perfect size for this tap.
There is a whole suite of accessories for 8020 extrusions such as hinges, latches, seals and device mounts to structural parts like corner pieces and flanges. The entire setup is very modular and easy.
Everything attaches using slot nuts like these. All of the fasteners I am using are stainless steel also.
The interior corner brackets attach like so, both the short and tall ones.
I have since changed the spreadsheet to show a 4 hole interior corner for this short extrusion due to the gas struts wanting to twist things up with the 2 hole bracket shown here.
Frame halves fastened! See? I told you it was easy.
Place the wedge hinges close to the outside.
Fitting the gas struts using the slot nuts and 10mm ball studs. The struts for the wedge are 100 lbs 36”. One strut per side. It can take a bit of fine tuning to get it where you want.
You’ll need to stack a few washers, the studs are a tad long.
I used some of these bulbed seal strips to seal the wedge opening. This seal is designed to sit in the extrusion slots as shown.
Aluminium Jeep JK hood latches work really well!
These latches do require a little tweaking. The top pivot had two tabs on the back that had to be ground down while the hook part needed one hole drilled out and countersunk (only using 1 bolt on that part).
I also added another latch on each side of the wedge, the gas struts want to push up on the small upper extrusion when closed and these extra latches help keep all of the seals in contact.
The Roof and floor are made from 3mm Aluminium composite panels called MaxMetal (AluPanel is another brand of this panel type). It is a plastic core sandwiched and bonded by two thin sheets of aluminium. It is much lighter and stiffer than equivalent sheets of plain aluminium. I got the sheets from a local sign shop. The max sheet size is 5’x10’ which is needed to do the entire roof & floor in one sheet each. My friends at Sherpa Equipment Company helped me router the panel out the sheet. I had all of the bolt holes and corner contours cut out as well, which is WAY better than having to drill those by hand.
Digital files for the Floor / Roof / Lower panels / Spaceframe / Brackets & Canvas are available on my Shopify store (<-- Link).
If you do not have a router, it is doable by hand with a jigsaw and drill but takes a lot of time and measuring.
I fastened the roof to the 8020 extrusions along every edge using the slot nuts and short machine screws. The floor will be done similarly but the bolts will be longer where they go through the spaceframe.
Along this whole interface I used an extrusion weather seal similar to the bulbed seal above, but this one is meant as a fixed seal against a flat surface like these panels. Cut it into short pieces to fill the gaps between slot nuts.
The corner pieces are not quite the same height as the extrusion, not sure why! So you will want to fill the small gap with some of the cork/rubber gasket on each corner.
Here is the floor. The sleeping area will be 50in x 78in (close to a Full mattress that is 54in x 75in).
The remainder of the 100” floor length is for the entry/exit opening, which I mentioned has a cover. The holes in the middle are where the floor will be bolted to the spaceframe which provides extra support.
Digital files for the Floor / Roof / Lower panels / Spaceframe / Brackets & Canvas are available on my Shopify store (<-- Link).
This one is even more tedious to cut and drill by hand than the roof, but doable.
The lower extrusion’s exterior corner pieces are not available in the 4.5” tall version, but you can get the uncut lengths of the triangle shape and drill the holes yourself. This is where the CNC mill comes in handy. Another option is to stack 1.5” and 3” tall corner pieces. Probably the best course of action if you are lacking machining equipment.
Last edited: