Fleetwood Neon Modified for off road

winn442

New member
Great thread on the camper! Good looking 90 as well, I've done several frame-up's on Series, 90's and 110's over the past 20+ years....a 100" hybrid was my favorite. https://www.youtube.com/watch?v=M6aRPWY3rjs

In the earlier part of the thread, you were originally contemplating using wheel adapters before you went the Rover hub/disc route. I thought of converting to Rover discs as well (got plenty laying around), but the Campo I've got has a Treg hitch with combo surge/electric brakes. The surge brakes work great so I don't want to go to the time and expense of re-engineering everything for hydraulic brakes. Not even going to bother wiring in an electric controller to the 90 as they work so good. I wouldn't pull anything heavier than the Campo again that used electric brakes anyhow (I hauled a Range Rover from South Georgia to Birmingham behind a 90 one time and had to stop and change my underwear twice).

Do you remember who sold the adapters that converted to 5 on 6.5? There are plenty of adapters that convert FROM 5 on 6.5, but not TO. I could get some trailer hub assemblies out of Australia that are 5x6.5, but with shipping it would be over 600 bucks. I'm a cheapskate.
 

winn442

New member
Awesome! thanks so much!

Wonder if they can go from a 6 lug landcruiser to 5 on 6.5, if not, they are standard 10" drum hub assemblies, so I can get a couple of 5 lug assemblies cheap locally and then the adapters to match them. I'll give them a call.

Thanks again!
 

MountainD

Adventurer
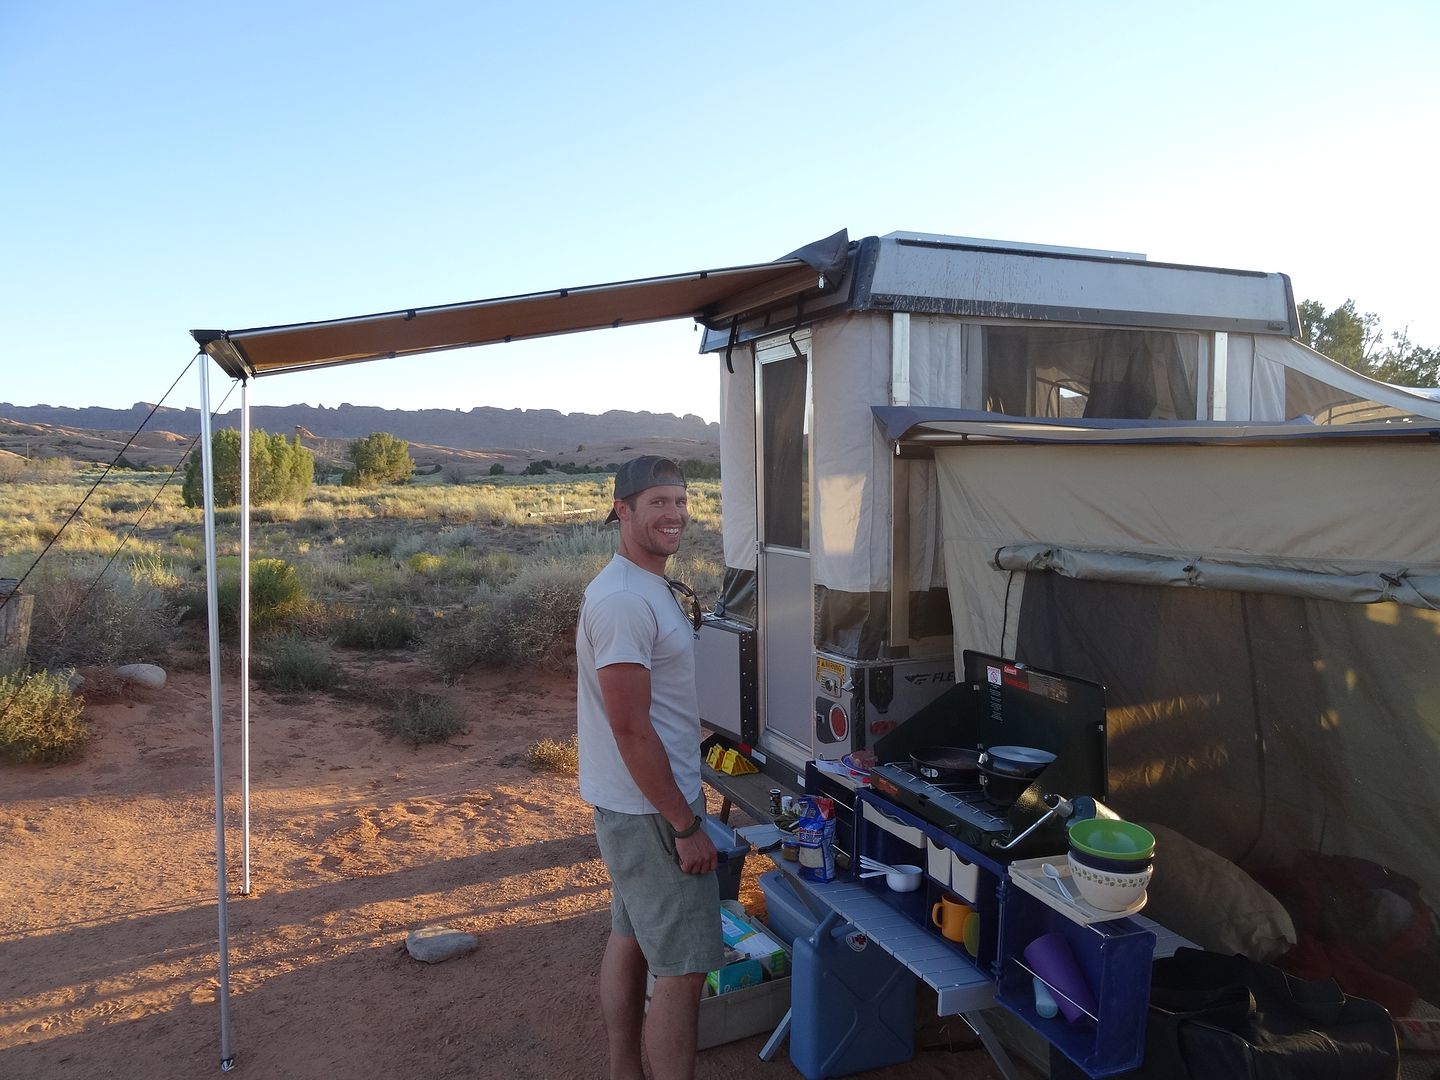
I picked up an ARB4402A 2000 series awning off ebay for a great deal to add to the trailer... not sure how to mount it but I have been talking about the rack. I have been practicing with the ReadyWelder hooked to the Miller Mig welder (to run as a spool gun) for aluminum to weld the Jerry Can holders so I think I'll weld up the roof rack also out of aluminum (keeping it very light) and I will mount the awning to that. I need to figure out some mechanism that makes it easy to swap from side to side as some campsites just need it on a specific side. I also need to finalize how to mount it--my thought is to use sikaflex at the rack/top unions and then trough bolt it through the roof and mount a load distribution strap on the inside between mounting points (open to advice--just seems most secure). I plan to get that and the Jerry Can holders completed this fall... Winter will see changes to the interior... I am excited to have some down time projects :)

If you have any advice to secure the rack to roof, I'd love to hear it.

If you have any advice on a good removable mechanism for the awning, again, all ears. Right now I figure to just bolt it and un bolt it, but would consider a quick release (that doesn't scream steal me!).
 

hamthis

Observer
What is the prevailing thought on tongue weight for an off road trailer? I intentionally put my axle just forward of the center of the box so that when I add my batteries and accessories on the tongue that I wouldn't overload the tongue weight. I have seen many say around 10-15% tongue weight but I have also seen folks say that for off road 30% is better. Any thoughts on % of tongue weights?

Andy--you may want to consider going to a trailer jack with the side mounted lever---when I rotated my top mounted lever to lift my tongue it would hit my tongue box which is inconvenient to say the least---the side mounted levers alleviate this. I got mine at Harbor Freight.

I am having a box-moving party next Saturday so I can get some friends to help move my box over. I then have to finish the fenders, install the tongue box and winch lifting mechanism, button up the wiring and install the steps (which arrived a few days ago!).

View attachment 286191

What stairs did you get? they look nice!
 

MountainD

Adventurer
Brophy AS23. Great stair and I think the best value-- sturdy and well made. Got it from eTrailer for about $200. http://www.etrailer.com/p-AS23.html I considered the Torklift as well, also well made, but didn't really get anything more for the increase in cost. To do over again, I'd get the Brophy again.
 

Jeepinaaron

Adventurer
I picked up an ARB4402A 2000 series awning off ebay for a great deal to add to the trailer... not sure how to mount it but I have been talking about the rack. I have been practicing with the ReadyWelder hooked to the Miller Mig welder (to run as a spool gun) for aluminum to weld the Jerry Can holders so I think I'll weld up the roof rack also out of aluminum (keeping it very light) and I will mount the awning to that. I need to figure out some mechanism that makes it easy to swap from side to side as some campsites just need it on a specific side. I also need to finalize how to mount it--my thought is to use sikaflex at the rack/top unions and then trough bolt it through the roof and mount a load distribution strap on the inside between mounting points (open to advice--just seems most secure). I plan to get that and the Jerry Can holders completed this fall... Winter will see changes to the interior... I am excited to have some down time projects :)

If you have any advice to secure the rack to roof, I'd love to hear it.

If you have any advice on a good removable mechanism for the awning, again, all ears. Right now I figure to just bolt it and un bolt it, but would consider a quick release (that doesn't scream steal me!).

How did you end up mounting yours?

For me, I had a very specific mounting criteria because I needed to use the ARB room. I drilled holes into the aluminum uprights and just bolt it on when I get to camp. When I don't use it on the trailer I use it on my Jeep. In transport it is on my Jeep.

Here you can see how mine is mounted.


MountainD

Adventurer
INTERESTING!!! So it is snowy and cold so I haven't thought about it. But a couple days ago my rivnut tool arrived-- so I may do that too!! Food for thought. I've thought about the extra room and how I could do it, as my trailer is too tall now.. Thanks for the inspiration!!!
 
Last edited:

Jeepinaaron

Adventurer
Yea that was my exact problem. We were planning a two week trip to Co and Utah with three of us sleeping in the trailer, so I utilized the ARB awning and awning room to turn the camper into a duplex! But of course, the camper is too tall to attach the awning to the roof. That is why I ended up drilling into the uprights. To me it seemed like the simplest solution to the problem. I utilize the 6mm bolts with a wing nut on them to allow quick installation on the trailer. It only takes a few minutes to move the awning from my Jeep to the camper. I haven't had any issues with the awning becoming loose during travel.
 

MountainD

Adventurer
Yes! Although I didn't do much over winter as life sort of got in the way (I had rust on my bulkhead of the D90 as well as some other issues, so I had to weld in new metal work and finish the truck as rust isn't something that can just sit...).

I found a full width tongue box in lieu of the harbor freight version which has allowed a ton more storage, but in order to fit that, I had to remove the hydraulic brake actuator and hand brake and find a place to relocate those. I also had to secure the new tongue box, make a new battery holder, and rewire the whole system... That said (and pictures coming soon), I welded up the mounts for the new location of the brake equipment and got that all plumbed in, I secured the tongue box and rewired 95% back together, and then I added some more goodies to the tongue box and trailer including:

Charging plug built into the tongue box to power the CTEK charger
Plug for the solar panels so I can just plug my portable panels into the tongue box to charge batteries
Battery kill switch
LED lights for inside tongue box

Things left to do (picking up metal this week):
Rack for awning with quick releases to move from left to right side
LED Reverse lights
LED Step Lights
LED Reading light for inside

I'll post picks later this week--it is coming out nicely.
 

MountainD

Adventurer
Here are the photos of the new (used) tongue box installed. I found it on Craigs list for $100 and it is about 2" less narrow than the trailer--a perfect fit! The black nob at the top right is the battery disconnect and below that on the right is the "shore plug" for the charger for the battery and to the left of that is the plug for the portable solar panel extension cord--I just plug the panel into that and it charges the battery. I have to clean up the wiring a little more in the box and I am making a top for both the battery as well as the "fuse panel"--the current fuse panel (circuit breakers) is just temporary until I get it all beautified. I am also going to finish the wiring along the tongue and enclose it in a spiral sleeve. There is so much more storage now! I can fit my steps in there as well as all my leveling components, emergency gear, tools... plenty of room.

I had to relocate the hydraulic disc brake actuator and handbrake to the side but it is still pretty well protected. I will be adding a protection bar in front of the brake to keep them from getting wacked by tree branches. Getting ready for camping season!

Next up--Awning rack...
 

Attachments

  • actuator.jpg
    actuator.jpg
    559.1 KB · Views: 85
  • batteries.jpg
    batteries.jpg
    541.4 KB · Views: 88
  • trailer box.jpg
    trailer box.jpg
    576.3 KB · Views: 86
  • front of box.jpg
    front of box.jpg
    556.6 KB · Views: 84
  • CB panel.jpg
    CB panel.jpg
    547.3 KB · Views: 86
  • brake and actuator.jpg
    brake and actuator.jpg
    556 KB · Views: 85
  • Lower plugs.jpg
    Lower plugs.jpg
    504.2 KB · Views: 77

Forum statistics

Threads
185,894
Messages
2,879,294
Members
225,450
Latest member
Rinzlerz
Top