GCRAD1's ADV80

Mauka2Makai

Explorer
Looked to do a last minute reservation at Doheney and all dates were full for our availability... maybe next time. What spots would you recommend for the primo beach areas? Maybe will just have to drive down to check the area out ... always interested in beach side camping and surfing, especially when close by. Great posts and pics... standing by for more.
 

GCRad1

Adventurer
Hello Mauka2Makai,

I would recommend spots 27 - 89 as all of those are beach front spots with sand connected directly to your site. If you like the sound of frogs, sections 27 - 37 is along side the creek that flows into the ocean. Pure beachfront is spots 40-93. We stayed somewhere in the 70's, I think it was spot #75 or #77.

Here is the site map:
http://www.parks.ca.gov/pages/645/files/DohenyCampMap2013.pdf

8658391687_ebe712c730_z.jpg


Looked to do a last minute reservation at Doheney and all dates were full for our availability... maybe next time. What spots would you recommend for the primo beach areas? Maybe will just have to drive down to check the area out ... always interested in beach side camping and surfing, especially when close by. Great posts and pics... standing by for more.
 

GCRad1

Adventurer
HAPPY U-JOINT REPLACEMENT

9083204134_d7eaf1636e_z.jpg

260,000+ miles and I think the ADV80 deserves new U-Joints! I finally broke down and made the purchase with service! I trust and have become quite dedicated to taking my rig to Yotamasters for all of technical service beyond my means. I say "dedicated" as it is a 30-mile drive at about 45min's to an hour to get there. I would love to do all my service myself, but time and space (at a town home) are not in my stack of cards. Plus, I was getting ready for a trip to the High Serria's and wanted to get this done and sorted rather quickly without hassle as I had a lot of other things on the plate to make ready for this business trip.

9080978205_eb53b223a1_z.jpg

The 80-Series Toyota Land Cruiser is a full-time 4WD system consisting of two drive shafts driven from the center differential. This is the front drive shaft or output shaft that connects to the front axle. We have already removed the bolts from the flanges and are removing the rear bolts and about to pop this shaft out. We will use Trail Gear U-Joints vs factory Toyota U-Joints for the front shaft. But for the rear we will use Factory U-Joints.

Front U-Joints:
Trail Gear / Matsuba U-Joints:
These stock OEM Replacement U-Joints have been tested to 3700 ft-lbs of torque before failure. These U-Joint fit most 1979-1995 4wd applications. Does not fit CV assemblies. Includes four install clips and Zerk grease fitting (not shown in photo). Made in Japan.


9083196884_5e33575efa_z.jpg

Rear U-Joints
Toyota OEM U-joint 100048[/COLOR]
Due to the massive and or odd size of the rear U-Joint OE is the ONLY way to go!!!

9083194430_99b446149f_z.jpg

Looking down the barrel of the rear driveshaft.

9080969935_77cd2e4148_z.jpg

Chris Besanson of Yotamasters working on the ADV80 as shot in Panorama mode with an iPhone 5.

Whats going in:
9173228840_bba0808941_z.jpg

Front U-Joint:
Trail-Gear U-joint, Toyota OEM, 100048-1-KIT
Rear U-Joint:
Factory Toyota U-Joints #04371-36030

9171001103_a14668d9e7_z.jpg

Old dogs are out - new pup's are in and the boss takes a visual inspection:
9080960833_0f67c3a923_z.jpg

Eric of Yotamasters gives us the 411 on the finer art of drive shafts and the front driveshaft in-phase / out of phase discussion. Most all Toyota 4X4 trucks call for in-phase shafts. The 80-Series Land Cruiser calls for a out of phase front shaft. We actually tested it both ways and didn't notice much difference. But again, my truck is not sitting at factory height and that could have something to do with it.

Either way... WHY DID I WAIT SO LONG TO CHANGE THESE!!!! Less driveline clunk and SMOOTHNESS was the results of changing the U-Joints!!!
 

GCRad1

Adventurer
replacement option for the charcoal canister

Found a replacement option for the charcoal canister. As time passes on these older rigs, things just need replacing and or we want to try to improve them or at least get them running as best possible - PREVENTATIVE MAINTENANCE!!!

10918285464_977d2ba0cd_z.jpg

New canister on the left / stock on the right. I purchased this new canister from Pep Boys as they are closet parts house to both my house and work here in Southern California. Here is the canister for reference: BWD Fuel Vapor Canister
$35.99 - Part # CP1018 SKU: 9780059
http://www.pepboys.com/product/details/9780059/00660/?quantity=1

10918151835_aeaa8df6d3_z.jpg

On the new canister's bottom, notice that I drilled a hole in the very center and out on the outer portion of the trey. I should have shot another image of the other side as you will see baffle-tray's and you would understand why I did it this. I will not be using the overflow line as on the stock one - it drops whatever flows over down into the frame rail.

10918144295_b7785226f7_z.jpg

I removed the stock charcoal canister. Its best to come in from the bottom as the fasteners are located on the engine side.


10918153415_b7d2cccbe5_z.jpg

Black tubes are from the new canister and the metal ones are from the stock canister. You will notice that the new canister has a larger [5/16"] inlet. The stock line is a smaller [1/4"] tube from the fuel tank.

10918452773_1d5e6175b3_z.jpg

I patched a connector from the 1/4" line to the 5/16" line into the inlet. Not the best case scenario but it is what it is...

It's not pretty:
10918222576_d6e18a1dd6_z.jpg

But it works. While in the canister thread, most remove the bottom bracket only. I removed both and used zip ties top and bottom as I did not have a longer bolt at this time. It will all go bath together stock again soon as I think this canister is only going to be temporary. I need some sexy Wiggins Clamps!!

I've read about a couple of guys who replaced the charcoal in their factory canisters, but that is more involved at the moment. So, I will keep my stock canister and try to replace the charcoal so I can put it all back together to have the factory look at a later day - one day when I am so board with nothing else to do...
 

GCRad1

Adventurer
North Lake Tahoe / Donner Summit / Cisco Grove / Monitor Pass - Road Trip

9204528732_463e868323_z.jpg

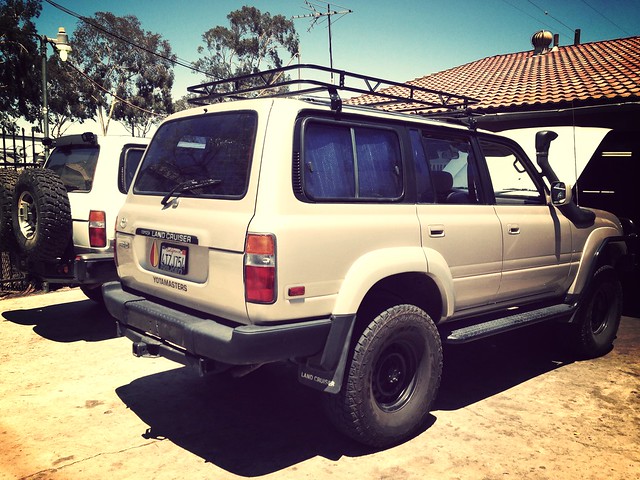
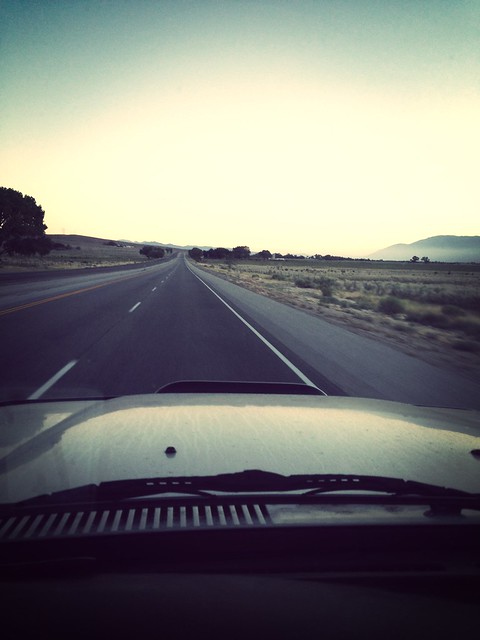
My work, on rare occasions has be on some little trips that I try to make the most of by also making some very short off-pavement trips in the ADV80. But this is HWY395 and it too is very scenic along the mountain range. Sometimes it can seem quiet lonely along this route and or you can find soulstice in the solitude.

9438777528_380fd60b7f_z.jpg

9438780752_0eb0ca505f_z.jpg

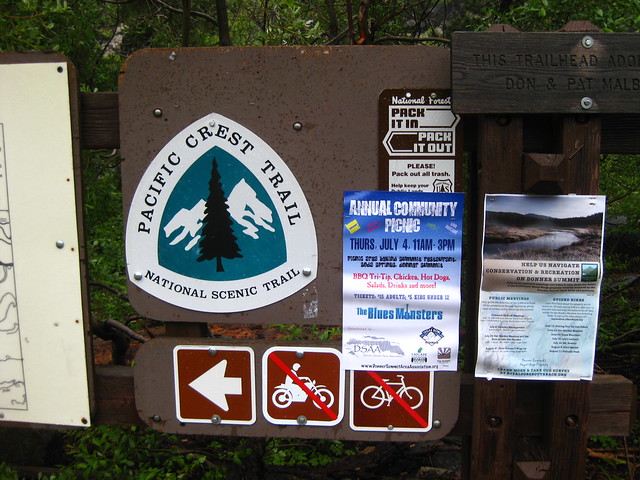
Atop of the Donner Summit the PCT Pacific Crest Trail crosses and I came upon it not looking for it.

11617880934_6985c96fca_z.jpg

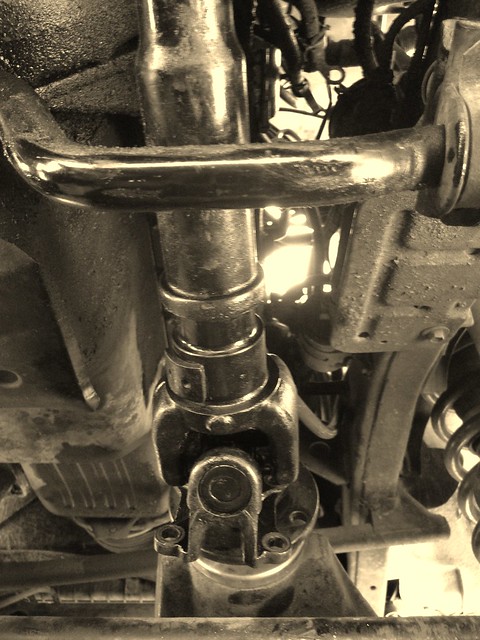
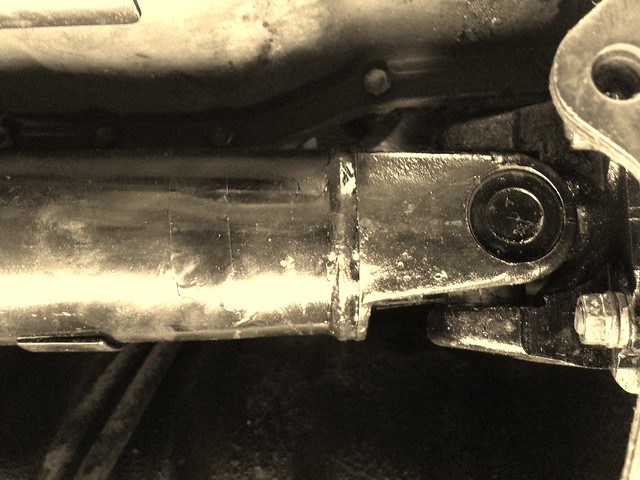
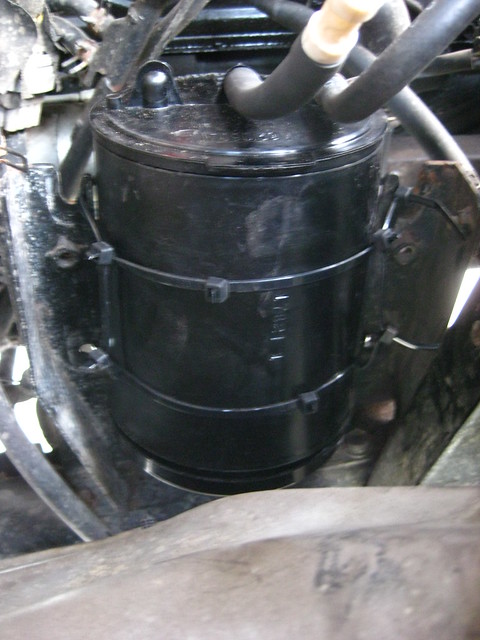
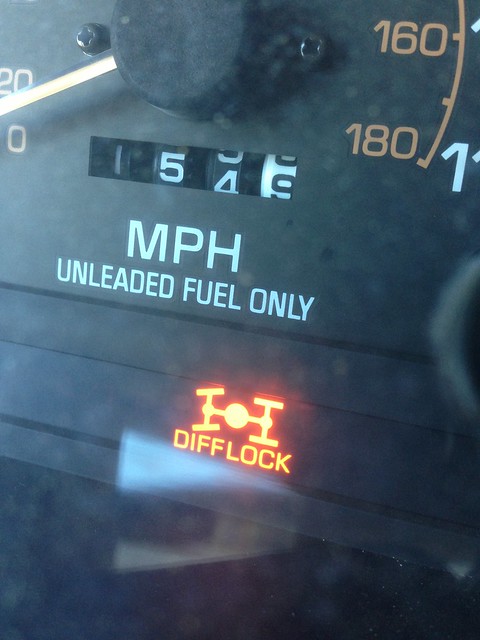
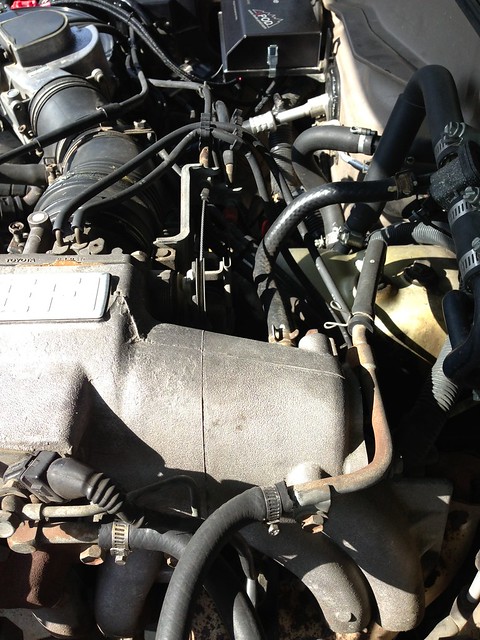
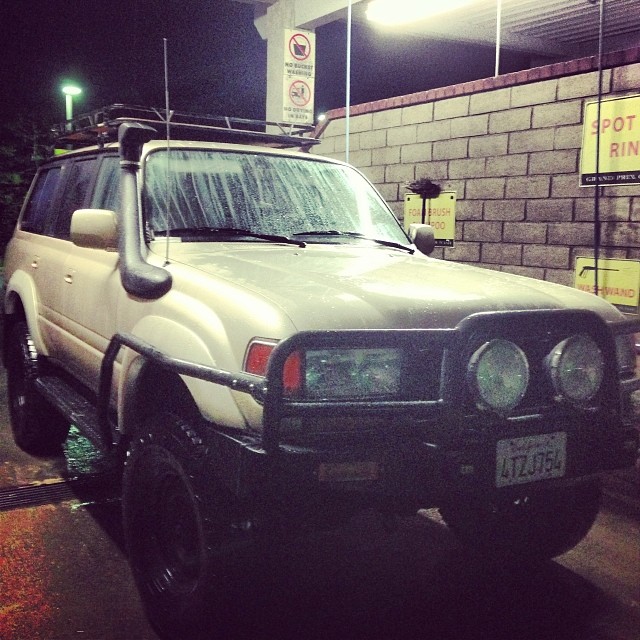
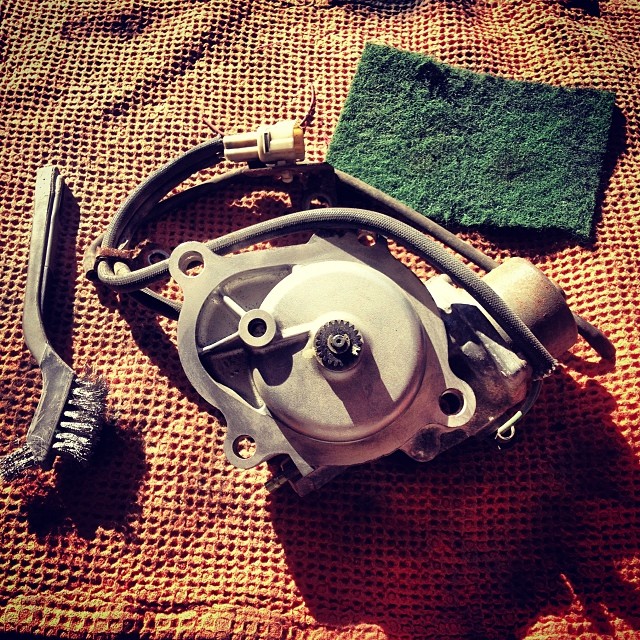
While up on the Donner Summit my trip would not be without issue as my DiffLock light came on the dash and the CDL engaged while driving.
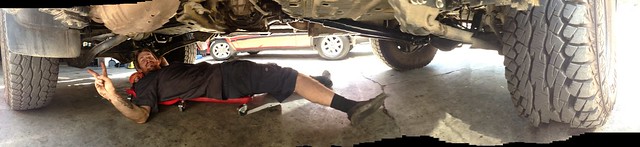
Long story short, I also placed a phone call to Yotamasters to consult with them as well. Needless to say, I would be 2WDriving it back home as I disconnected the T-Case control module that it located in the driver side kick panel.

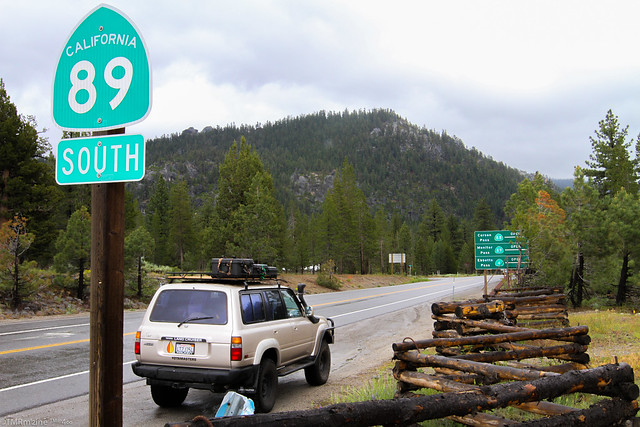
While on the way back, I came through south Lake Tahoe and came across Monitor Pass - HWY 89 as it connects to HWY 395 the scenic way.

9240475679_396e3597b1_z.jpg

Monitor Pass (el. 8,314 ft / 2,534 m) is a high mountain pass in California in the Sierra Nevada southeast of Lake Tahoe. It is traversed by State Route 89 near that highway's southern terminus at U.S. Route 395 near the community of Topaz. While this section of Route 89 serves to connect the basins of the West Walker River and Carson River, Monitor Pass itself lies on a side ridge between tributaries of the East Fork Carson River. Crossing the pass allows for a more direct route between U.S. 395 and Markleeville, California, at the expense of some additional elevation.

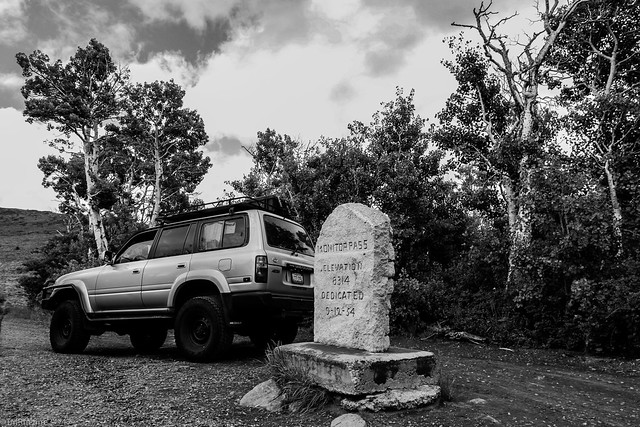
At the top of the summit:
9243374242_7d59ef42c3_z.jpg

You will see this marker and if you travel in the direction toward HWY395, just after this sign, look on your left and you will see...

9240608457_c7fcb4c7f1_z.jpg

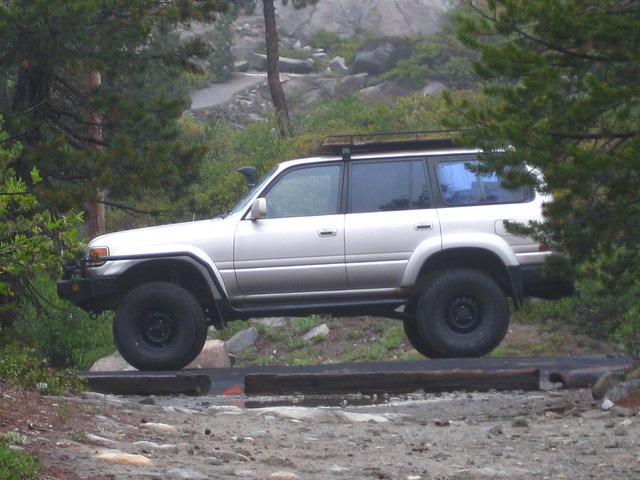
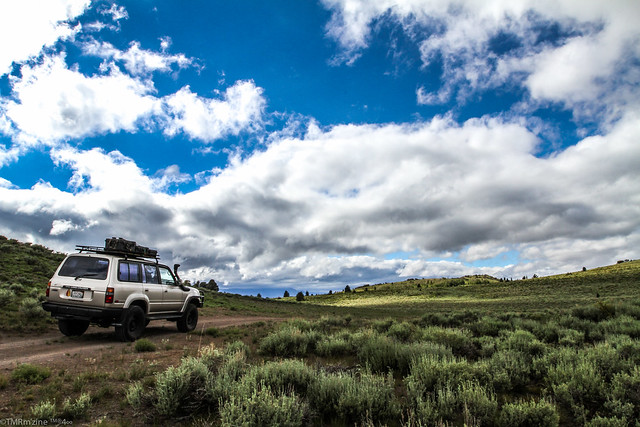
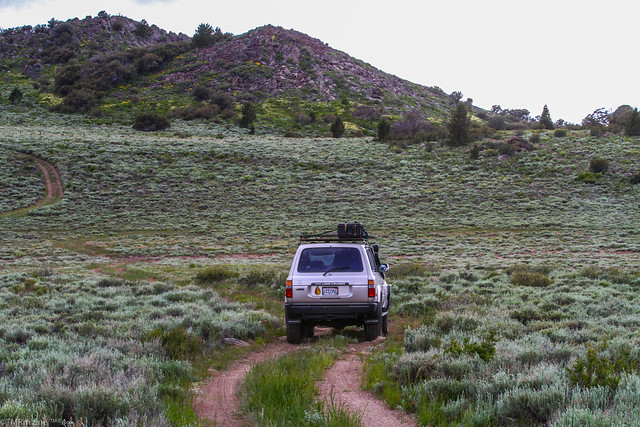
A little two track trail! I had to give it a quick look! Has anyone adventured around up here?!?!?!
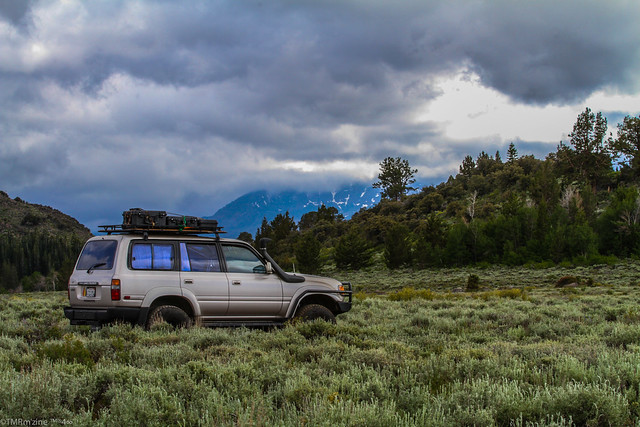
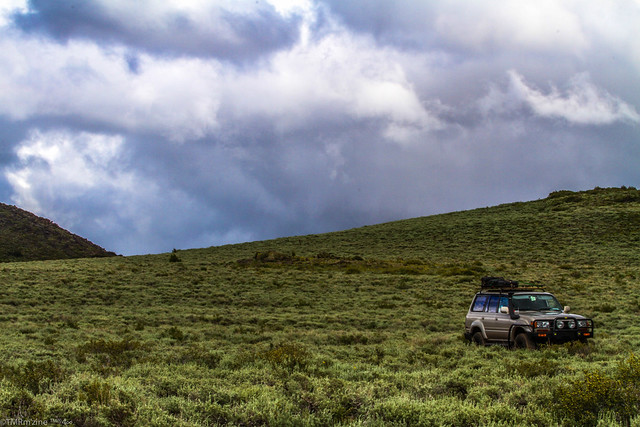
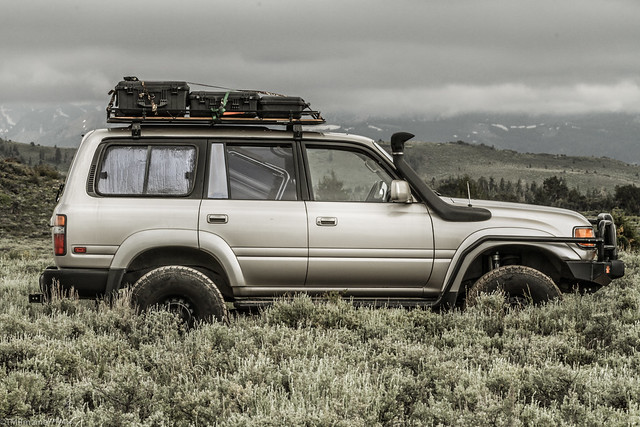
While I was only in 2WDrive mode, I did not want to get off too far so I spent some time shooting some cool images of the rig in this BIG OPEN visual surrounding!

9240648309_6207c85970_z.jpg

9243440718_7ca76c62ce_z.jpg

9243489082_33b2578f91_z.jpg


9243445908_7861dff3f1_z.jpg

I drove around on a few different splits and came back out onto the paved road a little ways down from where I entered, but with time permitting, I could have gone further back in. How far? I don't know and need to spend some time looking at the maps as this place is looked epic in every direction!
 

GCRad1

Adventurer
California Legit - Smog Check Time!!!

10999625154_d552704064_z.jpg

Smog check time! For those of us in California, this is an every two year process. That is for those of us within the more city/urban areas. My buddy lives down in Paula, CA and does not have to have smog checks, but that is a "whole'nother" conversation.

I switched up my smog station location as my previous smog check guy that was conveniently located by my work in Irvine/Foothill Ranch has vanished. I gave a call to my buddy Steve who runs I-FIX-EM service shop in Costa Mesa. He sent me over to the guys at 7 Star Smog also in Costa Mesa.
7 Star Smog
1661 Superior Ave - Unit D
Costa Mesa, CA 92627
(949) 722-7411

10999549856_b72b354d1f_z.jpg

The sniffer apparatus stuffed in the ADV80's exhaust outlet.

10999666153_b974d0480b_z.jpg

Checking my timing. How advanced are you? I'm super-advanced, just not in the engine compartment. It is a 3FE engine...

10999612594_4264a8ba2d_z.jpg

10999617974_9de333bbf3_z.jpg

The hi-tech toilet plunger is stuffed into the fuel inlet side and more test are ran.

10999673123_7b4a0b76ae_z.jpg

While the guy is playing with his smog test toys, Im admiring his mirror setup for spotting cars into the shop when he is working solo.

10999619644_426545434e_z.jpg

Getting close, but I'm not seeing the verbiage that I want to see...

10999440935_ba1267612d_z.jpg

Now that is what I like to see! $55 worth of dead presidents - thank you very much!

10999451005_f10a5af651_z.jpg

I'm out the door until next time - every two years for smog inspection. The 7 Stars Smog guys said that pre-2000 vehicles will have rolling dyno stress test going into effect 2014 and more equipment the smog stations are mandated by the state to purchase, thus fee increase.
 

GCRad1

Adventurer
ADV80 gets the PVC Oil Catch Can Treatment

How may of you have noticed the oil build up in the air inlet tube when cleaning your air filter? Why is the engine dumping so much oil back into the engine at the air inlet tube? While doing some research many seem to resort to using an PVC Oil Catch Cans for the 80-Series and while there seems to be a lot of info on the 1993+ vehicles, not so much for the '91-'92 3FE-powerplant owners, yet I have the same issue. This is where the guys at Yotamasters come in handy for direction and in-put! I have them on speed-dial and they have a stall with ADV80 painted on it! Just kidding, it's just a cardboard sign they put out when they know I'm coming... hehehe

I purchased my catch can on "fleabay"
11093341155_9220f13bb8_z.jpg

BLACK TURBO OIL CATCH CAN TANK RESERVOIR 750ML JDM ALUMINUM

Purchased from:
http://www.ebay.com/sch/drifteffects/m.html?_nkw=&_armrs=1&_ipg=&_from=


The 3FE engine;
11093332215_7391fbc8ca_z.jpg

I have two hoses dumping directly into the air inlet tube after the mass airflow meter. Smog was apparently a big issue with Toyota even back then...
And there is another that you do not see in these images...

12490723665_de269309b1_z.jpg

12491204894_15a4a4feb4_z.jpg

Yotamasters installed the catch can on the drivers side firewall at the pinch molding.

12642737585_f85193a04d_z.jpg

12642741235_97c6ee2e95_z.jpg

Here is the hose configuration after installation. The hose from the PCV valve at the rear of the valve cover ports directly into the intake manifold and we spliced in the catch can between here. While this may not cut down the influx of oil into the air inlet tube, we wanted to see if this would have any effect in catching oil that is getting dumped into the inlet side with the air and fuel. If it really does work, then I may opt for another and try to capture oil going into the air intake tube.

Recently I took a trip to the desert and had quite a bit of bouncing around on some cross desert high speed whoop shock testing...
12490856103_c65044332c_z.jpg

of the 481-miles, 246-miles where freeway driven so it was a decent amount of desert driving.:smiley_drive:

As you can see...
12491207314_2fa84d11cc_z.jpg

this much oil was captured before going into the intake manifold! :victory:
 

GCRad1

Adventurer
Return of the CDL center diff lock warning light - Now with busted thumb

11617880934_6985c96fca_z.jpg

The ADV80 tossed me a nice surprise! My DCL DiffLocker warning light illuminated on the dash in a nice warm orange'ish color while commuting to work. Upon attempting to entry my works driveway, the steering was very tight and the radius was very short. I had to back up and try it again to get the rig to turn in without too much force on the traction heavy tarmac. This is issue came about once before while on a business trip back in June.

11618283816_069f45f9e4_z.jpg

During lunch I did the same as last time and disconnected the transmission computer located in the driver side kick panel. Jumped in and backed up and forward and repeated the process to see if I could get the CDL to disengage. But this time, no avail. With time pressing for a meeting I was to be at in 15-minutes, I took the front driveshaft out, but during the process I added some dis-coloring to my thumb. I disconnected the front portion first and while disconnecting the rear portion, breaking it loose also meant some extra forward momentum. As the rear portion came off the bolts, the front portion of the shaft came down and my thumb was perfectly aligned between the propshaft and front sway bar. BAM and thank you! Thats going to leave a mark...

11525780145_836bb105d4_z.jpg

A couple of days later on the weekend, I do not let the now 2WD ADV80 stop my daughter and I from having fun! The ADV80 is rendered back to 2WD for the moment and will have to get it back in the shop soon as I will need the rig for service work - again.

"Hello Yotamasters, yea, can you get the cardboard sign ready." :Mechanic:
 

GCRad1

Adventurer
CDL Solenoid Replacement - Testing, 1, 2, 3 - 4WD come in please.

12063990975_c23062e453_z.jpg

Spent a sack full of quarters and an hours worth of under carriage mud-grit-grime reduction at the car wash in preparation for the ADV80 to go to Yotamasters for service.:snorkel:
Want to be nice to your service shop? Give your rig and underwear wash before dropping your rig off. They will appreciate it as "customer service" is a two way street.

12018098324_d2582fe4bc_z.jpg

I purchased this 1992 CDL Solenoid and a couple of other parts from a guy parting out a '92 80-Series in Kansas. I got this one to replace my finicky SDL-S in hopes that this will fix it. I will get the front drive shaft back in and get the Transmission computer hooked back up. I will get the speedo-sensor gasket replaced at the transmission as its currently leaking past my homemade exterior gasket sealant attempt. It worked for a little while... then a general PM service check up is in order as well.
 

GCRad1

Adventurer
MPG VS MPG

Hello KBAHUS, Thank you for your question.
While I usually get around 14-mpg, I think I got around 11-mpg on this trip. But some items to consider... I rarely break 65-mph, maybe 70+ on a good downhill and this trip has more hills and some step climbs especially for the "get out and push" 3FE wonder engine!

12459263445_ce6c810d95_z.jpg

What kind of gas mileage do you get loaded with the Pelican boxes on the roof rack?
 

kbahus

Adventurer
That is not too bad with all of that air resistance, been trying to figure out if I should mount my Pelicans and jerry cans on the roof or not, gas mileage being the prime concern.
 

Forum statistics

Threads
185,883
Messages
2,879,161
Members
225,450
Latest member
Rinzlerz
Top