Hey Vortec Guys! / Sierra pickup / Suburban / Yukon etc - Finally has Index!

rayra

Expedition Leader
I was thinking to install the front CV half-axles today, as a time management thing, even though my upper control arms aren't here yet. And yesterday's forecast was for partly cloudy all day. But just as I was gearing up mid-morning the radio blurted 'possible rain / snow in the region today, snow possible down to 1500'. Our elevation is ~1200'. So not the conditions I'd want to be on the ground wrenching in.
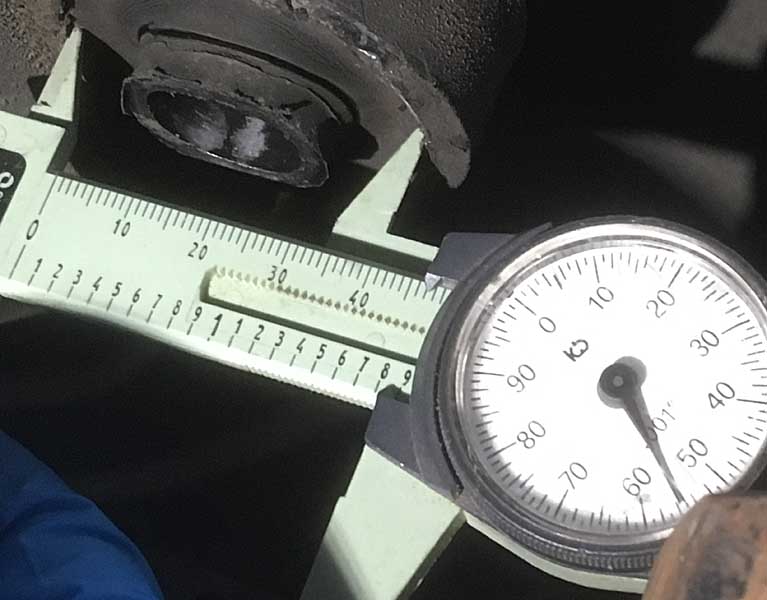
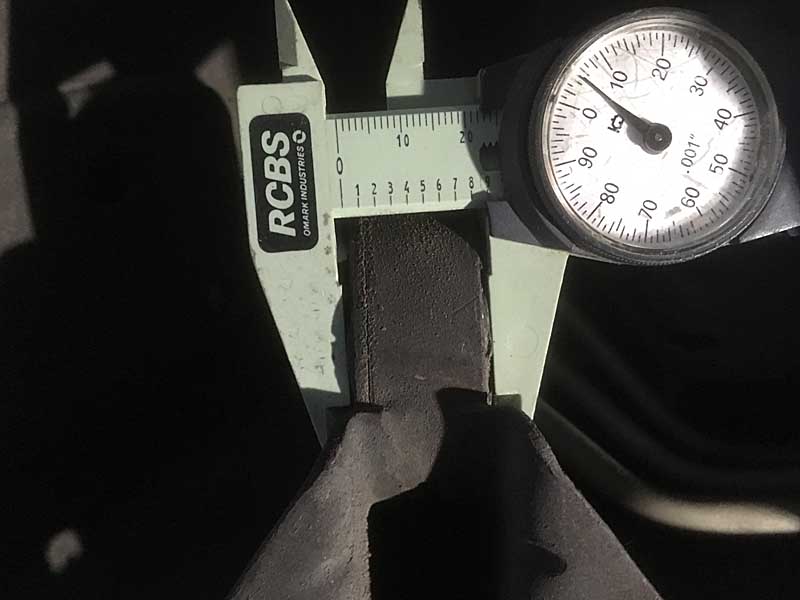
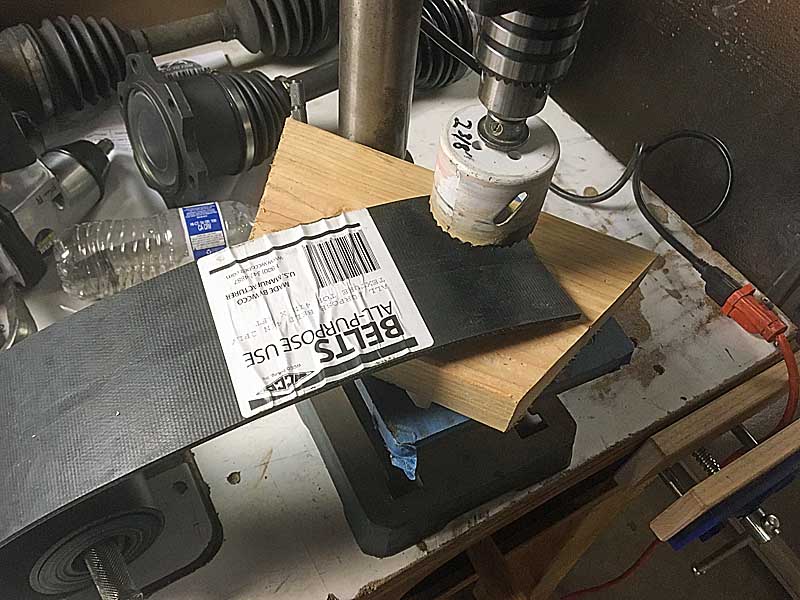
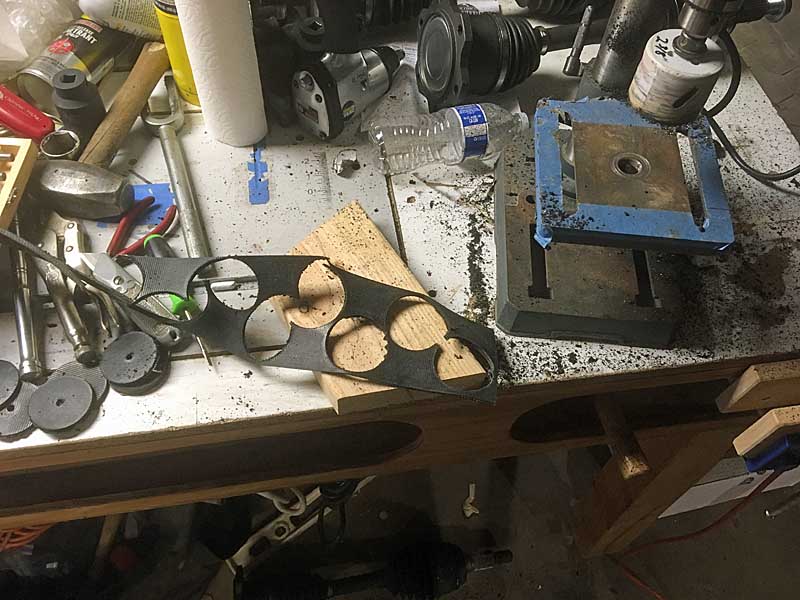
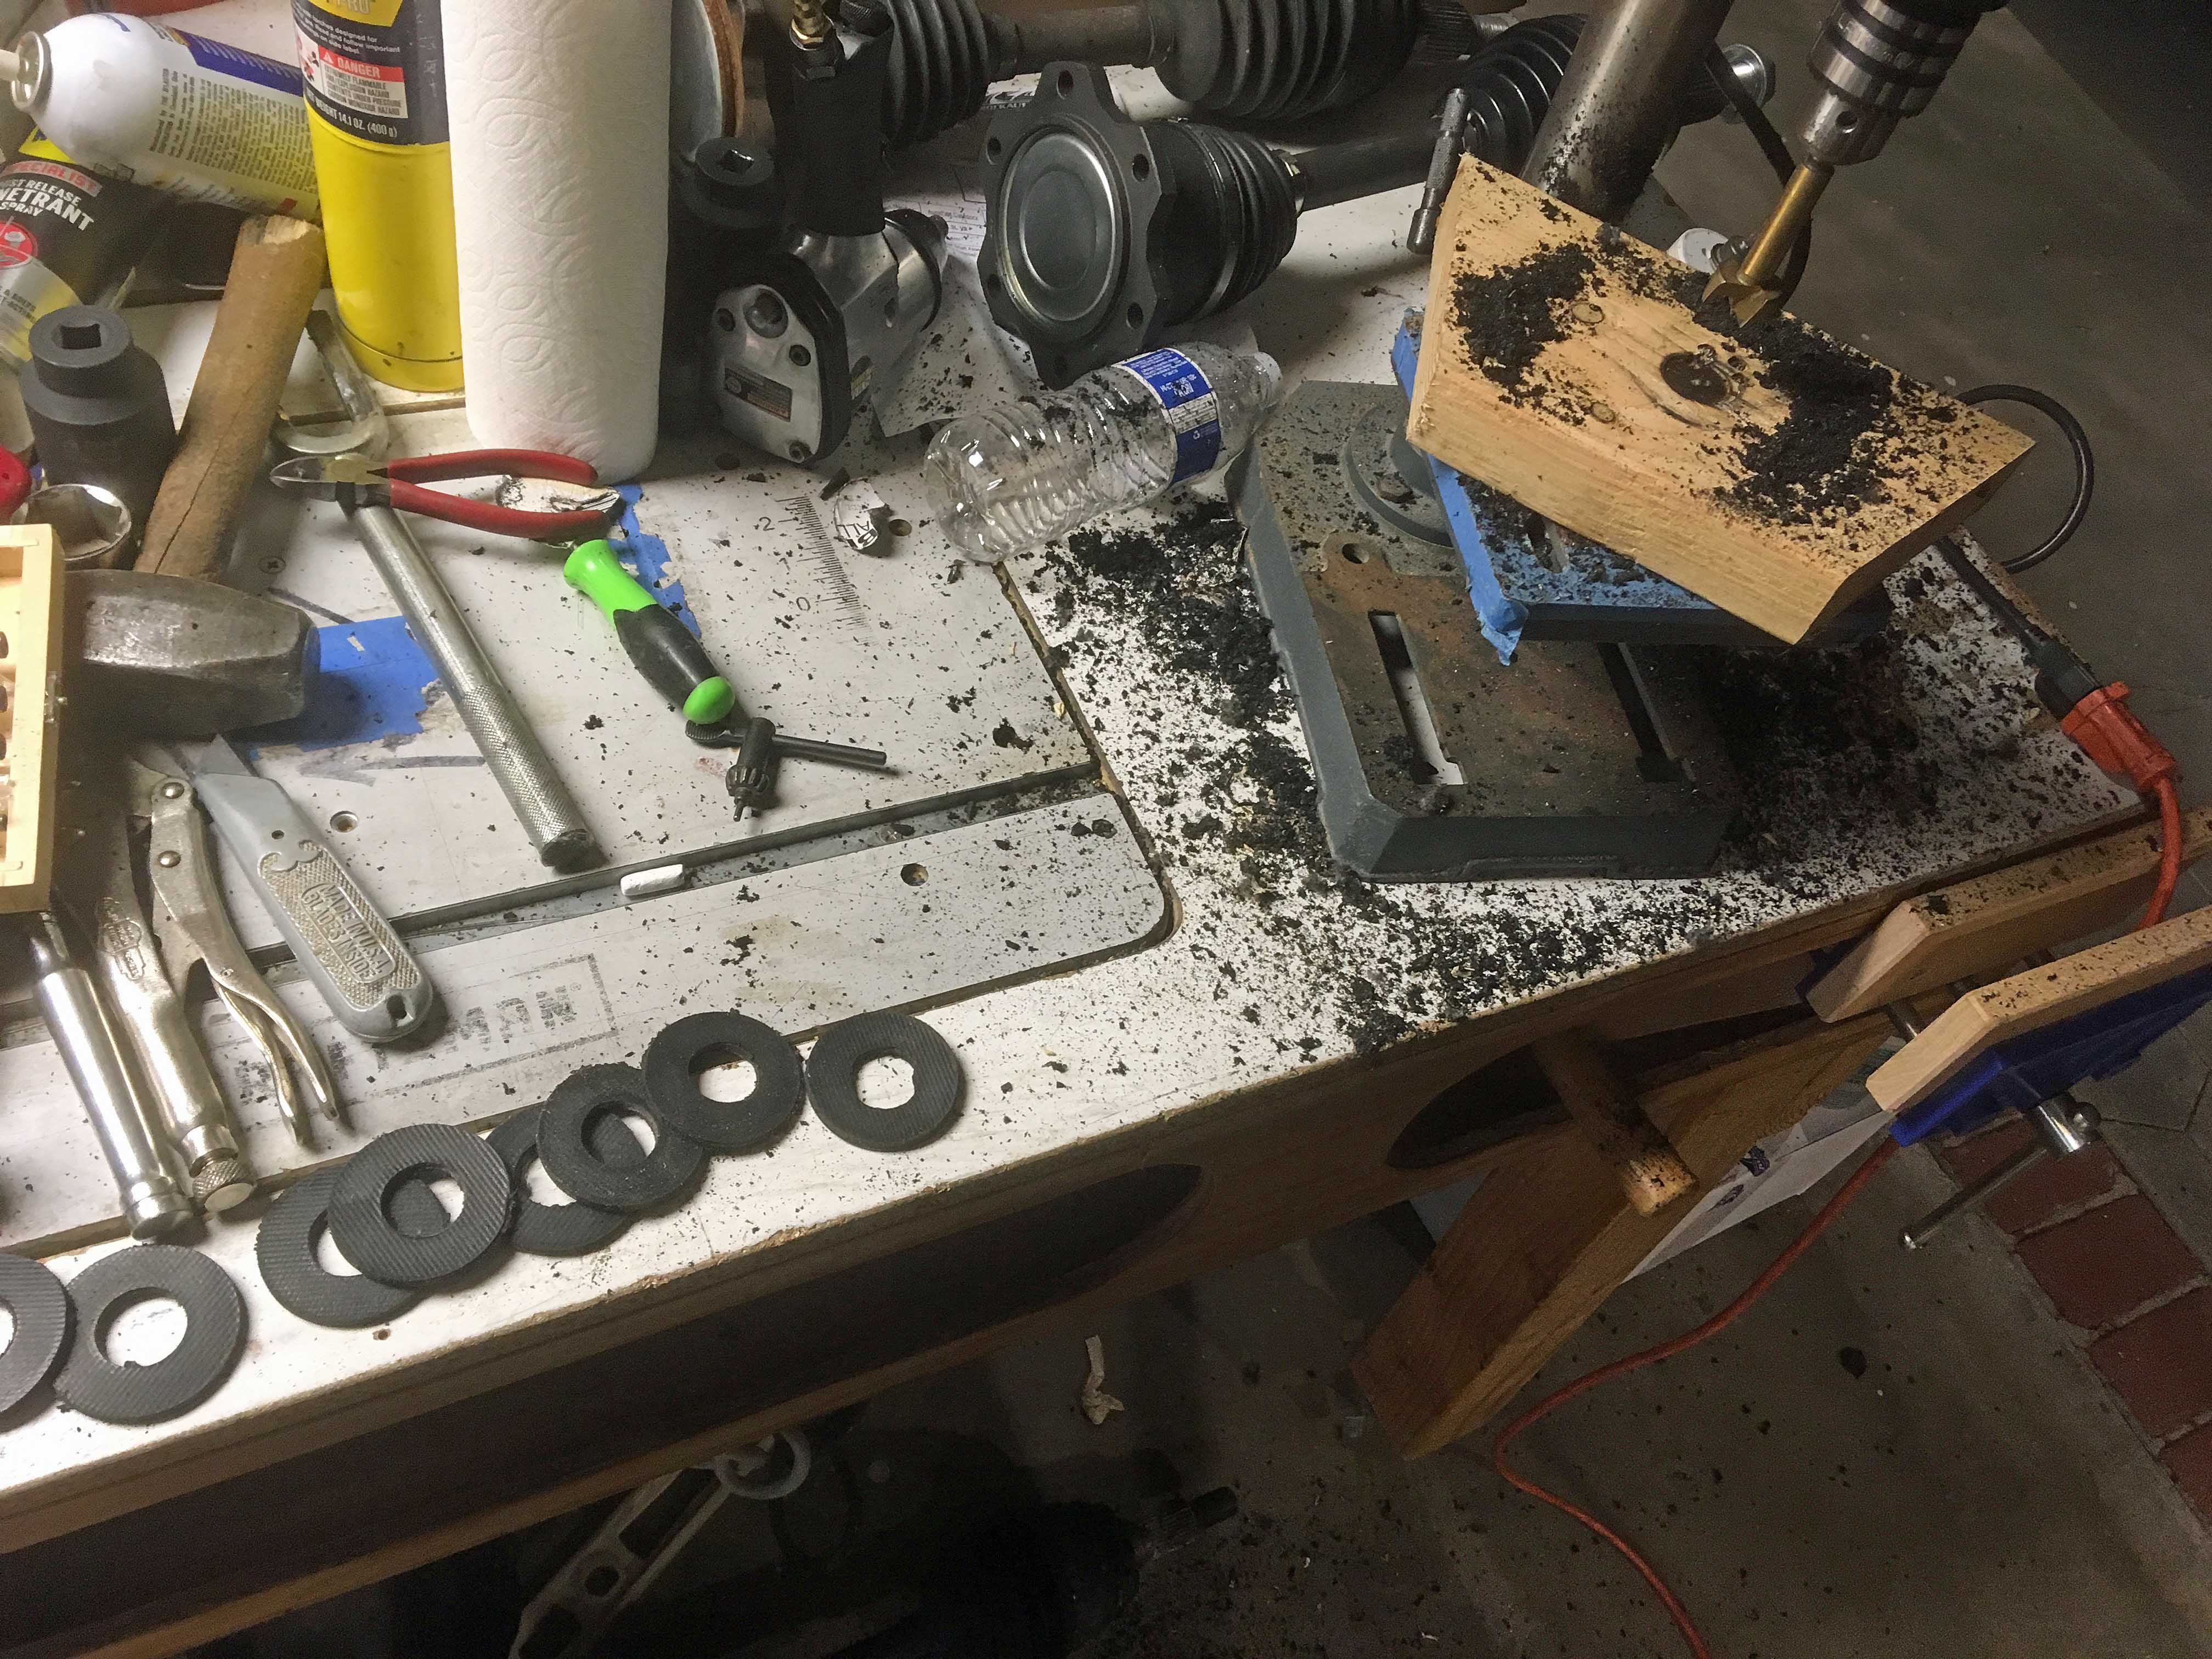
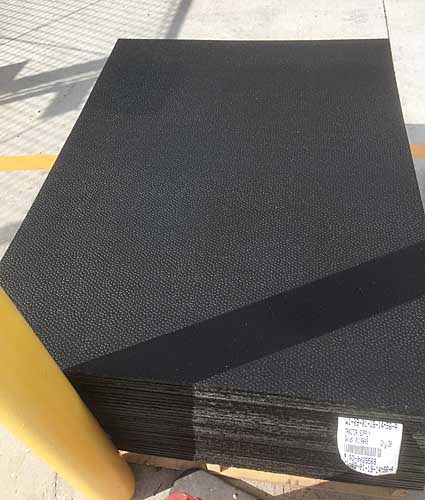
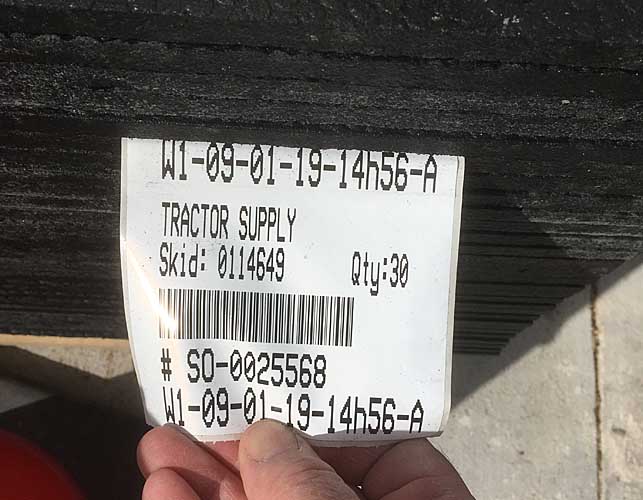
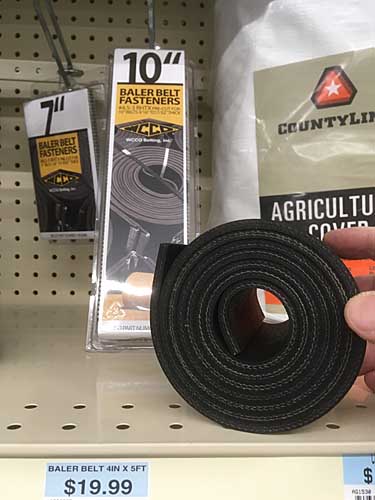
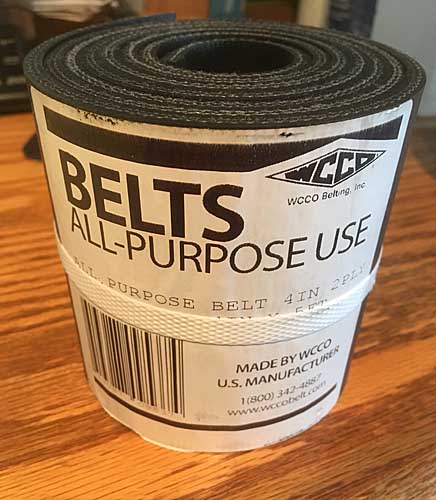
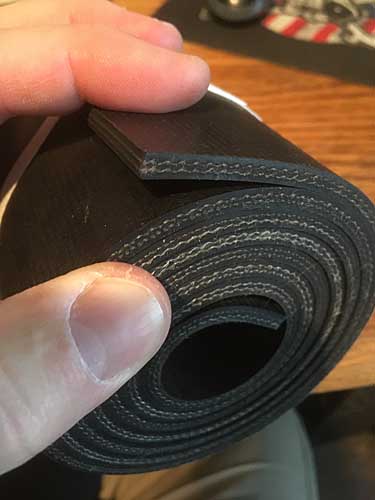
So I screwed off and went shopping for rubber material to use as shims for the frame crossmember mounts for the torsion bars. Home Depot and Lowes, no joy. McMaster-Carr online material supply, ludicrously overpriced for a square foot of material. Then I thought of Tractor Supply, had once been looking at their 4'x6' horse stall rubber mats for another project, 'nice material'. Reinforced heavy rubber sheet material, meant to stand up to iron-shod horse feets. Just the thing to wedge between two shifting pieces of steel. But que lastima, no tengo aqui. But they did have some smaller thinner mats along the same line. 3'x4'. While I was wandering the store on the way to get a price for that unmarked pallet of stuff, I also found some reinforced rubber belting used for farm machinery (hay bailer / roller). I think it too is just the sort of thing. It's a little too thin and I think thin enough to double layer. The bigger mat would have to be shaved down on the table saw or band saw to a proper thickness.

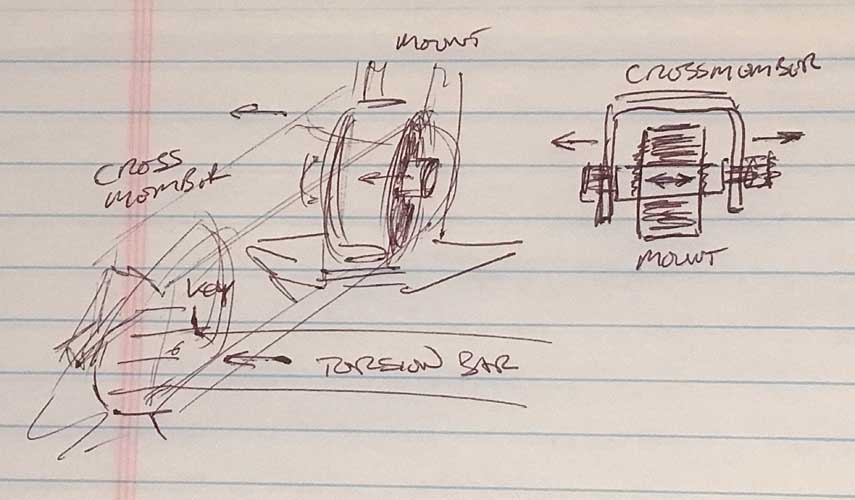
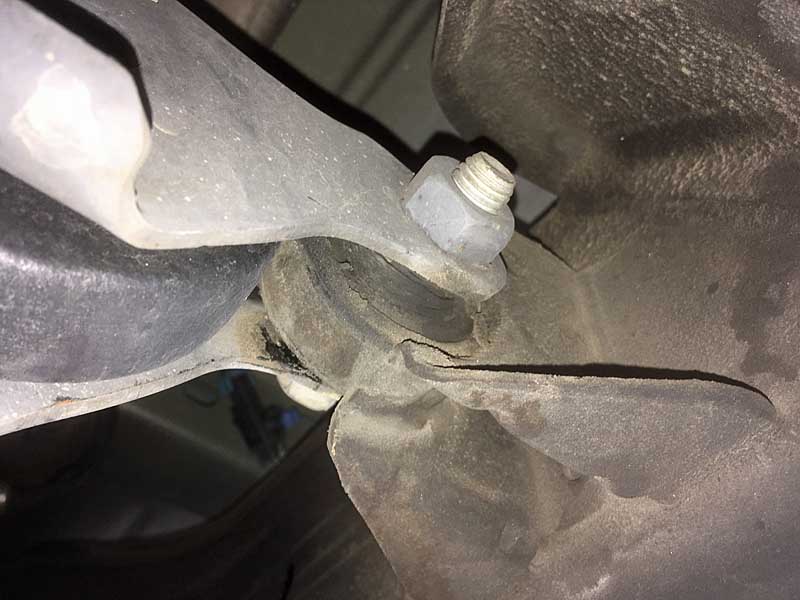
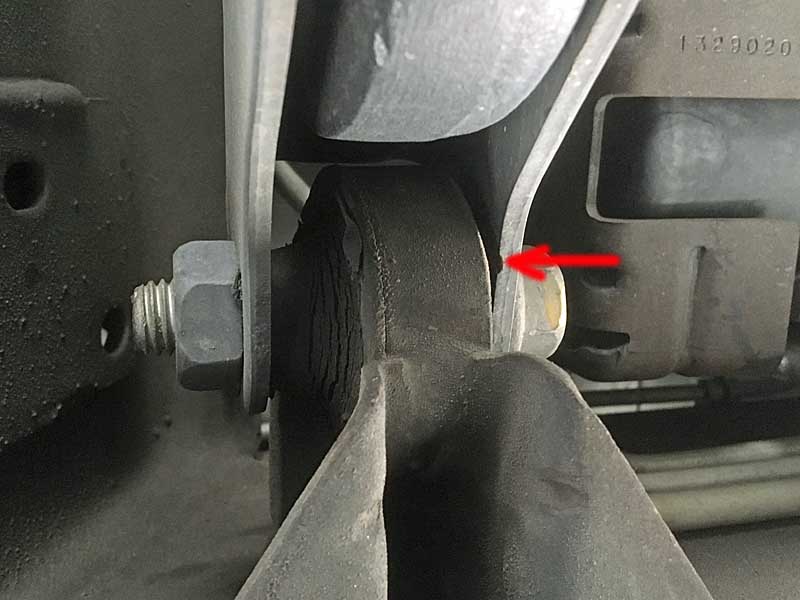
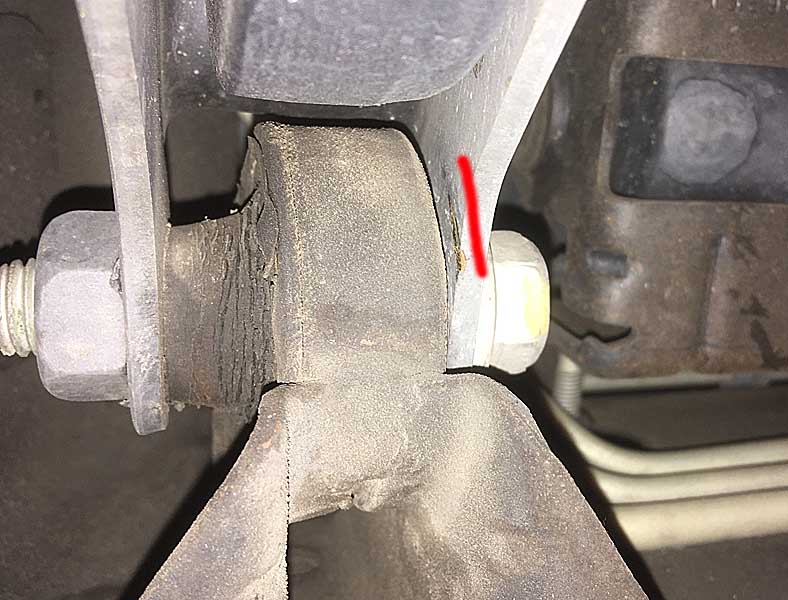
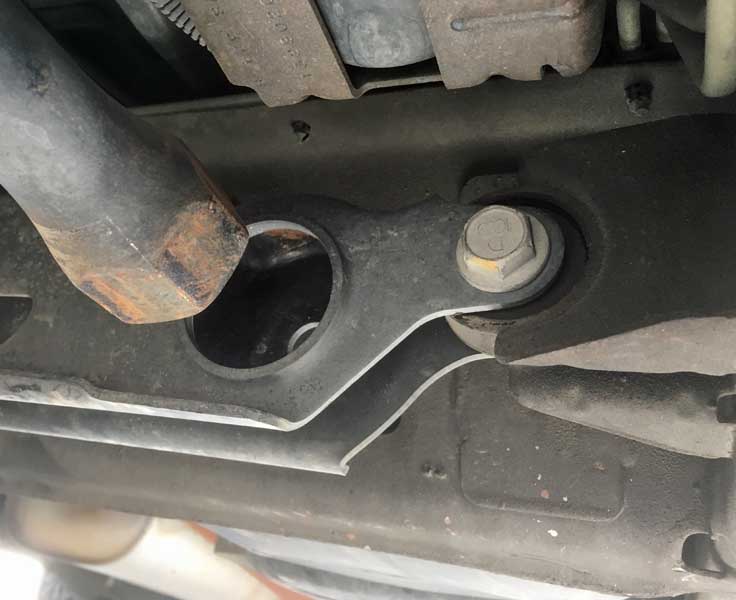
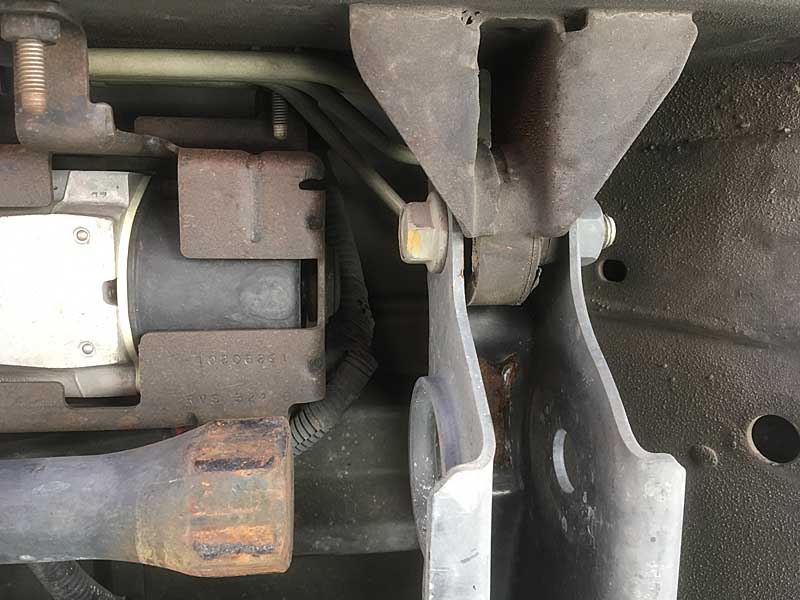
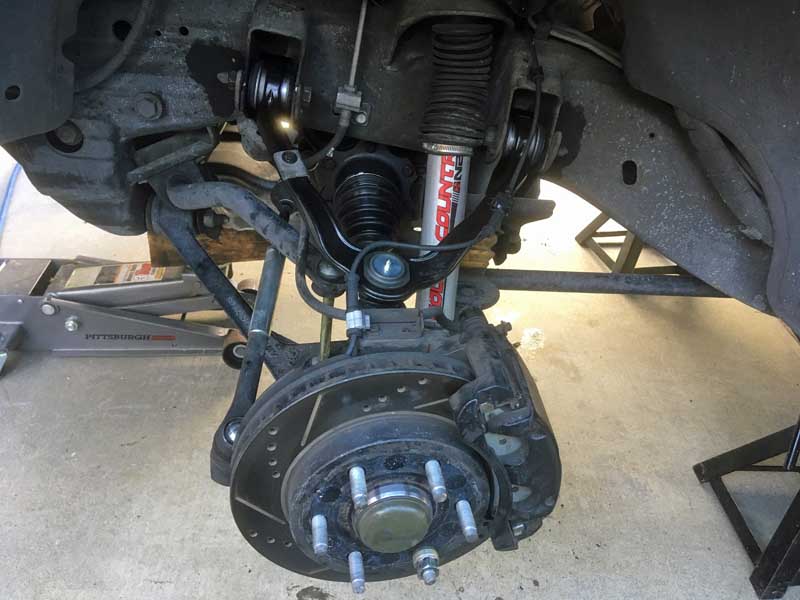
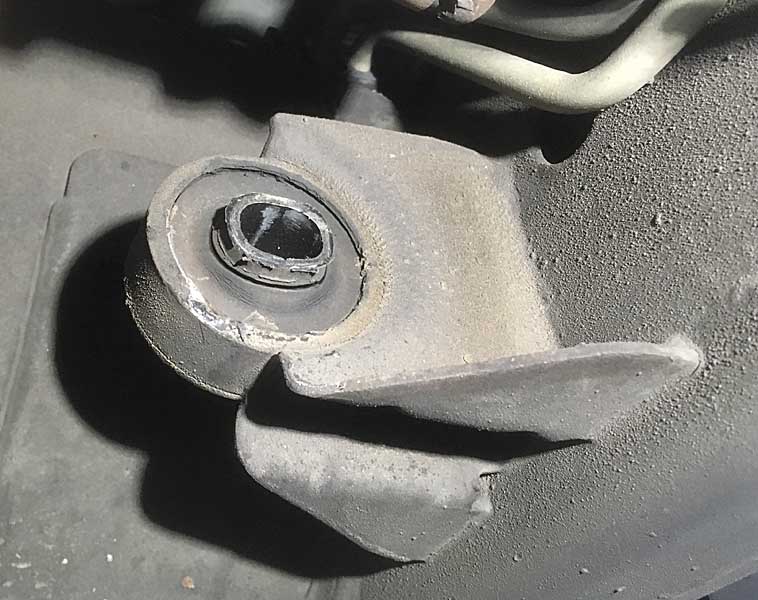
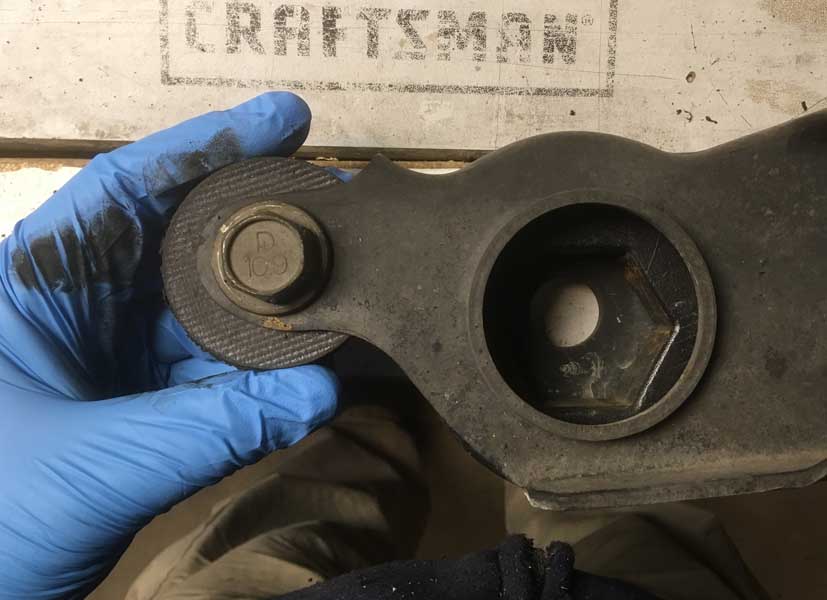
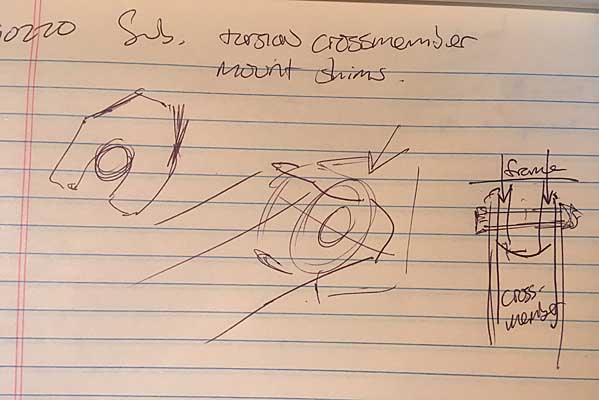
My intent is to cut the material into a pickle-fork / 'U' shape. The crossmember is a stamped steel, inverted 'U' channel, its end ears overlapping the steel and rubber donut mount projecting inward from the side rails of the vehicle frame. A large bolt passes thru each end of the crossmember, thru the sleeved rubber donut mount.
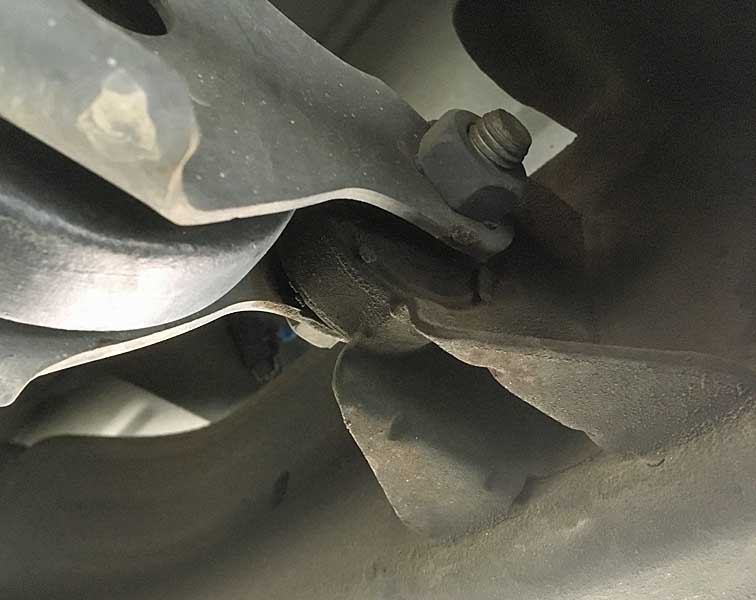
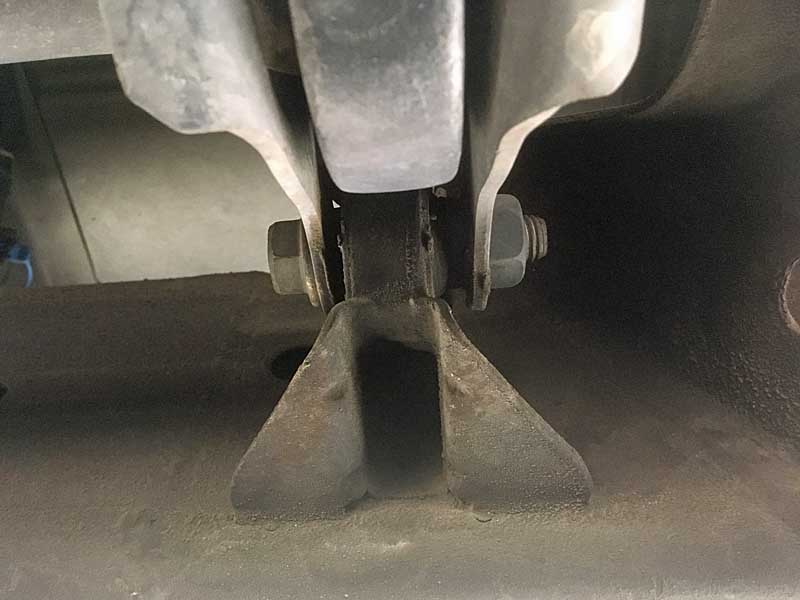
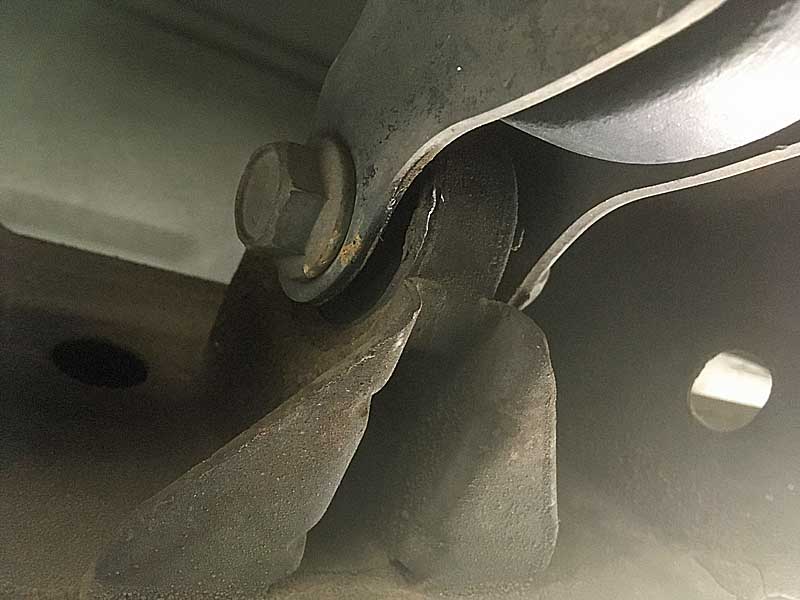
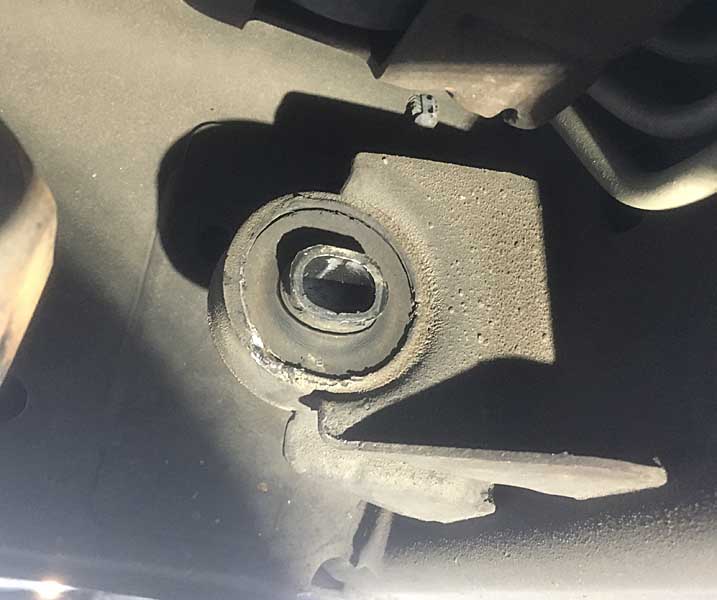
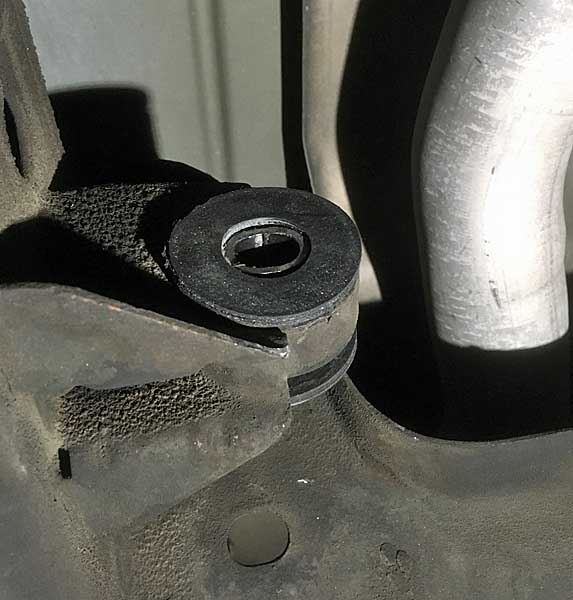
This crossmember houses the torsion keys / ends of the torsion mounts. Fore-aft movement in the front control arms is transferred via the torsion bars to this crossmember. Its mounts are supposed to cushion and absorb some of these forces. The mount rubber ages and fails, allowing the crossmember to shift fore-aft more than intended. Resulting in some of the knocking I'm hearing / feeling, as the crossmember metal contacts the metal collar of the frame mount.
I intend to fashion some U-shaped shims out of this reinforced rubber material and wedge them into the gaps between the frame mounts and crossmember.
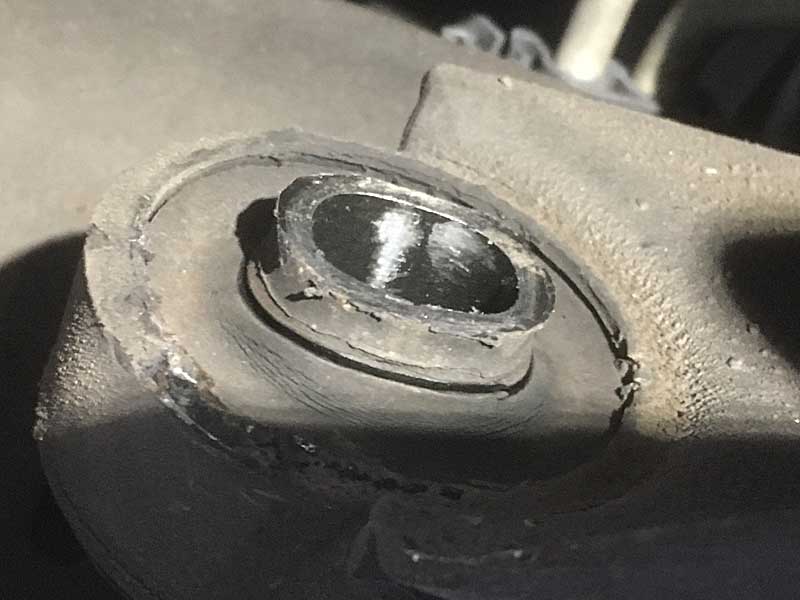
The ends of the crossmember are open, there's a gap above the mounts where a shim could be slid down into place. Make the shim long enough and it gets fully between crossmember and mount ring and it also sticks out that top gap, which will keep the shim from rotating and falling out. OR just cut the material large enough to fill the area of contact and put a hole thru the middle and just bolt it in place. My intent is to dismount the torsion bars and keys, anyway and fully drop the crossmember to assess the issue. So once fully apart it's just as "easy" to craft the shims like washers. Then they CAN'T fall out.
But this rubber belt material is 3/16" thick. My total gap space is ~5/8". No workee. I MIGHT be able to cram the crossmember onto a double layer on both sides. MAYBE. Or I might have to somehow shave down two shims so each side is 1 & 2/3 thicknesses. OR put two layers on the forward side, where the compression issue is and 1 layer on the back side. The ends of the torsion bars are essentially free floating. The fore-aft positioning of the crossmember has some leeway. 2 on the front side, 1 on the back - and if they are done washer-style, they can't fall out, so they don't have to fit tight.

I'm also looking into how bad of an idea it might be to grease the trailing end of the torsion bar, where it fits in the torsion adjustment key. Then when the front end is bashing about, that rear end of the torsion bar isn't hanging up and driving the crossmember rearward. Something tells me it isn't a good idea to lube the torsion bar. Don't really know what keeps it from working its way out of place just as it sits, anyway. Only the friction of the torsion-twist of the bar, I suppose. As it is right now, rust and grit are holding my crossmember rearward out of its centered fore-aft place, anyway.
I vaguely recall wiping the torsion bar ends with lithium grease when I changed my torsion keys, a few years ago. Or maybe I'm just remember the intent and not the act. Get a lot of that as you age, a bad case of CRS. Can't Remember ********.

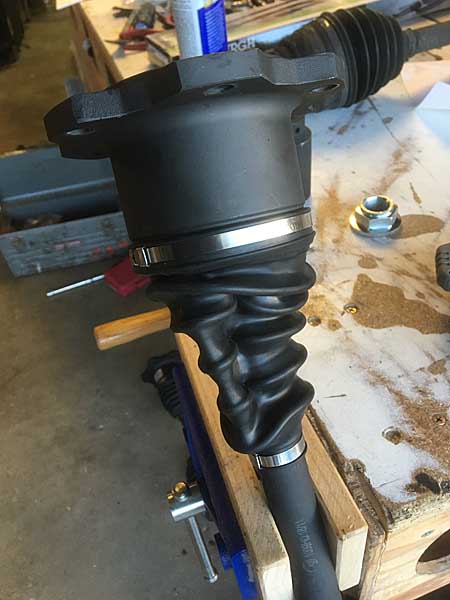
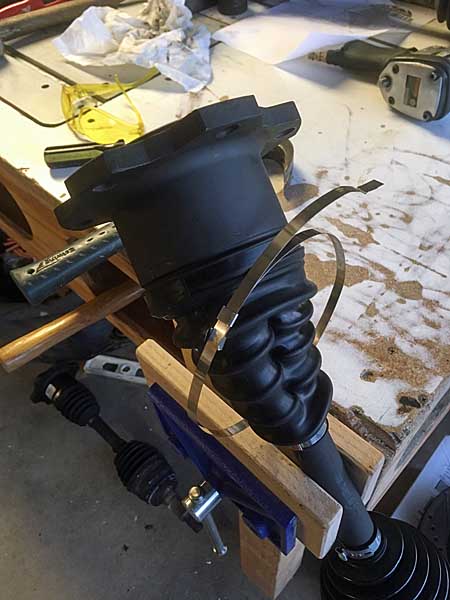
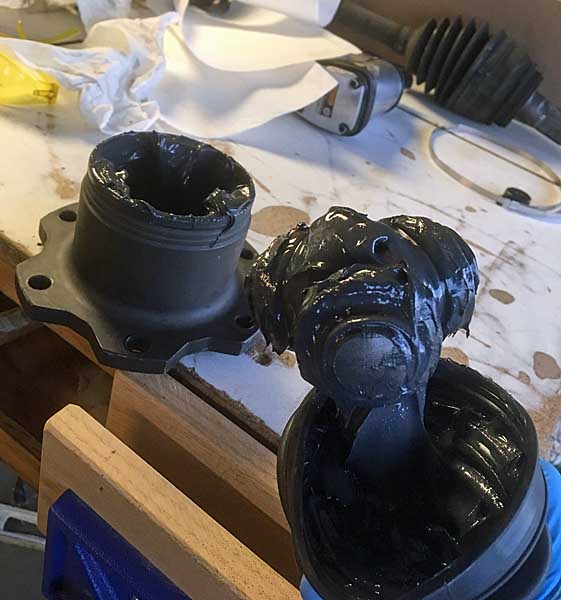
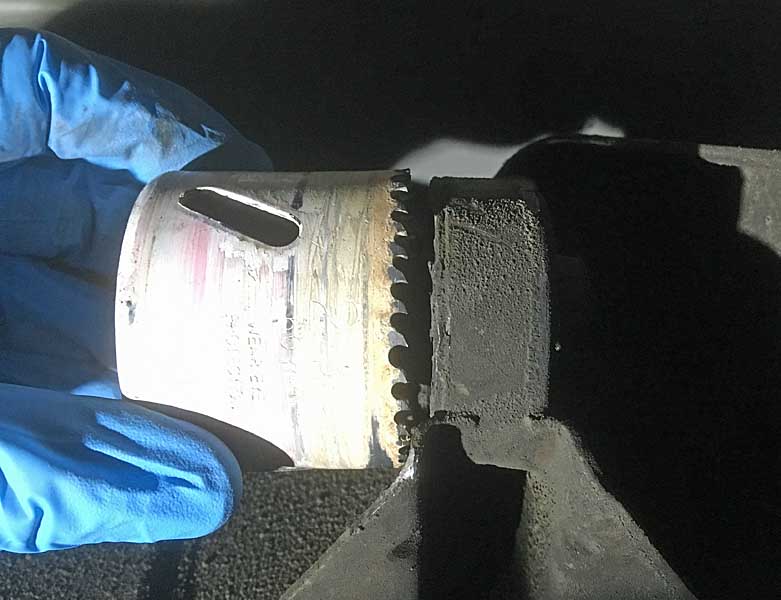
Various pics of material sourcing efforts and of the type of reinforced rubber material I've been talking about using.

crossmembershims04.jpg
crossmembershims05.jpg
crossmembershims06.jpg
crossmembershims07.jpg
crossmembershims08.jpg
crossmembershims09.jpg
 

jham4x4

New member
Why wouldn't you just order some new torsion bar cross member replacement bushings? Granted its a little work removing the rivets, it would be a better solution. I'm about to replace mine as they have 228K miles on them.
 

rayra

Expedition Leader
Can't seem to get just the bushings for a GMT800. Have to buy the whole mount with the rubber molded into the steel bracket, which must then be welded onto the frame rails, after cutting the old mounts off. Not paying a shop several hundred dollars to do that and I don't have the means or good enough welding skills to do it in my driveway. And can't dismantle things and drive it anywhere. I suppose I could do all the demo work and burn a AAA tow to a frame / mod shop to get the new ones welded in, then put it back together there or burn another tow bringing it home (you get 4 a year with AAA).

Doesn't appear to be rivets in my design. If the mount had enough of a flange I'd considering using rivnuts and bolting the new ones in. I have the ability to cut off the old mounts. Even considered having flange plates welded to a new mount, just so I could do the swap in my driveway.

I've also considered milling a replacement bushing out of hockey pucks. They're <$2ea. Disassemble, carve and grind out the cast-in rubber mount, cut down pucks to fit both the mount collar and the bolt sleeve. But step-cut the pucks so they fit like control arm bushings, stuck in from both sides but with a flange / rim filling the void between mount ring and the crossmember faces. Original bushing should have been made that way, anyway, to preclude the fore-aft shifting. And it would have prolonged the life, instead of relying on rubber cohesion to the bolt sleeve to stand up to the forces of such a heavy vehicle. Should have been made that way in the first place. In fact would probably be an aftermarket demand for such a replacement part. If there is such a thing I can't seem to find it.
It would be a neat little 'cottage industry' type of thing. Pucks are 3" dia x 1" thick. The spacing in the crossmember is ~1-3/4". The steel ring of the mount is around 2" in diameter.
So I'd have to slice off about 3/16 off the face of a puck with my table saw.
Then drill the center hole to be a tight fit on the bolt sleeve recouped from the old mount.
Then rig a jig to rotate the puck on and use either the DADO blade on the saw or preferably a nice rabbeting bit on my table router and cut that 1/2" high x 1/2" deep step in the outer edge of the puck.
I need a proper lathe, the table saw method is sketchy and dangerous.
I have a huge 12" disc sander mounted on a heavy iron table, I could thin the pucks and work their outer diameter down with that, messily enough. And the rubber should be hard enough to work with the router table. But I'll still want to make a jig to firmly control the puck without sticking my fingers in there.

or find some 2" OD control arm bushings and trim them to fit. That's the better way to go for a long-term fix, anyway. But not going to happen before I tear it all apart Fri-Sat. I'll probably take a full set of pics and dimensions while I have it all dismantled and then I can take my time finding best-fit bushings and obtaining and modding them. Then I can just take the torsion bar setup apart again and put in the customized bushings.

eta

find something like this, which can be pruned to fit in a pair, narrow ends touching inside the mount ring, sleeve thru them, the wider rubber flange sittign between the frame mount and the crossmember faces.
https://www.energysuspensionparts.com/bulk-2892
 

davisi

New member
Why not purchase a couple of new mounts, pull the bushings out, and use them in the mounts that are currently welded on?
 

lilkia

Active member
Why dont you use a press to press to replace the crossmember bushings? Cut or press the old bushing out of the housing on the frame (careful with the housing) and cut the housing away from the new bushing. Then use something like a balljoint press to press in the new one. I can see the three little indents on the old bushing to hold it in place. You may have to make some anvils using some plate or like most backyard press jobs the right size socket. Its honestly no different than a lower control arm bushing.

Looking back was the one side riveted on and the other welded? Can you not cut off the welded side and drill the frame and through bolt both sides?
 

rayra

Expedition Leader
I believe the new mount rubbe rwould be adhered to the steel. Might damage the new bushing trying to remove it. Also, that adhesion is part of how that bushing is designed to work, I'll diagram a cross section view. The bolt sleeve is stuck in the rubber donut, the donut is stuck in the mount ring. The aging / failing front control arm bushings are allowing some fore-aft movement in the suspension. That's transferring fore-aft forces to the sleeve inside the mount donut and breaking it down. Its guts are now allowing the crossmember to shift rearward, friction in the torsion bar end / key is keeping the crossmember pushed back. The torsion bar is walking forward out of the key. You can see the exposed hex end of the torsion bar at the top of that earlier picture of the mount.

Too, it's $80+ to buy a pair of dorman mounts, just to excise the bushings. The rubber material I've bought was $18 and will be about the same amount of work. Modifying new rubber control arm bushings wouldn't cost much more, either, they ought to be less than $10 apiece. But cutting them out of new mounts would destroy the very adhesion this mount seems to rely on. Put them in and there'd be nothing to keep the new rubber donut from pushing right out of the ring mount.

crossmembershims10.jpg


When the adhesion on the sleeve of the donut itself fails, the forces pushing the torsion bar rearward then move the crossmember into contact with the metal of the mount, that's part of the clunking I'm hearing / feeling. I really want to interpose some rubber between those metal parts. And there we are back at making large washers out of the thin belt material, or making some control arm bushing fit.

I'm taking it all apart Fri/Sat, I'll take some detailed pics and measurements of the existing mount when I do. But I expect to fashion some fender-washer-like pieces to go around that bolt sleeve and fill the gaps between mount ring and crossmember faces as at least a stopgap. And use the measurements to modify some control arm bushings later. But tomorrow it's replacing my CV axles and upper control arms/bushings/upper ball joints. And getting those torsion bars seated back where they belong in the keys, get the crossmember evenly spaced on the mounts. And get it shimmed so it can't move as much and clunk around.
And while I have it all loose, see what condition my lower control arm bushings are in, how much play is there. I'm sure I need to replace them too. 140k mi and 17yrs. Delco lowers with bushings and ball joints already in there are $135ea. Moogs $115. Maybe later this Spring. At that point the only moving things in the front end that I haven't replaced are the part the wheel hubs bolt to (the spindle arm on other designs), the sway bar and the steering box. I'll have replaced everything else.

/got to remember to do my rear bearings soon, too. I drive too fast / hard to ignore them any longer, especially after the front left failing
 

fl0w3n

Observer
On my 06 Duramax the original owner's lift kit had drop torsion cross member brackets on it.

When I got rid of that junk, I was able to buy through GM Parts Direct everything I needed to return it back to factory. The ears for the frame, the bolts to hold it to the frame, and the entire cross member.

I did it in my driveway.
 

fl0w3n

Observer
Also, Rayra, did you ever solve the fuel filling issue where the tank seemed to pressurize and trigger the gas pump to click off?
 

rayra

Expedition Leader
@fl0w3n

Yes, the charcoal filter change and the reverse-flow compressed air injection thru the line from the filter cannister to the fuel tank seemed to clear those issues. Didn't have any more trouble filling the tank to a normal cutoff. My presumption is that there's a floating cutoff / rollover valve like a reverse snorkel in the fuel pump assembly, although I could never find certain documentation of that. And that is was stuck in the closed / rollover position, thereby blocking flow to the evap cannister and thus the vapor backpressure that was tripping the filling station cutoffs. I figured the air blow knocked it loose. Never had an early cutoff after that.
The missus had a habit of pumping fuel and then squeezing more in after the auto cutoff, as she often ran the vehicle until the 'low fuel' light came on. That sort of overfilling usually results in the evap getting saturated / wet with fuel and triggering other errors. Begged her not to run the tank dry or overfill it, for many reasons. But that original fuel pump made it to the 199,650mi if had on it when we sold it last Halloween.


Took another look at a batch of pictures I took back on Feb5, of the torsion key crossmember mounts, and now understanding better what I'm looking at those mounts are failed / failing. And there's clear evidence that the crossmember is banging against the steel ring housing the rubber mount. There's supposed to be about 5/16" of space between the ring and crossmember faces. The side very close to the ring is less than 1/8" and is the side towards the front of the vehicle in all the pics, the first half are the passenger side mount, the rest are the driver side and I've highlighted the contact damage in red. These are the areas I want to get some reinforced rubber between, while I work up some modified control arm bushings.
And you can see from the broader pics, the mount is welded to the fully boxed frame, no bolts or rivets. Maybe the 2500 frames are an open C channel?, with the same design of mount riveted in thru the bottom triangular flanges of the replacement mounts. Would just need to drill both rivets and bolt holes in the replacement's flange, to replace the mounts. Not so on the Sub.

crossmembershims11.jpg

crossmembershims12.jpg

crossmembershims13.jpg

crossmembershims14.jpg

crossmembershims15.jpg

crossmembershims16.jpg

crossmembershims17.jpg


well, whatever it is, I should have it all apart in about 12hrs. And be back late Fri nt or Saturday with the results.
 

lilkia

Active member
I thought one of the pictures showing rivets in the mount was yours but I was wrong. However looking at your pics it looks like there is the mount ring and then another metal ring surrounding the bushing. Even if there isnt. The bushing should just be a slip fit like the control arm bushings. The bushings shouldnt go anywhere. I would think there is just a vertical load on them. There shouldnt be any lateral movement. Theyre probably just a glue in bushing.
 

rayra

Expedition Leader
yeah and they're reasonably priced, too. Have you actually bought and used them? The lips on them might help keep them in place in the ring.


what a drag, today. Got most of it done, but had and have some stubborn problems.

Things were going pretty good on the driver side, got everything apart but was still waiting on Fedex to deliver my new upper control arms.
So I stuck the upper ball joint bolt back down in its hole while I started jimmying the new axle into place. Got the splined end into the hub, then started shifting the other end into place and somewhere along the way I knocked the upper ball joint stud loose and the brake / hub assemble fell over outward, pulling the axle out of my hands. Fumbled around to get things re-aligned and suddenly the axle don't fit. Examine things and realize I've pulled the brand new CV axle apart, inside the boot. Crap.

Skipped that and went to pulling the other side apart and couldn't get the ball joint to separate. And THEN Fedex shows up.

So I looked at what I still needed to do and the lowering sun and started doing triage, figuring I wasn't going to get it done before dark.

Put the remaining new axle on the driver side (after comparing the messed up one to it), put in its new upper arm and got it all put back together, sans the dismounted torsion bar.

beat, hammered, pried, torched the passenger side, still can't get the balljoint to part. Running out of light, I dismantled the torsion crossmember and took the caliper measurements on the torsion crossmember mounts / rings, and slung all the tools and parts into the garage.

After dinner I went back out and set out trying to cut and drill reinforced rubber. Good times. Good thing I had a vapor respirator handy. Slinging sticky melted bits of rubber everywhere, it was awkward and slightly hazardous, but I fabricated what I intended to make. But I don't htink I'll be able to fit two rubber washers on each face of the mounts. They're a bit too thick. But I'm gonna try tomorrow, first thing. Want to remount the torsion bars as I need that force to help get the balljoint apart.
Things are going to get very loud and very hot tomorrow. I'm going to strip everything I can off that passenger armature tomorrow, brake assembly, ABS sensor wire, brake hose, hell the new hub too, etc, anything that wont like big hammers and MAP torches.

crossmembershims18.jpg
crossmembershims19.jpg
crossmembershims20.jpg
crossmembershims21.jpg
crossmembershims22.jpg
crossmembershims23.jpg
crossmembershims24.jpg
crossmembershims25.jpg
crossmembershims26.jpg
crossmembershims27.jpg
crossmembershims28.jpg
crossmembershims29.jpg
crossmembershims30.jpg
crossmembershims31.jpg
crossmembershims32.jpg
crossmembershims33.jpg
crossmembershims34.jpg
crossmembershims35.jpg
crossmembershims36.jpg
crossmembershims37.jpg


I gotta find my pneumatic chisel. Or rent a hammer drill. Something I can drive upward on that ball joint stud with. Hammering isn't getting it done.

Almost forgot. Dimensions. The mounting rings are 1.85" ID, call it 1-7/8". OD is 2.15". Ring depth/width is .9". The bolt sleeve in the mount is oval / tic-tac shaped, 1" OD x .85"
So when I cut the rubber washers I just cut the middle hole at 1".
The gap between the end flanges of the crossmember is 1.52". Leaves .62" of gap space. 4 of my washers are .75.
I expect to pry the bolt sleeves forward again, at least centered, and get two washers on the front face. And at least one on the back. I'm going to try to lube things up with spray silicone wedge the pairs in place and try to pull the crossmember down onto them, aligned well enough to drive the bolts thru. The crossmember tabs are flat steel protrusions, might get enough flex to force things snug.
But at worst I'll get two layers - 3/8" of rubber on the front face of the mount and 1 layer on the back side. It should help stop the metal on metal contact.


And there's no way I got that band clamp back on there tight enough, it'll probably sling grease everywhere first time I get things nice and hot. I should find another way to clamp it up. If I can find some ladder clamp(s) that aren't made from Chinesium crap. Maybe I'll put the original axle back in there tomorrow, when I put things back together, while I find a proper clamp.
 

Forum statistics

Threads
185,914
Messages
2,879,557
Members
225,497
Latest member
WonaWarrior
Top