How would you outfit this custom LJ?

jscherb

Expedition Leader
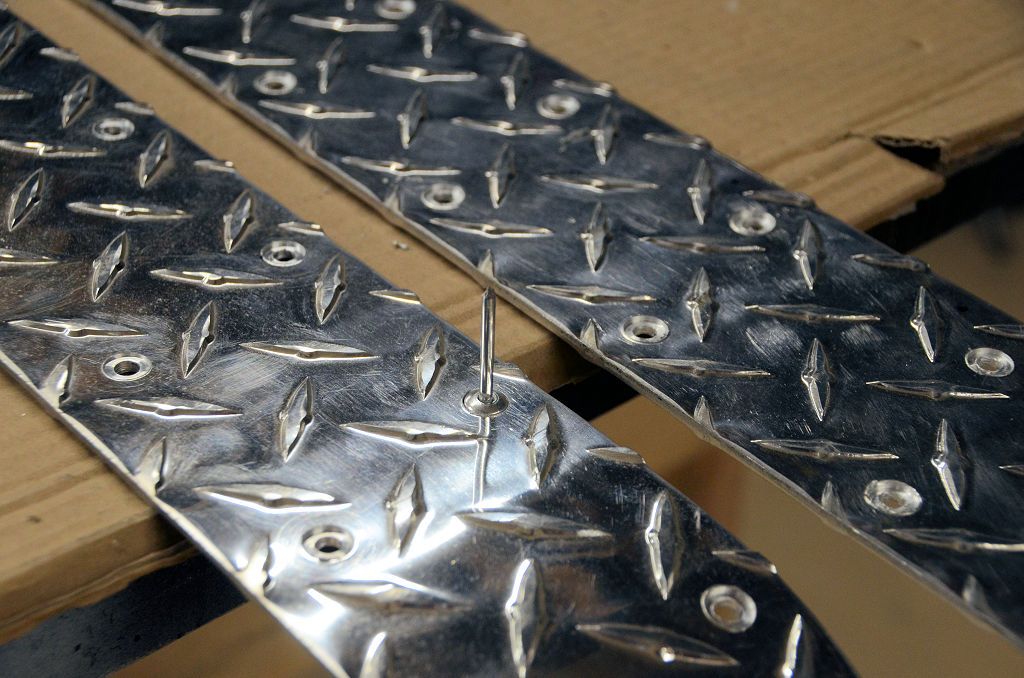
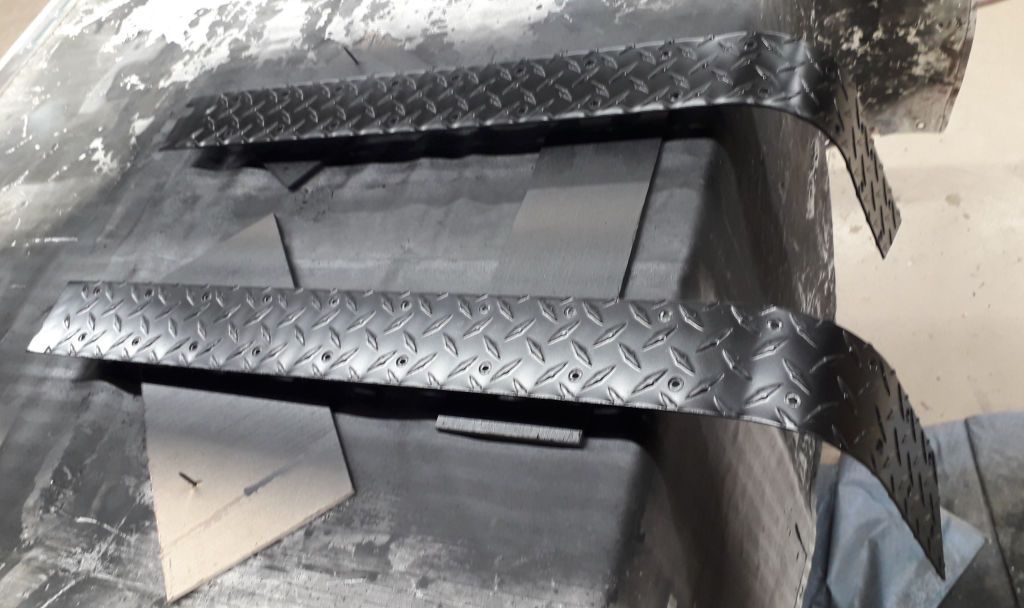
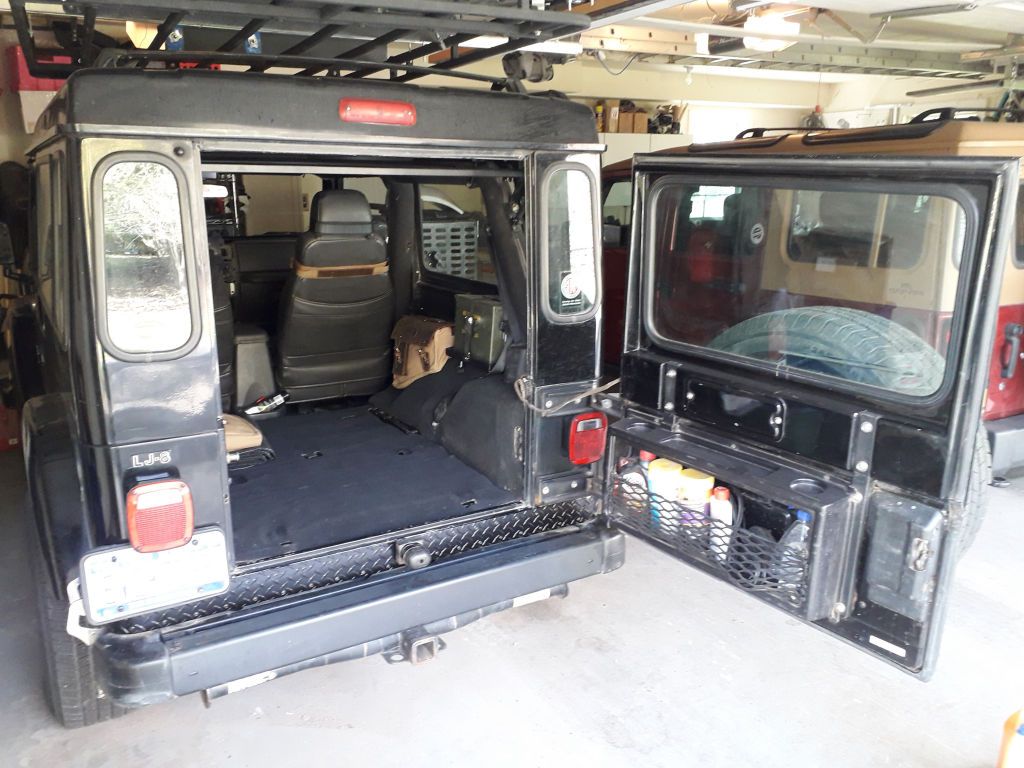
I've got some 1/8" thick diamond plate so the first thing to do is bend it to match the curve of the tub.

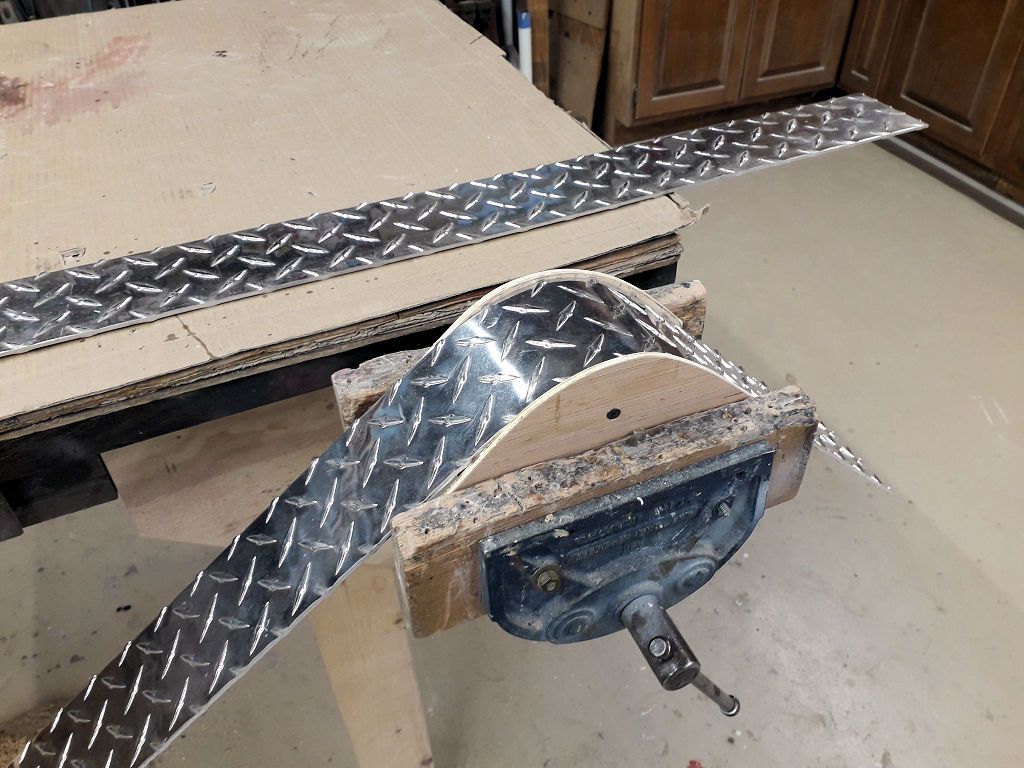
Since the metal is fairly narrow, the curve can be bent by hand and to do that accurately I've made up a wooden buck to bend it around. It's a slightly smaller diameter than the corner of the tub because the metal will spring back a bit during the bending process. I added guides along the side of the buck to ensure the bend is at 90 degrees across the metal rather than skewed.

CornerArmorBuck_zpsksesttcx.jpg


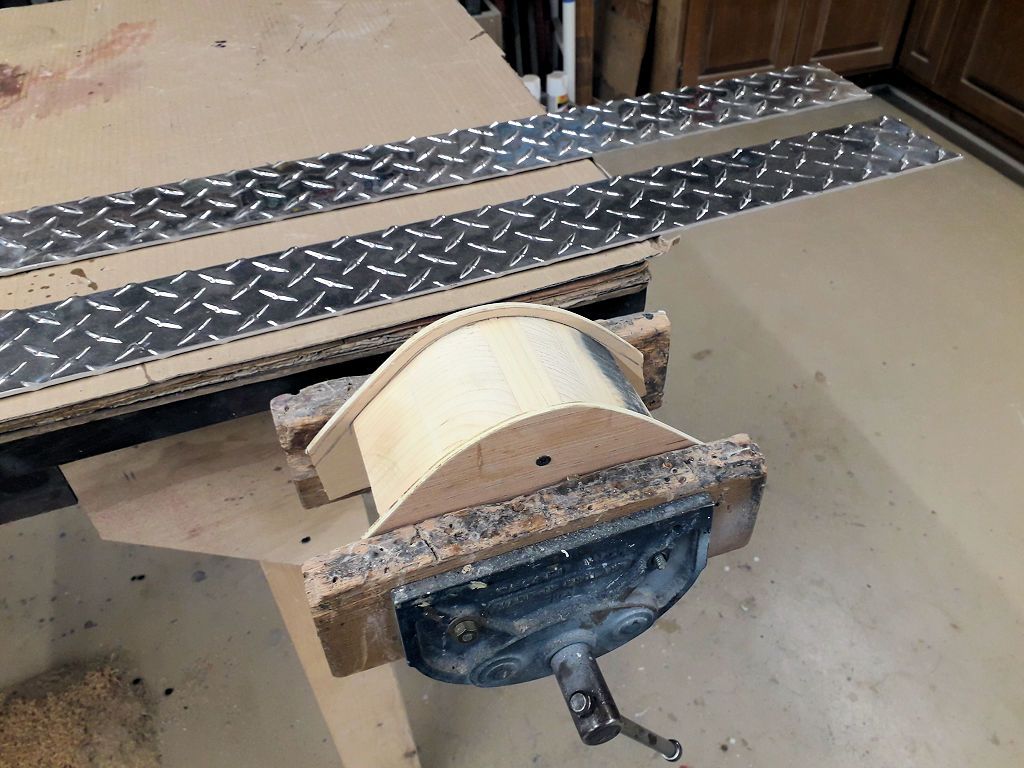
The metal is 1/8" aluminum so it was pretty easy to bend it over the buck by hand.
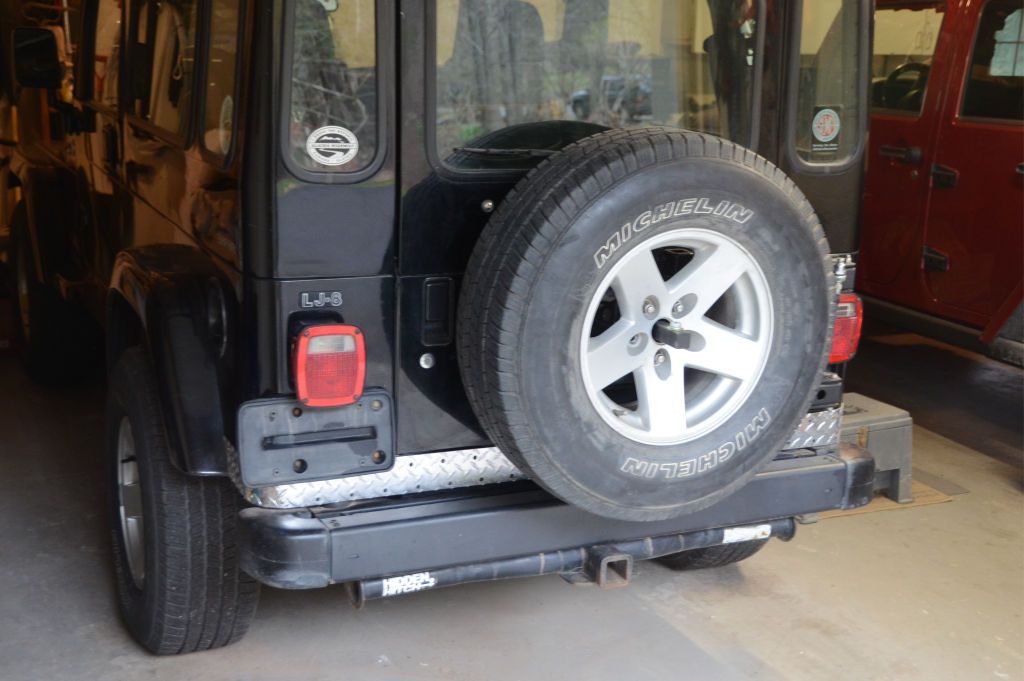
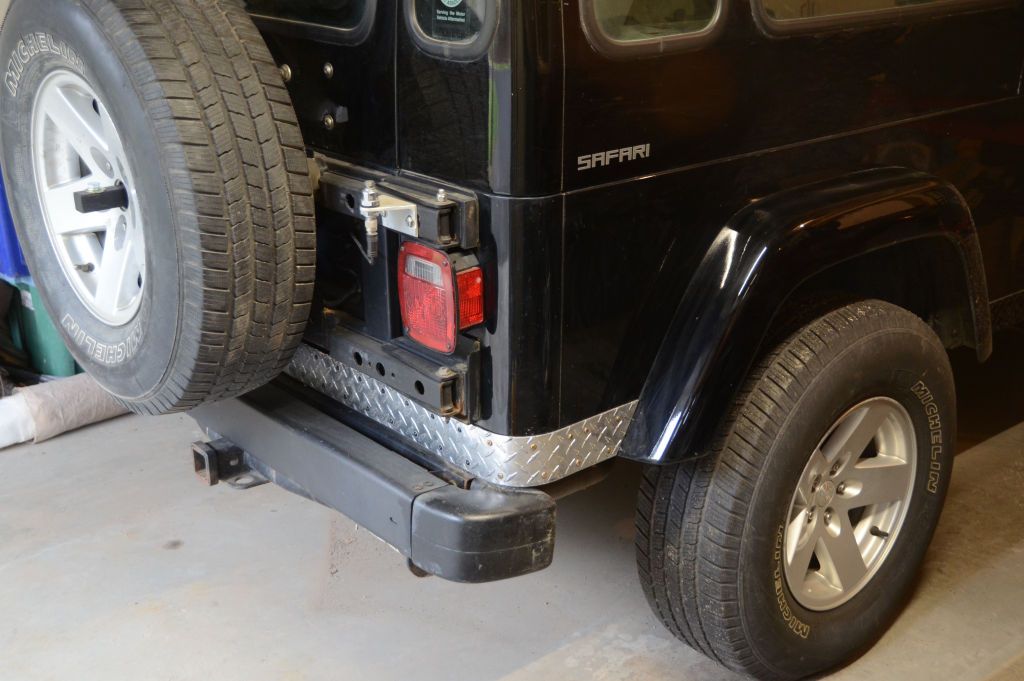
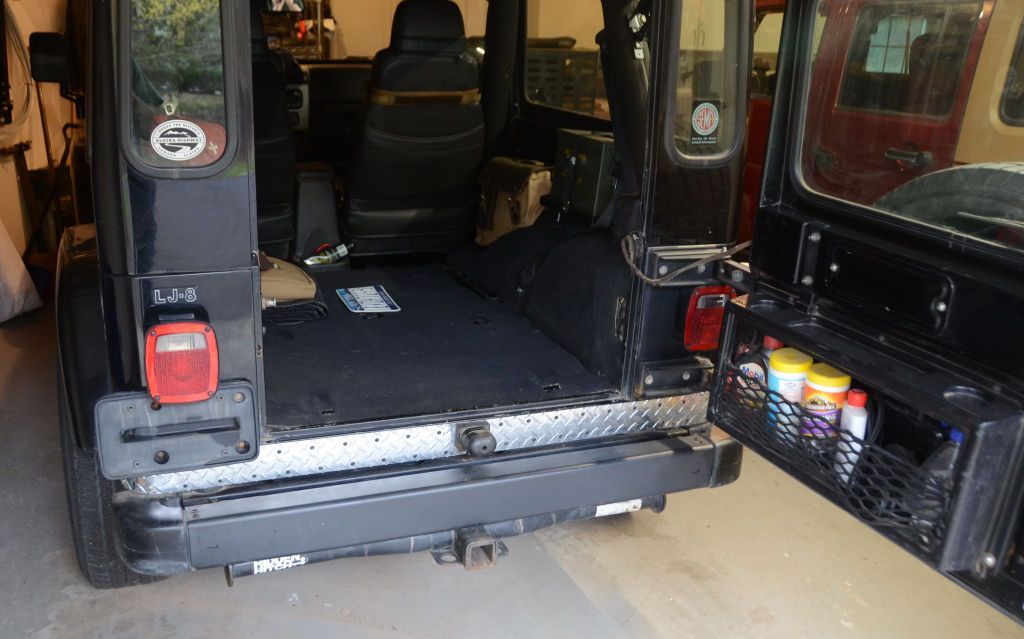
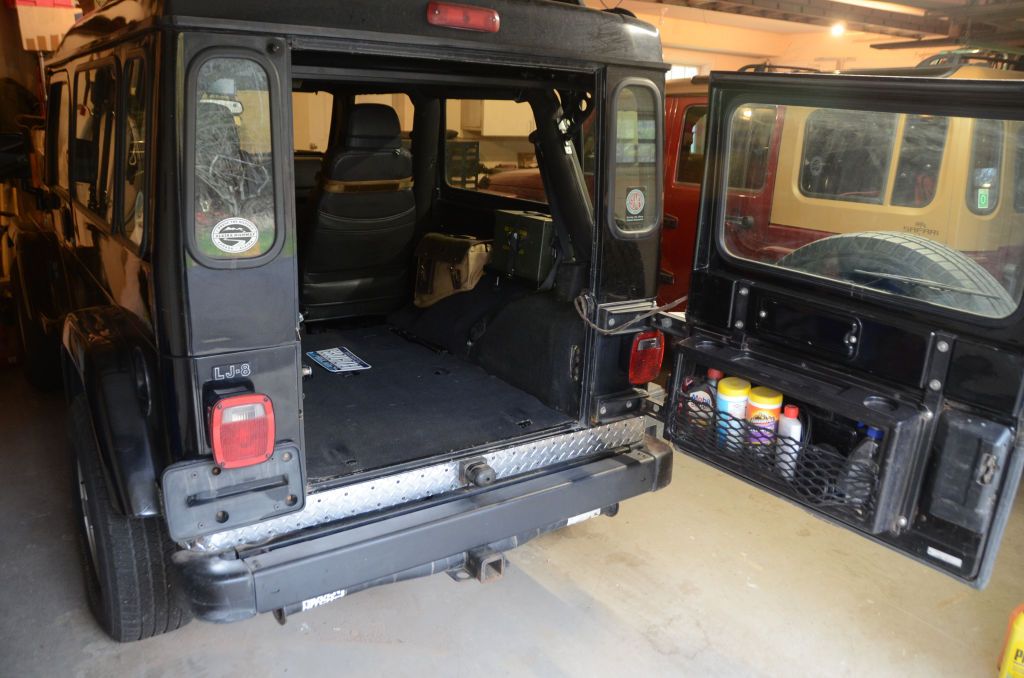
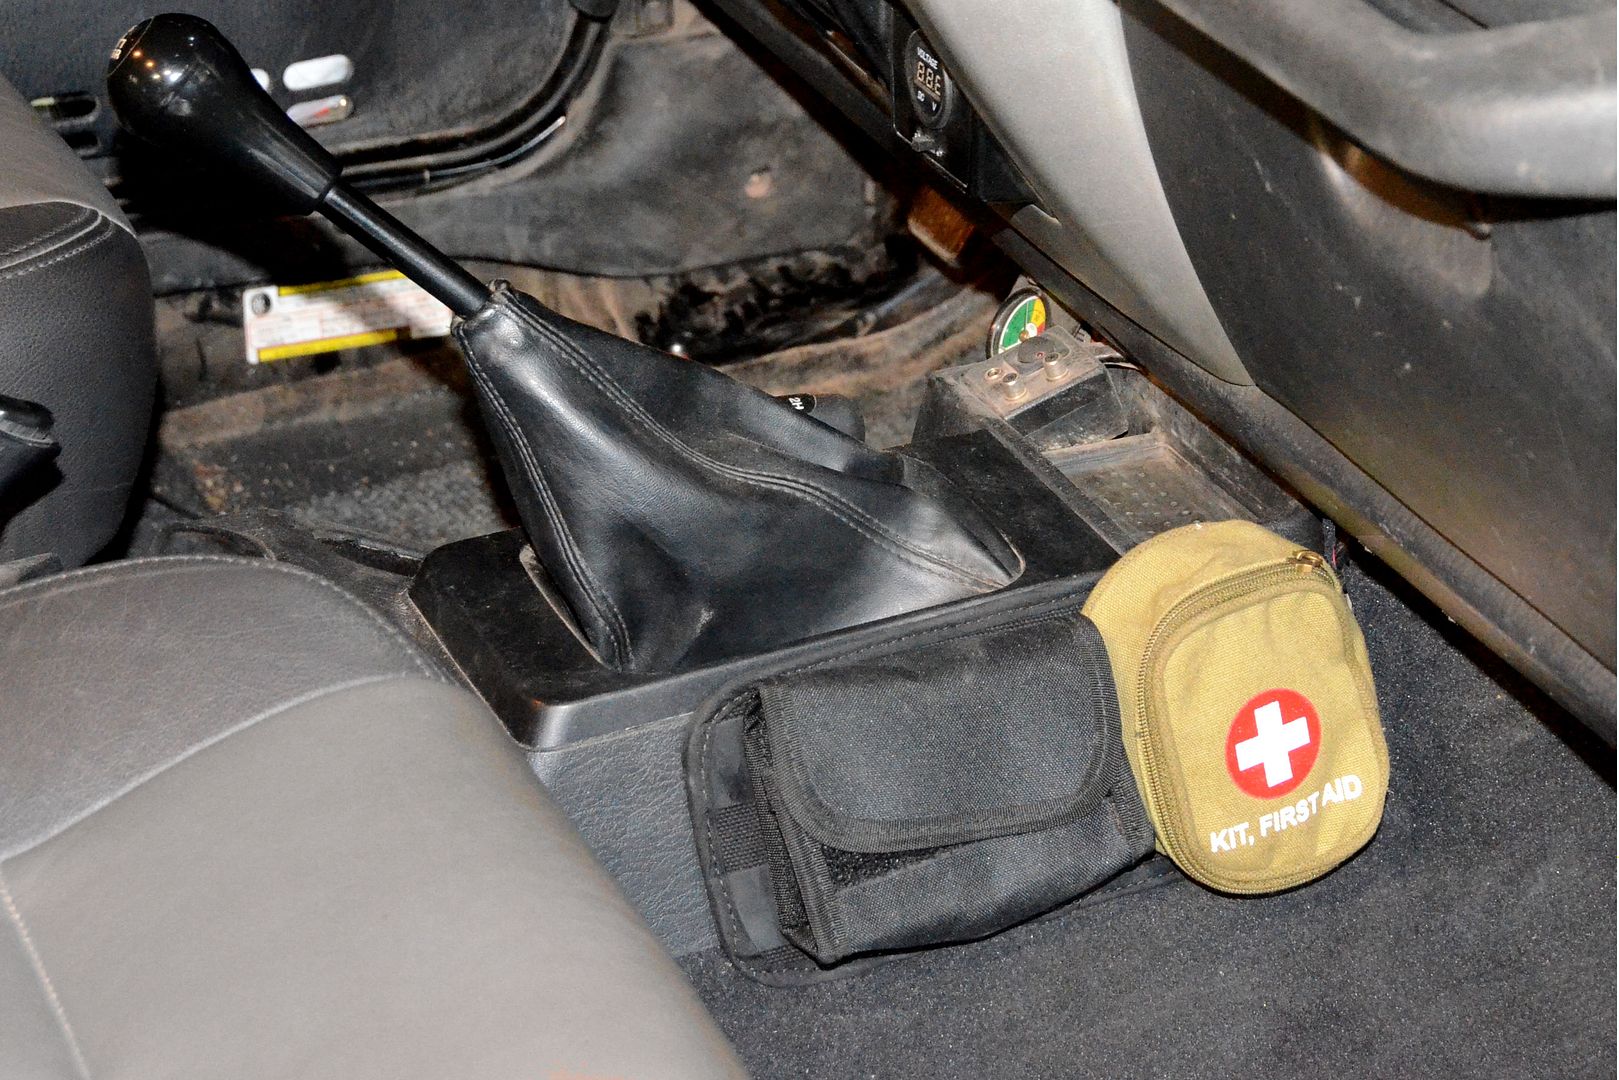
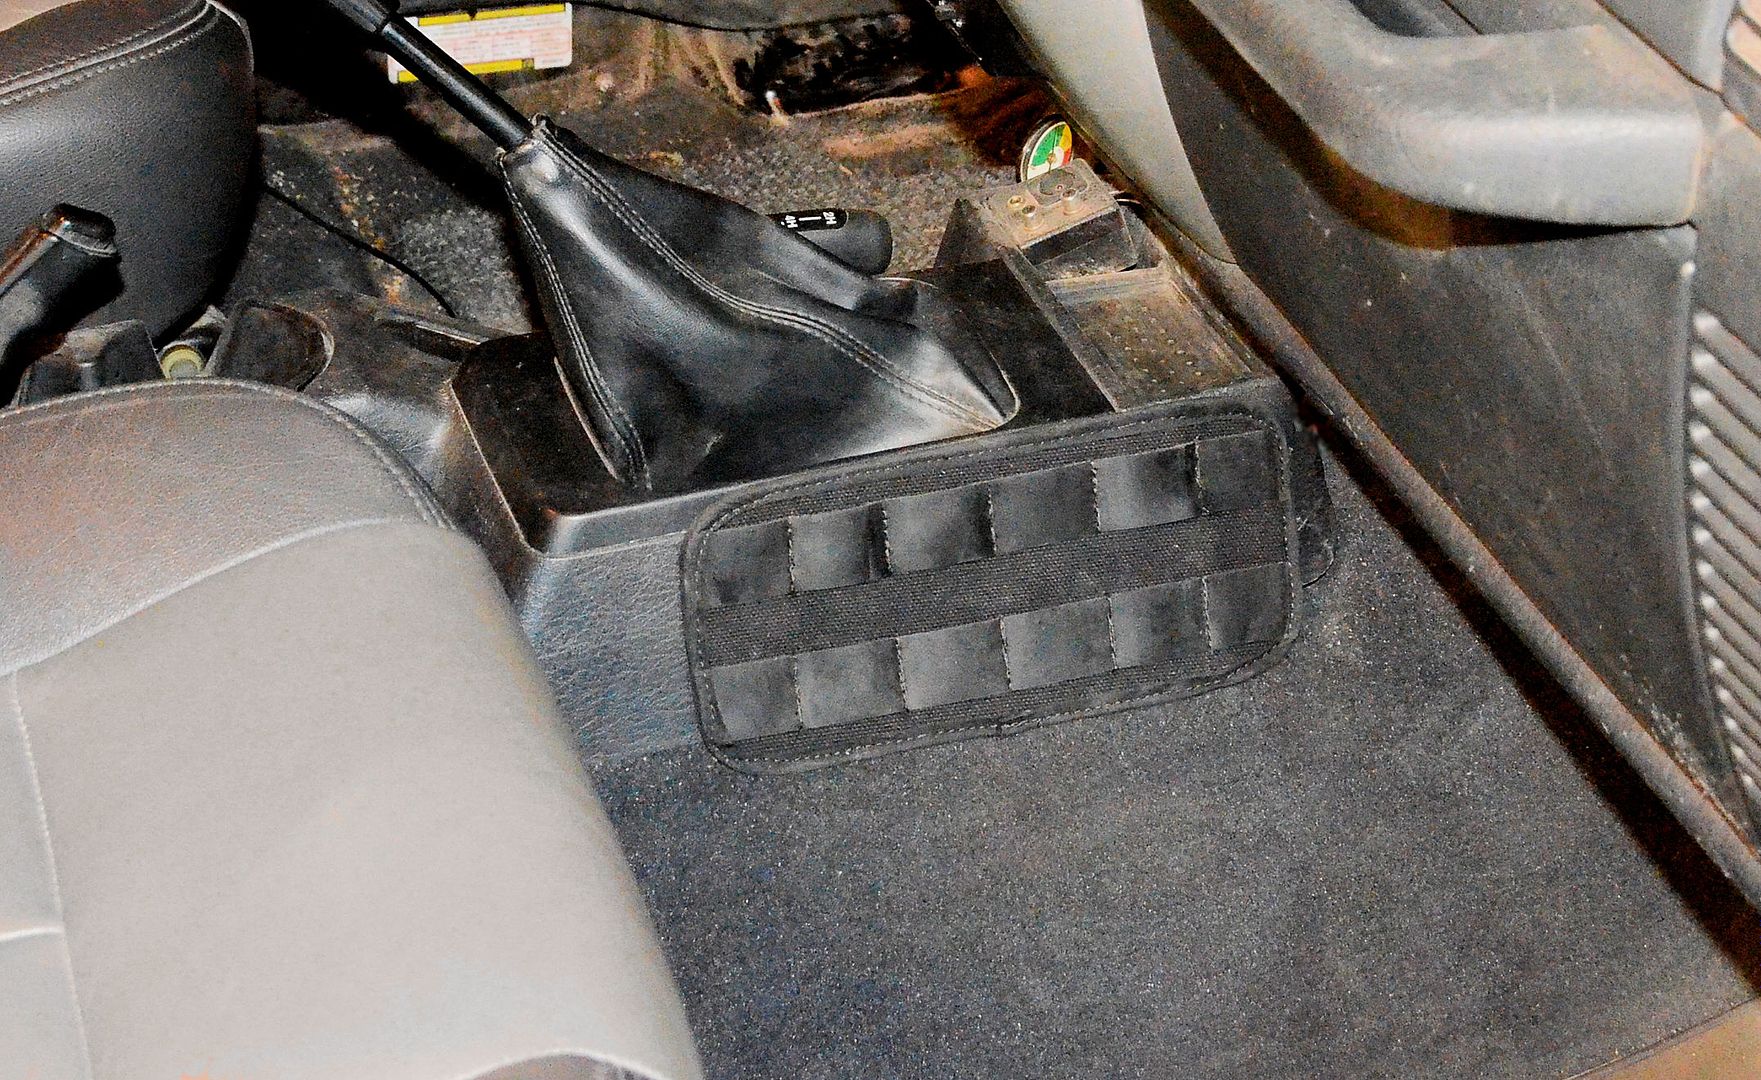
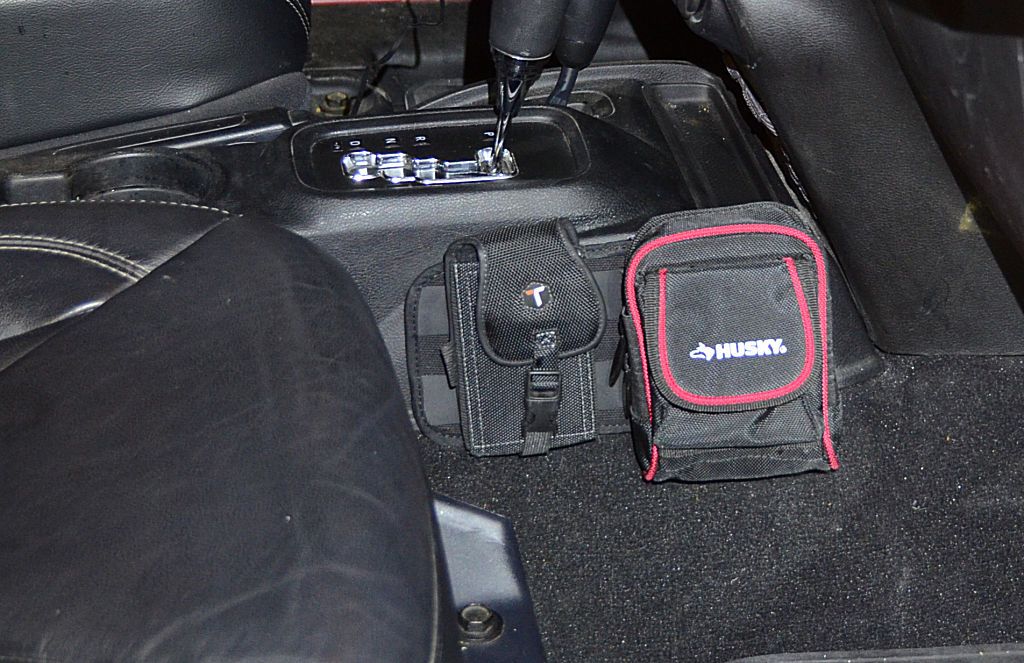
CornerArmorBending_zpsrt2kkamu.jpg


Test fitting:

CornerArmorFitting1_zpsol6sds7e.jpg


CornerArmorFitting2_zpsu2qsaoeg.jpg


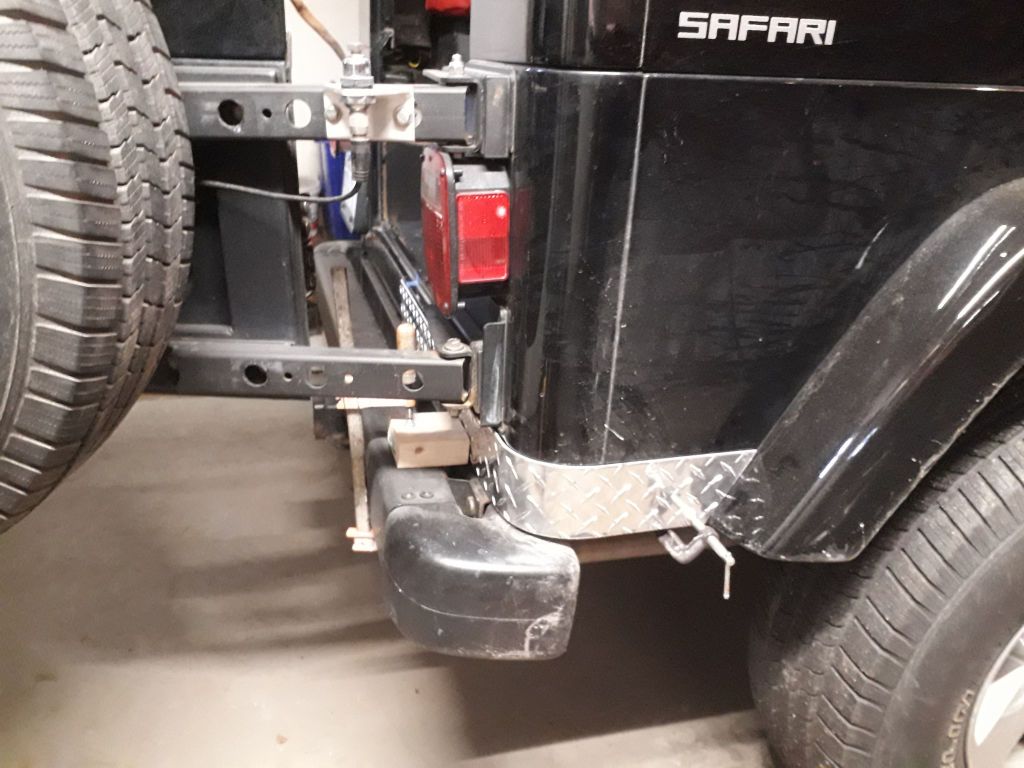
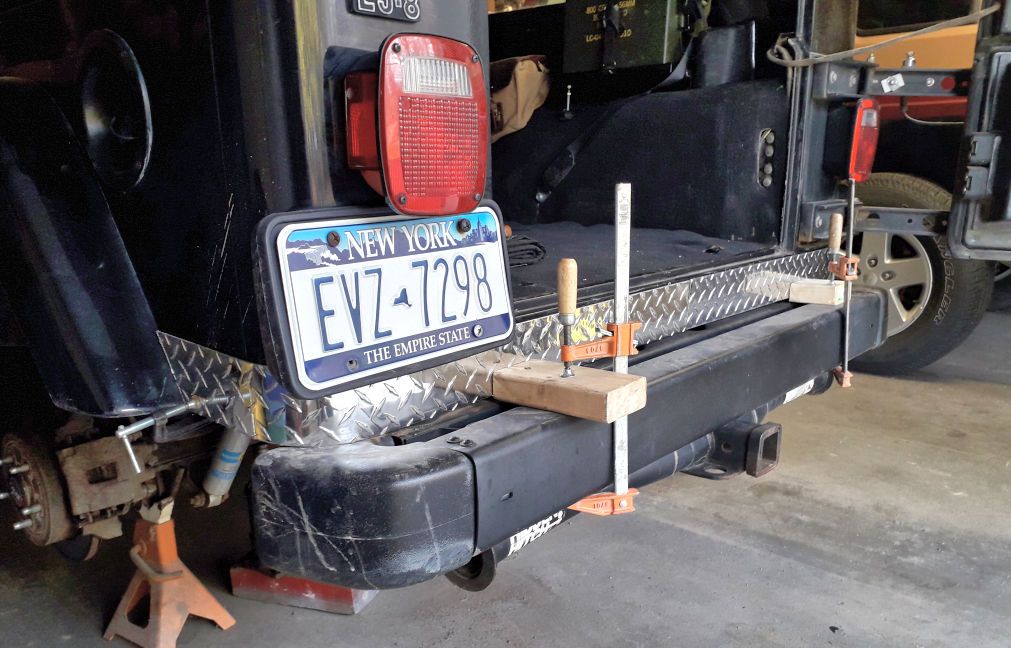
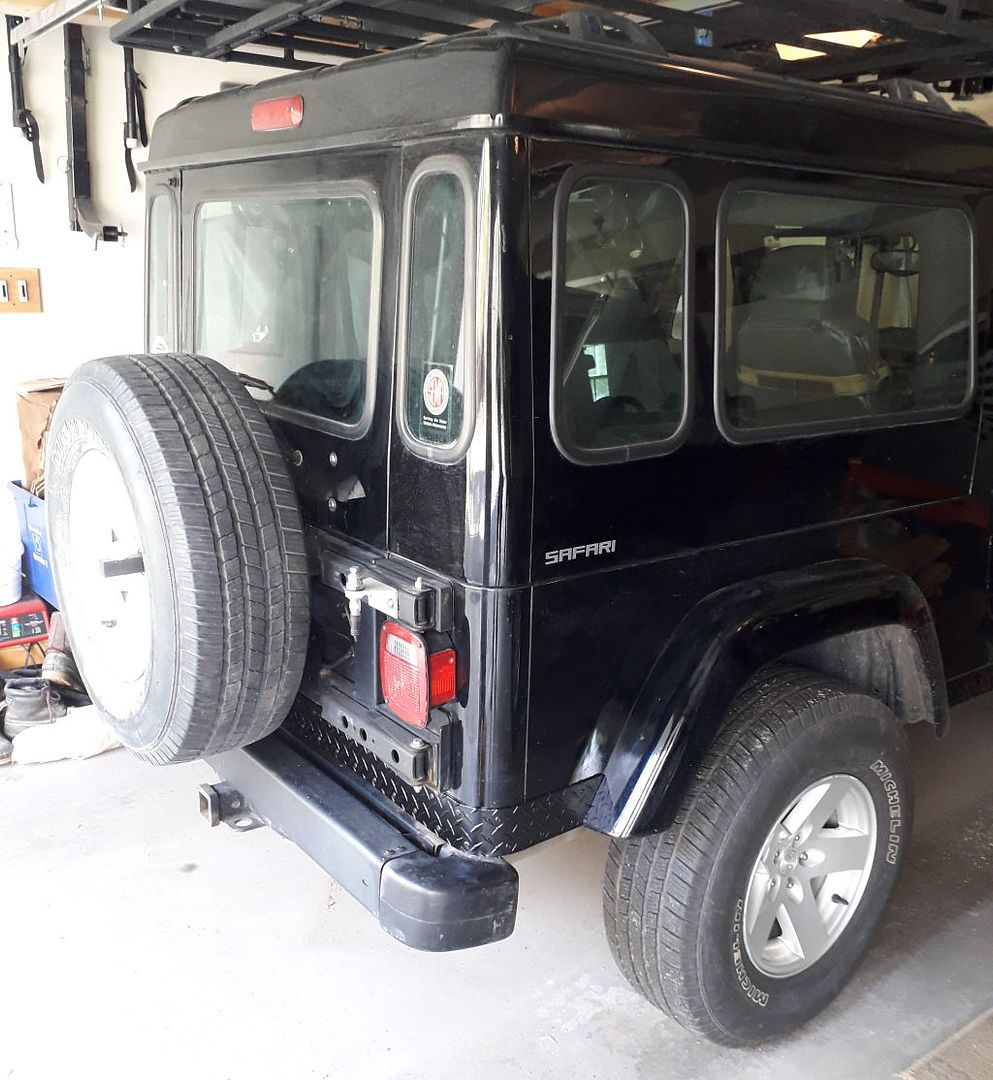
I've done it in two pieces; they meet in the center where the spare tire snubber mounts so the joint won't be visible.

Next I'll drill mounting holes in the diamondplate and finish them in satin black.
 
Last edited:

Zeep

Adventurer
New York winters are going to do a number on that tail panel, under the tailgate.
You'll need to remove, and clean under that a couple times a year.
That's what I do, under my Rubicon rockers.
 

jscherb

Expedition Leader
New York winters are going to do a number on that tail panel, under the tailgate.
You'll need to remove, and clean under that a couple times a year.
That's what I do, under my Rubicon rockers.
I will be using pop rivets and marine epoxy to attach the diamondplate to the body; the epoxy will increase the strength beyond what pop rivets would provide and will also permanently seal the diamondplate to the body.
 

jscherb

Expedition Leader
For a neater looking installation, I'll set the rivet heads flush with the surface by counterboring the holes a bit.

CornerArmorCounterbore_zpspypkenqe.jpg
 

jscherb

Expedition Leader
Final test install; everything is installed temporarily with screws so I can check the fit and locate the holes. Next I'll remove it for painting.

CornerArmorTestInstall1_zpsps9ehyiu.jpg


CornerArmorTestInstall2_zpsxnlpuckr.jpg


CornerArmorTestInstall3_zps3pesqkxa.jpg


CornerArmorTestInstall4_zpskd0usr69.jpg
 

jscherb

Expedition Leader
The first step in finishing is epoxy primer. Since the final color for these is black, I used black epoxy primer, then I shot it with a satin black topcoat:

CornerArmorPainted_zpskcdjjlnl.jpg


They'll be ready for installation in the morning.
 

jscherb

Expedition Leader
The side of the center console seems like a good place for small Molle pouches, flashlights, etc., so I came up with a simple Molle panel that installs to the side of the center console with no drilling or adhesive. I made this a while back and tested it in the JKU but finally got around to testing it in the LJ today.

ConsoleMolleTJ2_zpsbgxaawrz.jpg


If the seat is slid all the way forward it could interfere with a pouch towards the rear of the Molle panel so the panel is a little shorter than the console.

ConsoleMolleTJ1_zpss0cahc5y.jpg


I made the panel stiff enough to support belt clip pouches, in this photo there's a Husky belt clip pouch from Home Depot intended to be used on a tool belt, and a small belt clip phone pouch (this photo was taken in my JKU, the Molle panel attaches to that console the same way it works with the TJ console.

ConsoleMolle2_zpso3hqvvl9.jpg
 

jscherb

Expedition Leader
Has anyone seen one of these before?

I found this used early TJ-era tailgate storage compartment for sale last week and it wasn't expensive so I couldn't resist picking it up to see if it could be useful. It's from Bestop and I think it was discontinued early in the TJ years because the only references I could find to it online go up to 97-02 TJs. Since it was discontinued I'm guessing it didn't sell too well so probably not many people thought it would be useful.

I temporarily installed it on a test tailgate in the workshop with clamps:

BestopTailgateOrganizer1_zpsw9cxyubx.jpg


It's got three small pockets, two larger pockets and one full-width pocket.

BestopTailgateOrganizer2_zps076jpfpk.jpg


It's designed to clip in place not unlike the plastic strip on the bottom of a soft top; strangely the metal mounting strip it came with is wider than a TJ tailgate so to test it on this tailgate I installed a strip of automotive upholstery j-clip which works very well. In this photo the original long metal strip is at left and the plastic j-clip I used for the temporary install is under the compartment panel, you can see the plastic strip sewed to the back of the panel that slips into the clip:

BestopTailgateOrganizer3_zpslrfgwlme.jpg


Not sure if I'll use it; the color matches my JKU hardtop so I'll see if there's a use for it in that Jeep.
 

1stDeuce

Explorer
Been a while since I've visited this thread. Soooooo many ideas!!! :) I feel like such a slacker... My poor TJ just gets (ab)used as-is. About the only thing I've done to it in the last few years is change the oil and replace the tires. Oh, a few weeks ago I finally welded up some nice tow bar brackets and bolted them to a new (to me) TJ front bumper. Much better than the multi-piece "removable" Roadmaster setup that I had bolted to the old bumper. :)

My TJ has 5" more rear overhang than an unlimited, but I still haven't managed to hurt the tub where yours is bent... I ran the stock TJ bumper when I did more Moab, and it did bend up some. I have a Mopar rear bumper now that offers a little better departure, and hasn't bent. I do have some marks in my grill where the XD9000i has bumped it. Seems crazy since there's at least 1/2" of gap between the two, and I've never seen it get much closer, even when using a hi-lift on the front bumper. Pretty sure it hit when I was backing down a ledge on Poison Spider. It landed pretty hard on the front bumper, with the front tires hanging in the air... :)

Keep up the posts, some of us really enjoy the inspiration!!
 

jscherb

Expedition Leader
A few weeks ago I posted this Molle band for the LJ's seats:

YJSaharaLJTest2_zpsmhl3zomw.jpg


The idea came from YJ Sahara seats, although on the YJ the bands are permanently sewn to the seats. I updated the design so the band just slips over the seat and is removable, and it supports Molle gear on back.

A pair of YJ originals that have seen better days:

CLSeats1_zpsa8ibywez.jpg


Even though my interior isn't Spice color, I sewed the one in the first photo in Spice/tan to match the YJ originals just to see how they might compare to the original. I just sewed a set in gray to match my leather upholstery.

YJSaharaGrayBand2_zpsxbq844wj.jpg


YJSaharaGrayBand1_zpsdmcvpp5p.jpg


With a military surplus Molle bag:

YJSaharaGrayBandMolle_zpsvvckd9g5.jpg


They seem like they'll be useful.
 

jscherb

Expedition Leader
The YJ Sahara came with a bag permanently attached to the back of the seat:

YJSaharaSeatBand_zpsjvgky8h4.jpg


I also sewed an updated version of the bag. I made it all gray because my interior is gray/dark gray. Might look better in dark gray but I had all the necessary materials in light gray so that's what I used.

SaharaBagProto1b_zpsebawowti.jpg


My updated design bag is removable and attaches with Molle straps. It also has a removable shoulder strap.

SaharaBagProto1a_zpsnwxalvwc.jpg


I'm not sure the YJ style bag is very useful because it's pretty small and doesn't hold much, but I can see lots of uses for Molle bags hanging on the seat backs.

YJSaharaGrayBands_zpsuedmwawq.jpg
 

jscherb

Expedition Leader
A week or so ago I posted photos in my JK thread of a new design spare-mounted trash/gear bag I came up with:

LidSides_zpsedder2eq.jpg


In that thread I also posted photos of a load of soft tops the dealer gave me when they were cleaning out their storage room. Using some of the fabric from one of the premium tops they gave me, I started work on a spare tire bag. In this photo all of the parts are cut and ready for sewing to begin.

PremiumFabricKit_zpstmq7aqzg.jpg


It'll end up looking like this photo edit in which I replaced the Spice color with black:

TrashHopperLJ2Black_zpsdzr0y1xd.jpg


Should match the black LJ nicely. And speaking of matching, in this next photo the remaining pieces of premium soft top fabric will be used to make a new set of roll-up soft sides for the LJ Safari Cab - the black premium fabric will look great with the black LJ. I've got all the parts for those - fabric, zippers, plastic strips to secure the bottom of the sides to the tub rails, everything except the tinted vinyl window material. The supplier I want to use for that is very slow in shipping right now due to virus constraints. It won't stop me from sewing the soft sides though, installing the windows is the very last step so if I finish the rest of the sewing before the vinyl arrives the sides will end up being "panel truck sides" with no windows until the vinyl does arrive.

PremiumFabricParts_zpsooee6f5x.jpg
 

jscherb

Expedition Leader
I've had an Exogate on my LJ since before it was a production product - I made the prototype of what became the Exogate in my home workshop in 2011. Since then I've made many accessories for the Exogate, many of which I've posted here and some of which have become production options, like the Hilift and Rotopax cariers.

One thing that could be useful is a prop to hold the tailgate open - say you're parked on an incline and the tailgate wants to swing closed, a prop to hold the gate open would be very handy.

I've been working on a prop design. This design bolts in place in the current production Exogate wide-swing hinges with no drilling and it shouldn't interfere with any other accessories bolted to the hinge. Here's one view of the design showing the closed and propped positions. A few details not included in this drawing, this is a slightly simplified view to show the concept of operation.

ExogateProp1_zpsujwwt3dj.jpg
 

Forum statistics

Threads
185,813
Messages
2,878,471
Members
225,352
Latest member
ritabooke
Top