You are using an out of date browser. It may not display this or other websites correctly.
You should upgrade or use an alternative browser.
You should upgrade or use an alternative browser.
ImNoSaint's 2.5 Thread
- Thread starter Imnosaint
- Start date
Imnosaint
Adventurer
Thank you. I wouldn't do it without the Blue Sea box.Nice man, it's looking good. I dig the auxiliary light wiring job. Those Blue Seas fuse boxes make life real easy.
Imnosaint
Adventurer
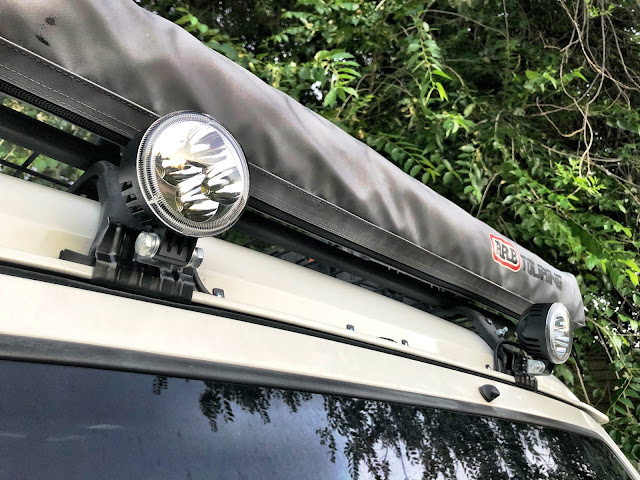
Rear Work Lamps
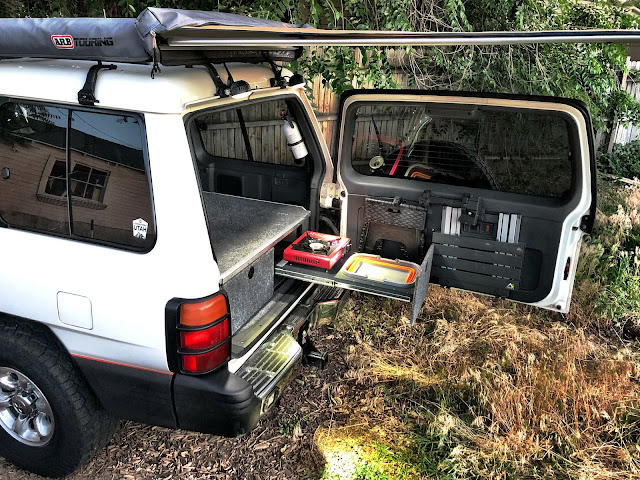
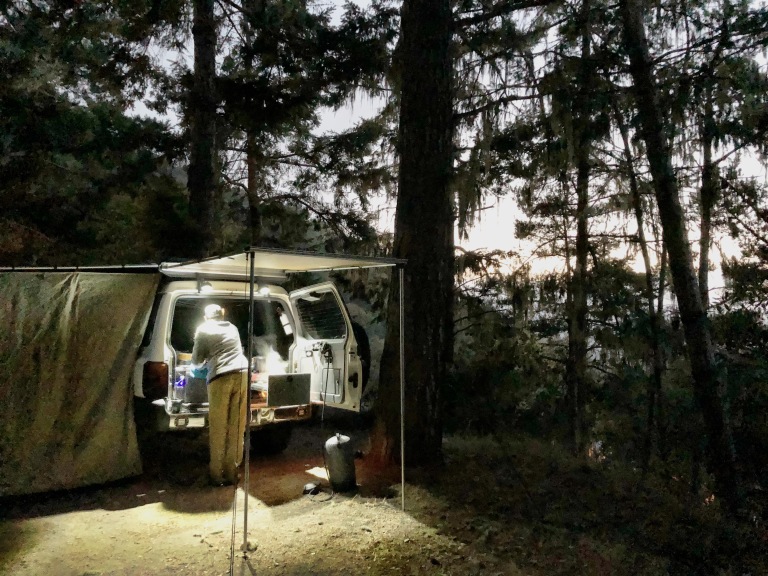
Rounding out the illumination modifications on the Nomad is a pair of three-inch, 12W LED work lamps mounted on the rear Surco roof rack stanchions.
Although the interior cargo lamp has been converted to LED, I needed more light on the food prep area along with a bit more illumination rearward, though the LED reverse light upgrade puts out great coverage.
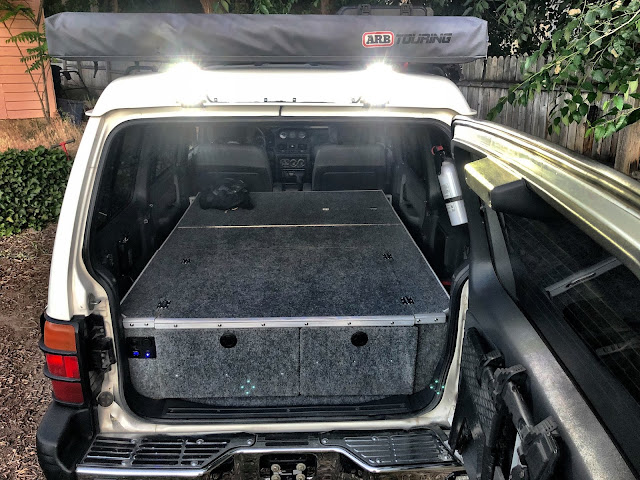
The work lamps are wired from the control panel I built into the platform.
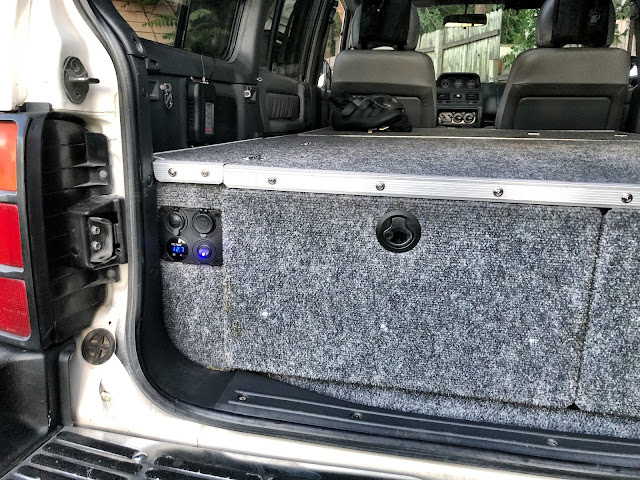
I pulled a hot lead with a ground from the Blue Sea Blade fuse block to the rear of the platform and wired the circuit through the voltmeter, to the 12V marine socket, to the USB, to the switch and terminated at the lamps.
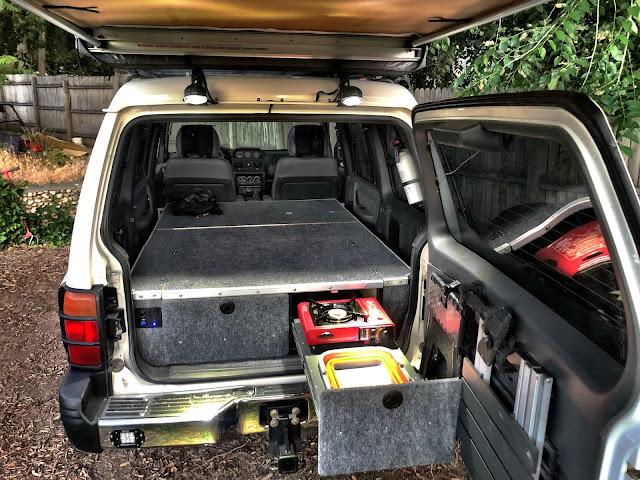
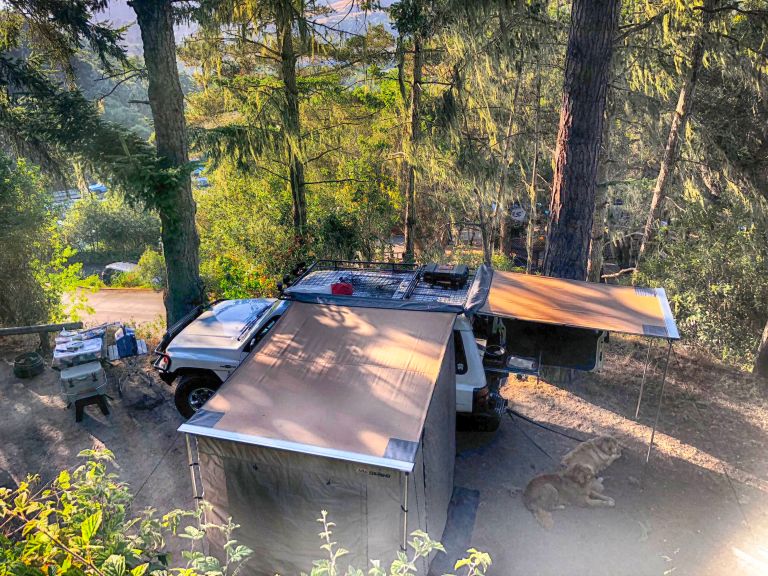
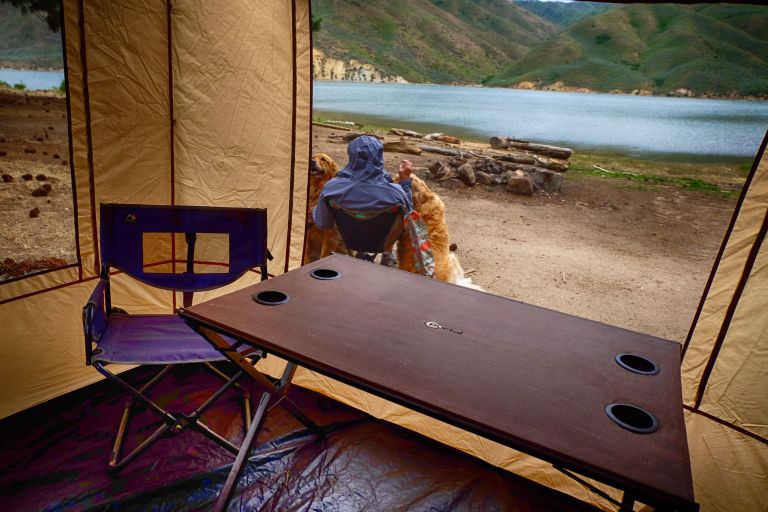
Twelve watts is just right, not overpowering, spotting the work area and the storage drawer and when we're not cooking we can bounce them off the awning for a soft, indirect light.
Rounding out the illumination modifications on the Nomad is a pair of three-inch, 12W LED work lamps mounted on the rear Surco roof rack stanchions.
Although the interior cargo lamp has been converted to LED, I needed more light on the food prep area along with a bit more illumination rearward, though the LED reverse light upgrade puts out great coverage.
The work lamps are wired from the control panel I built into the platform.
I pulled a hot lead with a ground from the Blue Sea Blade fuse block to the rear of the platform and wired the circuit through the voltmeter, to the 12V marine socket, to the USB, to the switch and terminated at the lamps.
Twelve watts is just right, not overpowering, spotting the work area and the storage drawer and when we're not cooking we can bounce them off the awning for a soft, indirect light.
Last edited:


Toasty
Looking for that thing i just had in my hand...
Old Coast road? Bixby Bridge, Big Sur?
Imnosaint
Adventurer
Yep. Coast Road is now open. It opened the week previous to our visit, having been closed for the last two years due to heavy rains, erosion, and damage caused by slides. We stopped and talked with a man woking on a pedestrian passage next to a cattle guard who was kind enough to fill us in on the road repair story, most of which, from what we saw of his work, was done by him throughout the road’s traverse.Old Coast road? Bixby Bridge, Big Sur?
He wasn’t in the employ of the State of California, but rather by the owner of the private property through which this road passed. This philanthropist has restored the road at what must have been incredible expense making it safe and passable for motorists and hikers alike. You don’t hear about this kind of environmentalism, but we’re grateful to both these individuals.
Imnosaint
Adventurer
Trans Pan Gasket and Filter Change
The Nomad’s been oozing a few too many fluids, two to be exact, oil and transmission fluid. I did the transmission pan seal swap and filter change and learned a few lessons along the way that you might find helpful if you ever find yourself considering doing the same.
Yes, the frame cross member that supports the transmission has to be removed in order to access the bolts on the rear of the pan, but it’s not as daunting as it looks. Remove the differential bash plate, support the transmission with a jack, just giving enough lift to ease the burden off the cross member. Remove the four bolts – two on each side – of the cross member, and the bolts that secure it to the center support, then remove the center support as well.
When dropping the pan it appears that the transmission fluid dip stick tube needs to be unbolted from the manifold support on the side of the LH valve cover. It doesn’t. The tube is a two-piece slip-in with the junction about fourteen inches above the pan. When all the pan bolts are removed, the tube will slip out and the pan will drop free. Installation is just as easy.
When installing the new filter, be sure to gently torque the retention bolts in a pattern that will evenly mate the filter to the surface. There are a couple schools of thought on this, inward out, front to back, whatever. Just be consistent.
I used a bit of silicone grease to keep the new gasket aligned when I installed the pan. When reassembling the center support hardware, torque the center support bracket, but leave all other fasteners loose as you assemble to make realigning everything easier. Tolerances are pretty tight and you’ll need just a bit of wiggle room to get bolts into holes.
I was a little suspicious of where the dip stick tube enters the pan – there often seemed to be trans fluid accumulating there, so I patched the area up with JB Quick Weld. Everything reassembled and new fluid, there are no leaks and the Nomad is shifting fine.
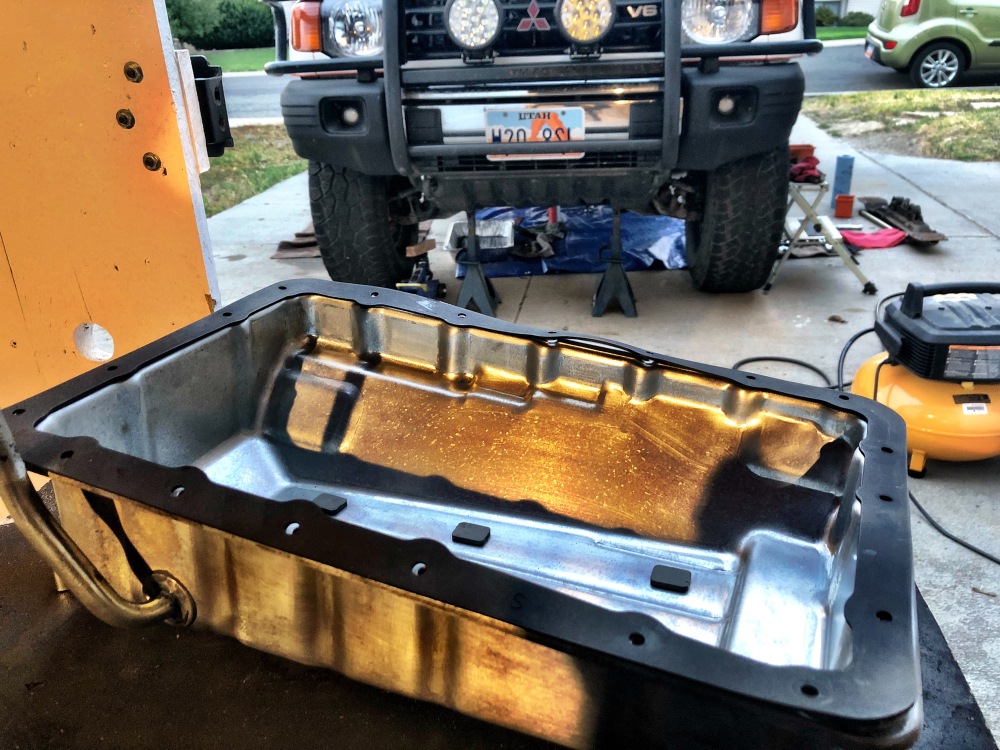
Imnosaint
Adventurer
Painted Wheels
I’ve been going the rounds on the Nomad’s wheels – stick with stock or go aftermarket – and I figured I didn’t have much to lose if I tried painting my stock wheels to begin with.
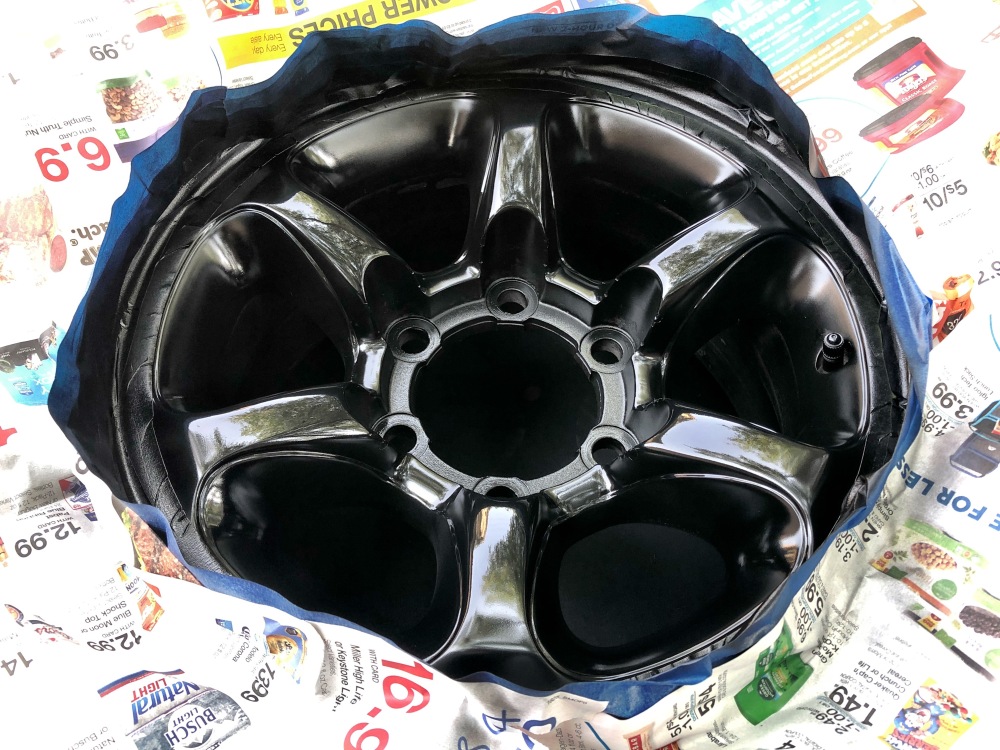
I’m not much on blackout. I like contrast and I like the ’60s and ’70 look of Chevy SS wheels with chrome hubs, lugs and outer trim rings over a dark dish, so I thought I’d try to replicate that with these wheels.
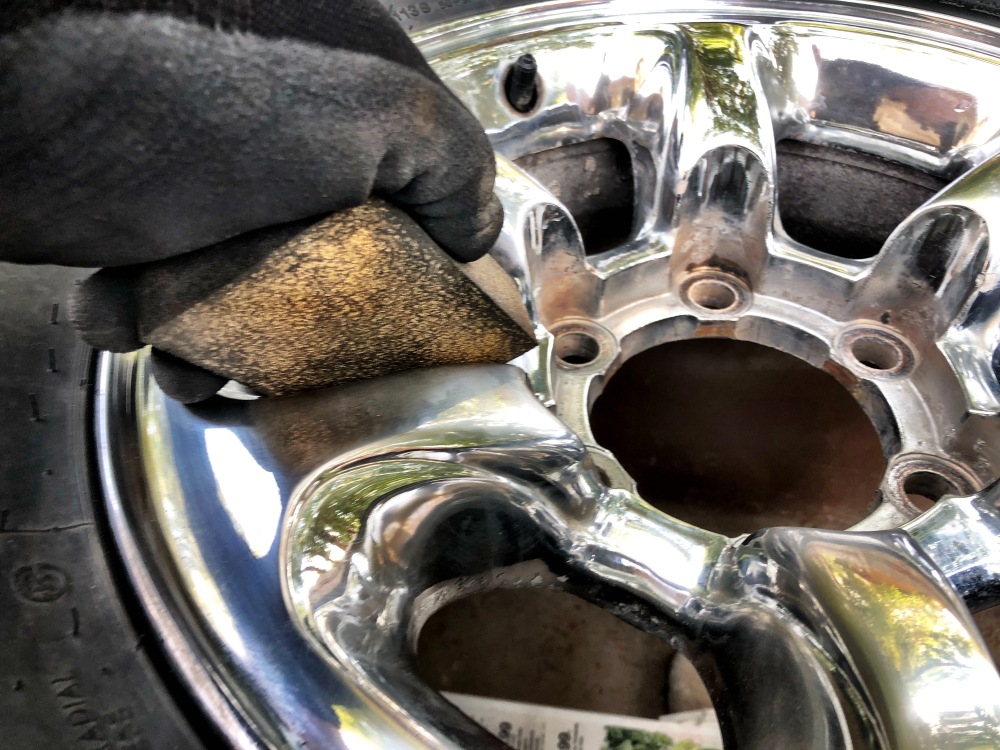
Two key issues in painting anything are prep and products. Each wheel was thoroughly washed and degreased and I used a semi-fine sanding sponge to scuff the chrome.
I then masked the area on the rim using a flexible 3M tape that when carefully applied appeared to created a good bleed-proof line.
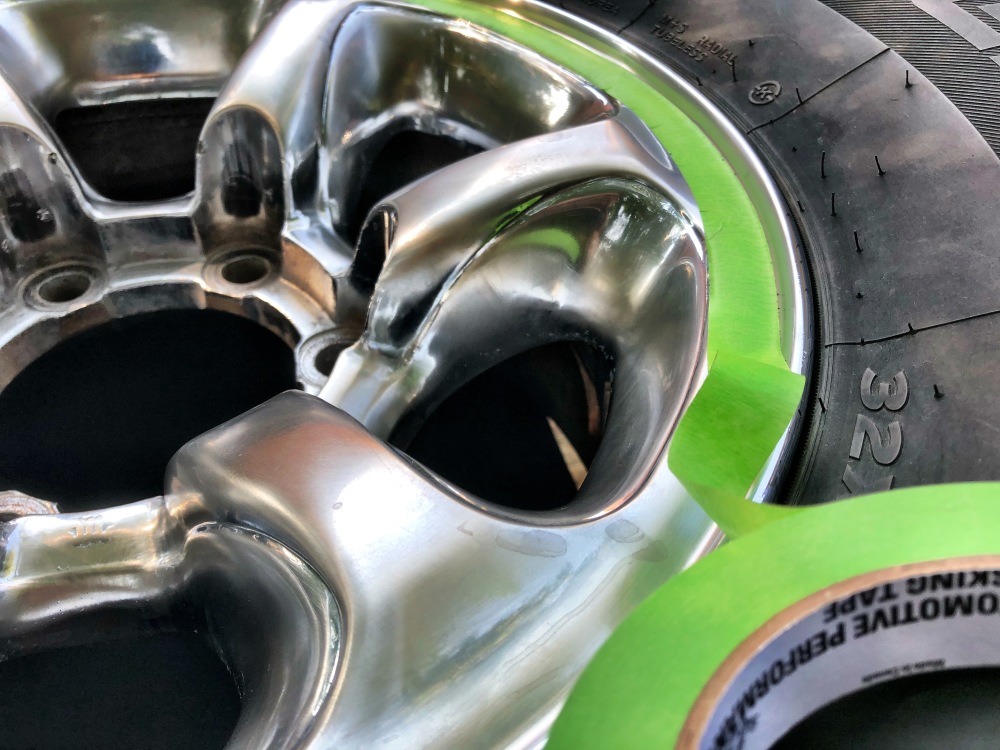
With the rim line set, I masked the rest of the tire.
I used Dupli-Color products only because that’s what I could find at my local auto parts store. I’ve shot these before and found that cans that have been sitting for awhile on retail shelves have mix and propellant issues. Fresher is better. The downside to that is retailers who know this only stock one can at a time.
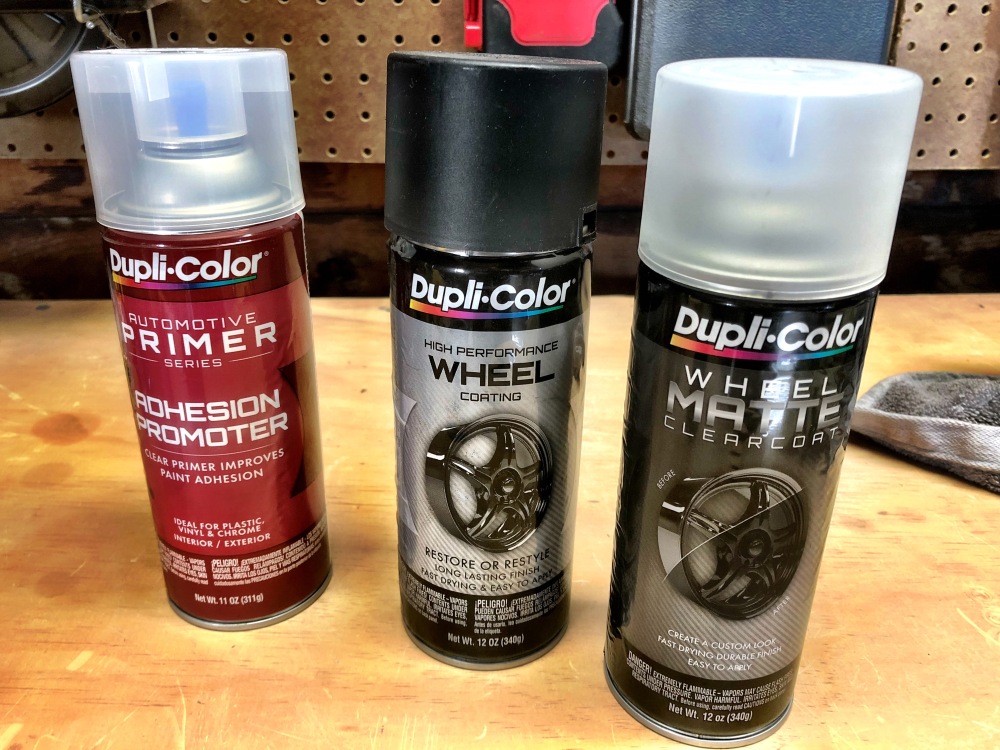
The scope of this project went over two days, painting the driver side wheels on Saturday, and the passenger side on Sunday. I say this because I ran out of stock, after finishing the driver side wheels and need to buy more, only to not find the same adhesion promoter. I went with a Dupli-Color primer instead on the passenger side. Both products did just fine.
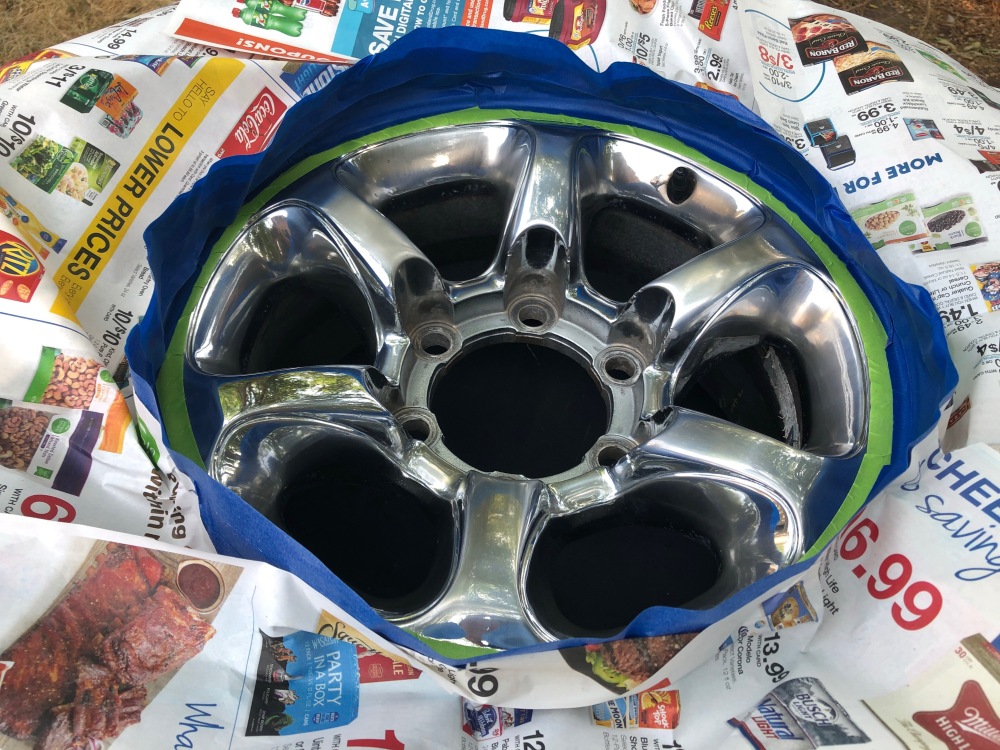
In shooting the wheels I stuck to the timing instructions, three coats each of the primer, coating and clear coat. The results were good.
After an adequate set time I removed the masking to see how well it prevented bleeding.
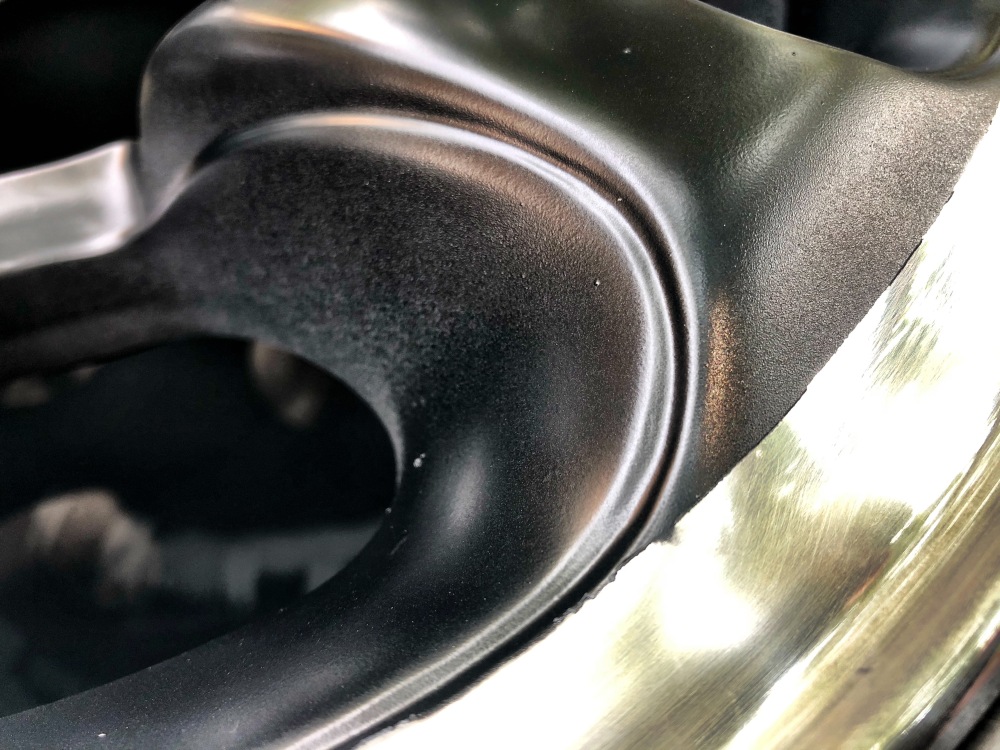
Better than I thought, but not perfect. A little steel wool knocked that down and feathered the edge well.
It’s growing on me, maybe even enough to stop dreaming about aftermarket wheels.
At least for now.
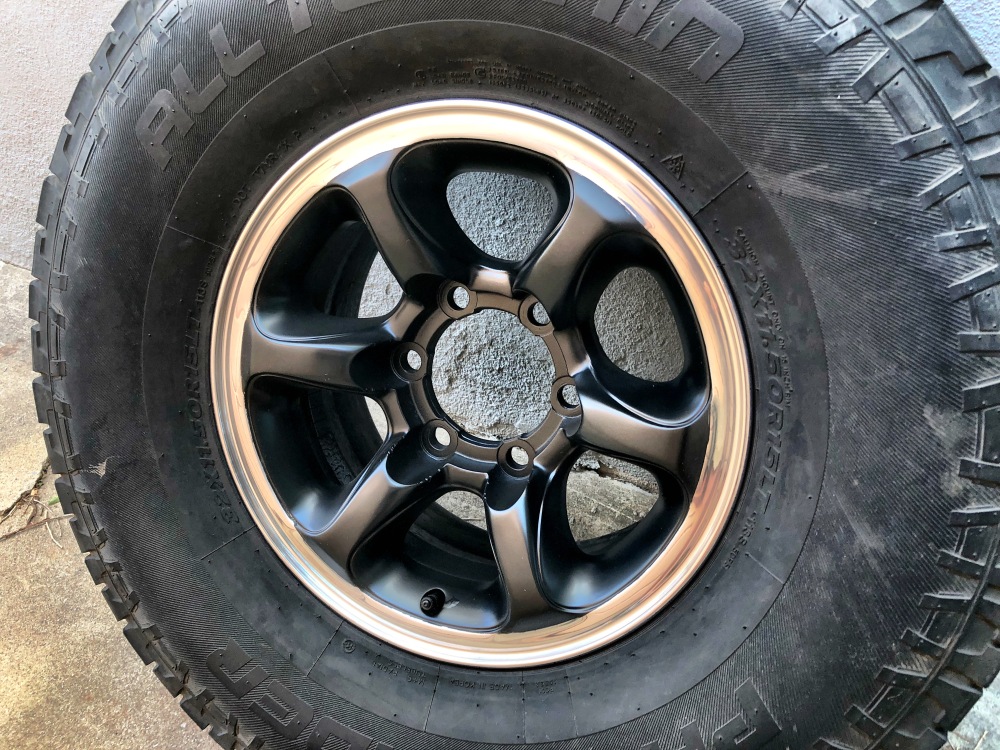
I’ve been going the rounds on the Nomad’s wheels – stick with stock or go aftermarket – and I figured I didn’t have much to lose if I tried painting my stock wheels to begin with.
I’m not much on blackout. I like contrast and I like the ’60s and ’70 look of Chevy SS wheels with chrome hubs, lugs and outer trim rings over a dark dish, so I thought I’d try to replicate that with these wheels.
Two key issues in painting anything are prep and products. Each wheel was thoroughly washed and degreased and I used a semi-fine sanding sponge to scuff the chrome.
I then masked the area on the rim using a flexible 3M tape that when carefully applied appeared to created a good bleed-proof line.
With the rim line set, I masked the rest of the tire.
I used Dupli-Color products only because that’s what I could find at my local auto parts store. I’ve shot these before and found that cans that have been sitting for awhile on retail shelves have mix and propellant issues. Fresher is better. The downside to that is retailers who know this only stock one can at a time.
The scope of this project went over two days, painting the driver side wheels on Saturday, and the passenger side on Sunday. I say this because I ran out of stock, after finishing the driver side wheels and need to buy more, only to not find the same adhesion promoter. I went with a Dupli-Color primer instead on the passenger side. Both products did just fine.
In shooting the wheels I stuck to the timing instructions, three coats each of the primer, coating and clear coat. The results were good.
After an adequate set time I removed the masking to see how well it prevented bleeding.
Better than I thought, but not perfect. A little steel wool knocked that down and feathered the edge well.
It’s growing on me, maybe even enough to stop dreaming about aftermarket wheels.
At least for now.
MrGalantguy
Mitsubishi Loyalist
Great job on the wheels man...not many have the patience doing something like that. I did something similar on Evo 8 Enkies with the "time attack" look years ago. Its definitely time consuming with the proper prep and masking.
Imnosaint
Adventurer
OME HD Install
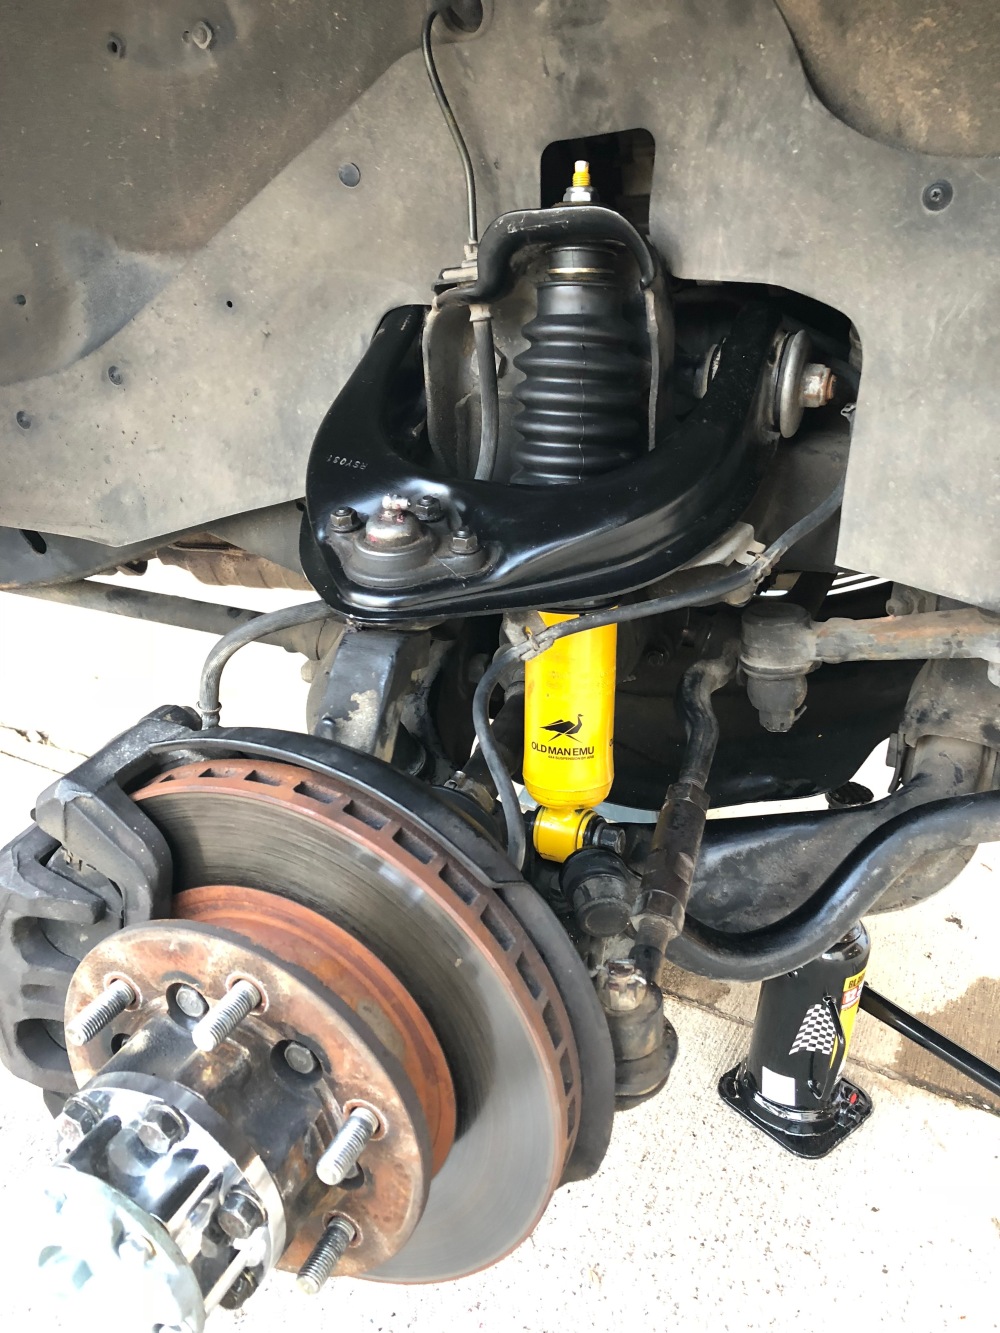
This is my second install of Old Man Emu heavy duty shocks and springs on a Montero, the first one on my previous Gen3. The difference was significant enough to do the same for the Nomad and I’m certainly not disappointed.
The front install is straight forward, done in about fifteen minutes per side. Likewise the rear shocks, as long as a generous treatment of penetrating oil is used on the lower shock mounts. Stubborn buggers.
There’s a bit of YouTube guidance out there on the spring swap that get into disconnecting the brake line, locker vacuum hose, and the panhard bar, but I was able to extract the old springs and install the HDs with only the shocks disconnected at the axle with a jack supporting the axle giving me the finesse needed to not stretch lines or hoses and still line everything back up to bolt up.
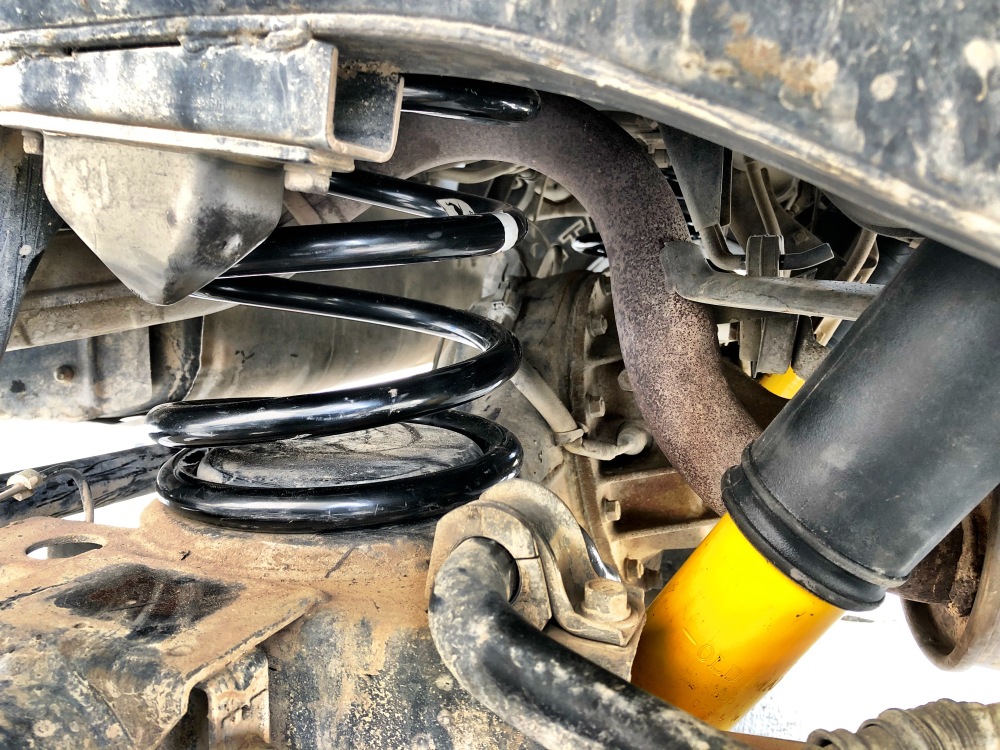
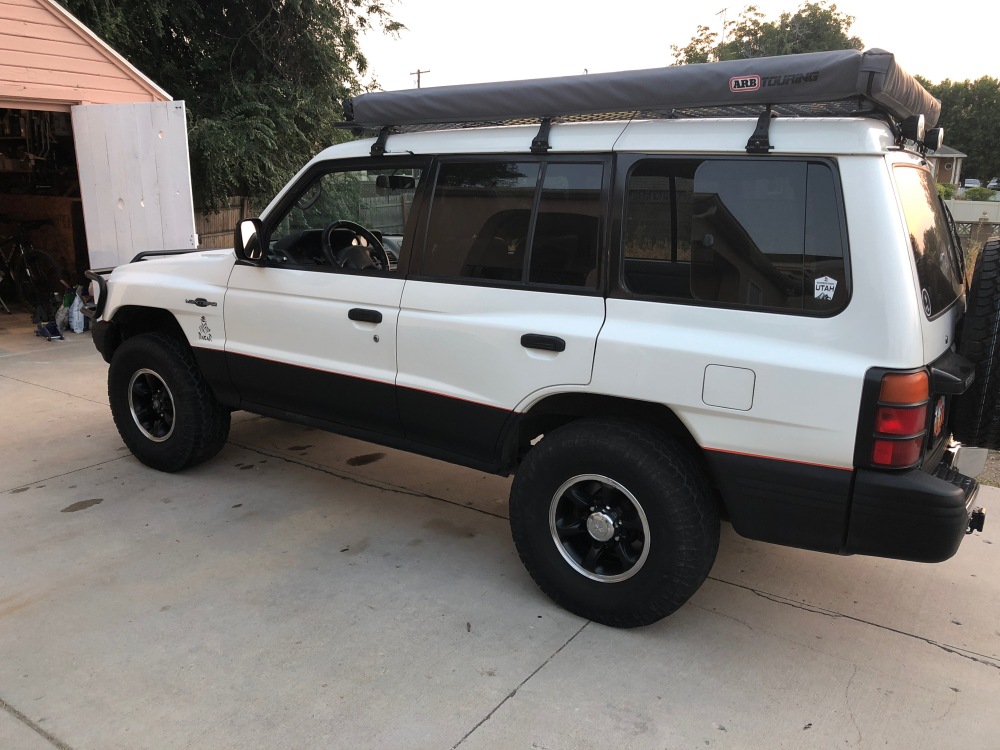
The difference is substantial, worth the investment for me. Quicker turn in, solid rebound and response, washboards dissolve away and there’s a sure-footedness that may only exist in my mind, but it feels much more solid.
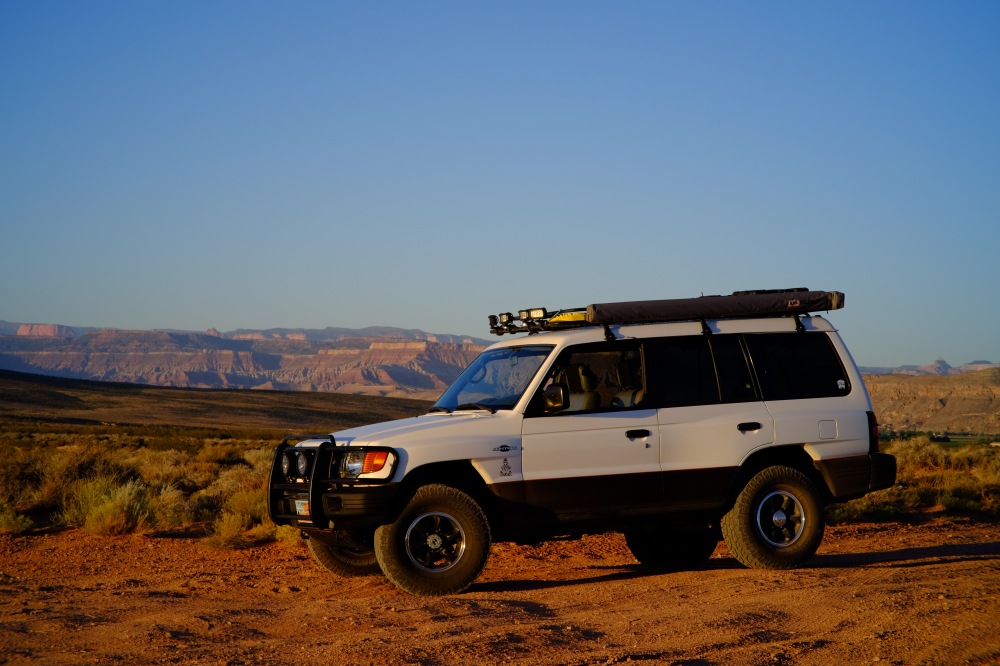
I thrashed the Nomad at Little Valley near Sand Hollow in Southern Utah. It’s a collection of every surface imaginable, from deep powdery sand to shale, large boulders to slick rock to limestone ledges, and the Nomad performed flawlessly.
This is my second install of Old Man Emu heavy duty shocks and springs on a Montero, the first one on my previous Gen3. The difference was significant enough to do the same for the Nomad and I’m certainly not disappointed.
The front install is straight forward, done in about fifteen minutes per side. Likewise the rear shocks, as long as a generous treatment of penetrating oil is used on the lower shock mounts. Stubborn buggers.
There’s a bit of YouTube guidance out there on the spring swap that get into disconnecting the brake line, locker vacuum hose, and the panhard bar, but I was able to extract the old springs and install the HDs with only the shocks disconnected at the axle with a jack supporting the axle giving me the finesse needed to not stretch lines or hoses and still line everything back up to bolt up.
The difference is substantial, worth the investment for me. Quicker turn in, solid rebound and response, washboards dissolve away and there’s a sure-footedness that may only exist in my mind, but it feels much more solid.
I thrashed the Nomad at Little Valley near Sand Hollow in Southern Utah. It’s a collection of every surface imaginable, from deep powdery sand to shale, large boulders to slick rock to limestone ledges, and the Nomad performed flawlessly.
Imnosaint
Adventurer
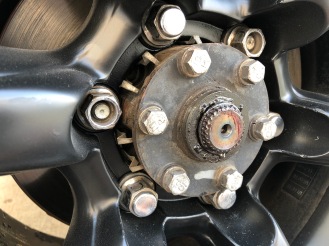
Locking Hubs
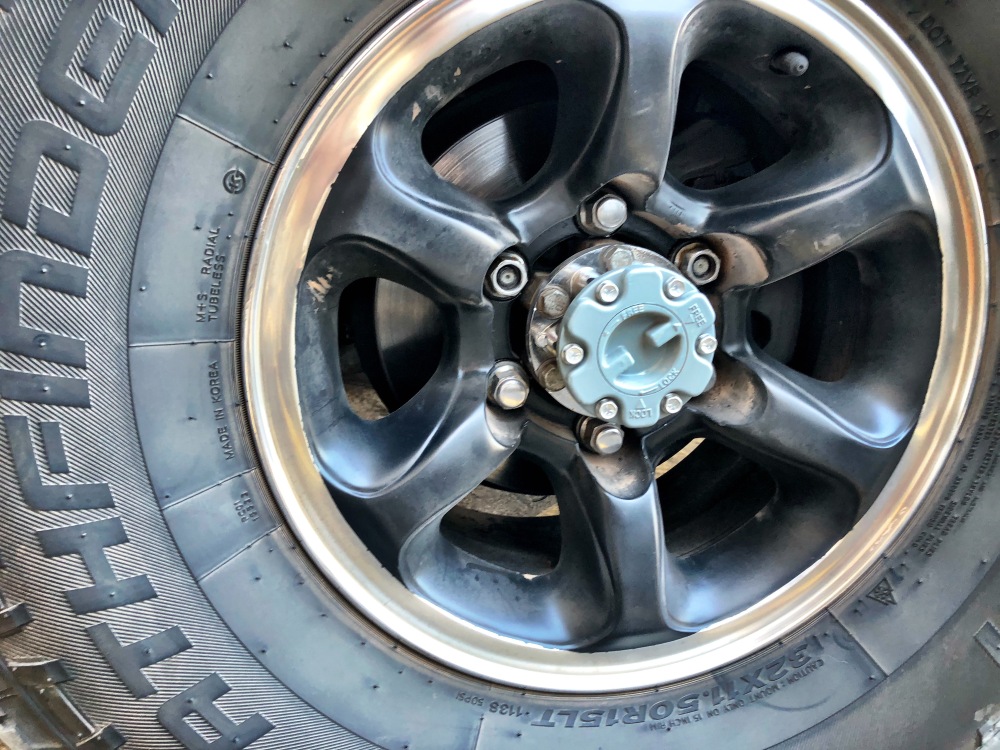
Trying to get the best mileage possible given the 650+ mile/week commute, I thought I’d try a pair of lockable hubs to free up the hubs from font axles and transfer case when I don’t need them. Plus, locking in the hubs takes me back to an old Bronco.
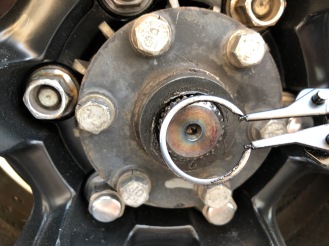
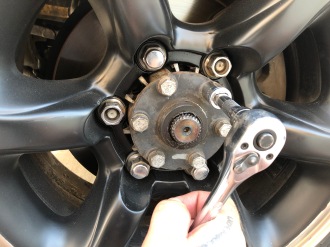
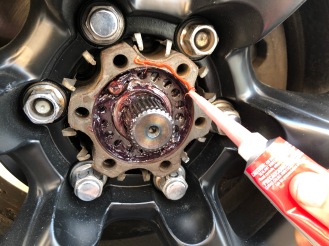
I sourced a pair of Aisin hubs through Amazon and began the install. I removed the hub (channel locks grabbed and leveraged well), the snap ring, and the outer hub casing. I made sure the spline assembly was well-greased and added liquid gasket around the face perimeter. I disassembled the lockable hub and installed using the existing hardware, torquing everything to spec.
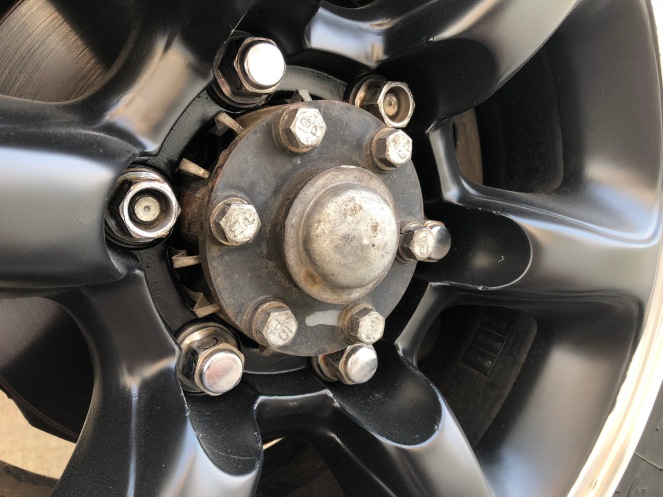
But, you’re thinking, wait, those aren’t Aisn hubs! And you’d be right.
The hubs shipped to me were FSM 002 instead of FHM 002, and they do not fit. ********.
Looks like those hubs are hard to find after all. In my search I came across these Chinese Aisin knock-offs for $50. Not $50 each, $50 for the pair. (I have two pair as a result of this miscommunication.) For that price I thought I’d give it a shot and so far given the abuse of terrain in most every form on earth, they’ve given me no reason to doubt them. I carry the OE hubs onboard just incase I blow them out, but so far, so good.
Trying to get the best mileage possible given the 650+ mile/week commute, I thought I’d try a pair of lockable hubs to free up the hubs from font axles and transfer case when I don’t need them. Plus, locking in the hubs takes me back to an old Bronco.
I sourced a pair of Aisin hubs through Amazon and began the install. I removed the hub (channel locks grabbed and leveraged well), the snap ring, and the outer hub casing. I made sure the spline assembly was well-greased and added liquid gasket around the face perimeter. I disassembled the lockable hub and installed using the existing hardware, torquing everything to spec.
But, you’re thinking, wait, those aren’t Aisn hubs! And you’d be right.
The hubs shipped to me were FSM 002 instead of FHM 002, and they do not fit. ********.
Looks like those hubs are hard to find after all. In my search I came across these Chinese Aisin knock-offs for $50. Not $50 each, $50 for the pair. (I have two pair as a result of this miscommunication.) For that price I thought I’d give it a shot and so far given the abuse of terrain in most every form on earth, they’ve given me no reason to doubt them. I carry the OE hubs onboard just incase I blow them out, but so far, so good.
Imnosaint
Adventurer
Rodded Radiator
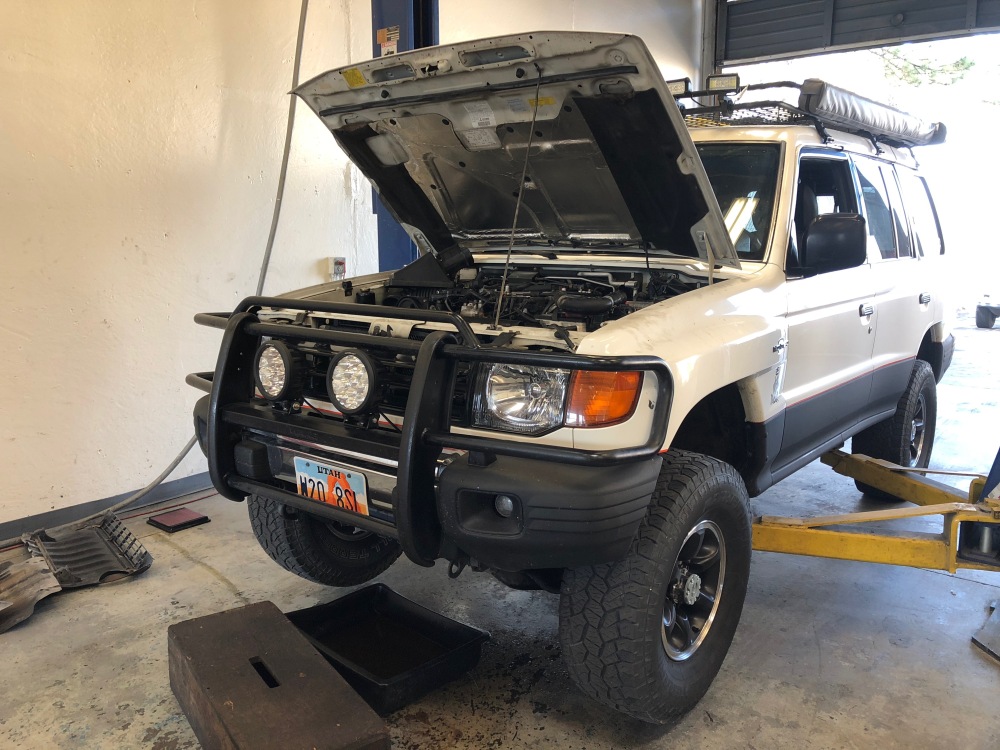
The Nomad’s temp gauge has been more erratic than a supreme court nominee hearing and with a cursory level check I started to rule out the issue starting with the lease expensive fix, this being a new temp sender. No difference.
I noticed that the upper hose was too pliable, empty even while the engine was at idle and figured the radiator finally occluded somewhere, so in to J-Mac’s radiator shop on State Street in Salt Lake City.
They removed, rodded and pressure tested the radiator, discovering a thirty percent blockage inside and a twenty percent blockage of the fins. The Nomad’s keeping its cool now.
Great shop, great service, competitive pricing. Got all this done for around the price of an aftermarket aluminum radiator.
Imnosaint
Adventurer
Rigid 22 Top Boxes
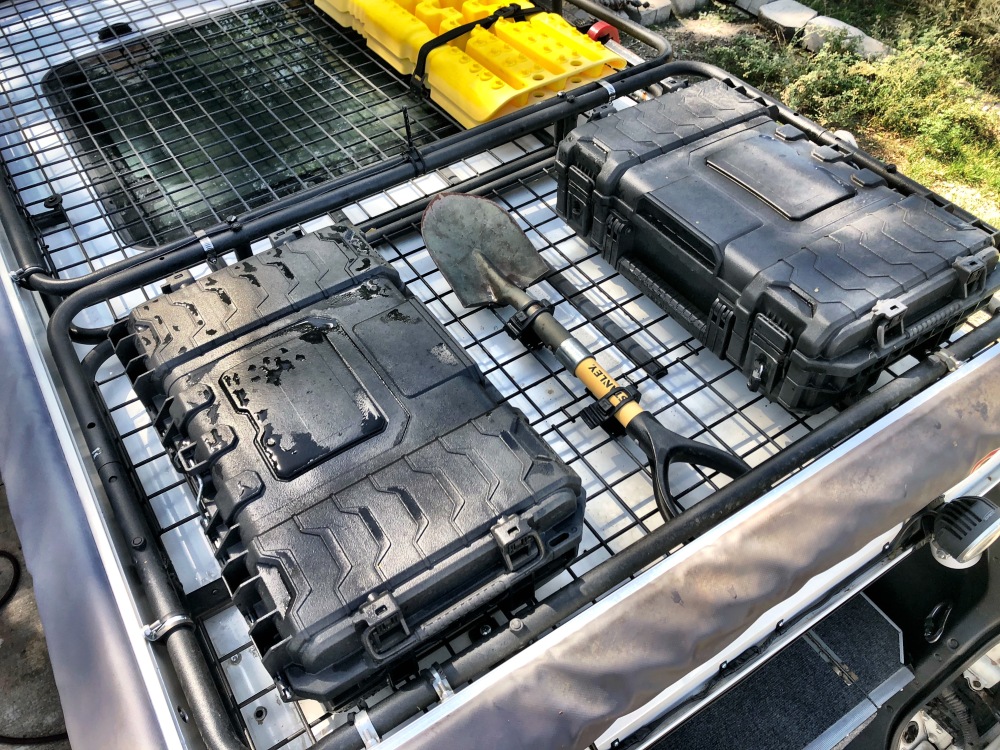
Mounted to the rear Apex rack is a pair of Rigid 22″ Pro Tool Top Organizers. I’ve been a Pelican case consumer for the last twenty years, but I wasn’t keen on modifying a pair for roof-top storage, and then I saw ADV riders modifying this case for use as panniers and top cases, which got me into a Home Depot to check them out.
Metal hardware (not stainless), high-impact resin, and o-ring seals make this an attractive alternative to Pelicans. Factor in the price, $30, and the argument is over. I picked up two, painted them in bed liner and mounted them with u-bolt hardware that secures inside the case.
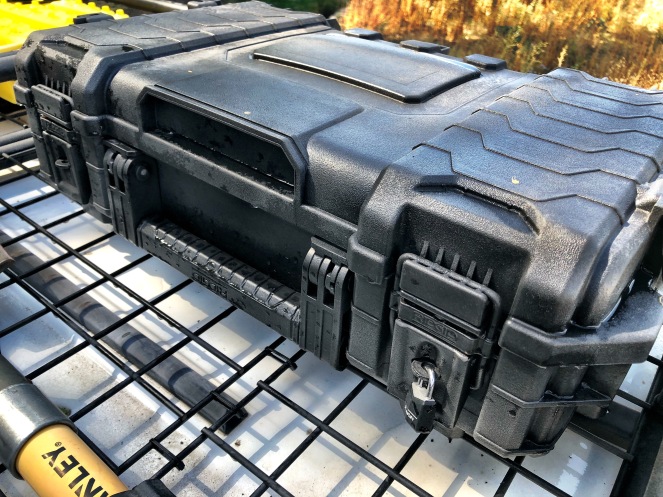
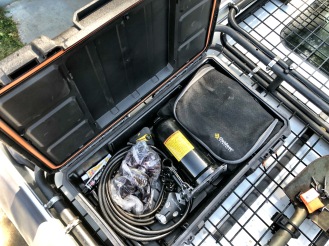
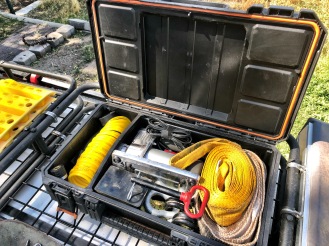
The case secures with lockable compression latches that seal the o-ring. Their low profile still accommodates a Viair compressor and a nine-ton bottle jack along with other recovery items I keep on the Nomad.
The cases are 22×14.75×6.5 inches. I like the clever cleat system that allows other Rigid cases to be mounted or the 22 to be stacked. Their open milk-crate style case would be great for fire wood. If they made it collapsable, I’d have a pair of those as well.
Mounted to the rear Apex rack is a pair of Rigid 22″ Pro Tool Top Organizers. I’ve been a Pelican case consumer for the last twenty years, but I wasn’t keen on modifying a pair for roof-top storage, and then I saw ADV riders modifying this case for use as panniers and top cases, which got me into a Home Depot to check them out.
Metal hardware (not stainless), high-impact resin, and o-ring seals make this an attractive alternative to Pelicans. Factor in the price, $30, and the argument is over. I picked up two, painted them in bed liner and mounted them with u-bolt hardware that secures inside the case.
The case secures with lockable compression latches that seal the o-ring. Their low profile still accommodates a Viair compressor and a nine-ton bottle jack along with other recovery items I keep on the Nomad.
The cases are 22×14.75×6.5 inches. I like the clever cleat system that allows other Rigid cases to be mounted or the 22 to be stacked. Their open milk-crate style case would be great for fire wood. If they made it collapsable, I’d have a pair of those as well.