Los Angeles -Class Attack Sub(urban), Build / Collected Werks topic - '02 k1500 Z71

rayra

Expedition Leader
High Speed test run completed. Took a dash up into the 5 fwy 'Grapevine' mountain pass, 80mph+ up the hill to Vista Del Lago overlooking Pyramid Lake. And hitting 90mph on the downhill. Panel is still in place and undisturbed. Still needs better and more screws, far as I'm concerned. Going to order some No10 truss-head phillips-drive screws from McMaster-Carr as I can't find what I want in my local big-box stores.

solarpanelmount90 grapevine run.jpg


And now that my oil is good and hot the vehicle computer started squawking about needing an oil change.
 

TNSG

Member
094591fe3e83a676baa8e172011d3a3e.jpg
Real nice rig! I am slowly working mine to the end you are. I am in the TN State Guard, similar to your CA State Military Reserve. We handle Commo and Emergency Management issues with TEMA and the National Guard Units.

Fixing a few issues before moving on to the real “stealthy” add-ons!


Sent from my iPad using Tapatalk
 

Phreak480

Army Guy
094591fe3e83a676baa8e172011d3a3e.jpg
Real nice rig! I am slowly working mine to the end you are. I am in the TN State Guard, similar to your CA State Military Reserve. We handle Commo and Emergency Management issues with TEMA and the National Guard Units.

Fixing a few issues before moving on to the real “stealthy” add-ons!


Sent from my iPad using Tapatalk


You should do a build thread when you do yours too.
 

rayra

Expedition Leader
welcome aboard TNSG, looking forward to seeing what you come up with. I've got an older separate build thread(s) on both my storage platform / drawers build and my aux power supply mods. I have a lot of ideas I haven't implemented in both regards, if you are looking for ideas. Part of what I've been building was with Prepper and Search & Rescue / HAM activities in mind, wanting to add map boards or a thin map sheet tray, larger antennae and still to come some overhead ceiling racks for fishing poles and antennae.

I also intend to add some roof-rack-mounted 'scene' / area lights.

The rear cargo area sidewalls also cover a lot of empty volume where built-in cubbies are power stations or even charging sockets for handheld radios can be built. I never dug deep into the emergency services vendors after getting sticker shock on my first few forays, but there should at least be several ideas for storage and equipment racks.

And if you look at the first page of my 'Vortec and GMT800 guys' topic you'll find a link to a roster of most of the Sub and Tahoe guys here and their builds. And the Storage subforum here has a huge variety of ideas and techniques for rear storage.
 
Last edited:

rayra

Expedition Leader
El nuevo tornillos de trabajando es aqui! El nuevo tornillos de trabajando es aqui!

solarpanelmount91 new screws.jpg


Truss head machine screws to replace the hex bolts holding the roof deck on, and pan head stainless screws to better secure the solar panel frame to that roof deck. Too damned windy here today to do anything with them, though.

~340mi of high speed freeway driving this past Saturday with no trouble at all with the solar install. And the nice big leadign edge gasket is still right where I put it.

eta I still have some doubts about the sloped leading edge in washboard road conditions. I don't think it will hold up and still need to make some strong mechanical attachments of that front slope. Not going to trust epoxy to hold on relatively smooth aluminum and especially not with my flat crossbars of the roof deck. Too much 'trampoline' action in that. I need to get busy fabricating the 3/4" square tubing crossbraces.
 
Last edited:

rayra

Expedition Leader
FedEx Ground just left, The new axles are here! The new axles are here! And Amazon dropped off the new giant socket for them this morning. Sorta. Turns out they DON'T need a 36mm, their new nut is also 35mm, just like the originals. And of course I tore open the socket packaging and marked it up, before finding out. Ah well, $11 sorta wasted.

axle sockets nuts.jpg


Did a little fiddling with 'PlastiDip' spray rubber coating on the lid of my center console. Last week I took a left turn in a hurry and my phone went skittering off the plastic lid and down between console and passenger seat. Couldn't get to it without some implements, after I got home. The later models have a rubber tray liner there. Checked and they don't fit / match. So hit on the idea of a coating and took the console out and carefully masked the area and hit it with gray PlastiDip a couple days ago. And instantly hated the color contrast. A deep bluish gray. Console plastic is yellow-gray, Confederate Butternut, even. So today I peeled it off (in a single sheet) and did it all again in black.

console black plastidip.jpg


Last week while unclogging a sunroof drain and finding my OnStar roof antenna mount gasket crumbled to nothing, I also found my sunroof air dam busted and just laying loose in the sunroof housing. When the sunroof glass is retracted the air dam is supposed to pop up and alter the airflow to reduce buffeting noise. Didn't notice it not popping up. Turns out it's a very simple contraption with a pair of mousetrap-like spring wires and a couple mounting arms whose tabs socket into the sunroof frame. The movement of the sunroof bumps some short arms in the tracks at each end of the air dam, to drive it down flat. Open the glass and the springs push it up. I found both PLASTIC tabs busted off.
Some time later I had them krazy glued on, but the first one busted right off again when I tried to re-mount the thing. Checked with the local dealer and elsewhere online, replacement parts not available. Either pay a fortune for the entire sunroof mechanism, or scavenge them from a wrecking yard.
OR do my usual foolishness and make some aluminum replacements from scratch. So I need to do some measuring and find some suitable bar stock.
And maybe take anothe rlook around for replacement parts.
It's a P-shaped part with two flanges where the pivot is, the back of the 'P' is a flattish tab. I can drill and file-carve it out of solid piece.
And see if I can pull the existing stuff apart without breaking anything else.

sunroofairdam01.jpg
sunroofairdam02.jpg
sunroofairdam03.jpg
 

rayra

Expedition Leader
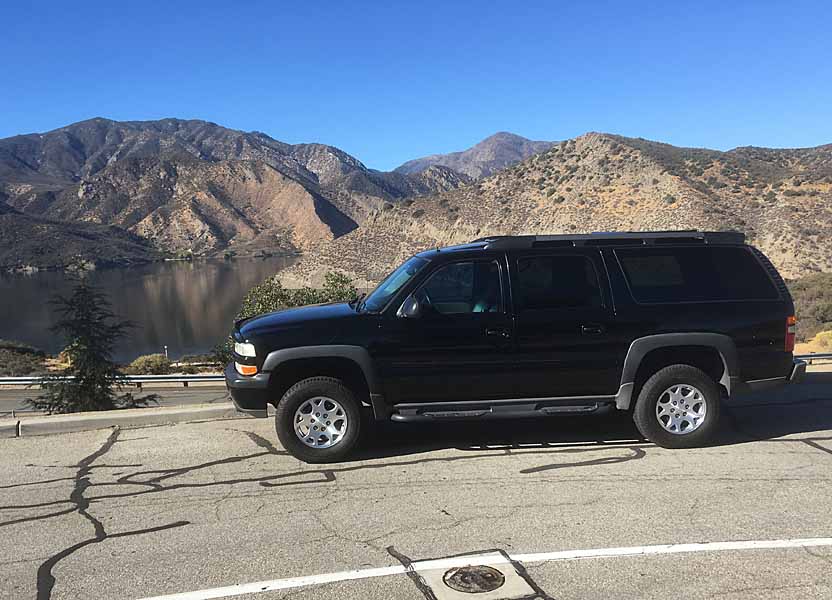
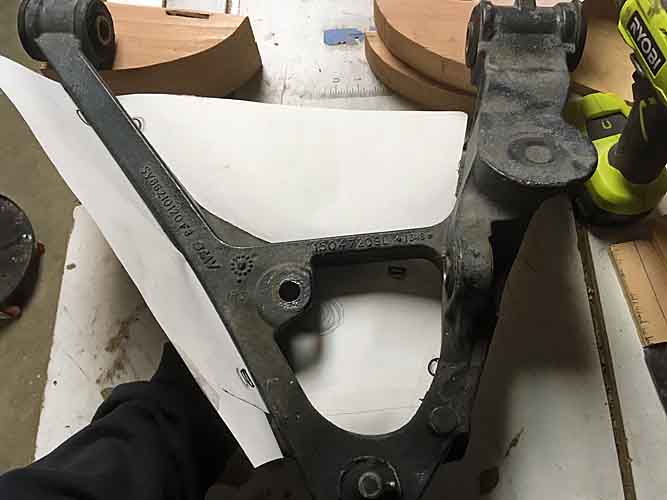
Work continues of refreshing the front end. No sechsy high-dollar 'off road' specialty parts, though. But fresh bushing sand ball joints is still a nice improvement in ride. Only managed to take a pic after I excised the factory lower. Hardest part of the job was breaking loose the old ball joint. Rest went easy. I keep getting the 'free' torsion bar unloading tool from my local Autozone. Few more times and the gas alone going back and forth for the thing would have paid for just buying one outright. But I never planned to use one so many times.

I'm also farting around again with an idea mentioned long ago and just recently again in Stryder's build topic -
- the idea of some protective shields on the leading edges of the lower control arms as a means of protecting the CV boots from intrusions. I have been known to massacre some shrubbery in the high desert. 'Unsprung weight is bad', but I figure such plates would weigh less than 2-lbs per side.
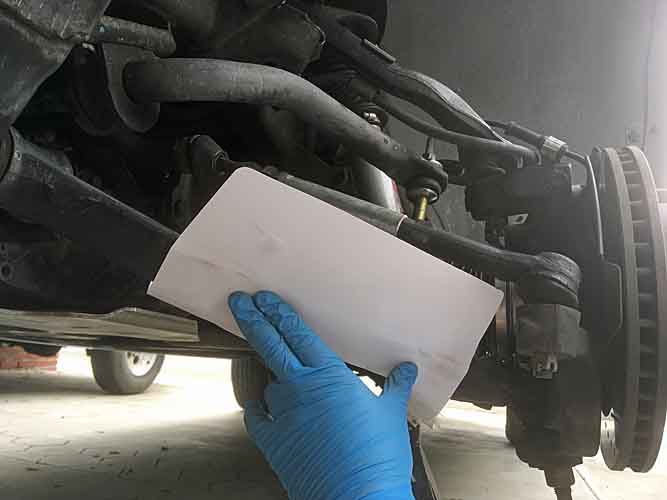
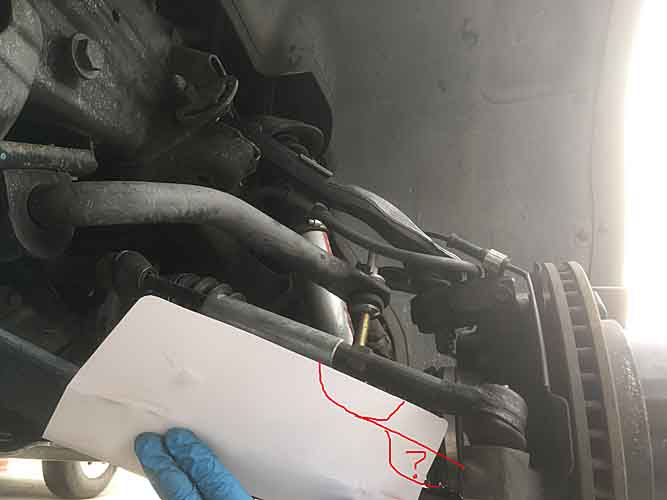
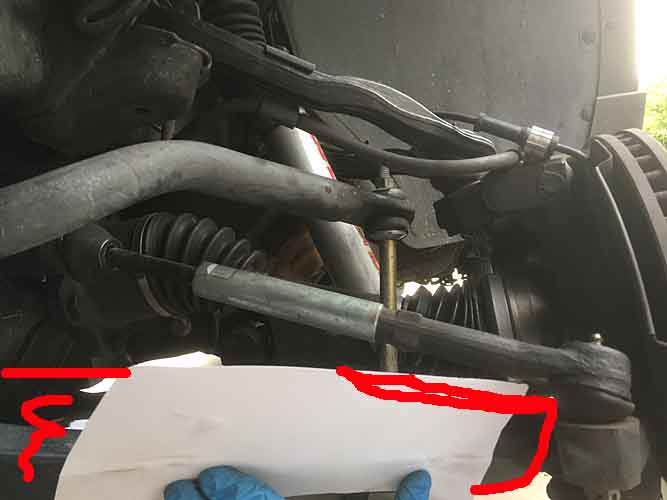
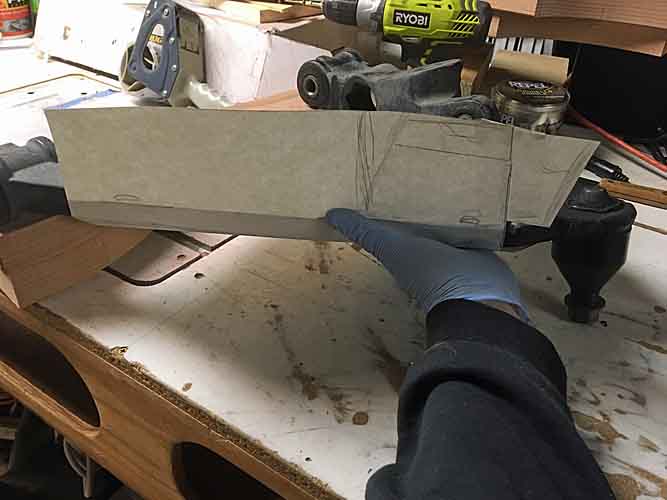
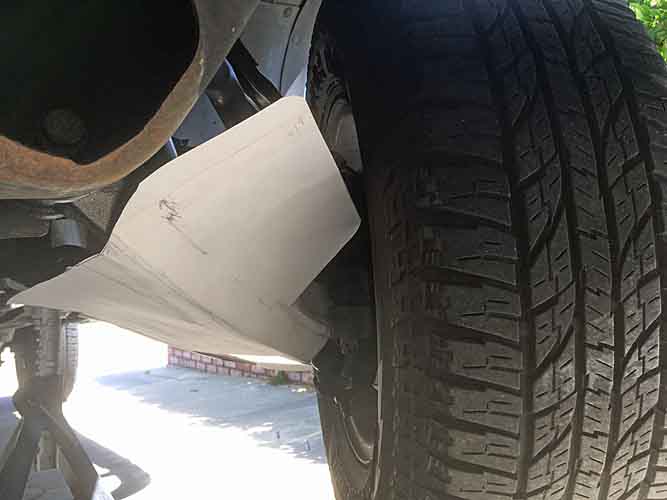
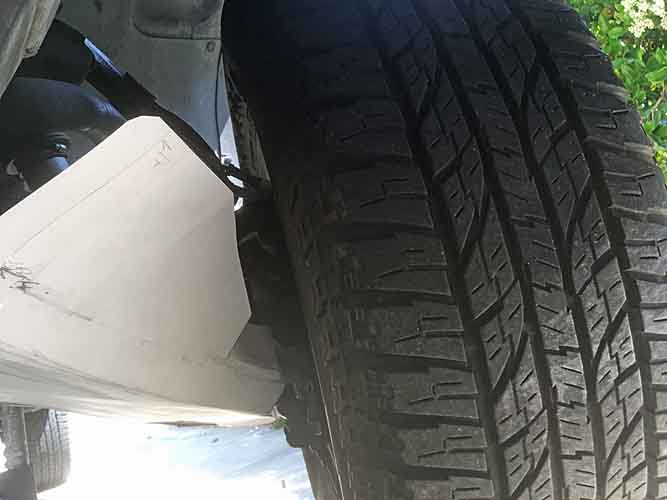
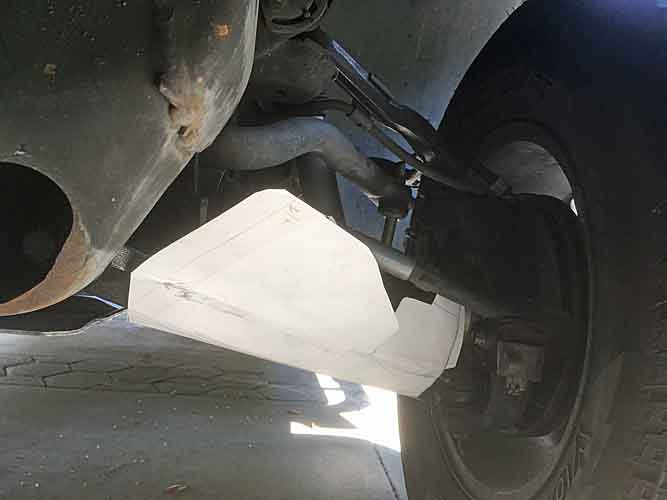
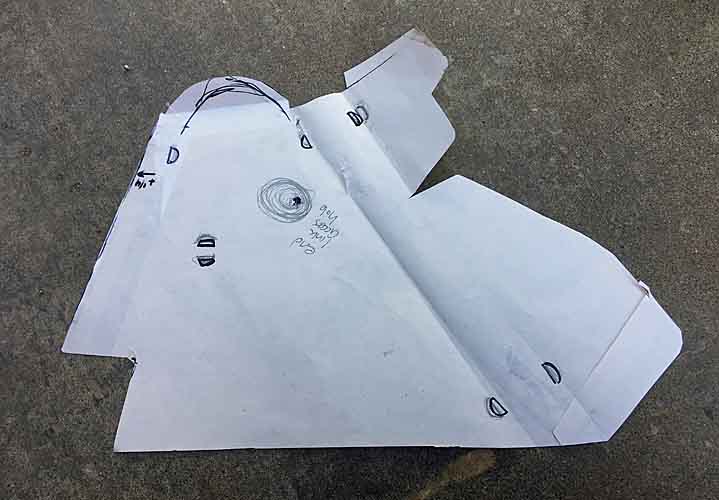
Anyway, was farting around with a paper mockup while changing out the lower arm and am retaining the removed arm so I can use it for a forming buck for some prototype plates. I have a few different attachment methods in mind, looking to avoid an drilling / tapping of the arm itself. Instead bending the plate in ways that lock onto or wrap around the control arm such that the added plates bolt to themselves.

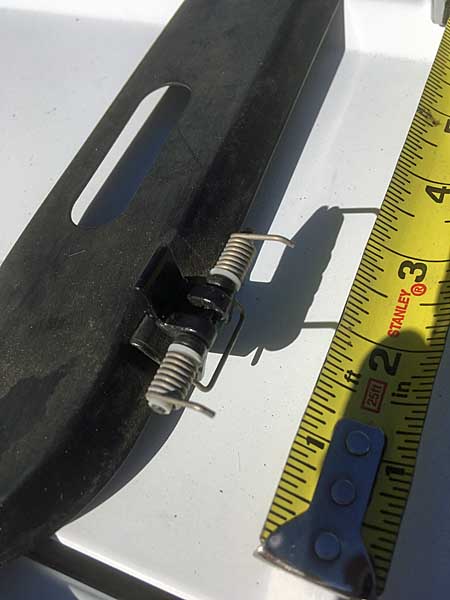
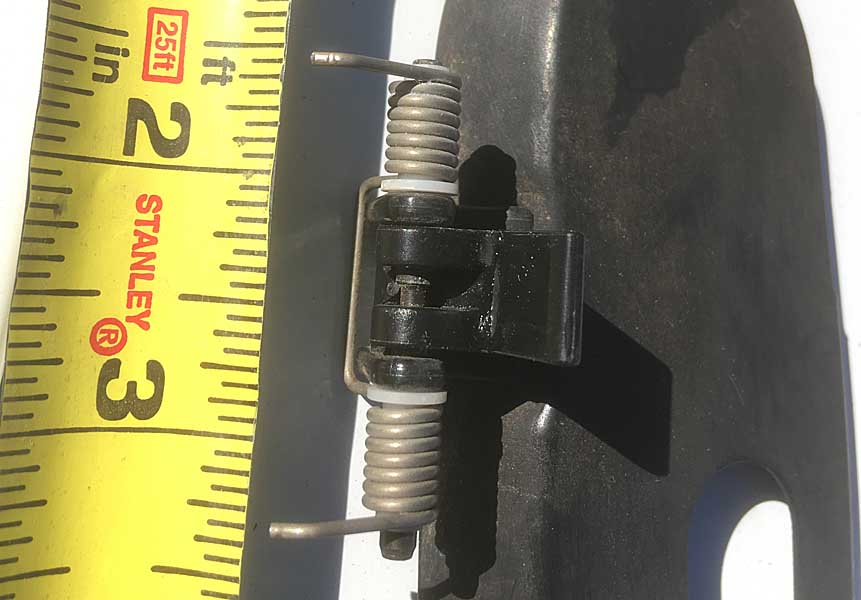
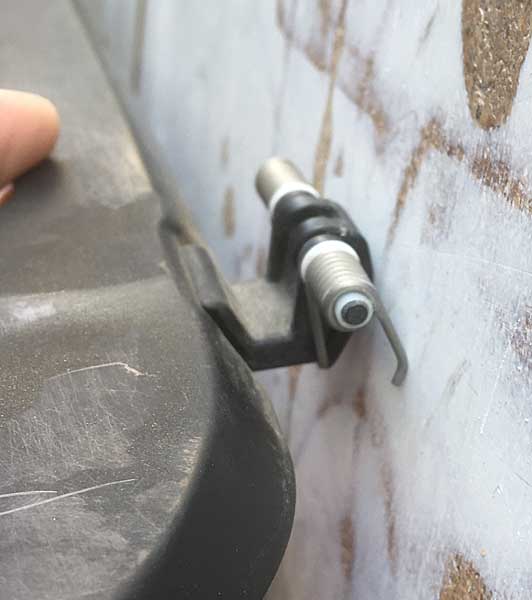
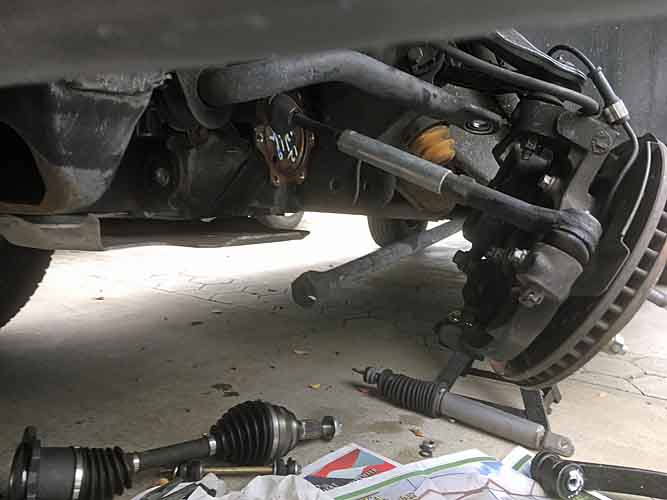
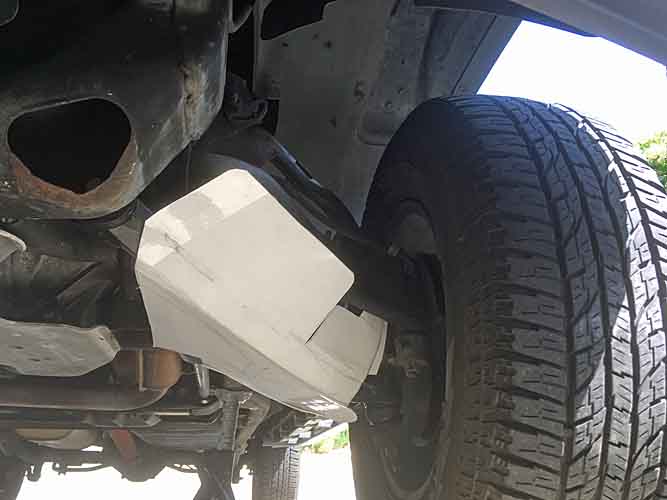
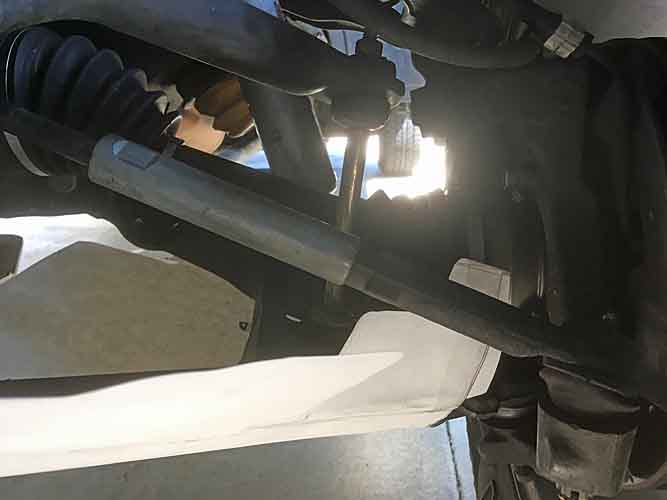
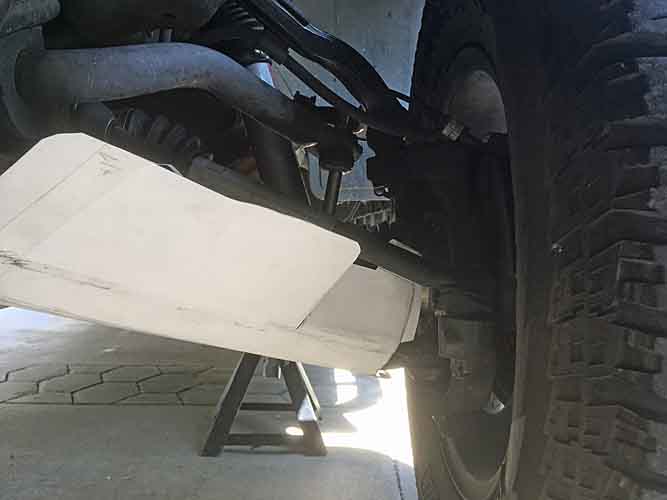
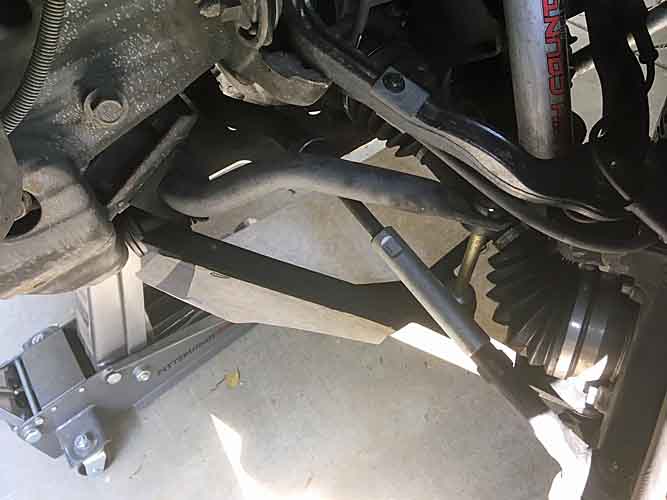
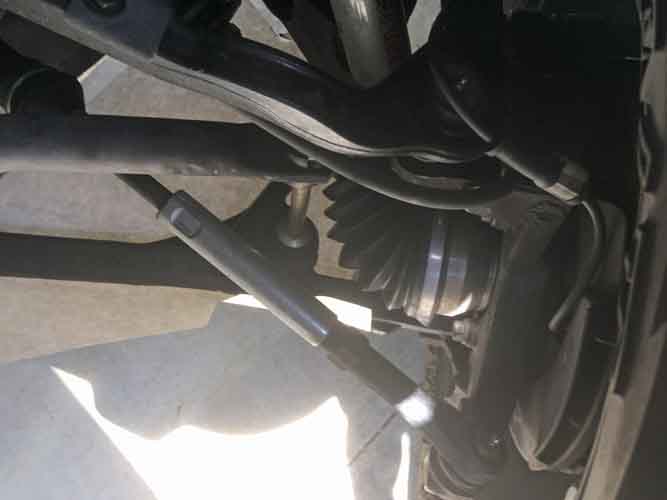
1st pic is from below the lower arm, second is level looking straight into the CV, third is marked up for possible expansions in the area covered, 4th is just the lower arm removed.

lowerarmplate04.jpg
lowerarmplate05.jpg
lowerarmplate06.jpg
lowerarmplate07.jpg


I'll probably need to trim / notch the plate for the movement of the tie rod and wrap up and around the steering stop molded into the lower arm and where the steering knuckle moves inward. And can extend the 'plate' further up the control arm toward the bushing and maybe increase its height. The sway and steering arms are well behind the plate in that area.
If I wind up making a set of milled polyurethane torsion mount bushings, I'll probably lower the the front end while the torsion bars are out to get max suspension compression and check plate fit there too. See where I can add or have to remove. Then I can get a proper template worked up and move on to some legit 3/16" 6063 aluminum plate. I might do a test with some thin sheet metal and double stick tape, in the interim. More to come on this idea.

With the changing of the lowers I'll have replaced everything in the front suspension and steering except the steering box and the steering knuckles and torsion bars. And sway bars. All the bushings / moving parts are new over the last 4yrs / 20k mi. That includes oem-replacement CV half-axles and front wheel hubs/bearings. It's riding really nice, even with the torsion leveling keys. I also previously installed Spohn's boxed rear lower control / trailing arms, new OEM springs, lifting shims, new end links in the rear too. And the shocks all around. So basically now all the suspension is new.

Still want to proactively replace the rear bearings.

Finished too late today for proper test drives. Not sure if I've finally eliminated my mystery front end shift-clunk. Only other thing I can think to do in that regard is replace engine and transmission mounts. And the way I romp on it sometimes and some heavily washboarded roads I've been on, I should probably do them anyway, given the age and mileage of the vehicle.

The home-made torsion key crossmember rubber mounts I put in still look good as new. But I haven't put them under any off-road stress get. town/highway driving isn't stressing them at all.


eta monday aft.
Just finished running some errands this morning and I'd say the shift-clunk noises in the front end are 80% remediated. The fore-aft displacement of the driver side torsion bar led me to believe the front left lower had the greatest wear / slop, so that's the side I chose to replace first. That seems to have paid off nicely. I still need to change the passenger side, but that's labor and parts cost$ for another day.
 
Last edited:

jonb8

Adventurer
You have a very clean Suburban Rayra, my favorite color and your bringing it back better then factory...
 

rayra

Expedition Leader
well I think I have the lower arm protective plates figured out, rough paper, anyway. I hope to have some thin sheetmetal prototypes fitted and attached my Memorial Day, have a couple other things going on right now. It's going to basically be a bottom covering design, bent to continue up the front face for protection in that aspect too. The CV boot at the wheel hub is really exposed from below. the axle end is much less exposed but could still use some protection from a straight-in intrusion. The tie rods are an issue when the wheels are turned inward. Trimming down the frontal protection to clear the tie rods in that position leave the boot totally exposed when the wheels are turned fully outward. I'm still needing to work with paper a bit more and see if I can make a partial cut in the frontal protection and have the section at the hub end be more vertical, rising up between the CV boot and the outer tie rod end. Coming up to the rear of the tie rod, while the central and upper protection sits sloped well in front of the tie rod. The bottom-most portion of the frontal area would remain one piece along the sloped front of the control arm itself.
Despite the bottom face of the control arm not being completely flat, I think the whole thing can be done with a single piece of sheet metal. The crosspiece of the A-arm is where the whole plate would be attached / clamped. Along with two straps on the front aspect. The zipties or ladder clamps would penetrate the sheet metal thru a series of buttonhole-like slots. Positioned snug to the control arm structure so the straps can really be made tight without distorting the metal. And maybe with two welts of peel and stick rubber 'bubble-seal' along the two bottom outer edges of the control arm to forestall whistling or vibration rattle.
I'll try and do the 'full paper' mockup next week and take some pics of it in place as illustration of the idea.
 

rayra

Expedition Leader
My other lower arm came today, but not getting to it until next week. Got my old driver side arm cleaned up / degreased and some paper stock laid out to start shaping the full plates. But I'm also trying to get a dual BBQ/grill counter and pergola completed by Memorial weekend, so lots of demands on my time.
Still looking around for a local affordable plate metal source. Been looking up places so far to hit as I drive around Los Angeles. Have to finish the paper template to see how small a sheet I can fit two patterns on, it will be something around 2'x3'. Just don't like paying a fortune for it. The mail order places like McMaster are insane.


eta some rough paper templates. The last pic, the line above my thumb is where the frontal plate extension will be split. the gap extending down to the top surface of the lower control arm. left of my thumbnail, the plate continues on its bent angle which wraps around the bottom leading edge of the control arm. That's about a 50-55deg angle, can't find my angle gauge right now. To the right of my thumb, towards the wheel hub, that portion of the plate will be bent further to near-vertical. That will put the rightmost extension of it between the CV boot and the tie rod end. The ~40deg difference in angles of the two portions should create a pass-thru for the steering linkage to move freely in its full range of motion. Next week I'll temp attach the template to the control arm on the vehicle and move the suspension and steering as much as possible while I trim and shape the template for clearance. Once I think it's close enough I'll make a thin sheetmetal copy and install it and see how it goes.

The 'D' shapes are where holes will be made to allow ladder clamps to be used to secure the plate to the control arm. Four of them right now. This will probably evolve into something more sturdy later. Once I actually start working with plate. I'm also thinking to add an access hole for the end link bolt head. The trailing edge of the plate is for now just cut flush with the trailing edge of the arm. But there is potential there for a large bent tab that would lock onto the trailing lip of the arm.

CV plates 010.jpg
CV plates 011.jpg
CV plates 012.jpg
 
Last edited:

rayra

Expedition Leader
will do. I think I've already found Online Metals and their prices were seemingly as high as McMaster-Carr. Basically $400 for 4'x8'x1/8" sheet of 6063. I can't stomach that. When I get my templates proofed in some thin sheetmetal I'll figure out the minimum size piece of plate needed to cut both sides and by it that way if I can. Although I do have other larger sheets needed for both fuel tank protector and a replacement in metal for my roof deck. So I'm really rather hoping I find a good affordable regional source that I can drive to and pick it up myself.

Made an abortive attempt to change my passenger front lower control arm today, was defeated by the ball joint stud. Really frozen in there. Broke out ever trick and tool I had, except the flame wrench. By 2pm I was beat and overheated and making sloppy strikes with a sledge and gave up. So put everything back together and will try another day. Think I bent the newish inner tie rod, too. very poor results.

Then I finished off making some more fitting checks and tweaks to the paper template for the lower arm / CV boot protective plates.

Pics in sequence. Expanded the frontal coverage towards the frame rail, trimmed and squared the wheel hub end which will be bent vertical up between the boot and outer tie rod. Notched the top of it for a bit more clearance of the moving tie rod. Then I turned the wheel hard in and the frontal plate was way too close so I trimmed and shaped it for about 1-1/4" clearance of the tire. Which turned the frontal aspect into more of an uneven trapezoid. But the idea of splitting the upturned front face into two sections work in the range of motion. I also turned the wheel fully outward and the hub end still does a good job of frontal protection for the exposed CV boot.
When I have the suspension apart when I try the lower replacement again, I'll attach a sheetmetal pattern mockup with the torsion and shock removed and work the suspension thru it's full range of motion to again check clearances.

CV plates 013.jpg
CV plates 014.jpg
CV plates 015.jpg
CV plates 016.jpg
CV plates 017.jpg
CV plates 018.jpg

CV plates 019a.jpg
CV plates 020.jpg
CV plates 021.jpg
 

Forum statistics

Threads
185,830
Messages
2,878,674
Members
225,393
Latest member
jgrillz94
Top