CoyoteThistle
Adventurer
Hi all. Been lurking around the site for quite some time. Finally getting around to introducing myself and our expedition vehicle.
First off, sincere thanks to everyone who posts info on their rigs and shares advice on travel destinations. This place is an amazing resource and great source of inspiration!
Anyway, we got a 2010 Nissan Frontier 4X4 about a year ago. Our first off-road trip was 5 days in and around Death Valley last winter. We had a great time but sleeping in a tent or heading towards a motel every night was a bit of a drag. I started researching ideas. Nothing out there quite fit all our criteria - the things that came close tended to be expensive (of course).
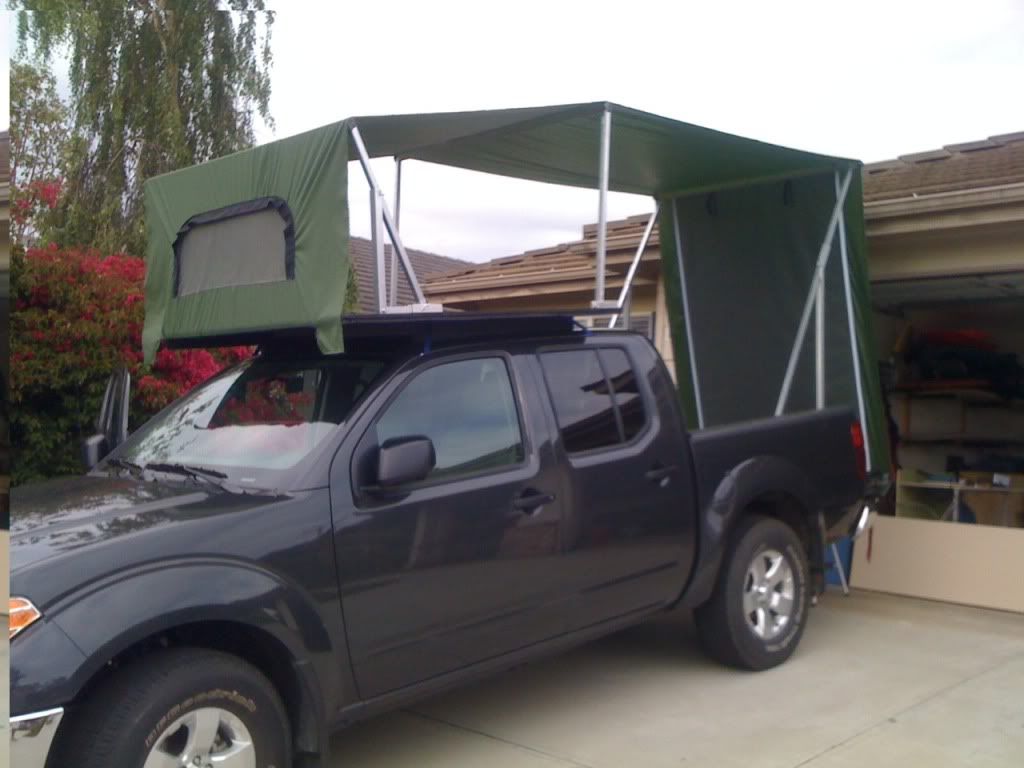
So, we started from scratch and made our own creation. We call it - Pro-Rig!
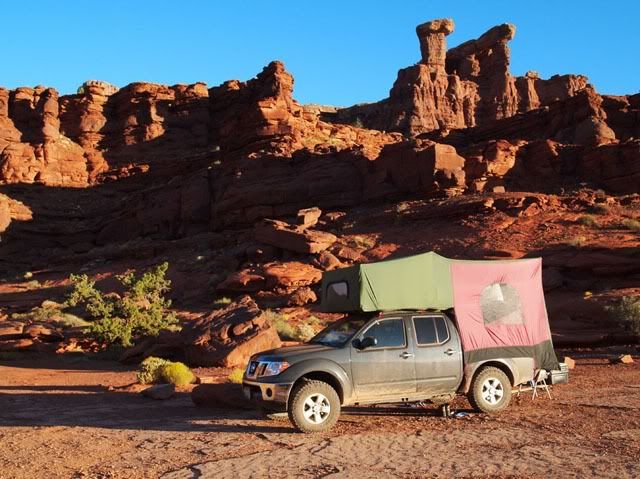
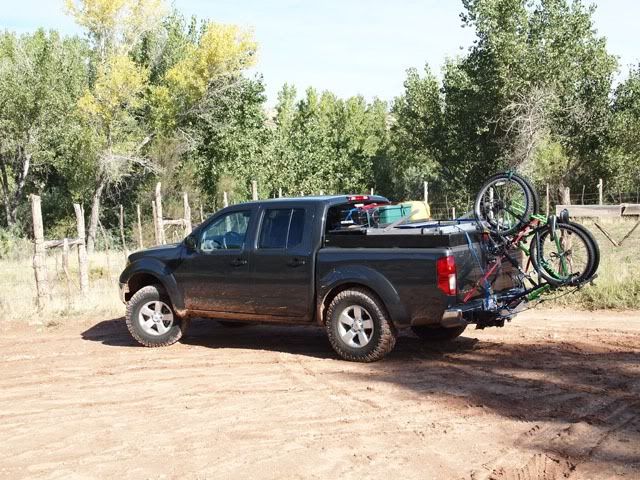
Here it is during recent beta testing in SE Utah earlier this month:
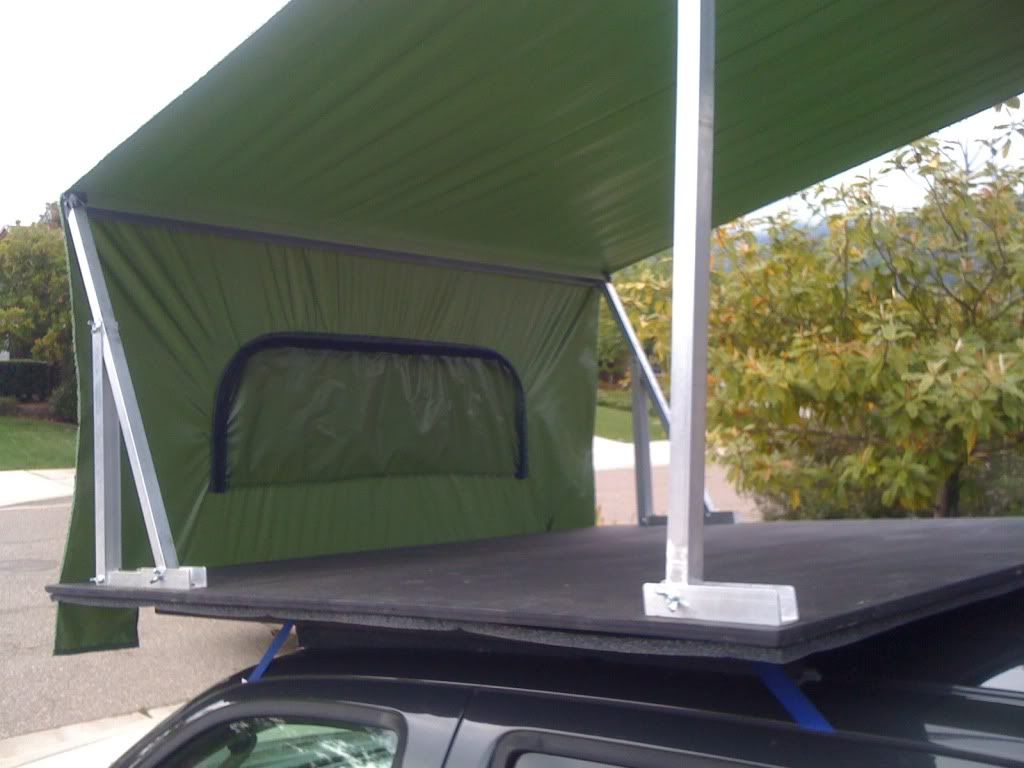
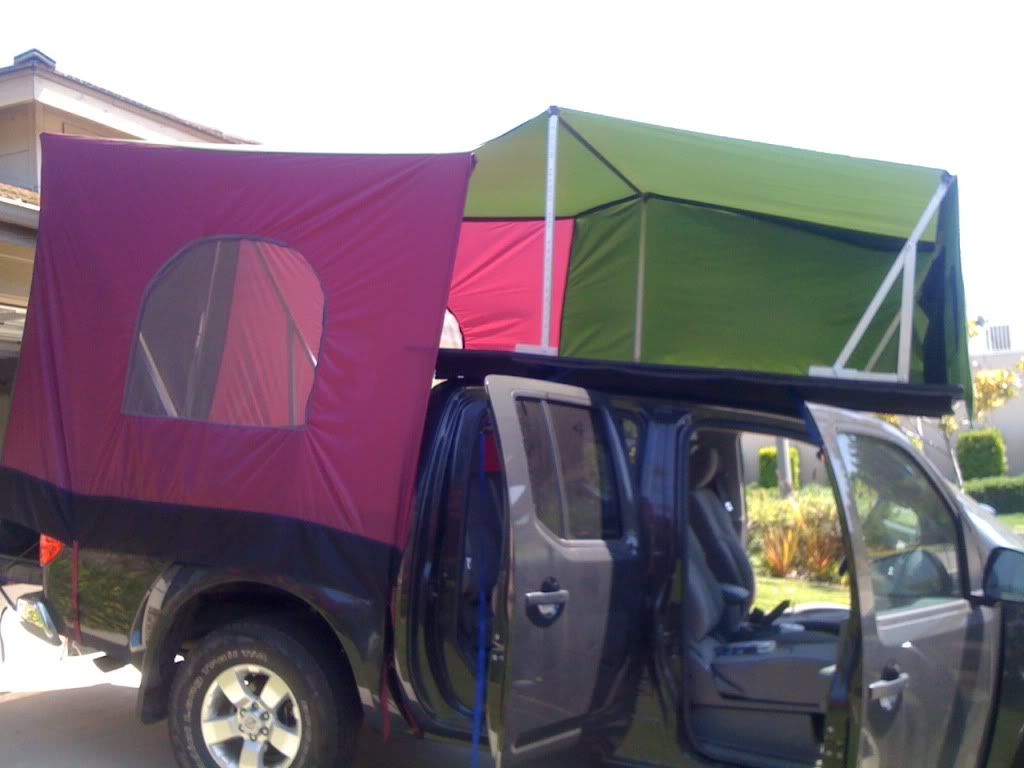
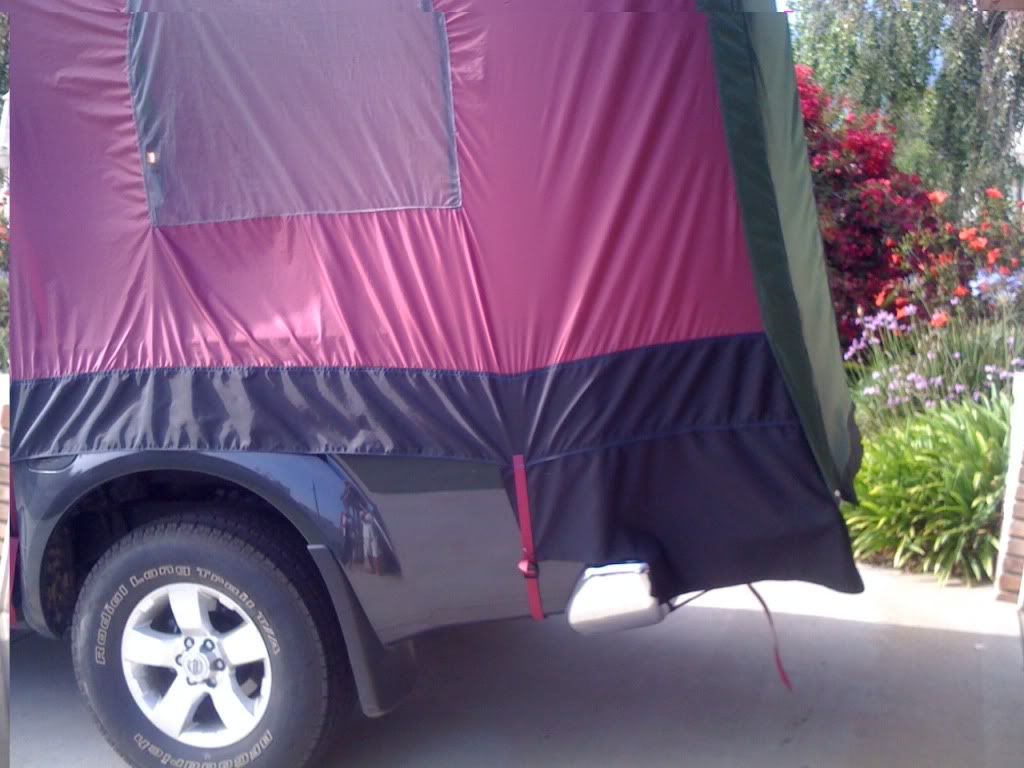
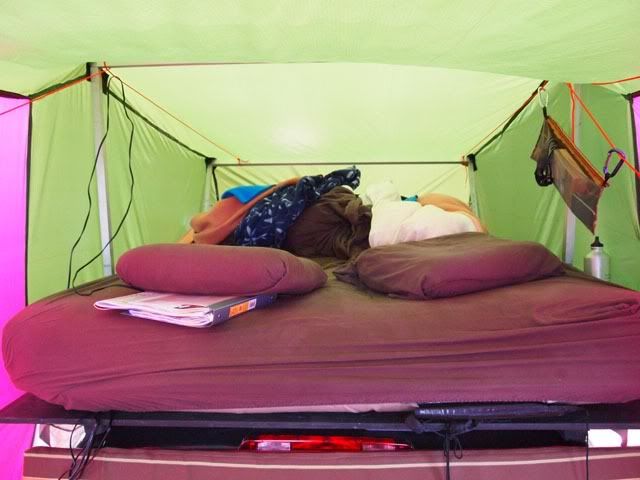
Six feet of head room in the back.
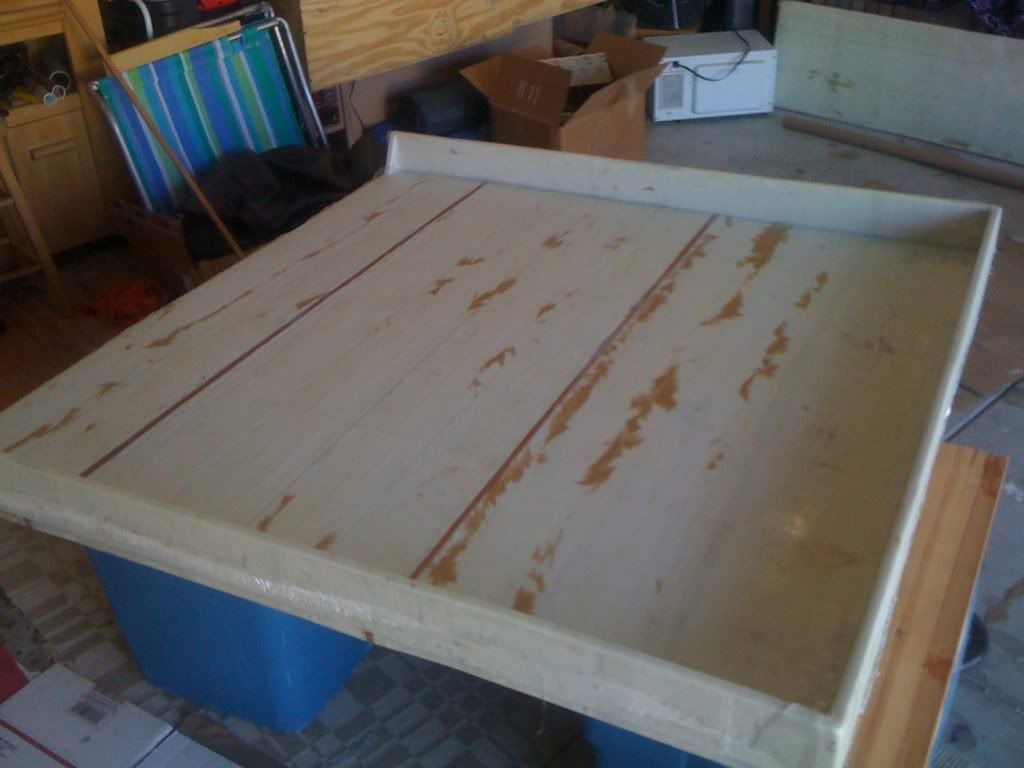
That's a queen size bed over the cab. The fiberglass composite tub that is the base of the bed becomes a "cap" over the bed of the truck in travel mode.
That's an inflatable mattress with a 1" foam pad over it for insulation.
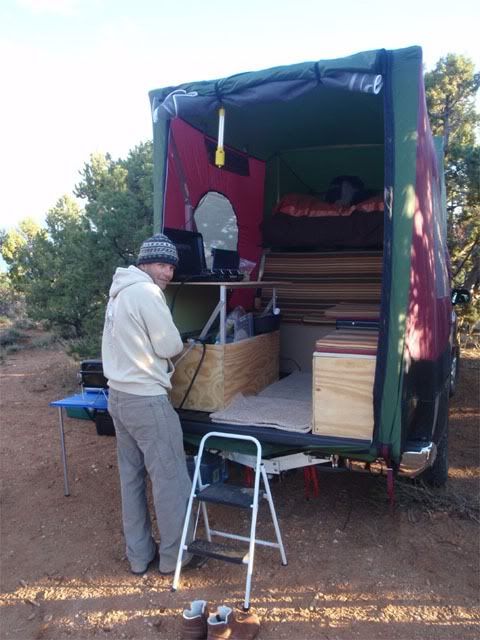
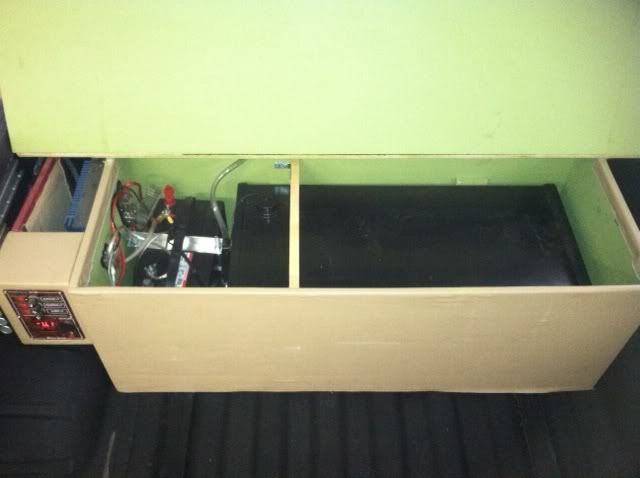
Across the front of the bed of the truck is the "gaucho", the main seating area. Housed within the gaucho is an 18-gallon water tank, deep cycle battery, water pump and some storage. The fuse/switch box is on the port side along with lots of 12v plugs and an amp for the audio system:
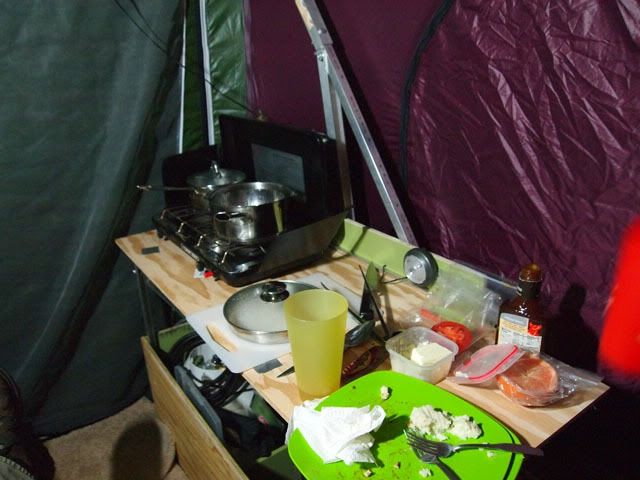
The kitchen pops up to make a waist-high counter that holds a 2-burner stove and a sink (we forgot the real counter with the sink and built in cutting board on this trip - stopped at a Home Depot and improvised a basic replacement seen here). Below is a 10-gallon propane tank, storage for the stove and all the other cooking gear. A water line with quick-connects comes from the gaucho to the kitchen where it tees off to a sink sprayer and a hose outlet (for future on-demand heated shower):
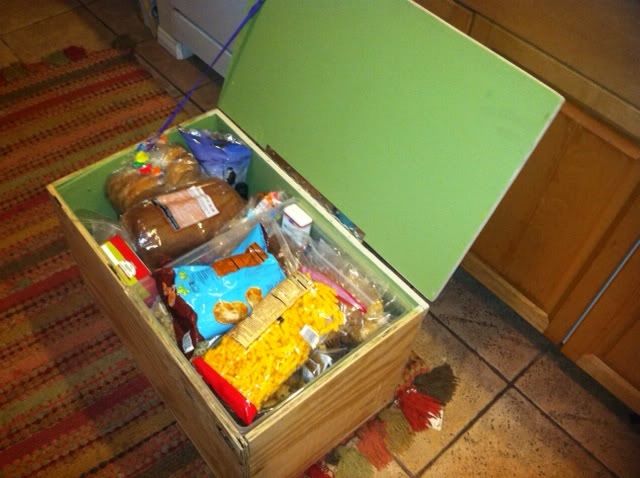
A third box just holds food:
All these pieces, plus an action packer, fit snugly in the bed while traveling. There's room around the edges for a roll-up table and other odds and ends under there as well.
An Edgestar 12v fridge (love it!), clothes, recovery gear, etc. ride in the back seats.
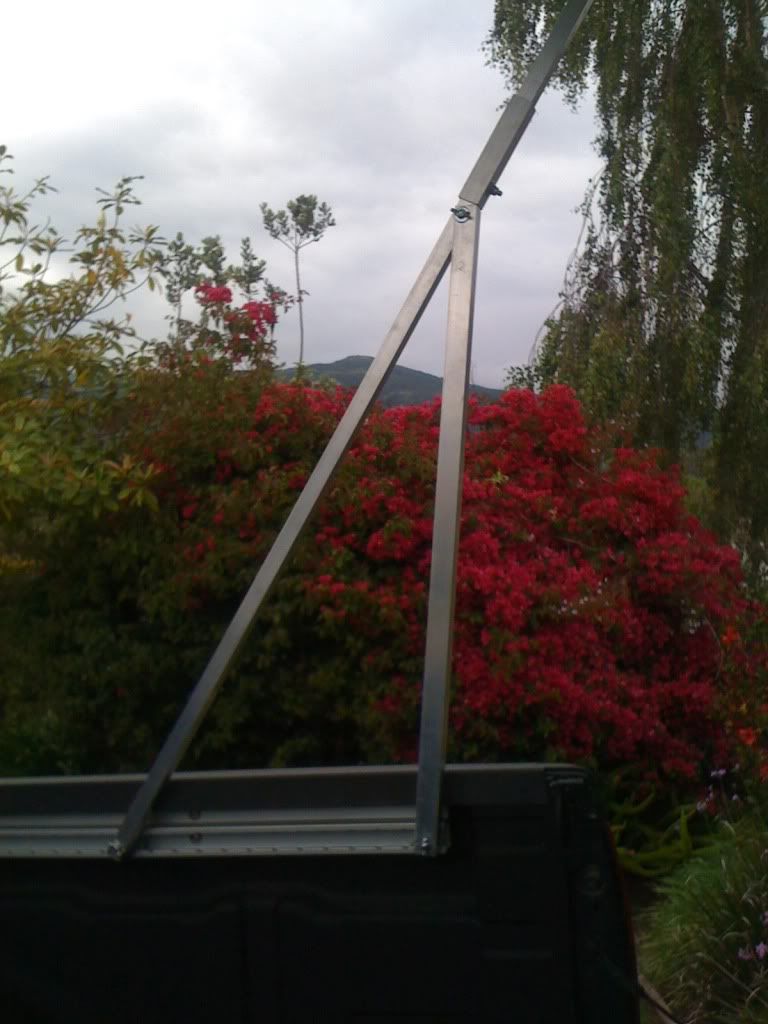
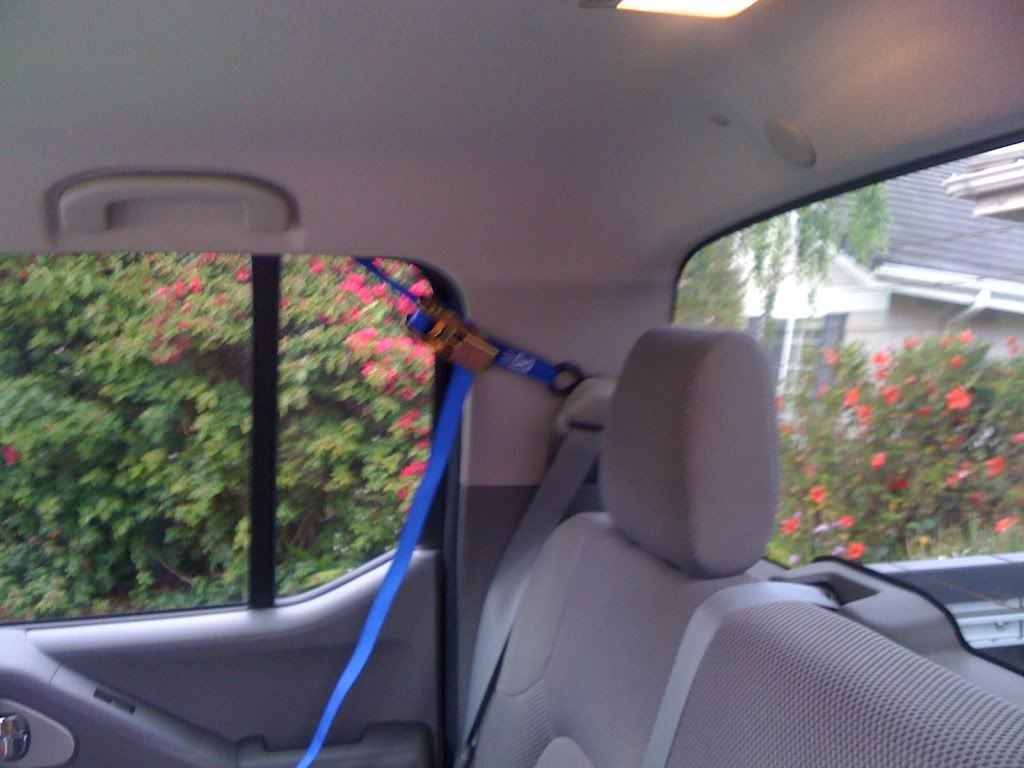
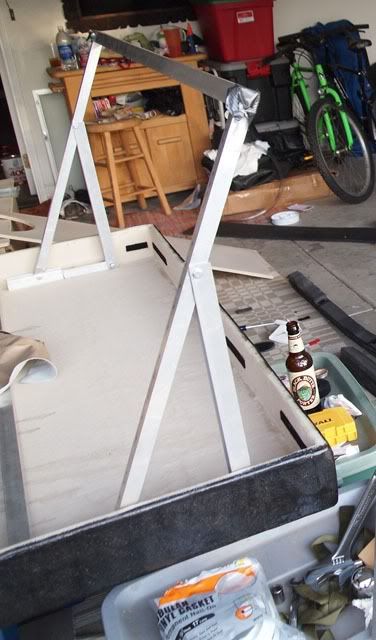
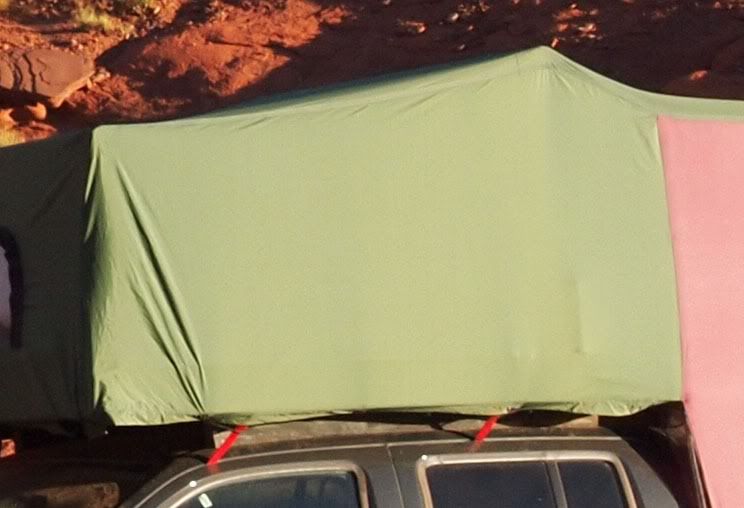
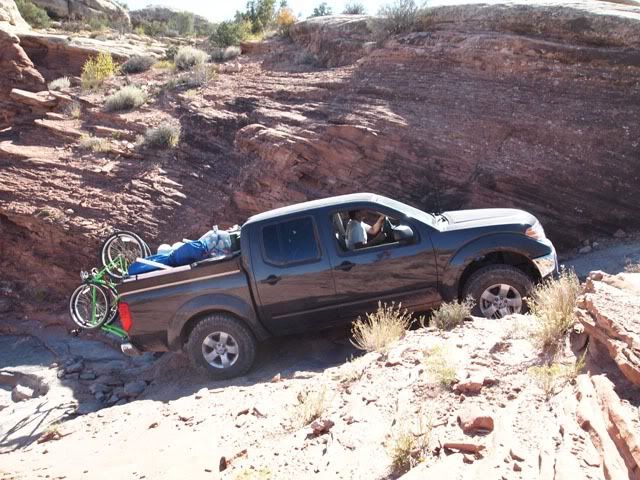
The aluminum "superstructure" that holds up the shell is strapped to the top of the cap. There's room for all kinds of other odd things on there as well, including an auxiliary fuel (or water) tank, a tub for trash, a small grill, camp chairs and fire wood. The truck has a 3" lift but with the weight of all the gear, the rear end was back down to stock height (with the water tank full). Even so, we managed to get over Elephant Hill in Canyonlands with mostly only dragging the hitch (a lot!). I think some helper springs are in our future.
Hanging off the back of it all is the custom bike rack/Hi-Lift jack holder. We had no idea if this thing was going to work - we loaded the bikes up for the first time as we were pulling out of the driveway for this trip. Luckily, it worked great. The bikes are super stable even off road and the departure angle isn't reduced. Here's the rack, just some aluminum angle, a few bolts and some fork mount clamps. The jack is held on by some u-bolts:

We came back from the trip satisfied with Pro-Rig, but with a list of improvements. It takes about an hour to do a full setup or take down - longer than I'd like. I think we can get it down to about 45min, but probably not much less. Acceptable for a trip where we move every day - better for spending a few nights at a stop and exploring.
Pro-Rig is really designed for fair-weather exploring. We had a night in the low 20's with frozen condensation inside above our heads, but we slept warm under a down comforter and wool blanket. One breezy night (15-20 mph), the shell was flapping around a bit but nothing threatened to blow up as far as I could tell. The green fabric is waterproof (the burgundy stuff is not, but it is breathable) so the sleeping area will stay dry in the event of a midnight downpour - for rainy weather though, we will use a fly over the back end.
I'll follow up with some details on the build and more technical info if there is interest. In general, it took a lot of hours (especially sewing the shell) but not a ton of money. Most importantly, it was a lot of fun to design and build.
I hope some of you are willing to share thoughts for improvements, additions and so forth!
First off, sincere thanks to everyone who posts info on their rigs and shares advice on travel destinations. This place is an amazing resource and great source of inspiration!
Anyway, we got a 2010 Nissan Frontier 4X4 about a year ago. Our first off-road trip was 5 days in and around Death Valley last winter. We had a great time but sleeping in a tent or heading towards a motel every night was a bit of a drag. I started researching ideas. Nothing out there quite fit all our criteria - the things that came close tended to be expensive (of course).
So, we started from scratch and made our own creation. We call it - Pro-Rig!
Here it is during recent beta testing in SE Utah earlier this month:
Six feet of head room in the back.
That's a queen size bed over the cab. The fiberglass composite tub that is the base of the bed becomes a "cap" over the bed of the truck in travel mode.
That's an inflatable mattress with a 1" foam pad over it for insulation.
Across the front of the bed of the truck is the "gaucho", the main seating area. Housed within the gaucho is an 18-gallon water tank, deep cycle battery, water pump and some storage. The fuse/switch box is on the port side along with lots of 12v plugs and an amp for the audio system:
The kitchen pops up to make a waist-high counter that holds a 2-burner stove and a sink (we forgot the real counter with the sink and built in cutting board on this trip - stopped at a Home Depot and improvised a basic replacement seen here). Below is a 10-gallon propane tank, storage for the stove and all the other cooking gear. A water line with quick-connects comes from the gaucho to the kitchen where it tees off to a sink sprayer and a hose outlet (for future on-demand heated shower):
A third box just holds food:
All these pieces, plus an action packer, fit snugly in the bed while traveling. There's room around the edges for a roll-up table and other odds and ends under there as well.
An Edgestar 12v fridge (love it!), clothes, recovery gear, etc. ride in the back seats.
The aluminum "superstructure" that holds up the shell is strapped to the top of the cap. There's room for all kinds of other odd things on there as well, including an auxiliary fuel (or water) tank, a tub for trash, a small grill, camp chairs and fire wood. The truck has a 3" lift but with the weight of all the gear, the rear end was back down to stock height (with the water tank full). Even so, we managed to get over Elephant Hill in Canyonlands with mostly only dragging the hitch (a lot!). I think some helper springs are in our future.
Hanging off the back of it all is the custom bike rack/Hi-Lift jack holder. We had no idea if this thing was going to work - we loaded the bikes up for the first time as we were pulling out of the driveway for this trip. Luckily, it worked great. The bikes are super stable even off road and the departure angle isn't reduced. Here's the rack, just some aluminum angle, a few bolts and some fork mount clamps. The jack is held on by some u-bolts:
We came back from the trip satisfied with Pro-Rig, but with a list of improvements. It takes about an hour to do a full setup or take down - longer than I'd like. I think we can get it down to about 45min, but probably not much less. Acceptable for a trip where we move every day - better for spending a few nights at a stop and exploring.
Pro-Rig is really designed for fair-weather exploring. We had a night in the low 20's with frozen condensation inside above our heads, but we slept warm under a down comforter and wool blanket. One breezy night (15-20 mph), the shell was flapping around a bit but nothing threatened to blow up as far as I could tell. The green fabric is waterproof (the burgundy stuff is not, but it is breathable) so the sleeping area will stay dry in the event of a midnight downpour - for rainy weather though, we will use a fly over the back end.
I'll follow up with some details on the build and more technical info if there is interest. In general, it took a lot of hours (especially sewing the shell) but not a ton of money. Most importantly, it was a lot of fun to design and build.
I hope some of you are willing to share thoughts for improvements, additions and so forth!
") ).
).