You are using an out of date browser. It may not display this or other websites correctly.
You should upgrade or use an alternative browser.
You should upgrade or use an alternative browser.
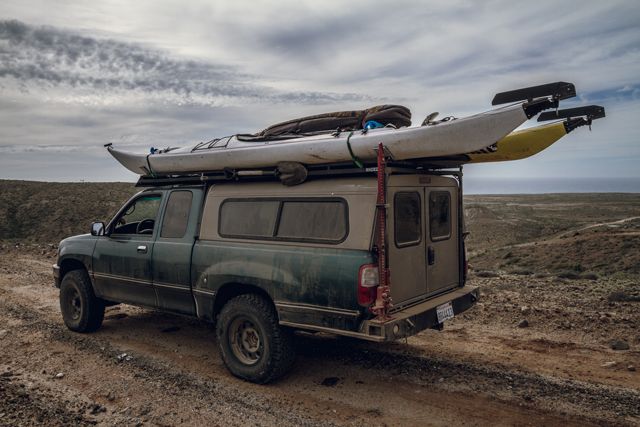
Project T100: "Baja Explorer Ver. 2"
- Thread starter G100
- Start date
uscg2008
Explorer
This is how I made my drawer/ table adjustable so I can level it out on uneven ground, just a idea. So that huge platform/ table you have can be level. I don't know how much you use it but here you go.Here are a couple upgrades I made before my Baja trip:
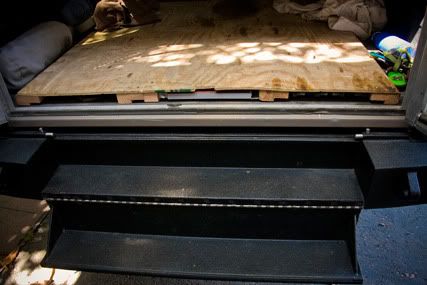
New Platform:
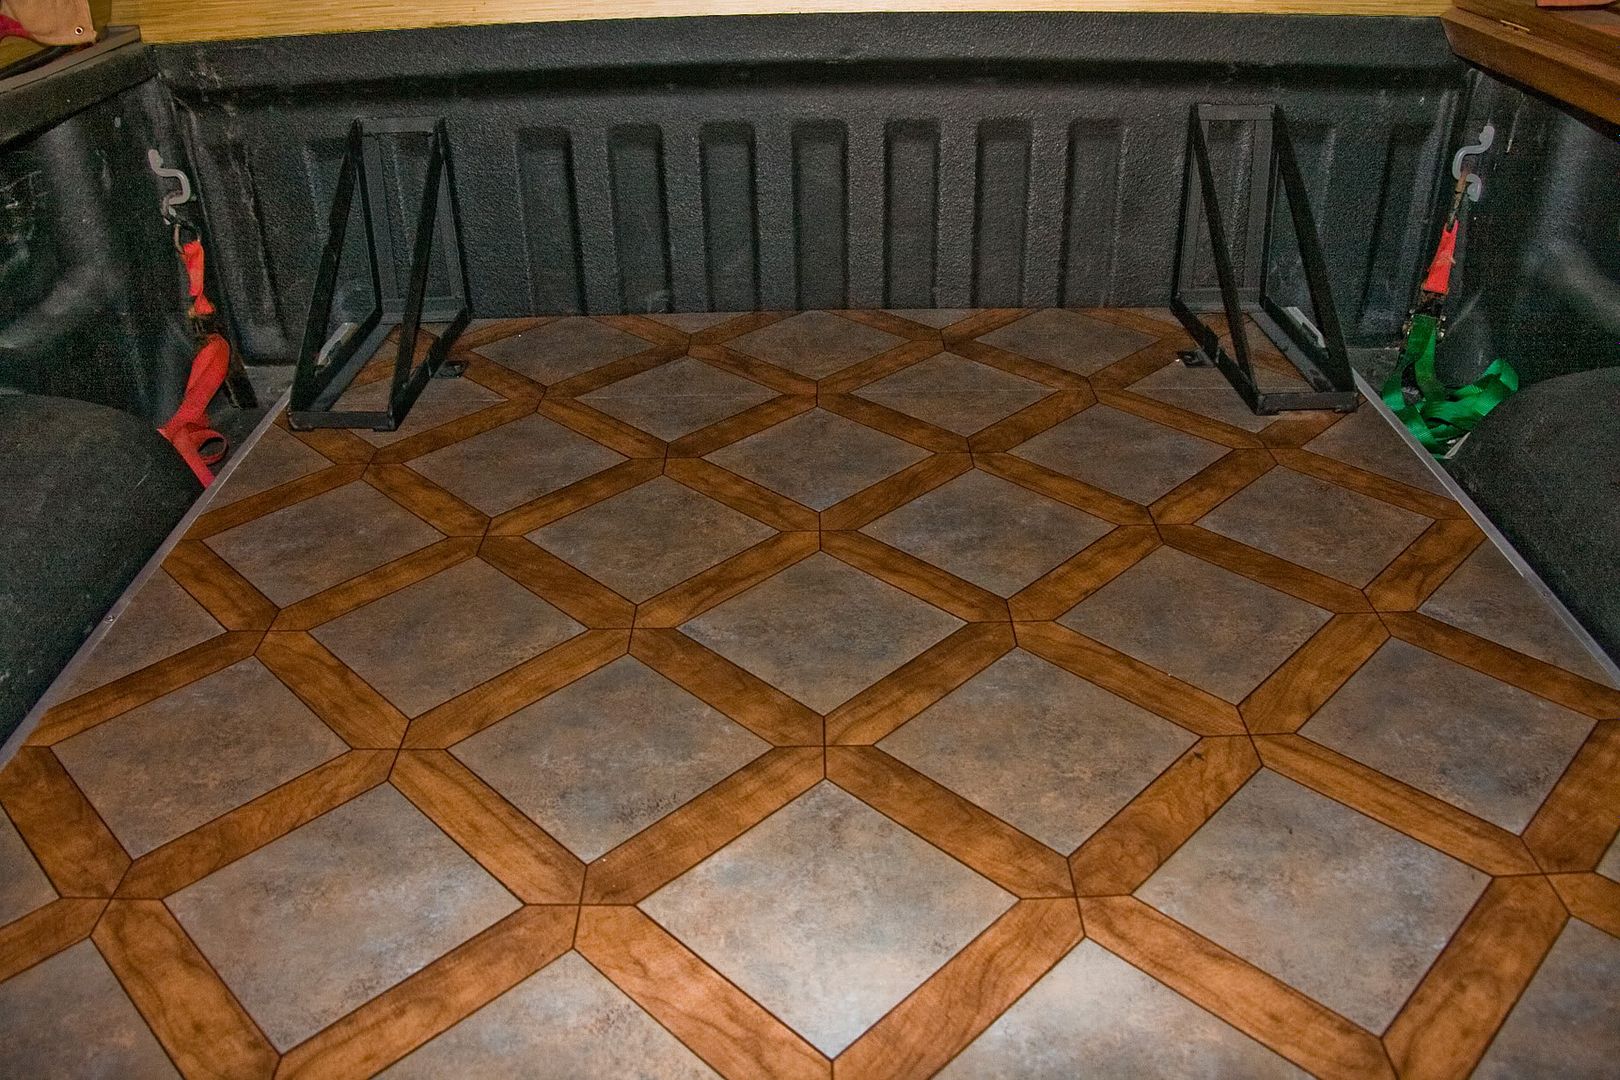
The thing that started this whole project was I found a piece of linoleum that would fit perfectly in the back of my truck to cover up my nasty piece of plywood that is saturated with oil, dirt, and who knows whatelse. I liked the look of the linoleum so much I couldn't get myself to glue it down on such a nasty piece of wood. So I bought a new piece of ply, which then led to buying new 2X6s, which led to aluminum edgeing, which led to painting it black, before I new it, my free piece of linoleum cost me over $100 in materials. But I am happy with the results.
Old nasty plywood platform (when it was fairly new):
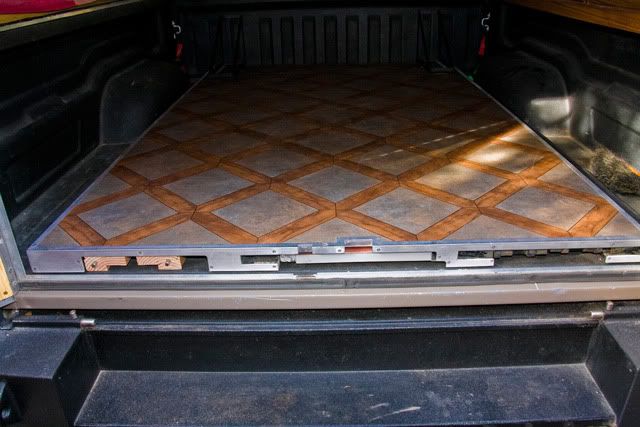
New linoleum platform with aluminum edgeing:
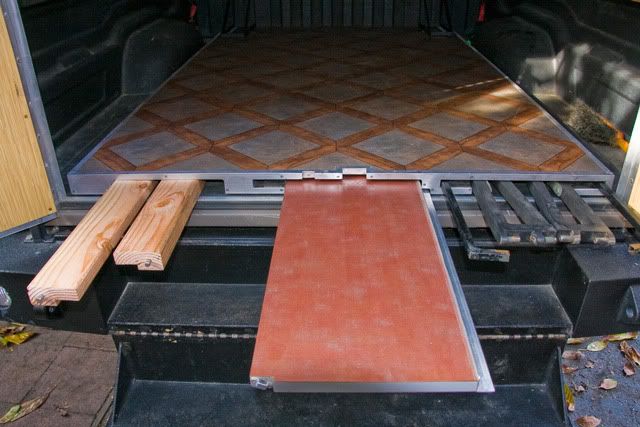
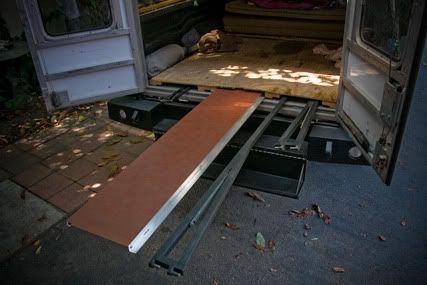
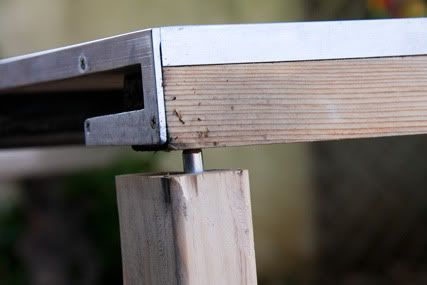
and I came up with some cheap legs so I can pull it out and make a nice big table:

just a 2X4 and a cariage bolt with the head cut off:
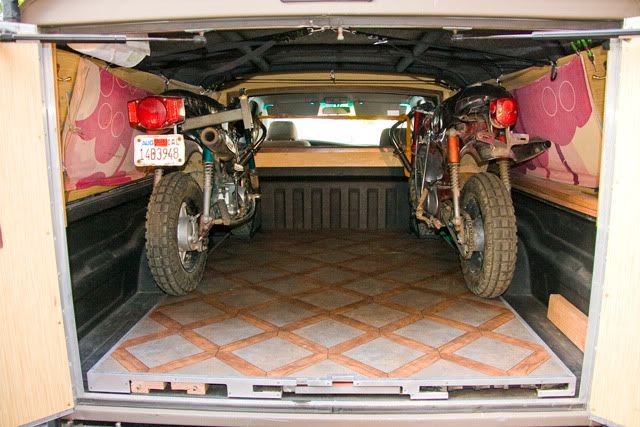
Wheel chokes:
Since I was going to be taking my little Honda CT70's with me on this trip I figured I needed to come up with a good way to them pack up quick, easy, and solid. So I came up with these wheel chokes. They worked great on the trip.
held in place by some little studs, quick and easy:
One on each side:
Still lots of room for gear:
Surf racks:
I siliconed some pipe insulation tubing on to the roof bars to pad the boards. Then added some anchors to the sides and in the middle and made some adjustable nylon straps.

Paper towel holder:
Lastly, I'm always needing paper towels, so I need a place to keep them out, but out of the way:
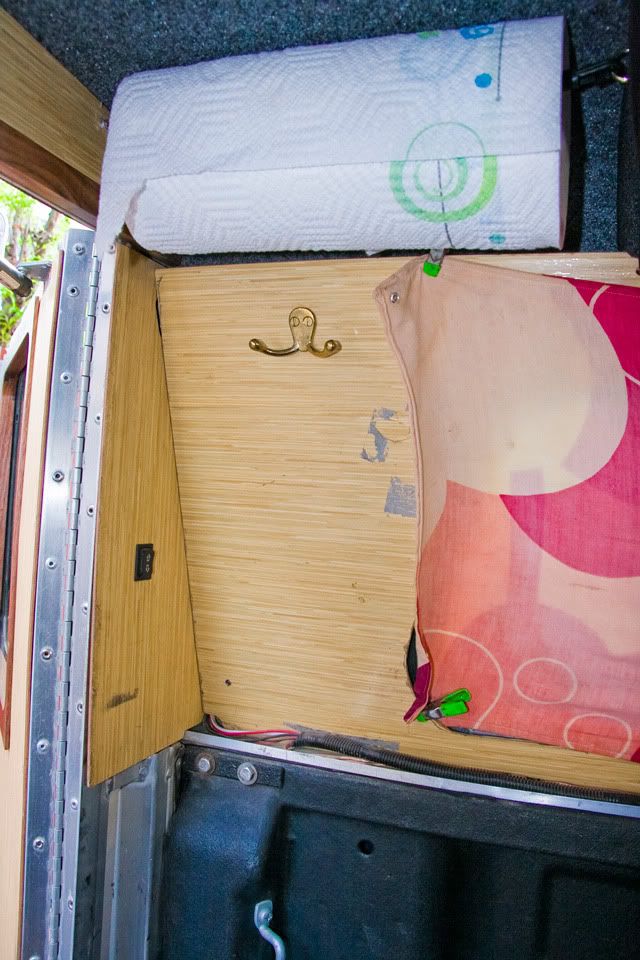
I just made two anchor points with rings use a small bungee cord with clips to hold the paper towel. Its pressed against the roof so that it doesn't un-ravel.
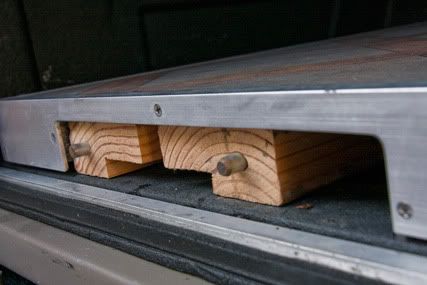
Drawer with legs folded.
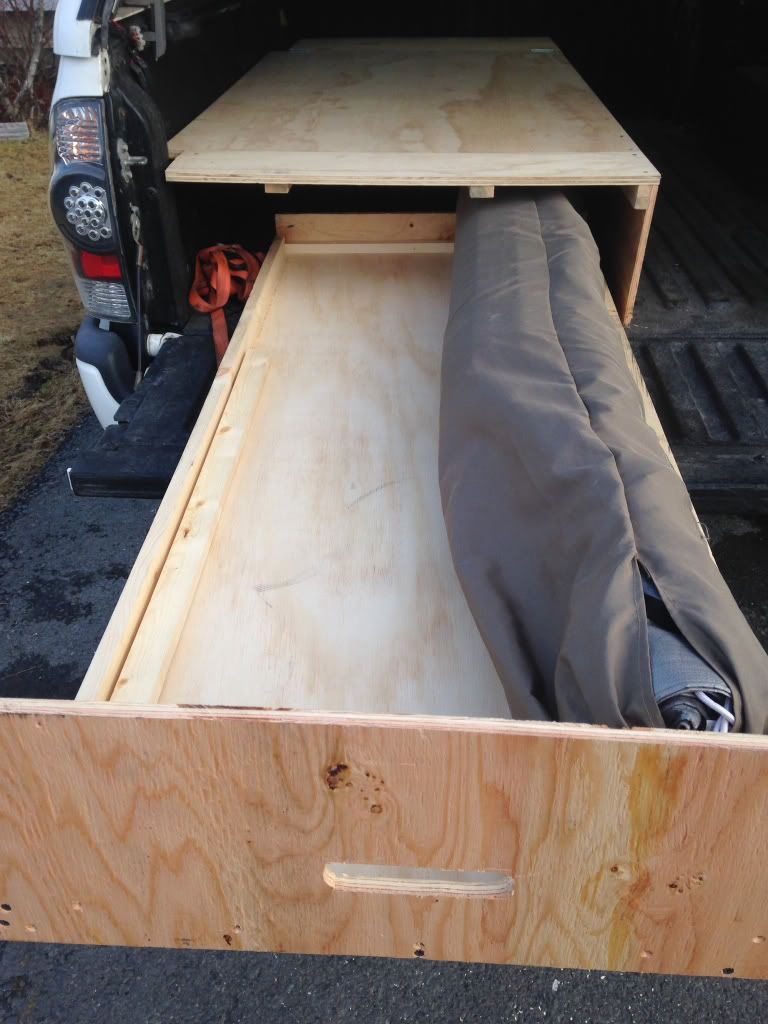
Legs extended
Just drilled holes in the wood and attached it with a bolt and wing nut.
Taylor1982
New member
How did you do the doors?
Amphibeast
Adventurer
Dude….Totally diggin on your "T"…… I may have to give mine some functional utilitarian love like yours….. I dig the barn doors.. I may have to go that route and build some, and the bumper, steps & sliders…….. Too cool for school! I am hoping to get South for the shrimp festival in San Felipe.. Every November I think. Anyway, I may have to pick your brain for Baja & my T100 XL Taco wagon! Damn I love tacos almost as much as burritos…. Unless they are street Tacos… But then again off-road tacos are the best too……
rjfarnworth
TwotterPilot
How did you make your curtains inside the shell? Im looking for any easy and cheap way to make some.
02rangeredge
Adventurer
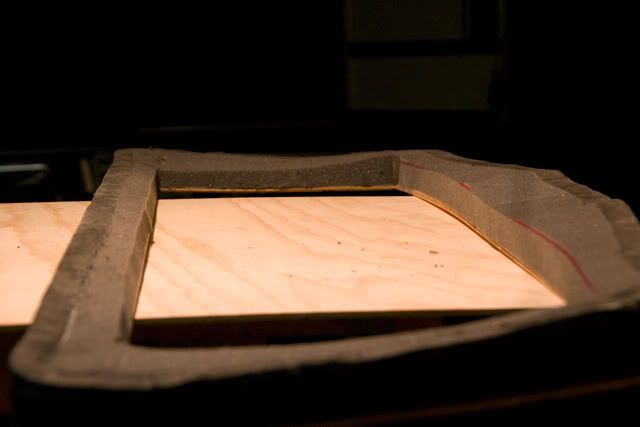
Here it is with the contour cuts:
You'll notice I put a pitch on the top so that water will run down and off the sides.
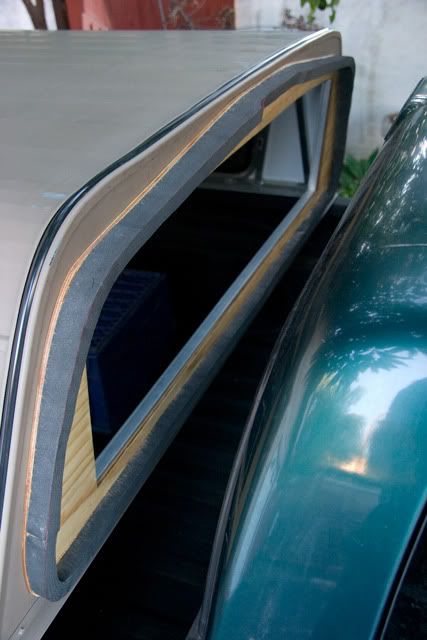
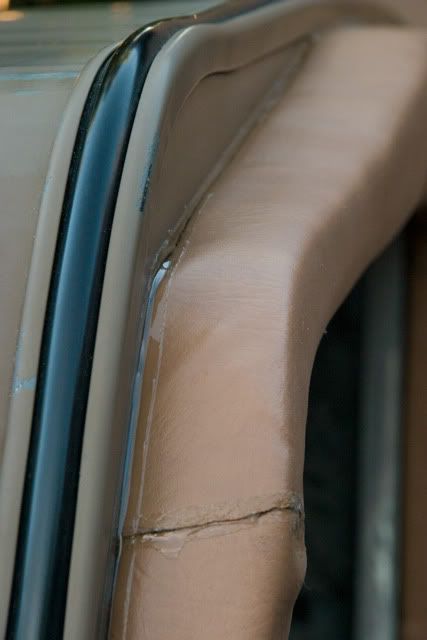
Once I got the outer shell of the boot fitting nicely against the back of the truck, it did take some adjustments, I started fitting the filler foam in. The filler foam is the "supreem" type of foam from foam on-line. The guy there told me it was moisture and mildew resistant so i got it. I ran out of the 3M 74, so I glued the rest down with 3M 77.
Once all the filler pieces were glued on I had to trim them to the contour of the truck aswell.
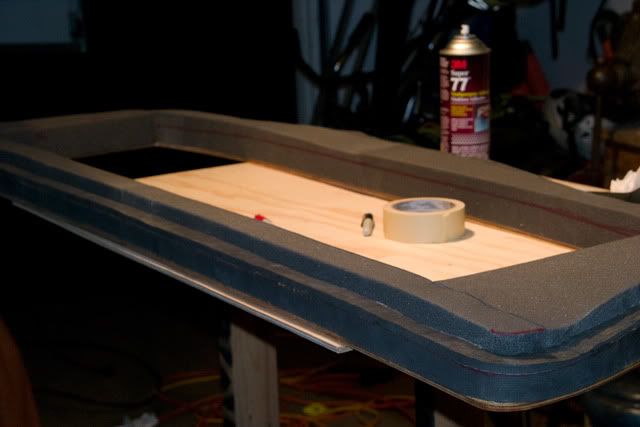
Now that the inside of the boot is built the fun part of covering it begins. I got some marine grade UV resistant vinyl material at a fabric store. I was planning on getting black but they didn't have it, so I got the color closest to the color of the shell. Covering this wasn't easy, it took me a couple nights to finish it. I wanted to use the least amount of pieces possible so there wouldn't be too many seams. I started on the bottom and overlaped my seams as I worked my way up so that the seams were pointing down. I ended up doing it in 6 pieces.
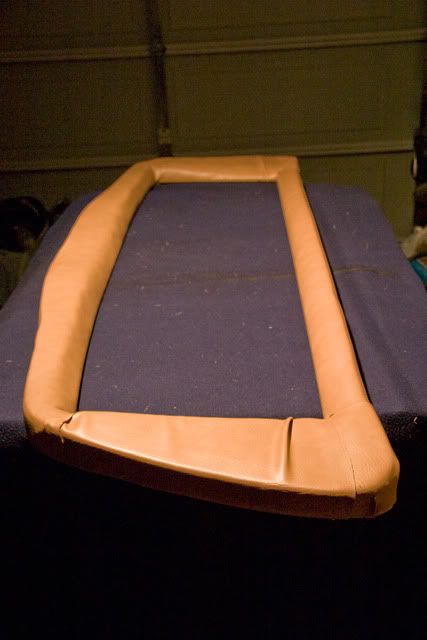
I used a staple gun to fasten it into the plywood.
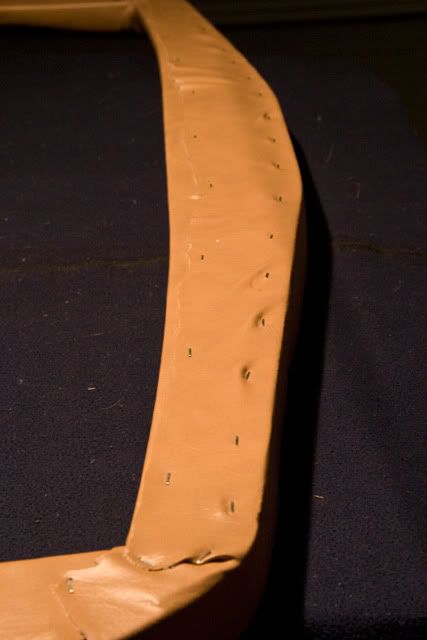
I glued all the seams with a clear marine adhesive made by GOOP, it is a lot like silicone but more perminate and is supposed to be UV resistant.

And here it is attached to the shell:
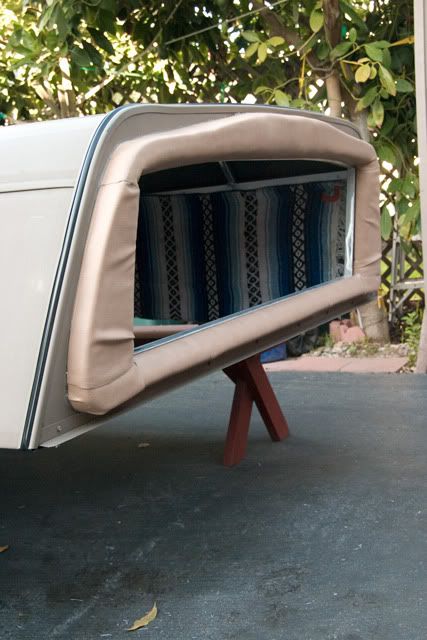
I ran a bead of the GOOP marine adhesive along the seam between the shell and the boot aswell to make that seam water-proof. I will later put a bead of some regular silicone on the other seam to make the connection completely water-proof
I will post pictures of it all put together as soon as possible. The boot made re-installing the shell a bit tougher, having to compress the boot against the truck while getting all the bolt holes aligned properly. Once it was all put together I ran a super small thin bead of some normal silicone to seal the boot to the truck, this way I can still remove the shell if i need to. Oh and for you who are wondering I took a hose to it and didn't get a single drip.
how's this holding up? it's a great solution to a problem I've got going on, and seems like a WAY better option than the inflatable gasket/boot options
G100
Adventurer
Still rolling strong
Toyojay: Yeah, funny I have been thinking lately I should update with some of my newer modifications. I'll be doing some more real soon cause I have added another member to the family and we will be doing a 2 or 3 week trip though baja this spring.
02rangeredge: Haven't had leak . . . ever.
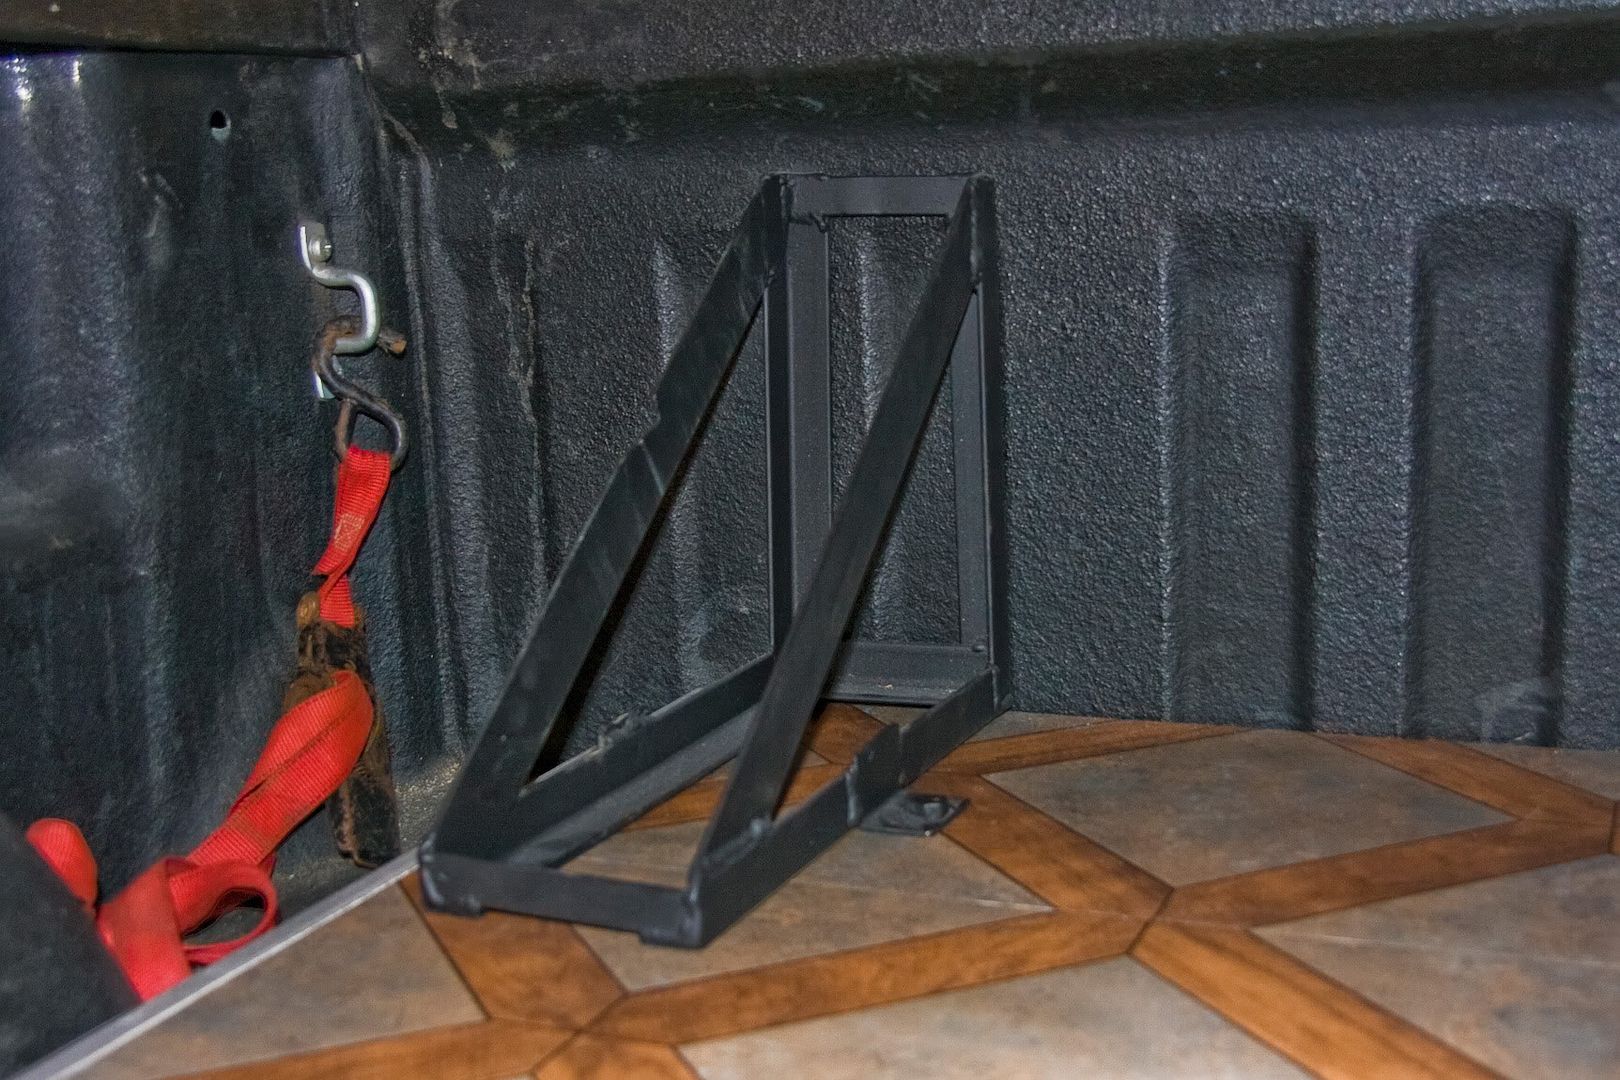
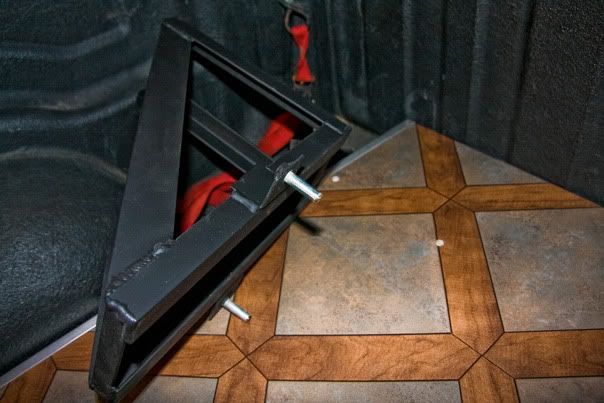
One of my additions is a Hi-lift jack mount.
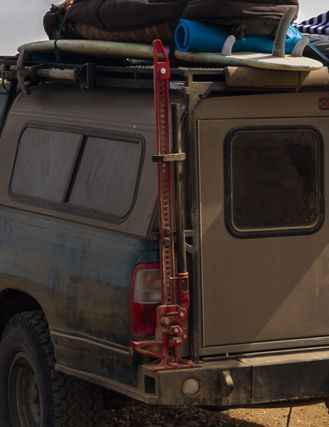
It is really simple, solid, and multi-functional. I wanted it stored low cause its heavy, in a easy place to get to and for it to be easily removable because i only put it on when I am on a trip. So the jack sits on a removable bracket that is a thin piece of metal with some nubs (like the bottom of soccer cleats) that fit in the holes of the jack base I think there is 6 nubs, this keeps it from moving around laterally. Then to keep it from moving up out of this base, it is bolted to the rack support. I used bolts that have the same size head as my lug nuts so I don't need two different size sockets. It is super nice to use as a step and handle to help you get down off the rack.
Toyojay: Yeah, funny I have been thinking lately I should update with some of my newer modifications. I'll be doing some more real soon cause I have added another member to the family and we will be doing a 2 or 3 week trip though baja this spring.
02rangeredge: Haven't had leak . . . ever.
One of my additions is a Hi-lift jack mount.
It is really simple, solid, and multi-functional. I wanted it stored low cause its heavy, in a easy place to get to and for it to be easily removable because i only put it on when I am on a trip. So the jack sits on a removable bracket that is a thin piece of metal with some nubs (like the bottom of soccer cleats) that fit in the holes of the jack base I think there is 6 nubs, this keeps it from moving around laterally. Then to keep it from moving up out of this base, it is bolted to the rack support. I used bolts that have the same size head as my lug nuts so I don't need two different size sockets. It is super nice to use as a step and handle to help you get down off the rack.
G100
Adventurer
Back at it.
Alright so I need some help.
I have been getting things setup for a trip down south in a couple weeks, and I purchased a few things.

Bilstens went on no problem.
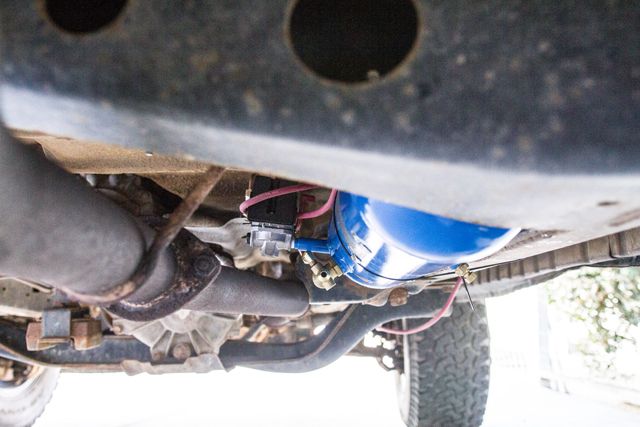
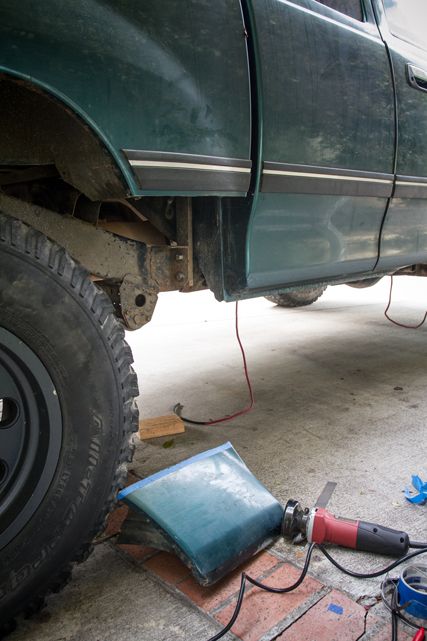
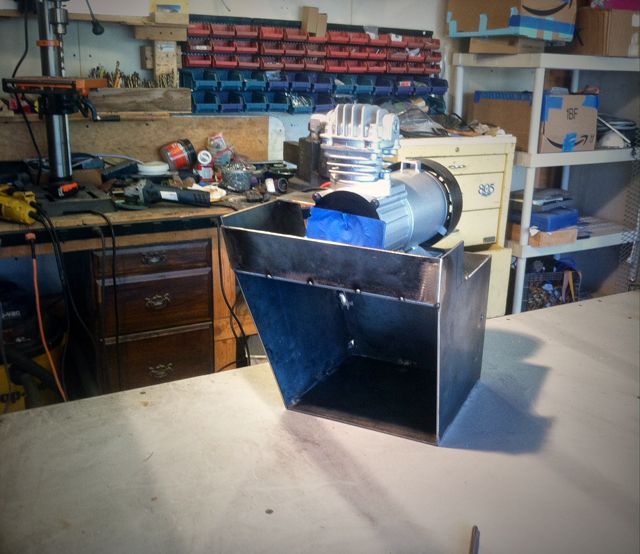
So for the 'on board air' setup I separated the compressor from the tank. The compressor is going to be fitted up in the quarter panel opposite side of the gas filler tube. The only place i can find for the tank is to strap it to the frame but I am a little afraid its to close to the exhaust pipe. Not worried about the tank more worried about the switch box getting to hot.
Here is a picture what do you guys think? too close? Am I going to run into problems?
Alright so I need some help.
I have been getting things setup for a trip down south in a couple weeks, and I purchased a few things.
Bilstens went on no problem.
So for the 'on board air' setup I separated the compressor from the tank. The compressor is going to be fitted up in the quarter panel opposite side of the gas filler tube. The only place i can find for the tank is to strap it to the frame but I am a little afraid its to close to the exhaust pipe. Not worried about the tank more worried about the switch box getting to hot.
Here is a picture what do you guys think? too close? Am I going to run into problems?
bigeyedfish
Member
I think it will hold up just fine. If you're concerned, it would be easy to make a heat shield out of aluminum as long as you had a way to mount it.
Sent from my SAMSUNG-SM-G900A using Tapatalk
Sent from my SAMSUNG-SM-G900A using Tapatalk
G100
Adventurer
Soo.....
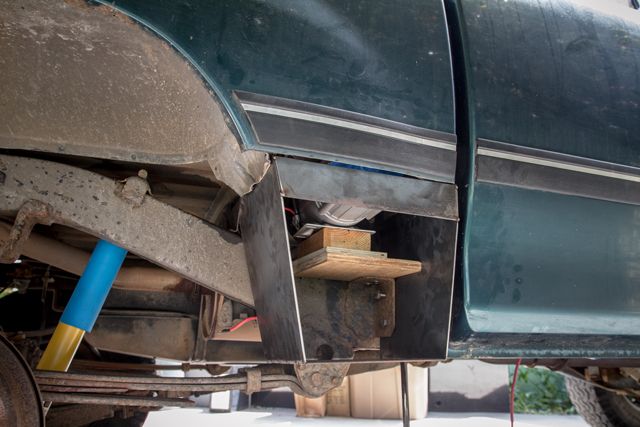
So still haven't decided whether that pressure switch is too close to the exhaust pipe, was kinda hoping for some educated opinions from here. Hello? anyone out there? So in my deliberation with that I decide to move over to mounting the compressor, then my inner expo member came out and well I couldn't help myself, I got this idea and a couple minutes later . . .
So still haven't decided whether that pressure switch is too close to the exhaust pipe, was kinda hoping for some educated opinions from here. Hello? anyone out there? So in my deliberation with that I decide to move over to mounting the compressor, then my inner expo member came out and well I couldn't help myself, I got this idea and a couple minutes later . . .
I don't think I would be worried about the proximity to your exhaust with the pressure switch as much as just being exposed to the elements and getting splashed/potentially submerged. It wouldn't be hard to move your pressure switch off the tank and add a manifold for it up in a safer place. Then you would just plug off those ports in the tank.
Also I am interested to see where your new body work leads! Ive considered building a tool box into that area before.
Also I am interested to see where your new body work leads! Ive considered building a tool box into that area before.
Forum statistics
Members online
- al_burpe
- Indoorwindmill
- wig
- Imgoingonanadvencha
- Blowby
- JCDriller
- Colt4522
- Dougnuts
- tjbrubi
- adamalli
- collk22
- wfv56
- vogelt4
- MaynardFerguson
- svmaple
- mmmaaatttttt
- Jdisla4649
- mark5280
- webfoots
- Jsnable
- Jesse42
- Raisinhead
- esc IA
- swigs91
- AndrewTK
- deadbeat son
- pirranah
- NOPEC
- rdrop
- zip
- slick621
- MotoFly23
- pugslyyy
- pinevalley
- MarcusG
- Theshwed
- Spencer for Hire
- DieselDaddy
- jnr4095
- RoverGS
- WOODY2
- gator70
- Waymin
- gregmchugh
- motosickle
- Aces st
- Kraske
- BigSkySerf
- al415
- Obsessed2findARuggedHybid
Total: 1,087 (members: 63, guests: 1,024)