Quigley 4x4 Chevy Express build

Corneilius

Adventurer
(I'll probably use Scepter MWC water cans with either a foot pump or a drop in whale pump....

I LOVE my foot pump, draws from a 7 gallon reliance jug. Highly recommend, my biggest thing with the Surflow 12v pumps is the noise while cycling. Also negates the need for a valve on the faucet and conserves water. To round out my unaffiliated sales pitch, its easy to winterize and can be refilled from a body of water or spigot in a pinch.
 

710m

Observer
I LOVE my foot pump, draws from a 7 gallon reliance jug. Highly recommend, my biggest thing with the Surflow 12v pumps is the noise while cycling. Also negates the need for a valve on the faucet and conserves water. To round out my unaffiliated sales pitch, its easy to winterize and can be refilled from a body of water or spigot in a pinch.

Glad to hear you like the foot pump. I'm also thinking it might end up serving double duty in the garage when it isn't in the van. I'd love to have a small hands-free sink in there so I can wash up before going into the house.

The water conservation aspect is also a bonus.
 

710m

Observer
I got some weird looks from my neighbors when I parked my ultra tall white cargo "Cleaner" van (which is surprising given how strange they are :peepwall:). The looks got even weirder when I started spending hours underneath it staring and cursing with a tape measure. Must have thought I was working on a contraband transport vehicle. :costumed-smiley-007

Of course once the project started too come together they stopped giving me the evil eye. In fact a few were jealous.

Don't worry about your pace. Do what you can when you can. Looking good thus far. I appreciate those who take the time strip a project down. :)

Wait, so what kind of "cleaner" van is this? Like the Wolf in Pulp Fiction kind of "cleaner"? Or like dry cleaners? Maybe the neighbors have a right to be concerned....
 
Last edited:

710m

Observer
battery rack

Why is it that I always underestimate long it takes me to build something?

Since I've decided to keep propane out of my van and cook with electric using an induction stove and maybe a microwave (if it'll fit) I figured I need lots of juice. So I have four 100Ah batteries that need to be placed somewhere. Considering how precious the interior space is, I decided to mount the on the frame behind the driver seat. The distance between the body mounts on the frame is 49" and the length of my four group 27 batteries is 48", so they should fit.

I made a hinged frame for each pair of batteries that I'll be painting and mounting to the van shortly. So far the rack fits on the van and the batteries fit in the rack, so the only question that remains is whether the batteries fit in the rack while the rack is on the van.

Battery bracket

Below you can see the rack clamped to the van frame and the rear half is pivoted down so that the batteries can be inserted and then it can be pushed up and bolted into place.

Battery bracket

Battery bracket

The next step will be to put some rivnuts in the frame and wrap this project up. Oh, I still need to find a way to secure the batteries to the rack and add a plate to the bottom to protect the batteries from road debris, but that shouldn't be too hard. All it'll take is more time. :)
 

TeleSteve

Adventurer
I placed an 8D battery in the same location on my AWD Express. The frame is thick enough that it can be drilled and tapped, no rivnuts necessary. Looks like you will have plenty of battery, nice work so far.
 

710m

Observer
I saw you were testing a Pinzgauer wheel on your van. Ummm ... won't work. Pinzgauer wheels have a 7 INCH offset. Not 7 mm. They have the same offset as a Hummer wheel. A jeep usually has 3.5" offset. You'd be best off trying to find an aftermarket wheel specifically for that van.

Oh, there are so many reasons those wheels wouldn't fit. I was just trying them to see what a 255/85 tire would look like on the van. I ended up going with 235/85. Thanks for the heads up though. :)
 

710m

Observer
I placed an 8D battery in the same location on my AWD Express. The frame is thick enough that it can be drilled and tapped, no rivnuts necessary. Looks like you will have plenty of battery, nice work so far.

Yeah, it seems like a good spot for batteries. I would have to disagree about the frame being thick enough for drilling and tapping, though. The frame is only about 0.133" thick, which wouldn't have enough threads for the 5/16-18 bolts I want to use. Usual rule of thumb is to have the thread depth equal to the diameter of the bolt.
 

710m

Observer
battery rack

Well, I'm just chipping away at this thing. I got the rivet nuts placed in the frame and everything fits :) Now its a matter of painting and mounting everything.

I finally figured out a solid method for installing the rivnuts into the frame. I tried several methods, but this one was the most robust and kept the rivnut aligned during installation. The parts list for the improve rivnut tool is as follows.

5/16 grade 8 bolt (about 2" long I believe)
a couple of 5/16 washers
a toothed 5/16 washer
a 1/2" heavy duty steel bushing

The nice part is that all these parts are available in the hardware drawers at Lowes.


To use the tool you just insert the rivnut, hold the bushing with a pair of pliers and turn the bolt to crimp the rivnut. The end result looks something like this.


I would be remiss if I didn't give a shoutout to my favorite tool when drilling in steel: my Drill Doctor. Trying to do this without sharp bits is pretty much futile. This one even puts on the split point which makes life a lot easier.


710m

Observer
battery rack

This weekend I worked on the seats and the battery rack. The battery rack works mostly as expected except for one glitch. The battery in the way front interferes with an intrusion as the rack is pivoted up. The outcropping into the space is right underneath the seatbelt retractor and I haven't looked yet what is in that space. I haven't really had time to investigate too closely. The terminals on the other 3 batteries clear the body by about 1/4" when the rack pivots up.


710m

Observer
Transit bench installation

The transit bench wasn't too difficult to install. The most time consuming part was cutting the spacer plates to deal with the corrugated floor. All in all I think I spent a couple hours behind the drill press to cut all the holes.


The spacing of the holes on the Transit mounts were such that they barely fit between the crossmembers on the van, so that actually worked out OK. Each grade 8 bolt is now secured through the floor, the spacer plates, and then a transverse mounted 1/4"bar. I don't think these seats will be going anywhere.


The seat position turned out to barely be OK. When tipping the bench forward to remove it from the brackets the drive side seatbelt guard scrapes the window frame. This is kind of annoying and we'll see how it goes with the trim installed. Either way, I didn't want the seats to the passenger side anymore because then we wouldn't be able to scoot around it at all.


The seats are comfortable and should be good for extended road trips.

Next steps will be the galley and flooring. I did get some seat swivels in, but they are going to require me to cut the seat bases shorter. There's just not enough headroom to increase the seat height by another 1.5" for the swivels.
 

710m

Observer
electrical

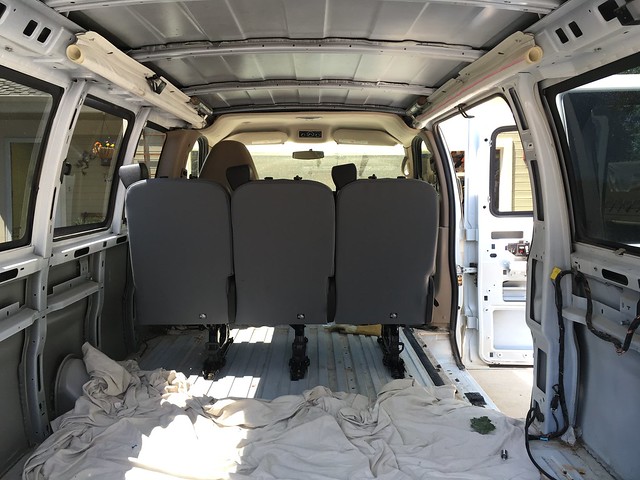
With the seats mounted, I returned to the electrical side of things. I didn't want to install and and wire up the batteries until the seats were in, just in case I needed access to the floor where the batteries were mounted.

So, this past weekend I wired up the batteries, the inverter, the battery disconnect, the current sense resistor, and fuses, etc.

All the DC wiring from the batteries to the inverter is 2/0 awg welding cable, capable of handling the 200A that the inverter can draw. The wiring from the primary battery to the house batteries is 2 awg.

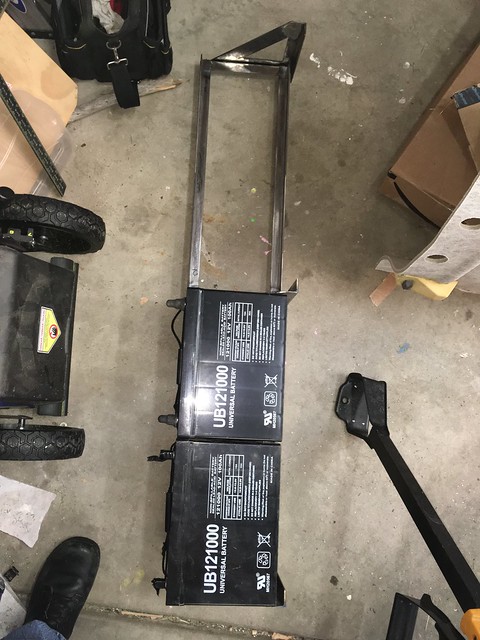
Here's a shot of the batteries looking towards the rear of the van.


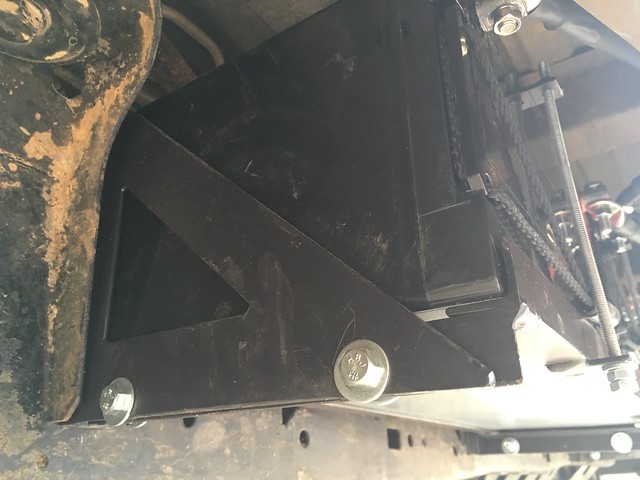
Unfortunately there's not enough clearance to top the batteries up with the cabling attached, so the connections were made with the batteries up there. There's plenty of room to work, so it wasn't too bad.

Looking towards the back:


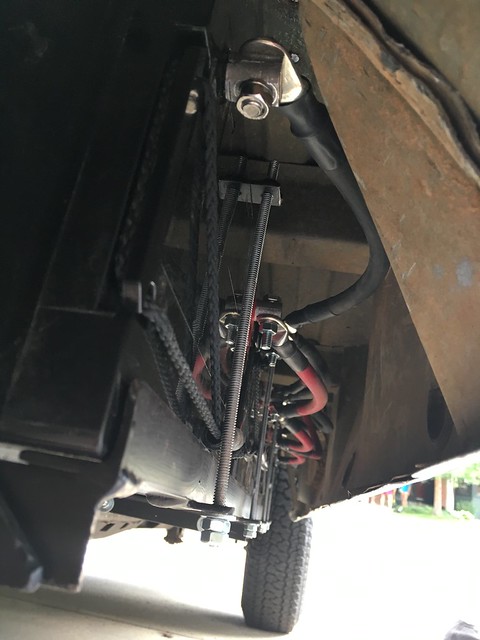
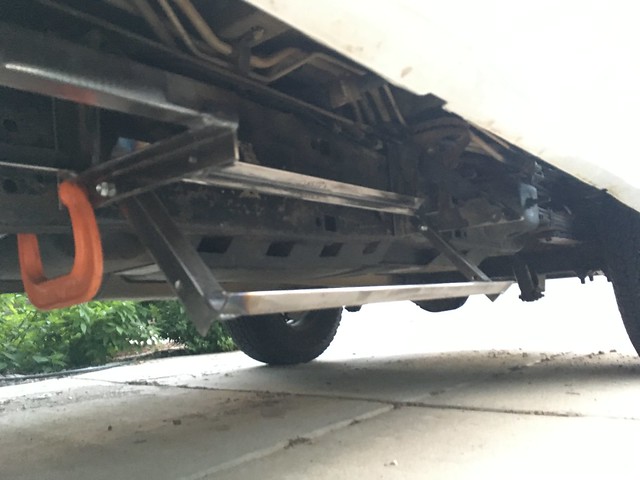
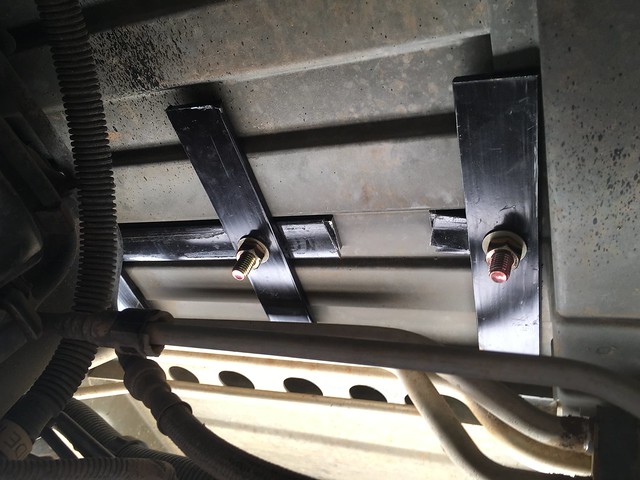
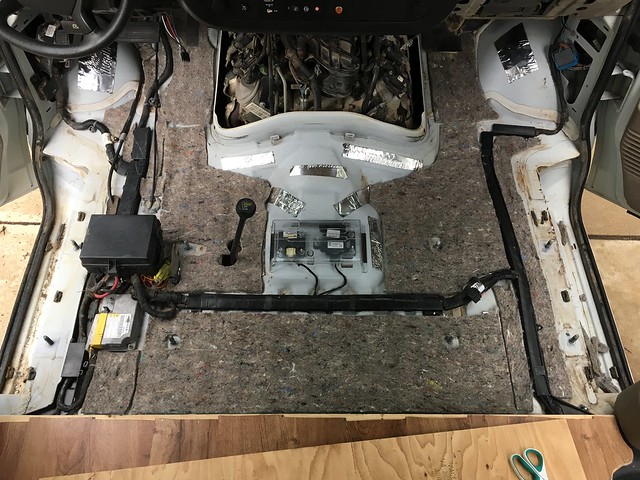
Looking towards the front and where the cables go up through the floor:


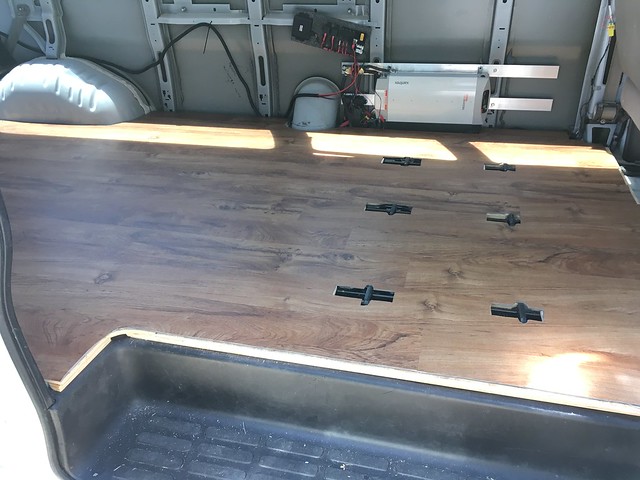
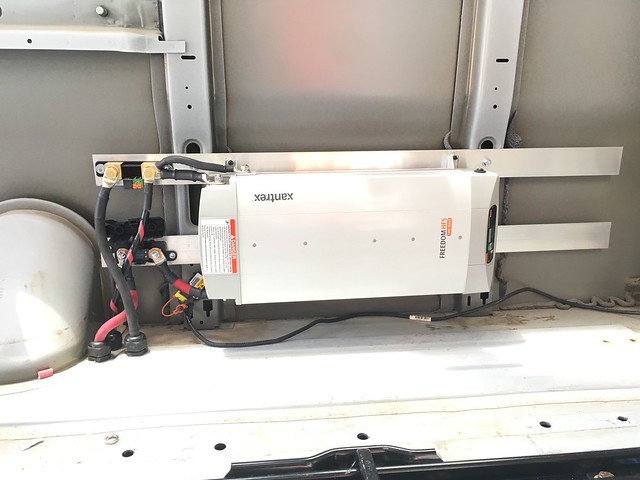
The inverter is next to the bench seat on the wall, together with the current sense resistor and the 200A fuse.


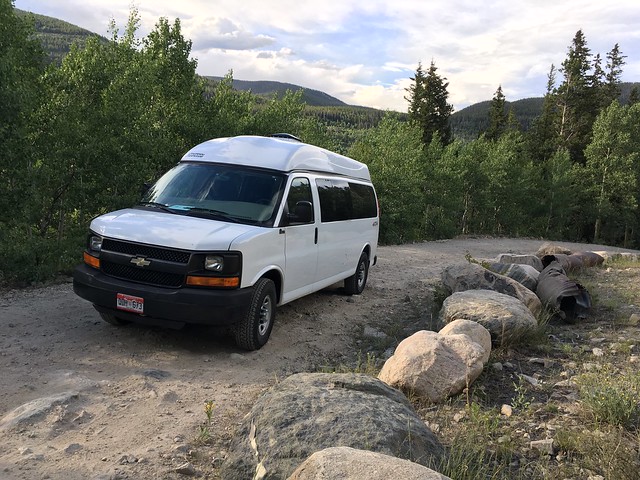
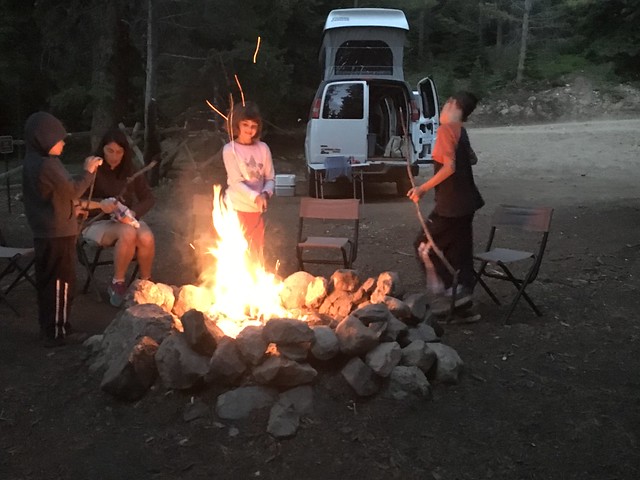
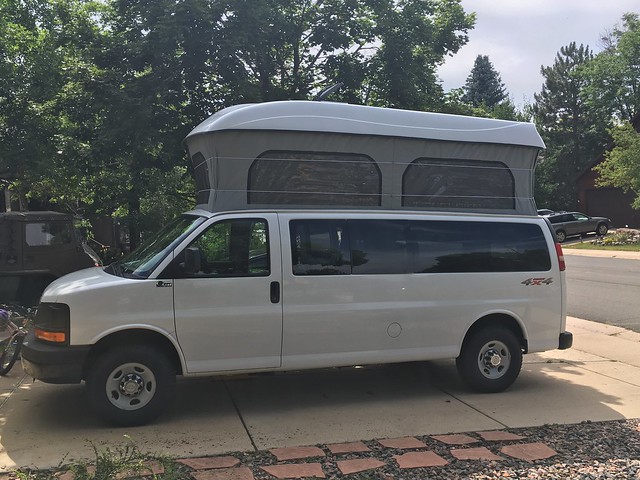
On a side note, we did get our poptop installed by Colorado Campervan. We'll have to figure out how exactly we're going to arrange the sleeping platforms when we're driving and when we're parked to maximize the available standing room. But the top allows for a lot of flexibility, so it's probably about as good as it gets as far as campervans go.


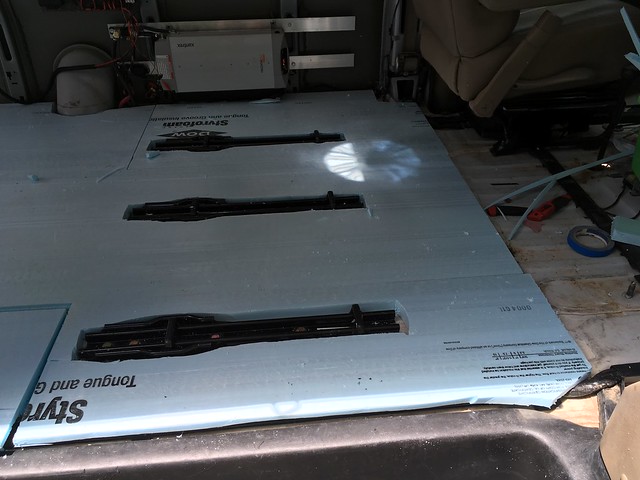
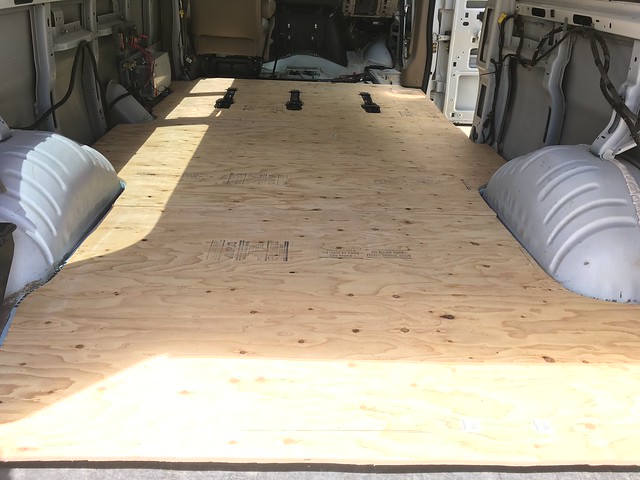
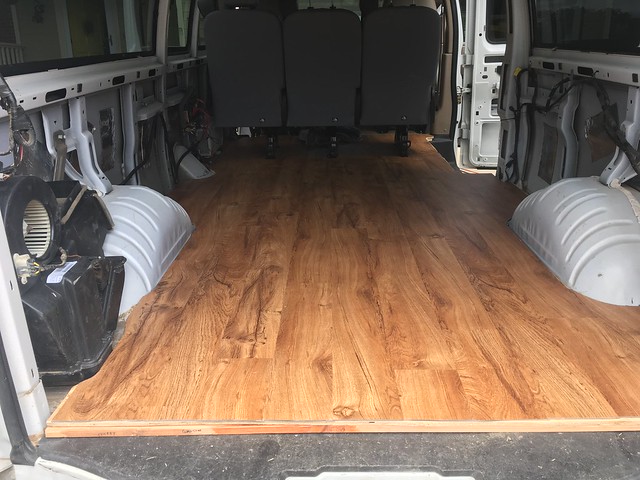
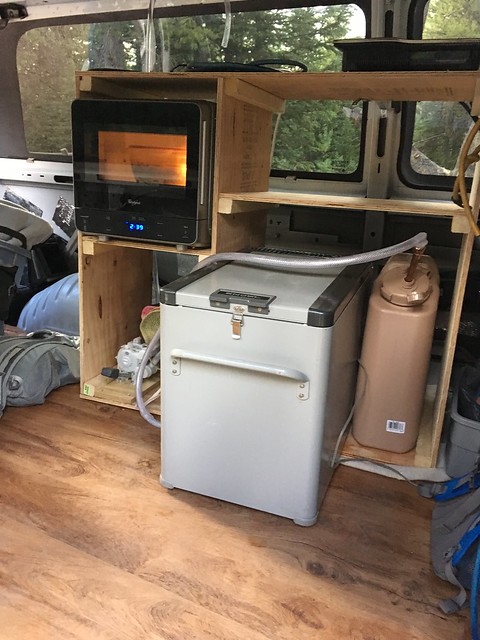
Next steps will be the flooring and the galley.
 

710m

Observer
rear flooring

It's been a bit since the last update, I guess I've been busy trying to get the van in sufficiently good shape to take on some trips.

I decided to put 1" rigid foam insulation in the back followed by 1/2" plywood and vinyl plank flooring. I would've preferred thinner insulation, but it just wasn't available at the time. I glued each layer to the next using 3M 77 adhesive and gorilla glue for some of the trouble spots, except for the vinyl planking which is floating. I hogged out the bottom of the rigid foam to make room for the wiring that runs across the floor in the van.

Van

Van

I used the insulation as a template to cut the plywood subfloor. I cut the plywood a little bigger than the insulation to clear the trim near the doors and then used some trimmed wood pieces to support the plywood at those spots.

Van

I didn't show it here, but I glued some wood spacers to cover some of the seat mounts so that the vinyl planking is supported at those spots. The vinyl was definitely the easiest to install. It was a piece of cake to cut with some heavy duty scissors.

Van

Van

I'm pretty happy with how this turned out. It already got pretty scratched up on our first trip, so it isn't quite as durable as I'd hoped, but it's all good.
 

710m

Observer
carpet installation

Since this was originally a fleet van it came with black vinyl flooring which we didn't care for at all. Unfortunately there is no molded carpet available for my van, so I ended up rolling my own. I ended up putting down about 3 layers of automotive carpet padding and then put the carpet on top of that. Each layer of carpet padding covered more of the wiring and made for a relatively smooth final layer.

I expected all the layers of padding to cover the ridges in the floor, but that didn't turn out to be the case. You can clearly see the ridges between the seats, but there's not much I can do about it now. Should I have filled in the ridges before putting the padding down?

I used upholstery spray adhesive to adhere everything and that was some amazingly sticky stuff. I started out cutting the padding with standard scissors and after getting several blisters searched for a better solution. The better solution turned out to be heavy duty kitchen shears, they cut much better than the standard scissors. The only thing left on the flooring is all the trim between the carpet and the vinyl and some trim pieces on the vinyl near the doors.

Van

Van

Van

Van

Van

Van
 

710m

Observer
maiden voyage

We decided to make a quick test run of our configuration before we head out for a two week road trip to California next week. I threw together a galley so that we could try out our equipment at our National Forest camp site. The road there was a super easy awd trail that I usually would've blasted over at 30 MPH in the Pinzgauer, but now I need to be all worried about clearance and stuff.

Van

We put the galley behind the seats and quickly realized that we really want all this stuff closer to the rear doors. It would be nice to be able to access this stuff from either inside or outside since most of our time was spent outside. That was the whole point of throwing this thing together, to try it out and not have hard feelings when we decide to do something different. All the equipment was nice to have (microwave, induction stove, foot pump, etc.). Our pot did keep sliding off the induction stove, that thing is slippery!

Van

It was wonderful to be out and about again...

Van
 

Forum statistics

Threads
185,915
Messages
2,879,589
Members
225,497
Latest member
WonaWarrior
Top