Sabre
Overlanding Nurse
Inspired by folks like Monstero, I've been wanting to install a winch on the Gen III yet retain the OEM front bumper. I like the curved look of the stock version, have trimmed the bumper extensively to give plenty of clearance, and wanted to avoid adding unnecessary weight (and removing too much weight from my wallet). After lots of research, I settled on either a Superwinch Talon or a Comeup Seal; both have the waterproof construction that i was looking for as well as being compatible with synthetic line, although they both feature the "high in the middle" design that would make stealth mounting problematic.
Unfortunately, being a man of humble means, I couldn't justify the expense for a tool that would realistically see little use, so I just enjoyed the vehicle and kept my eye on the used market. I have a habit of scanning for something I want without any sense of urgency, then pouncing quickly when it comes up. You have to be patient, but....
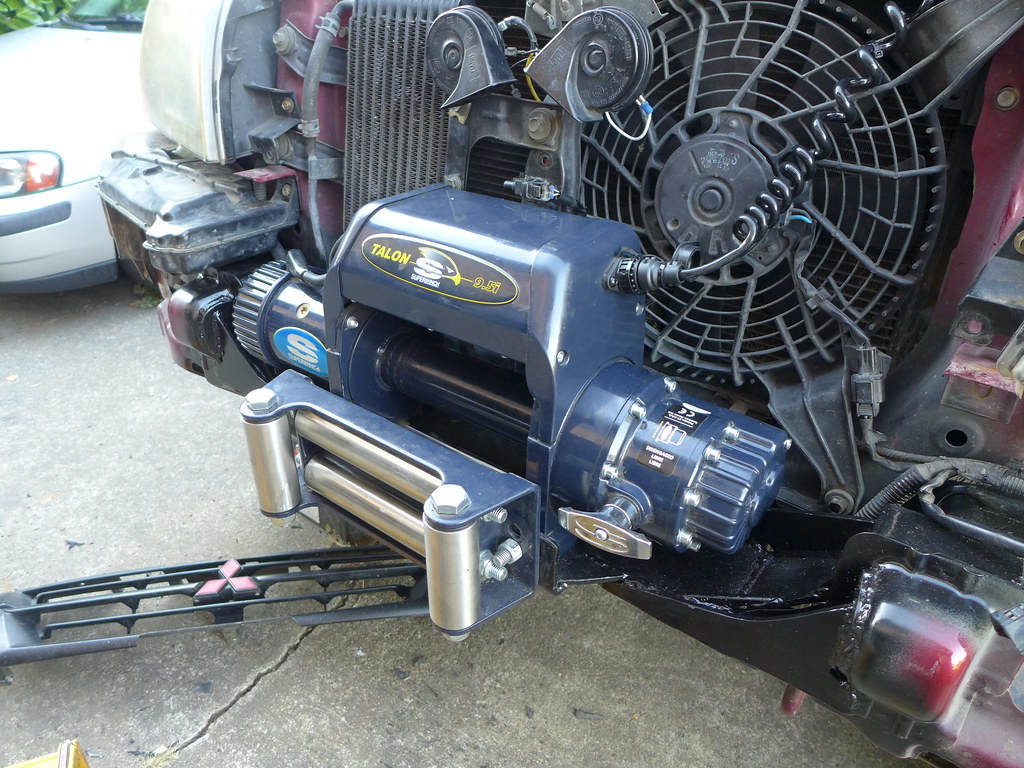
A local truck dealership posted a Superwinch Talon 9.5i on Craigslist for a ridiculous price, less than half the best price I found online. I went over immediately and learned that it was pulled from a truck that a new small business had built, but that the company had gone bust and the truck had to be repossessed. The cable didn't appear to have ever been spooled out (it was still wound only hand-tight), the fairlead rollers were mint, the winch was mint, and the neoprene winch cover was mint. Also included were several brand-new adjustable hitches, pintle adapter, etc. I sold these on Craigslist and ended up paying only about 25% of the normal cost for the winch. Score one for the poor guy!
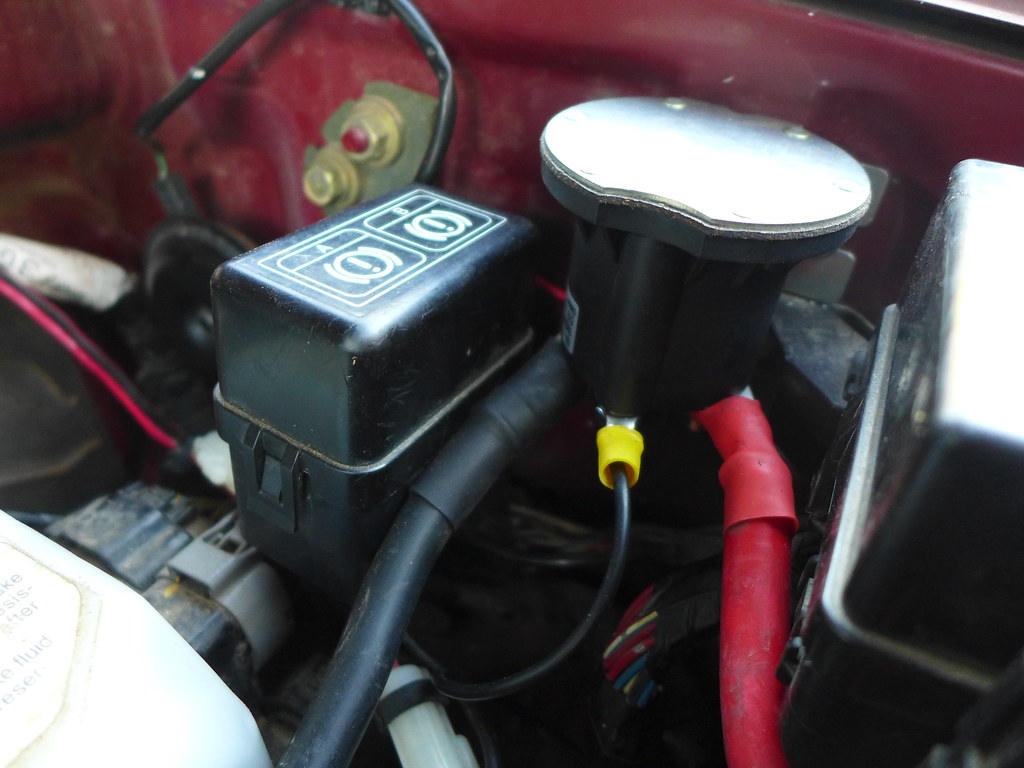
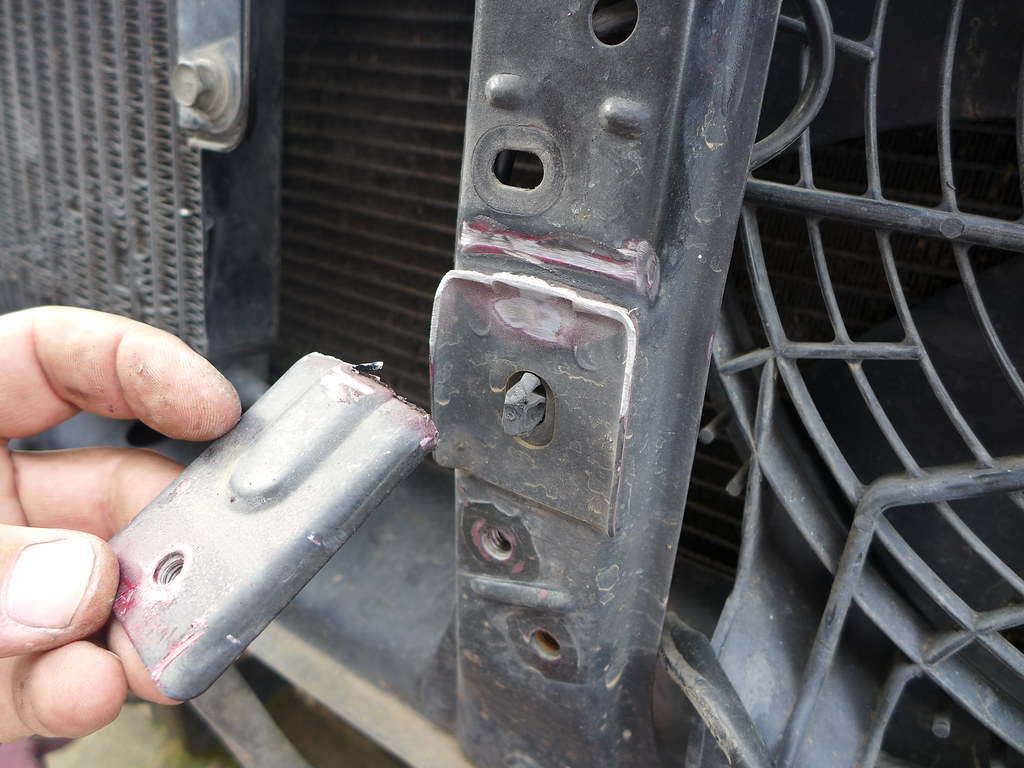
I unspooled the steel cable and sourced 90 feet of 3/8" synthetic line from a bulk wholesaler. I then pulled everything off the front of the Montero and started measuring. The first task was to relocate the two Fiamm horns and the outside air temperature sensor higher to get them out of the way and to cut off the center bumper support bracket.
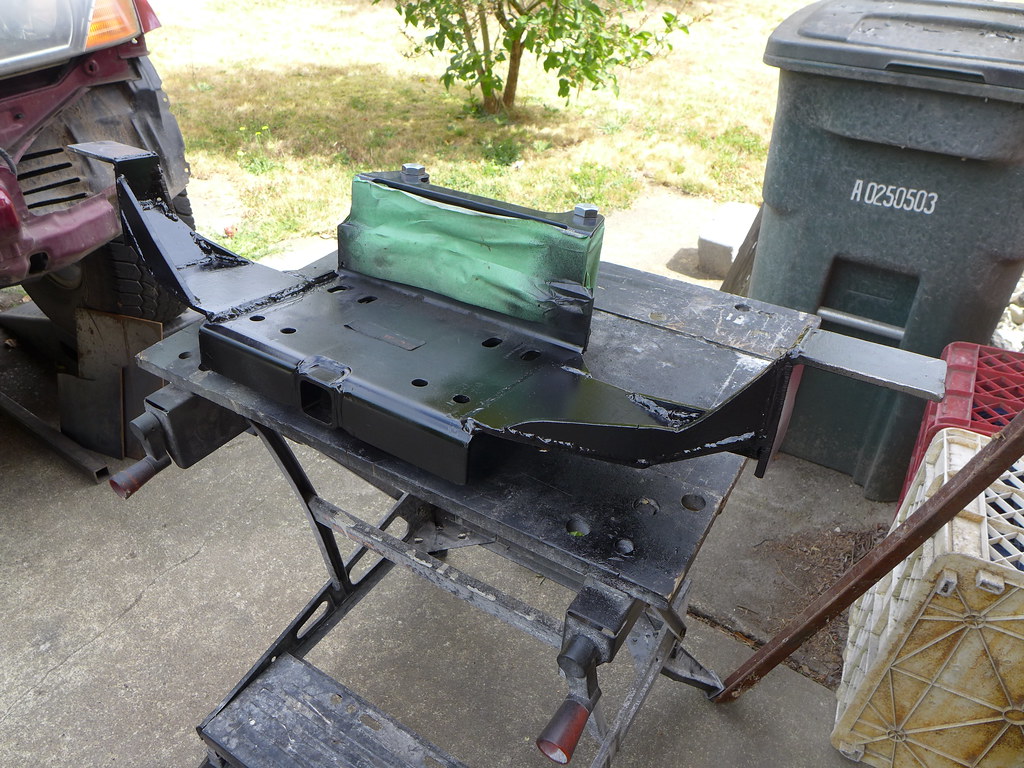
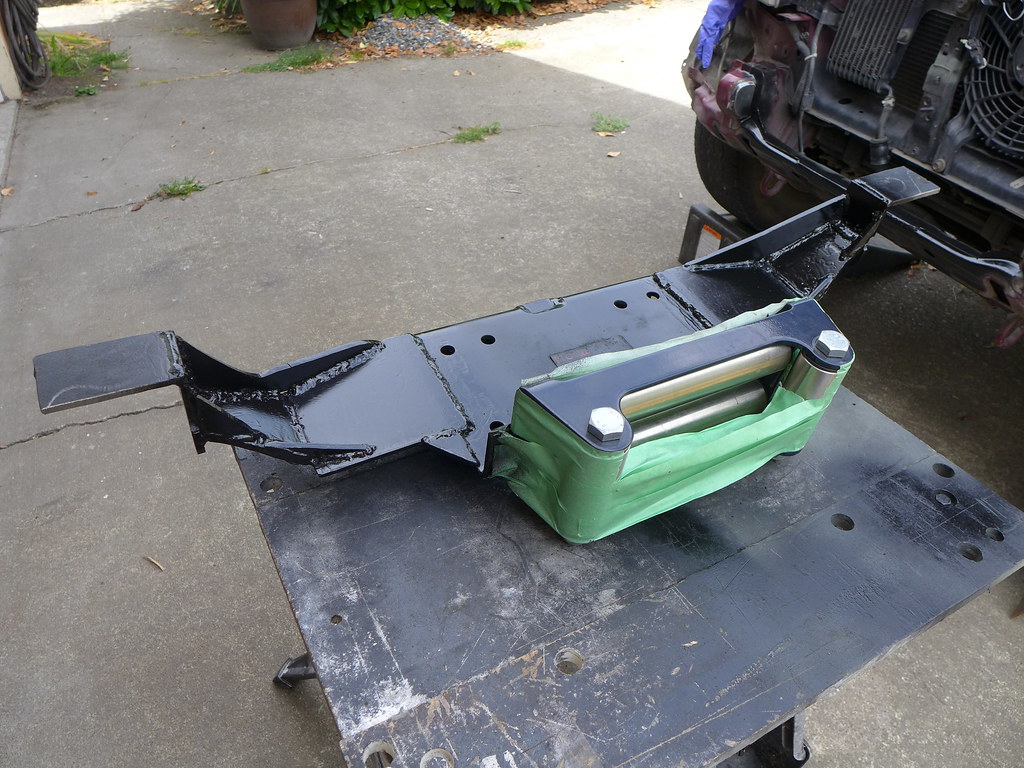
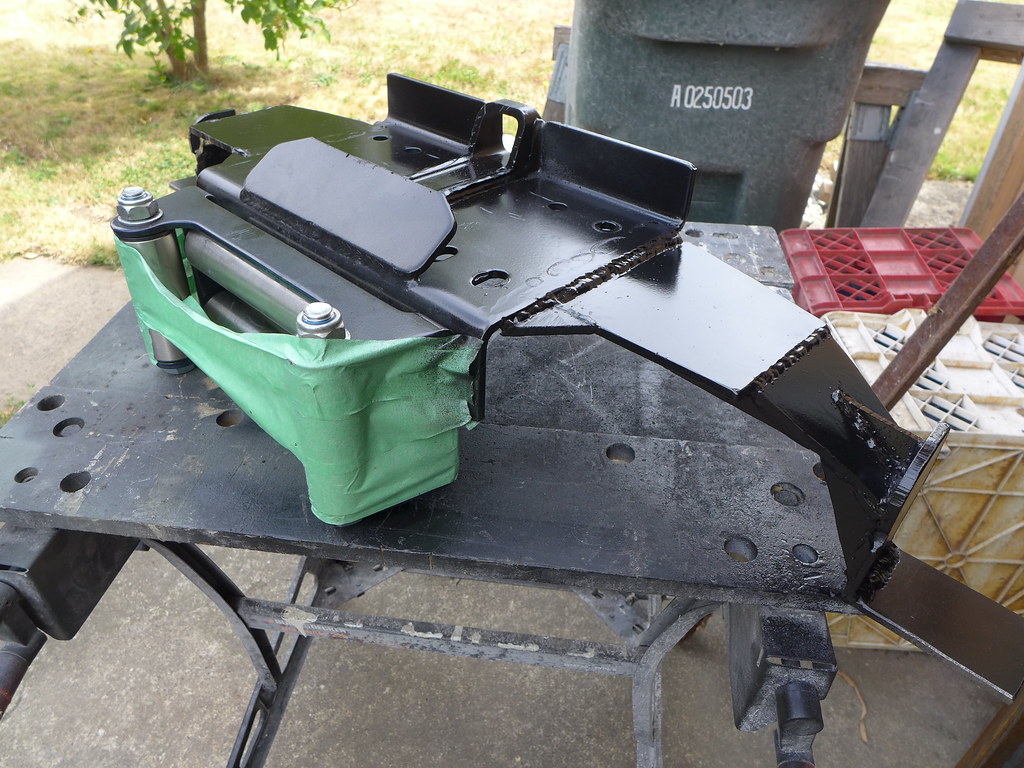
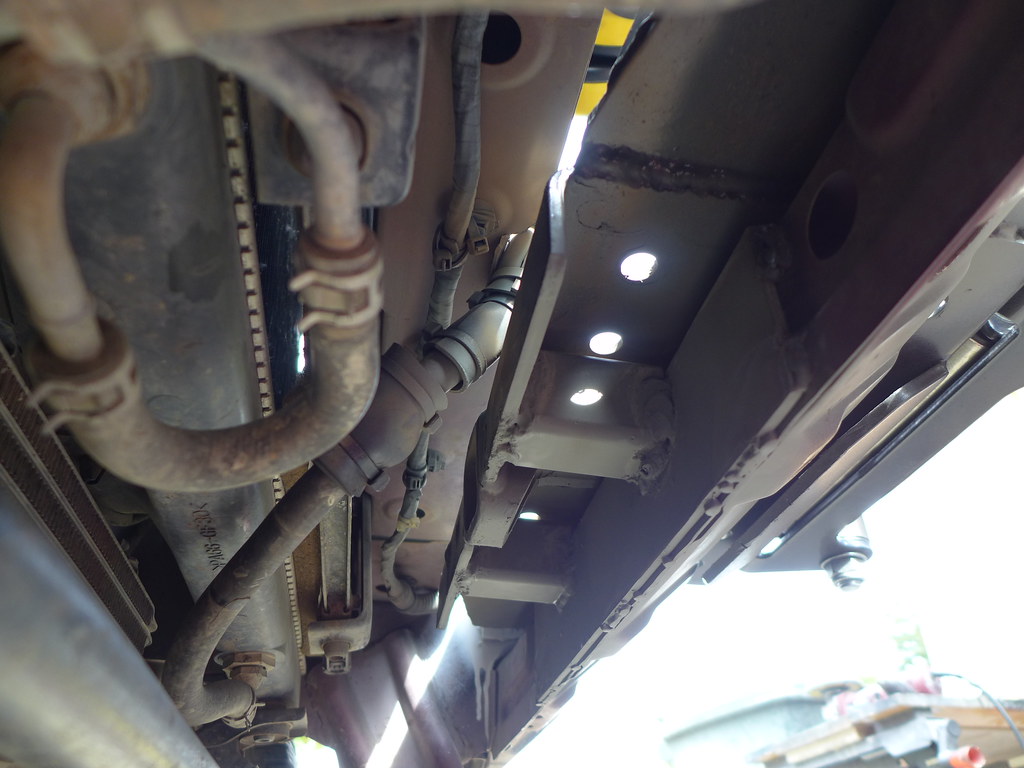
In the picture above I'm about to cut off the standing seam of the front crossmember to get the winch as low as possible. I welded a strip of steel flat stock to the top of the crossmember to both reinforce where I cut the seam and to provide a platform of sorts for the winch mounting plate. I next added reinforcing plates to the two crush members which would serve as weld points for the winch cradle.
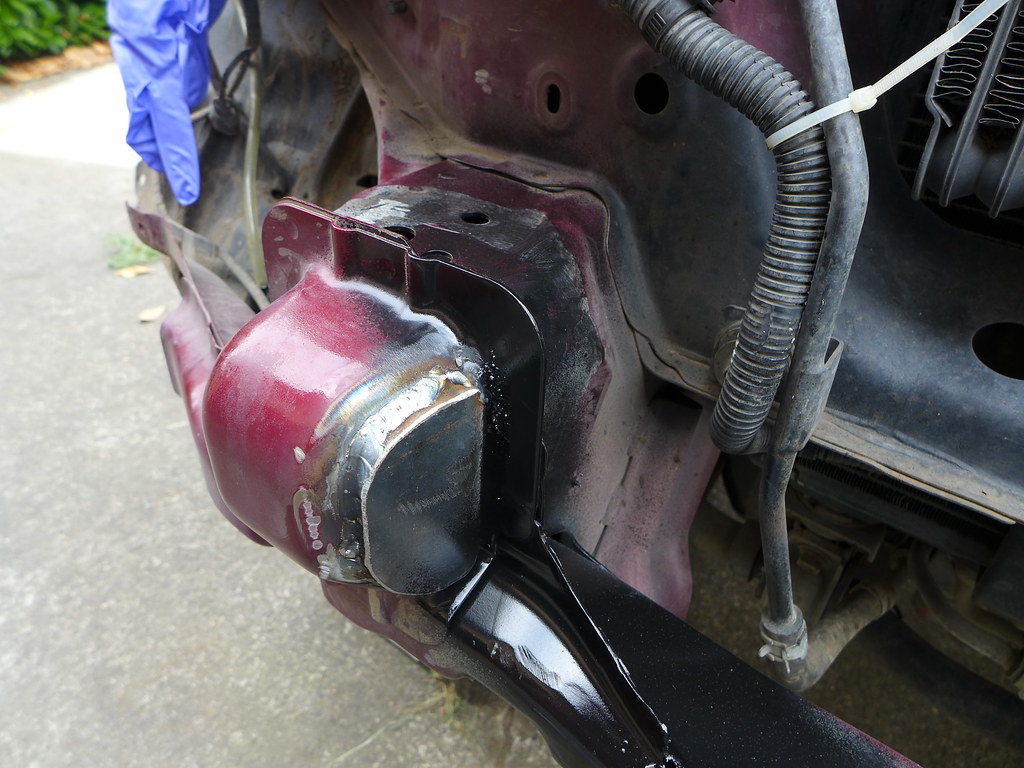
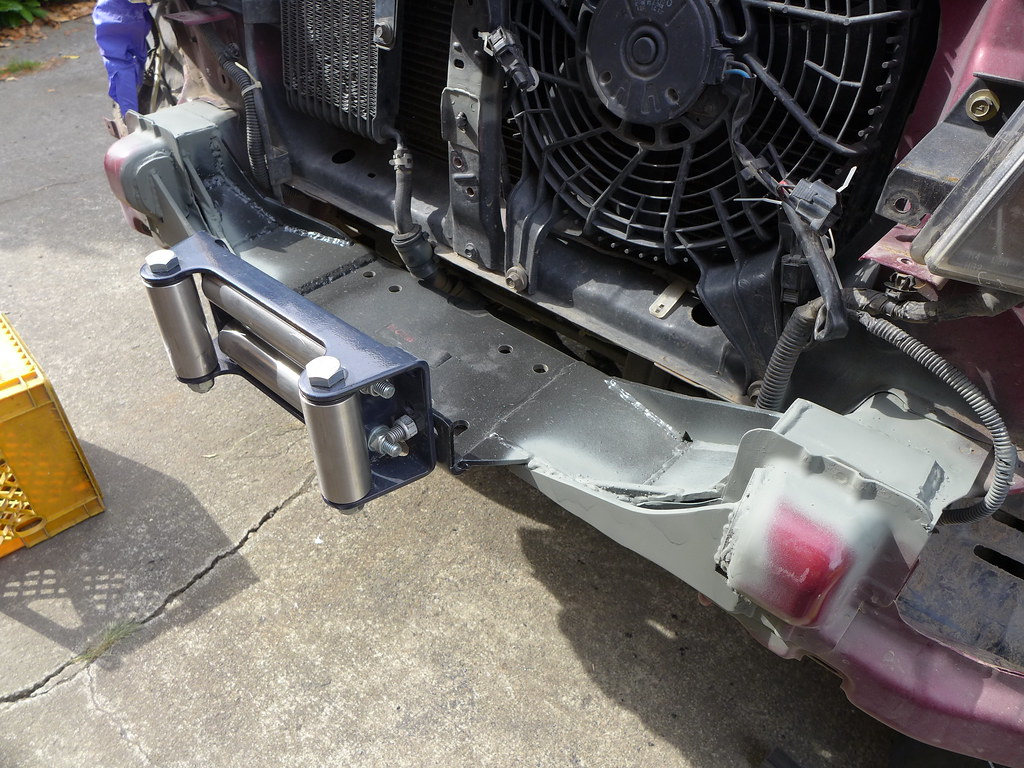
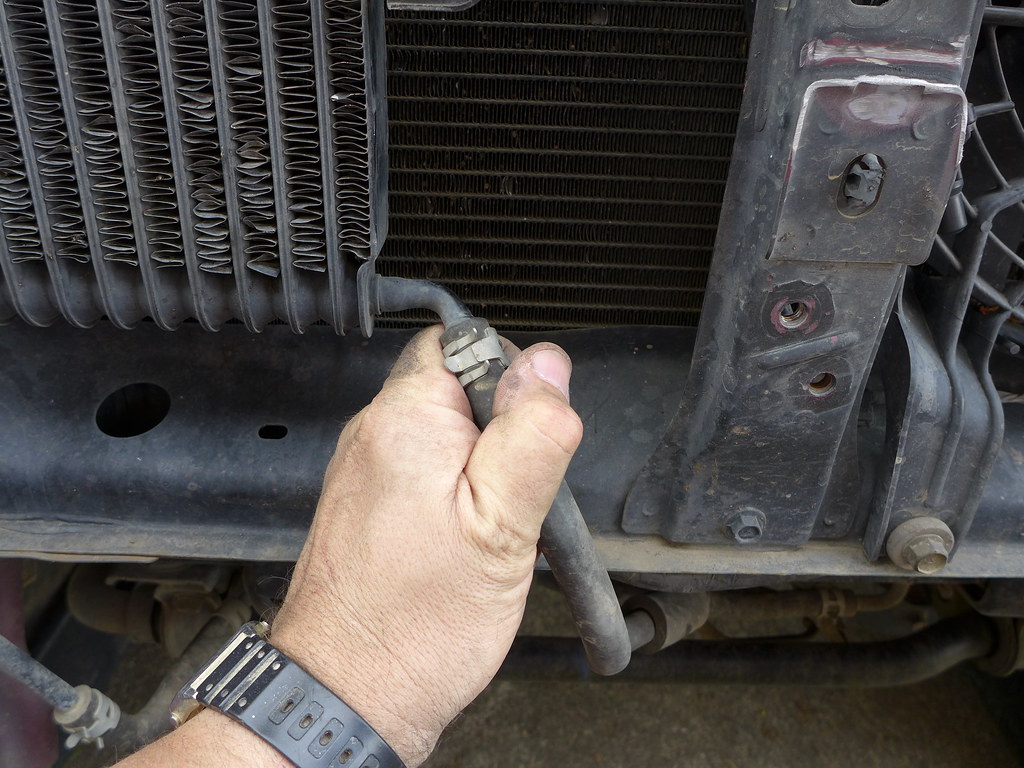
After a few trial fits, I found that the oil cooler line needed a small amount of relocation. I bent the nipple on the cooler, trimmed a gap in the front-facing seam of the crossmember that runs in front of the radiator, and added some abrasion-prevention sleeves made from larger diameter hose topped with neoprene sheet.
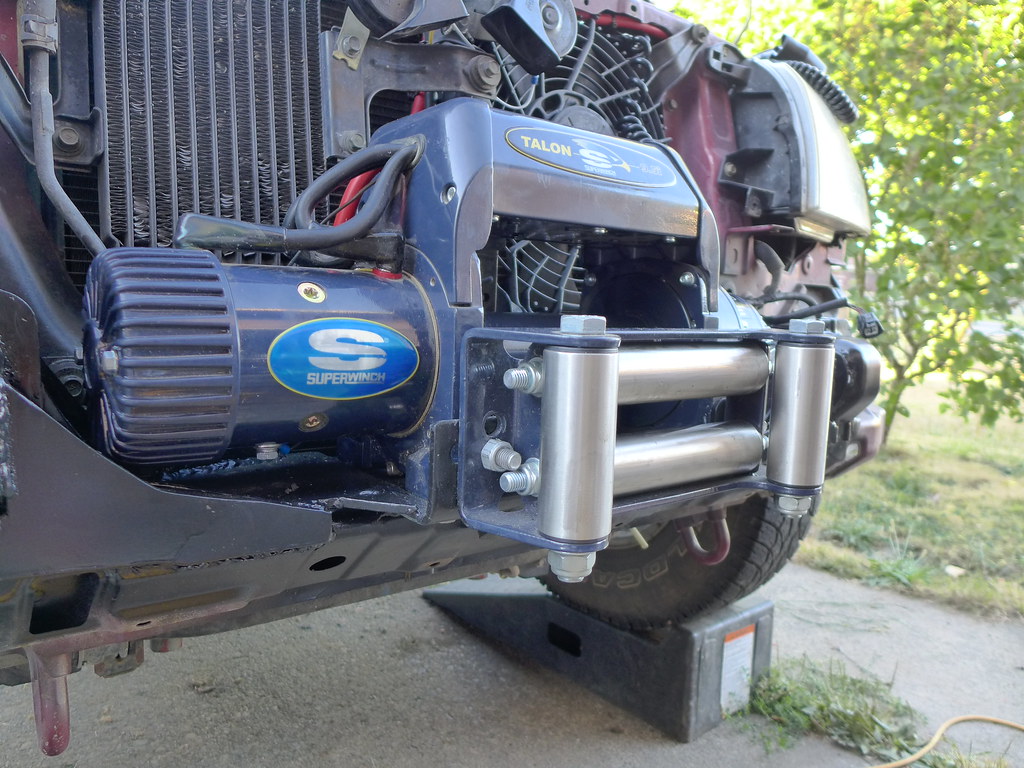
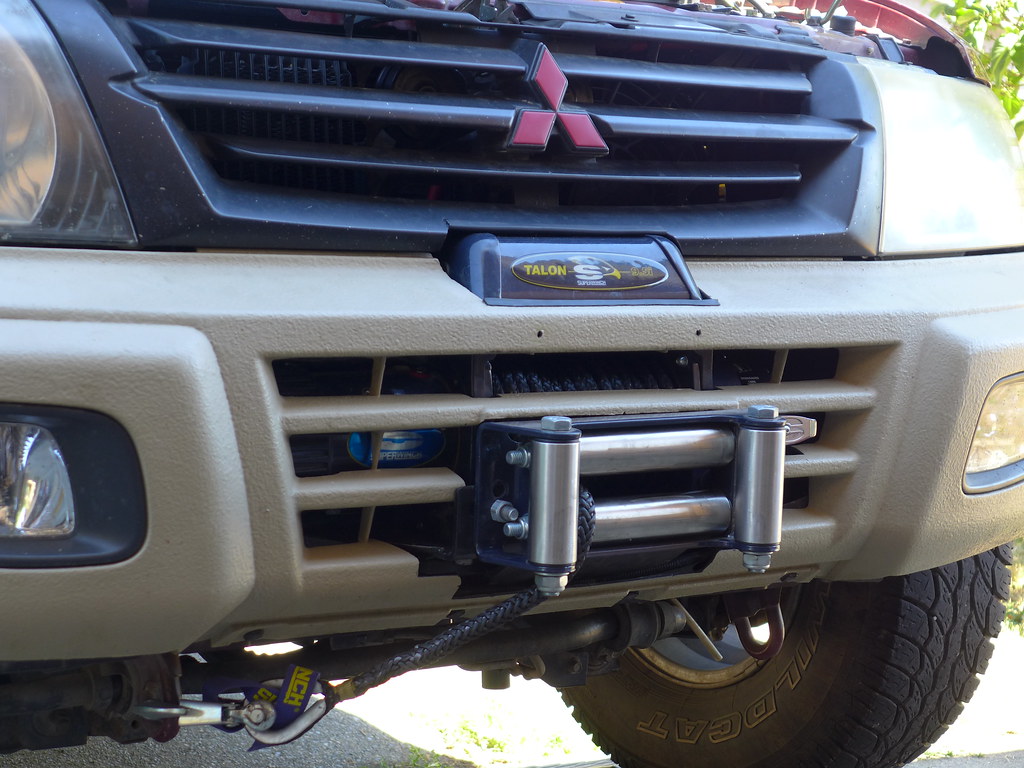
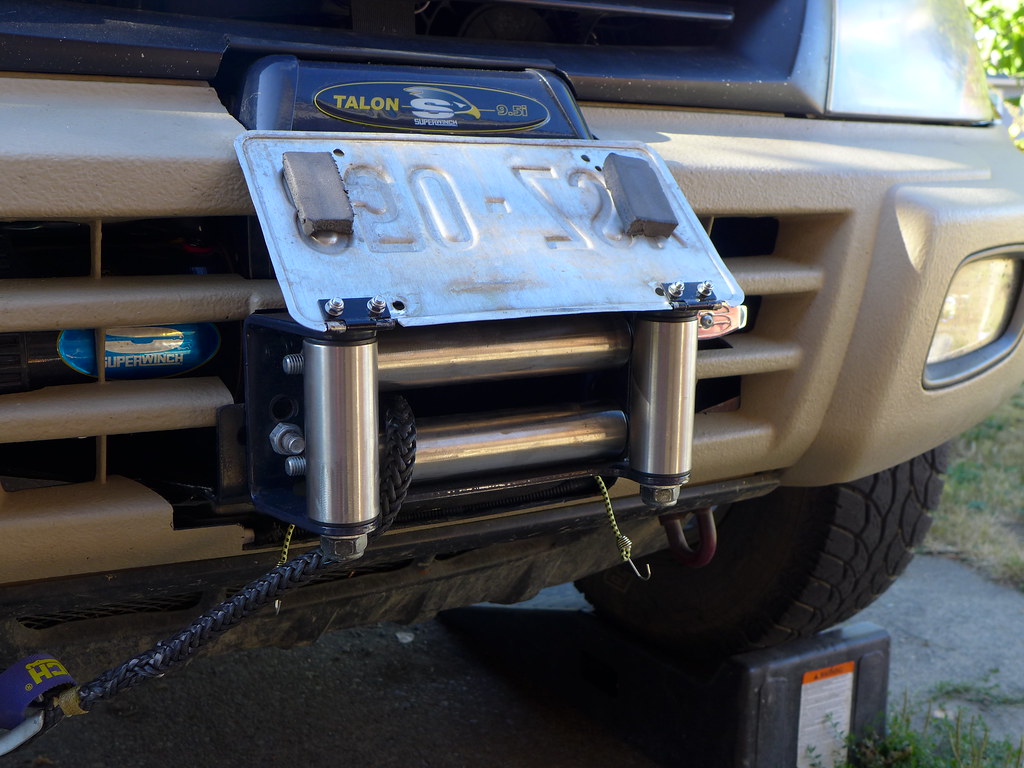
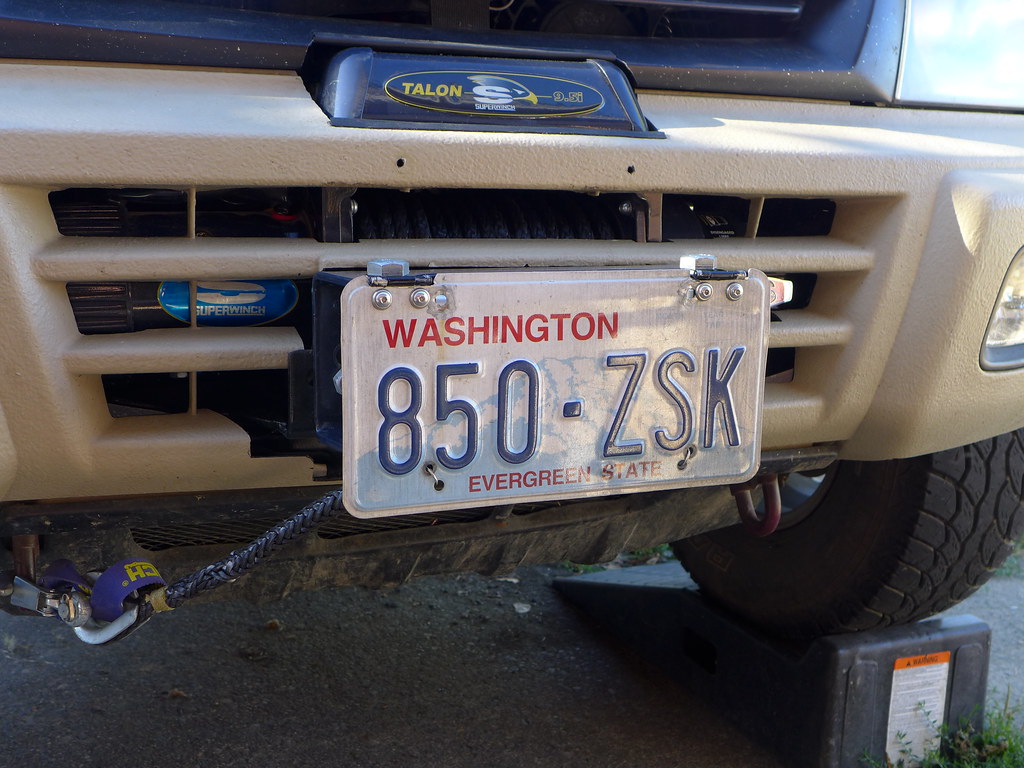
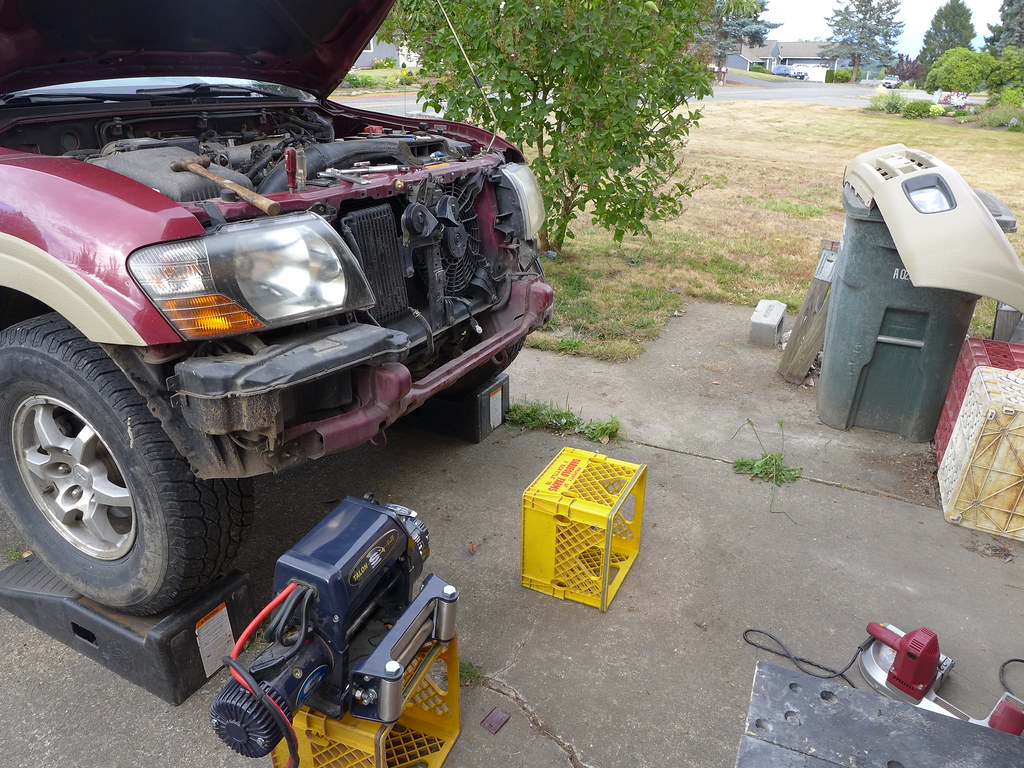
So here's how things looked when the truck was ready to have the winch mounting cradle attached.
Unfortunately, being a man of humble means, I couldn't justify the expense for a tool that would realistically see little use, so I just enjoyed the vehicle and kept my eye on the used market. I have a habit of scanning for something I want without any sense of urgency, then pouncing quickly when it comes up. You have to be patient, but....
A local truck dealership posted a Superwinch Talon 9.5i on Craigslist for a ridiculous price, less than half the best price I found online. I went over immediately and learned that it was pulled from a truck that a new small business had built, but that the company had gone bust and the truck had to be repossessed. The cable didn't appear to have ever been spooled out (it was still wound only hand-tight), the fairlead rollers were mint, the winch was mint, and the neoprene winch cover was mint. Also included were several brand-new adjustable hitches, pintle adapter, etc. I sold these on Craigslist and ended up paying only about 25% of the normal cost for the winch. Score one for the poor guy!
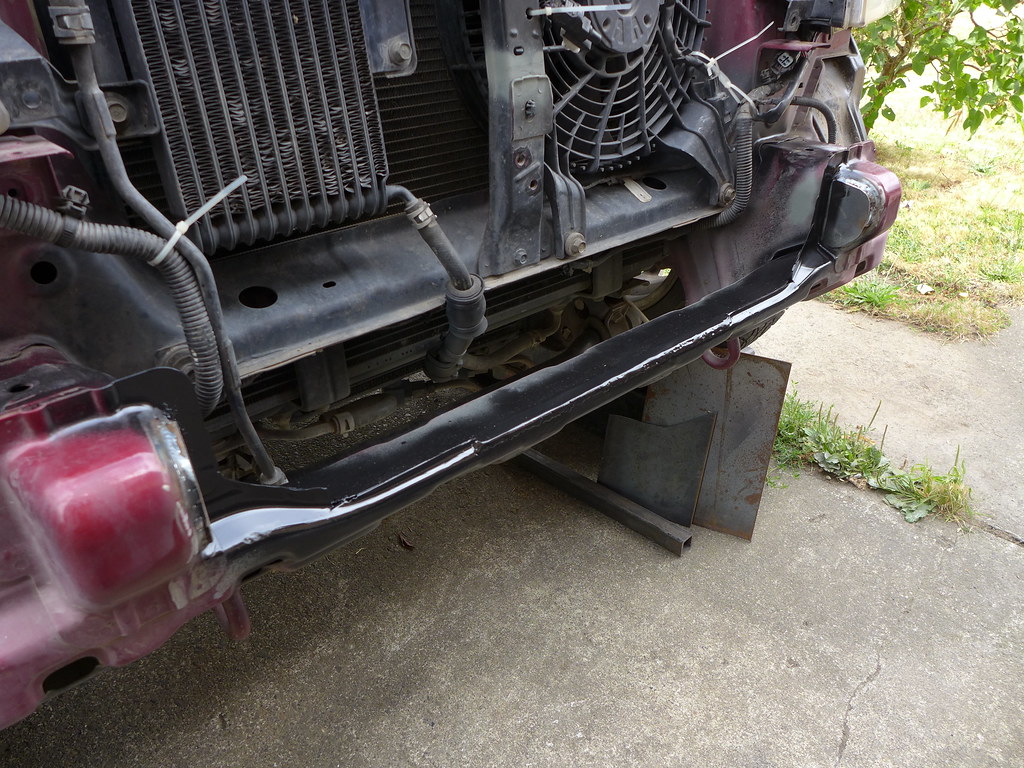
I unspooled the steel cable and sourced 90 feet of 3/8" synthetic line from a bulk wholesaler. I then pulled everything off the front of the Montero and started measuring. The first task was to relocate the two Fiamm horns and the outside air temperature sensor higher to get them out of the way and to cut off the center bumper support bracket.
In the picture above I'm about to cut off the standing seam of the front crossmember to get the winch as low as possible. I welded a strip of steel flat stock to the top of the crossmember to both reinforce where I cut the seam and to provide a platform of sorts for the winch mounting plate. I next added reinforcing plates to the two crush members which would serve as weld points for the winch cradle.
After a few trial fits, I found that the oil cooler line needed a small amount of relocation. I bent the nipple on the cooler, trimmed a gap in the front-facing seam of the crossmember that runs in front of the radiator, and added some abrasion-prevention sleeves made from larger diameter hose topped with neoprene sheet.
So here's how things looked when the truck was ready to have the winch mounting cradle attached.
Last edited: