The DiscoDavis Sandglow Thread

DiscoDavis

Explorer
05/02/2017: Did not pay attention

Tried to back the car out of the garage with the drivers door open, got caught on a workbench and bent the check strap to crap. Bulkhead was already dented but now I know how...

34799283291_e2dff1b722_b.jpg


I'll take it off and fix it with a vise one of these days.

34931253675_e358484874_b.jpg
 

DiscoDavis

Explorer
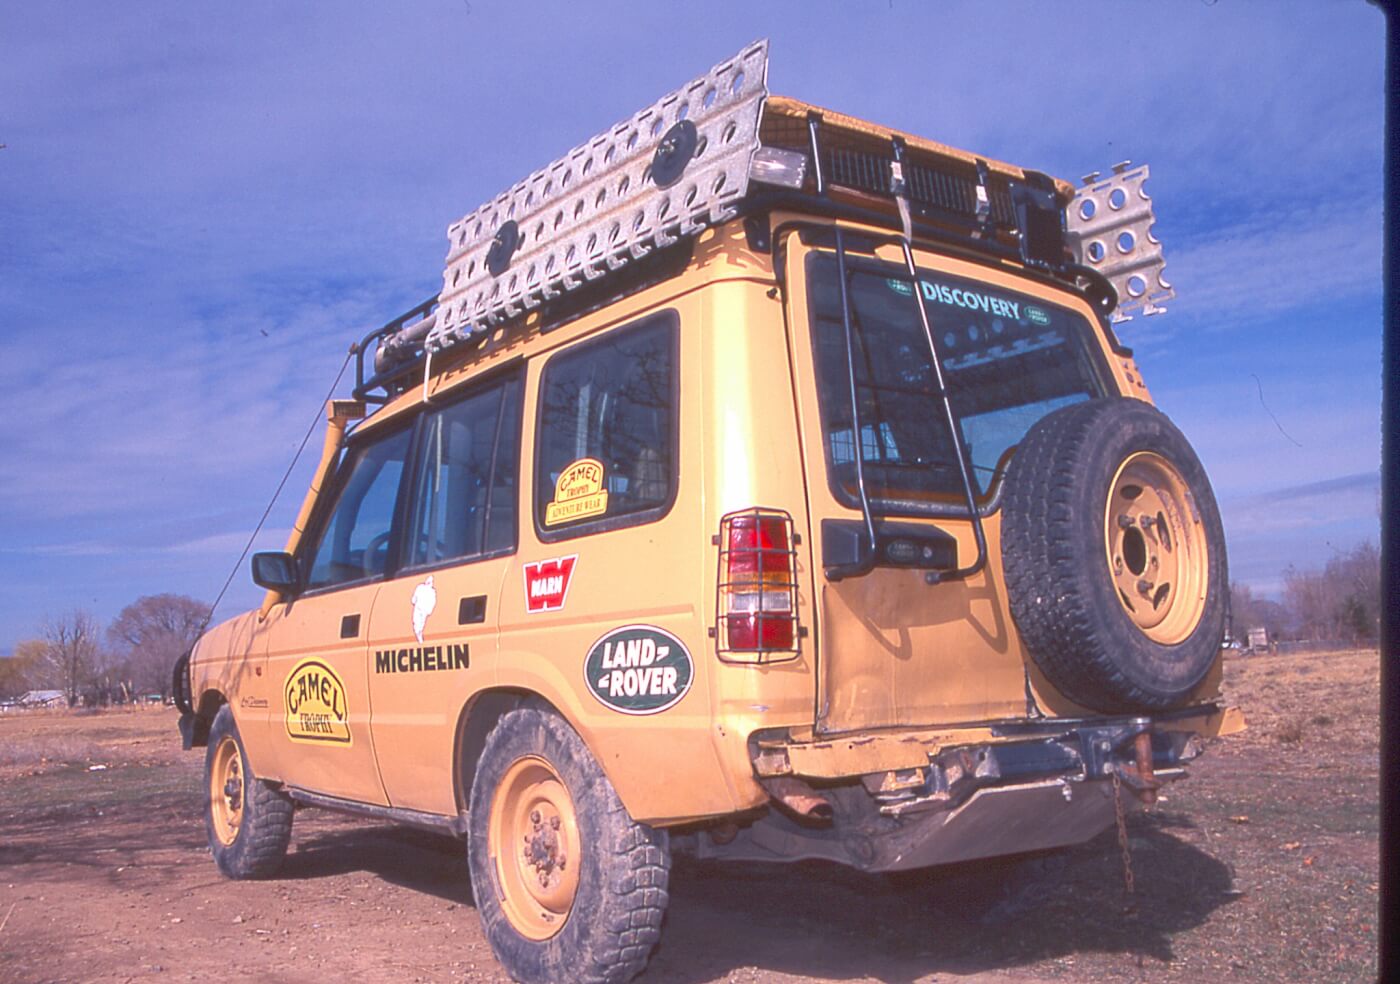
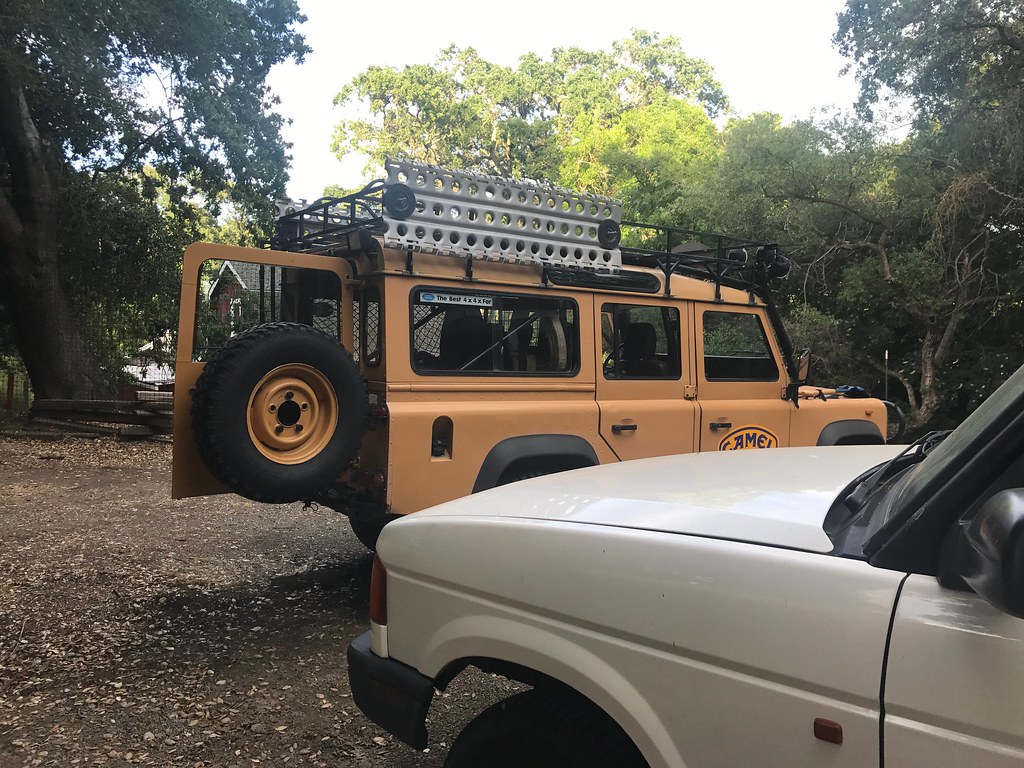
05/04/2017: Rear door spare

34767496922_f6ff022ab6_b.jpg


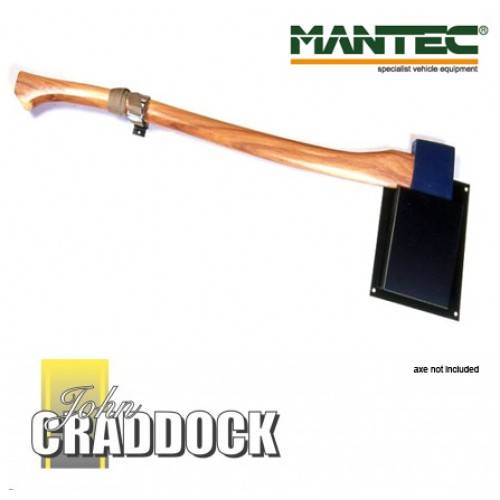
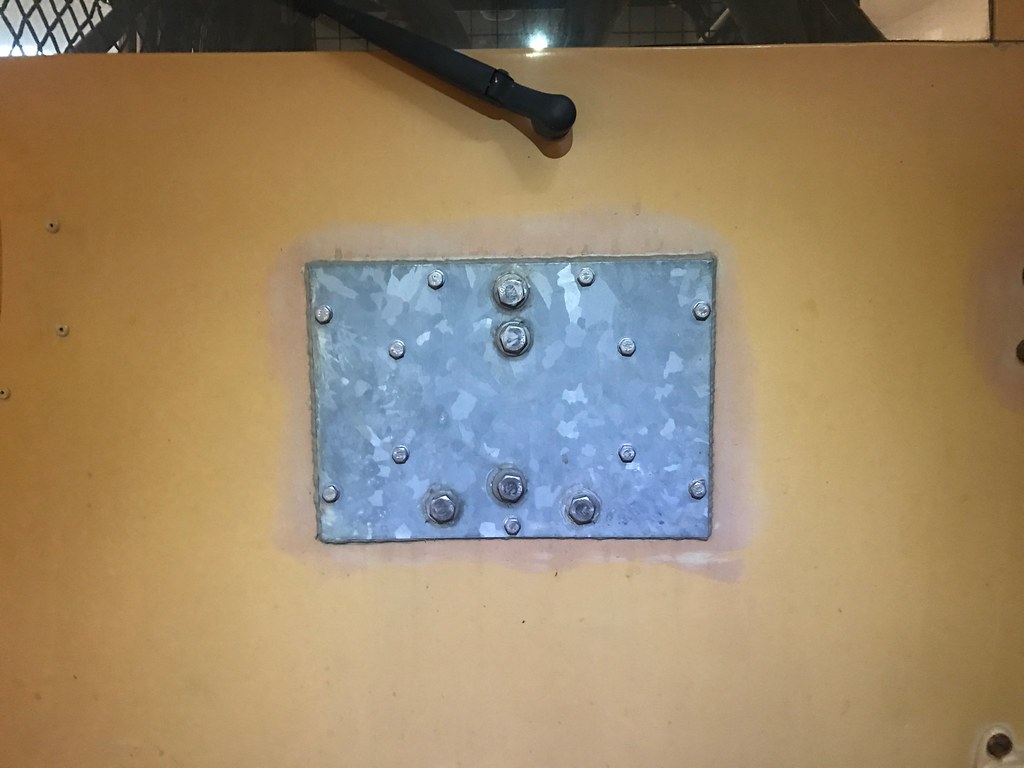
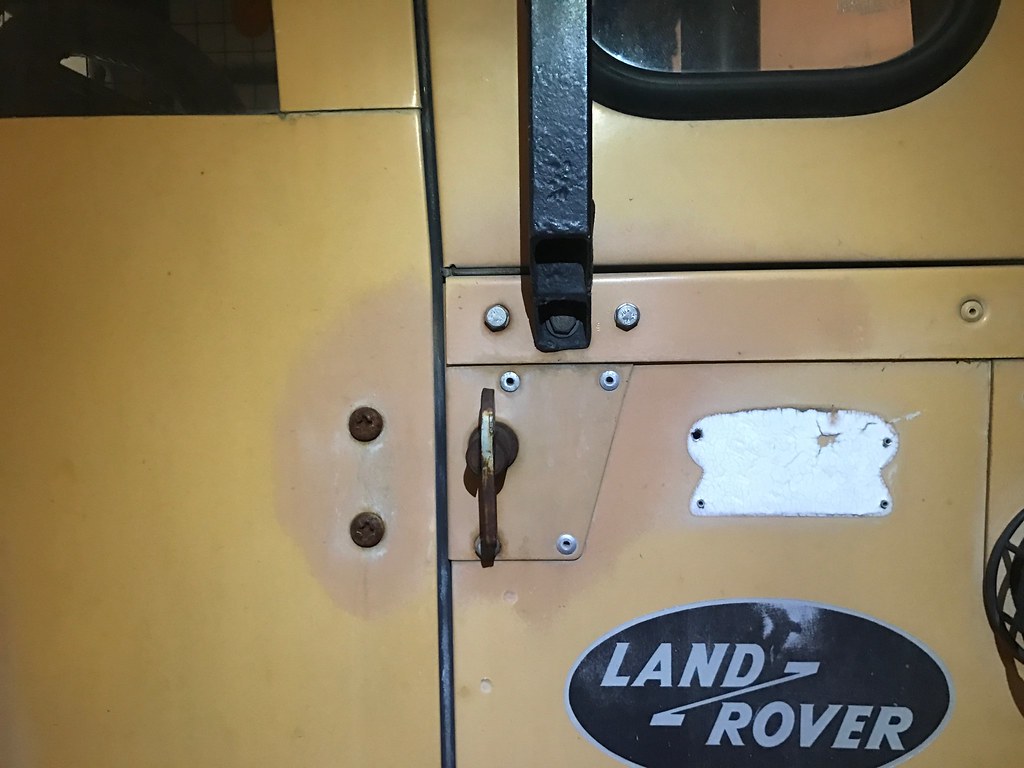
Got a mantec from RN. Did not know there are two styles, all that changes is where the bottom hinge ends up, I have the one that sits a bit lower. The 110 came with this weird thing modeled off of a pickup tailgate sort of frame using pickup hardware, which if you see my car will explain why were pickup cotters bolted into the rear of the tub, and hinges on the bumper. The door plate was blanked off with a piece of galvanized steel. I have seen old footage with some 110's having this plate bare as you see here, but the swingout was one of the concessions I am willing to make with regards to originality. The old weird carrier is not original as far as I can tell, and the PO already removed the middle hinge on the door and lost it so I have no choice if I want a door spare.
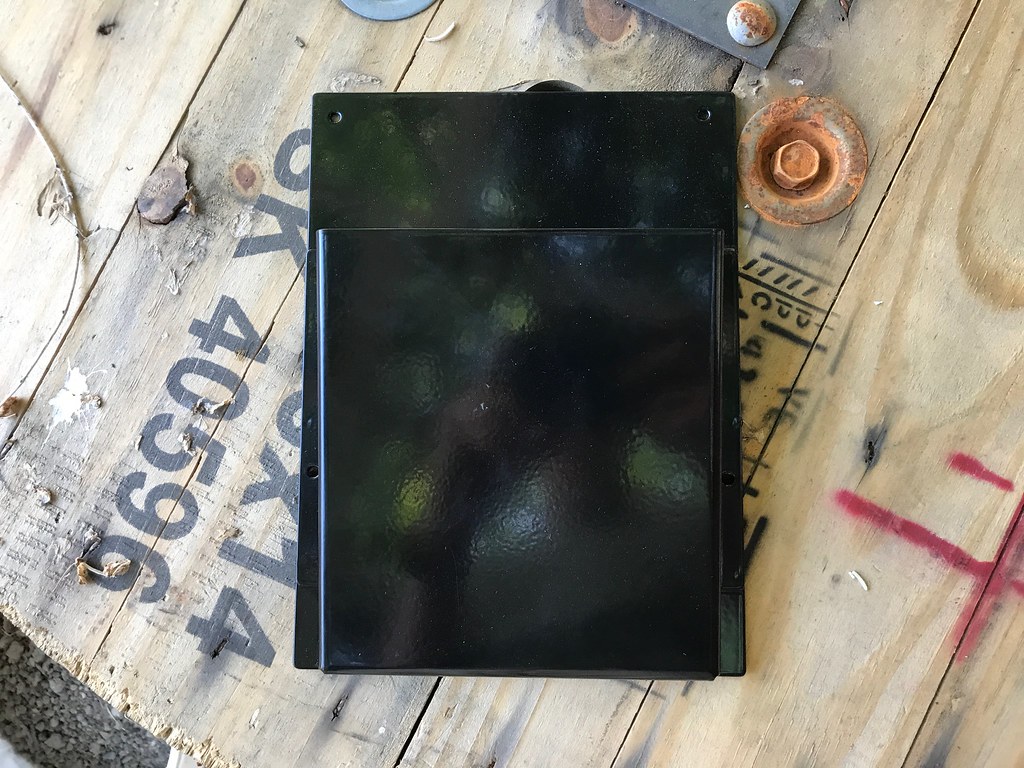
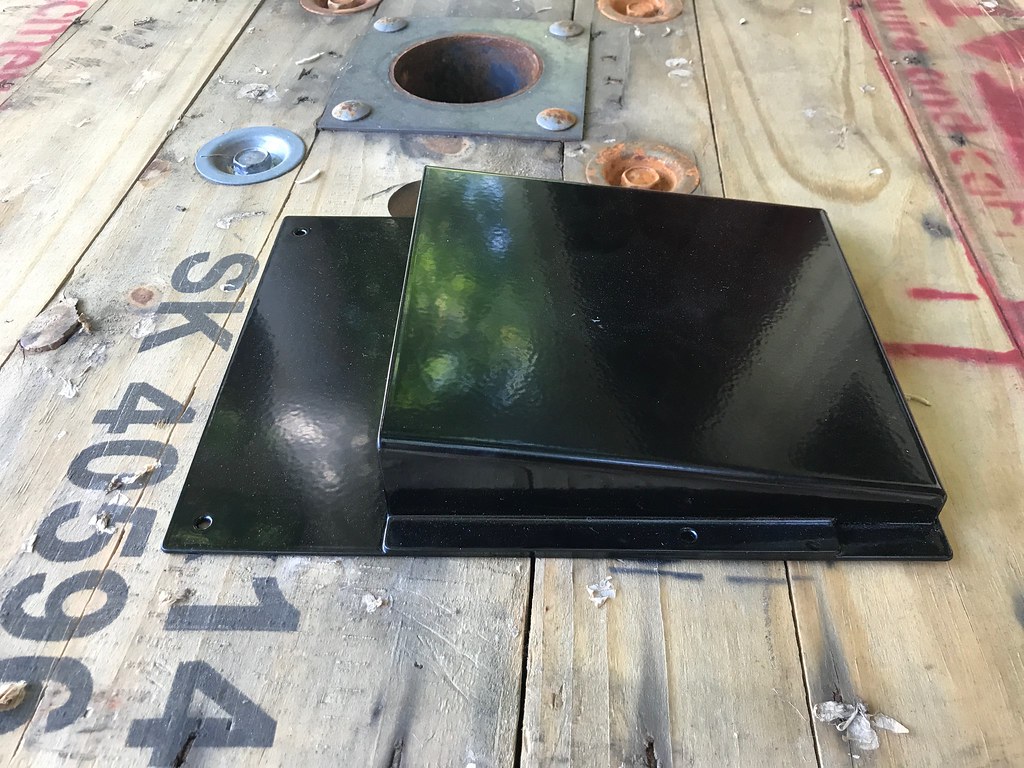
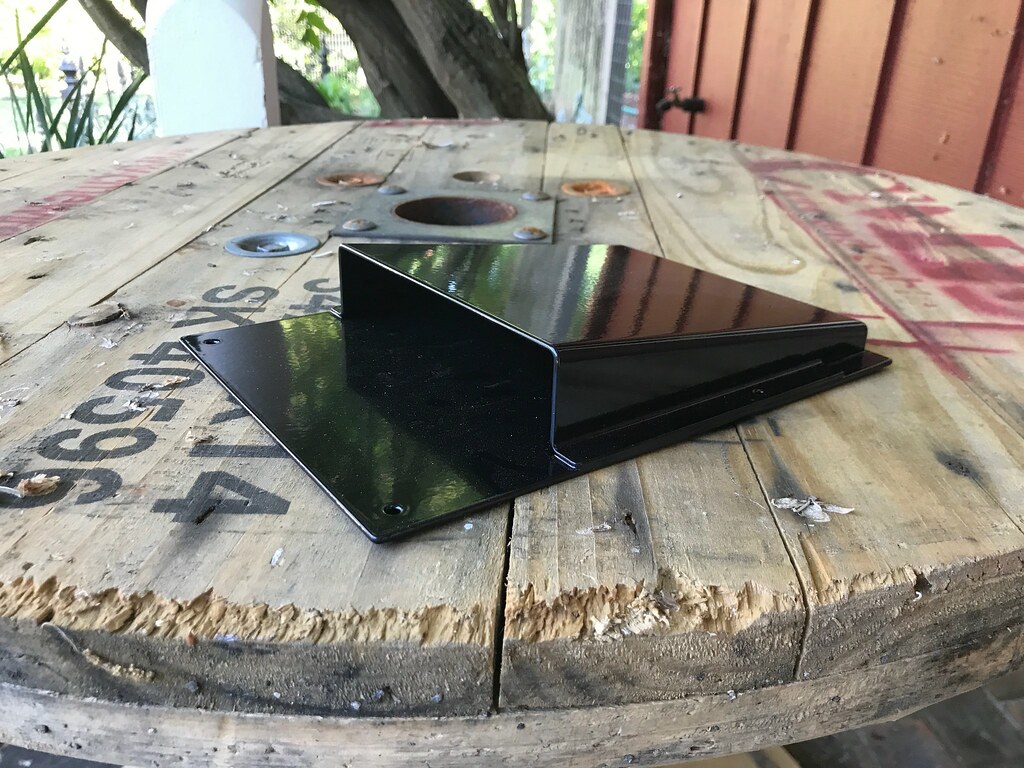
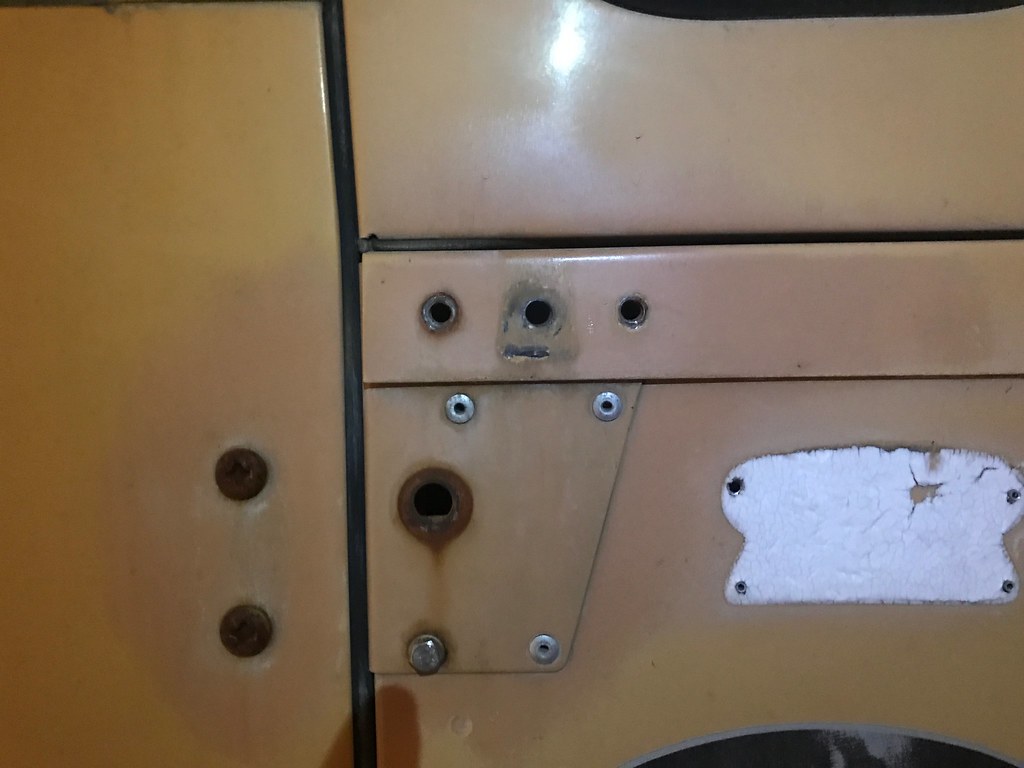
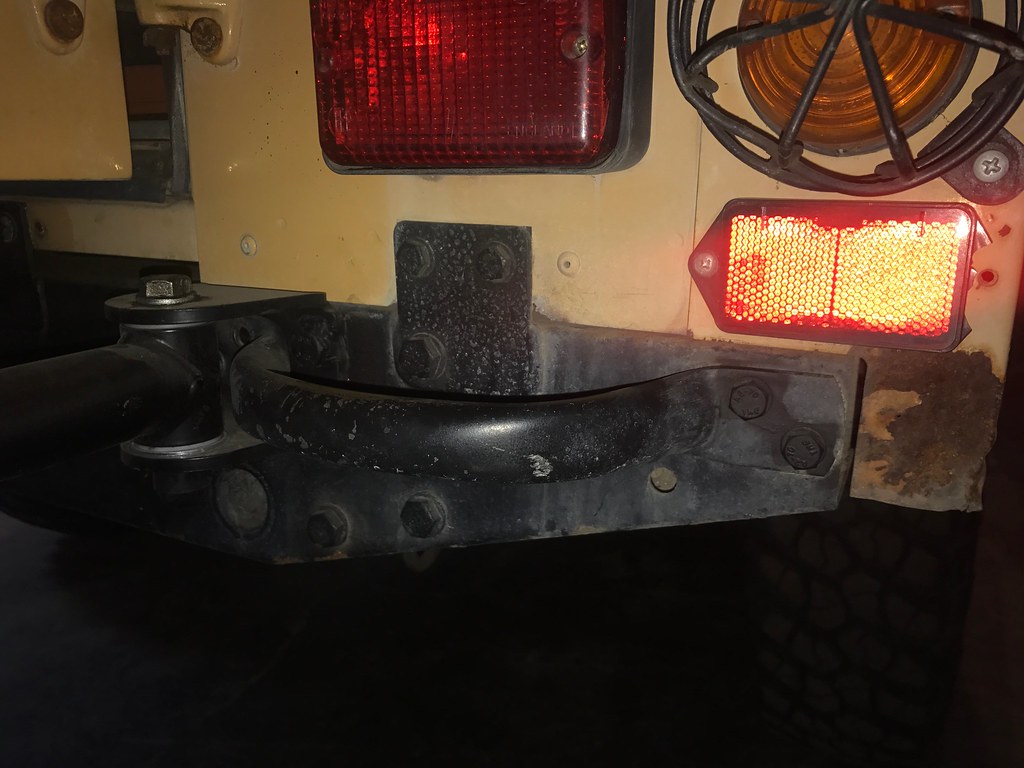
34544011100_911bffa184_b.jpg


Blanking plate

34767295692_9600d5a89d_b.jpg


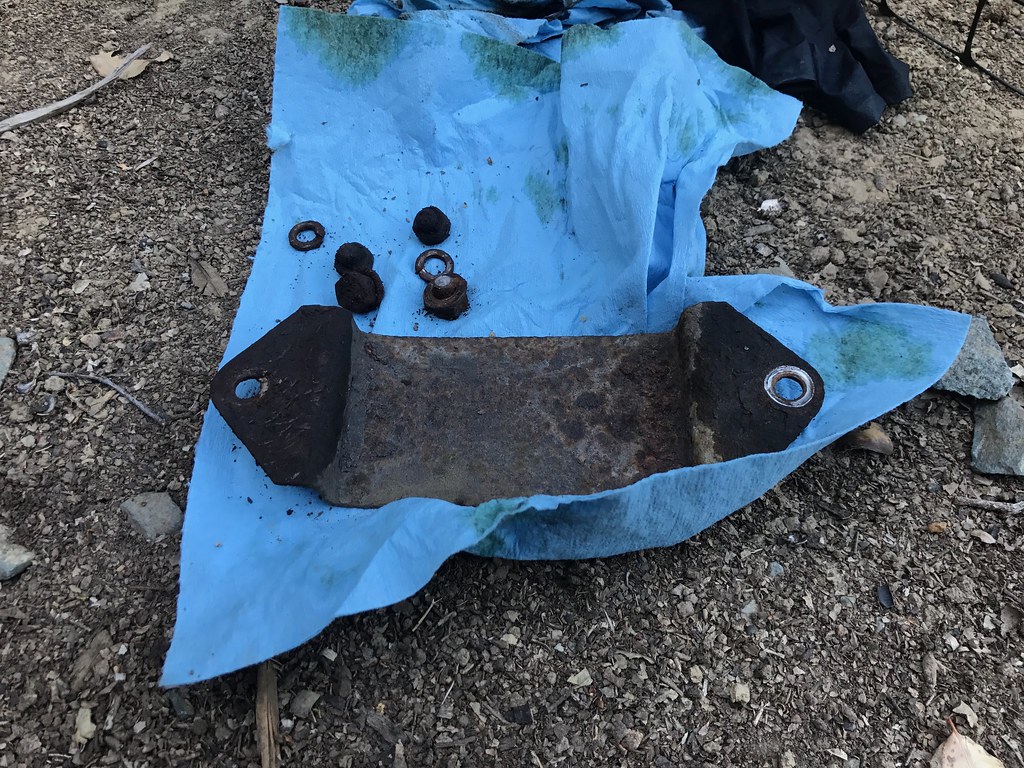
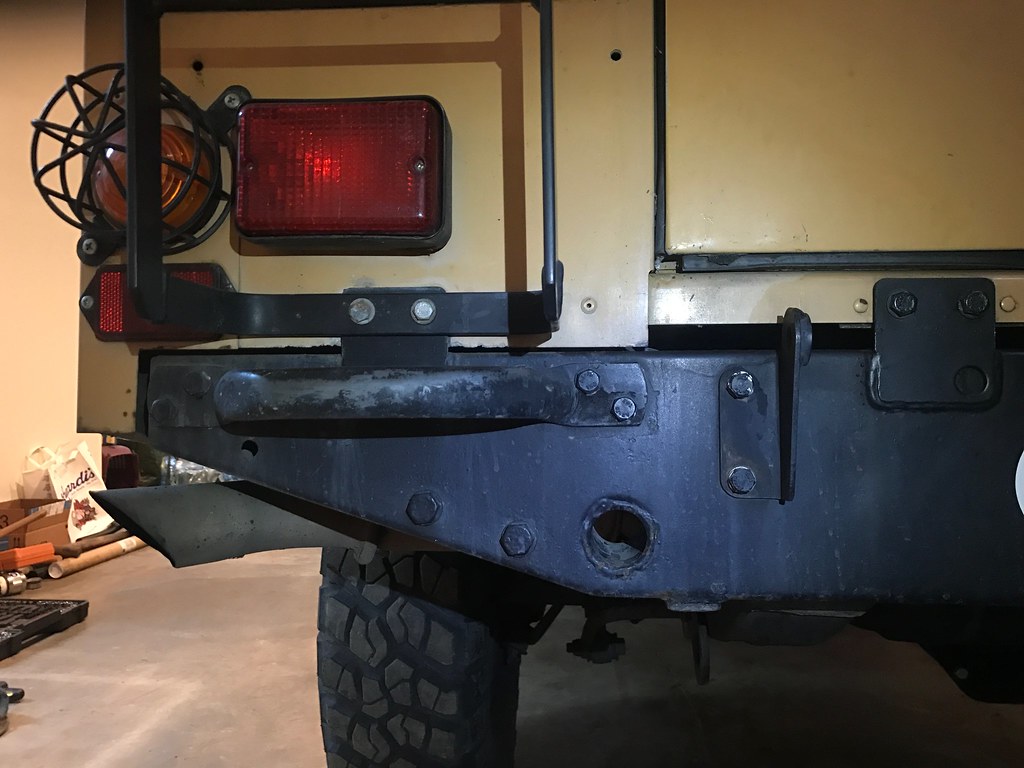
Pickup Cotter bolted into where the middle hinge would be on the door

34890533316_681185261d_b.jpg


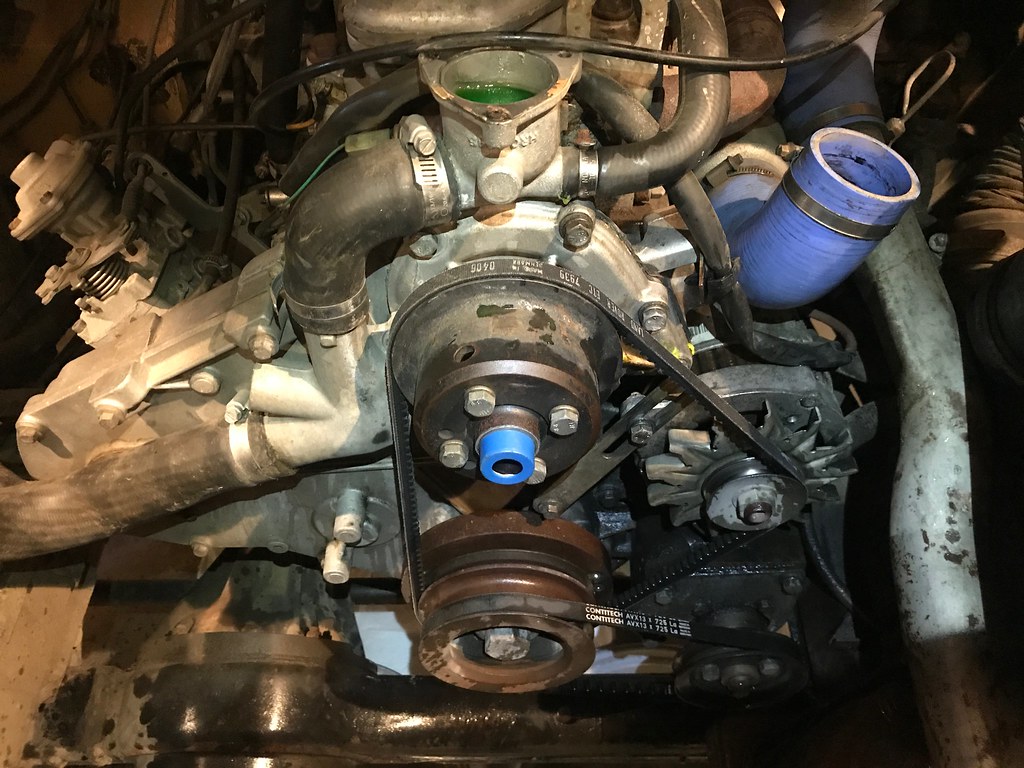
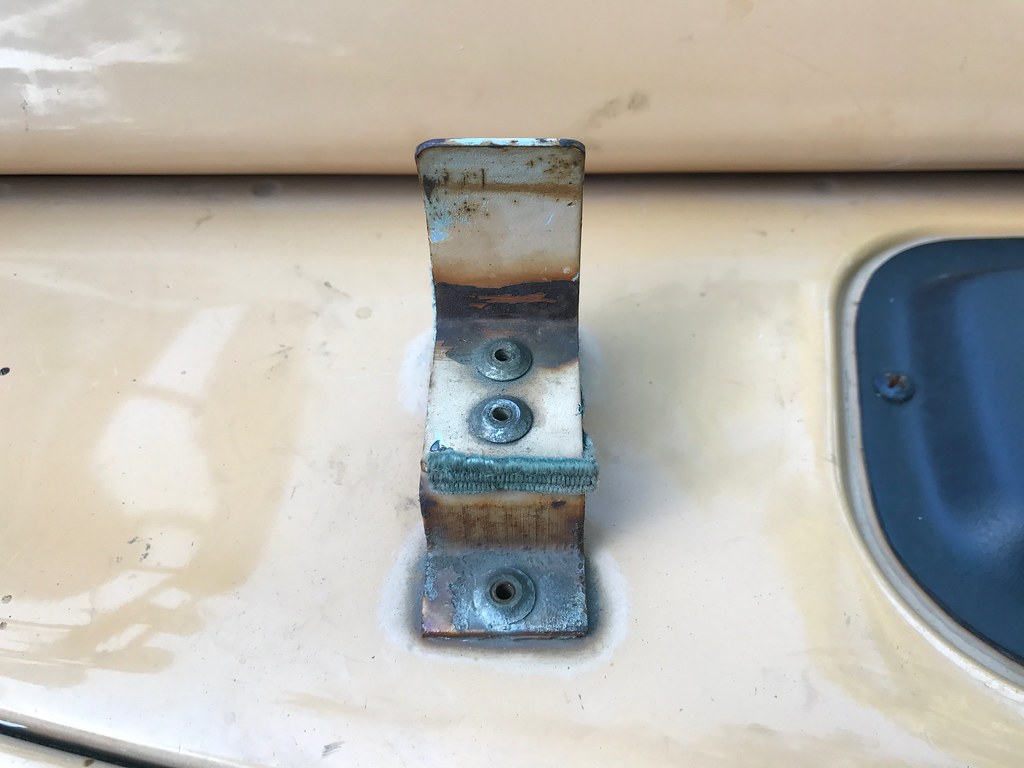
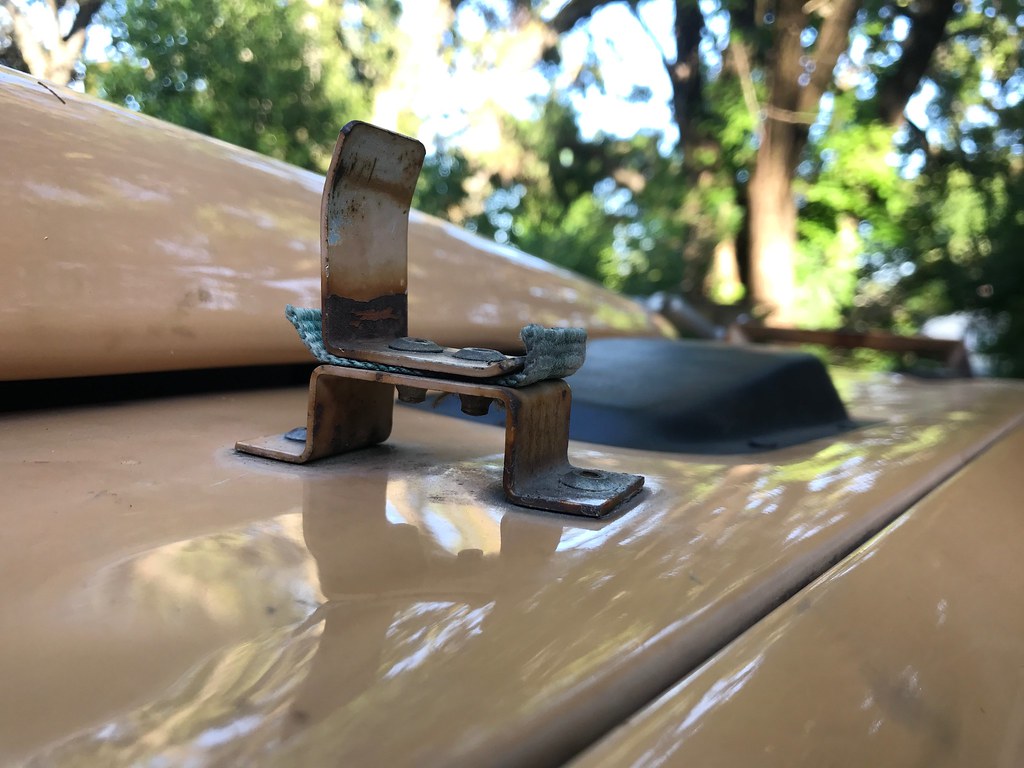
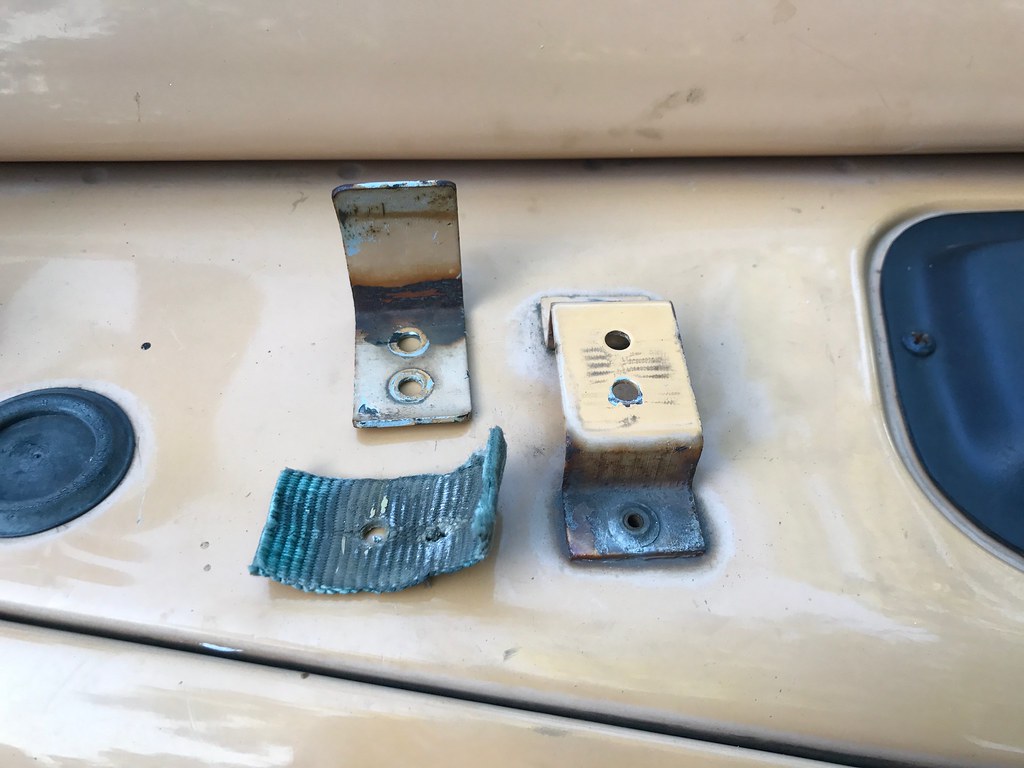
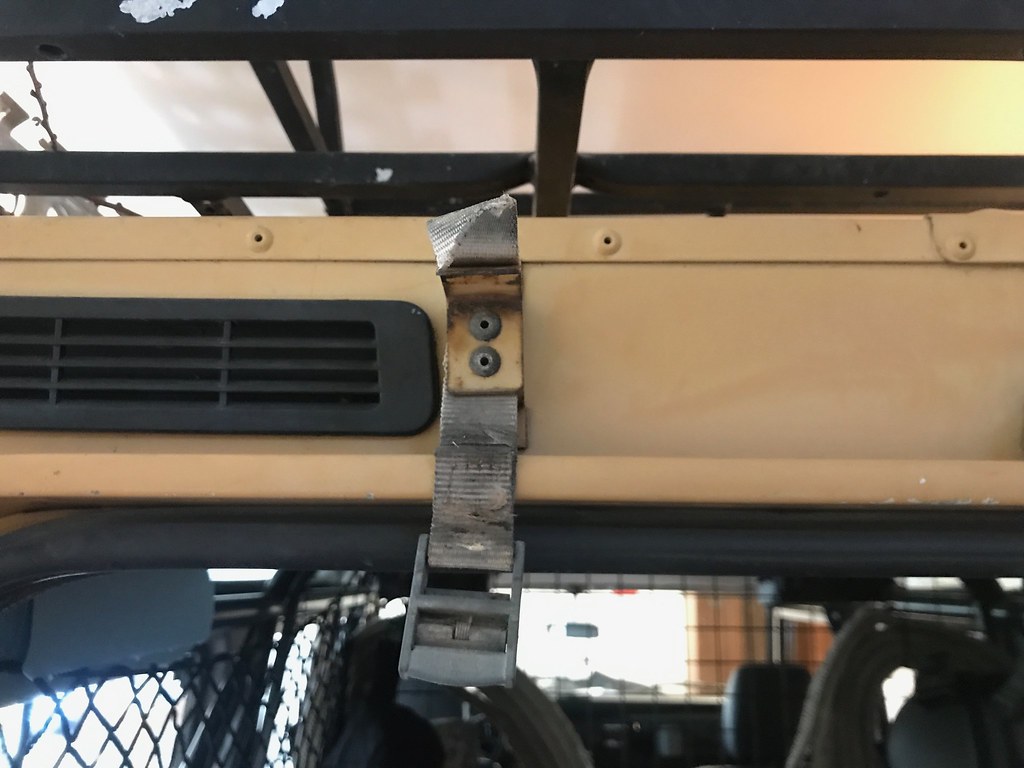
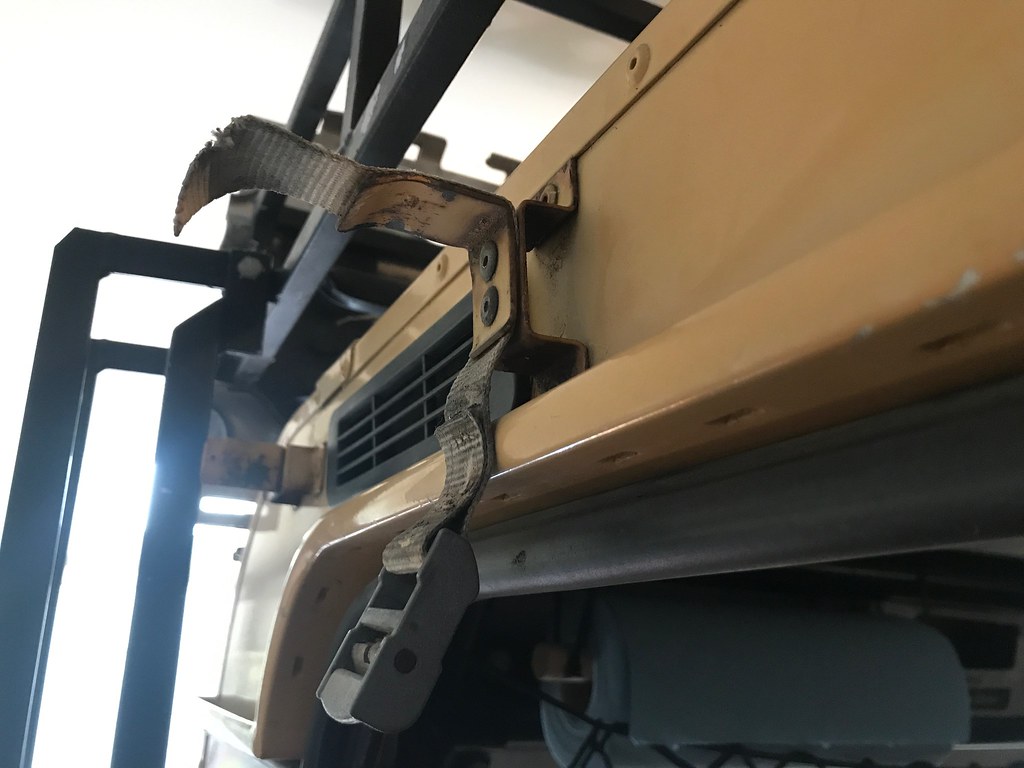
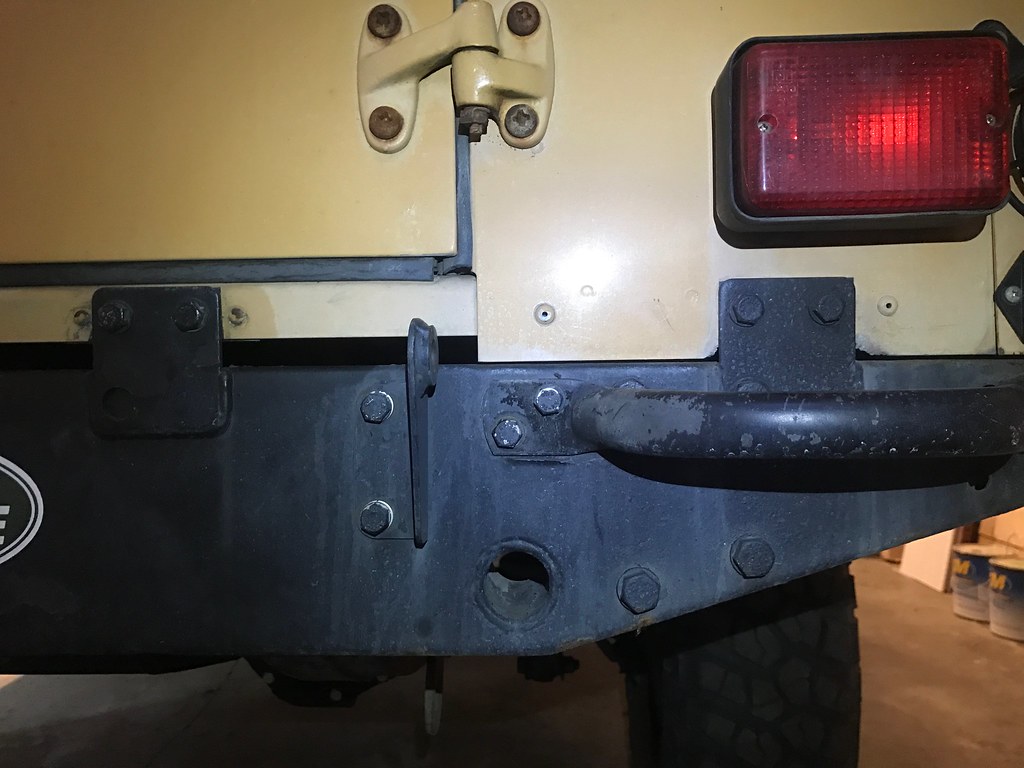
As far as I can tell these are Land Rover tailgate hinge brackets

34767304282_6196da3801_b.jpg


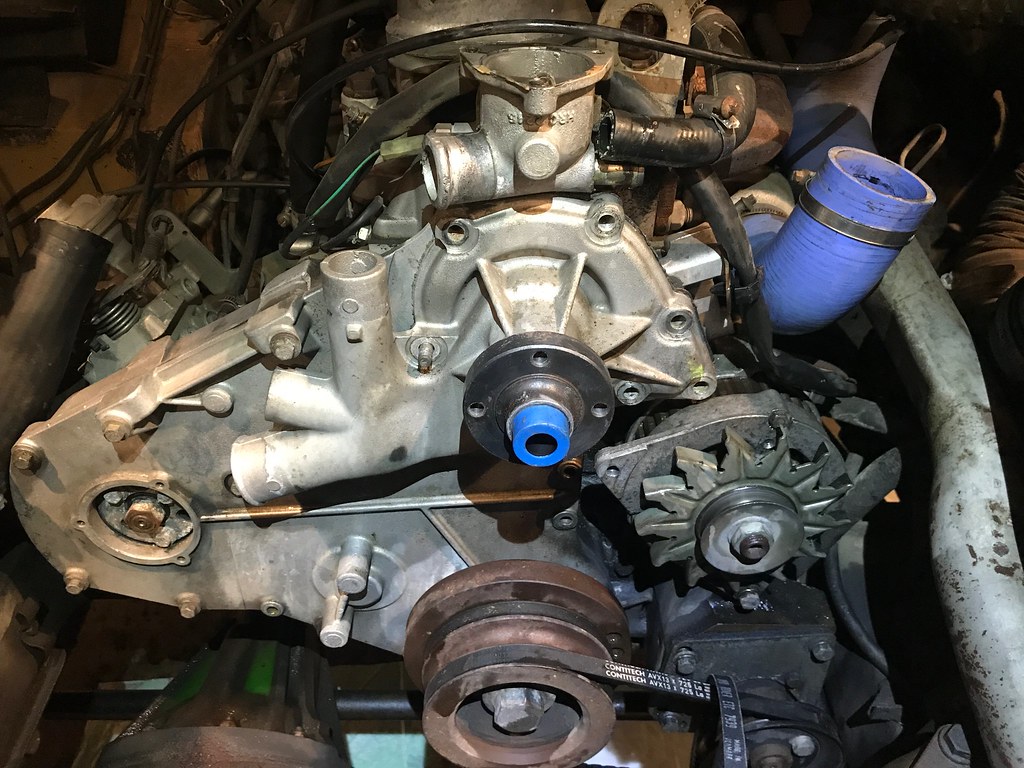
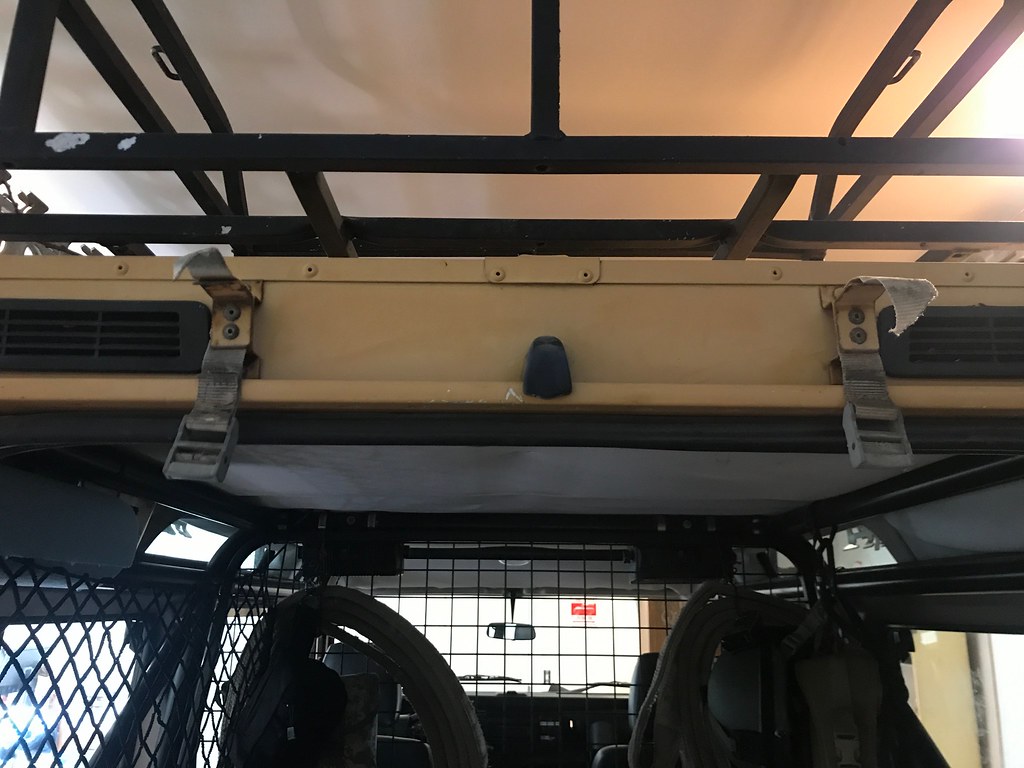
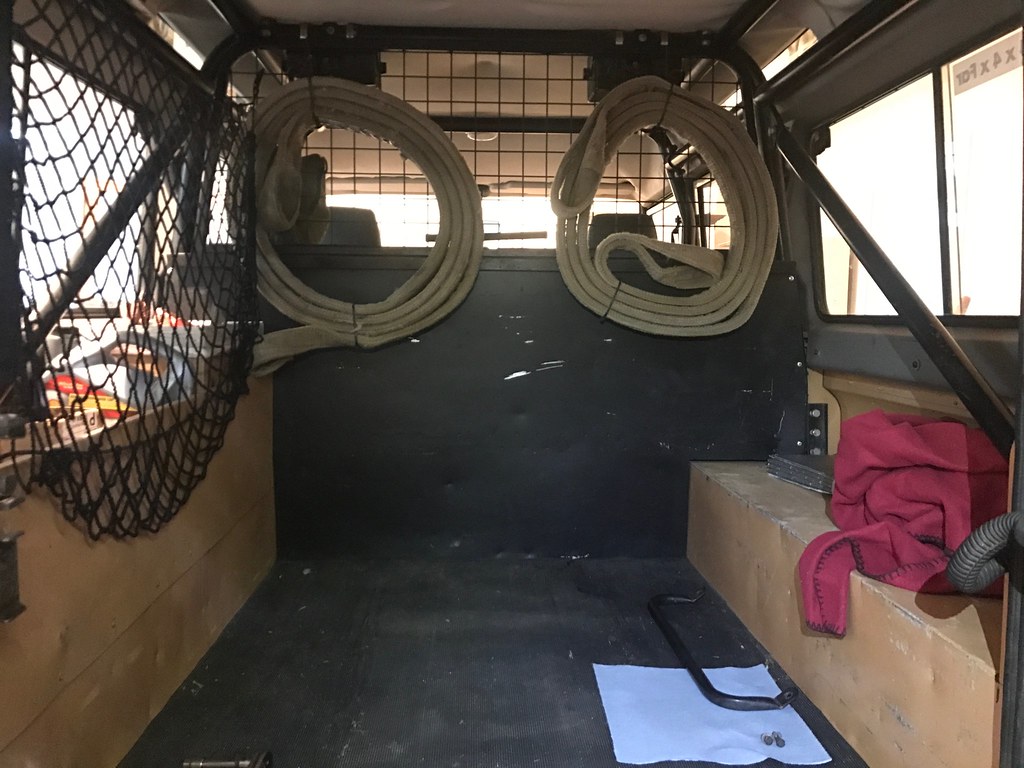
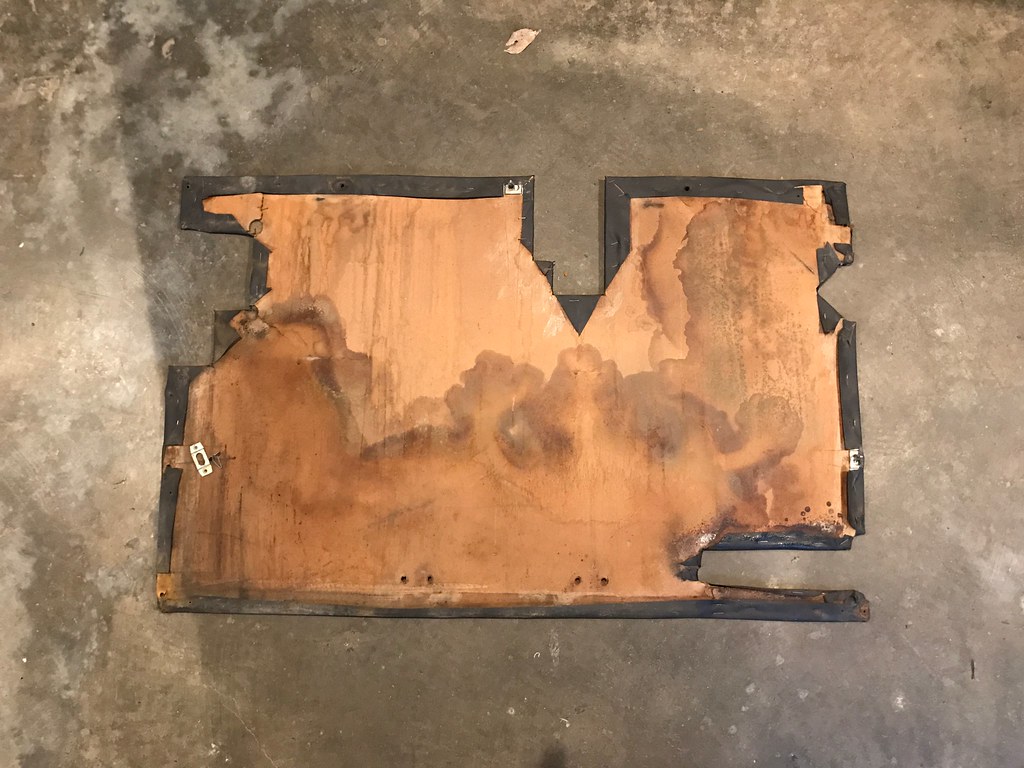
Most everything removed from the back
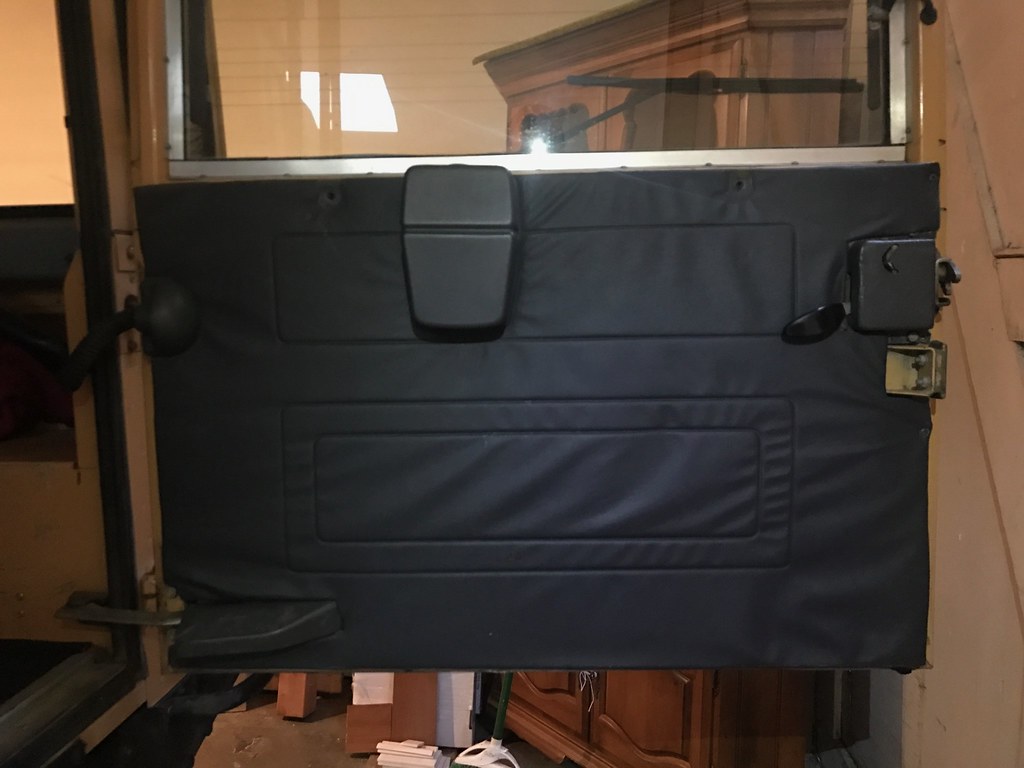
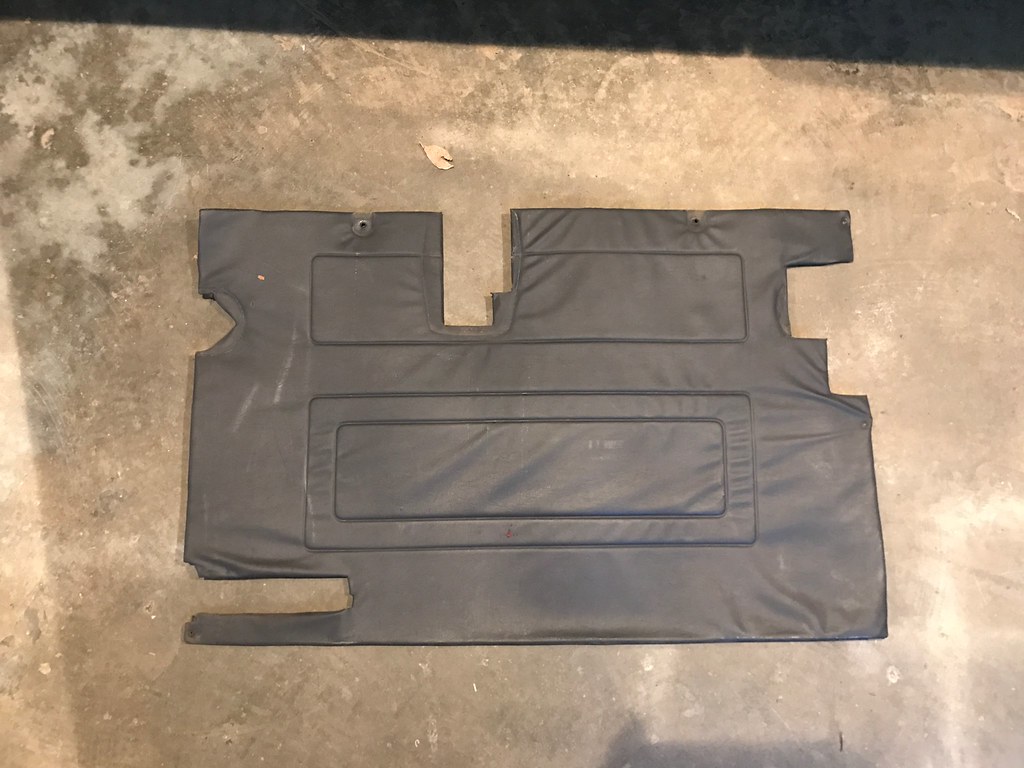
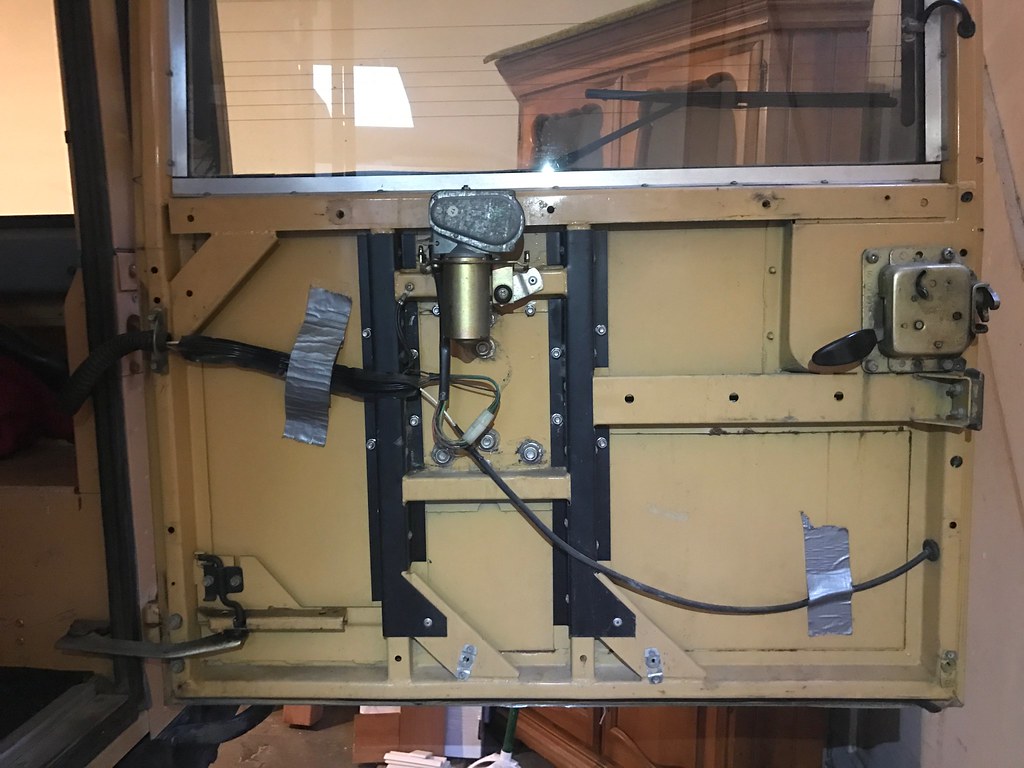
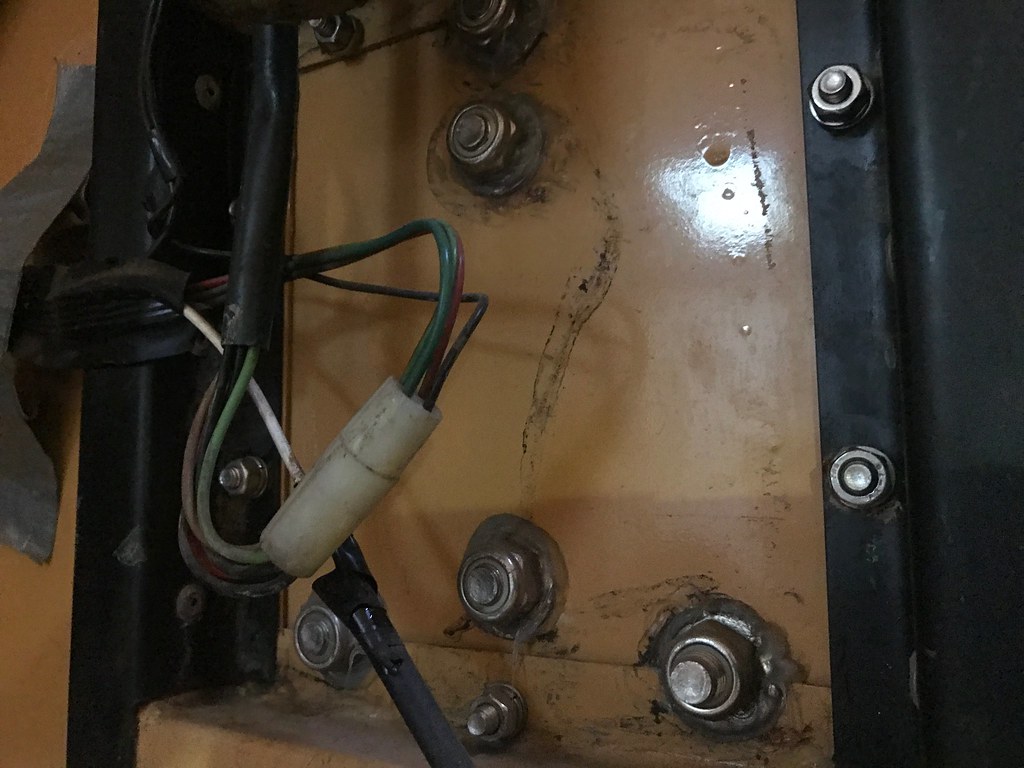
34767306852_541bd9c5d6_b.jpg


Took the door apart

34767307912_b54dd6295b_b.jpg


34767313882_7e5f3baf10_b.jpg


Somewhat funky, I would like to replace with aluminum and perhaps save the vinyl skin to swap. Very little structural integrity left.

34544024670_c0170c212e_b.jpg


34544025310_5c941f92c8_b.jpg


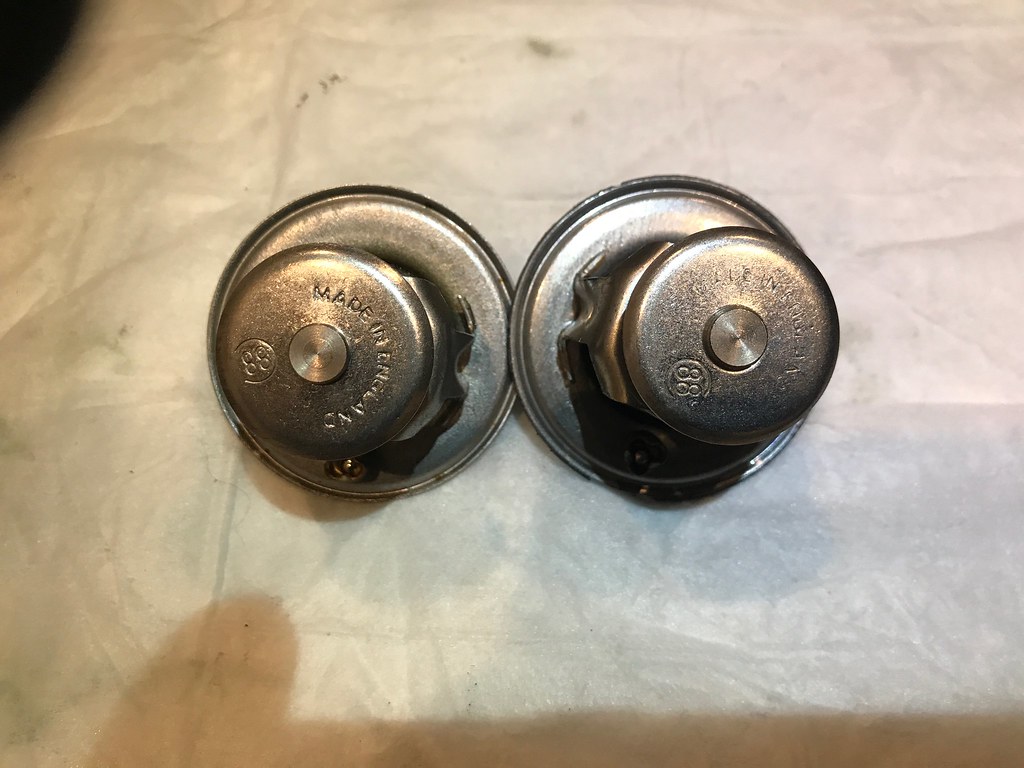
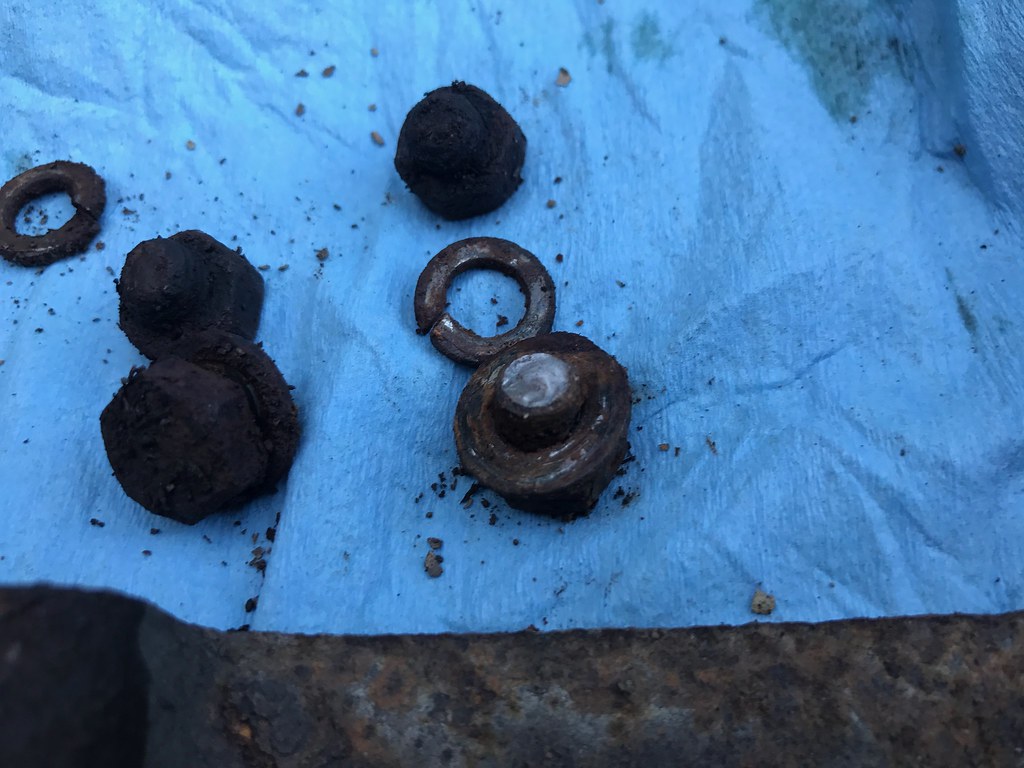
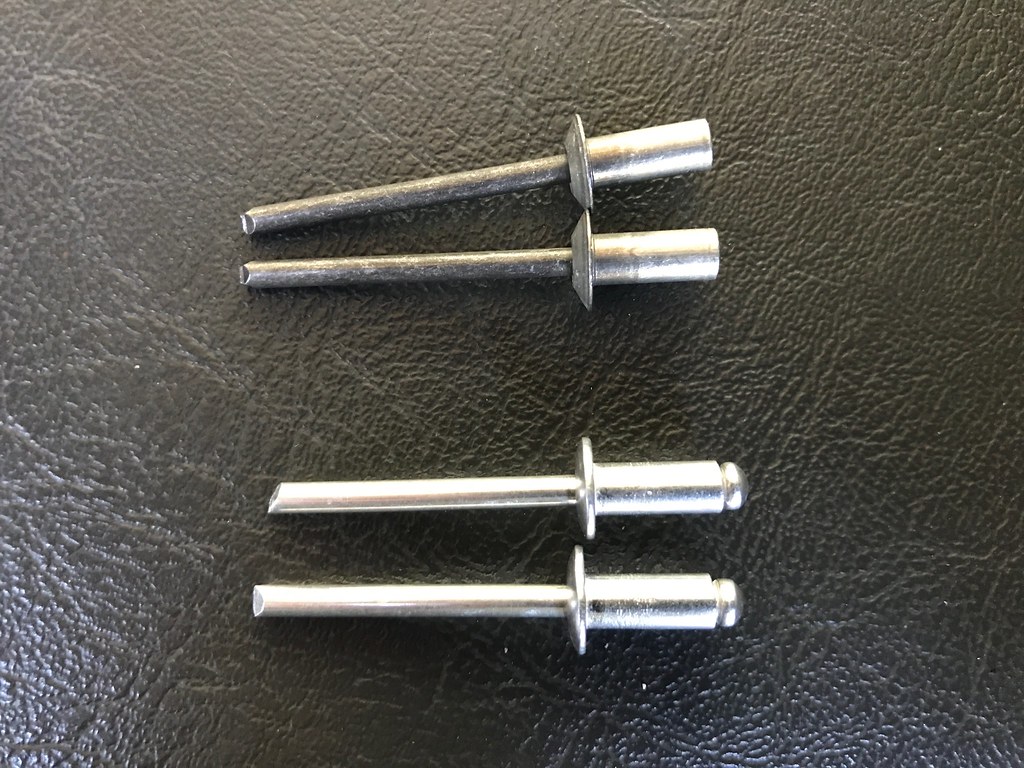
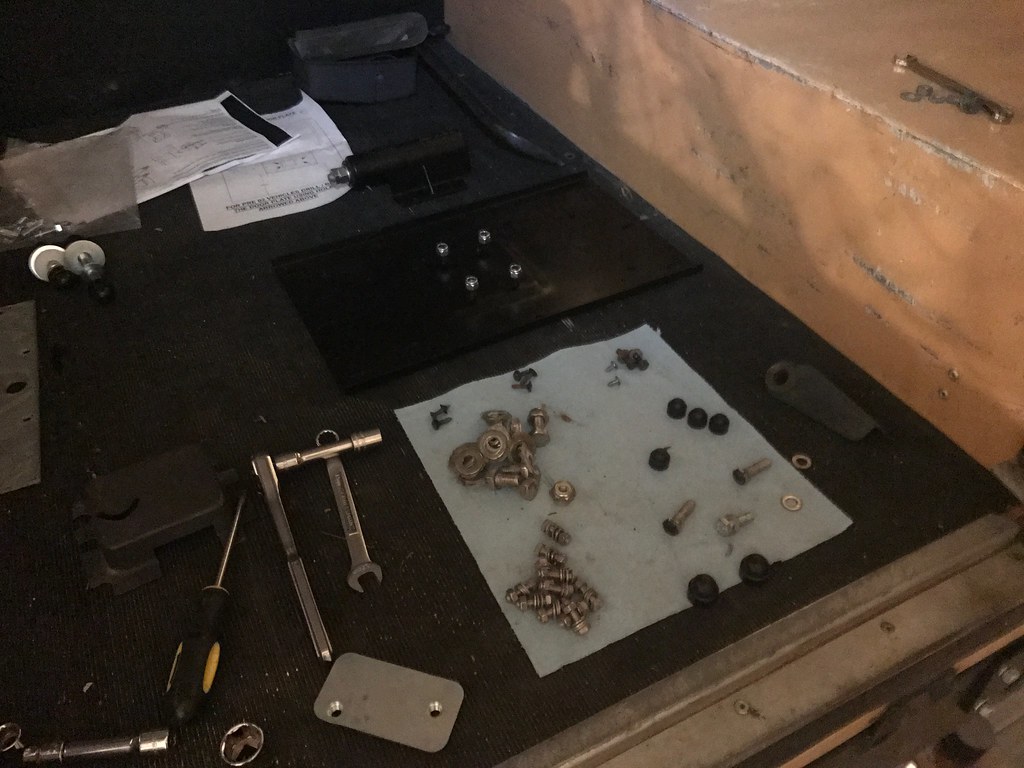
Whoever did this hardware did a great job. Most everything was siliconed which kept the threads intact, zero sticking or corrosion. All the hardware was 8.8 and in fantastic shape. I kept all of it as spares.

34890550176_236ff8b8d8_b.jpg


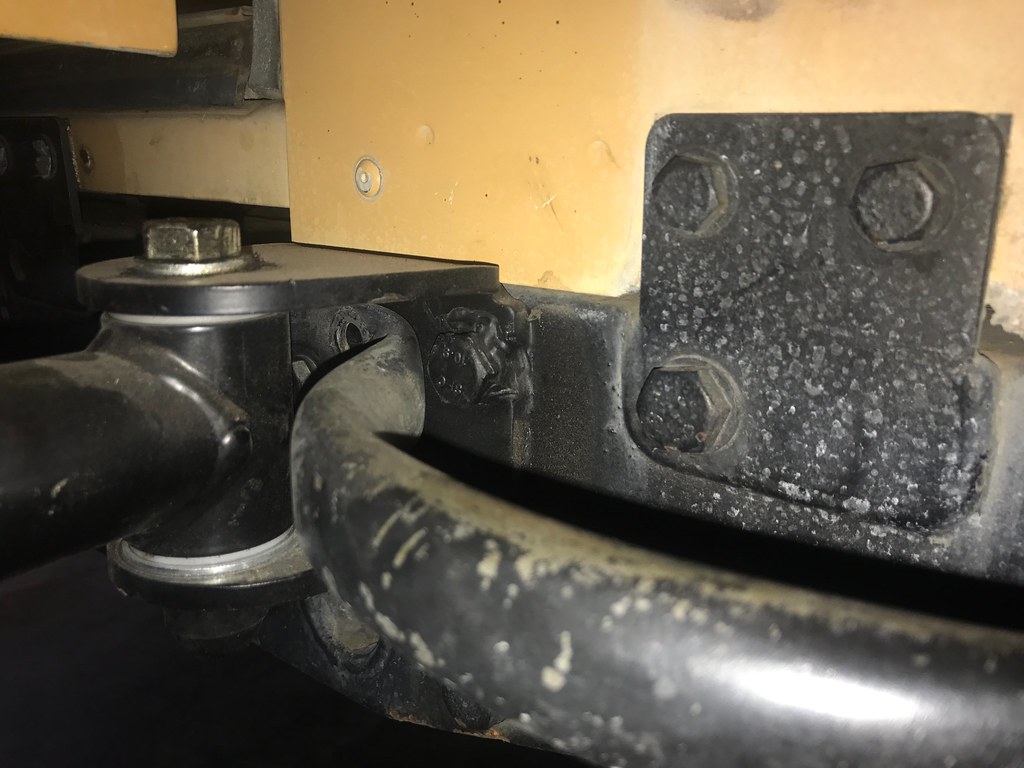
Cotter was in the way of the top hinge to go in

34088172194_c287a9ec4e_b.jpg


Removed

34088174814_18af3bb725_b.jpg


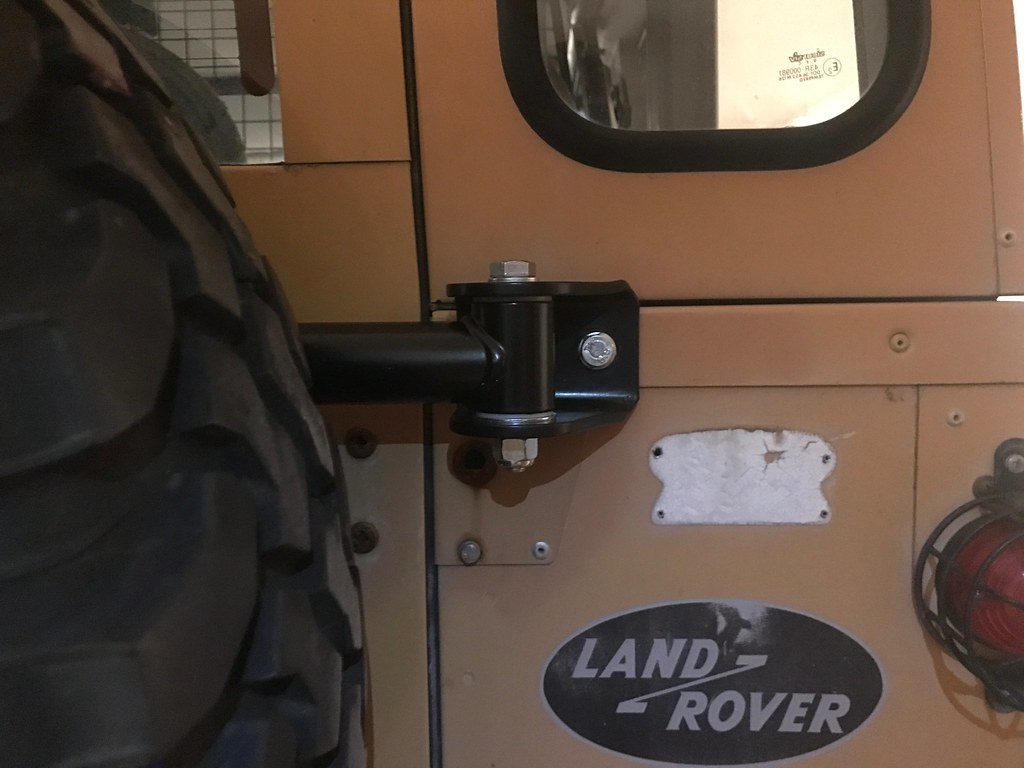
Mantec instructions were pretty good, luckily if you see above someone had added a bit of stiffening pieces to the door so I just bolted everything in. Did not drill the extra edge holes, connection seemed more than fine for just holding the swingout to the door.

34767332912_33f2d04f29_b.jpg


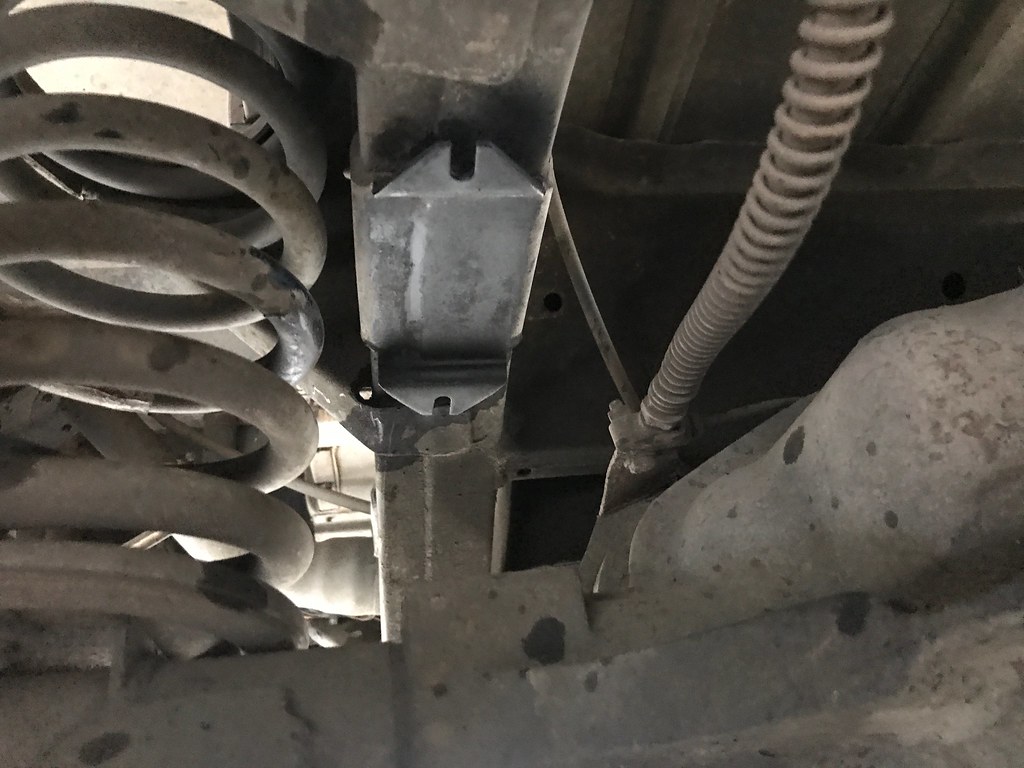
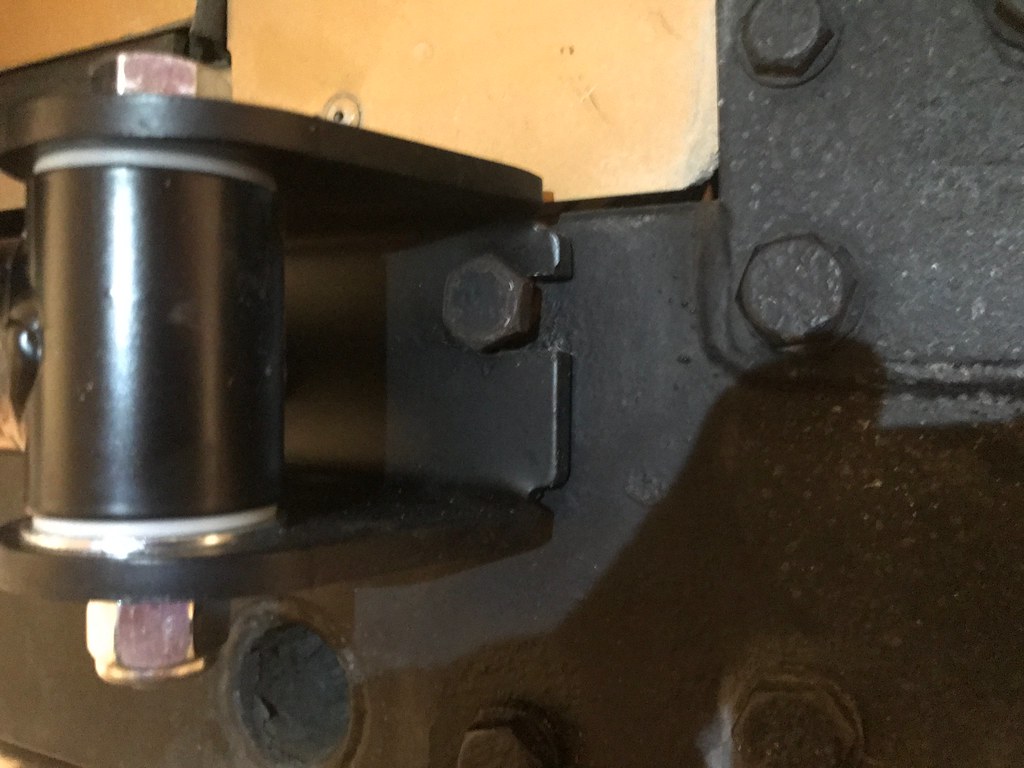
The bottom hinge ran into a problem. See the far right bolt is meant to be a dinky short one included in the kit, but the roll cage is in the way and I was not going to remove a bolt just to have the mount fit better. So Joe was over and cut into the hinge plate so we could accomodate the rollcage bolt. We did this the night the mantec was delivered so it was an interesting feeling butchering a brand new part.

34088178274_bf68b5d444_b.jpg


34890567296_7cc6b070d6_b.jpg


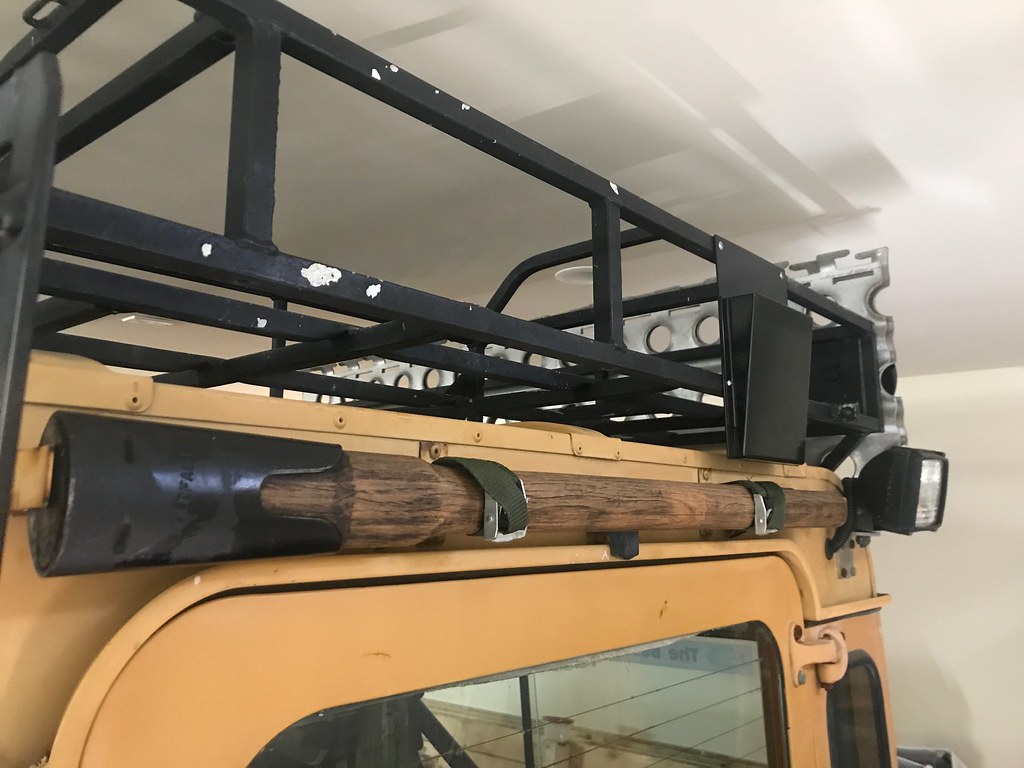
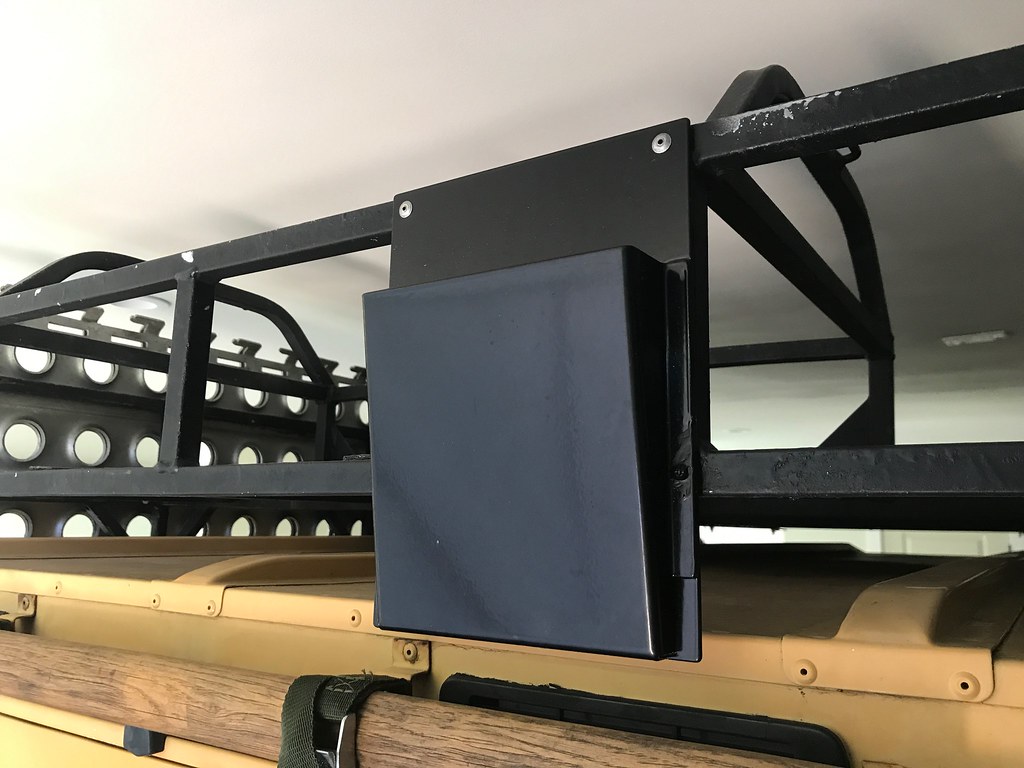
The top hinge was ok, but the eagle eyed among you will notice that now the support bar that connects the rear passenger corner of the rack to the tub no longer fits there. This is something we unfortunately need to correct. Either modify the original bar with a few extra drilled holes OR fab a duplicate bar that is shorter and somewhat different. I have identical materials to make one so it is not complicated to cut and weld a bit of square tube. BUT I would like to keep the original bar because otherwise it will just get lost in a box somewhere and that's one less original piece on the car...

34544044580_b20a156a7e_b.jpg


Bottom hinge

34931280375_efe371c80d_b.jpg


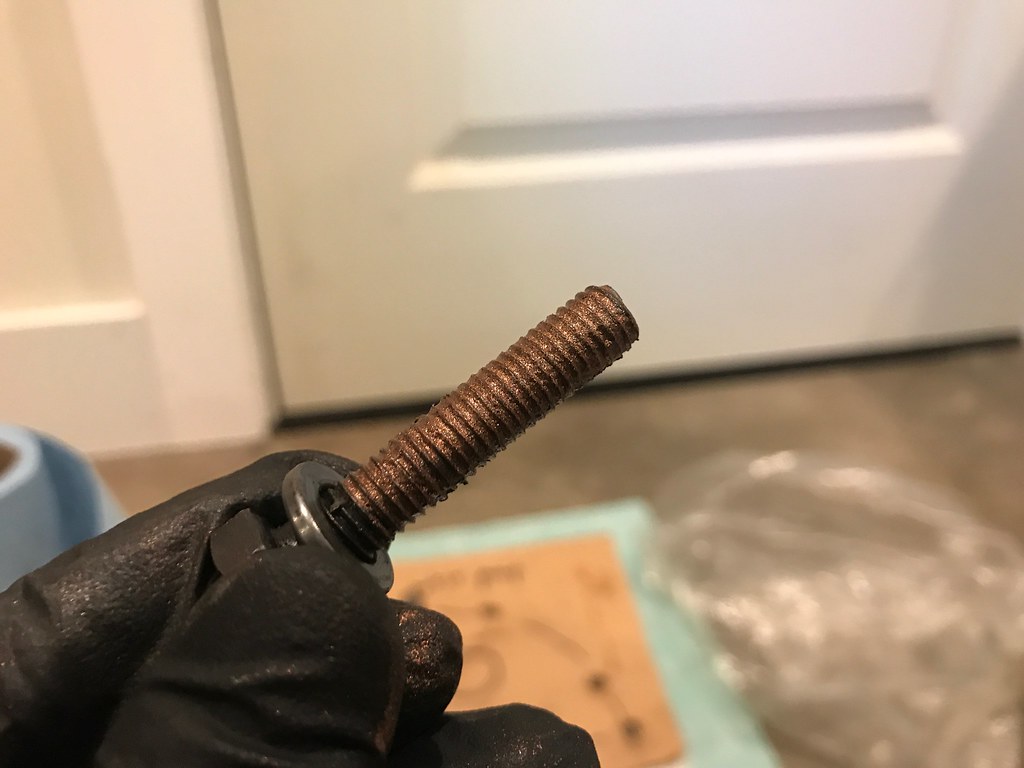
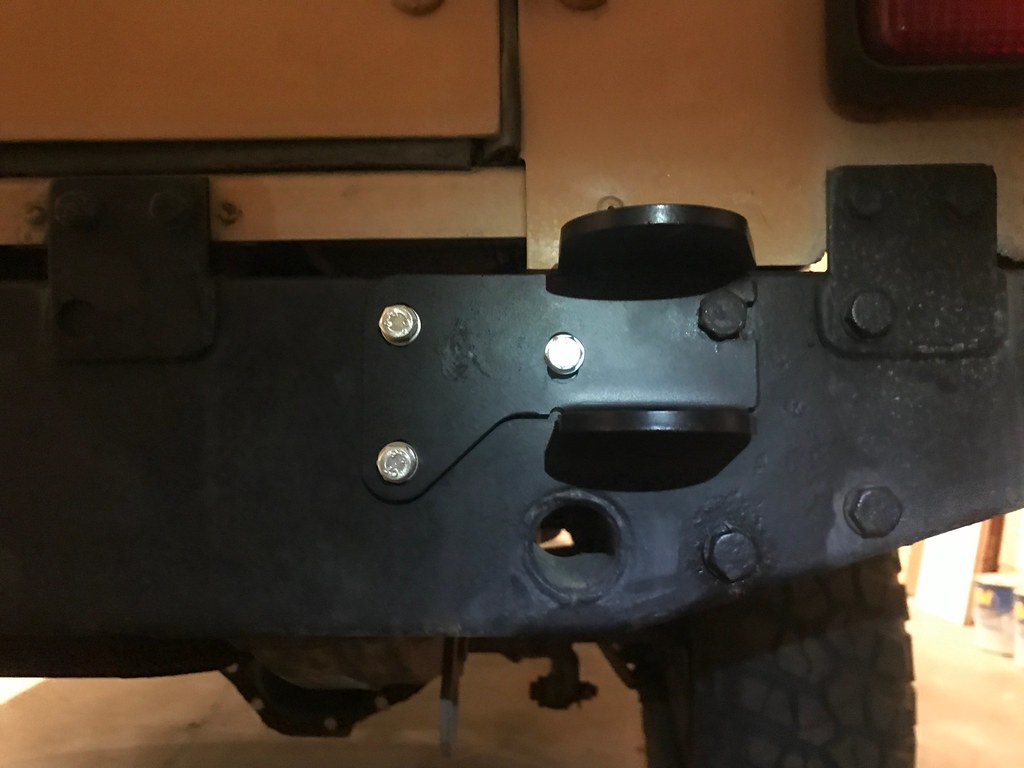
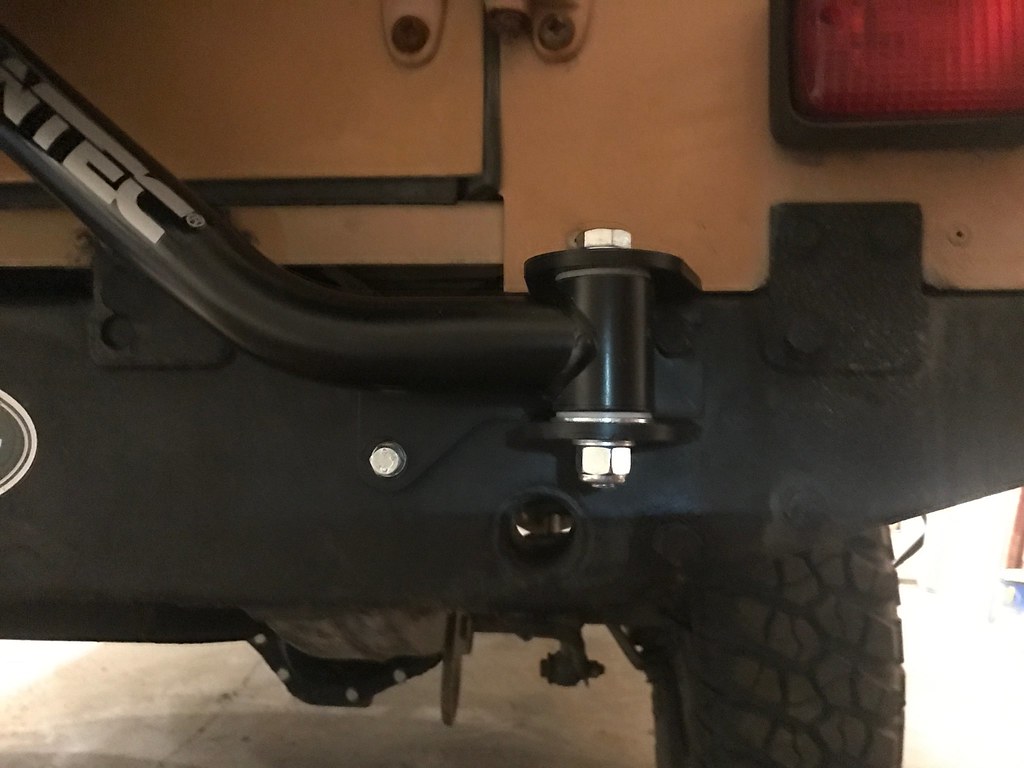
Same issue as with the vertical bar, it looked like the car was going to lose the bumperette because of the mount. However it almost just fit perfectly back in between the hinge pivot and the backing plate, so one bolt short I put it back on. I was really happy with this. Swapped out the roll cage bolt (the threads were trashed) later for a 10.9 grade one of the same size, then put some liquid electrical tape in the cutout gap to try and keep dirt and water away.

34935572602_05e3d3aa62_b.jpg


35060156906_cdd027bde0_b.jpg


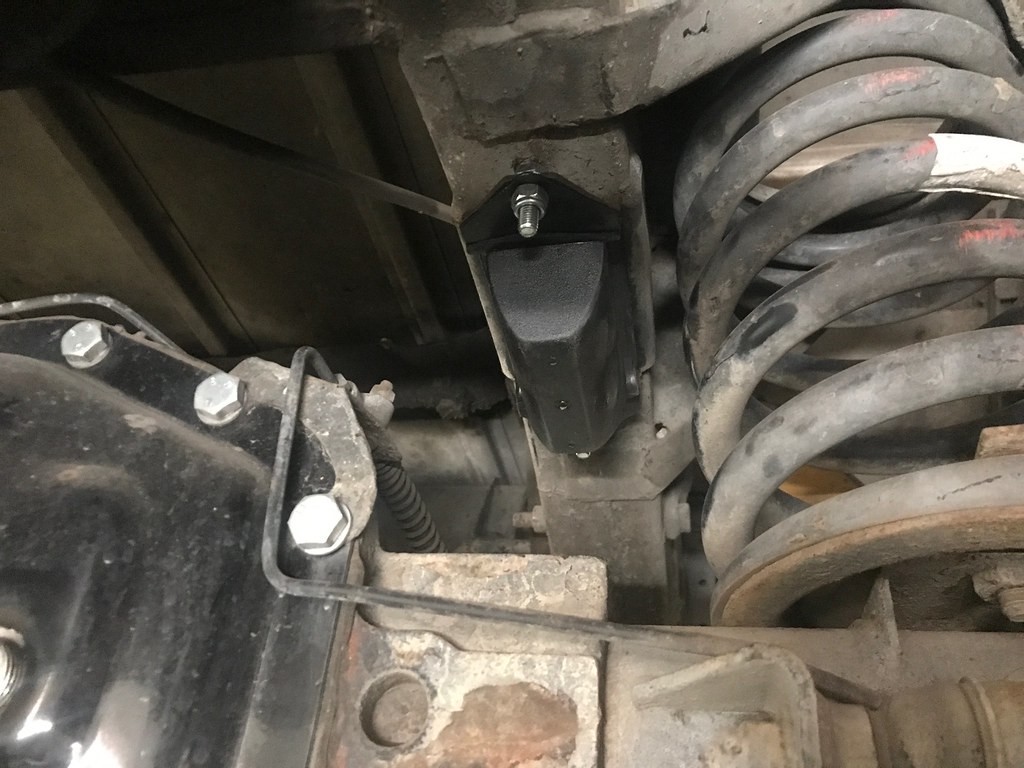
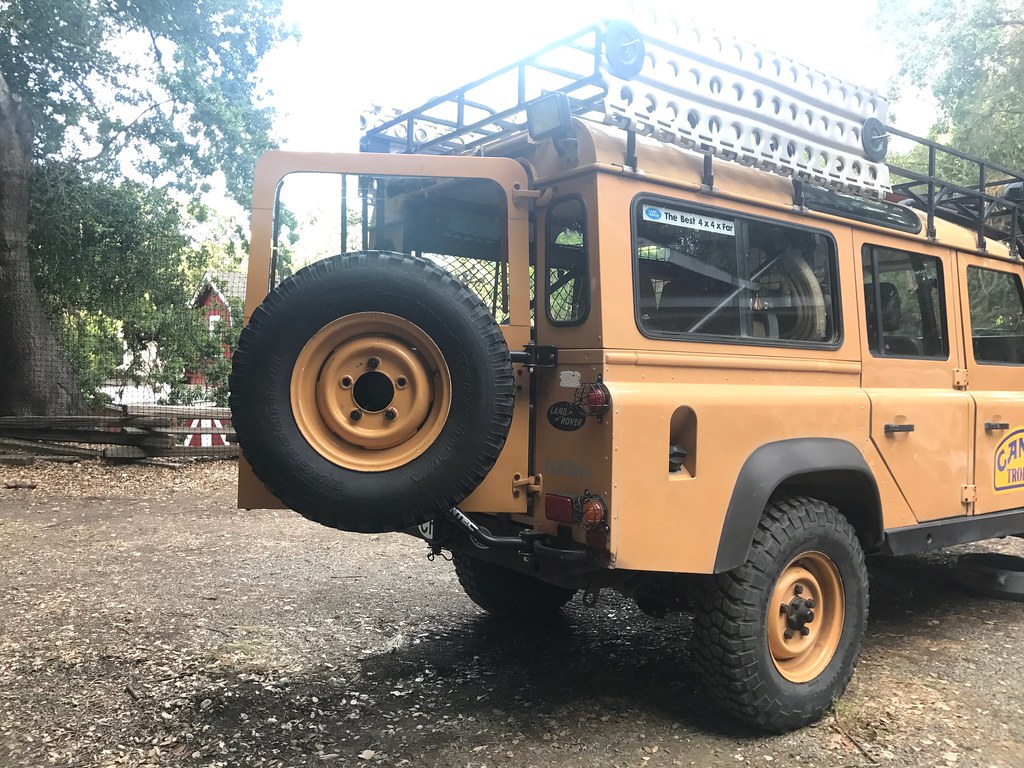
Works really well. The car looks a bit more correct. Still working on that vertical bar. The studs for the wheel are threaded so that I fit one lugnut each on the stud before the wheel goes on, and one each to hold the wheel to the stud over it. So in theory I have a couple spare nuts available if something gets lost or broken. Plus the stud end and nut are flush with this offset.

34088357954_6776f06999_b.jpg
 
Last edited:

DiscoDavis

Explorer
05/17/2017: Water pump

Got home from work, 110 was idling in the driveway fine. ******** chatting with Joe, turned back and she was dribbling coolant all over the axle and the dirt... poop. Didn't even take a break and drove into the garage for surgery. Remember the snapped fanbelt? Really glad we addressed the fan nut threads with grease...

34120964373_56dd307bce_b.jpg

(you can see the SuperWarnch strap is still on here :))

Fortunately her previous owner did give me a spare pump because he did the same job in a parking lot, but no seal so I luckily had ordered a few at the swap meet earlier.

34120992283_4ce80c6d62_b.jpg


34544136660_c4c3a9350c_b.jpg


34767438222_4ee22a8b2d_b.jpg


My interpretation of modern art

34544168110_a58a87fb2f_b.jpg


No clue what brand this pump is... hopefully not britpart

34544140560_8e5846a7f2_b.jpg


Not a bad time to swap the thermostat too (it was working fine), whoever did this before me was again a lifesaver by using copper grease on all the bolts!!!

34544144500_90d8744718_b.jpg


34890662956_c957289182_b.jpg


New stat=Left Old stat=Right; Both appear identical.

34120986823_6dc20ec553_b.jpg


34799387111_bb745ba05c_b.jpg


34120989043_2b95337a65_b.jpg


Was very careful with the pump bolts, again, they were copper greased. Thank you!

34767434512_7a5d9a16bd_b.jpg


New pump on, remembered to grease the paper gasket, cleaned mating faces with a razor blade and a scrub pad

34931421615_521596149f_b.jpg


I regreased the bolts!

34931425705_1a6ff95604_b.jpg


All this needed to come off to get the fan shroud out

34121008373_2722a05a10_b.jpg


Bled and did the first test drive at 1am. Drove to work in the morning.

Note: It was a pain to clean up all the spilt coolant and recycle into containers for disposal, but it is important not to pollute. Useful to have a little water spray bottle to wash all the areas with coolant residue.
 

Kgh

Let’s go already!
Nice work Davis. Methodical and ordered pump replacement, I like.

I have seen a few older Defenders with the rear crossmember hinges. Weird how some stuff left the factory...

Thanks for keeping this updated.
 

DiscoDavis

Explorer
Nice work Davis. Methodical and ordered pump replacement, I like.

I have seen a few older Defenders with the rear crossmember hinges. Weird how some stuff left the factory...

Thanks for keeping this updated.

Thank you Kip :) Good intel

New update to come, been busy and always something going on with the car. Replacement water pump has been leaking coolant from the relief hole since day 1, got a new pump both water and diesel lift waiting now... turns out Rovahfarm [only?] sells the Britpart ones... So next time round I need to find the best quality make.

Did a short trip the past weekend, bit tippy, but brought some pro photographers with. Next build definitely leaning towards HCPU with cage and another husky winch... man those things work good. Another sandglow car might be a good call, shamel trophy or something ;)

CAMEL-TROPHY-DEFENDER-11-HCPU-VAC.jpg


Found this photo of an old SD prototype for the trophy.
47.1315210352.jpg


I start to see where the sickness starts... there's always another landy that would do this or that job just a bit better.
 

DiscoDavis

Explorer
Serviced the swivel ball grease.

34088217884_98a9f0de84_b.jpg


34088215184_916678d32a_b.jpg


34931328105_74d6d23869_b.jpg


34890606936_8ef6a56b36_b.jpg


34931338825_14de36e08a_b.jpg

It seems all the one shot packets are 370 or 375mL

34767371722_466f50a116_b.jpg

I did laugh when I read this. Suitable for all Land Rovers, period :)

34931322495_cf58292150_b.jpg

What came out of the swivels maybe added up to barely 1 packet, seems they got low.

Axle bump stops


35057194506_6473183ec3_b.jpg

Old and rusty plate, rubber fell off a long time ago

35057190176_091a3b3c9e_b.jpg

Broke the bolts, much rust

34287106273_2294fb8717_b.jpg

cleaned the mounting face and spray painted it just lightly

35057296196_169acab008_b.jpg

Used a proline RN part, and some extra bolts I had lying around, not exact length
 
Last edited:

DiscoDavis

Explorer
Pressure testing the snorkel, Pt I

A plumber at work made this for me to test the snorkel for pressure (figure 3psi = roughly 10ft of water)

35097072045_713a39be4c_b.jpg

the fender to snorkel body was rotted, most of the collars at the airbox also leaked. Unsuccessful

34966529821_5fc861d26c_b.jpg

Basically just a sealing collar, fitting for compressor hose, valve, and a gauge to show loop pressure.

To be continued.
 
Pressure testing the snorkel, Pt I

A plumber at work made this for me to test the snorkel for pressure (figure 3psi = roughly 10ft of water)


To be continued.

Connor,

I love whatching the build and when I finally get around to my own Defender, I'll have lots of references to go back to on here.

I build and pressure test a lot of tanks for my bikes; gas tanks and oil tanks. My recommendation is pressurize to 1psi and let it sit for 15 min. If it holds, go to 2-3psi and do the same. After that, you are pretty much good as you will never be below 1 atmosphere unless you are Camel Scuba! hahaha

DO NOT go anything more than 5 PSI as that is enough to cause serious damage to just about any type of structure and actually cause you to open up leaks. I've watched guys blow the welds and bungs right out of a tanks at 7 psi.

Hope this helps anyone who reading and pressure testing things.

Love the build, so envious!

Hope to link up when I get to Cali!
 

DiscoDavis

Explorer
Connor,

I love whatching the build and when I finally get around to my own Defender, I'll have lots of references to go back to on here.

I build and pressure test a lot of tanks for my bikes; gas tanks and oil tanks. My recommendation is pressurize to 1psi and let it sit for 15 min. If it holds, go to 2-3psi and do the same. After that, you are pretty much good as you will never be below 1 atmosphere unless you are Camel Scuba! hahaha

DO NOT go anything more than 5 PSI as that is enough to cause serious damage to just about any type of structure and actually cause you to open up leaks. I've watched guys blow the welds and bungs right out of a tanks at 7 psi.

Hope this helps anyone who reading and pressure testing things.

Love the build, so envious!

Hope to link up when I get to Cali!

This is a concern, I did let the valve go wide open one of the first times and up to 8psi before the collar ejected the apparatus off. At least LR overengineered some of these turbo hoses! Since then it was 1psi, 2psi, and stop at 3psi which was more than enough.

Better get here quick! Switzerland is calling ;)

Are you moving?
 

DiscoDavis

Explorer
Tool hardware Part I

34953166755_af91aff4a4_b.jpg


After months of using zip ties, tried a few straps, including this LR one which was OK but not correct

34544008040_4f06199a81_b.jpg


34767292412_6561bc4002_b.jpg


Then we found these britpart straps, which are about as close as can be to the mantec ones (spanset), buckles good, strap length was correct, double holes spaced correctly. Also got some genuine LR rivets from Rovers North

34770940532_2c52a0eda3_b.jpg


35057330256_4d7bcd6357_b.jpg


35057331546_539c1db72a_b.jpg


34091416514_c69d2bbac7_b.jpg

Here's how the LR rivets compare to the standard fare hardware store 3/16" rivets

34124173293_40e24286df_b.jpg


Drilled the old rivets out and got to it

Shovel:

34953133005_93d3158349_b.jpg


34953134155_18011c8b36_b.jpg


34953142835_7499f8eacc_b.jpg


34953147145_5252f7614d_b.jpg


34953149975_4bedeee8f0_b.jpg


34953152585_78966db163_b.jpg


34953158235_bfdbeac118_b.jpg


Pickaxe:

34953156705_704644973f_b.jpg


34710385740_1db431f8a4_b.jpg


35097085065_c92e07b1af_b.jpg


34932971102_ed1ef7f4d5_b.jpg


34253347794_6b6efb56df_b.jpg


34966568271_f0eb509088_b.jpg

One might notice the buckles were reversed on the new straps, I just prefer it this way to access tools, and so that the door would not catch the buckles if they hung down.

I did learn that the LR rivets take much more force to set, it would have been much easier to use a pneumatic tool but it is possible with a hand rivet gun.

Next: CT axe mount
 

DiscoDavis

Explorer
Tool Hardware Part II

10302-4-amk-mantec-axe-mounting-kit.jpg

(discontinued Mantec item, photo from JohnCraddockLtd.co.uk)

camel-trophy110.jpg

(photo from google images)

SB1-2.jpg

(photo from dieselworldmag.com)

Poring over old videos and photos, there was a very hard to find piece missing from the car (probably lost after the cars were de-equipped for post-trophy sale). The Axe mount is one strap for the handle, and a pocket for the axe head. A fellow from Belgium had an original one and was nice enough to have copies made. Thought the axe pocket was aluminum originally, this one is steel, something to check when I see another camel. The holes were also too small for the 3/16" rivets, so while I did drill this one out to match, I also do not know what the original size was for the holes. I would hazard a guess that they were 3/16"

34091419084_d58cafebc6_b.jpg


34770962032_d3acdede80_b.jpg


34547354560_a648033cf0_b.jpg


One way I knew that the brownchurch rack on the car was original was because it had 4 holes for this missing mount. Popped right on in a few minutes :)

35527576591_7327512a5a_b.jpg


35527574761_4d416f0319_b.jpg
 
Last edited:

Forum statistics

Threads
185,783
Messages
2,878,182
Members
225,329
Latest member
FranklinDufresne
Top