"TrailTop" modular trailer topper building components

jscherb

Expedition Leader
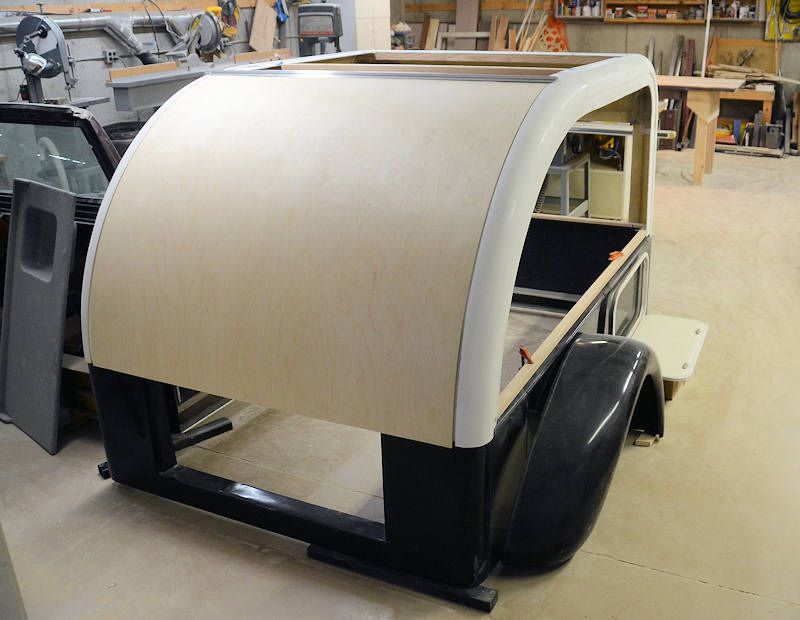
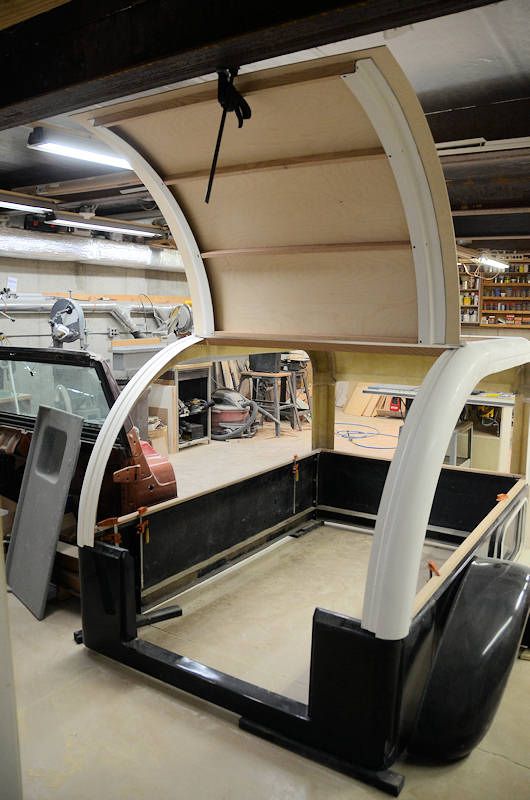
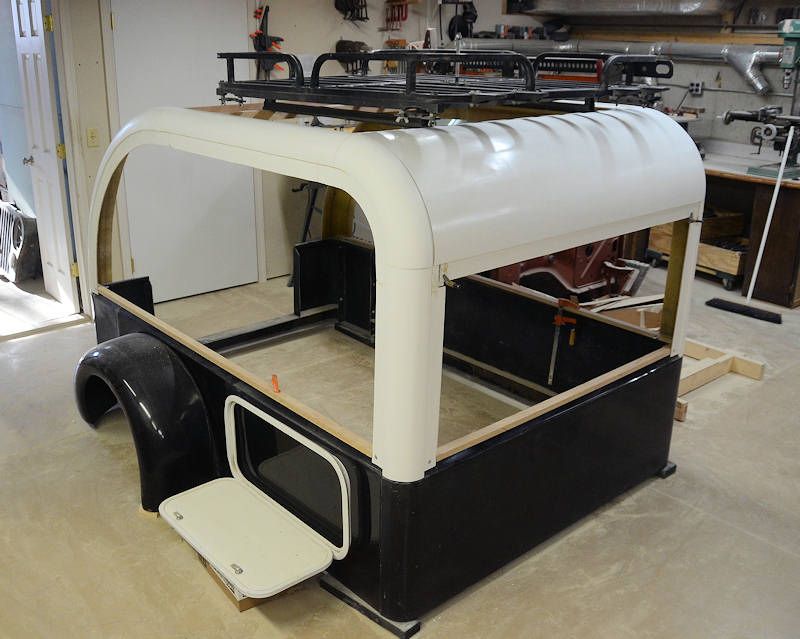
I decided to put the second layer of 1/8" plywood skin on the hatch "the hard way"... by that I mean I oriented it 90 degrees differently from the first layer. The first layer was put on with the grain of 2 of the 3 plies running crosswise - that way it bent very easily around the curve. I decided to run this one the other way so that the final laminate of two layers of plywood had the same number of plies running in each direction for maximum strength. I'm sure putting both layers the "easy way" would have been plenty strong enough, but I wanted to see how hard it would be to do it the other way.

Answer: it takes a lot more clamps. I used ratchet straps to pull the plywood into shape, the straps are attached to pipes running through cinder blocks on the floor. Then I use clamps around the perimeter.

I used Titebond III wood glue - it's waterproof and it's also thin enough to be spread easily with a paintbrush, so I could coat the entire surface of the plywood quickly with glue.

HatchSkin12_zps1c4d7c75.jpg


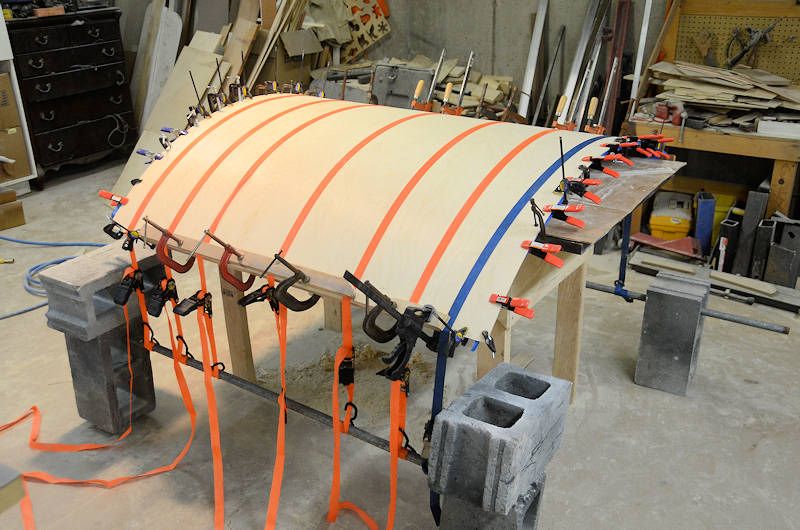
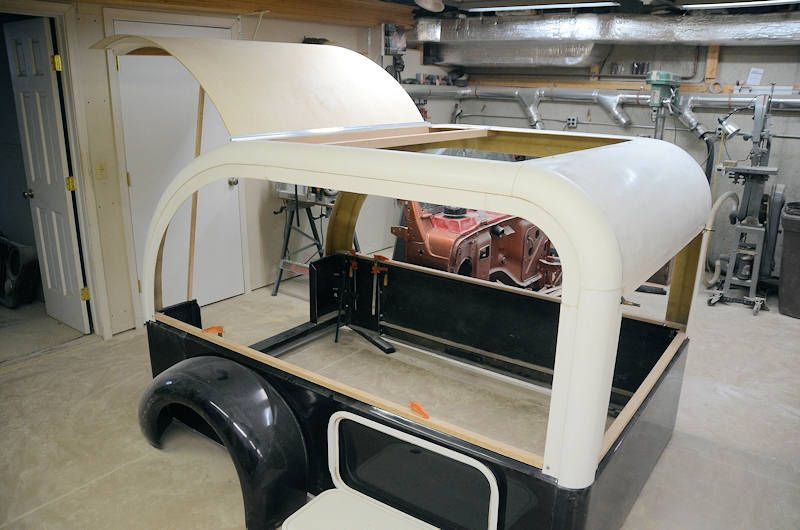
I'll let it set up overnight and tomorrow it'll get installed on the camper shell.
 

screwball48

Explorer
Excellent work as always. Even if your project never is a complete build thank you for showing us the work that you are placing into it and the build process required to achieve your design.
 

zelatore

Explorer
I'm really impressed with the amount of work and thought you're putting into this project. I have no need for a trailer but just looking at the components makes me want to build one!

That last pic reminds me of the old woodworker's axiom - You can never had too many clamps.
 

jscherb

Expedition Leader
Excellent work as always. Even if your project never is a complete build thank you for showing us the work that you are placing into it and the build process required to achieve your design.

I'm really impressed with the amount of work and thought you're putting into this project. I have no need for a trailer but just looking at the components makes me want to build one!

Thanks guys. And thanks to everyone who continues to offer comments and criticisms of the design and the project - your thoughts, even negative ones, help me a lot!

That last pic reminds me of the old woodworker's axiom - You can never had too many clamps.

I do still have quite a few in reserve :).
 

jscherb

Expedition Leader
I couldn't resist doing the 225-lb. gorilla test when I took the clamps off the hatch this morning,. I'll declare the curved fiberglass ribs and the entire hatch plenty strong enough :).

HatchGorillaTest_zpsa5f787cb.jpg
 

jscherb

Expedition Leader
A few photos of the hatch in place.

HatchFit1_zpsde661df0.jpg


HatchFit2_zps7c466b70.jpg


HatchFit3_zps8709cb1b.jpg


HatchFit4_zps13d4471f.jpg


All that's left on the outside of the shell now are flat spaces to fill in with plywood or whatever skin material is chosen.
 

jscherb

Expedition Leader
Don't you just love it when a plan comes together? Beautiful work, Jeff.

Thanks! :)

On my projects I typically spend more time designing and planning than actually doing the work. That seems to pay off for me, all of the TrailTop parts have pretty much fallen into right place during the proof-of-concept build.
 

jscherb

Expedition Leader
The top would be really neat with clear Lexan insert

Might be a little hard to get privacy that way :). How about translucent Lexan roof and front panels, and a solid side panel with a window? Curtains could give you privacy in the front and the side windows, probably nobody's going to look in the roof?

LexanPanels1_zps15d6f12e.jpg
 

jscherb

Expedition Leader
Last week I posted a few photos showing how I was putting cross-ribs in the roof to support a roof-top tent or a cargo basket:

RackMount2_zps22c3e11e.jpg


When I wrote that I thought it was more likely that someone might put a roof-top tent on a more rectangular TrailTop rather than a teardrop shape, but then the March/April issue of Cool Tears showed up in my inbox this morning... there's a feature in it about a teardrop with a roof-top tent on it:

CoolTearsRTT_zps1d502fdb.jpg


I guess I'm not so crazy after all :).
 

jscherb

Expedition Leader
I found an RV mural on eBay the other day that might be cool on the side of a TrailTop. Here's a concept drawing, I've done the TrailTop framework in black to match the tub and the silhouetted palm trees.

SunsetMural1_zpsfb5cde41.jpg


The seller offers them in several sizes, and I contacted them to ask if they could do a custom size specifically for this project. Yes they can, a 38"x82" would be $134.95. Here's the listing: http://www.ebay.com/itm/28120947402...eName=STRK:MEWAX:IT&_trksid=p3984.m1423.l2648

In this next photo/drawing I've edited the TrailTop framework to black (didn't paint the hatch, you can use your imagination on that). I've also used translucent Lexan for the roof and front panel, it could be a dark tint that looked almost black from the outside but still provided some visibility from the inside.

SunsetMural2_zpsdea5eba9.jpg
 

jscherb

Expedition Leader
Now that I've got the hatch installed, I can show you what I've designed for sealing the hatch opening from the elements. There are two separate weatherstrips - on the outside edge of the hatch is an EDPM rubber strip, it's 3/4" wide by 3/16" thick. This attaches to the inside of the hatch. Then a little bit inboard of that, there's a D-profile hollow weatherstrip.

Weatherstrip1_zps564e75f1.jpg


Here's a closeup, the D-profile weatherstrip sits right at the inner edge of the jamb flange, and on the TrailTop curved pieces the flange has an additional recess. This forms a drip channel so that any water that might get past the outer weatherstrip will be channeled away. Although I've done it slightly differently, the drip channel idea borrows from automotive hatchback standard practice; it should work just as well the seal on a hatchback.

Weatherstrip2_zpsce87cf60.jpg
 

Forum statistics

Threads
185,882
Messages
2,879,160
Members
225,450
Latest member
Rinzlerz
Top