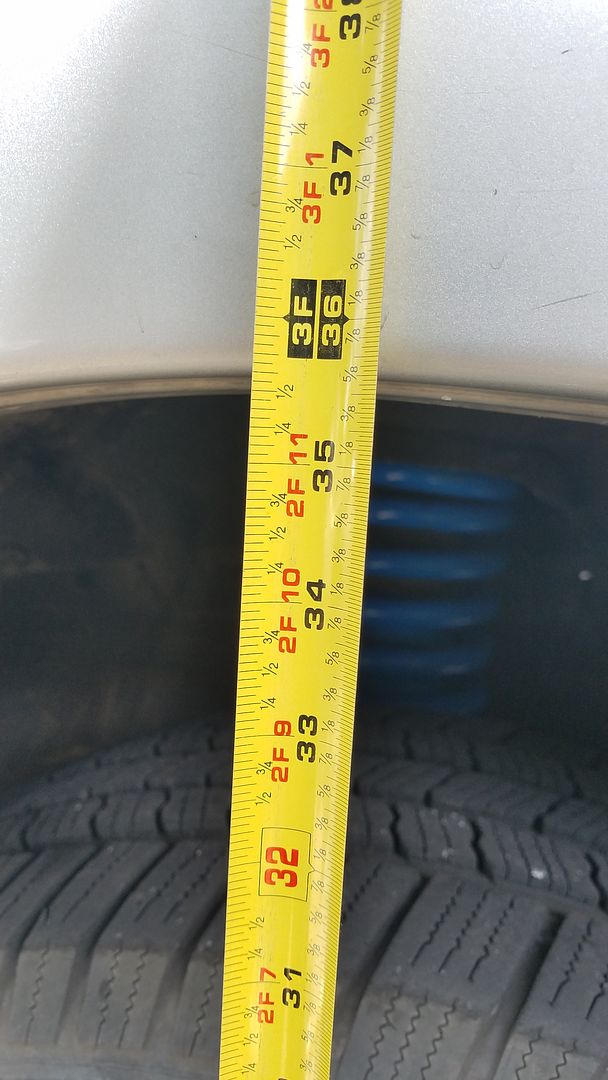
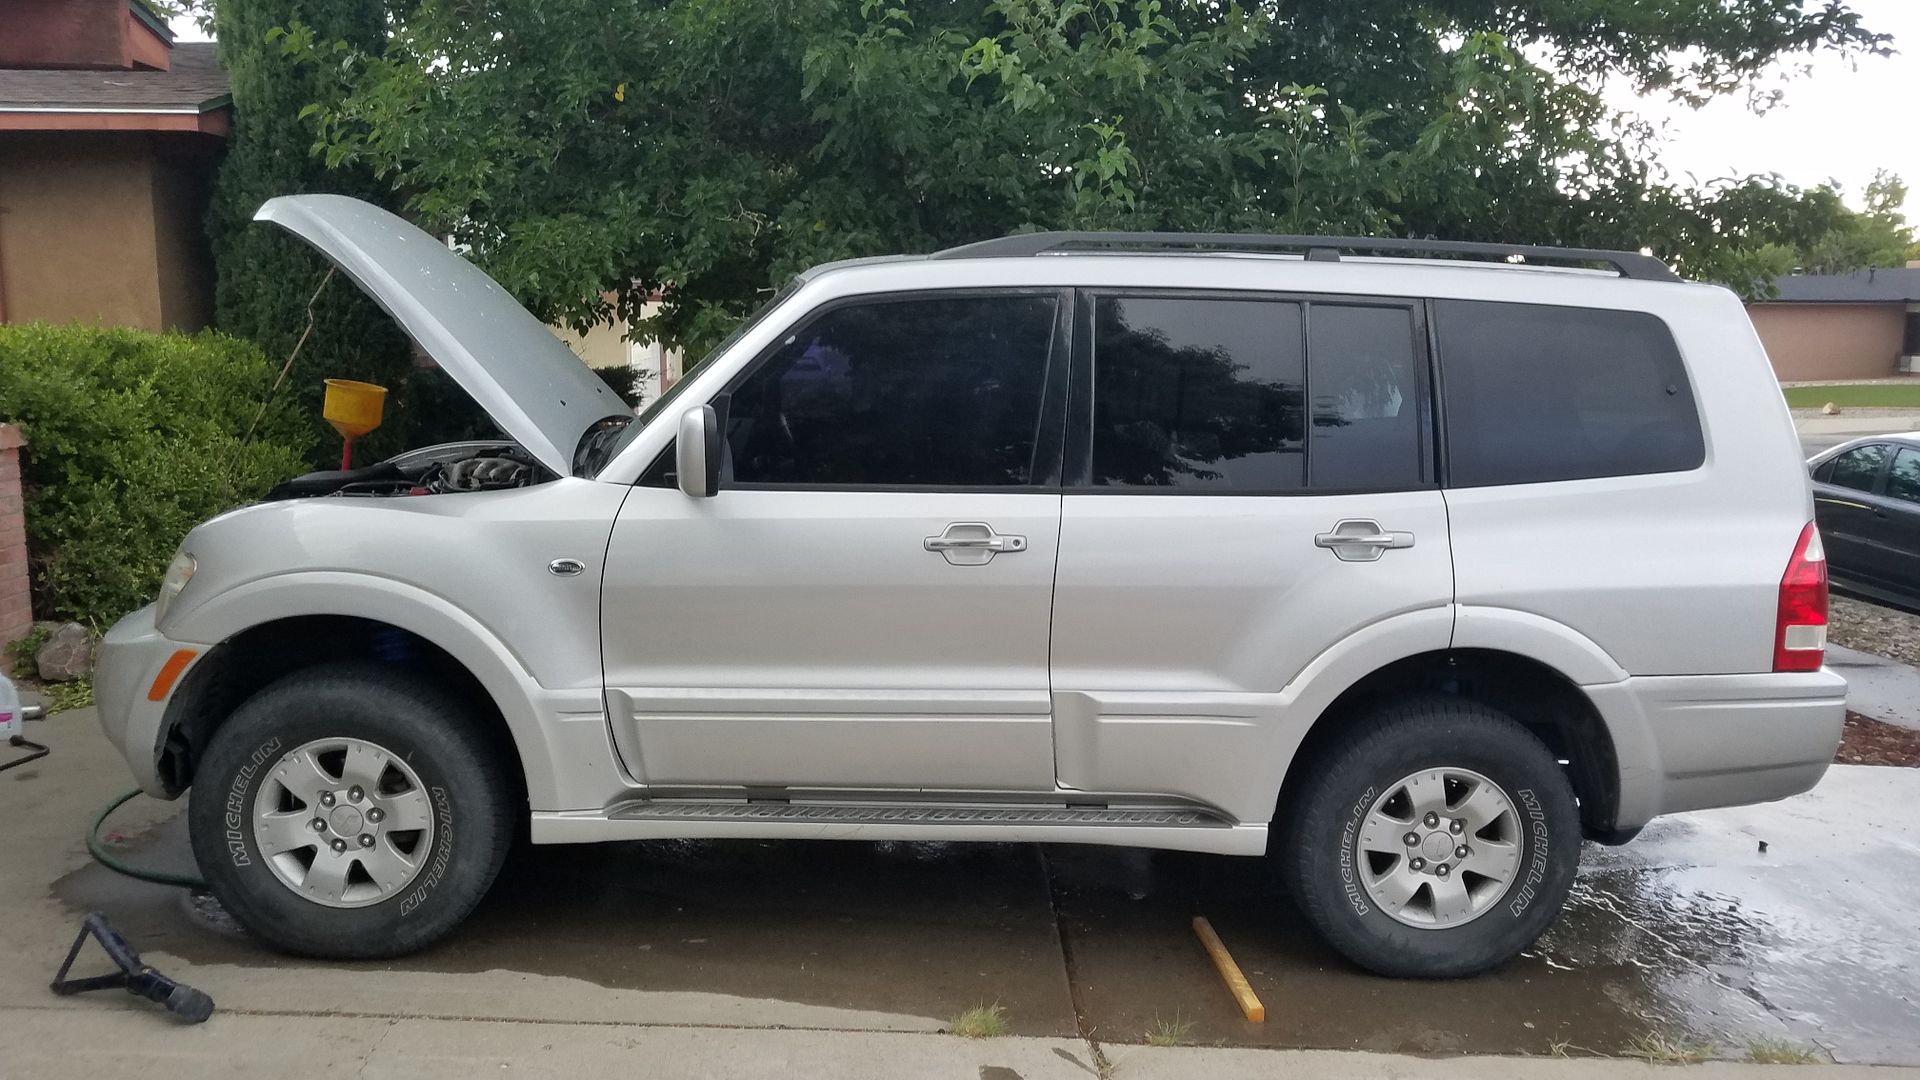
Yet another 3rd Gen Montero "Build", also story time!

eyehate

Member
That was for transmission flush and fill, plus t-case only. i think the trans was 240 alone. I figured i would do the diffs myself :)

Never got to run that trail in the jeep, but then again i've only been snowboarding there a few times.

So I tackled the front springs and struts today. Much more of an effort than the rears, and i had to break down and bring the fronts to the shop that does my racecar stuff to use their spring compressor as the harbor freight ones I had both broke.

So, here is said install without further ado.

Before:
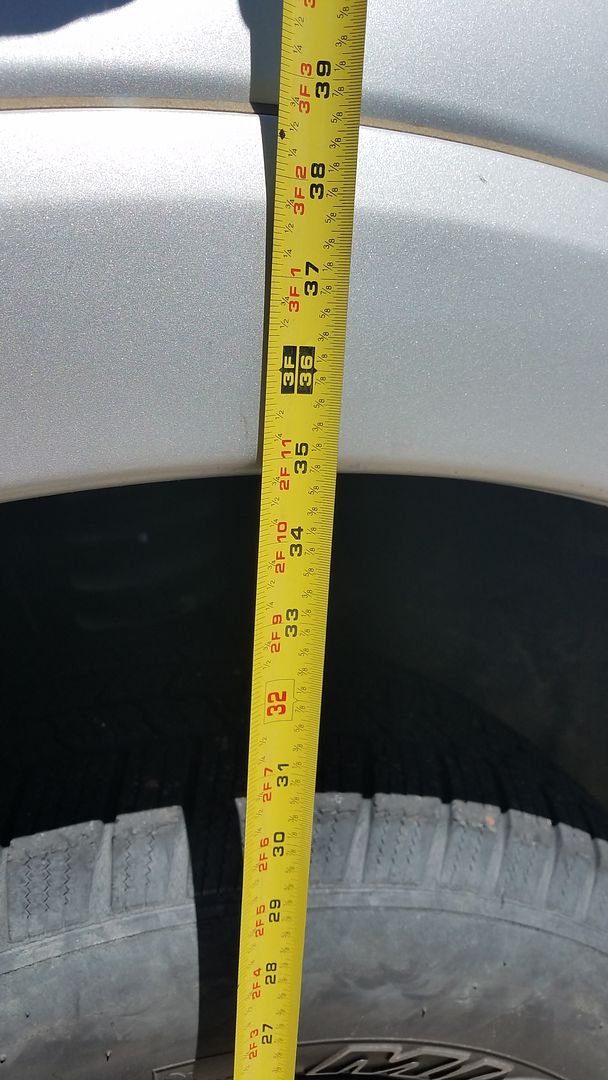
20170722_114208_zpsgetju9vt.jpg


The tools:
Basically the same as the rears, plus a 22mm wrench, 12mm socket, 14mm socket, extension and a 2x4.

The steps:

Jack up, place on jack stand, remove wheels!

Pop the hood, and remove the airbox, and battery from the top of the motor, pretty simple process, mostly 12mm and one 10mm. Be care with the battery box, Mitsu decided it would be a good idea to connect everything in the engine bay to it.
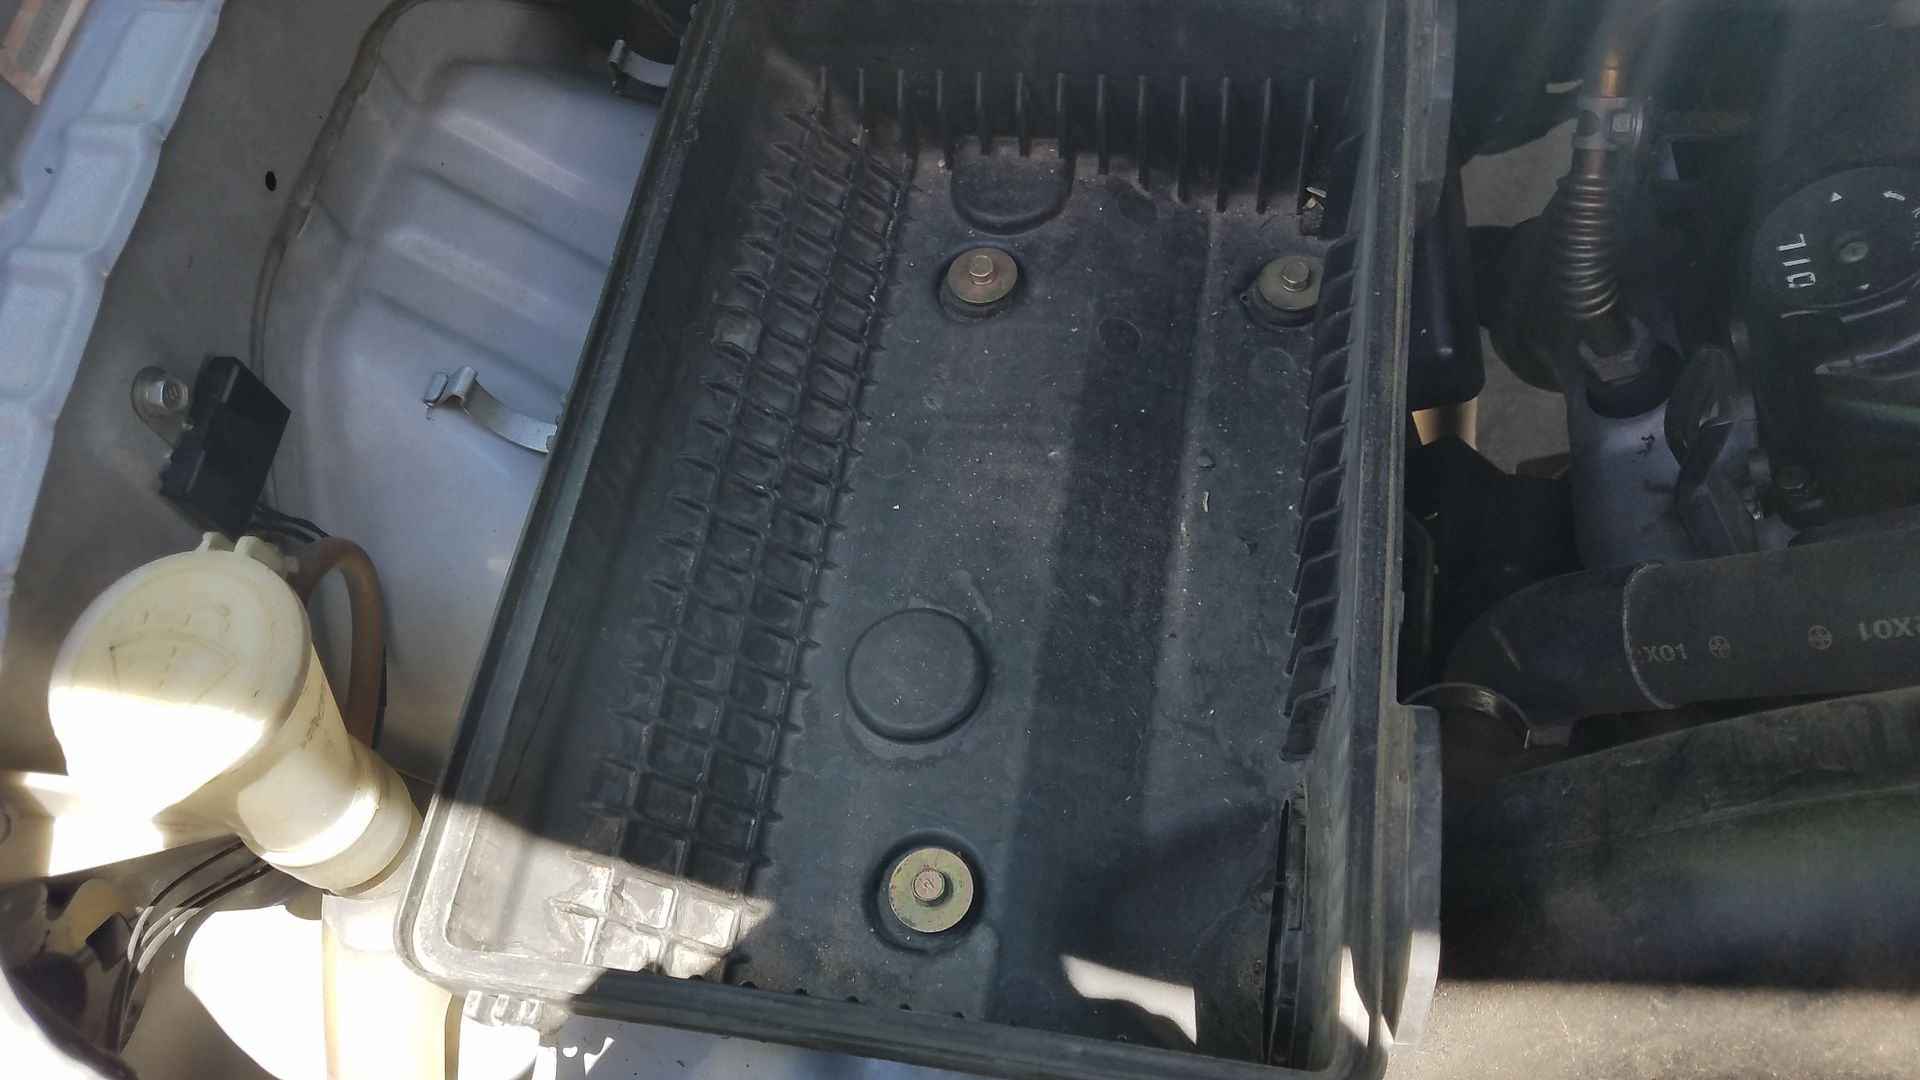
20170722_122543_zpsjzxg3dlg.jpg


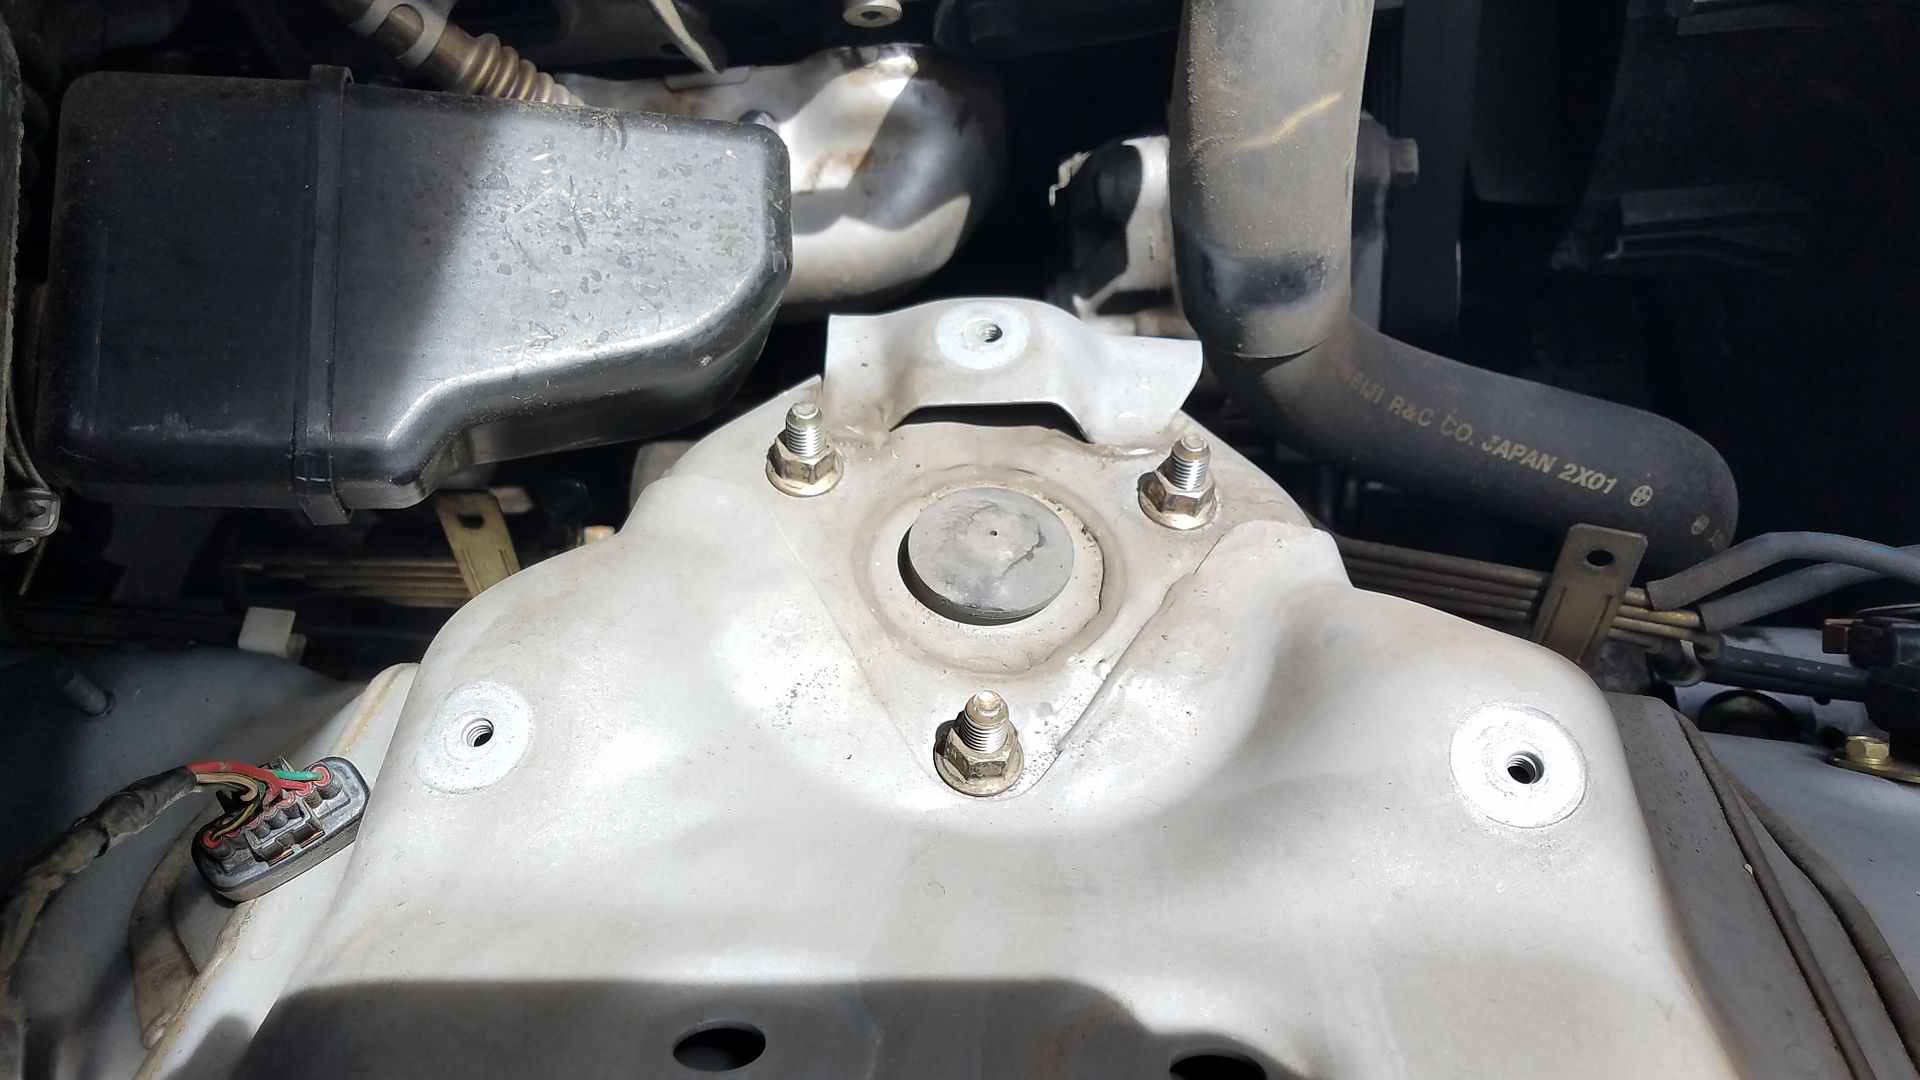
Once the battery box and air box are removed, there will be 3 14mm nuts holding the strut stops to the chassis. Remove those suckers.
20170722_142547_zpslg28jvf5.jpg


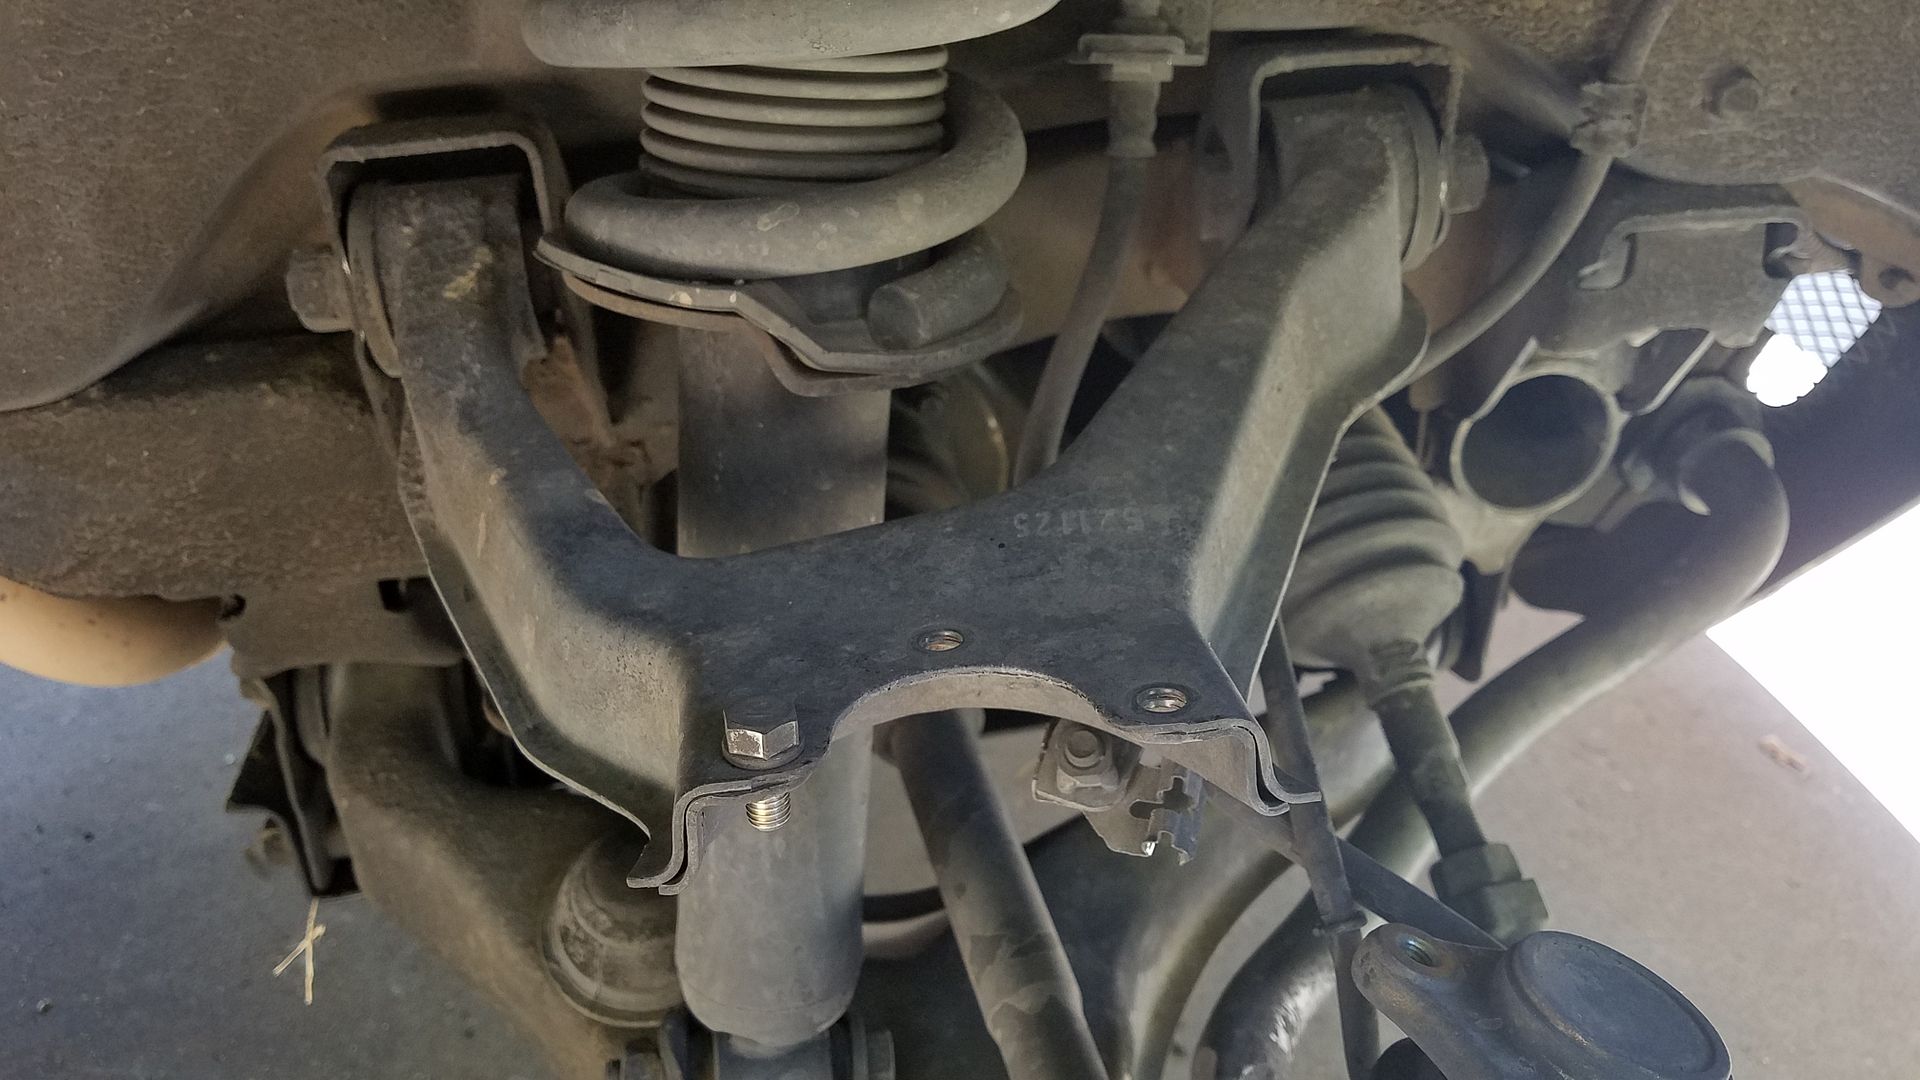
Next use a 12mm to take off the 3 bolts holding the knuckle to the upper control arm.
20170722_115326_zpsojdgqqnd.jpg


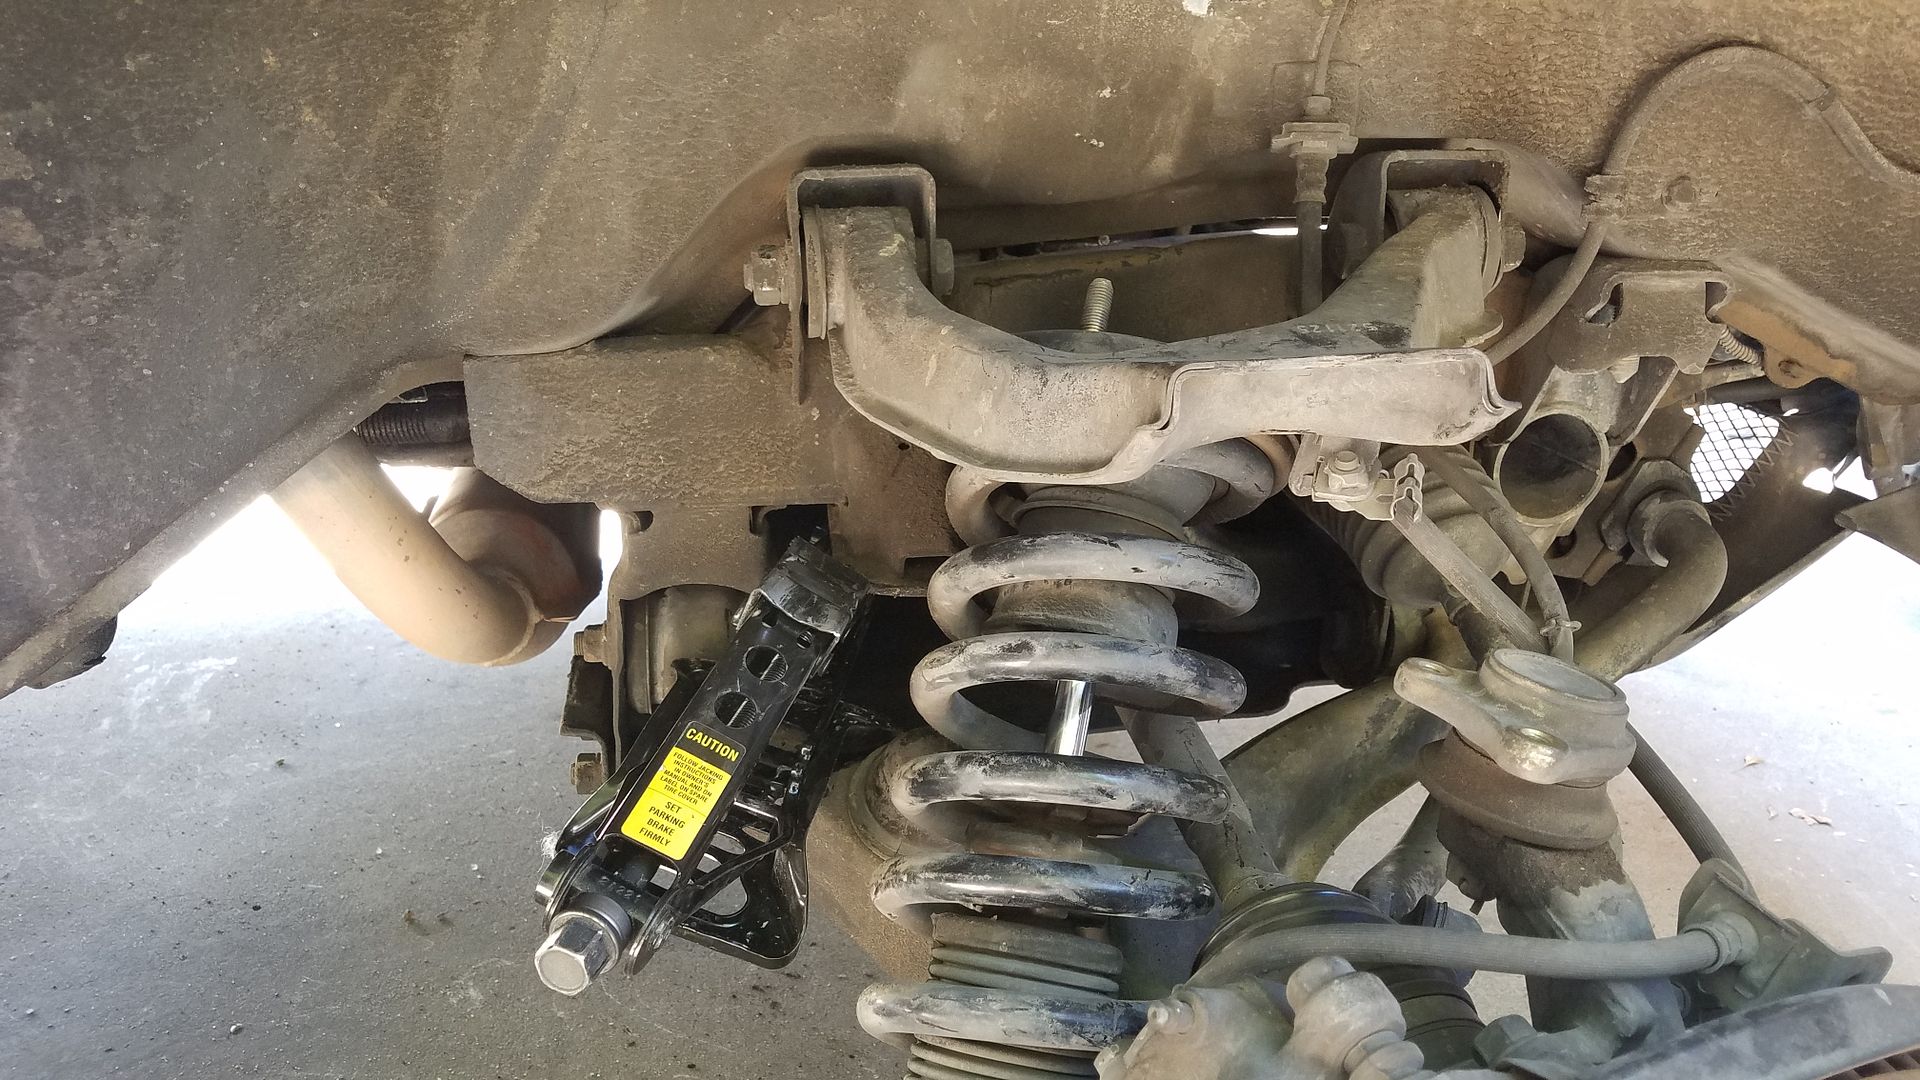
Now there are 2 ways to get the strut out, by removing one side of the upper control arm or by not removing the upper control arm at all. One takes a long time and one doesn't, i'll leave you to decide.
20170722_124244_zpserddsmt2.jpg


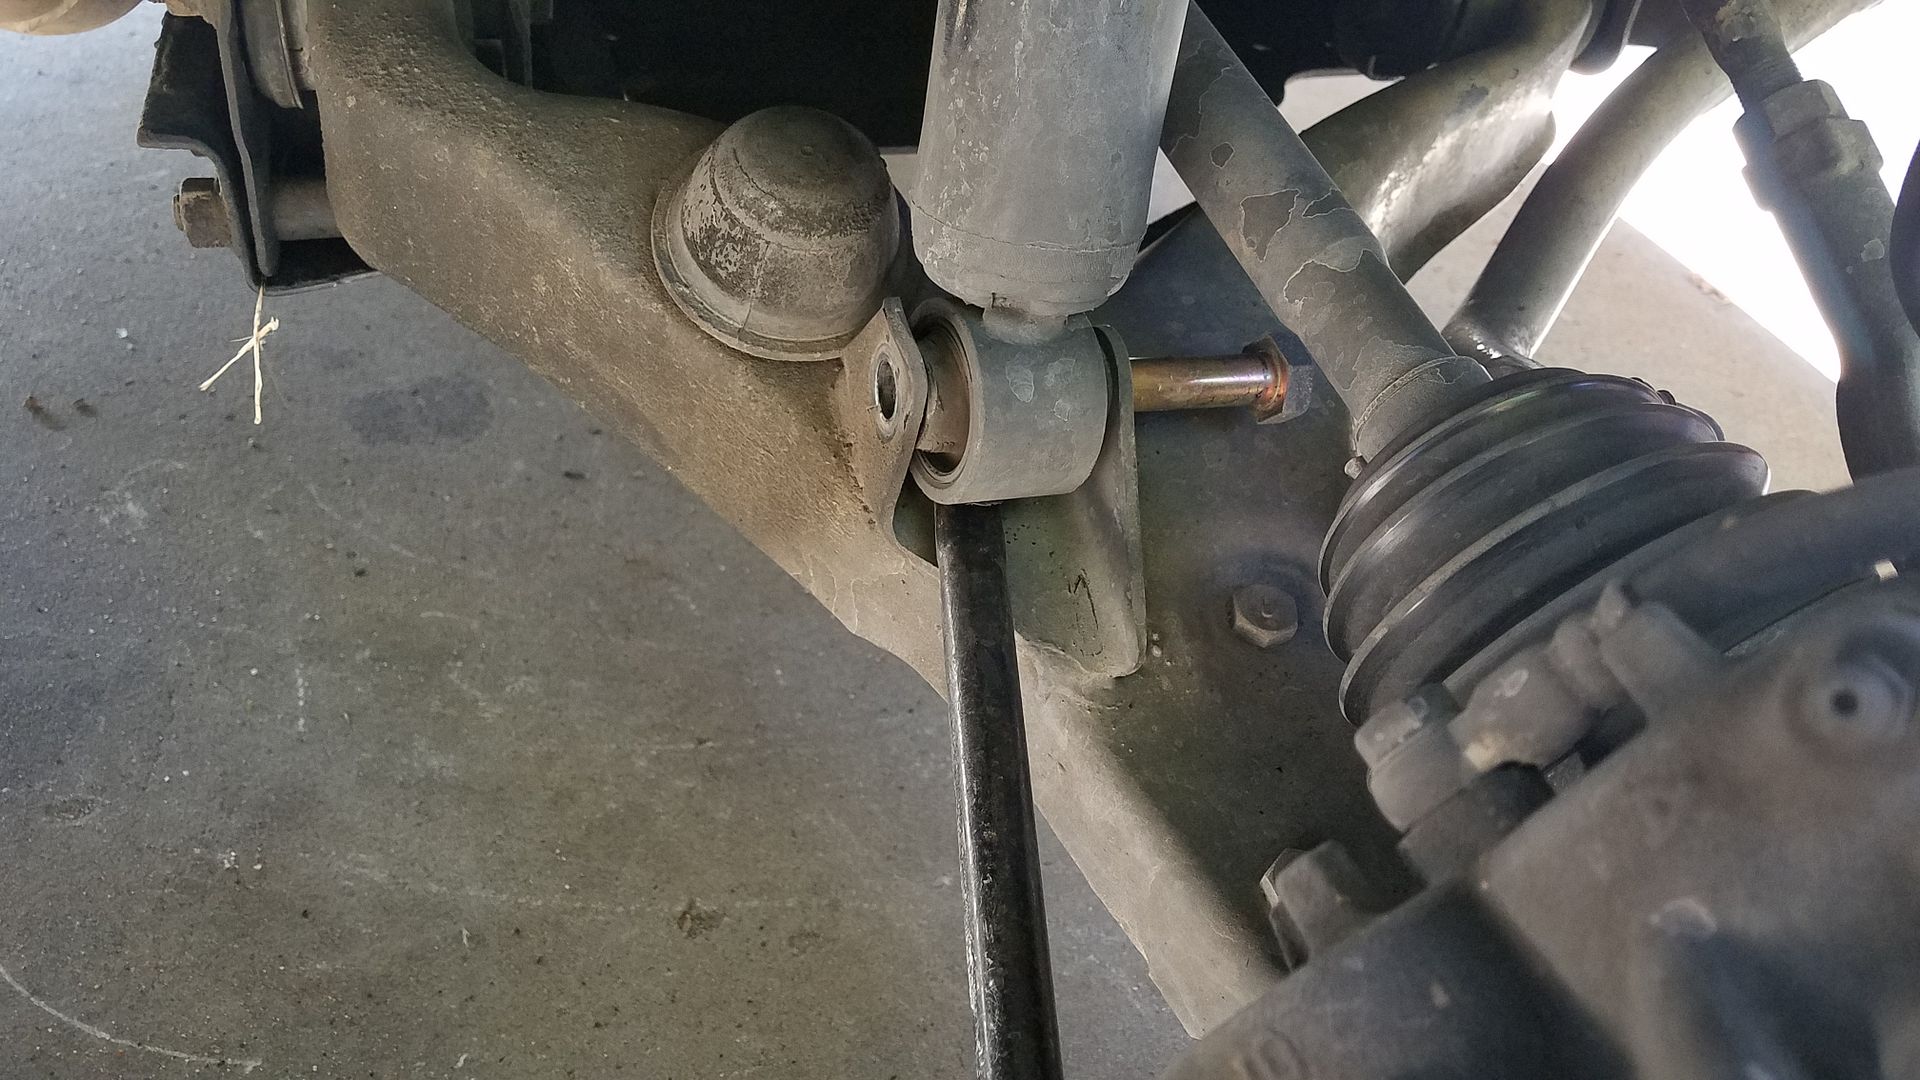
Remove the bolt holding the strut to the lower control arm. It may slip as its still under tension from the spring. It helps to jack the lca up and use a spring compressor, but I ended up jacking the control arm down with the bottle jack (I broke my faithful scissor jack trying this...) You can see my jack placement on the install pics of the next coilover.
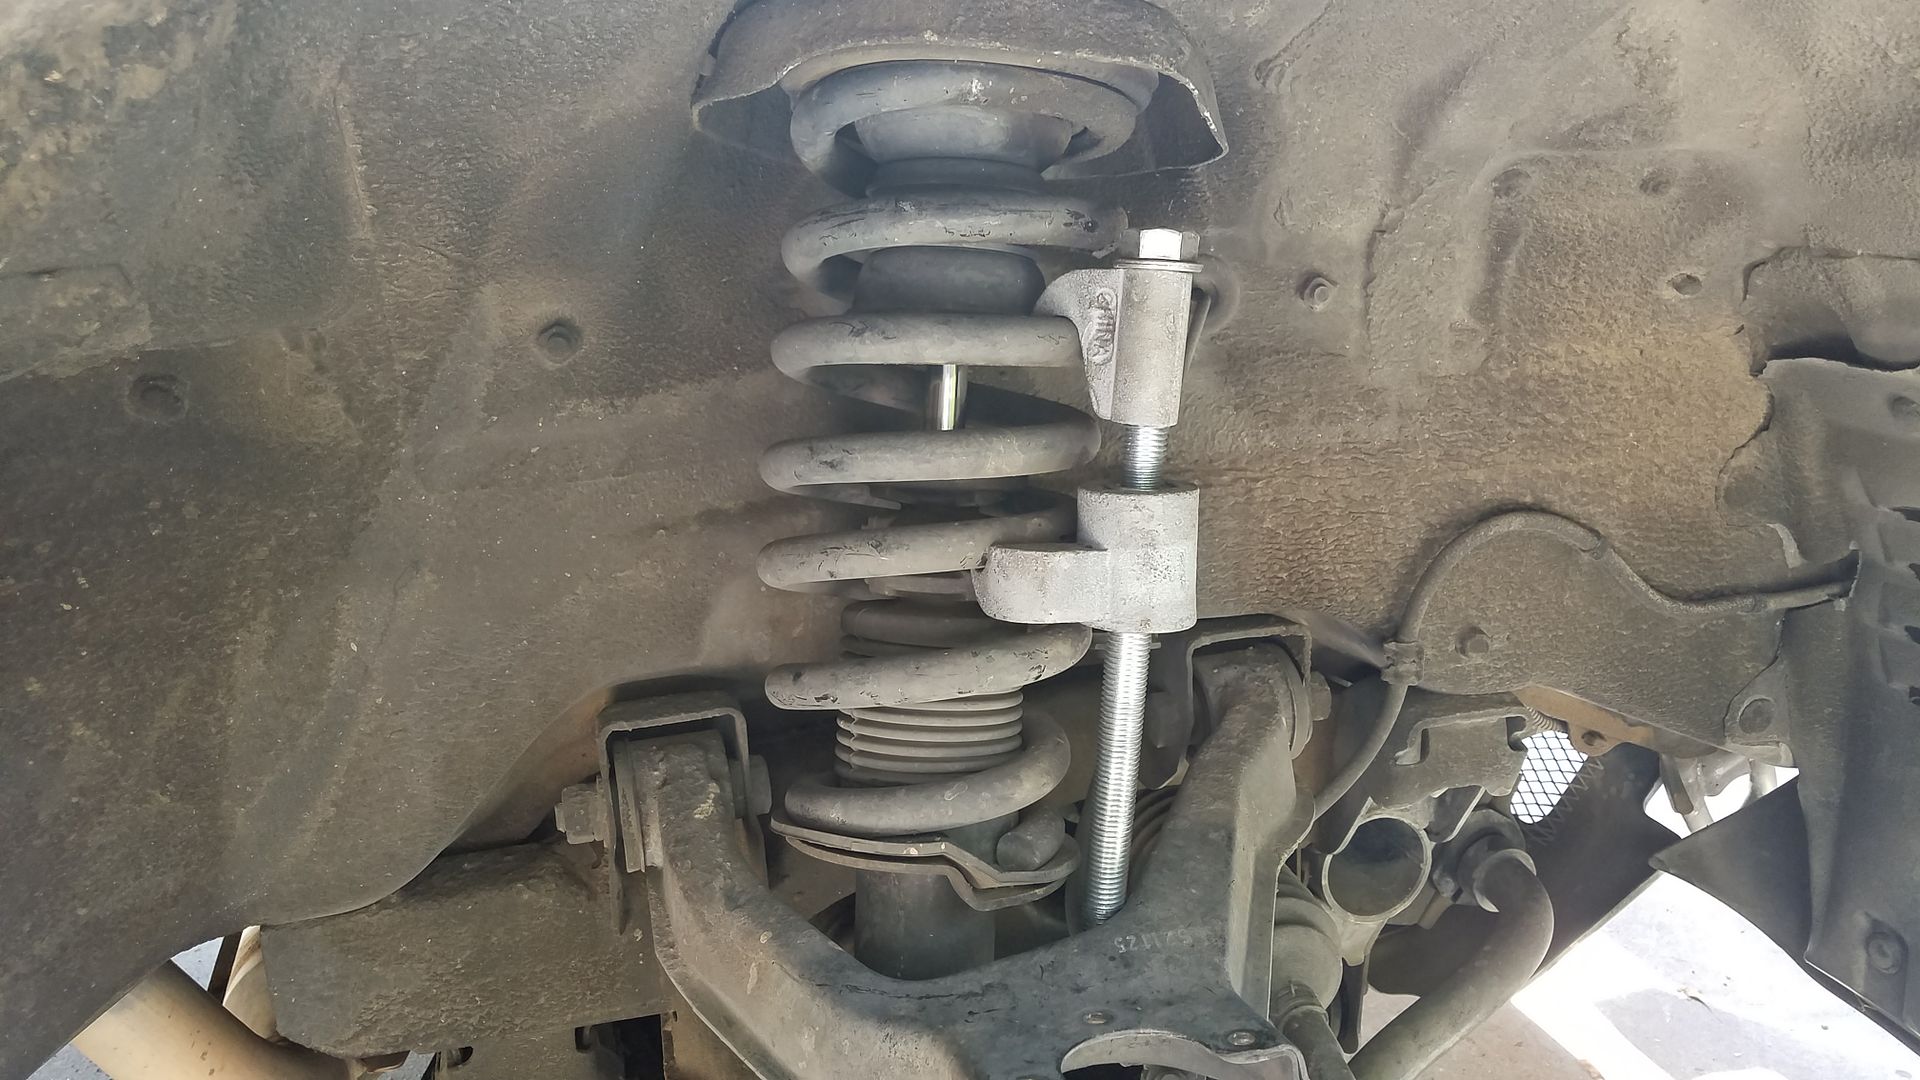
20170722_121020_zpsuv96fajj.jpg


20170722_121649_zpshknaefiw.jpg


After you wrangle the strut out, I would advise bringing them to a shop to have the strut tops and rubber washers removed and then installed on the new springs and struts. Otherwise keep an eye on the way the strut bushings go together and do it yourself!
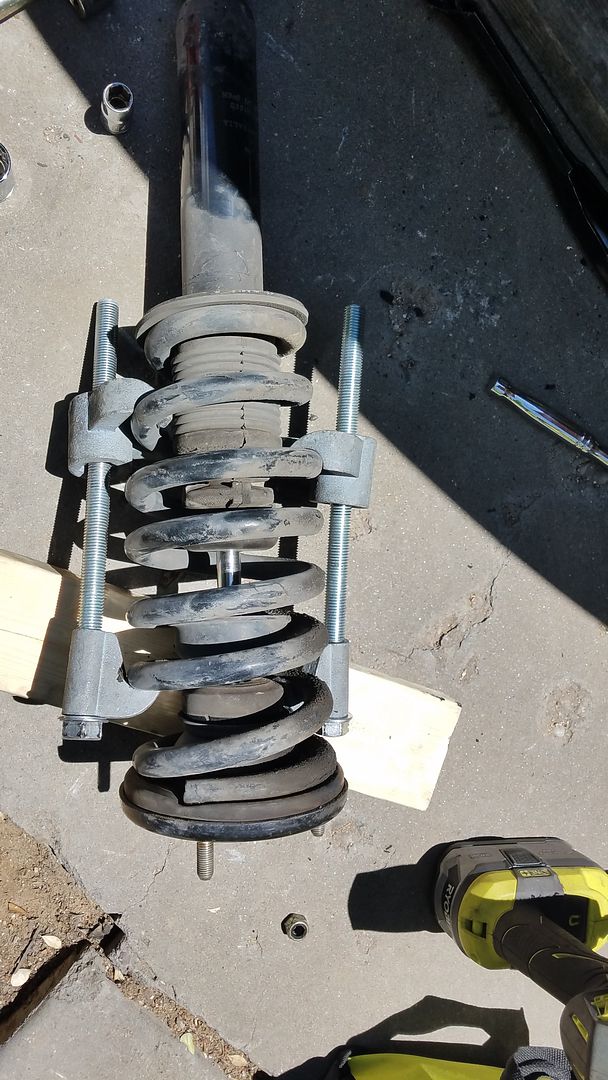
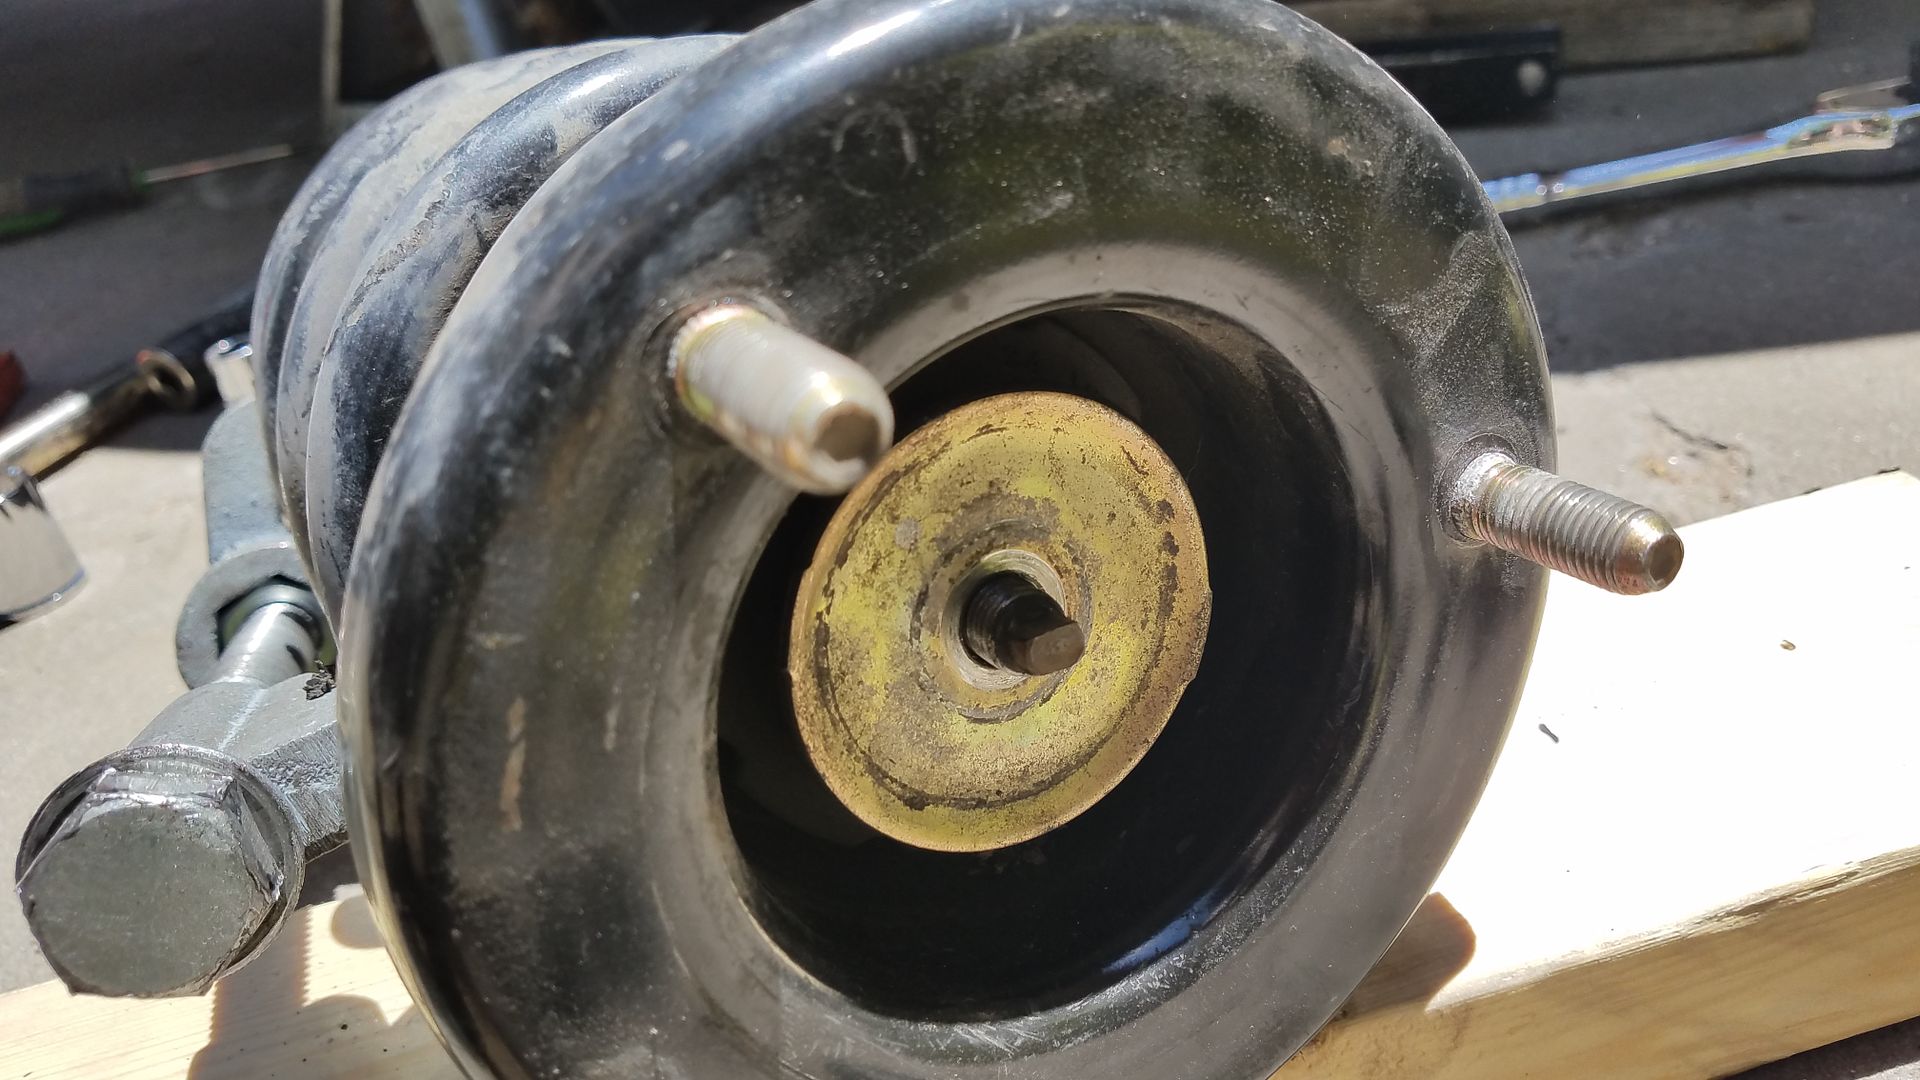
20170722_125120_zps3jou0tsc.jpg


20170722_125126_zps5yj4vt25.jpg


Once you have the strut put together, its time to get it back in its place. If you chose wisely above and removed one side of the upper control arm, this will be a snap if you jack the lca down as in the pic below.
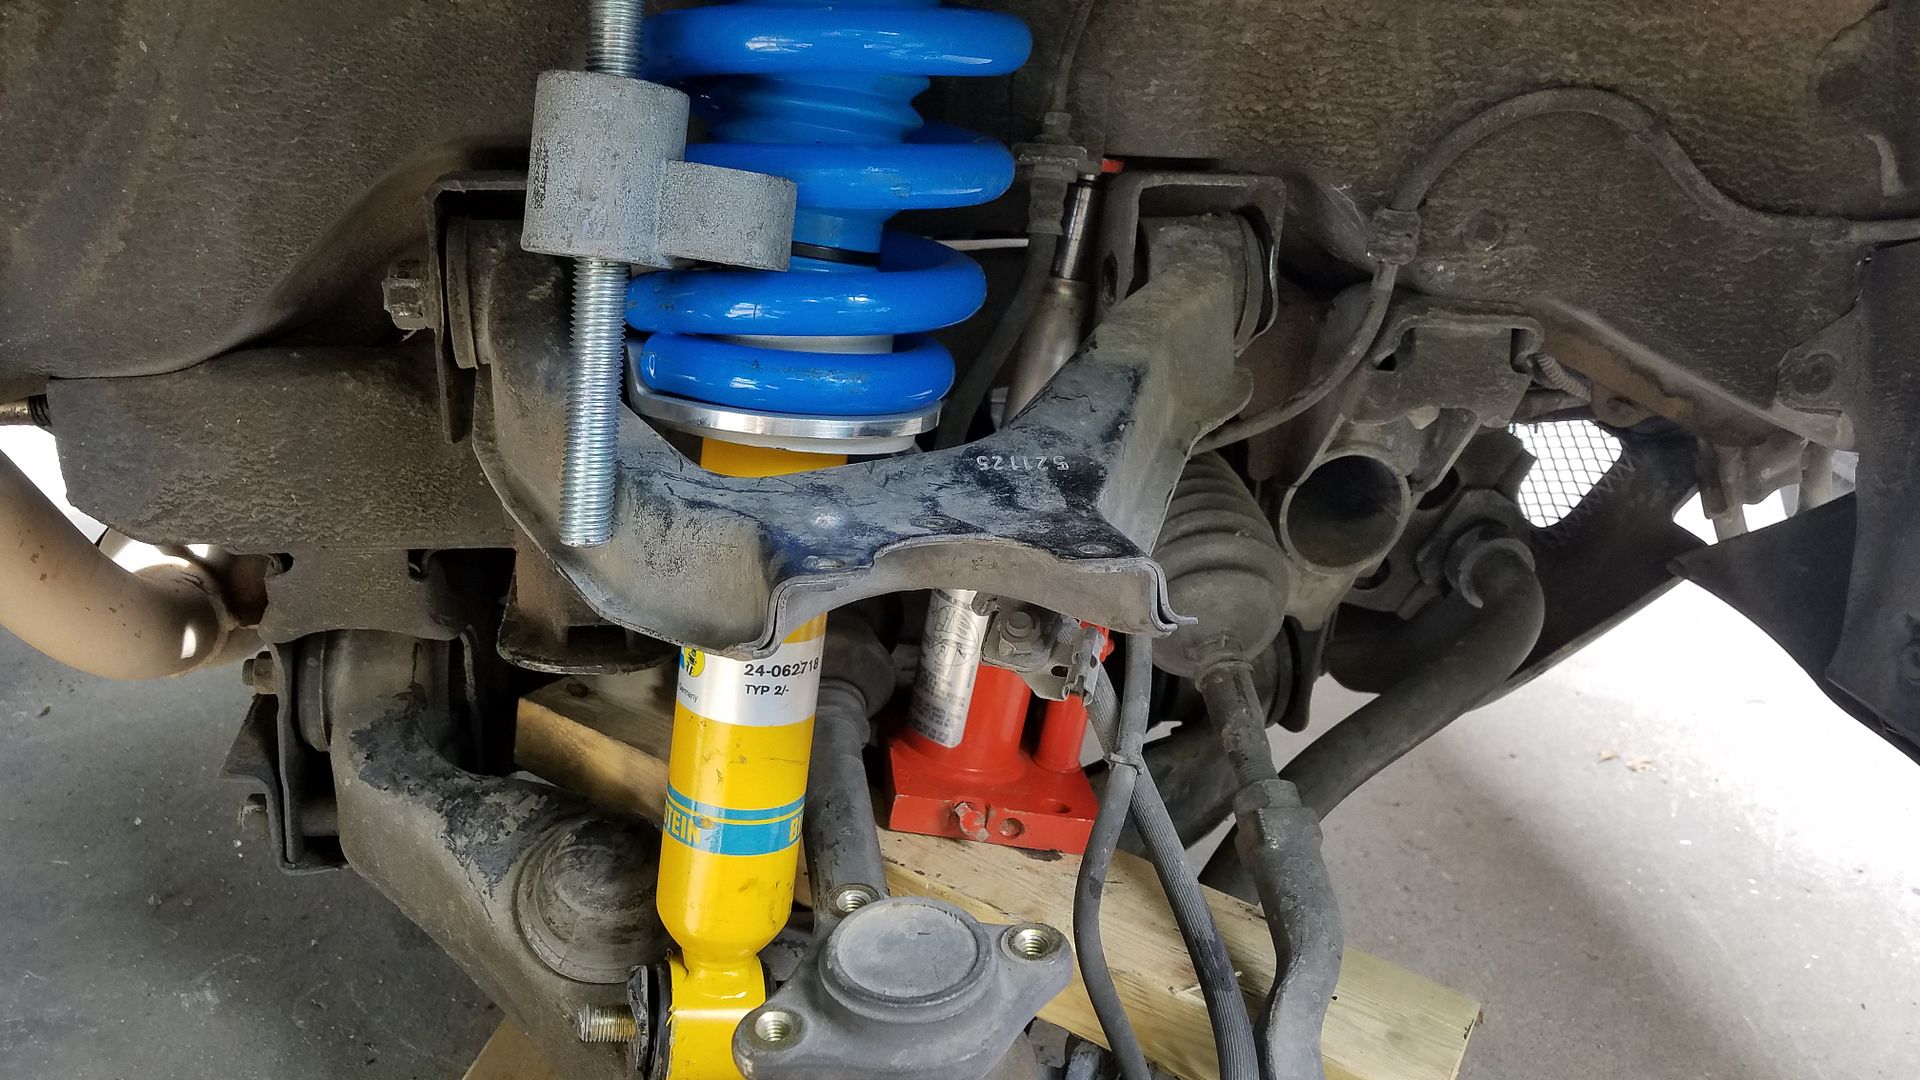
20170722_145236_zpsdvrteyph.jpg


Get the strut holes lined back up and let the jack out bit by bit until you can get the bolt on the lca though the bottom of the strut. Get every bolt tight again, put the battery and airbox back on, and it should then look as such!
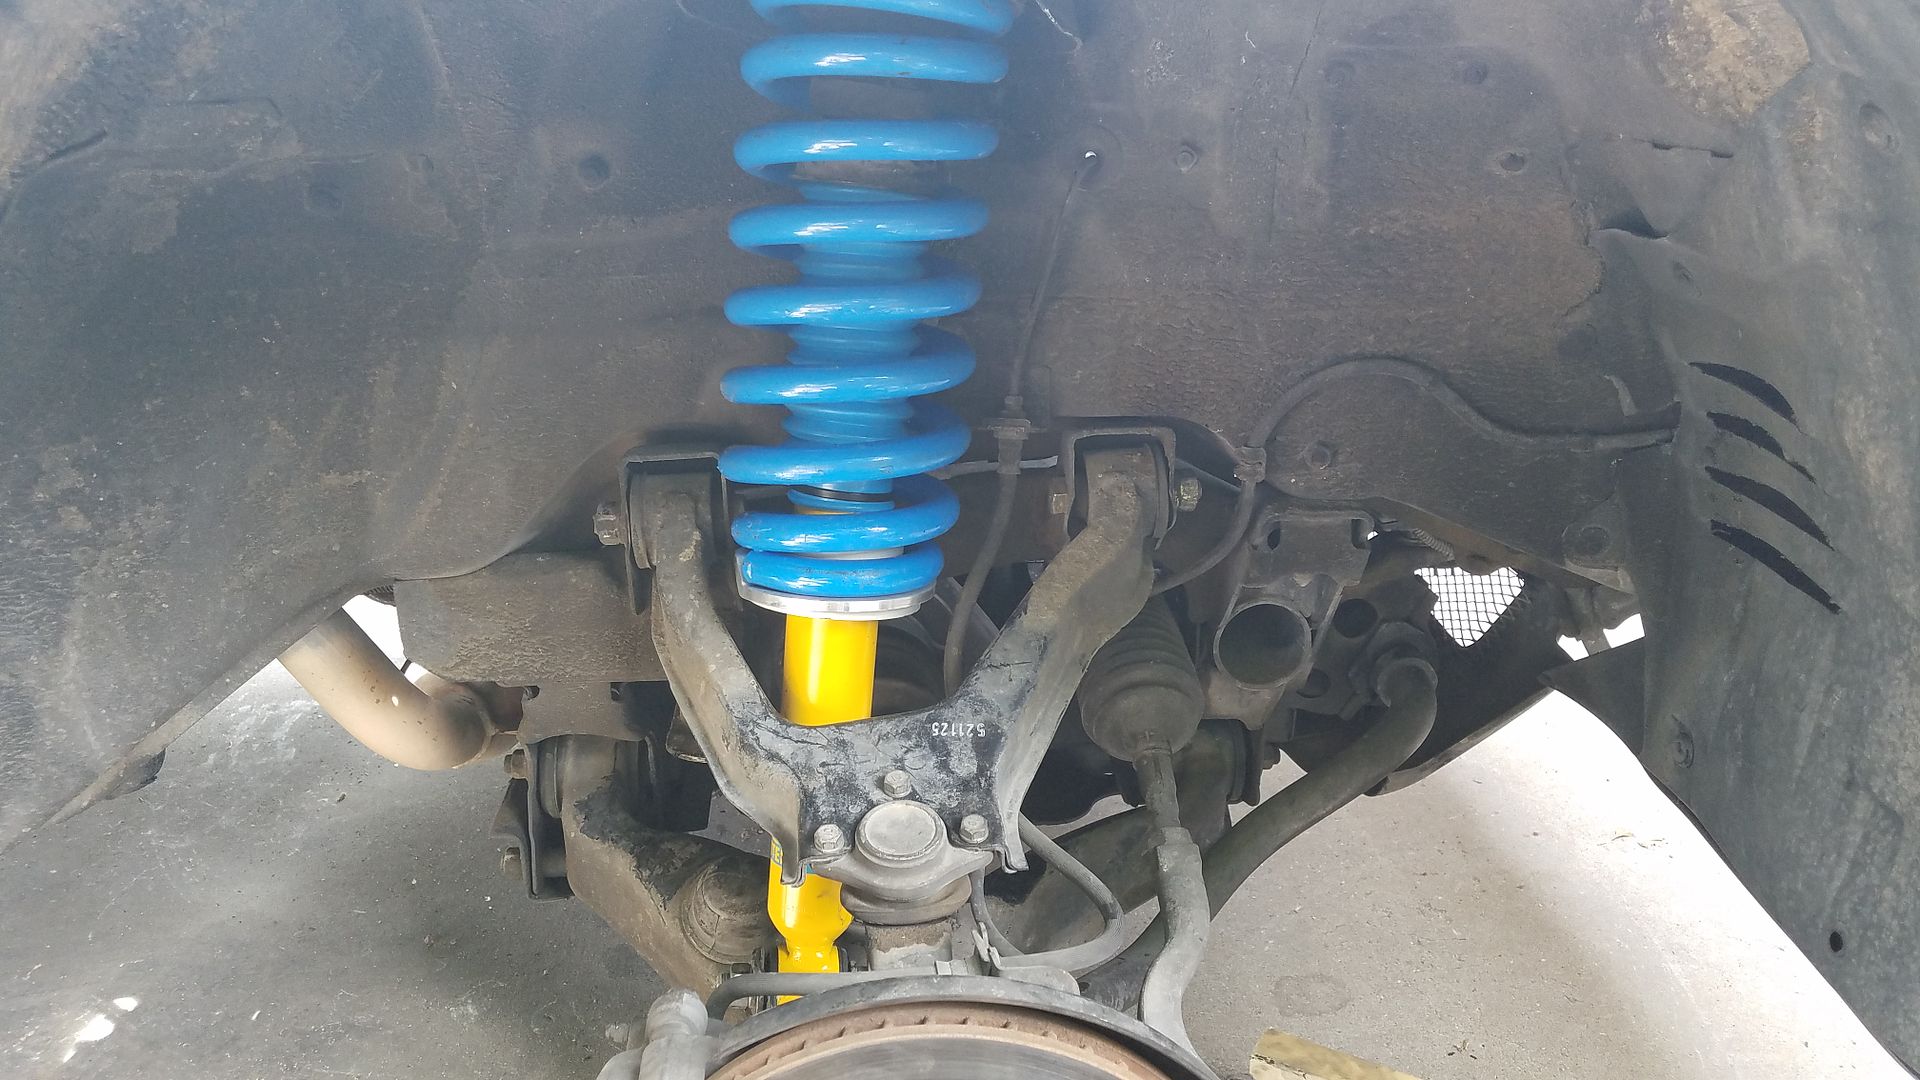
20170722_150519_zpsokyqy3xi.jpg


The outcome:

20170722_151050_zpsufgpim2z.jpg


20170722_193615_zpsj6ejasok.jpg
 

Rod

Observer
How does it ride afterwards? After my Bilstein strut install the ride got better (old shocks were original and wore out), but still slightly rougher then id like..so I am weary about changing springs.
 

eyehate

Member
My rear shocks were completely blown out and the truck bounced from one speed bump to the next, this new setup solved that issue. As for the ride overall, it doesn't seem too stiff to me, and handles much better on turn in, but I am used to vehicles with coilovers so maybe I am biased. It is noticeably stiffer than before, but when swaying from side to side the body roll is more pronounced... Odd for only a 2 inch lift. So far after a day of driving on it, I do like it much better than the worn our crap that was on there before.
 

Inyo_man

Don't piss down my back and tell me it's raining.
Looks great!

It will transform the ride and performance of the rig!

Sorry to hear about the cost of the fluid swaps...
The transfer case is just a drain and fill (just like the diffs.), easy to do...
The transmission flush is also easy, but takes a bit longer.

Below is a link to a DIY auto transmission flush.
Just skip the filter replacement section if you're not refreshing it.

http://www.pajeroclub.co.za/forum/viewtopic.php?t=2115

I purchased the ATF from the mob linked below:

https://www.maperformance.com/products/mitsubishi-diamond-atf-sp-iii-1-quart

Cheers
 

eyehate

Member
Great info, I will probably change the fluid again in 10-15k miles, as it was black when he was draining it. I'll just follow those instructions next time for that.

Went camping again with some family this week in Big Lake Arizona. While there wasn't any trails or hard driving, it was very very wet and muddy getting up to our spot, which made it pretty fun going back and forth to the lake. Again, even with completely bald tires, it crawled up no problems. It basically rained the whole time, but is a pic:
20170726_172032_zpsqe2dfmjh.jpg

Whilst camping, the tires came in and as soon as I came back today, picked them up and headed off to discount. Here is the before and after!
20170727_163911_zpszxmhuwvx.jpg
I am really liking the way it looks with the gunmetal 01-02 wheels and the mud terrains. Starting to look a bit more purpose built and less mall crawler-esque :)

20170727_184411_zpskxcy7mh7.jpg
 
Last edited:

eyehate

Member
Thanks Rod!

Today she threw a p1400, and stumbles at idle pretty bad, drives fine after i get going but good lord it looks like I can't drive a manual transmission vehicle the way it lunges. Any ideas on this one? A quick google showed nothing but results for montero sports, which can be pretty hit or miss troubleshooting wise.
 

Inyo_man

Don't piss down my back and tell me it's raining.
The Haynes manual identifies code P1400 as "manifold differential pressure sensor circuit problem".

Did you have the battery disconnected for a while before you drove it last?
The "dying at idle" sounds like the process the computer goes through to "relearn" driving style.
 

eyehate

Member
No battery disconnect. Did that before and that was a completely different feel than this is. I did how ever charge the battery and it seems to have happened after that.

Where is this sensor located? Any pics would be great.
 

haolepinoy

Incomplete Idiot
Funny, I was just looking into this for an unrelated reason, but here's some info I found if it can help:

Info on the MDP sensor (also called the MAP sensor) can be found in the 2003 FSM in section 13Ac-557 and following. The p1400 code means the sensor is reading pressures much too low or high to be possible (below 2.4 kPa or above 118 kPa...normal range is between 20.6 - 34.0 kPa). Several places online discussing this code for Mitsu's said its often always a bad sensor (though it wouldn't hurt to check for vacuum leaks first...my '03 has quite a few dryrotted 4mm hoses that cause my MDP to read 71.7 kPa, which is outside of normal range but not so far as to throw a code). OEM p# is MD305600 and lists for around $141. Aftermarket sensors seem to get negative reviews in the few articles I read.

Here's the location, on top of the intake manifold at the back passenger side. Connector has 3 wires.

MAP Sensor Location.jpg
 

eyehate

Member
Wow, that is perfect info, thank you so very much!! I looked today at all of the connectors, vacuum lines and sensors on top of the motor and disconnected then canned air them all out. No visible cracks, but it may be a good idea to go get some hose and cut to length on all the same sizes.

After doing some troubleshooting it looks like it only throws the code during warm up, after it hits operating temp, the truck runs perfectly. Looks like its time for a new sensor!
 

eyehate

Member
Took it out and cleaned it, no better. New sensor has been ordered. Flushed the coolant as well, since that probably was neglected too. I am dreading having to do the timing belt and what not as I am almost sure they didn't do that.
 

eyehate

Member
Ok I'm stuck again :/

Got the replacement map sensor in, started her up and boom, same thing... The p1400 code went away only to be replaced by P0401.

Removed egr took apart and cleaned, reinstalled and still having the same rough idle only when cold. I guess a replacement of that is in order next?
 

haolepinoy

Incomplete Idiot
Here's the FSM's suggestions for the p0401 code:
> Dirty EGR valve or EGR passage
> EGR valve (stepper motor) has failed
> Open or shorted EGR valve circuit or loose connector
> MDP sensor failed

In section 17 of the FSM regarding the Emissions Control System it says that rough idle may be caused by the following Emissions Control-related items:
> The EGR valve is not closed
> A vacuum hose is disconnected or damaged
> There may be a malfunction of the PCV valve
> There may be a malfunction of the purge control system

Regarding the replaced MDP: Are you able to read live data with a scan tool? After the engine has warmed up and is idling you should see values between 20.6 and 34.0 kPa. Hopefully you didn't get a lemon sensor, but I find it a little strange that this new code popped up after replacing the sensor...and one of its causes is a bad MDP sensor. Also, have you done any drive cycles? The long term fuel trims need to readjust...you can reset them by disconnecting the battery or just let them adapt by driving. You can drive and see if the codes go away and the idle relearns over some time.

Rough idle at start up together with the p0401 indicates that possibly the EGR may be stuck slightly open, or possibly has a leak at the gasket (did you inspect of replace the gasket when you took it off to clean?). It is supposed to be closed when the engine is cold, when it is at idle, or when it is at WOT. If it is not fully closed at idle or the gasket is leaking it will serve as a vacuum leak.

Regarding cleaning the EGR: Did you check and clean the EGR passage on the intake manifold side too? P0401 codes are often caused by carbon blockage on the intake side rather than in the EGR itself. Also...did you use solvents to clean the EGR valve? The FSM says pretty emphatically not to use solvents or cleaners (only a wire brush and compressed air) since doing so can likely damage the stepper motor if it gets into it. Since you had the code before cleaning the EGR I wouldn't think doing this would have made anything worse, but...never know.

I wouldn't just go about replacing the EGR. It isn't cheap (MR988441 @ $200) and might not be bad. Checking the EGR is rather simple. Turn the ignition to the ON position and listen closely to the EGR (you should hear the stepper motor moving). Next, if you have a multimeter that reads resistance you can check the EGR stepper motor coil resistance, as seen here:

EGR Test.jpg
* Note: the FSM contradicts itself a little here with the test values because in 13Ac-392 it says that standard values should be between 20 - 24 ohms. I found mine to be 21.4 ohms so I'm assuming that the 20 -24 range is the right one.

Regarding the rough idle: You can use propane or starter fluid to test for a vacuum leak at the EGR to Intake Mani gasket while the engine is idling (and other places around the intake manifold). BE VERY CAREFUL with starting fluid and the hot exhaust surfaces...propane is slightly safer. If you notice an increase in engine speed when spraying the combustibles around the area you know you have a leak and need another gasket or hose.
 

Forum statistics

Threads
185,828
Messages
2,878,635
Members
225,393
Latest member
jgrillz94

Members online

Top